


点击上方蓝色我们家Java,选择“关注”
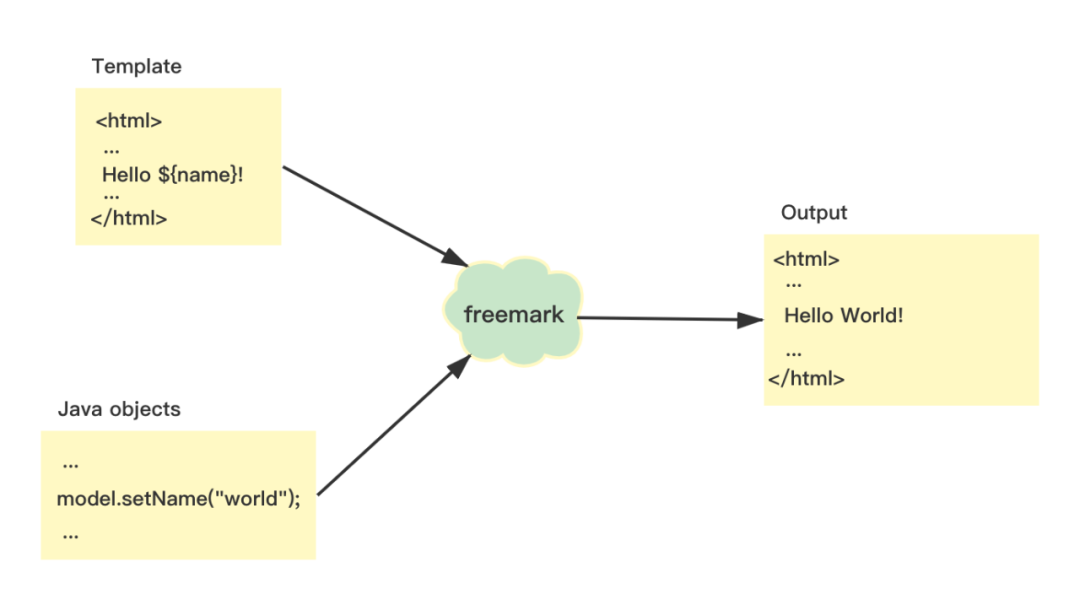
首先来介绍freemarker:freemarker是一个java模版引擎,基于模版生成文本输出的通用工具,纯java代码开发。一般我们认为freemarker的出现是为了代替jsp,除此之外它还可以在servlet容器外运行。还可以用来生成输出文本(HTML网页,电子邮件,配置文件,源代码等)的通用工具。
在pom.xml文件中导入依赖,由于SpringBoot默认支持freemarker模版引擎,所以在引入依赖时不需要添加版本号:
<dependency>
   <groupId>org.springframework.boot</groupId>
   <artifactId>spring-boot-starter-freemarker</artifactId>
</dependency>
之后对freemarker进行配置:
spring:
  jackson:
    date-format: yyyy-MM-dd HH:mm:ss
    time-zone: GMT+8
  datasource:
    driver-class-name: com.mysql.cj.jdbc.Driver
    url: jdbc:mysql://localhost:3306/Family?useUnicode=true&characterEncoding=utf-8&useSSL=false
    username: root
    password: 123456
  freemarker:
    cache: false
    suffix: .ftl
    charset: UTF-8
    template-loader-path: classpath:/templates/
spring.freemarker.cache:用来进行缓存配置
(开发阶段配置为false,生产阶段设置为true)
spring.freemarker.suffix:模版文件的后缀名
spring.freemarker.charset:文件的编码
spring.freemarker.template-loader-path:加载模版引擎的路径
在resources下面的templates文件中创建freemarker.ftl文件
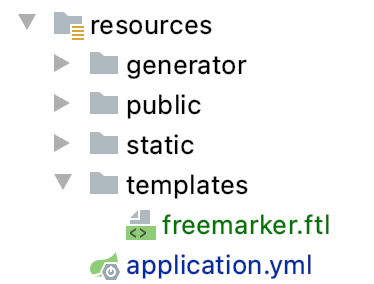
在创建freemarker.ftl文件时,没有以创建ftl为后缀的选项,我们只需要创建一个freemarker.html文件,将它改名为freemarker.ftl即可。
<!DOCTYPE html>
<html lang="en">
<head>
    <meta charset="UTF-8">
    <title>宠物</title>

    <link rel="stylesheet" href="/webjars/bootstrap/css/bootstrap.min.css">
</head>
<body>
<div class="container">
    <table class="table">
        <tr>
            <td>名称</td>
            <td>种类</td>
        </tr>

        <#list pets as pets>
            <tr>
                <td>${pets.name}</td>
                <td>${pets.varieties}</td>
            </tr>
        </#list>
    </table>
</div>

<script src="/webjars/jquery/jquery.min.js "></script>
<script src="/webjars/bootstrap/js/bootstrap.min.js"></script>
</body>
</html>
之后对TemplateController.java稍作修改:
package com.javafamily.familydemo.controller;


import com.javafamily.familydemo.model.PetsVO;
import com.javafamily.familydemo.service.PetsService;
import org.springframework.stereotype.Controller;
import org.springframework.ui.Model;
import org.springframework.web.bind.annotation.GetMapping;
import org.springframework.web.bind.annotation.RequestMapping;

import javax.annotation.Resource;
import java.util.List;

@Controller
@RequestMapping("/template")
public class TemplateController {

    @Resource
    PetsService petsService;

    @GetMapping("/freemarker")
    public String index(Model model) {

        List<PetsVO> pets = petsService.getAll();

        model.addAttribute("pets", pets);

        return "freemarker";
    }
}
执行代码,在浏览器访问:
http://localhost:8888/template/freemarker:

下面来介绍thymeleaf模版引擎,首先要确定自己的IDEA种是否安装了thymeleaf插件(识别语法,增强开发体验)。
安装好插件后才能继续操作。
thymeleaf 也是一个Java 模板引擎,可以处理模版文件(HTML、XML、CSS、JAVASCRIPT ),也可以作为静态模版来使用,是 Java 服务器端 HTML5 开发的理想选择。thymeleaf 使用方法与freemarker非常相似。
首先在pom.xml中引入Thymeleafy依赖:
<dependency>
   <groupId>org.springframework.boot</groupId>
   <artifactId>spring-boot-starter-thymeleaf</artifactId>
</dependency>
之后对配置文件进行修改:
spring:
  jackson:
    date-format: yyyy-MM-dd HH:mm:ss
    time-zone: GMT+8
  datasource:
    driver-class-name: com.mysql.cj.jdbc.Driver
    url: jdbc:mysql://localhost:3306/Family?useUnicode=true&characterEncoding=utf-8&useSSL=false
    username: root
    password: 123456
  thymeleaf:
    cache: false
    check-template-location: true
    enabled: true
    encoding: UTF-8
    excluded-view-names:
    mode: HTML5
    prefix: classpath:/templates/
    suffix: .html
spring.thymeleaf.cache:缓存配置
spring.thymeleaf.check-template-location:检查模版是否存在
spring.thymeleaf.enabled:是否启用MVC Thymeleaf视图分辨率。
spring.thymeleaf.encoding:模版编码
spring.thymeleaf.excluded-view-names:从解析中排除的视图名称列表
spring.thymeleaf.mode/spring.thymeleaf.prefix/spring.thymeleaf.suffix:分别表示模版模式/存放路径/后缀
在resources下面的templates文件中创建thymeleaf.html文件
<!DOCTYPE html>
<html lang="en" xmlns:th="http://www.thymeleaf.org">
<head>
    <meta charset="UTF-8">
    <title>宠物</title>

    <link rel="stylesheet" href="/webjars/bootstrap/css/bootstrap.min.css">
</head>
<body>

<div class="container">
    <table class="table">
        <tr>
            <td>名称</td>
            <td>种类</td>
        </tr>

        <tr th:each="item : ${pets}">
            <td th:text="${item.name}"></td>
            <td th:text="${item.varieties}"></td>
        </tr>
    </table>
</div>


<script src="/webjars/jquery/jquery.min.js "></script>
<script src="/webjars/bootstrap/js/bootstrap.min.js"></script>

</body>
</html>
然后稍微修改一下TemplateController:
package com.javafamily.familydemo.controller;


import com.javafamily.familydemo.model.PetsVO;
import com.javafamily.familydemo.service.PetsService;
import org.springframework.stereotype.Controller;
import org.springframework.ui.Model;
import org.springframework.web.bind.annotation.GetMapping;
import org.springframework.web.bind.annotation.RequestMapping;

import javax.annotation.Resource;
import java.util.List;

@Controller
@RequestMapping("/template")
public class TemplateController {

    @Resource
    PetsService petsService;

    @GetMapping("/thymeleaf")
    public String index(Model model) {

        List<PetsVO> pets = petsService.getAll();

        model.addAttribute("pets", pets);

        return "thymeleaf";
    }
}
完成代码的修改后执行代码,浏览器中输入http://localhost:8888/template/thymeleaf
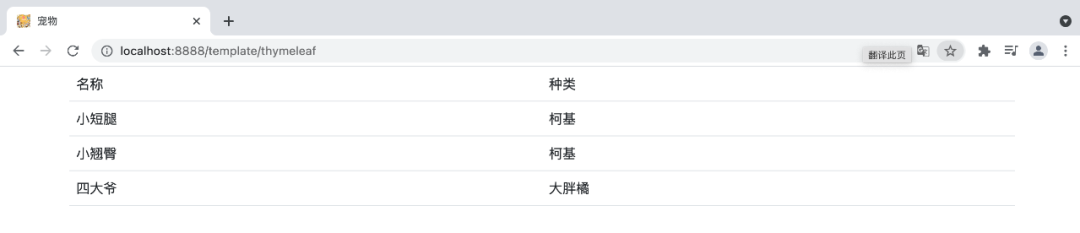
得到想要的结果。
点击下方阅读原文,查看上一篇
