目录
一、rac安装规划1.1、所需软件介绍1.2、IP地址规划1.3、操作系统本地磁盘分区规划1.4、共享存储与ASM磁盘组规划二、操作系统配置2.1、准备OS2.2、添加网卡2.3、修改主机名2.4、配置静态IP地址2.4.1、修改mac地址2.4.2、配置静态IP地址2.5、关闭防火墙2.6、禁用selinux2.7、修改/etc/hosts文件2.8、添加组和用户2.9、创建安装目录2.9.1、挂载/u01目录2.9.2、创建目录2.10、配置grid和oracle用户的环境变量文件2.11、配置root用户的环境变量2.12、安装软件依赖包2.13、配置内核参数2.13.1、修改/etc/sysctl.conf文件2.13.2、修改/etc/security/limits.conf文件2.13.3、修改/etc/pam.d/login文件2.13.4、修改/etc/profile文件2.14、关闭NTP和chrony服务2.15、关闭avahi-daemon2.16、将NOZEROCONF=yes添加到/etc/sysconfig/network文件中2.17、禁用透明大页2.18、停止不用的服务2.19、提升开关机速度三、配置共享存储3.1、服务端配置3.1.1、创建LVM3.1.2、使用yum安装targetd和targetcli3.1.3、使用targetcli创建设备3.1.4、使用targetcli创建iqn和LUN3.1.5、使用targetcli创建acls3.1.6、配置target监听IP和端口3.1.7、保存配置3.2、客户端配置3.2.1、安装服务并启动3.2.2、使用iscsiadm发现可用存储设备并登陆连接3.2.3、创建并配置udev rules文件四、数据库软件包准备4.1、上传安装软件4.2、解压软件五、安装前预检查5.1、安装补丁包(cvuqdisk)5.2、配SSH互信,建立ssh等效性5.3、cluster硬件检测--安装前预检查配置信息六、图形界面安装集群和db6.1、安装grid6.2、安装db6.3、创建磁盘组6.4、创建数据库七、静默安装集群和db7.1、静默安装grid7.1.1、root.sh脚本7.2、静默安装db软件7.3、创建DATA和FRA磁盘组7.4、静默创建数据库7.5、创建PDB数据库八、修改基本配置8.1、禁用crs和db的自启动8.2、修改SQL提示符
一、rac安装规划
官网安装过程:https://docs.oracle.com/en/database/oracle/oracle-database/21/rilin/index.html
1.1、所需软件介绍
Oracle RAC不支持异构平台。在同一个集群中,可以支持具有速度和规模不同的机器,但所有节点必须运行在相同的操作系统。Oracle RAC不支持具有不同的芯片架构的机器。
| 序号 | 类型 | 内容 | MD5 |
|---|---|---|---|
| 1 | 数据库 | LINUX.X64_213000_db_home.zip | 8ac915a800800ddf16a382506d3953db |
| 2 | 集群软件 | LINUX.X64_213000_grid_home.zip | b3fbdb7621ad82cbd4f40943effdd1be |
| 3 | 操作系统 | CentOS-7.8-x86_64-DVD-2003.iso | 16673979023254EA09CC0B57853A7BBD |
| 4 | 虚拟机软件 | VMware Workstation Pro 16.0.0 build-16894299 | |
| 5 | Xmanager Enterprise 4 | Xmanager Enterprise 4,用于打开图形界面 | |
| 6 | SecureCRTPortable.exe | Version 6.6.1 (build 289) ,带有SecureCRT和SecureFX,用于SSH连接和FTP上传 |
备注:
1、OS内存至少8G
2、安装OS和数据库前需要对下载好的安装包进行MD5值校验,检查其完整性
21c数据库软件下载可以参考:https://www.xmmup.com/dbbao76zaidockerzhongzhixu2bujikeyongyouoracle-21chuanjing.html
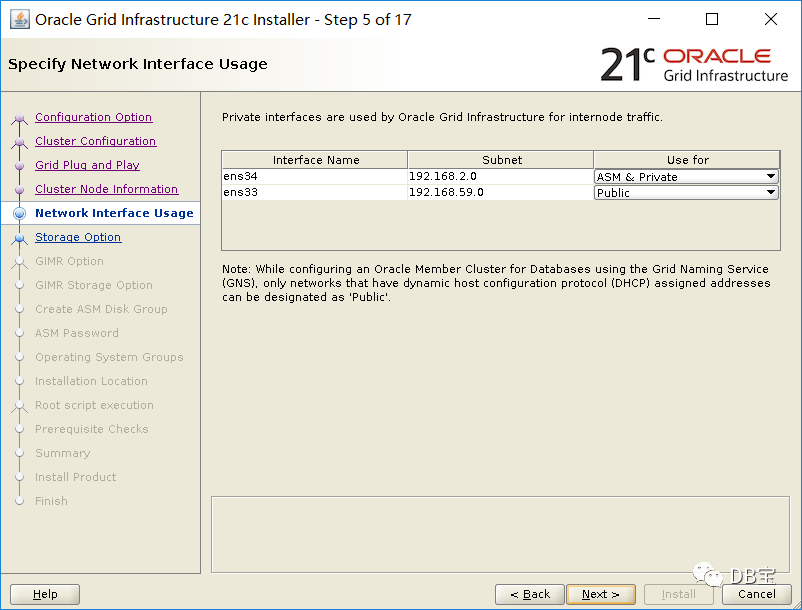
1.2、IP地址规划
从Oracle 11g开始,一共至少7个IP地址,2块网卡,其中public、vip和scan都在同一个网段,private在另一个网段,主机名不要包含下横线,如:RAC_01是不允许的;通过执行ifconfig -a
检查2个节点的网卡名称必须一致。另外,在安装之前,公网、私网共4个IP可以ping通,其它3个不能ping通才是正常的。
从18c开始,scan建议至少3个。
| 节点/主机名 | IP Address | Interface Name | 地址类型 | 注册位置 | 虚拟网卡适配器 | 操作系统网卡 |
|---|---|---|---|---|---|---|
| raclhr-21c-n1 | 192.168.59.62 | raclhr-21c-n1 | Public | /etc/hosts | VMnet8(nat模式) | ens33 |
| raclhr-21c-n1 | 192.168.59.64 | raclhr-21c-n1-vip | Virtual | /etc/hosts | VMnet8(nat模式) | ens33 |
| raclhr-21c-n1 | 192.168.2.62 | raclhr-21c-n1-priv | Private | /etc/hosts | VMnet2(仅主机模式) | ens34 |
raclhr-21c-n2 | 192.168.59.63 | raclhr-21c-n2 | Public | /etc/hosts | VMnet8(nat模式) | ens33 |
raclhr-21c-n2 | 192.168.59.65 | raclhr-21c-n2-vip | Virtual | /etc/hosts | VMnet8(nat模式) | ens33 |
raclhr-21c-n2 | 192.168.2.63 | raclhr-21c-n2-priv | Private | /etc/hosts | VMnet2(仅主机模式) | ens34 |
| 192.168.59.66 192.168.59.67 192.168.59.68 | raclhr-21c-scan | SCAN | /etc/hosts | VMnet8(nat模式) | ens33 |
1.3、操作系统本地磁盘分区规划
除了/boot分区外,其它分区均采用逻辑卷的方式,这样有利于文件系统的扩展。
| 序号 | 分区名称 | 大小 | 逻辑卷 | 用途说明 |
|---|---|---|---|---|
| 1 | /u01 | 50G | /dev/mapper/vg_orasoft-lv_orasoft_u01 | oracle和grid的安装目录 |
| 2 | /soft | 20G | /dev/mapper/VG_OS-lv_VG_OS_soft | 存储软件,至少10G |
1.4、共享存储与ASM磁盘组规划
| 序号 | ASM磁盘名称 | 磁盘组名称 | 冗余方式 | 大小 | 用途 | 备注 |
|---|---|---|---|---|---|---|
| 1 | /dev/asm-diskd /dev/asm-diske /dev/asm-diskf | OCR | Normal | 3G | OCR+VOTINGDISK | 最少1G |
| 2 | /dev/asm-diskg /dev/asm-diskh /dev/asm-diski | MGMT | External | 30G | MGMT | 最少30G,可以选择不安装GIMR组件 |
| 3 | /dev/asm-diskj /dev/asm-diskk /dev/asm-disl | DATA | External | 45G | 存储数据库数据文件 | |
| 4 | /dev/asm-diskm /dev/asm-diskn /dev/asm-disko | FRA | External | 30G | 快速恢复区 |
二、操作系统配置
若无特殊说明,那么以下操作在2个节点均需要执行。
2.1、准备OS
安装步骤略,也可以下载小麦苗已经安装好的虚拟机环境:https://www.xmmup.com/ziliaofenxiang.html
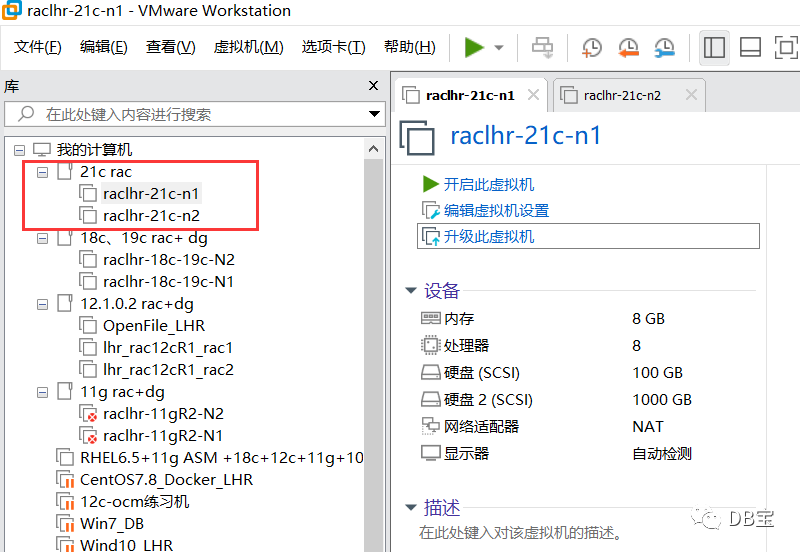
安装一台虚拟机,然后复制改名,如下:

用虚拟机软件打开:
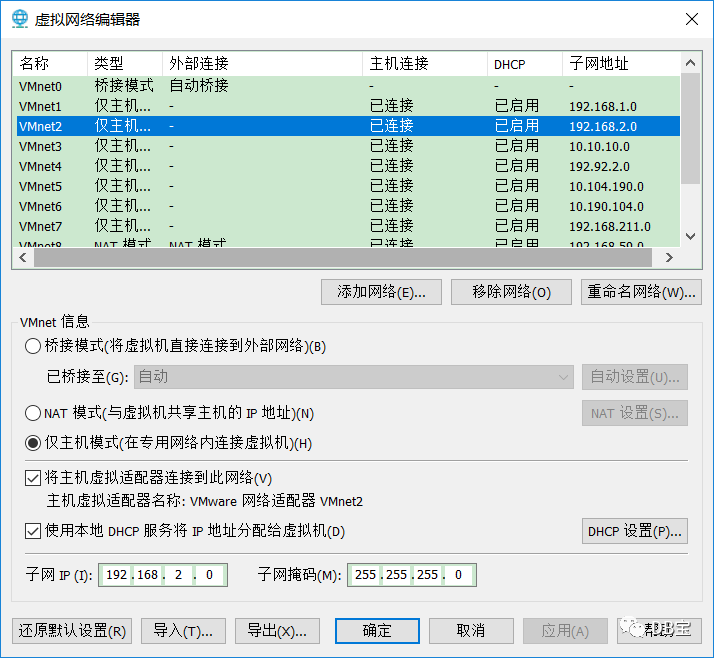
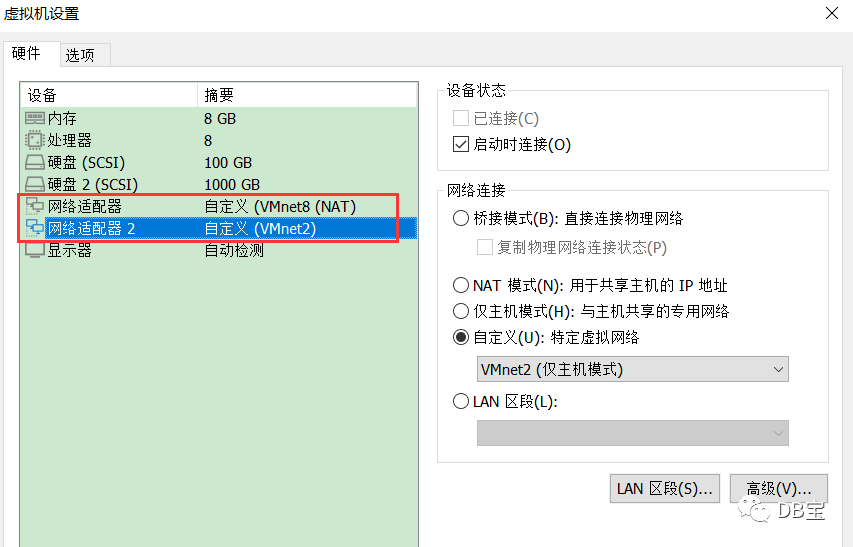
2.2、添加网卡
首先,需要添加网卡适配器:
VMnet2如下:
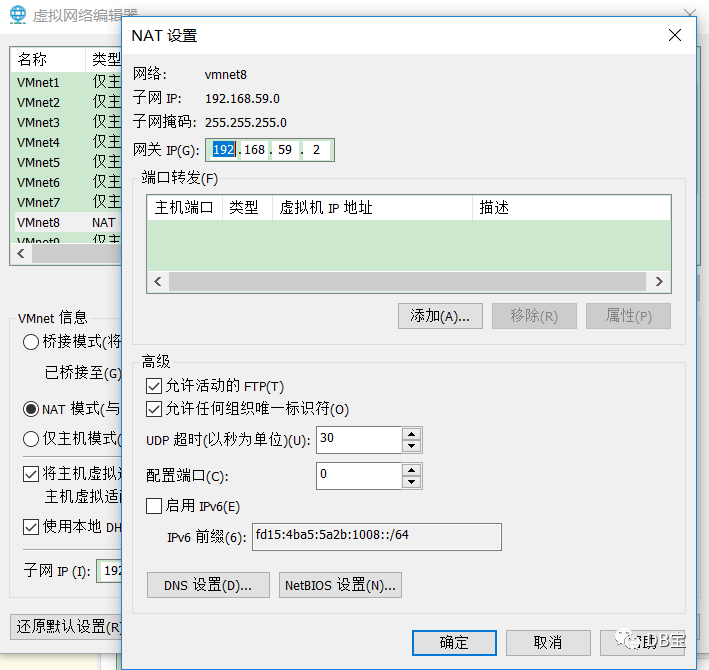
VMnet8如下:
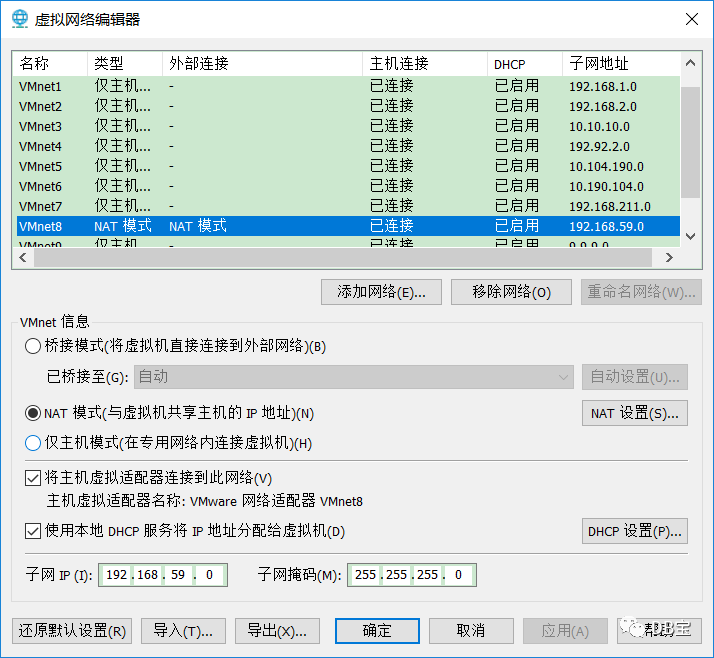
网关为:192.168.59.2,如下所示:
先删除再添加
,添加2块网卡,VMnet8为公有网卡,VMnet2为私有网卡,如下所示:
打开后,选择我已复制该虚拟机。

2.3、修改主机名
修改2个节点的主机名为raclhr-21c-n1和raclhr-21c-n2:
1hostnamectl set-hostname raclhr-21c-n1
2hostnamectl set-hostname raclhr-21c-n2
2.4、配置静态IP地址
在2个节点上分别配置静态IP地址。
在节点2上配置IP的时候注意将IP地址(IPADDR)修改掉。需要确保2个节点上的网卡MAC地址不一样,否则节点间不能通信。
2.4.1、修改mac地址
使用ifconfig
或ip link show
查看mac地址,修改文件/etc/udev/rules.d/70-persistent-ipoib.rules
1cat > /etc/udev/rules.d/70-persistent-ipoib.rules <<"EOF"
2SUBSYSTEM=="net", ACTION=="add", DRIVERS=="?*", ATTR{address}=="00:0c:29:25:83:db", ATTR{type}=="1", KERNEL=="eth*", NAME="ens33"
3SUBSYSTEM=="net", ACTION=="add", DRIVERS=="?*", ATTR{address}=="00:0c:29:25:83:e5", ATTR{type}=="1", KERNEL=="eth*", NAME="ens34"
4EOF
2.4.2、配置静态IP地址
注意修改IPADDR和HWADDR地址。
1、配置公网:/etc/sysconfig/network-scripts/ifcfg-ens33
 1cat > /etc/sysconfig/network-scripts/ifcfg-ens33 <<"EOF"
 2DEVICE=ens33
 3NAME=ens33
 4IPADDR=192.168.59.62
 5NETMASK=255.255.255.0
 6GATEWAY=192.168.59.2
 7ONBOOT=yes
 8USERCTL=no
 9BOOTPROTO=static
10HWADDR=00:0c:29:25:83:db
11TYPE=Ethernet
12IPV6INIT=no
13DNS1=114.114.114.114
14DNS2=8.8.8.8
15NM_CONTROLLED=no
16EOF
2、配置私网:/etc/sysconfig/network-scripts/ifcfg-ens34
。注意第二块网卡不能配置网关,否则系统默认网关就变成了第二块网卡的网关,从而导致系统不能上外网。
 1cat > /etc/sysconfig/network-scripts/ifcfg-ens34 <<"EOF"
 2DEVICE=ens34
 3NAME=ens34
 4IPADDR=192.168.2.62
 5NETMASK=255.255.255.0
 6ONBOOT=yes
 7USERCTL=no
 8BOOTPROTO=static
 9HWADDR=00:0c:29:25:83:e5
10TYPE=Ethernet
11IPV6INIT=no
12DNS1=114.114.114.114
13DNS2=8.8.8.8
14NM_CONTROLLED=no
15EOF
该部分内容做完后,可以重启一次OS。
2.5、关闭防火墙
1systemctl disable firewalld
2systemctl stop firewalld
3systemctl status firewalld
4
5systemctl list-unit-files | grep fire
2.6、禁用selinux
手工修改/etc/selinux/config
的SELINUX=disabled
,或使用下面命令:
1sed -i '/^SELINUX=.*/ s//SELINUX=disabled/' /etc/selinux/config
重启才能生效,校验:
1[root@raclhr-21c-n1 ~]# getenforce
2Disabled
2.7、修改/etc/hosts文件
增加如下的内容:
 1#Public IP
 2192.168.59.62            raclhr-21c-n1
 3192.168.59.63            raclhr-21c-n2
 4
 5#Private IP
 6192.168.2.62             raclhr-21c-n1-priv
 7192.168.2.63             raclhr-21c-n2-priv
 8
 9#Virtual IP
10192.168.59.64            raclhr-21c-n1-vip
11192.168.59.65            raclhr-21c-n2-vip
12
13#Scan IP
14192.168.59.66            raclhr-21c-scan
15192.168.59.67            raclhr-21c-scan
16192.168.59.68            raclhr-21c-scan
注意:需要保留127.0.0.1 localhost
这行。
2.8、添加组和用户
 1groupadd -g 54321 oinstall
 2groupadd -g 54322 dba
 3groupadd -g 54323 oper
 4groupadd -g 54324 backupdba
 5groupadd -g 54325 dgdba
 6groupadd -g 54326 kmdba
 7groupadd -g 54327 asmdba
 8groupadd -g 54328 asmoper
 9groupadd -g 54329 asmadmin
10groupadd -g 54330 racdba
11
12useradd -u 54321 -g oinstall -G dba,asmdba,backupdba,dgdba,kmdba,racdba,oper oracle
13useradd -u 54322 -g oinstall -G asmadmin,asmdba,asmoper,dba,racdba grid
14
15echo lhr | passwd --stdin oracle
16echo lhr | passwd --stdin grid
2.9、创建安装目录
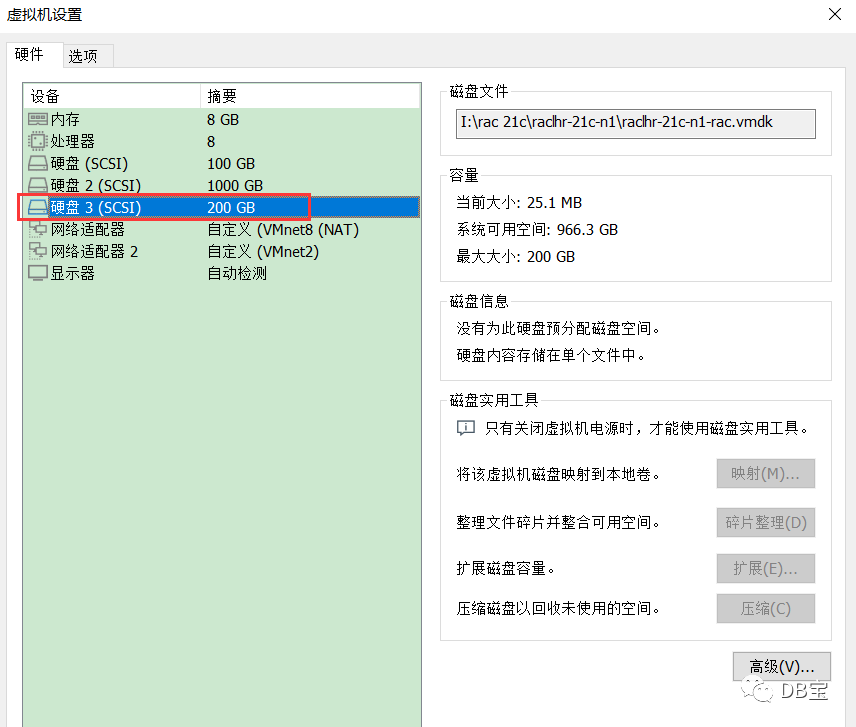
2.9.1、挂载/u01目录
首先,在2个节点都各自添加一块200g大小的磁盘:
然后做卷组,200g磁盘大约分10个PE,每个PE大约20g:
  1[root@raclhr-21c-n1 ~]# fdisk -l | grep sd
  2Disk /dev/sdb: 1073.7 GB, 1073741824000 bytes, 2097152000 sectors
  3/dev/sdb1            2048   209717247   104857600   8e  Linux LVM
  4/dev/sdb2       209717248   419432447   104857600   8e  Linux LVM
  5/dev/sdb3       419432448   629147647   104857600   8e  Linux LVM
  6/dev/sdb4       629147648  2097151999   734002176    5  Extended
  7/dev/sdb5       629149696   838864895   104857600   8e  Linux LVM
  8/dev/sdb6       838866944  1048582143   104857600   8e  Linux LVM
  9/dev/sdb7      1048584192  1258299391   104857600   8e  Linux LVM
 10/dev/sdb8      1258301440  1468016639   104857600   8e  Linux LVM
 11/dev/sdb9      1468018688  1677733887   104857600   8e  Linux LVM
 12/dev/sdb10     1677735936  1887451135   104857600   8e  Linux LVM
 13/dev/sdb11     1887453184  2097151999   104849408   8e  Linux LVM
 14Disk /dev/sda: 107.4 GB, 107374182400 bytes, 209715200 sectors
 15/dev/sda1   *        2048     2099199     1048576   83  Linux
 16/dev/sda2         2099200   180248575    89074688   8e  Linux LVM
 17Disk /dev/sdc: 214.7 GB, 214748364800 bytes, 419430400 sectors
 18[root@raclhr-21c-n1 ~]# fdisk /dev/sdc
 19Welcome to fdisk (util-linux 2.23.2).
 20
 21Changes will remain in memory only, until you decide to write them.
 22Be careful before using the write command.
 23
 24Device does not contain a recognized partition table
 25Building a new DOS disklabel with disk identifier 0x6d06be8a.
 26
 27Command (m for help): m
 28Command action
 29   a   toggle a bootable flag
 30   b   edit bsd disklabel
 31   c   toggle the dos compatibility flag
 32   d   delete a partition
 33   g   create a new empty GPT partition table
 34   G   create an IRIX (SGI) partition table
 35   l   list known partition types
 36   m   print this menu
 37   n   add a new partition
 38   o   create a new empty DOS partition table
 39   p   print the partition table
 40   q   quit without saving changes
 41   s   create a new empty Sun disklabel
 42   t   change a partition's system id
 43   u   change display/entry units
 44   v   verify the partition table
 45   w   write table to disk and exit
 46   x   extra functionality (experts only)
 47
 48Command (m for help): l
 49
 50 0  Empty           24  NEC DOS         81  Minix / old Lin bf  Solaris
 51 1  FAT12           27  Hidden NTFS Win 82  Linux swap / So c1  DRDOS/sec (FAT-
 52 2  XENIX root      39  Plan 9          83  Linux           c4  DRDOS/sec (FAT-
 53 3  XENIX usr       3c  PartitionMagic  84  OS/2 hidden C:  c6  DRDOS/sec (FAT-
 54 4  FAT16 <32M      40  Venix 80286     85  Linux extended  c7  Syrinx
 55 5  Extended        41  PPC PReP Boot   86  NTFS volume set da  Non-FS data
 56 6  FAT16           42  SFS             87  NTFS volume set db  CP/M / CTOS / .
 57 7  HPFS/NTFS/exFAT 4d  QNX4.x          88  Linux plaintext de  Dell Utility
 58 8  AIX             4e  QNX4.x 2nd part 8e  Linux LVM       df  BootIt
 59 9  AIX bootable    4f  QNX4.x 3rd part 93  Amoeba          e1  DOS access
 60 a  OS/2 Boot Manag 50  OnTrack DM      94  Amoeba BBT      e3  DOS R/O
 61 b  W95 FAT32       51  OnTrack DM6 Aux 9f  BSD/OS          e4  SpeedStor
 62 c  W95 FAT32 (LBA) 52  CP/M            a0  IBM Thinkpad hi eb  BeOS fs
 63 e  W95 FAT16 (LBA) 53  OnTrack DM6 Aux a5  FreeBSD         ee  GPT
 64 f  W95 Ext'd (LBA) 54  OnTrackDM6      a6  OpenBSD         ef  EFI (FAT-12/16/
 6510  OPUS            55  EZ-Drive        a7  NeXTSTEP        f0  Linux/PA-RISC b
 6611  Hidden FAT12    56  Golden Bow      a8  Darwin UFS      f1  SpeedStor
 6712  Compaq diagnost 5c  Priam Edisk     a9  NetBSD          f4  SpeedStor
 6814  Hidden FAT16 <3 61  SpeedStor       ab  Darwin boot     f2  DOS secondary
 6916  Hidden FAT16    63  GNU HURD or Sys af  HFS / HFS+      fb  VMware VMFS
 7017  Hidden HPFS/NTF 64  Novell Netware  b7  BSDI fs         fc  VMware VMKCORE
 7118  AST SmartSleep  65  Novell Netware  b8  BSDI swap       fd  Linux raid auto
 721b  Hidden W95 FAT3 70  DiskSecure Mult bb  Boot Wizard hid fe  LANstep
 731c  Hidden W95 FAT3 75  PC/IX           be  Solaris boot    ff  BBT
 741e  Hidden W95 FAT1 80  Old Minix
 75
 76Command (m for help): p
 77
 78Disk /dev/sdc: 214.7 GB, 214748364800 bytes, 419430400 sectors
 79Units = sectors of 1 * 512 = 512 bytes
 80Sector size (logical/physical): 512 bytes / 512 bytes
 81I/O size (minimum/optimal): 512 bytes / 512 bytes
 82Disk label type: dos
 83Disk identifier: 0x6d06be8a
 84
 85   Device Boot      Start         End      Blocks   Id  System
 86
 87Command (m for help): n
 88Partition type:
 89   p   primary (0 primary, 0 extended, 4 free)
 90   e   extended
 91Select (default p): p
 92Partition number (1-4, default 1):
 93First sector (2048-419430399, default 2048):
 94Using default value 2048
 95Last sector, +sectors or +size{K,M,G} (2048-419430399, default 419430399): +20G
 96Partition 1 of type Linux and of size 20 GiB is set
 97
 98Command (m for help): n
 99Partition type:
100   p   primary (1 primary, 0 extended, 3 free)
101   e   extended
102Select (default p):
103Using default response p
104Partition number (2-4, default 2):
105First sector (41945088-419430399, default 41945088):
106Using default value 41945088
107Last sector, +sectors or +size{K,M,G} (41945088-419430399, default 419430399): +20G
108Partition 2 of type Linux and of size 20 GiB is set
109
110Command (m for help): n
111Partition type:
112   p   primary (2 primary, 0 extended, 2 free)
113   e   extended
114Select (default p):
115Using default response p
116Partition number (3,4, default 3):
117First sector (83888128-419430399, default 83888128):
118Using default value 83888128
119Last sector, +sectors or +size{K,M,G} (83888128-419430399, default 419430399): +20G
120Partition 3 of type Linux and of size 20 GiB is set
121
122Command (m for help): n
123Partition type:
124   p   primary (3 primary, 0 extended, 1 free)
125   e   extended
126Select (default e):
127Using default response e
128Selected partition 4
129First sector (125831168-419430399, default 125831168):
130Using default value 125831168
131Last sector, +sectors or +size{K,M,G} (125831168-419430399, default 419430399):
132Using default value 419430399
133Partition 4 of type Extended and of size 140 GiB is set
134
135Command (m for help): n
136All primary partitions are in use
137Adding logical partition 5
138First sector (125833216-419430399, default 125833216):
139Using default value 125833216
140Last sector, +sectors or +size{K,M,G} (125833216-419430399, default 419430399): +20G
141Partition 5 of type Linux and of size 20 GiB is set
142
143Command (m for help): n
144All primary partitions are in use
145Adding logical partition 6
146First sector (167778304-419430399, default 167778304):
147Using default value 167778304
148Last sector, +sectors or +size{K,M,G} (167778304-419430399, default 419430399): +20G
149Partition 6 of type Linux and of size 20 GiB is set
150
151Command (m for help): n
152All primary partitions are in use
153Adding logical partition 7
154First sector (209723392-419430399, default 209723392):
155Using default value 209723392
156Last sector, +sectors or +size{K,M,G} (209723392-419430399, default 419430399): +20G
157Partition 7 of type Linux and of size 20 GiB is set
158
159Command (m for help): n
160All primary partitions are in use
161Adding logical partition 8
162First sector (251668480-419430399, default 251668480):
163Using default value 251668480
164Last sector, +sectors or +size{K,M,G} (251668480-419430399, default 419430399): +20G
165Partition 8 of type Linux and of size 20 GiB is set
166
167Command (m for help): n
168All primary partitions are in use
169Adding logical partition 9
170First sector (293613568-419430399, default 293613568):
171Using default value 293613568
172Last sector, +sectors or +size{K,M,G} (293613568-419430399, default 419430399): +20G
173Partition 9 of type Linux and of size 20 GiB is set
174
175Command (m for help): n
176All primary partitions are in use
177Adding logical partition 10
178First sector (335558656-419430399, default 335558656):
179Using default value 335558656
180Last sector, +sectors or +size{K,M,G} (335558656-419430399, default 419430399): +20G
181Partition 10 of type Linux and of size 20 GiB is set
182
183Command (m for help): n
184All primary partitions are in use
185Adding logical partition 11
186First sector (377503744-419430399, default 377503744):
187Using default value 377503744
188Last sector, +sectors or +size{K,M,G} (377503744-419430399, default 419430399): +20G
189Value out of range.
190Last sector, +sectors or +size{K,M,G} (377503744-419430399, default 419430399):
191Using default value 419430399
192Partition 11 of type Linux and of size 20 GiB is set
193
194Command (m for help): p
195
196Disk /dev/sdc: 214.7 GB, 214748364800 bytes, 419430400 sectors
197Units = sectors of 1 * 512 = 512 bytes
198Sector size (logical/physical): 512 bytes / 512 bytes
199I/O size (minimum/optimal): 512 bytes / 512 bytes
200Disk label type: dos
201Disk identifier: 0x6d06be8a
202
203   Device Boot      Start         End      Blocks   Id  System
204/dev/sdc1            2048    41945087    20971520   83  Linux
205/dev/sdc2        41945088    83888127    20971520   83  Linux
206/dev/sdc3        83888128   125831167    20971520   83  Linux
207/dev/sdc4       125831168   419430399   146799616    5  Extended
208/dev/sdc5       125833216   167776255    20971520   83  Linux
209/dev/sdc6       167778304   209721343    20971520   83  Linux
210/dev/sdc7       209723392   251666431    20971520   83  Linux
211/dev/sdc8       251668480   293611519    20971520   83  Linux
212/dev/sdc9       293613568   335556607    20971520   83  Linux
213/dev/sdc10      335558656   377501695    20971520   83  Linux
214/dev/sdc11      377503744   419430399    20963328   83  Linux
215
216
217Command (m for help): t
218Partition number (1-11, default 11): 1
219Hex code (type L to list all codes): 8e
220Changed type of partition 'Linux' to 'Linux LVM'
221
222Command (m for help): t
223Partition number (1-11, default 11): 2
224Hex code (type L to list all codes): 8e
225Changed type of partition 'Linux' to 'Linux LVM'
226
227Command (m for help): t
228Partition number (1-11, default 11): 3
229Hex code (type L to list all codes): 8e
230Changed type of partition 'Linux' to 'Linux LVM'
231
232Command (m for help): t
233Partition number (1-11, default 11): 5
234Hex code (type L to list all codes): 8e
235Changed type of partition 'Linux' to 'Linux LVM'
236
237Command (m for help): t
238Partition number (1-11, default 11): 6
239Hex code (type L to list all codes): 8e
240Changed type of partition 'Linux' to 'Linux LVM'
241
242Command (m for help): t
243Partition number (1-11, default 11): 7
244Hex code (type L to list all codes): 8e
245Changed type of partition 'Linux' to 'Linux LVM'
246
247Command (m for help): t
248Partition number (1-11, default 11): 8
249Hex code (type L to list all codes): 8e
250Changed type of partition 'Linux' to 'Linux LVM'
251
252Command (m for help): t
253Partition number (1-11, default 11): 9
254Hex code (type L to list all codes): 8e
255Changed type of partition 'Linux' to 'Linux LVM'
256
257Command (m for help): t
258Partition number (1-11, default 11): 10
259Hex code (type L to list all codes): 8e
260Changed type of partition 'Linux' to 'Linux LVM'
261
262Command (m for help): t
263Partition number (1-11, default 11):
264Hex code (type L to list all codes): 8e
265Changed type of partition 'Empty' to 'Linux LVM'
266
267
268Command (m for help): p
269
270Disk /dev/sdc: 214.7 GB, 214748364800 bytes, 419430400 sectors
271Units = sectors of 1 * 512 = 512 bytes
272Sector size (logical/physical): 512 bytes / 512 bytes
273I/O size (minimum/optimal): 512 bytes / 512 bytes
274Disk label type: dos
275Disk identifier: 0x6d06be8a
276
277   Device Boot      Start         End      Blocks   Id  System
278/dev/sdc1            2048    41945087    20971520   8e  Linux LVM
279/dev/sdc2        41945088    83888127    20971520   8e  Linux LVM
280/dev/sdc3        83888128   125831167    20971520   8e  Linux LVM
281/dev/sdc4       125831168   419430399   146799616    5  Extended
282/dev/sdc5       125833216   167776255    20971520   8e  Linux LVM
283/dev/sdc6       167778304   209721343    20971520   8e  Linux LVM
284/dev/sdc7       209723392   251666431    20971520   8e  Linux LVM
285/dev/sdc8       251668480   293611519    20971520   8e  Linux LVM
286/dev/sdc9       293613568   335556607    20971520   8e  Linux LVM
287/dev/sdc10      335558656   377501695    20971520   8e  Linux LVM
288/dev/sdc11      377503744   419430399    20963328   8e  Linux LVM
289
290Command (m for help): w
291The partition table has been altered!
292
293Calling ioctl() to re-read partition table.
294Syncing disks.
分区完成后,开始创建逻辑卷,挂载分区等操作:
1pvcreate /dev/sdc1 /dev/sdc2 /dev/sdc3 /dev/sdc5 /dev/sdc6 /dev/sdc7 /dev/sdc8 /dev/sdc9 /dev/sdc10 /dev/sdc11
2vgcreate vg_oracle /dev/sdc1 /dev/sdc2 /dev/sdc3 /dev/sdc5 /dev/sdc6 /dev/sdc7 /dev/sdc8 /dev/sdc9 /dev/sdc10 /dev/sdc11
3lvcreate -n lv_orasoft_u01 -L 60G vg_oracle
4mkfs.ext4 /dev/vg_oracle/lv_orasoft_u01
5mkdir /u01
6mount /dev/vg_oracle/lv_orasoft_u01 /u01
7
8echo "/dev/vg_oracle/lv_orasoft_u01 /u01  ext4 defaults 0 0" >> /etc/fstab
查询:
 1[root@raclhr-21c-n1 ~]# df -h
 2Filesystem                            Size  Used Avail Use% Mounted on
 3devtmpfs                              3.9G     0  3.9G   0% /dev
 4tmpfs                                 3.9G     0  3.9G   0% /dev/shm
 5tmpfs                                 3.9G   13M  3.9G   1% /run
 6tmpfs                                 3.9G     0  3.9G   0% /sys/fs/cgroup
 7/dev/mapper/centos_lhrdocker-root      50G  5.0G   42G  11% /
 8/dev/sda1                             976M  143M  767M  16% /boot
 9/dev/mapper/centos_lhrdocker-home     9.8G   41M  9.2G   1% /home
10/dev/mapper/vg_docker-lv_docker       788G   73M  748G   1% /var/lib/docker
11tmpfs                                 797M   12K  797M   1% /run/user/42
12tmpfs                                 797M     0  797M   0% /run/user/0
13/dev/mapper/vg_oracle-lv_orasoft_u01   59G   53M   56G   1% /u01
2.9.2、创建目录
 1mkdir -p /u01/app/21.3.0/grid
 2mkdir -p /u01/app/grid
 3mkdir -p /u01/app/oracle
 4mkdir -p /u01/app/oracle/product/21.3.0/dbhome_1
 5chown -R grid:oinstall /u01
 6chown -R oracle:oinstall /u01/app/oracle
 7chmod -R 775 /u01/
 8
 9mkdir -p /u01/app/oraInventory
10chown -R grid:oinstall /u01/app/oraInventory
11chmod -R 775 /u01/app/oraInventory
2.10、配置grid和oracle用户的环境变量文件
oracle用户:
 1cat >> /home/oracle/.bash_profile <<"EOF"
 2
 3umask 022
 4export ORACLE_SID=rac21c1
 5export ORACLE_BASE=/u01/app/oracle
 6export ORACLE_HOME=$ORACLE_BASE/product/21.3.0/dbhome_1
 7export LD_LIBRARY_PATH=$ORACLE_HOME/lib:/lib:/usr/lib
 8export NLS_DATE_FORMAT="YYYY-MM-DD HH24:MI:SS"
 9export TMP=/tmp
10export TMPDIR=$TMP
11export PATH=$ORACLE_HOME/bin:$ORACLE_HOME/OPatch:$PATH
12
13
14export EDITOR=vi
15export TNS_ADMIN=$ORACLE_HOME/network/admin
16export ORACLE_PATH=.:$ORACLE_BASE/dba_scripts/sql:$ORACLE_HOME/rdbms/admin
17export SQLPATH=$ORACLE_HOME/sqlplus/admin
18
19
20#export NLS_LANG="SIMPLIFIED CHINESE_CHINA.ZHS16GBK" --AL32UTF8 SELECT userenv('LANGUAGE') db_NLS_LANG FROM DUAL;
21export NLS_LANG="AMERICAN_CHINA.ZHS16GBK"
22
23alias sqlplus='rlwrap sqlplus'
24alias rman='rlwrap rman'
25alias asmcmd='rlwrap asmcmd'
26alias dgmgrl='rlwrap dgmgrl'
27alias sas='sqlplus / as sysdba'
28
29EOF
30
31
32
33cat >> /home/grid/.bash_profile <<"EOF"
34
35umask 022
36export ORACLE_SID=+ASM1
37export ORACLE_BASE=/u01/app/grid
38export ORACLE_HOME=/u01/app/21.3.0/grid
39export LD_LIBRARY_PATH=$ORACLE_HOME/lib
40export NLS_DATE_FORMAT="YYYY-MM-DD HH24:MI:SS"
41export PATH=$ORACLE_HOME/bin:$PATH
42alias sqlplus='rlwrap sqlplus'
43alias asmcmd='rlwrap asmcmd'
44alias dgmgrl='rlwrap dgmgrl'
45alias sas='sqlplus / as sysdba'
46
47EOF
注意:另外一台数据库实例名须做相应修改:
Oracle:export ORACLE_SID=rac21c2grid:export ORACLE_SID=+ASM2
2.11、配置root用户的环境变量
1cat >> /etc/profile <<"EOF"
2
3export ORACLE_BASE=/u01/app/grid
4export ORACLE_HOME=/u01/app/21.3.0/grid
5export GRID_BASE=$ORACLE_BASE
6export GRID_HOME=$ORACLE_HOME
7export PATH=$PATH:$ORACLE_HOME/bin
8
9EOF
2.12、安装软件依赖包
安装一些常用的包:
 1yum install -y openssh-clients openssh-server initscripts  net-tools telnet which wget \
 2    passwd e4fsprogs lrzsz sudo unzip lvm2 tree traceroute lsof file tar systemd \
 3    bridge-utils mlocate mailx strace less mmv stress
 4yum install -y dos2unix rlwrap xdpyinfo xorg-x11-apps nmap numactl numactl-devel \
 5    iproute rsyslog bash-completion tmux sysbench vim redhat-lsb smartmontools xinetd \
 6    gcc  make  sysstat ksh binutils socat cmake automake autoconf bzr bison libtool deltarpm \
 7    rsync libev pv subversion nload gnuplot jq oniguruma yum-fastestmirror net-snmp net-snmp-utils \
 8    nfs-utils rpcbind  postfix dovecot bind-utils bind bind-chroot dnsmasq haproxy keepalived bzr \
 9    fio bzip2 ntp flex lftp
10yum install -y ncurses-devel libgcrypt-devel libaio libaio-devel \
11    perl perl-Env perl-devel  perl-Time-HiRes perl-DBD-MySQL perl-ExtUtils-MakeMaker perl-TermReadKey \
12    perl-Config-Tiny perl-Email-Date-Format perl-Log-Dispatch perl-Mail-Sender perl-Mail-Sendmail \
13    perl-MIME-Lite perl-Parallel-ForkManager perl-Digest-MD5 perl-ExtUtils-CBuilder perl-IO-Socket-SSL \
14    perl-JSON openssl-devel libverto-devel libsepol-devel libselinux-devel libkadm5 keyutils-libs-devel \
15    krb5-devel libcom_err-devel cyrus-sasl* perl-DBD-Pg perf slang perl-DBI  perl-CPAN \
16    perl-ExtUtils-eBuilder cpan perl-tests
17yum install -y  compat-libstdc++-33 gcc-c++  glibc glibc-common glibc.i686  glibc-devel glibc-devel.i686 \
18    libgcc libgcc.i686 libstdc++   libstdc++-devel  libaio.i686   libaio-devel.i686 \
19    libXext  libXext.i686  libXtst  libXtst.i686  libX11  libX11.i686  libXau  libXau.i686  \
20    libxcb  libxcb.i686  libXi  libXi.i686   unixODBC  unixODBC-devel  zlib-devel  zlib-devel.i686 \
21    compat-libcap1 libXp libXp-devel libXp.i686 elfutils-libelf elfutils-libelf-devel compat-db \
22    gnome-libs pdksh xscreensaver fontconfig-devel libXrender-devel
23
24 yum remove PackageKit -y
检查:
 1rpm -q --qf '%{NAME}-%{VERSION}-%{RELEASE} (%{ARCH})\n' binutils \
 2compat-libcap1 \
 3compat-libstdc++-33 \
 4gcc \
 5gcc-c++ \
 6glibc \
 7glibc-devel \
 8ksh \
 9libgcc \
10libstdc++ \
11libstdc++-devel \
12libaio \
13libaio-devel \
14libXext \
15libXtst \
16libX11 \
17libXau \
18libxcb \
19libXi \
20make \
21elfutils-libelf-devel \
22sysstat  | grep "not installed"
2.13、配置内核参数
2.13.1、修改/etc/sysctl.conf文件
 1cat >> /etc/sysctl.conf <<"EOF"
 2vm.swappiness = 1
 3vm.dirty_background_ratio = 3
 4vm.dirty_ratio = 80
 5vm.dirty_expire_centisecs = 500
 6vm.dirty_writeback_centisecs = 100
 7kernel.shmmni = 4096
 8kernel.shmall = 1073741824
 9kernel.shmmax = 4398046511104
10kernel.sem = 250 32000 100 128
11net.ipv4.ip_local_port_range = 9000 65500
12net.core.rmem_default = 262144
13net.core.rmem_max = 4194304
14net.core.wmem_default = 262144
15net.core.wmem_max = 1048576
16fs.aio-max-nr = 1048576
17fs.file-max = 6815744
18kernel.panic_on_oops = 1
19kernel.watchdog_thresh=30
20EOF
生效:
1/sbin/sysctl -p
2.13.2、修改/etc/security/limits.conf文件
 1echo "grid soft nofile 1024
 2grid hard nofile 65536
 3grid soft stack 10240
 4grid hard stack 32768
 5grid soft nproc 2047
 6grid hard nproc 16384
 7oracle soft nofile 1024
 8oracle hard nofile 65536
 9oracle soft stack 10240
10oracle hard stack 32768
11oracle soft nproc 2047
12oracle hard nproc 16384
13oracle hard memlock  8145728
14oracle soft memlock  8145728
15root soft nproc 2047 " >> /etc/security/limits.conf
2.13.3、修改/etc/pam.d/login文件
1echo "session required pam_limits.so" >> /etc/pam.d/login
2.13.4、修改/etc/profile文件
 1cat >> /etc/profile << "EOF"
 2if [ $USER = "oracle" ] || [ $USER = "grid" ]; then
 3        if [ $SHELL = "/bin/ksh" ]; then
 4              ulimit -p 16384
 5              ulimit -n 65536
 6        else
 7              ulimit -u 16384 -n 65536
 8        fi
 9        umask 022
10fi
11EOF
2.14、关闭NTP和chrony服务
可以采用操作系统的NTP服务,也可以使用Oracle自带的服务ctss,如果ntp没有启用,那么Oracle会自动启用自己的ctssd进程。
从oracle 11gR2 RAC开始使用Cluster Time Synchronization Service(CTSS)同步各节点的时间,当安装程序发现NTP协议处于非活动状态时,安装集群时间同步服务将以活动模式(active)自动进行安装并同步所有节点的时间。如果发现配置了NTP,则以观察者模式(observer mode)启动集群时间同步服务,Oracle Clusterware不会在集群中进行活动的时间同步。
1systemctl stop ntpd
2systemctl disable ntpd.service
3mv /etc/ntp.conf /etc/ntp.conf.bak
Chrony是一个开源的自由软件,它能帮助你保持系统时钟与时钟服务器(NTP)同步,因此让你的时间保持精确。它由两个程序组成,分别是chronyd和chronyc。chronyd是一个后台运行的守护进程,用于调整内核中运行的系统时钟和时钟服务器同步。它确定计算机增减时间的比率,并对此进行补偿。chronyc提供了一个用户界面,用于监控性能并进行多样化的配置。它可以在chronyd实例控制的计算机上工作,也可以在一台不同的远程计算机上工作。
1systemctl disable chronyd
2systemctl stop chronyd
3mv /etc/chrony.conf /etc/chrony.conf_bak
2.15、关闭avahi-daemon
1systemctl stop avahi-daemon
2systemctl disable avahi-daemon
Avahi允许程序在不需要进行手动网络配置的情况 下,在一个本地网络中发布和获知各种服务和主机。例如,当某用户把他的计算机接入到某个局域网时,如果他的机器运行有Avahi服务,则Avahi程式自动广播,从而发现网络中可用的打印机、共享文件和可相互聊天的其他用户。这有点象他正在接收局域网中的各种网络广告一样。
Linux下系统实际启动的进程名,是avahi-daemon。
2.16、将NOZEROCONF=yes添加到/etc/sysconfig/network文件中
1echo 'NOZEROCONF=yes' >> /etc/sysconfig/network
2.17、禁用透明大页
参考:https://www.xmmup.com/linux-biaozhundayehetoumingdaye.html
 1cat >> /etc/rc.local <<"EOF"
 2
 3if test -f /sys/kernel/mm/transparent_hugepage/enabled; then
 4   echo never > /sys/kernel/mm/transparent_hugepage/enabled
 5fi
 6
 7if test -f /sys/kernel/mm/transparent_hugepage/defrag; then
 8   echo never > /sys/kernel/mm/transparent_hugepage/defrag
 9fi
10
11EOF
12
13chmod +x /etc/rc.d/rc.local
14sh /etc/rc.local
15
16cat /sys/kernel/mm/transparent_hugepage/defrag
17cat /sys/kernel/mm/transparent_hugepage/enabled
建议配置大页功能,参考:https://www.xmmup.com/oracleshujukupeizhidaye.html
2.18、停止不用的服务
 1systemctl list-unit-files | grep enable
 2
 3systemctl stop autofs
 4systemctl stop nfslock
 5systemctl stop rpcidmapd
 6systemctl stop rpcgssd
 7systemctl stop ntpd
 8systemctl stop bluetooth.service
 9systemctl stop cups.path
10systemctl stop cups.socket
11systemctl stop postfix.service
12systemctl stop rpcbind.service
13systemctl stop rpcbind.socket
14systemctl stop NetworkManager-dispatcher.service
15systemctl stop dbus-org.freedesktop.NetworkManager.service
16systemctl stop abrt-ccpp.service
17systemctl stop cups.service
18systemctl stop libvirtd
19
20systemctl disable autofs
21systemctl disable nfslock
22systemctl disable rpcidmapd
23systemctl disable rpcgssd
24systemctl disable ntpd
25systemctl disable bluetooth.service
26systemctl disable cups.path
27systemctl disable cups.socket
28systemctl disable postfix.service
29systemctl disable rpcbind.service
30systemctl disable rpcbind.socket
31systemctl disable NetworkManager-dispatcher.service
32systemctl disable dbus-org.freedesktop.NetworkManager.service
33systemctl disable abrt-ccpp.service
34systemctl disable cups.service
35systemctl disable  libvirtd
2.19、提升开关机速度
在centos在关机或开机时一直等待,等待时间久,卡住时间久,提示A stop job is running for ……
解决:
1cat >> /etc/systemd/system.conf << "EOF"
2DefaultTimeoutStartSec=5s
3DefaultTimeoutStopSec=5s
4EOF
5
6systemctl daemon-reload
三、配置共享存储
这个是重点,也是最容易出错的地方。共享存储可以使用第三方软件提供的方式来共享(例如openfiler),也可以使用 WMware Workstation软件进行存储共享,也可以使用ISCSI网络存储服务来配置共享存储。
我们本次使用ISCSI网络存储服务+udev的方式进行模拟共享存储,将节点2上的多出的磁盘作为共享存储。
3.1、服务端配置
这里的服务端即节点2。
3.1.1、创建LVM
在节点2执行:
 1lvcreate -L 1g -n lv_ocr1 vg_oracle
 2lvcreate -L 1g -n lv_ocr2 vg_oracle
 3lvcreate -L 1g -n lv_ocr3 vg_oracle
 4
 5lvcreate -L 10g -n lv_mgmt1 vg_oracle
 6lvcreate -L 10g -n lv_mgmt2 vg_oracle
 7lvcreate -L 10g -n lv_mgmt3 vg_oracle
 8
 9lvcreate -L 15g -n lv_data1 vg_oracle
10lvcreate -L 15g -n lv_data2 vg_oracle
11lvcreate -L 15g -n lv_data3 vg_oracle
12
13lvcreate -L 10g -n lv_fra1 vg_oracle
14lvcreate -L 10g -n lv_fra2 vg_oracle
15lvcreate -L 10g -n lv_fra3 vg_oracle
3.1.2、使用yum安装targetd和targetcli
在节点2执行:
1yum -y install targetd targetcli
2
3systemctl start target
4systemctl enable target
5systemctl status target
6
7systemctl list-unit-files|grep target.service
同时确认targetd服务启动状态和开机启动。
3.1.3、使用targetcli创建设备
targetcli进入命令行,cd到/backstores/block目录下,创建设备:
 1targetcli
 2ls
 3cd /backstores/block
 4
 5create ocr1 /dev/vg_oracle/lv_ocr1
 6create ocr2 /dev/vg_oracle/lv_ocr2
 7create ocr3 /dev/vg_oracle/lv_ocr3
 8
 9create mgmt1 /dev/vg_oracle/lv_mgmt1
10create mgmt2 /dev/vg_oracle/lv_mgmt2
11create mgmt3 /dev/vg_oracle/lv_mgmt3
12
13create data1 /dev/vg_oracle/lv_data1
14create data2 /dev/vg_oracle/lv_data2
15create data3 /dev/vg_oracle/lv_data3
16
17create fra1 /dev/vg_oracle/lv_fra1
18create fra2 /dev/vg_oracle/lv_fra2
19create fra3 /dev/vg_oracle/lv_fra3
执行过程:
 1[root@raclhr-21c-n2 ~]# targetcli
 2Warning: Could not load preferences file /root/.targetcli/prefs.bin.
 3targetcli shell version 2.1.53
 4Copyright 2011-2013 by Datera, Inc and others.
 5For help on commands, type 'help'.
 6
 7/> ls
 8o- / ......................................................................................................................... [...]
 9  o- backstores .............................................................................................................. [...]
10  | o- block .................................................................................................. [Storage Objects: 0]
11  | o- fileio ................................................................................................. [Storage Objects: 0]
12  | o- pscsi .................................................................................................. [Storage Objects: 0]
13  | o- ramdisk ................................................................................................ [Storage Objects: 0]
14  o- iscsi ............................................................................................................ [Targets: 0]
15  o- loopback ......................................................................................................... [Targets: 0]
16/> cd /backstores/block
17/backstores/block>
18/backstores/block> create ocr1 /dev/vg_oracle/lv_ocr1
19Created block storage object ocr1 using /dev/vg_oracle/lv_ocr1.
20/backstores/block>
21/backstores/block> create ocr2 /dev/vg_oracle/lv_ocr2
22create ocr3 /dev/vg_oracle/lv_ocr3
23Created block storage object ocr2 using /dev/vg_oracle/lv_ocr2.
24
25/backstores/block> create ocr3 /dev/vg_oracle/lv_ocr3
26create mgmt1 /dev/vg_oracle/lv_mgmt1
27create mgmt2 /dev/vg_oracle/lv_mgmt2
28Created block storage object ocr3 using /dev/vg_oracle/lv_ocr3.
29/backstores/block>
30/backstores/block> create mgmt1 /dev/vg_oracle/lv_mgmt1
31Created block storage object mgmt1 using /dev/vg_oracle/lv_mgmt1.
32/backstores/block> create mgmt2 /dev/vg_oracle/lv_mgmt2
33create mgmt3 /dev/vg_oracle/lv_mgmt3
34Created block storage object mgmt2 using /dev/vg_oracle/lv_mgmt2.
35/backstores/block> create mgmt3 /dev/vg_oracle/lv_mgmt3
36
37Created block storage object mgmt3 using /dev/vg_oracle/lv_mgmt3.
38/backstores/block>
39/backstores/block> create data1 /dev/vg_oracle/lv_data1
40Created block storage object data1 using /dev/vg_oracle/lv_data1.
41/backstores/block> create data2 /dev/vg_oracle/lv_data2
42Created block storage object data2 using /dev/vg_oracle/lv_data2.
43/backstores/block> create data3 /dev/vg_oracle/lv_data3
44Created block storage object data3 using /dev/vg_oracle/lv_data3.
45/backstores/block>
46/backstores/block> create fra1 /dev/vg_oracle/lv_fra1
47Created block storage object fra1 using /dev/vg_oracle/lv_fra1.
48/backstores/block> create fra2 /dev/vg_oracle/lv_fra2
49Created block storage object fra2 using /dev/vg_oracle/lv_fra2.
50/backstores/block> create fra3 /dev/vg_oracle/lv_fra3
51Created block storage object fra3 using /dev/vg_oracle/lv_fra3.
52/backstores/block> ls
53o- block ..................................................................................................... [Storage Objects: 12]
54  o- data1 .............................................................. [/dev/vg_oracle/lv_data1 (15.0GiB) write-thru deactivated]
55  | o- alua ....................................................................................................... [ALUA Groups: 1]
56  |   o- default_tg_pt_gp ........................................................................... [ALUA state: Active/optimized]
57  o- data2 .............................................................. [/dev/vg_oracle/lv_data2 (15.0GiB) write-thru deactivated]
58  | o- alua ....................................................................................................... [ALUA Groups: 1]
59  |   o- default_tg_pt_gp ........................................................................... [ALUA state: Active/optimized]
60  o- data3 .............................................................. [/dev/vg_oracle/lv_data3 (15.0GiB) write-thru deactivated]
61  | o- alua ....................................................................................................... [ALUA Groups: 1]
62  |   o- default_tg_pt_gp ........................................................................... [ALUA state: Active/optimized]
63  o- fra1 ................................................................ [/dev/vg_oracle/lv_fra1 (10.0GiB) write-thru deactivated]
64  | o- alua ....................................................................................................... [ALUA Groups: 1]
65  |   o- default_tg_pt_gp ........................................................................... [ALUA state: Active/optimized]
66  o- fra2 ................................................................ [/dev/vg_oracle/lv_fra2 (10.0GiB) write-thru deactivated]
67  | o- alua ....................................................................................................... [ALUA Groups: 1]
68  |   o- default_tg_pt_gp ........................................................................... [ALUA state: Active/optimized]
69  o- fra3 ................................................................ [/dev/vg_oracle/lv_fra3 (10.0GiB) write-thru deactivated]
70  | o- alua ....................................................................................................... [ALUA Groups: 1]
71  |   o- default_tg_pt_gp ........................................................................... [ALUA state: Active/optimized]
72  o- mgmt1 .............................................................. [/dev/vg_oracle/lv_mgmt1 (10.0GiB) write-thru deactivated]
73  | o- alua ....................................................................................................... [ALUA Groups: 1]
74  |   o- default_tg_pt_gp ........................................................................... [ALUA state: Active/optimized]
75  o- mgmt2 .............................................................. [/dev/vg_oracle/lv_mgmt2 (10.0GiB) write-thru deactivated]
76  | o- alua ....................................................................................................... [ALUA Groups: 1]
77  |   o- default_tg_pt_gp ........................................................................... [ALUA state: Active/optimized]
78  o- mgmt3 .............................................................. [/dev/vg_oracle/lv_mgmt3 (10.0GiB) write-thru deactivated]
79  | o- alua ....................................................................................................... [ALUA Groups: 1]
80  |   o- default_tg_pt_gp ........................................................................... [ALUA state: Active/optimized]
81  o- ocr1 ................................................................. [/dev/vg_oracle/lv_ocr1 (1.0GiB) write-thru deactivated]
82  | o- alua ....................................................................................................... [ALUA Groups: 1]
83  |   o- default_tg_pt_gp ........................................................................... [ALUA state: Active/optimized]
84  o- ocr2 ................................................................. [/dev/vg_oracle/lv_ocr2 (1.0GiB) write-thru deactivated]
85  | o- alua ....................................................................................................... [ALUA Groups: 1]
86  |   o- default_tg_pt_gp ........................................................................... [ALUA state: Active/optimized]
87  o- ocr3 ................................................................. [/dev/vg_oracle/lv_ocr3 (1.0GiB) write-thru deactivated]
88    o- alua ....................................................................................................... [ALUA Groups: 1]
89      o- default_tg_pt_gp ........................................................................... [ALUA state: Active/optimized]
3.1.4、使用targetcli创建iqn和LUN
cd到/iscsi目录下,创建iqn;cd到/iscsi/iqn.20...0be/tpg1/luns
下创建LUN,参考命令如下:
 1cd /iscsi
 2create iqn.2021-08.xmmup.com:rac-21c-shared-disks
 3cd /iscsi/iqn.2021-08.xmmup.com:rac-21c-shared-disks/tpg1/luns
 4create /backstores/block/ocr1
 5create /backstores/block/ocr2
 6create /backstores/block/ocr3
 7create /backstores/block/mgmt1
 8create /backstores/block/mgmt2
 9create /backstores/block/mgmt3
10create /backstores/block/data1
11create /backstores/block/data2
12create /backstores/block/data3
13create /backstores/block/fra1
14create /backstores/block/fra2
15create /backstores/block/fra3
执行过程:
 1/> cd /iscsi
 2/iscsi> create iqn.2021-08.xmmup.com:rac-21c-shared-disks
 3Created target iqn.2021-08.xmmup.com:rac-21c-shared-disks.
 4Created TPG 1.
 5Global pref auto_add_default_portal=true
 6Created default portal listening on all IPs (0.0.0.0), port 3260.
 7/iscsi> ls
 8o- iscsi .............................................................................................................. [Targets: 1]
 9  o- iqn.2021-08.xmmup.com:rac-21c-shared-disks .......................................................................... [TPGs: 1]
10    o- tpg1 ................................................................................................. [no-gen-acls, no-auth]
11      o- acls ............................................................................................................ [ACLs: 0]
12      o- luns ............................................................................................................ [LUNs: 0]
13      o- portals ...................................................................................................... [Portals: 1]
14        o- 0.0.0.0:3260 ....................................................................................................... [OK]
15/iscsi> cd /iscsi/iqn.2021-08.xmmup.com:rac-21c-shared-disks/tpg1/luns
16/iscsi/iqn.20...sks/tpg1/luns> create /backstores/block/ocr1
17Created LUN 0.
18/iscsi/iqn.20...sks/tpg1/luns> create /backstores/block/ocr2
19Created LUN 1.
20/iscsi/iqn.20...sks/tpg1/luns> create /backstores/block/ocr3
21Created LUN 2.
22/iscsi/iqn.20...sks/tpg1/luns> create /backstores/block/mgmt1
23Created LUN 3.
24/iscsi/iqn.20...sks/tpg1/luns> create /backstores/block/mgmt2
25Created LUN 4.
26/iscsi/iqn.20...sks/tpg1/luns> create /backstores/block/mgmt3
27Created LUN 5.
28create /backstores/block/data1
29/iscsi/iqn.20...sks/tpg1/luns> create /backstores/block/data1
30Created LUN 6.
31/iscsi/iqn.20...sks/tpg1/luns> create /backstores/block/data2
32Created LUN 7.
33/iscsi/iqn.20...sks/tpg1/luns> create /backstores/block/data3
34Created LUN 8.
35create /backstores/block/fra1
36/iscsi/iqn.20...sks/tpg1/luns> create /backstores/block/fra1
37Created LUN 9.
38/iscsi/iqn.20...sks/tpg1/luns> create /backstores/block/fra2
39Created LUN 10.
40/iscsi/iqn.20...sks/tpg1/luns> create /backstores/block/fra3
41Created LUN 11.
42/iscsi/iqn.20...sks/tpg1/luns> ls
43o- luns ................................................................................................................. [LUNs: 12]
44  o- lun0 ................................................................. [block/ocr1 (/dev/vg_oracle/lv_ocr1) (default_tg_pt_gp)]
45  o- lun1 ................................................................. [block/ocr2 (/dev/vg_oracle/lv_ocr2) (default_tg_pt_gp)]
46  o- lun2 ................................................................. [block/ocr3 (/dev/vg_oracle/lv_ocr3) (default_tg_pt_gp)]
47  o- lun3 ............................................................... [block/mgmt1 (/dev/vg_oracle/lv_mgmt1) (default_tg_pt_gp)]
48  o- lun4 ............................................................... [block/mgmt2 (/dev/vg_oracle/lv_mgmt2) (default_tg_pt_gp)]
49  o- lun5 ............................................................... [block/mgmt3 (/dev/vg_oracle/lv_mgmt3) (default_tg_pt_gp)]
50  o- lun6 ............................................................... [block/data1 (/dev/vg_oracle/lv_data1) (default_tg_pt_gp)]
51  o- lun7 ............................................................... [block/data2 (/dev/vg_oracle/lv_data2) (default_tg_pt_gp)]
52  o- lun8 ............................................................... [block/data3 (/dev/vg_oracle/lv_data3) (default_tg_pt_gp)]
53  o- lun9 ................................................................. [block/fra1 (/dev/vg_oracle/lv_fra1) (default_tg_pt_gp)]
54  o- lun10 ................................................................ [block/fra2 (/dev/vg_oracle/lv_fra2) (default_tg_pt_gp)]
55  o- lun11 ................................................................ [block/fra3 (/dev/vg_oracle/lv_fra3) (default_tg_pt_gp)]
3.1.5、使用targetcli创建acls
设置哪些设备可以连接到此iqn上:
cd到acls目录下,创建2个client的acls,参考命令如下:
1cd /iscsi/iqn.2021-08.xmmup.com:rac-21c-shared-disks/tpg1/acls
2create iqn.2021-08.xmmup.com:rac-21c-shared-disks:client62
3create iqn.2021-08.xmmup.com:rac-21c-shared-disks:client63
执行:
 1/iscsi/iqn.20...sks/tpg1/luns> cd /iscsi/iqn.2021-08.xmmup.com:rac-21c-shared-disks/tpg1/acls
 2/iscsi/iqn.20...sks/tpg1/acls> ls
 3o- acls .................................................................................................................. [ACLs: 0]
 4/iscsi/iqn.20...sks/tpg1/acls> create iqn.2021-08.xmmup.com:rac-21c-shared-disks:client62
 5Created Node ACL for iqn.2021-08.xmmup.com:rac-21c-shared-disks:client62
 6Created mapped LUN 0.
 7Created mapped LUN 1.
 8Created mapped LUN 2.
 9Created mapped LUN 3.
10Created mapped LUN 4.
11Created mapped LUN 5.
12Created mapped LUN 6.
13Created mapped LUN 7.
14Created mapped LUN 8.
15Created mapped LUN 9.
16Created mapped LUN 10.
17Created mapped LUN 11.
18/iscsi/iqn.20...sks/tpg1/acls> create iqn.2021-08.xmmup.com:rac-21c-shared-disks:client63
19Created Node ACL for iqn.2021-08.xmmup.com:rac-21c-shared-disks:client63
20Created mapped LUN 0.
21Created mapped LUN 1.
22Created mapped LUN 2.
23Created mapped LUN 3.
24Created mapped LUN 4.
25Created mapped LUN 5.
26Created mapped LUN 6.
27Created mapped LUN 7.
28Created mapped LUN 8.
29Created mapped LUN 9.
30Created mapped LUN 10.
31Created mapped LUN 11.
32/iscsi/iqn.20...sks/tpg1/acls> ls
33o- acls .................................................................................................................. [ACLs: 2]
34  o- iqn.2021-08.xmmup.com:rac-21c-shared-disks:client62 ......................................................... [Mapped LUNs: 12]
35  | o- mapped_lun0 .......................................................................................... [lun0 block/ocr1 (rw)]
36  | o- mapped_lun1 .......................................................................................... [lun1 block/ocr2 (rw)]
37  | o- mapped_lun2 .......................................................................................... [lun2 block/ocr3 (rw)]
38  | o- mapped_lun3 ......................................................................................... [lun3 block/mgmt1 (rw)]
39  | o- mapped_lun4 ......................................................................................... [lun4 block/mgmt2 (rw)]
40  | o- mapped_lun5 ......................................................................................... [lun5 block/mgmt3 (rw)]
41  | o- mapped_lun6 ......................................................................................... [lun6 block/data1 (rw)]
42  | o- mapped_lun7 ......................................................................................... [lun7 block/data2 (rw)]
43  | o- mapped_lun8 ......................................................................................... [lun8 block/data3 (rw)]
44  | o- mapped_lun9 .......................................................................................... [lun9 block/fra1 (rw)]
45  | o- mapped_lun10 ........................................................................................ [lun10 block/fra2 (rw)]
46  | o- mapped_lun11 ........................................................................................ [lun11 block/fra3 (rw)]
47  o- iqn.2021-08.xmmup.com:rac-21c-shared-disks:client63 ......................................................... [Mapped LUNs: 12]
48    o- mapped_lun0 .......................................................................................... [lun0 block/ocr1 (rw)]
49    o- mapped_lun1 .......................................................................................... [lun1 block/ocr2 (rw)]
50    o- mapped_lun2 .......................................................................................... [lun2 block/ocr3 (rw)]
51    o- mapped_lun3 ......................................................................................... [lun3 block/mgmt1 (rw)]
52    o- mapped_lun4 ......................................................................................... [lun4 block/mgmt2 (rw)]
53    o- mapped_lun5 ......................................................................................... [lun5 block/mgmt3 (rw)]
54    o- mapped_lun6 ......................................................................................... [lun6 block/data1 (rw)]
55    o- mapped_lun7 ......................................................................................... [lun7 block/data2 (rw)]
56    o- mapped_lun8 ......................................................................................... [lun8 block/data3 (rw)]
57    o- mapped_lun9 .......................................................................................... [lun9 block/fra1 (rw)]
58    o- mapped_lun10 ........................................................................................ [lun10 block/fra2 (rw)]
59    o- mapped_lun11 ........................................................................................ [lun11 block/fra3 (rw)]
3.1.6、配置target监听IP和端口
cd到portals目录下创建portals:
1cd /iscsi/iqn.2021-08.xmmup.com:rac-21c-shared-disks/tpg1/portals
2delete 0.0.0.0 3260
3create 192.168.59.63
执行过程:
 1/iscsi/iqn.20...sks/tpg1/acls> cd /iscsi/iqn.2021-08.xmmup.com:rac-21c-shared-disks/tpg1/portals
 2/iscsi/iqn.20.../tpg1/portals> ls
 3o- portals ............................................................................................................ [Portals: 1]
 4  o- 0.0.0.0:3260 ............................................................................................................. [OK]
 5/iscsi/iqn.20.../tpg1/portals> delete 0.0.0.0 3260
 6Deleted network portal 0.0.0.0:3260
 7/iscsi/iqn.20.../tpg1/portals> create 192.168.59.63
 8Using default IP port 3260
 9Created network portal 192.168.59.63:3260.
10/iscsi/iqn.20.../tpg1/portals> ls
11o- portals ............................................................................................................ [Portals: 2]
12  o- 192.168.59.63:3260 ....................................................................................................... [OK]
13/iscsi/iqn.20.../tpg1/portals>
3.1.7、保存配置
1cd /
2saveconfig
说明:可以查看/etc/target/saveconfig.json配置文件,该配置文件保存着ISCSI的配置。
1/iscsi/iqn.20.../tpg1/portals> cd /
2/> saveconfig
3Configuration saved to /etc/target/saveconfig.json
4/>
3.2、客户端配置
客户端即节点1和节点2都需要配置。
3.2.1、安装服务并启动
 1yum -y install iscsi-initiator-utils
 2
 3-- 注意节点2的不同,应该为“client63”
 4echo "InitiatorName=iqn.2021-08.xmmup.com:rac-21c-shared-disks:client62" > /etc/iscsi/initiatorname.iscsi
 5
 6systemctl enable iscsid
 7systemctl start iscsid
 8systemctl status iscsid
 9
10
11-- 修改文件/usr/lib/systemd/system/iscsi.service,在“[Service]”下添加如下内容:
12TimeoutStartSec=5sec
13TimeoutStopSec=5sec
14
15
16systemctl daemon-reload
3.2.2、使用iscsiadm发现可用存储设备并登陆连接
1-- 找到可用存储设备:
2iscsiadm -m discovery -t st -p 192.168.59.63
3-- 登陆连接:
4iscsiadm -m node -T iqn.2021-08.xmmup.com:rac-21c-shared-disks -p 192.168.59.63 --login
5
6-- 若是重新配置,则删除以下内容,并重启OS才能生效
7rm -rf /var/lib/iscsi/nodes/*
8rm -rf /var/lib/iscsi/send_targets/*
9
执行过程:
1[root@raclhr-21c-n1 ~]# iscsiadm -m discovery -t st -p 192.168.59.63
2192.168.59.63:3260,1 iqn.2021-08.xmmup.com:rac-21c-shared-disks
3[root@raclhr-21c-n1 ~]# iscsiadm -m node -T iqn.2021-08.xmmup.com:rac-21c-shared-disks -p 192.168.59.63 --login
4Logging in to [iface: default, target: iqn.2021-08.xmmup.com:rac-21c-shared-disks, portal: 192.168.59.63,3260] (multiple)
5Login to [iface: default, target: iqn.2021-08.xmmup.com:rac-21c-shared-disks, portal: 192.168.59.63,3260] successful.
此时使用fdisk -l | grep dev
查看已经正常显示所有设备:
 1[root@raclhr-21c-n1 ~]# fdisk -l | grep dev
 2....
 3Disk /dev/sdd: 1073 MB, 1073741824 bytes, 2097152 sectors
 4Disk /dev/sde: 1073 MB, 1073741824 bytes, 2097152 sectors
 5Disk /dev/sdf: 1073 MB, 1073741824 bytes, 2097152 sectors
 6Disk /dev/sdg: 10.7 GB, 10737418240 bytes, 20971520 sectors
 7Disk /dev/sdh: 10.7 GB, 10737418240 bytes, 20971520 sectors
 8Disk /dev/sdi: 10.7 GB, 10737418240 bytes, 20971520 sectors
 9Disk /dev/sdj: 16.1 GB, 16106127360 bytes, 31457280 sectors
10Disk /dev/sdk: 16.1 GB, 16106127360 bytes, 31457280 sectors
11Disk /dev/sdl: 16.1 GB, 16106127360 bytes, 31457280 sectors
12Disk /dev/sdm: 10.7 GB, 10737418240 bytes, 20971520 sectors
13Disk /dev/sdn: 10.7 GB, 10737418240 bytes, 20971520 sectors
14Disk /dev/sdo: 10.7 GB, 10737418240 bytes, 20971520 sectors
3.2.3、创建并配置udev rules文件
直接运行如下的脚本:
 1-- 创建ASM磁盘udev配置文件
 2for i in  d e f g h i j k l m n o; do
 3echo "KERNEL==\"sd*\",ENV{DEVTYPE}==\"disk\",SUBSYSTEM==\"block\",PROGRAM==\"/usr/lib/udev/scsi_id -g -u -d \$devnode\",RESULT==\"`/usr/lib/udev/scsi_id -g -u /dev/sd$i`\", RUN+=\"/bin/sh -c 'mknod /dev/asm-disk$i b  \$major \$minor; chown grid:asmadmin /dev/asm-disk$i; chmod 0660 /dev/asm-disk$i'\"" >> /etc/udev/rules.d/99-oracle-asmdevices.rules
 4done
 5
 6-- 重启服务:
 7/sbin/udevadm trigger --type=devices --action=change
 8/sbin/udevadm control --reload
 9
10-- 查看磁盘
11ll /dev/asm*
执行过程:
 1[root@raclhr-21c-n1 ~]# for i in  d e f g h i j k l m n o; do
 2> echo "KERNEL==\"sd*\",ENV{DEVTYPE}==\"disk\",SUBSYSTEM==\"block\",PROGRAM==\"/usr/lib/udev/scsi_id -g -u -d \$devnode\",RESULT==\"`/usr/lib/udev/scsi_id -g -u /dev/sd$i`\", RUN+=\"/bin/sh -c 'mknod /dev/asm-disk$i b  \$major \$minor; chown grid:asmadmin /dev/asm-disk$i; chmod 0660 /dev/asm-disk$i'\"" >> /etc/udev/rules.d/99-oracle-asmdevices.rules
 3> done
 4[root@raclhr-21c-n1 ~]# cat /etc/udev/rules.d/99-oracle-asmdevices.rules
 5KERNEL=="sd*",ENV{DEVTYPE}=="disk",SUBSYSTEM=="block",PROGRAM=="/usr/lib/udev/scsi_id -g -u -d $devnode",RESULT=="360014054269a99f369e49f3b96c36a1f", RUN+="/bin/sh -c 'mknod /dev/asm-diskd b  $major $minor; chown grid:asmadmin /dev/asm-diskd; chmod 0660 /dev/asm-diskd'"
 6KERNEL=="sd*",ENV{DEVTYPE}=="disk",SUBSYSTEM=="block",PROGRAM=="/usr/lib/udev/scsi_id -g -u -d $devnode",RESULT=="360014050e1a3ca0338b4ec98c3fd3549", RUN+="/bin/sh -c 'mknod /dev/asm-diske b  $major $minor; chown grid:asmadmin /dev/asm-diske; chmod 0660 /dev/asm-diske'"
 7KERNEL=="sd*",ENV{DEVTYPE}=="disk",SUBSYSTEM=="block",PROGRAM=="/usr/lib/udev/scsi_id -g -u -d $devnode",RESULT=="360014059475c72da0e44253b4377a355", RUN+="/bin/sh -c 'mknod /dev/asm-diskf b  $major $minor; chown grid:asmadmin /dev/asm-diskf; chmod 0660 /dev/asm-diskf'"
 8KERNEL=="sd*",ENV{DEVTYPE}=="disk",SUBSYSTEM=="block",PROGRAM=="/usr/lib/udev/scsi_id -g -u -d $devnode",RESULT=="36001405cf669852f98240dd9596e1808", RUN+="/bin/sh -c 'mknod /dev/asm-diskg b  $major $minor; chown grid:asmadmin /dev/asm-diskg; chmod 0660 /dev/asm-diskg'"
 9KERNEL=="sd*",ENV{DEVTYPE}=="disk",SUBSYSTEM=="block",PROGRAM=="/usr/lib/udev/scsi_id -g -u -d $devnode",RESULT=="36001405120d8ce03eb94720ac9ffa91a", RUN+="/bin/sh -c 'mknod /dev/asm-diskh b  $major $minor; chown grid:asmadmin /dev/asm-diskh; chmod 0660 /dev/asm-diskh'"
10KERNEL=="sd*",ENV{DEVTYPE}=="disk",SUBSYSTEM=="block",PROGRAM=="/usr/lib/udev/scsi_id -g -u -d $devnode",RESULT=="36001405095565b2b64b4085bf3b13184", RUN+="/bin/sh -c 'mknod /dev/asm-diski b  $major $minor; chown grid:asmadmin /dev/asm-diski; chmod 0660 /dev/asm-diski'"
11KERNEL=="sd*",ENV{DEVTYPE}=="disk",SUBSYSTEM=="block",PROGRAM=="/usr/lib/udev/scsi_id -g -u -d $devnode",RESULT=="36001405647c901386824b27aceedf72f", RUN+="/bin/sh -c 'mknod /dev/asm-diskj b  $major $minor; chown grid:asmadmin /dev/asm-diskj; chmod 0660 /dev/asm-diskj'"
12KERNEL=="sd*",ENV{DEVTYPE}=="disk",SUBSYSTEM=="block",PROGRAM=="/usr/lib/udev/scsi_id -g -u -d $devnode",RESULT=="36001405030340160f0b4393becae3f60", RUN+="/bin/sh -c 'mknod /dev/asm-diskk b  $major $minor; chown grid:asmadmin /dev/asm-diskk; chmod 0660 /dev/asm-diskk'"
13KERNEL=="sd*",ENV{DEVTYPE}=="disk",SUBSYSTEM=="block",PROGRAM=="/usr/lib/udev/scsi_id -g -u -d $devnode",RESULT=="36001405ef600c31b0034c41ac16391ea", RUN+="/bin/sh -c 'mknod /dev/asm-diskl b  $major $minor; chown grid:asmadmin /dev/asm-diskl; chmod 0660 /dev/asm-diskl'"
14KERNEL=="sd*",ENV{DEVTYPE}=="disk",SUBSYSTEM=="block",PROGRAM=="/usr/lib/udev/scsi_id -g -u -d $devnode",RESULT=="36001405f671bb9a383e4808ad158b573", RUN+="/bin/sh -c 'mknod /dev/asm-diskm b  $major $minor; chown grid:asmadmin /dev/asm-diskm; chmod 0660 /dev/asm-diskm'"
15KERNEL=="sd*",ENV{DEVTYPE}=="disk",SUBSYSTEM=="block",PROGRAM=="/usr/lib/udev/scsi_id -g -u -d $devnode",RESULT=="360014053294b9b4056841baa79a34d67", RUN+="/bin/sh -c 'mknod /dev/asm-diskn b  $major $minor; chown grid:asmadmin /dev/asm-diskn; chmod 0660 /dev/asm-diskn'"
16KERNEL=="sd*",ENV{DEVTYPE}=="disk",SUBSYSTEM=="block",PROGRAM=="/usr/lib/udev/scsi_id -g -u -d $devnode",RESULT=="36001405b219421f2408475f8b8183eb1", RUN+="/bin/sh -c 'mknod /dev/asm-disko b  $major $minor; chown grid:asmadmin /dev/asm-disko; chmod 0660 /dev/asm-disko'"
17[root@raclhr-21c-n1 ~]# ll /dev/asm*
18ls: cannot access /dev/asm*: No such file or directory
19[root@raclhr-21c-n1 ~]# /sbin/udevadm trigger --type=devices --action=change
20[root@raclhr-21c-n1 ~]# /sbin/udevadm control --reload
21[root@raclhr-21c-n1 ~]# ll /dev/asm*
22ls: cannot access /dev/asm*: No such file or directory
23[root@raclhr-21c-n1 ~]# ll /dev/asm*
24brw-rw---- 1 grid asmadmin 8,  48 Aug 19 15:19 /dev/asm-diskd
25brw-rw---- 1 grid asmadmin 8,  64 Aug 19 15:19 /dev/asm-diske
26brw-rw---- 1 grid asmadmin 8,  80 Aug 19 15:19 /dev/asm-diskf
27brw-rw---- 1 grid asmadmin 8,  96 Aug 19 15:19 /dev/asm-diskg
28brw-rw---- 1 grid asmadmin 8, 112 Aug 19 15:19 /dev/asm-diskh
29brw-rw---- 1 grid asmadmin 8, 128 Aug 19 15:19 /dev/asm-diski
30brw-rw---- 1 grid asmadmin 8, 144 Aug 19 15:19 /dev/asm-diskj
31brw-rw---- 1 grid asmadmin 8, 160 Aug 19 15:19 /dev/asm-diskk
32brw-rw---- 1 grid asmadmin 8, 176 Aug 19 15:19 /dev/asm-diskl
33brw-rw---- 1 grid asmadmin 8, 192 Aug 19 15:19 /dev/asm-diskm
34brw-rw---- 1 grid asmadmin 8, 208 Aug 19 15:19 /dev/asm-diskn
35brw-rw---- 1 grid asmadmin 8, 224 Aug 19 15:19 /dev/asm-disko
36
37[root@raclhr-21c-n1 ~]# lsscsi
38[0:0:0:0]    disk    VMware,  VMware Virtual S 1.0   /dev/sda
39[0:0:1:0]    disk    VMware,  VMware Virtual S 1.0   /dev/sdb
40[0:0:2:0]    disk    VMware,  VMware Virtual S 1.0   /dev/sdc
41[3:0:0:0]    disk    LIO-ORG  ocr1             4.0   /dev/asm-diskd
42[3:0:0:1]    disk    LIO-ORG  ocr2             4.0   /dev/asm-diske
43[3:0:0:2]    disk    LIO-ORG  ocr3             4.0   /dev/asm-diskf
44[3:0:0:3]    disk    LIO-ORG  mgmt1            4.0   /dev/asm-diskg
45[3:0:0:4]    disk    LIO-ORG  mgmt2            4.0   /dev/asm-diskh
46[3:0:0:5]    disk    LIO-ORG  mgmt3            4.0   /dev/asm-diski
47[3:0:0:6]    disk    LIO-ORG  data1            4.0   /dev/asm-diskj
48[3:0:0:7]    disk    LIO-ORG  data2            4.0   /dev/asm-diskk
49[3:0:0:8]    disk    LIO-ORG  data3            4.0   /dev/asm-diskl
50[3:0:0:9]    disk    LIO-ORG  fra1             4.0   /dev/asm-diskm
51[3:0:0:10]   disk    LIO-ORG  fra2             4.0   /dev/asm-diskn
52[3:0:0:11]   disk    LIO-ORG  fra3             4.0   /dev/asm-disko
四、数据库软件包准备
4.1、上传安装软件
打开SecureFX软件:
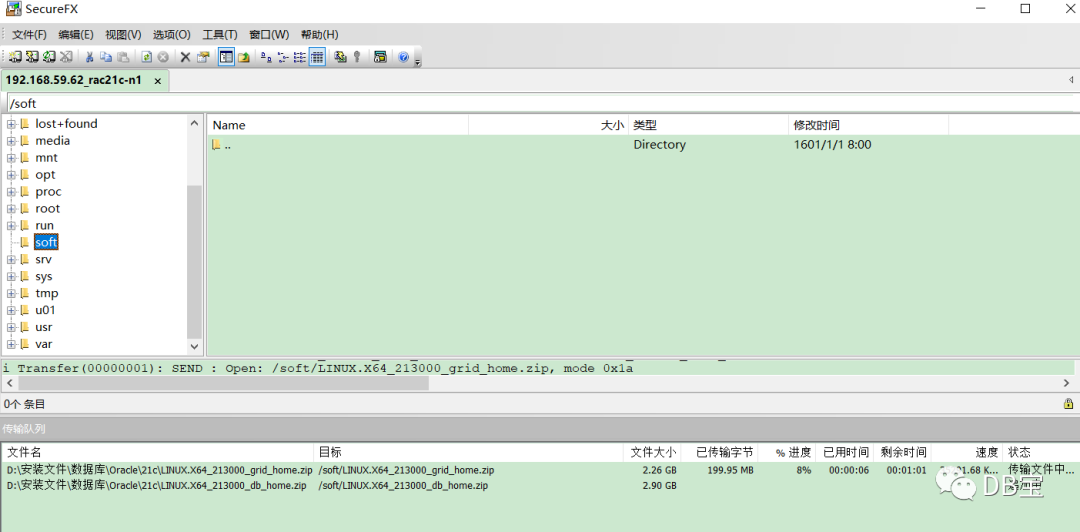
复制粘贴数据库文件到/soft目录下并等待上传完成。
注意,对安装包需要进行MD5值校验:
1[root@raclhr-21c-n1 ~]# cd /soft
2[root@raclhr-21c-n1 soft]# ll
3total 5401812
4-rw-r--r-- 1 root root 3109225519 Aug 16 09:58 LINUX.X64_213000_db_home.zip
5-rw-r--r-- 1 root root 2422217613 Aug 16 09:57 LINUX.X64_213000_grid_home.zip
6[root@raclhr-21c-n1 soft]# md5sum LINUX.X64_213000_grid_home.zip
7b3fbdb7621ad82cbd4f40943effdd1be  LINUX.X64_213000_grid_home.zip
8[root@raclhr-21c-n1 soft]# md5sum LINUX.X64_213000_db_home.zip
98ac915a800800ddf16a382506d3953db  LINUX.X64_213000_db_home.zip
4.2、解压软件
grid用户:
1unzip LINUX.X64_213000_grid_home.zip -d /u01/app/21.3.0/grid
oracle用户:
1unzip LINUX.X64_213000_db_home.zip -d /u01/app/oracle/product/21.3.0/dbhome_1
只在节点1上进行解压即可。
👉 注意:
1、不要同时进行解压2个文件,否则可能有未预料到的错误
2、需要搜索一下解压是否有报错的地方,搜索关键词“error”
注意:18c解压后的文件所在目录就是grid home。所以解压的时候,就要把文件解压到之前定的GRID_HOME下。在12c R2之前是安装的时候,软件会自动复制过去。
Starting with Oracle Database 18c, the Oracle Database software is available as an image file for download and installation. Extract the image software into the directory where you want your Oracle home to be located, and then run the runInstaller script to start the Oracle Database installation.
Starting with Oracle Database 18c, installation and configuration of Oracle Database software is simplified with Image-Based installation.
五、安装前预检查
5.1、安装补丁包(cvuqdisk)
在安装RAC之前,经常会需要运行集群验证工具CVU(Cluster Verification Utility),该工具执行系统检查,确认当前的配置是否满足要求。
首先判断是否安装了cvuqdisk包:
1rpm -qa cvuqdisk
如果没有安装,那么在2个节点上都执行如下命令进行安装该包:
1export CVUQDISK_GRP=oinstall
2cd /u01/app/21.3.0/grid/cv/rpm
3rpm -ivh  cvuqdisk-1.0.10-1.rpm
传输到第2个节点上进行安装:
1scp cvuqdisk-1.0.10-1.rpm root@raclhr-21c-n2:/soft
2
3-- 节点2安装cvuqdisk包
4export CVUQDISK_GRP=oinstall
5rpm -ivh  /soft/cvuqdisk-1.0.10-1.rpm
5.2、配SSH互信,建立ssh等效性
sshUserSetup.sh在GI安装介质解压缩后的sshsetup目录下。下面两条命令在节点1上执行即可,在root用户下执行:
1/u01/app/21.3.0/grid/oui/prov/resources/scripts/sshUserSetup.sh -user grid  -hosts "raclhr-21c-n1 raclhr-21c-n2" -advanced exverify -confirm
2/u01/app/21.3.0/grid/oui/prov/resources/scripts/sshUserSetup.sh -user oracle  -hosts "raclhr-21c-n1 raclhr-21c-n2" -advanced exverify -confirm
输入yes及密码一路回车即可。
以oracle和grid用户在2个节点上都测试两节点连通性:
1ssh raclhr-21c-n1 date
2ssh raclhr-21c-n2 date
3ssh raclhr-21c-n1-priv date
4ssh raclhr-21c-n2-priv date
第二次执行时不再提示输入口令,并且可以成功执行命令,则表示SSH对等性配置成功。
5.3、cluster硬件检测--安装前预检查配置信息
Use Cluster Verification Utility (cvu)
Before installing Oracle Clusterware, use CVU to ensure that your cluster is prepared for an installation:
Oracle provides CVU to perform system checks in preparation for an installation, patch updates, or other system changes. In addition, CVU can generate fixup scripts that can change many kernel parameters to at lease the minimum settings required for a successful installation.
Using CVU can help system administrators, storage administrators, and DBA to ensure that everyone has completed the system configuration and preinstallation steps.
./runcluvfy.sh -help
./runcluvfy.sh stage -pre crsinst -n rac1,rac2 –fixup -verbose
Install the operating system package cvuqdisk to both Oracle RAC nodes. Without cvuqdisk, Cluster Verification Utility cannot discover shared disks, and you will receive the error message "Package cvuqdisk not installed" when the Cluster Verification Utility is run (either manually or at the end of the Oracle grid infrastructure installation). Use the cvuqdisk RPM for your hardware architecture (for example, x86_64 or i386). The cvuqdisk RPM can be found on the Oracle grid infrastructure installation media in the rpm directory. For the purpose of this article, the Oracle grid infrastructure media was extracted to the home/grid/software/oracle/grid directory on racnode1 as the grid user.
在安装GRID之前,建议先利用CVU(Cluster Verification Utility)检查CRS的安装前环境。以grid用户运行:
1su - grid
2export CVUQDISK_GRP=oinstall
3export CV_NODE_ALL=raclhr-21c-n1,raclhr-21c-n2
4/u01/app/21.3.0/grid/runcluvfy.sh stage -pre crsinst -allnodes -fixup -verbose -method root
grid安装完成后还可以进行如下校验:
1$ORACLE_HOME/bin/cluvfy stage -pre crsinst -n all -verbose -fixup
未检测通过的显示为failed,有的failed可以根据提供的脚本进行修复。有的需要根据情况进行修复,有的failed也可以忽略。
报错一:
1/dev/shm mounted as temporary file system ...FAILED
2raclhr-21c-n2: PRVE-0421 : No entry exists in /etc/fstab for mounting /dev/shm
3raclhr-21c-n1: PRVE-0421 : No entry exists in /etc/fstab for mounting /dev/shm
参考:http://blog.itpub.net/26736162/viewspace-2214381
CentOS7和RHEL7在 etc/fstab中不包含/dev/shm ,可以手动加进去,或者忽略都可以。
报错二:
 1Systemd login manager IPC parameter ...FAILED
 2raclhr-21c-n2: PRVE-10233 : Systemd login manager parameter 'RemoveIPC' entry
 3               does not exist or is commented out in the configuration file
 4               "/etc/systemd/logind.conf" on node "raclhr-21c-n2".
 5               [Expected="no"]
 6
 7raclhr-21c-n1: PRVE-10233 : Systemd login manager parameter 'RemoveIPC' entry
 8               does not exist or is commented out in the configuration file
 9               "/etc/systemd/logind.conf" on node "raclhr-21c-n1".
10               [Expected="no"]
参考:http://blog.itpub.net/29371470/viewspace-2125673/
解决:
1echo "RemoveIPC=no" >> /etc/systemd/logind.conf
2systemctl daemon-reload
3systemctl restart systemd-logind
报错三:
1Network Time Protocol (NTP) ...FAILED
2raclhr-21c-n2: PRVG-1017 : NTP configuration file "/etc/ntp.conf" is present on
3               nodes "raclhr-21c-n2,raclhr-21c-n1" on which NTP daemon or
4               service was not running
5
6raclhr-21c-n1: PRVG-1017 : NTP configuration file "/etc/ntp.conf" is present on
7               nodes "raclhr-21c-n2,raclhr-21c-n1" on which NTP daemon or
8               service was not running
我们使用ctssd来同步集群的时间,所以ntp必须关闭。
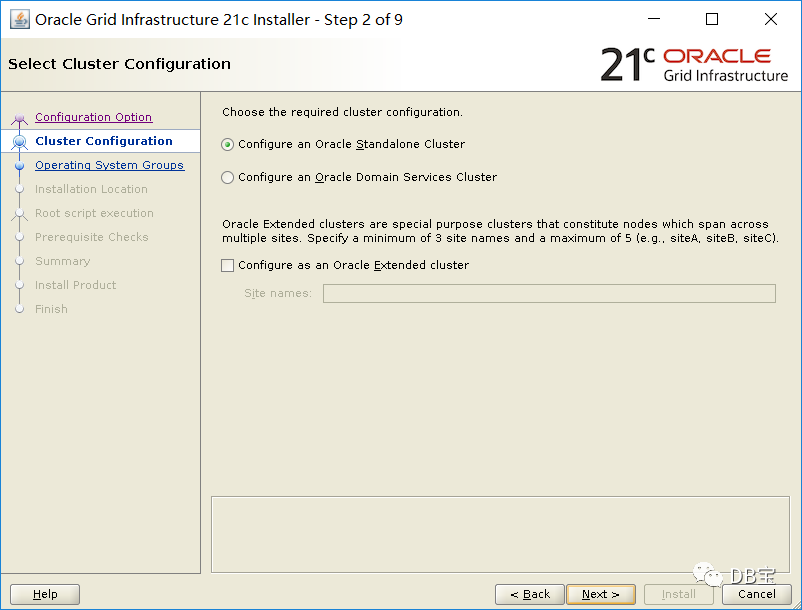
六、图形界面安装集群和db
安装之前重启一次OS,并检查网络和共享盘是否正确。
首先,打开Xmanager - Passive
,如下:

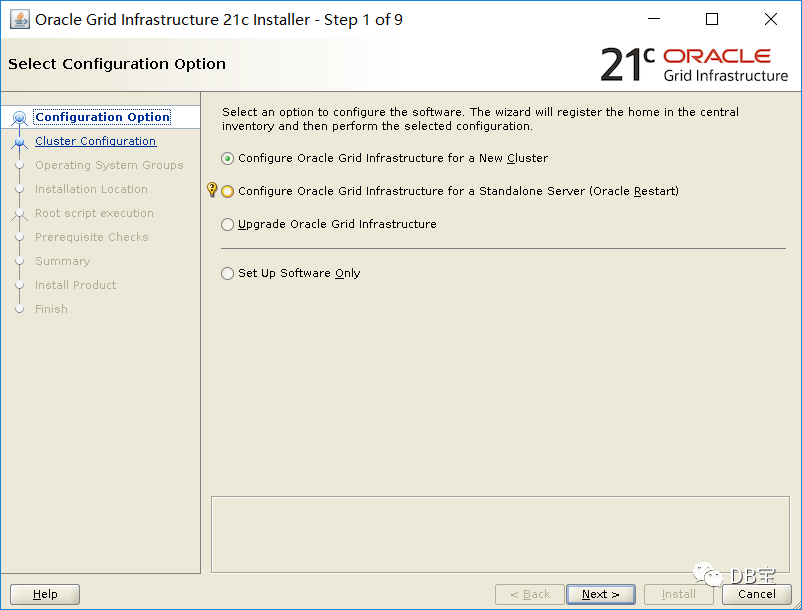
6.1、安装grid
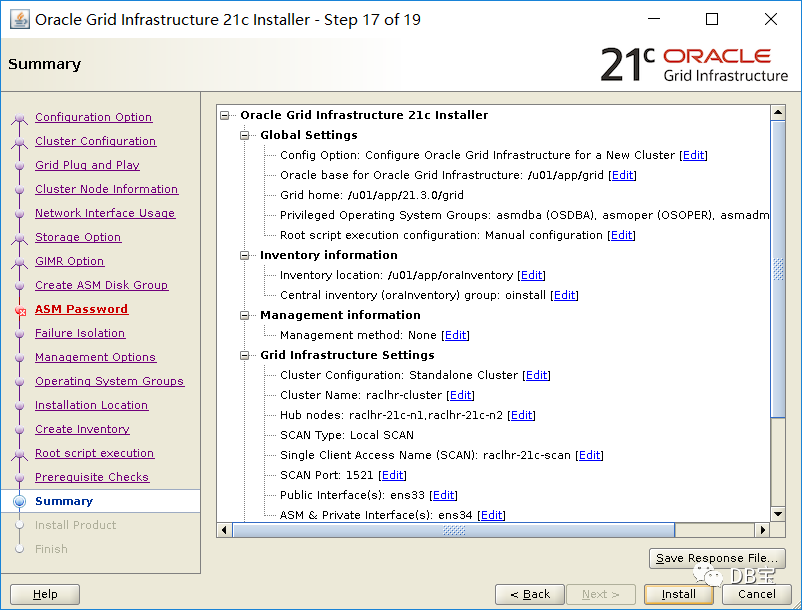
注意:以grid用户登录,然后运行下面这个脚本,和之前版本的grid安装有所不同:
1[grid@raclhr-21c-n1 ~]$ export DISPLAY=192.168.59.1:0.0
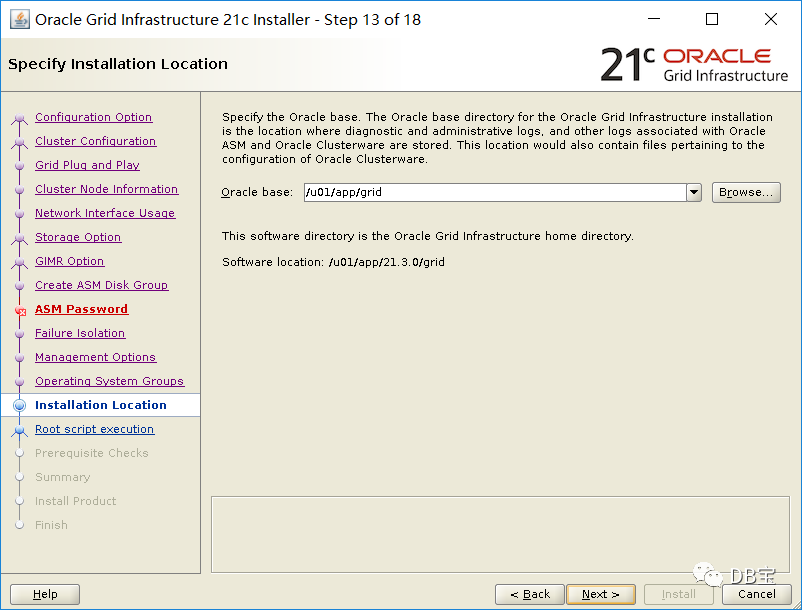
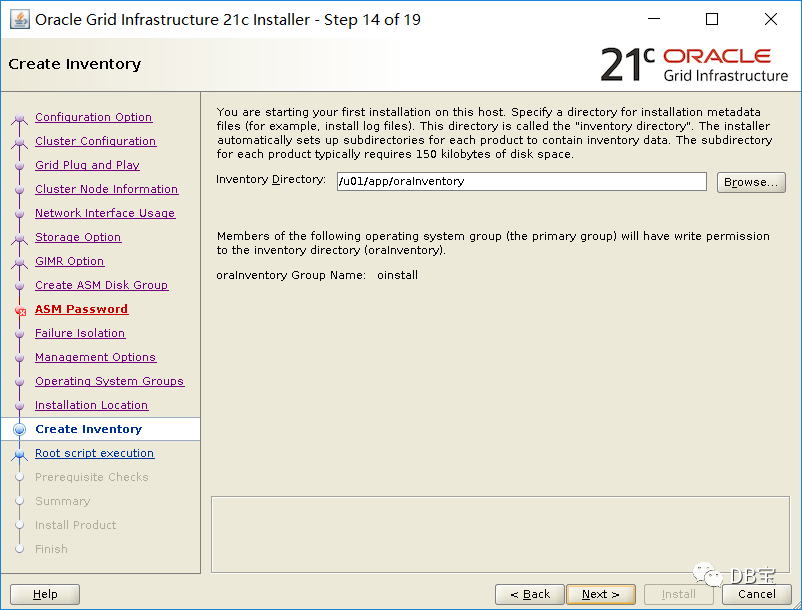
2[grid@raclhr-21c-n1 ~]$ /u01/app/21.3.0/grid/gridSetup.sh
3Launching Oracle Grid Infrastructure Setup Wizard...
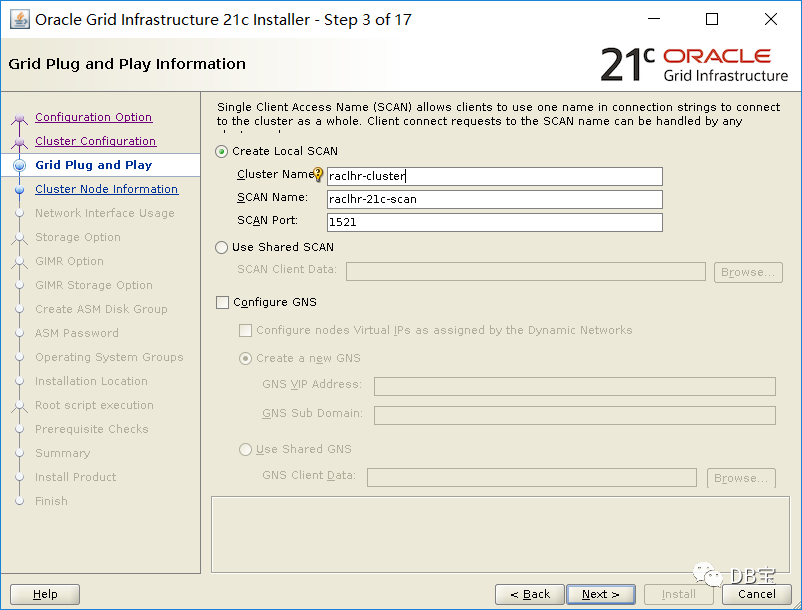
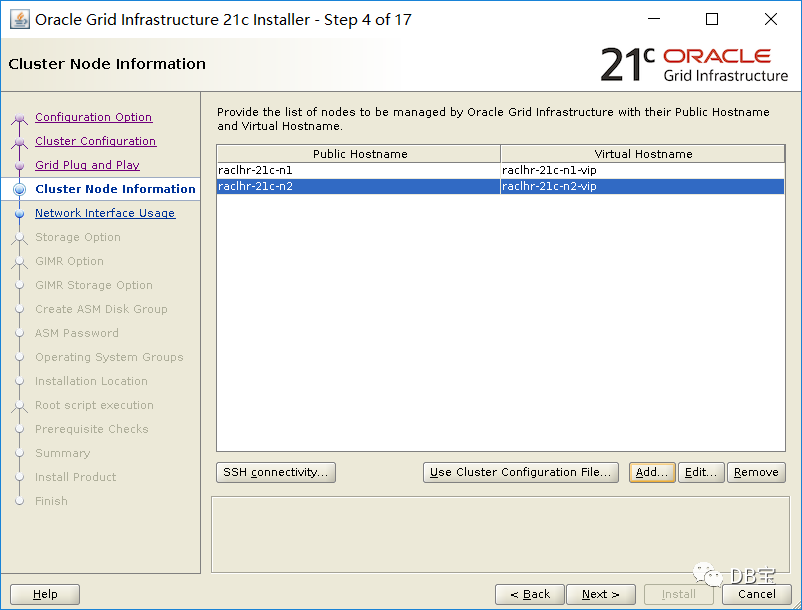
点击add
添加节点2后,点击next
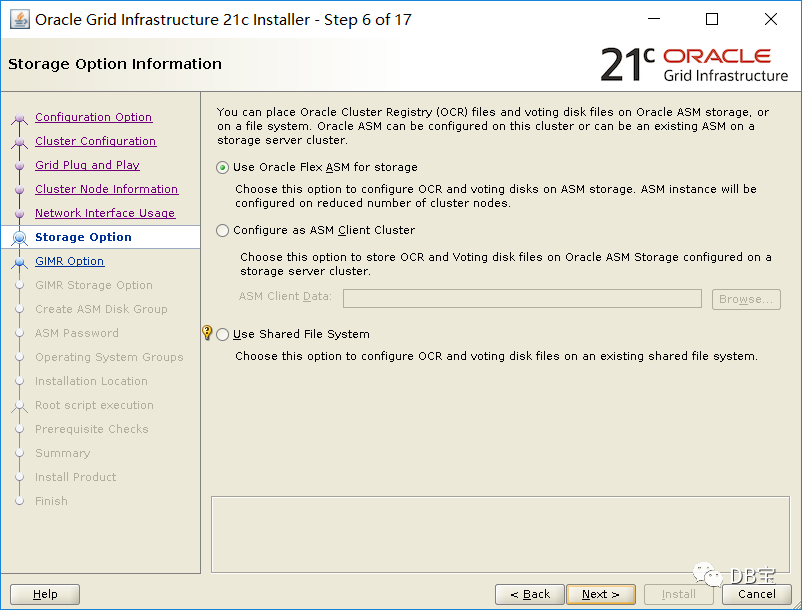
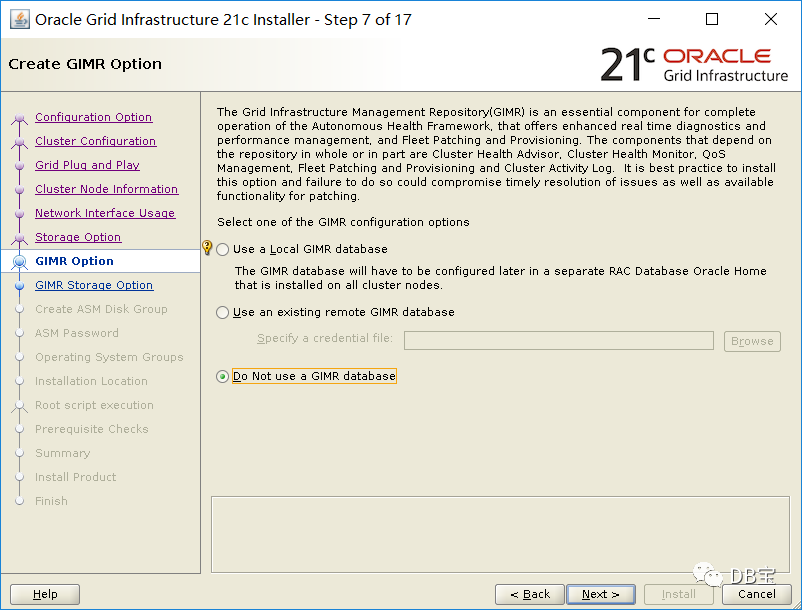
默认选中了不安装GIMR,我们也暂时不安装MIMR库:
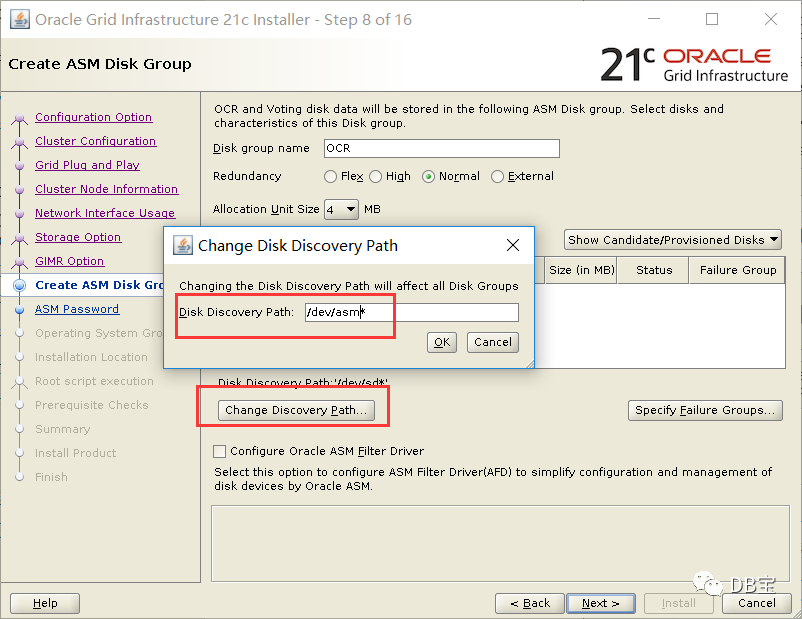
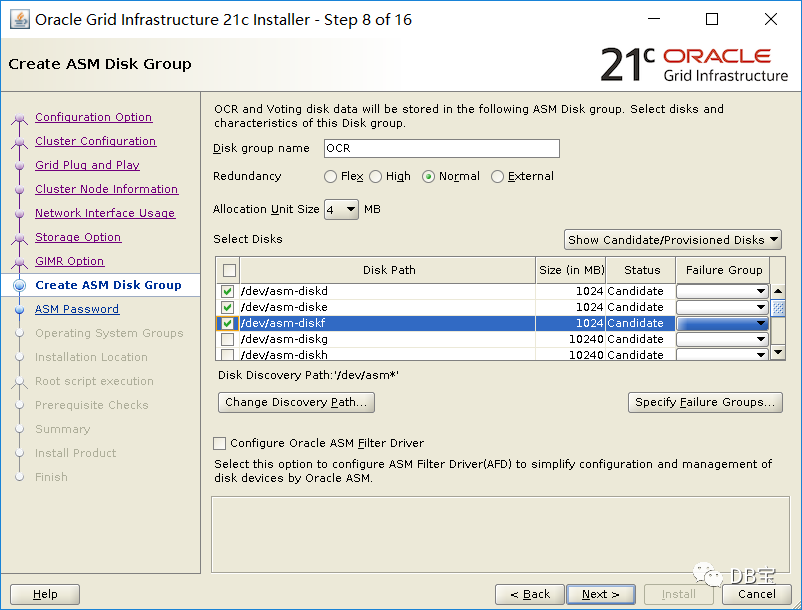
修改磁盘路径为“/dev/asm*
”就可以找到ASM磁盘了。
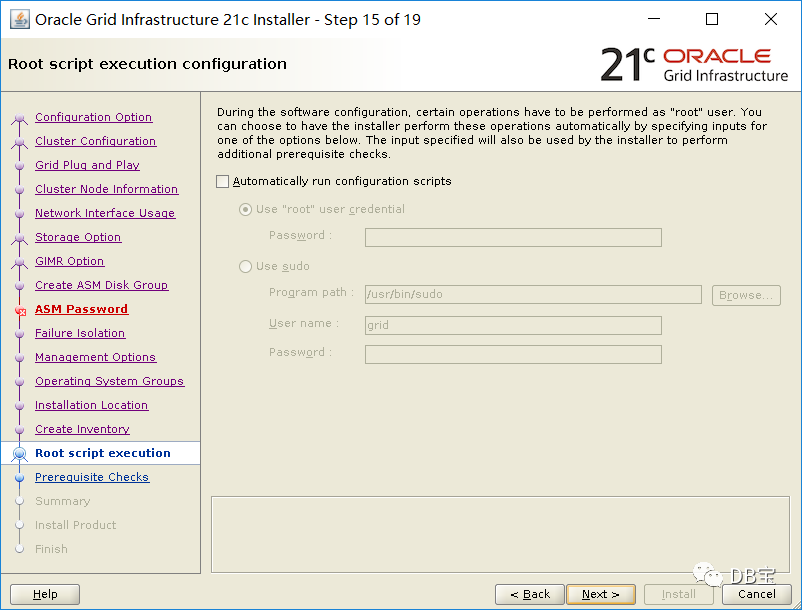
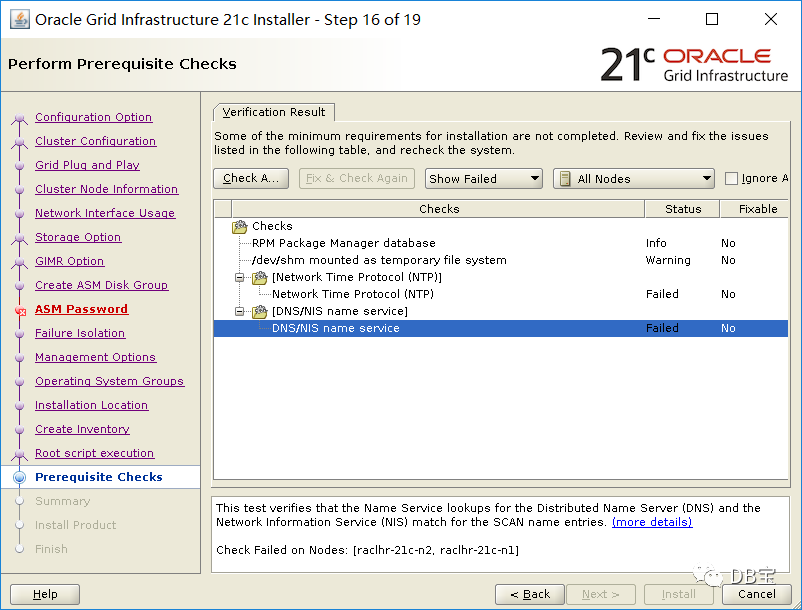
忽悠所有错误继续安装
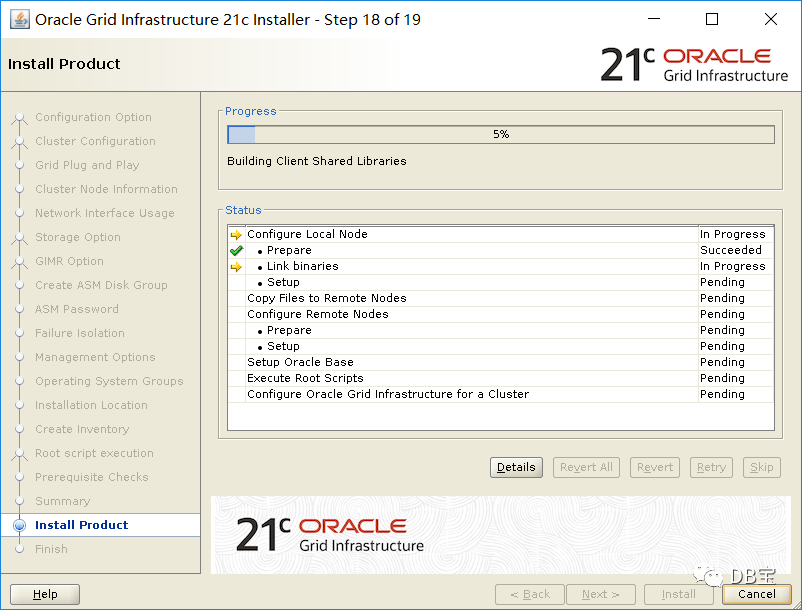
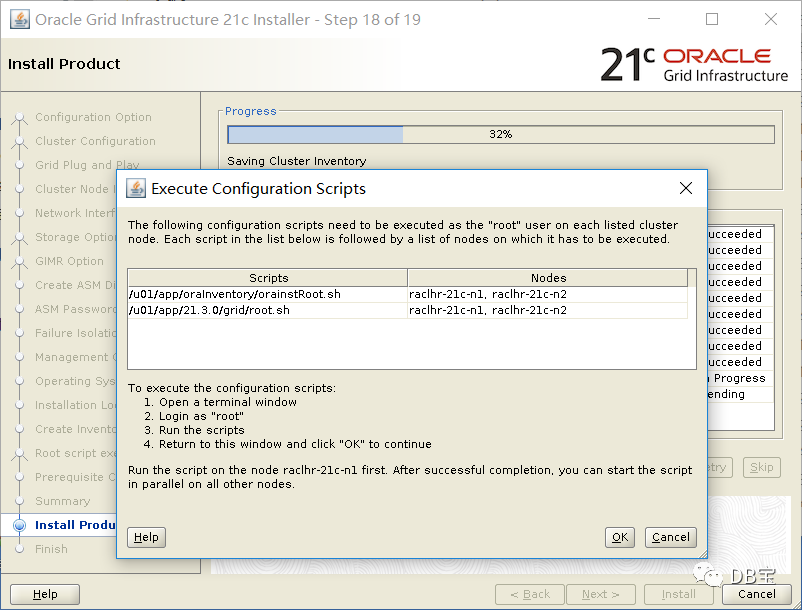
分别在节点1和节点2上执行:
1/u01/app/oraInventory/orainstRoot.sh
2/u01/app/21.3.0/grid/root.sh
节点1运行:
 1[root@raclhr-21c-n1 ~]# /u01/app/oraInventory/orainstRoot.sh
 2Changing permissions of /u01/app/oraInventory.
 3Adding read,write permissions for group.
 4Removing read,write,execute permissions for world.
 5
 6Changing groupname of /u01/app/oraInventory to oinstall.
 7The execution of the script is complete.
 8[root@raclhr-21c-n1 ~]# /u01/app/21.3.0/grid/root.sh
 9Performing root user operation.
10
11The following environment variables are set as:
12    ORACLE_OWNER= grid
13    ORACLE_HOME=  /u01/app/21.3.0/grid
14
15Enter the full pathname of the local bin directory: [/usr/local/bin]:
16   Copying dbhome to /usr/local/bin ...
17   Copying oraenv to /usr/local/bin ...
18   Copying coraenv to /usr/local/bin ...
19
20
21Creating /etc/oratab file...
22Entries will be added to the /etc/oratab file as needed by
23Database Configuration Assistant when a database is created
24Finished running generic part of root script.
25Now product-specific root actions will be performed.
26Relinking oracle with rac_on option
27Using configuration parameter file: /u01/app/21.3.0/grid/crs/install/crsconfig_params
282021-08-20 08:38:46: Got permissions of file /u01/app/grid/crsdata/raclhr-21c-n1/crsconfig: 0775
292021-08-20 08:38:46: Got permissions of file /u01/app/grid/crsdata: 0775
302021-08-20 08:38:46: Got permissions of file /u01/app/grid/crsdata/raclhr-21c-n1: 0775
31The log of current session can be found at:
32  /u01/app/grid/crsdata/raclhr-21c-n1/crsconfig/rootcrs_raclhr-21c-n1_2021-08-20_08-38-46AM.log
332021/08/20 08:38:56 CLSRSC-594: Executing installation step 1 of 19: 'SetupTFA'.
342021/08/20 08:38:56 CLSRSC-594: Executing installation step 2 of 19: 'ValidateEnv'.
352021/08/20 08:38:56 CLSRSC-594: Executing installation step 3 of 19: 'CheckFirstNode'.
362021/08/20 08:38:58 CLSRSC-594: Executing installation step 4 of 19: 'GenSiteGUIDs'.
372021/08/20 08:39:00 CLSRSC-594: Executing installation step 5 of 19: 'SetupOSD'.
38Redirecting to /bin/systemctl restart rsyslog.service
392021/08/20 08:39:00 CLSRSC-594: Executing installation step 6 of 19: 'CheckCRSConfig'.
402021/08/20 08:39:00 CLSRSC-594: Executing installation step 7 of 19: 'SetupLocalGPNP'.
412021/08/20 08:39:13 CLSRSC-594: Executing installation step 8 of 19: 'CreateRootCert'.
422021/08/20 08:39:17 CLSRSC-594: Executing installation step 9 of 19: 'ConfigOLR'.
432021/08/20 08:39:35 CLSRSC-594: Executing installation step 10 of 19: 'ConfigCHMOS'.
442021/08/20 08:39:35 CLSRSC-594: Executing installation step 11 of 19: 'CreateOHASD'.
452021/08/20 08:39:40 CLSRSC-594: Executing installation step 12 of 19: 'ConfigOHASD'.
462021/08/20 08:39:41 CLSRSC-330: Adding Clusterware entries to file 'oracle-ohasd.service'
472021/08/20 08:39:58 CLSRSC-4002: Successfully installed Oracle Autonomous Health Framework (AHF).
482021/08/20 08:40:14 CLSRSC-594: Executing installation step 13 of 19: 'InstallAFD'.
492021/08/20 08:40:14 CLSRSC-594: Executing installation step 14 of 19: 'InstallACFS'.
502021/08/20 08:40:19 CLSRSC-594: Executing installation step 15 of 19: 'InstallKA'.
512021/08/20 08:40:24 CLSRSC-594: Executing installation step 16 of 19: 'InitConfig'.
522021/08/20 08:41:52 CLSRSC-482: Running command: '/u01/app/21.3.0/grid/bin/ocrconfig -upgrade grid oinstall'
53CRS-4256: Updating the profile
54Successful addition of voting disk e4f4713a678d4f04bf0cce6c0c14692d.
55Successful addition of voting disk 7f85f487c7e34f42bff66f6c7cfc6032.
56Successful addition of voting disk 408b301b47c84f97bfc109558258b289.
57Successfully replaced voting disk group with +OCR.
58CRS-4256: Updating the profile
59CRS-4266: Voting file(s) successfully replaced
60##  STATE    File Universal Id                File Name Disk group
61--  -----    -----------------                --------- ---------
62 1. ONLINE   e4f4713a678d4f04bf0cce6c0c14692d (/dev/asm-diskd) [OCR]
63 2. ONLINE   7f85f487c7e34f42bff66f6c7cfc6032 (/dev/asm-diske) [OCR]
64 3. ONLINE   408b301b47c84f97bfc109558258b289 (/dev/asm-diskf) [OCR]
65Located 3 voting disk(s).
662021/08/20 08:43:30 CLSRSC-594: Executing installation step 17 of 19: 'StartCluster'.
672021/08/20 08:44:43 CLSRSC-343: Successfully started Oracle Clusterware stack
682021/08/20 08:44:43 CLSRSC-594: Executing installation step 18 of 19: 'ConfigNode'.
692021/08/20 08:47:14 CLSRSC-594: Executing installation step 19 of 19: 'PostConfig'.
702021/08/20 08:47:36 CLSRSC-325: Configure Oracle Grid Infrastructure for a Cluster ... succeeded
最后输出Configure Oracle Grid Infrastructure for a Cluster ... succeeded
表示成功,跑完后,检查一下:
 1[root@raclhr-21c-n1 ~]# crsctl stat res -t
 2--------------------------------------------------------------------------------
 3Name           Target  State        Server                   State details
 4--------------------------------------------------------------------------------
 5Local Resources
 6--------------------------------------------------------------------------------
 7ora.LISTENER.lsnr
 8               ONLINE  ONLINE       raclhr-21c-n1            STABLE
 9ora.chad
10               ONLINE  ONLINE       raclhr-21c-n1            STABLE
11ora.net1.network
12               ONLINE  ONLINE       raclhr-21c-n1            STABLE
13ora.ons
14               ONLINE  ONLINE       raclhr-21c-n1            STABLE
15--------------------------------------------------------------------------------
16Cluster Resources
17--------------------------------------------------------------------------------
18ora.ASMNET1LSNR_ASM.lsnr(ora.asmgroup)
19      1        ONLINE  ONLINE       raclhr-21c-n1            STABLE
20      2        OFFLINE OFFLINE                               STABLE
21ora.LISTENER_SCAN1.lsnr
22      1        ONLINE  ONLINE       raclhr-21c-n1            STABLE
23ora.LISTENER_SCAN2.lsnr
24      1        ONLINE  ONLINE       raclhr-21c-n1            STABLE
25ora.LISTENER_SCAN3.lsnr
26      1        ONLINE  ONLINE       raclhr-21c-n1            STABLE
27ora.OCR.dg(ora.asmgroup)
28      1        ONLINE  ONLINE       raclhr-21c-n1            STABLE
29      2        OFFLINE OFFLINE                               STABLE
30ora.asm(ora.asmgroup)
31      1        ONLINE  ONLINE       raclhr-21c-n1            STABLE
32      2        OFFLINE OFFLINE                               STABLE
33ora.asmnet1.asmnetwork(ora.asmgroup)
34      1        ONLINE  ONLINE       raclhr-21c-n1            STABLE
35      2        OFFLINE OFFLINE                               STABLE
36ora.cdp1.cdp
37      1        ONLINE  ONLINE       raclhr-21c-n1            STABLE
38ora.cdp2.cdp
39      1        ONLINE  ONLINE       raclhr-21c-n1            STABLE
40ora.cdp3.cdp
41      1        ONLINE  ONLINE       raclhr-21c-n1            STABLE
42ora.cvu
43      1        ONLINE  ONLINE       raclhr-21c-n1            STABLE
44ora.qosmserver
45      1        ONLINE  ONLINE       raclhr-21c-n1            STABLE
46ora.raclhr-21c-n1.vip
47      1        ONLINE  ONLINE       raclhr-21c-n1            STABLE
48ora.scan1.vip
49      1        ONLINE  ONLINE       raclhr-21c-n1            STABLE
50ora.scan2.vip
51      1        ONLINE  ONLINE       raclhr-21c-n1            STABLE
52ora.scan3.vip
53      1        ONLINE  ONLINE       raclhr-21c-n1            STABLE
54--------------------------------------------------------------------------------
节点2:
 1[root@raclhr-21c-n2 ~]# /u01/app/21.3.0/grid/root.sh
 2Performing root user operation.
 3
 4The following environment variables are set as:
 5    ORACLE_OWNER= grid
 6    ORACLE_HOME=  /u01/app/21.3.0/grid
 7
 8Enter the full pathname of the local bin directory: [/usr/local/bin]:
 9The contents of "dbhome" have not changed. No need to overwrite.
10The contents of "oraenv" have not changed. No need to overwrite.
11The contents of "coraenv" have not changed. No need to overwrite.
12
13Entries will be added to the /etc/oratab file as needed by
14Database Configuration Assistant when a database is created
15Finished running generic part of root script.
16Now product-specific root actions will be performed.
17Relinking oracle with rac_on option
18Using configuration parameter file: /u01/app/21.3.0/grid/crs/install/crsconfig_params
19The log of current session can be found at:
20  /u01/app/grid/crsdata/raclhr-21c-n2/crsconfig/rootcrs_raclhr-21c-n2_2021-08-20_08-51-42AM.log
212021/08/20 08:51:48 CLSRSC-594: Executing installation step 1 of 19: 'SetupTFA'.
222021/08/20 08:51:48 CLSRSC-594: Executing installation step 2 of 19: 'ValidateEnv'.
232021/08/20 08:51:48 CLSRSC-594: Executing installation step 3 of 19: 'CheckFirstNode'.
242021/08/20 08:51:50 CLSRSC-594: Executing installation step 4 of 19: 'GenSiteGUIDs'.
252021/08/20 08:51:50 CLSRSC-594: Executing installation step 5 of 19: 'SetupOSD'.
262021/08/20 08:51:50 CLSRSC-594: Executing installation step 6 of 19: 'CheckCRSConfig'.
272021/08/20 08:51:51 CLSRSC-594: Executing installation step 7 of 19: 'SetupLocalGPNP'.
282021/08/20 08:51:52 CLSRSC-594: Executing installation step 8 of 19: 'CreateRootCert'.
292021/08/20 08:51:52 CLSRSC-594: Executing installation step 9 of 19: 'ConfigOLR'.
302021/08/20 08:51:52 CLSRSC-594: Executing installation step 10 of 19: 'ConfigCHMOS'.
312021/08/20 08:52:23 CLSRSC-594: Executing installation step 11 of 19: 'CreateOHASD'.
322021/08/20 08:52:24 CLSRSC-594: Executing installation step 12 of 19: 'ConfigOHASD'.
332021/08/20 08:52:25 CLSRSC-330: Adding Clusterware entries to file 'oracle-ohasd.service'
342021/08/20 08:52:55 CLSRSC-594: Executing installation step 13 of 19: 'InstallAFD'.
352021/08/20 08:52:55 CLSRSC-594: Executing installation step 14 of 19: 'InstallACFS'.
362021/08/20 08:52:57 CLSRSC-594: Executing installation step 15 of 19: 'InstallKA'.
372021/08/20 08:52:58 CLSRSC-594: Executing installation step 16 of 19: 'InitConfig'.
382021/08/20 08:53:04 CLSRSC-4002: Successfully installed Oracle Autonomous Health Framework (AHF).
392021/08/20 08:53:08 CLSRSC-594: Executing installation step 17 of 19: 'StartCluster'.
402021/08/20 08:54:09 CLSRSC-343: Successfully started Oracle Clusterware stack
412021/08/20 08:54:09 CLSRSC-594: Executing installation step 18 of 19: 'ConfigNode'.
422021/08/20 08:54:28 CLSRSC-594: Executing installation step 19 of 19: 'PostConfig'.
432021/08/20 08:54:38 CLSRSC-325: Configure Oracle Grid Infrastructure for a Cluster ... succeeded
最后输出Configure Oracle Grid Infrastructure for a Cluster ... succeeded
表示成功,查看:
 1[root@raclhr-21c-n1 ~]# crsctl stat res -t
 2--------------------------------------------------------------------------------
 3Name           Target  State        Server                   State details
 4--------------------------------------------------------------------------------
 5Local Resources
 6--------------------------------------------------------------------------------
 7ora.LISTENER.lsnr
 8               ONLINE  ONLINE       raclhr-21c-n1            STABLE
 9               ONLINE  ONLINE       raclhr-21c-n2            STABLE
10ora.chad
11               ONLINE  ONLINE       raclhr-21c-n1            STABLE
12               ONLINE  ONLINE       raclhr-21c-n2            STABLE
13ora.net1.network
14               ONLINE  ONLINE       raclhr-21c-n1            STABLE
15               ONLINE  ONLINE       raclhr-21c-n2            STABLE
16ora.ons
17               ONLINE  ONLINE       raclhr-21c-n1            STABLE
18               ONLINE  ONLINE       raclhr-21c-n2            STABLE
19--------------------------------------------------------------------------------
20Cluster Resources
21--------------------------------------------------------------------------------
22ora.ASMNET1LSNR_ASM.lsnr(ora.asmgroup)
23      1        ONLINE  ONLINE       raclhr-21c-n1            STABLE
24      2        ONLINE  ONLINE       raclhr-21c-n2            STABLE
25ora.LISTENER_SCAN1.lsnr
26      1        ONLINE  ONLINE       raclhr-21c-n1            STABLE
27ora.LISTENER_SCAN2.lsnr
28      1        ONLINE  ONLINE       raclhr-21c-n1            STABLE
29ora.LISTENER_SCAN3.lsnr
30      1        ONLINE  ONLINE       raclhr-21c-n2            STABLE
31ora.OCR.dg(ora.asmgroup)
32      1        ONLINE  ONLINE       raclhr-21c-n1            STABLE
33      2        ONLINE  ONLINE       raclhr-21c-n2            STABLE
34ora.asm(ora.asmgroup)
35      1        ONLINE  ONLINE       raclhr-21c-n1            STABLE
36      2        ONLINE  ONLINE       raclhr-21c-n2            Started,STABLE
37ora.asmnet1.asmnetwork(ora.asmgroup)
38      1        ONLINE  ONLINE       raclhr-21c-n1            STABLE
39      2        ONLINE  ONLINE       raclhr-21c-n2            STABLE
40ora.cdp1.cdp
41      1        ONLINE  ONLINE       raclhr-21c-n1            STABLE
42ora.cdp2.cdp
43      1        ONLINE  ONLINE       raclhr-21c-n1            STABLE
44ora.cdp3.cdp
45      1        ONLINE  ONLINE       raclhr-21c-n2            STABLE
46ora.cvu
47      1        ONLINE  ONLINE       raclhr-21c-n1            STABLE
48ora.qosmserver
49      1        ONLINE  ONLINE       raclhr-21c-n1            STABLE
50ora.raclhr-21c-n1.vip
51      1        ONLINE  ONLINE       raclhr-21c-n1            STABLE
52ora.raclhr-21c-n2.vip
53      1        ONLINE  ONLINE       raclhr-21c-n2            STABLE
54ora.scan1.vip
55      1        ONLINE  ONLINE       raclhr-21c-n1            STABLE
56ora.scan2.vip
57      1        ONLINE  ONLINE       raclhr-21c-n1            STABLE
58ora.scan3.vip
59      1        ONLINE  ONLINE       raclhr-21c-n2            STABLE
60--------------------------------------------------------------------------------
此时回到界面点击OK,继续运行:
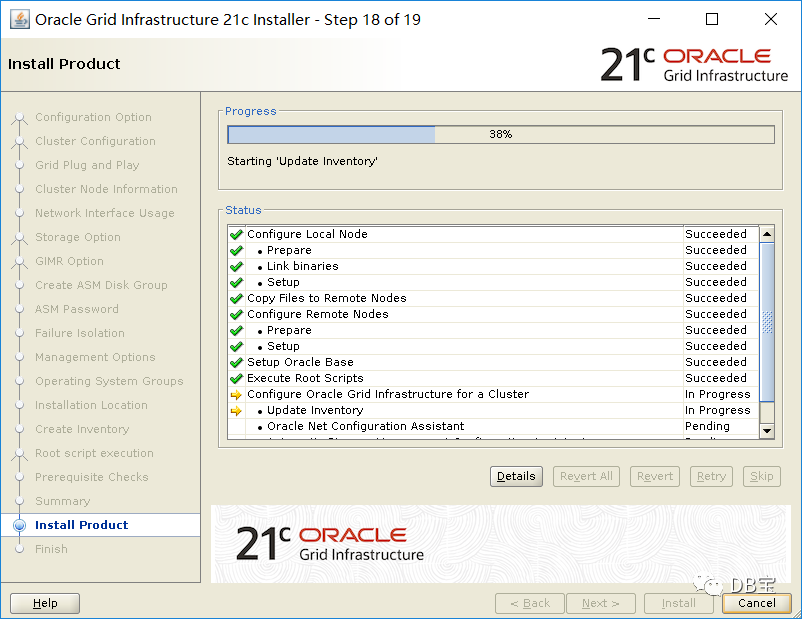
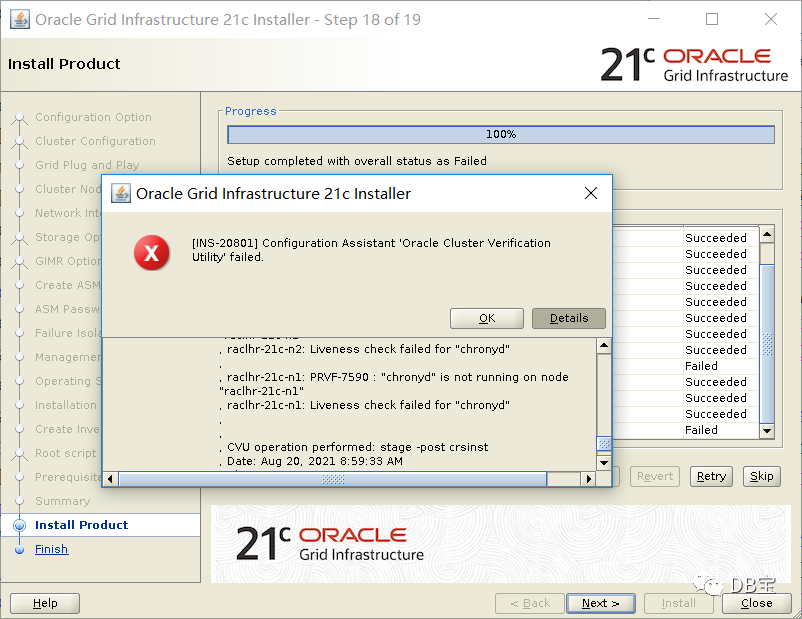
最后集群校验报错,看了一下是dns和ntp的问题,可以忽略,继续安装:
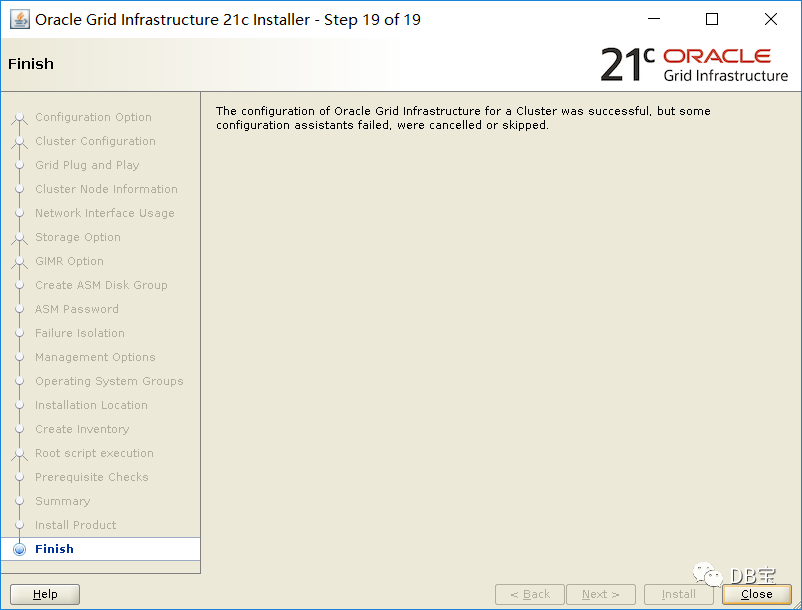
6.2、安装db
1[root@raclhr-21c-n1 ~]# su - oracle
2Last login: Thu Aug 19 15:26:38 CST 2021 on pts/0
3[oracle@raclhr-21c-n1 ~]$ cd $ORACLE_HOME
4[oracle@raclhr-21c-n1 dbhome_1]$ export DISPLAY=192.168.59.1:0.0
5[oracle@raclhr-21c-n1 dbhome_1]$ ./runInstaller
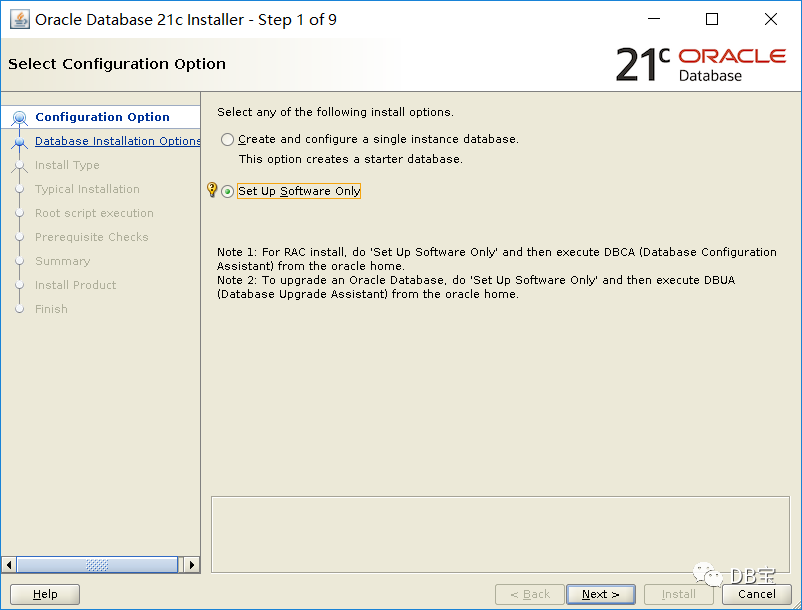
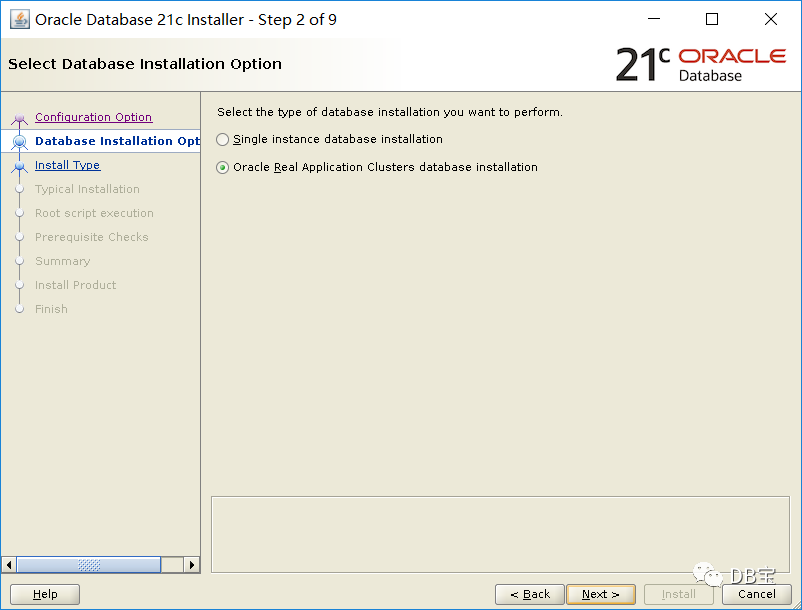
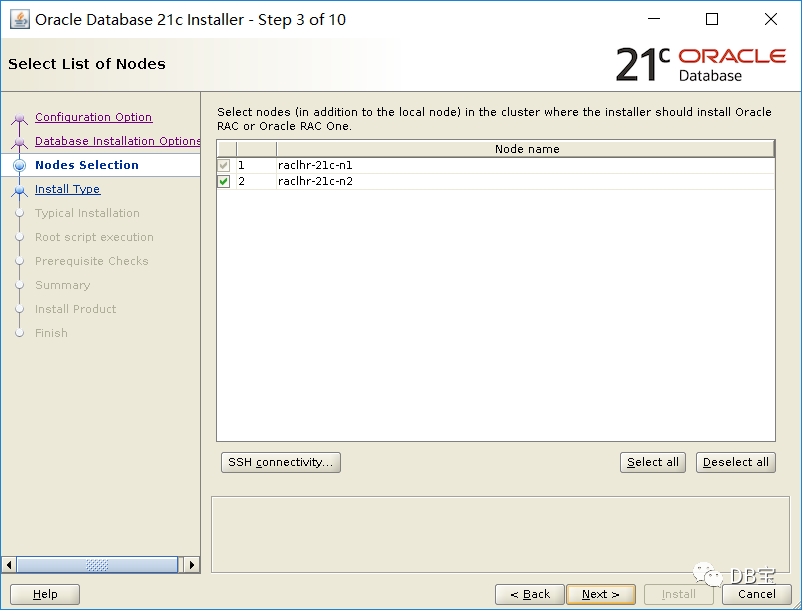
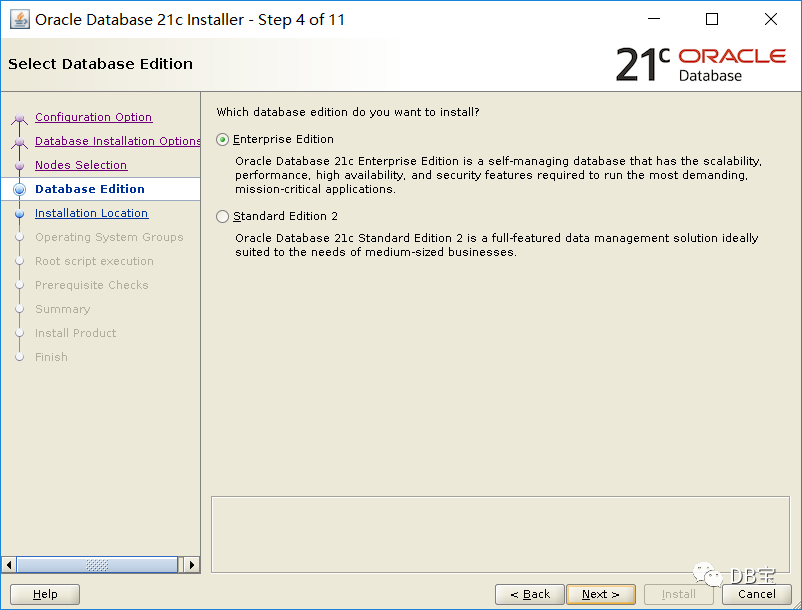
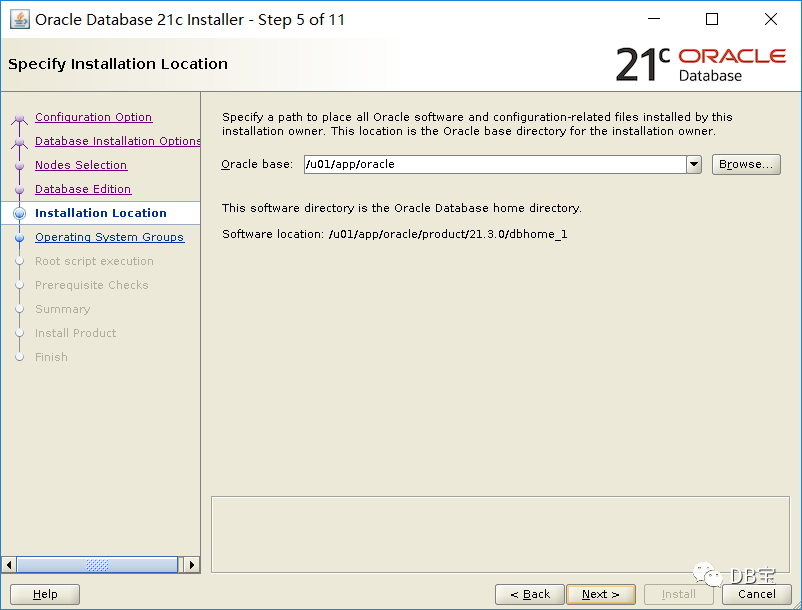
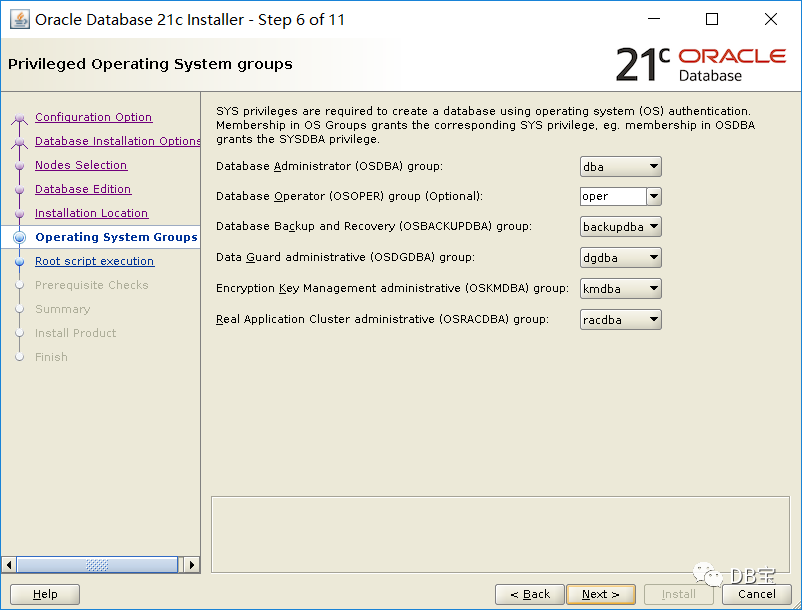
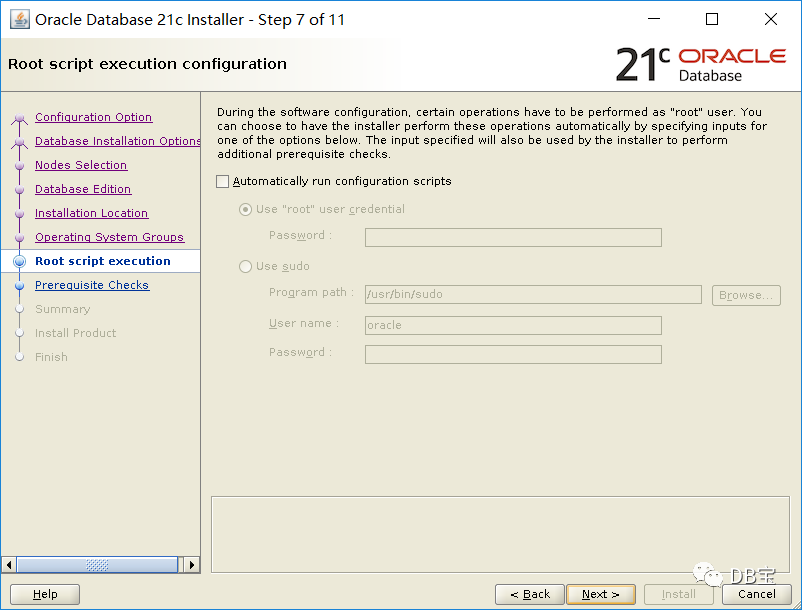
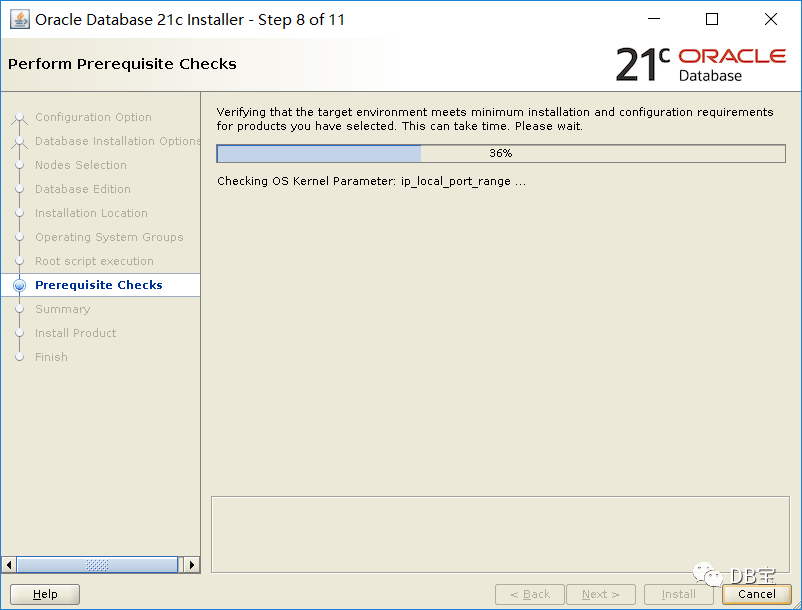
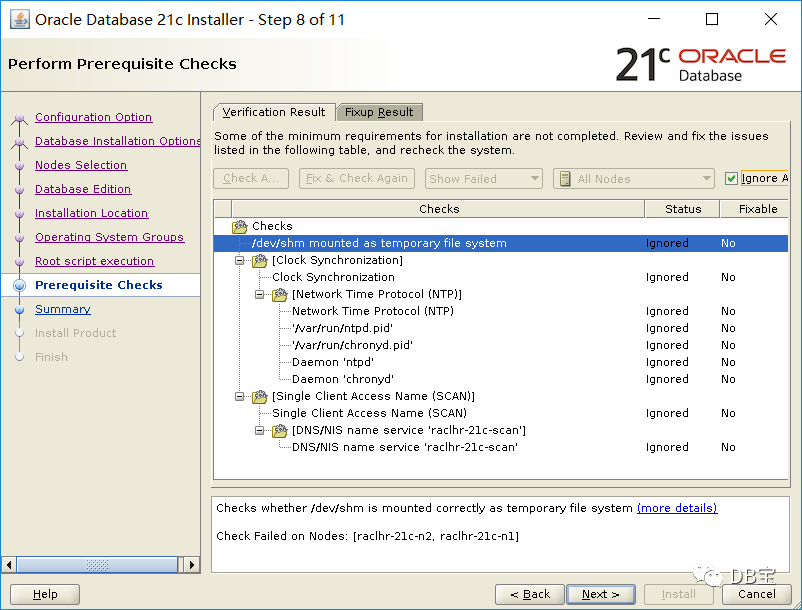

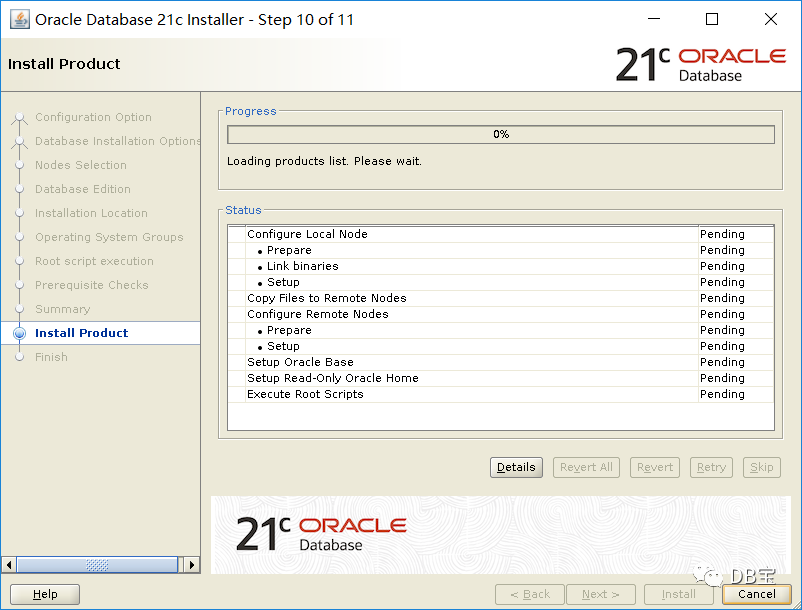
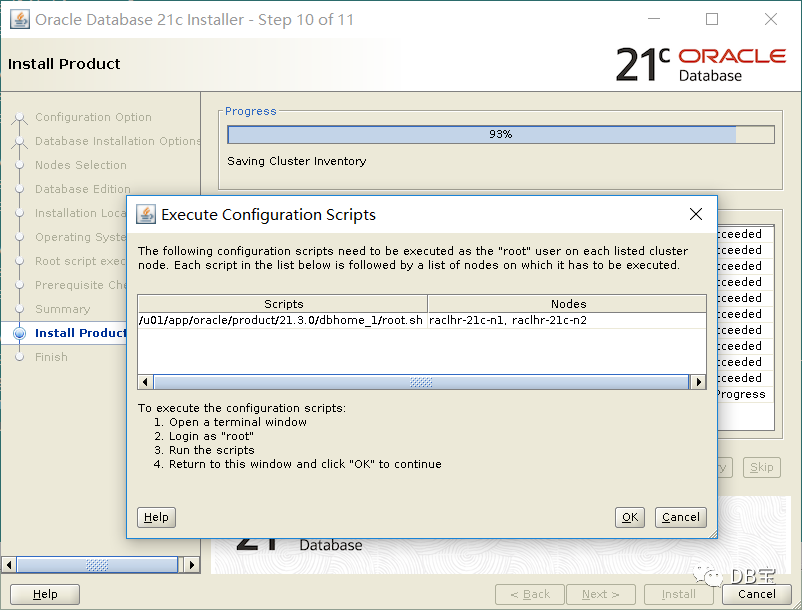
节点1和节点2分别执行:
 1[root@raclhr-21c-n1 ~]# /u01/app/oracle/product/21.3.0/dbhome_1/root.sh
 2Performing root user operation.
 3
 4The following environment variables are set as:
 5    ORACLE_OWNER= oracle
 6    ORACLE_HOME=  /u01/app/oracle/product/21.3.0/dbhome_1
 7
 8Enter the full pathname of the local bin directory: [/usr/local/bin]:
 9The contents of "dbhome" have not changed. No need to overwrite.
10The contents of "oraenv" have not changed. No need to overwrite.
11The contents of "coraenv" have not changed. No need to overwrite.
12
13Entries will be added to the /etc/oratab file as needed by
14Database Configuration Assistant when a database is created
15Finished running generic part of root script.
16Now product-specific root actions will be performed.
执行完后,点击OK:
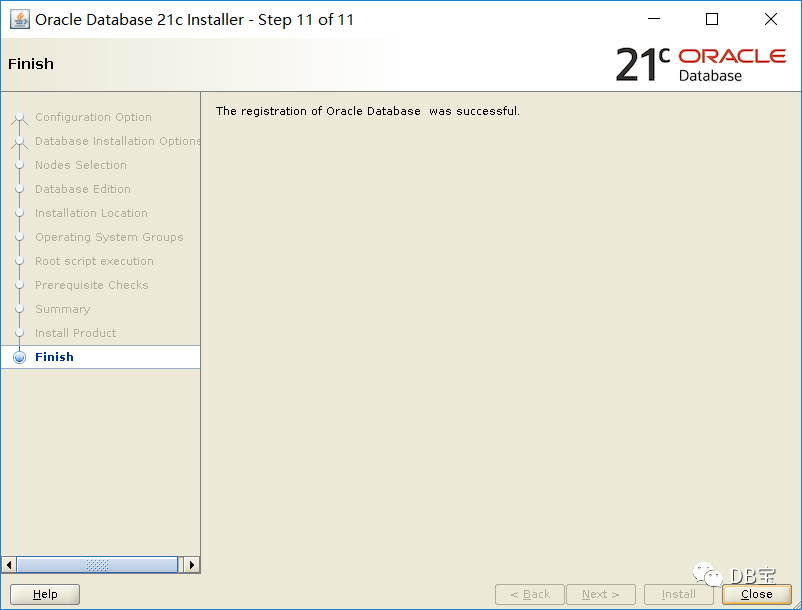
6.3、创建磁盘组
以 grid 用户执行 asmca 命令,创建DATA和FRA两个磁盘组。:
1[root@raclhr-21c-n1 ~]# su - grid
2Last login: Fri Aug 20 09:59:53 CST 2021
3[grid@raclhr-21c-n1 ~]$ export DISPLAY=192.168.59.1:0.0
4[grid@raclhr-21c-n1 ~]$ asmca
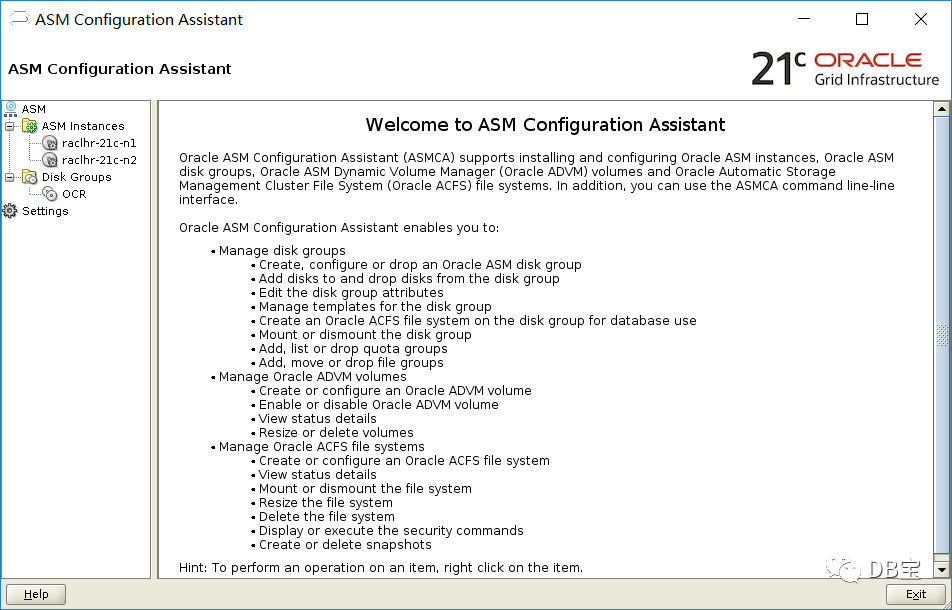
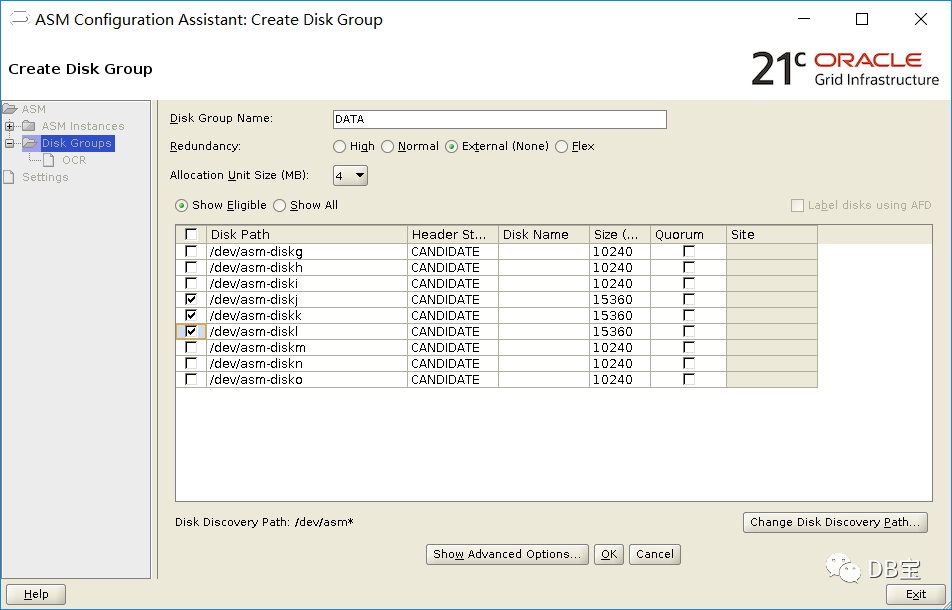
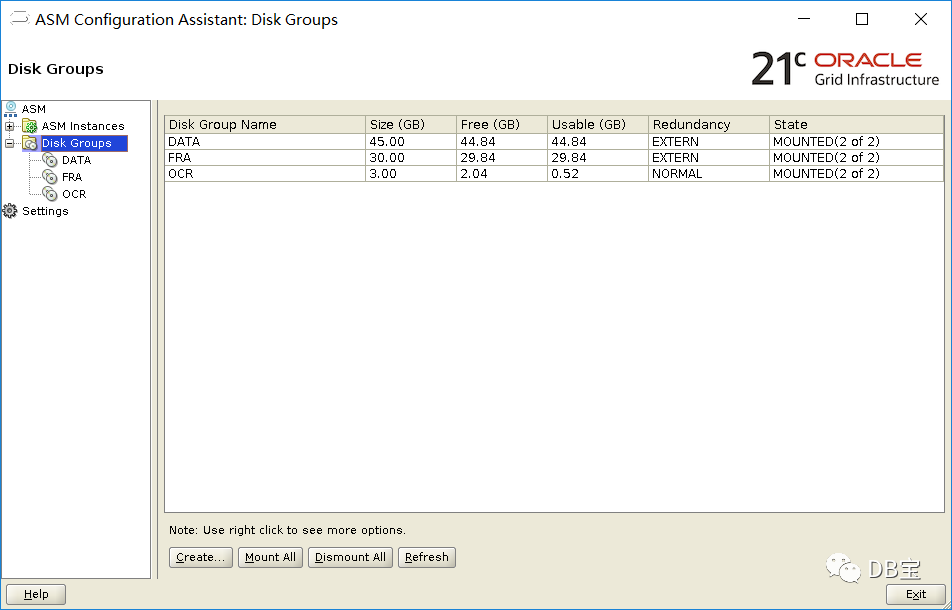
查看:
 1[grid@raclhr-21c-n1 ~]$ $ORACLE_HOME/bin/kfod disks=all st=true ds=true
 2--------------------------------------------------------------------------------
 3 Disk          Size Header    Path                                    Disk Group    User     Group
 4================================================================================
 5   1:       1024 MB MEMBER    /dev/asm-diskd                           OCR          grid     asmadmin
 6   2:       1024 MB MEMBER    /dev/asm-diske                           OCR          grid     asmadmin
 7   3:       1024 MB MEMBER    /dev/asm-diskf                           OCR          grid     asmadmin
 8   4:      10240 MB CANDIDATE /dev/asm-diskg                           #            grid     asmadmin
 9   5:      10240 MB CANDIDATE /dev/asm-diskh                           #            grid     asmadmin
10   6:      10240 MB CANDIDATE /dev/asm-diski                           #            grid     asmadmin
11   7:      15360 MB MEMBER    /dev/asm-diskj                           DATA         grid     asmadmin
12   8:      15360 MB MEMBER    /dev/asm-diskk                           DATA         grid     asmadmin
13   9:      15360 MB MEMBER    /dev/asm-diskl                           DATA         grid     asmadmin
14  10:      10240 MB MEMBER    /dev/asm-diskm                           FRA          grid     asmadmin
15  11:      10240 MB MEMBER    /dev/asm-diskn                           FRA          grid     asmadmin
16  12:      10240 MB MEMBER    /dev/asm-disko                           FRA          grid     asmadmin
17--------------------------------------------------------------------------------
18ORACLE_SID ORACLE_HOME
19================================================================================
6.4、创建数据库
1[oracle@raclhr-21c-n1 ~]$ export DISPLAY=192.168.59.1:0.0
2[oracle@raclhr-21c-n1 ~]$ dbca
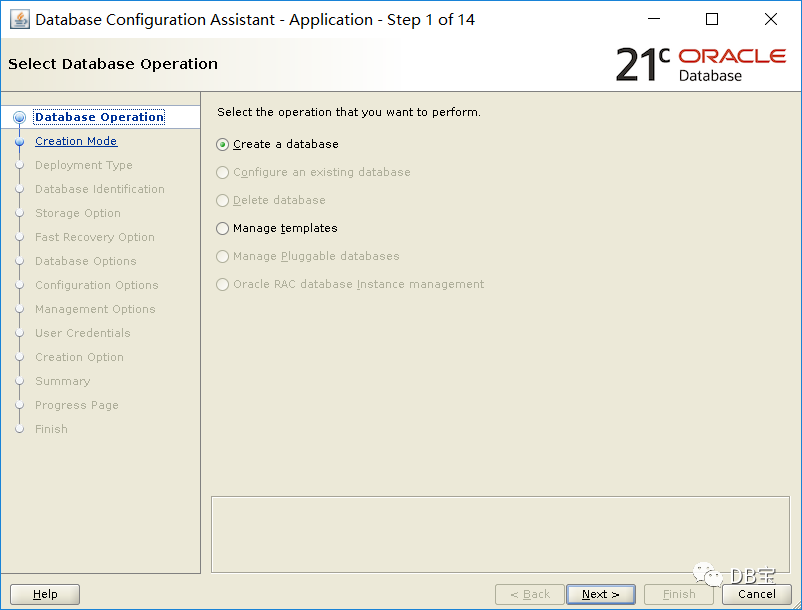
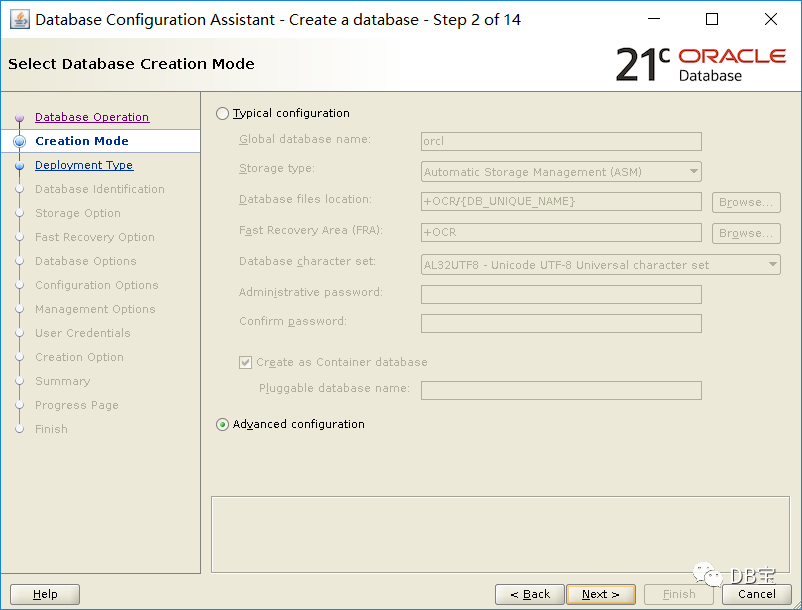
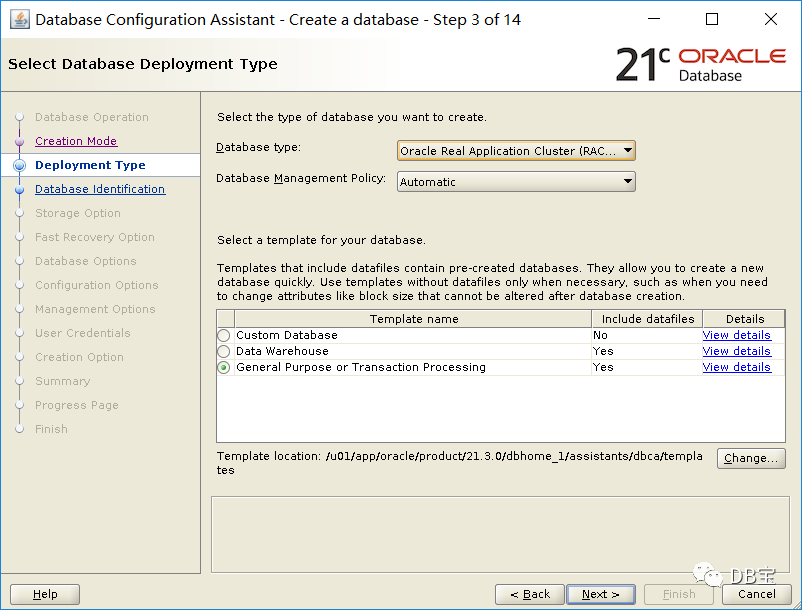
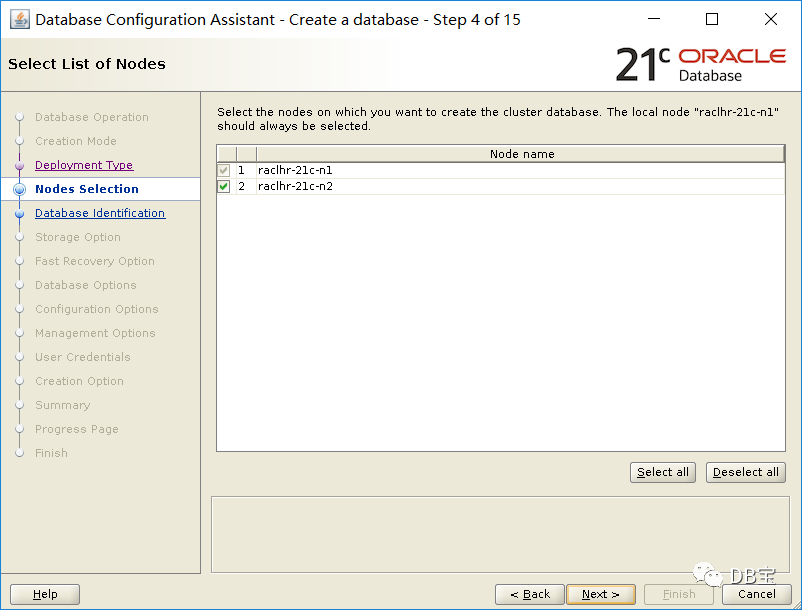
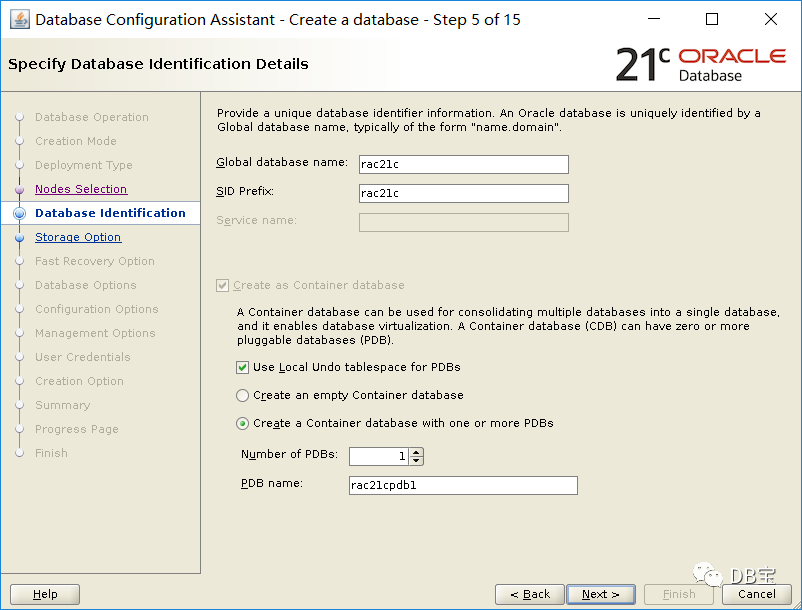

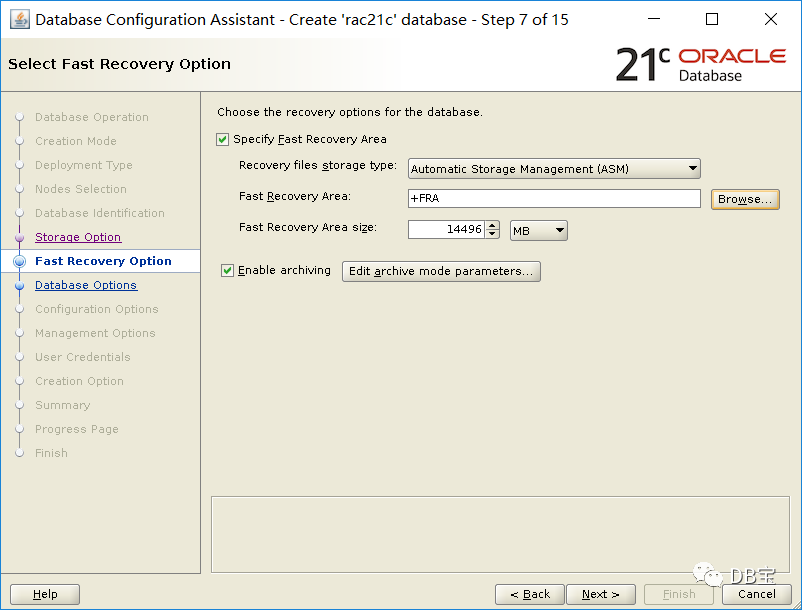
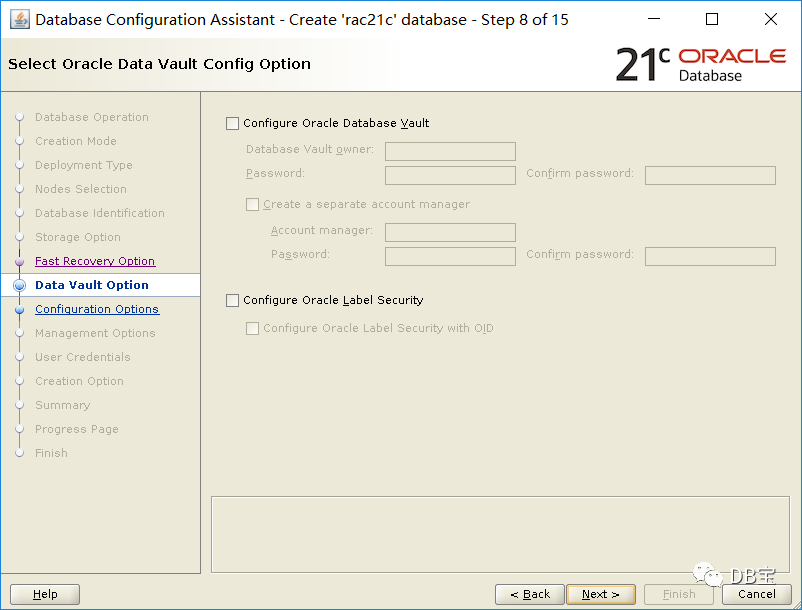
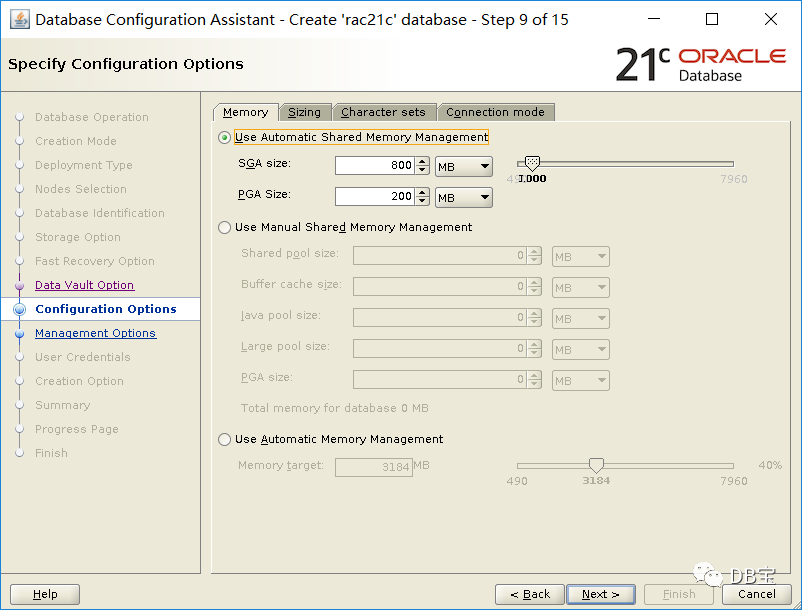
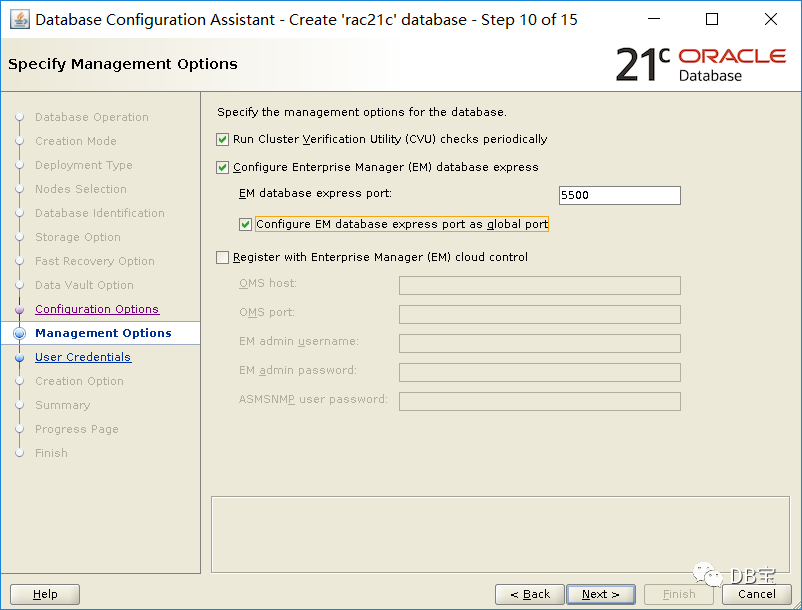
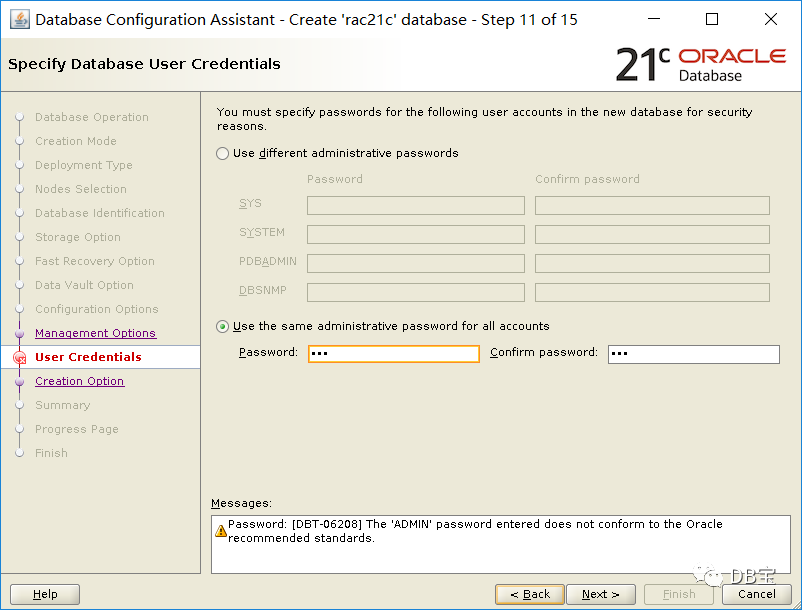
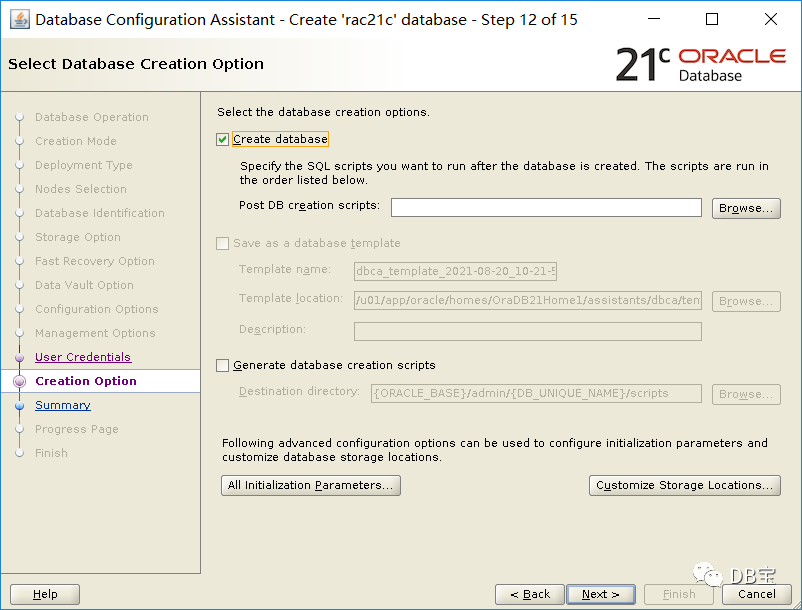
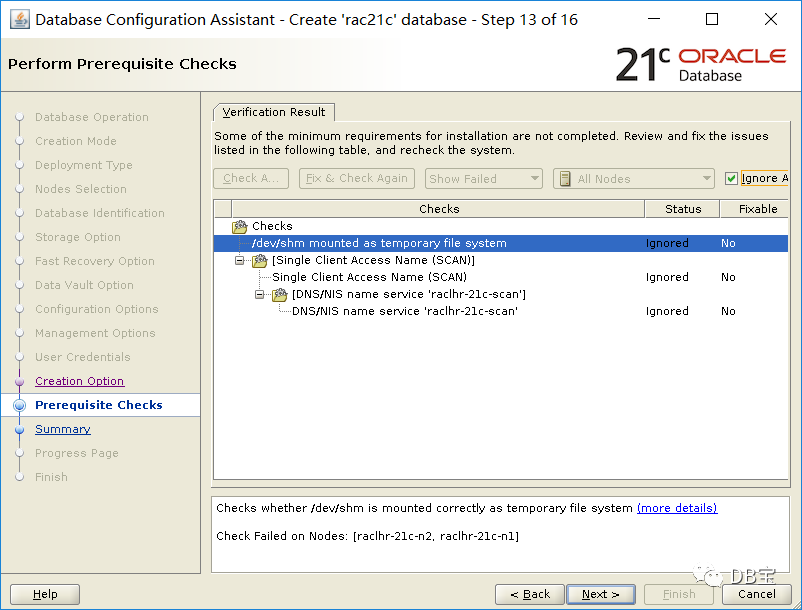
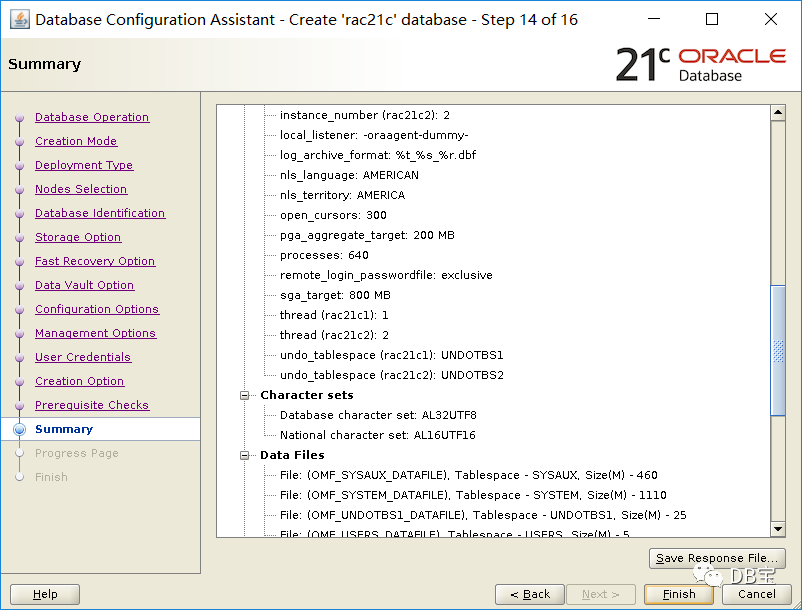
七、静默安装集群和db
安装之前重启一次OS,并检查网络和共享盘是否正确。
7.1、静默安装grid
 1/u01/app/21.3.0/grid/gridSetup.sh -silent  -force -noconfig  -ignorePrereq \
 2oracle.install.responseFileVersion=/oracle/install/rspfmt_crsinstall_response_schema_v21.0.0 \
 3INVENTORY_LOCATION=/u01/app/oraInventory \
 4oracle.install.option=CRS_CONFIG \
 5ORACLE_BASE=/u01/app/grid \
 6oracle.install.asm.OSDBA=asmdba \
 7oracle.install.asm.OSOPER=asmoper \
 8oracle.install.asm.OSASM=asmadmin \
 9oracle.install.crs.config.scanType=LOCAL_SCAN \
10oracle.install.crs.config.gpnp.scanName=raclhr-21c-scan \
11oracle.install.crs.config.gpnp.scanPort=1521 \
12oracle.install.crs.config.ClusterConfiguration=STANDALONE \
13oracle.install.crs.config.configureAsExtendedCluster=false \
14oracle.install.crs.config.clusterName=raclhr-cluster \
15oracle.install.crs.config.gpnp.configureGNS=false \
16oracle.install.crs.config.autoConfigureClusterNodeVIP=false \
17oracle.install.crs.config.clusterNodes=raclhr-21c-n1:raclhr-21c-n1-vip,raclhr-21c-n2:raclhr-21c-n2-vip \
18oracle.install.crs.config.networkInterfaceList=ens34:192.168.2.0:5,ens33:192.168.59.0:1 \
19oracle.install.asm.configureGIMRDataDG=false \
20oracle.install.crs.config.useIPMI=false \
21oracle.install.asm.storageOption=ASM \
22oracle.install.asm.SYSASMPassword=lhr \
23oracle.install.asm.diskGroup.name=OCR \
24oracle.install.asm.diskGroup.redundancy=NORMAL \
25oracle.install.asm.diskGroup.AUSize=4 \
26oracle.install.asm.diskGroup.disks=/dev/asm-diskd,/dev/asm-diske,/dev/asm-diskf \
27oracle.install.asm.diskGroup.diskDiscoveryString=/dev/asm-* \
28oracle.install.asm.monitorPassword=lhr \
29oracle.install.asm.configureAFD=false \
30oracle.install.crs.configureRHPS=false \
31oracle.install.crs.config.ignoreDownNodes=false \
32oracle.install.config.managementOption=NONE \
33oracle.install.crs.rootconfig.executeRootScript=false
执行过程:
 1[grid@raclhr-21c-n1 ~]$ /u01/app/21.3.0/grid/gridSetup.sh -silent  -force -noconfig  -ignorePrereq \
 2> oracle.install.responseFileVersion=/oracle/install/rspfmt_crsinstall_response_schema_v21.0.0 \
 3> INVENTORY_LOCATION=/u01/app/oraInventory \
 4> oracle.install.option=CRS_CONFIG \
 5> ORACLE_BASE=/u01/app/grid \
 6> oracle.install.asm.OSDBA=asmdba \
 7> oracle.install.asm.OSOPER=asmoper \
 8> oracle.install.asm.OSASM=asmadmin \
 9> oracle.install.crs.config.scanType=LOCAL_SCAN \
10> oracle.install.crs.config.gpnp.scanName=raclhr-21c-scan \
11> oracle.install.crs.config.gpnp.scanPort=1521 \
12> oracle.install.crs.config.ClusterConfiguration=STANDALONE \
13> oracle.install.crs.config.configureAsExtendedCluster=false \
14> oracle.install.crs.config.clusterName=raclhr-cluster \
15> oracle.install.crs.config.gpnp.configureGNS=false \
16> oracle.install.crs.config.autoConfigureClusterNodeVIP=false \
17> oracle.install.crs.config.clusterNodes=raclhr-21c-n1:raclhr-21c-n1-vip,raclhr-21c-n2:raclhr-21c-n2-vip \
18> oracle.install.crs.config.networkInterfaceList=ens34:192.168.2.0:5,ens33:192.168.59.0:1 \
19> oracle.install.asm.configureGIMRDataDG=false \
20> oracle.install.crs.config.useIPMI=false \
21> oracle.install.asm.storageOption=ASM \
22> oracle.install.asm.SYSASMPassword=lhr \
23> oracle.install.asm.diskGroup.name=OCR \
24> oracle.install.asm.diskGroup.redundancy=NORMAL \
25> oracle.install.asm.diskGroup.AUSize=4 \
26> oracle.install.asm.diskGroup.disks=/dev/asm-diskd,/dev/asm-diske,/dev/asm-diskf \
27> oracle.install.asm.diskGroup.diskDiscoveryString=/dev/asm-* \
28> oracle.install.asm.monitorPassword=lhr \
29> oracle.install.asm.configureAFD=false \
30> oracle.install.crs.configureRHPS=false \
31> oracle.install.crs.config.ignoreDownNodes=false \
32> oracle.install.config.managementOption=NONE \
33> oracle.install.crs.rootconfig.executeRootScript=false
34Launching Oracle Grid Infrastructure Setup Wizard...
35
36[WARNING] [INS-30011] The SYS password entered does not conform to the Oracle recommended standards.
37   CAUSE: Oracle recommends that the password entered should be at least 8 characters in length, contain at least 1 uppercase character, 1 lower case character and 1 digit [0-9].
38   ACTION: Provide a password that conforms to the Oracle recommended standards.
39[WARNING] [INS-30011] The ASMSNMP password entered does not conform to the Oracle recommended standards.
40   CAUSE: Oracle recommends that the password entered should be at least 8 characters in length, contain at least 1 uppercase character, 1 lower case character and 1 digit [0-9].
41   ACTION: Provide a password that conforms to the Oracle recommended standards.
42[WARNING] [INS-13013] Target environment does not meet some mandatory requirements.
43   CAUSE: Some of the mandatory prerequisites are not met. See logs for details. /tmp/GridSetupActions2021-08-20_04-58-51PM/gridSetupActions2021-08-20_04-58-51PM.log
44   ACTION: Identify the list of failed prerequisite checks from the log: /tmp/GridSetupActions2021-08-20_04-58-51PM/gridSetupActions2021-08-20_04-58-51PM.log. Then either from the log file or from installation manual find the appropriate configuration to meet the prerequisites and fix it manually.
45The response file for this session can be found at:
46 /u01/app/21.3.0/grid/install/response/grid_2021-08-20_04-58-51PM.rsp
47
48You can find the log of this install session at:
49 /tmp/GridSetupActions2021-08-20_04-58-51PM/gridSetupActions2021-08-20_04-58-51PM.log
50
51As a root user, execute the following script(s):
52        1. /u01/app/oraInventory/orainstRoot.sh
53        2. /u01/app/21.3.0/grid/root.sh
54
55Execute /u01/app/oraInventory/orainstRoot.sh on the following nodes:
56[raclhr-21c-n1, raclhr-21c-n2]
57Execute /u01/app/21.3.0/grid/root.sh on the following nodes:
58[raclhr-21c-n1, raclhr-21c-n2]
59
60Run the script on the node raclhr-21c-n1 first. After successful completion, you can start the script in parallel on all other nodes.
61
62Successfully Setup Software with warning(s).
63As install user, execute the following command to complete the configuration.
64        /u01/app/21.3.0/grid/gridSetup.sh -executeConfigTools -responseFile /u01/app/21.3.0/grid/install/response/grid_2021-08-20_04-58-51PM.rsp [-silent]
65Note: The required passwords need to be included in the response file.
66
67
68Moved the install session logs to:
69 /u01/app/oraInventory/logs/GridSetupActions2021-08-20_04-58-51PM
在安装grid软件和db软件的过程中,有一个过程是将节点1上的软件拷贝到节点2上,这个过程是利用的集群的公网进行传递软件的,可以使用ifconfig命令看到。
 1[root@raclhr-21c-n2 ~]# ifconfig
 2ens33: flags=4163<UP,BROADCAST,RUNNING,MULTICAST>  mtu 1500
 3        inet 192.168.59.63  netmask 255.255.255.0  broadcast 192.168.59.255
 4        inet6 fe80::20c:29ff:feb5:cf4b  prefixlen 64  scopeid 0x20<link>
 5        ether 00:0c:29:b5:cf:4b  txqueuelen 1000  (Ethernet)
 6        RX packets 4285065  bytes 6368668989 (5.9 GiB)
 7        RX errors 0  dropped 0  overruns 0  frame 0
 8        TX packets 161678  bytes 27715188 (26.4 MiB)
 9        TX errors 0  dropped 0 overruns 0  carrier 0  collisions 0
10
11ens34: flags=4163<UP,BROADCAST,RUNNING,MULTICAST>  mtu 1500
12        inet 192.168.2.63  netmask 255.255.255.0  broadcast 192.168.2.255
13        inet6 fe80::20c:29ff:feb5:cf55  prefixlen 64  scopeid 0x20<link>
14        ether 00:0c:29:b5:cf:55  txqueuelen 1000  (Ethernet)
15        RX packets 478  bytes 426304 (416.3 KiB)
16        RX errors 0  dropped 0  overruns 0  frame 0
17        TX packets 441  bytes 421344 (411.4 KiB)
18        TX errors 0  dropped 0 overruns 0  carrier 0  collisions 0
7.1.1、root.sh脚本
以root用户分别在2个节点上运行:
11. /u01/app/oraInventory/orainstRoot.sh
22. /u01/app/21.3.0/grid/root.sh
1、节点1执行过程:
  1[root@raclhr-21c-n1 u01]# /u01/app/oraInventory/orainstRoot.sh
  2Changing permissions of /u01/app/oraInventory.
  3Adding read,write permissions for group.
  4Removing read,write,execute permissions for world.
  5
  6Changing groupname of /u01/app/oraInventory to oinstall.
  7The execution of the script is complete.
  8[root@raclhr-21c-n1 u01]# /u01/app/21.3.0/grid/root.sh
  9Check /u01/app/21.3.0/grid/install/root_raclhr-21c-n1_2021-08-20_17-06-17-435524095.log for the output of root script
 10[root@raclhr-21c-n1 u01]# more  /u01/app/21.3.0/grid/install/root_raclhr-21c-n1_2021-08-20_17-06-17-435524095.log
 11Performing root user operation.
 12
 13The following environment variables are set as:
 14    ORACLE_OWNER= grid
 15    ORACLE_HOME=  /u01/app/21.3.0/grid
 16   Copying dbhome to /usr/local/bin ...
 17   Copying oraenv to /usr/local/bin ...
 18   Copying coraenv to /usr/local/bin ...
 19
 20
 21Creating /etc/oratab file...
 22Entries will be added to the /etc/oratab file as needed by
 23Database Configuration Assistant when a database is created
 24Finished running generic part of root script.
 25Now product-specific root actions will be performed.
 26Relinking oracle with rac_on option
 27Using configuration parameter file: /u01/app/21.3.0/grid/crs/install/crsconfig_params
 282021-08-20 17:06:38: Got permissions of file /u01/app/grid/crsdata/raclhr-21c-n1/crsconfig: 0775
 292021-08-20 17:06:38: Got permissions of file /u01/app/grid/crsdata: 0775
 302021-08-20 17:06:38: Got permissions of file /u01/app/grid/crsdata/raclhr-21c-n1: 0775
 31The log of current session can be found at:
 32  /u01/app/grid/crsdata/raclhr-21c-n1/crsconfig/rootcrs_raclhr-21c-n1_2021-08-20_05-06-38PM.log
 332021/08/20 17:06:46 CLSRSC-594: Executing installation step 1 of 19: 'SetupTFA'.
 342021/08/20 17:06:46 CLSRSC-594: Executing installation step 2 of 19: 'ValidateEnv'.
 352021/08/20 17:06:46 CLSRSC-363: User ignored prerequisites during installation
 362021/08/20 17:06:47 CLSRSC-594: Executing installation step 3 of 19: 'CheckFirstNode'.
 372021/08/20 17:06:49 CLSRSC-594: Executing installation step 4 of 19: 'GenSiteGUIDs'.
 382021/08/20 17:06:50 CLSRSC-594: Executing installation step 5 of 19: 'SetupOSD'.
 39Redirecting to /bin/systemctl restart rsyslog.service
 402021/08/20 17:06:50 CLSRSC-594: Executing installation step 6 of 19: 'CheckCRSConfig'.
 412021/08/20 17:06:50 CLSRSC-594: Executing installation step 7 of 19: 'SetupLocalGPNP'.
 422021/08/20 17:07:02 CLSRSC-594: Executing installation step 8 of 19: 'CreateRootCert'.
 432021/08/20 17:07:07 CLSRSC-594: Executing installation step 9 of 19: 'ConfigOLR'.
 442021/08/20 17:07:25 CLSRSC-594: Executing installation step 10 of 19: 'ConfigCHMOS'.
 452021/08/20 17:07:25 CLSRSC-594: Executing installation step 11 of 19: 'CreateOHASD'.
 462021/08/20 17:07:31 CLSRSC-594: Executing installation step 12 of 19: 'ConfigOHASD'.
 472021/08/20 17:07:31 CLSRSC-330: Adding Clusterware entries to file 'oracle-ohasd.service'
 482021/08/20 17:07:49 CLSRSC-4002: Successfully installed Oracle Autonomous Health Framework (AHF).
 492021/08/20 17:07:51 CLSRSC-594: Executing installation step 13 of 19: 'InstallAFD'.
 502021/08/20 17:07:51 CLSRSC-594: Executing installation step 14 of 19: 'InstallACFS'.
 512021/08/20 17:07:57 CLSRSC-594: Executing installation step 15 of 19: 'InstallKA'.
 522021/08/20 17:08:02 CLSRSC-594: Executing installation step 16 of 19: 'InitConfig'.
 532021/08/20 17:09:15 CLSRSC-482: Running command: '/u01/app/21.3.0/grid/bin/ocrconfig -upgrade grid oinstall'
 54CRS-4256: Updating the profile
 55Successful addition of voting disk 9e414fc873a04fa9bf804f75b1ab4aee.
 56Successful addition of voting disk f93fea3f47e14f0ebff2acf3d0477b04.
 57Successful addition of voting disk a9293487c98d4fb5bf07584e563c0a4f.
 58Successfully replaced voting disk group with +OCR.
 59CRS-4256: Updating the profile
 60CRS-4266: Voting file(s) successfully replaced
 61##  STATE    File Universal Id                File Name Disk group
 62--  -----    -----------------                --------- ---------
 63 1. ONLINE   9e414fc873a04fa9bf804f75b1ab4aee (/dev/asm-diskd) [OCR]
 64 2. ONLINE   f93fea3f47e14f0ebff2acf3d0477b04 (/dev/asm-diske) [OCR]
 65 3. ONLINE   a9293487c98d4fb5bf07584e563c0a4f (/dev/asm-diskf) [OCR]
 66Located 3 voting disk(s).
 672021/08/20 17:10:42 CLSRSC-594: Executing installation step 17 of 19: 'StartCluster'.
 682021/08/20 17:12:02 CLSRSC-343: Successfully started Oracle Clusterware stack
 692021/08/20 17:12:02 CLSRSC-594: Executing installation step 18 of 19: 'ConfigNode'.
 702021/08/20 17:14:37 CLSRSC-594: Executing installation step 19 of 19: 'PostConfig'.
 712021/08/20 17:15:01 CLSRSC-325: Configure Oracle Grid Infrastructure for a Cluster ... succeeded
 72
 73
 74[root@raclhr-21c-n1 ~]# crsctl stat res -t
 75--------------------------------------------------------------------------------
 76Name           Target  State        Server                   State details
 77--------------------------------------------------------------------------------
 78Local Resources
 79--------------------------------------------------------------------------------
 80ora.LISTENER.lsnr
 81               ONLINE  ONLINE       raclhr-21c-n1            STABLE
 82ora.chad
 83               ONLINE  ONLINE       raclhr-21c-n1            STABLE
 84ora.net1.network
 85               ONLINE  ONLINE       raclhr-21c-n1            STABLE
 86ora.ons
 87               ONLINE  ONLINE       raclhr-21c-n1            STABLE
 88--------------------------------------------------------------------------------
 89Cluster Resources
 90--------------------------------------------------------------------------------
 91ora.ASMNET1LSNR_ASM.lsnr(ora.asmgroup)
 92      1        ONLINE  ONLINE       raclhr-21c-n1            STABLE
 93      2        OFFLINE OFFLINE                               STABLE
 94ora.LISTENER_SCAN1.lsnr
 95      1        ONLINE  ONLINE       raclhr-21c-n1            STABLE
 96ora.LISTENER_SCAN2.lsnr
 97      1        ONLINE  ONLINE       raclhr-21c-n1            STABLE
 98ora.LISTENER_SCAN3.lsnr
 99      1        ONLINE  ONLINE       raclhr-21c-n1            STABLE
100ora.OCR.dg(ora.asmgroup)
101      1        ONLINE  ONLINE       raclhr-21c-n1            STABLE
102      2        OFFLINE OFFLINE                               STABLE
103ora.asm(ora.asmgroup)
104      1        ONLINE  ONLINE       raclhr-21c-n1            Started,STABLE
105      2        OFFLINE OFFLINE                               STABLE
106ora.asmnet1.asmnetwork(ora.asmgroup)
107      1        ONLINE  ONLINE       raclhr-21c-n1            STABLE
108      2        OFFLINE OFFLINE                               STABLE
109ora.cdp1.cdp
110      1        ONLINE  ONLINE       raclhr-21c-n1            STABLE
111ora.cdp2.cdp
112      1        ONLINE  ONLINE       raclhr-21c-n1            STABLE
113ora.cdp3.cdp
114      1        ONLINE  ONLINE       raclhr-21c-n1            STABLE
115ora.cvu
116      1        ONLINE  ONLINE       raclhr-21c-n1            STABLE
117ora.qosmserver
118      1        ONLINE  ONLINE       raclhr-21c-n1            STABLE
119ora.raclhr-21c-n1.vip
120      1        ONLINE  ONLINE       raclhr-21c-n1            STABLE
121ora.scan1.vip
122      1        ONLINE  ONLINE       raclhr-21c-n1            STABLE
123ora.scan2.vip
124      1        ONLINE  ONLINE       raclhr-21c-n1            STABLE
125ora.scan3.vip
126      1        ONLINE  ONLINE       raclhr-21c-n1            STABLE
127--------------------------------------------------------------------------------
最后输出Configure Oracle Grid Infrastructure for a Cluster ... succeeded
表示成功。
2、节点2执行过程:
  1[root@raclhr-21c-n2 ~]# /u01/app/oraInventory/orainstRoot.sh
  2Changing permissions of /u01/app/oraInventory.
  3Adding read,write permissions for group.
  4Removing read,write,execute permissions for world.
  5
  6Changing groupname of /u01/app/oraInventory to oinstall.
  7The execution of the script is complete.
  8[root@raclhr-21c-n2 ~]#
  9[root@raclhr-21c-n2 ~]#
 10[root@raclhr-21c-n2 ~]# /u01/app/21.3.0/grid/root.sh
 11Check /u01/app/21.3.0/grid/install/root_raclhr-21c-n2_2021-08-20_17-15-07-463118963.log for the output of root script
 12[root@raclhr-21c-n2 ~]# more  /u01/app/21.3.0/grid/install/root_raclhr-21c-n2_2021-08-20_17-15-07-463118963.log
 13Performing root user operation.
 14
 15The following environment variables are set as:
 16    ORACLE_OWNER= grid
 17    ORACLE_HOME=  /u01/app/21.3.0/grid
 18   Copying dbhome to /usr/local/bin ...
 19   Copying oraenv to /usr/local/bin ...
 20   Copying coraenv to /usr/local/bin ...
 21
 22
 23Creating /etc/oratab file...
 24Entries will be added to the /etc/oratab file as needed by
 25Database Configuration Assistant when a database is created
 26Finished running generic part of root script.
 27Now product-specific root actions will be performed.
 28Relinking oracle with rac_on option
 29Using configuration parameter file: /u01/app/21.3.0/grid/crs/install/crsconfig_params
 302021-08-20 17:15:39: Got permissions of file /u01/app/grid/crsdata/raclhr-21c-n2/crsconfig: 0775
 312021-08-20 17:15:39: Got permissions of file /u01/app/grid/crsdata: 0775
 322021-08-20 17:15:39: Got permissions of file /u01/app/grid/crsdata/raclhr-21c-n2: 0775
 33The log of current session can be found at:
 34  /u01/app/grid/crsdata/raclhr-21c-n2/crsconfig/rootcrs_raclhr-21c-n2_2021-08-20_05-15-39PM.log
 352021/08/20 17:15:45 CLSRSC-594: Executing installation step 1 of 19: 'SetupTFA'.
 362021/08/20 17:15:45 CLSRSC-594: Executing installation step 2 of 19: 'ValidateEnv'.
 372021/08/20 17:15:45 CLSRSC-363: User ignored prerequisites during installation
 382021/08/20 17:15:45 CLSRSC-594: Executing installation step 3 of 19: 'CheckFirstNode'.
 392021/08/20 17:15:46 CLSRSC-594: Executing installation step 4 of 19: 'GenSiteGUIDs'.
 402021/08/20 17:15:47 CLSRSC-594: Executing installation step 5 of 19: 'SetupOSD'.
 41Redirecting to /bin/systemctl restart rsyslog.service
 422021/08/20 17:15:47 CLSRSC-594: Executing installation step 6 of 19: 'CheckCRSConfig'.
 432021/08/20 17:15:48 CLSRSC-594: Executing installation step 7 of 19: 'SetupLocalGPNP'.
 442021/08/20 17:15:49 CLSRSC-594: Executing installation step 8 of 19: 'CreateRootCert'.
 452021/08/20 17:15:49 CLSRSC-594: Executing installation step 9 of 19: 'ConfigOLR'.
 462021/08/20 17:16:05 CLSRSC-594: Executing installation step 10 of 19: 'ConfigCHMOS'.
 472021/08/20 17:16:05 CLSRSC-594: Executing installation step 11 of 19: 'CreateOHASD'.
 482021/08/20 17:16:07 CLSRSC-594: Executing installation step 12 of 19: 'ConfigOHASD'.
 492021/08/20 17:16:07 CLSRSC-330: Adding Clusterware entries to file 'oracle-ohasd.service'
 502021/08/20 17:16:32 CLSRSC-594: Executing installation step 13 of 19: 'InstallAFD'.
 512021/08/20 17:16:32 CLSRSC-594: Executing installation step 14 of 19: 'InstallACFS'.
 522021/08/20 17:16:34 CLSRSC-594: Executing installation step 15 of 19: 'InstallKA'.
 532021/08/20 17:16:35 CLSRSC-594: Executing installation step 16 of 19: 'InitConfig'.
 542021/08/20 17:16:44 CLSRSC-594: Executing installation step 17 of 19: 'StartCluster'.
 552021/08/20 17:17:07 CLSRSC-4002: Successfully installed Oracle Autonomous Health Framework (AHF).
 562021/08/20 17:17:49 CLSRSC-343: Successfully started Oracle Clusterware stack
 572021/08/20 17:17:49 CLSRSC-594: Executing installation step 18 of 19: 'ConfigNode'.
 582021/08/20 17:18:08 CLSRSC-594: Executing installation step 19 of 19: 'PostConfig'.
 592021/08/20 17:18:13 CLSRSC-325: Configure Oracle Grid Infrastructure for a Cluster ... succeeded
 60
 61[root@raclhr-21c-n1 ~]# crsctl stat res -t
 62--------------------------------------------------------------------------------
 63Name           Target  State        Server                   State details
 64--------------------------------------------------------------------------------
 65Local Resources
 66--------------------------------------------------------------------------------
 67ora.LISTENER.lsnr
 68               ONLINE  ONLINE       raclhr-21c-n1            STABLE
 69               ONLINE  ONLINE       raclhr-21c-n2            STABLE
 70ora.chad
 71               ONLINE  ONLINE       raclhr-21c-n1            STABLE
 72               ONLINE  ONLINE       raclhr-21c-n2            STABLE
 73ora.net1.network
 74               ONLINE  ONLINE       raclhr-21c-n1            STABLE
 75               ONLINE  ONLINE       raclhr-21c-n2            STABLE
 76ora.ons
 77               ONLINE  ONLINE       raclhr-21c-n1            STABLE
 78               ONLINE  ONLINE       raclhr-21c-n2            STABLE
 79--------------------------------------------------------------------------------
 80Cluster Resources
 81--------------------------------------------------------------------------------
 82ora.ASMNET1LSNR_ASM.lsnr(ora.asmgroup)
 83      1        ONLINE  ONLINE       raclhr-21c-n1            STABLE
 84      2        ONLINE  ONLINE       raclhr-21c-n2            STABLE
 85ora.LISTENER_SCAN1.lsnr
 86      1        ONLINE  ONLINE       raclhr-21c-n1            STABLE
 87ora.LISTENER_SCAN2.lsnr
 88      1        ONLINE  ONLINE       raclhr-21c-n1            STABLE
 89ora.LISTENER_SCAN3.lsnr
 90      1        ONLINE  ONLINE       raclhr-21c-n2            STABLE
 91ora.OCR.dg(ora.asmgroup)
 92      1        ONLINE  ONLINE       raclhr-21c-n1            STABLE
 93      2        ONLINE  ONLINE       raclhr-21c-n2            STABLE
 94ora.asm(ora.asmgroup)
 95      1        ONLINE  ONLINE       raclhr-21c-n1            Started,STABLE
 96      2        ONLINE  ONLINE       raclhr-21c-n2            Started,STABLE
 97ora.asmnet1.asmnetwork(ora.asmgroup)
 98      1        ONLINE  ONLINE       raclhr-21c-n1            STABLE
 99      2        ONLINE  ONLINE       raclhr-21c-n2            STABLE
100ora.cdp1.cdp
101      1        ONLINE  ONLINE       raclhr-21c-n1            STABLE
102ora.cdp2.cdp
103      1        ONLINE  ONLINE       raclhr-21c-n1            STABLE
104ora.cdp3.cdp
105      1        ONLINE  ONLINE       raclhr-21c-n2            STABLE
106ora.cvu
107      1        ONLINE  ONLINE       raclhr-21c-n1            STABLE
108ora.qosmserver
109      1        ONLINE  ONLINE       raclhr-21c-n1            STABLE
110ora.raclhr-21c-n1.vip
111      1        ONLINE  ONLINE       raclhr-21c-n1            STABLE
112ora.raclhr-21c-n2.vip
113      1        ONLINE  ONLINE       raclhr-21c-n2            STABLE
114ora.scan1.vip
115      1        ONLINE  ONLINE       raclhr-21c-n1            STABLE
116ora.scan2.vip
117      1        ONLINE  ONLINE       raclhr-21c-n1            STABLE
118ora.scan3.vip
119      1        ONLINE  ONLINE       raclhr-21c-n2            STABLE
120--------------------------------------------------------------------------------
最后输出Configure Oracle Grid Infrastructure for a Cluster ... succeeded
表示成功。
3、然后以安装用户grid在节点1执行如下脚本:
1/u01/app/21.3.0/grid/gridSetup.sh -silent -executeConfigTools -responseFile /u01/app/21.3.0/grid/install/response/grid_2021-08-20_04-58-51PM.rsp
执行结果:
 1[grid@raclhr-21c-n1 ~]$ /u01/app/21.3.0/grid/gridSetup.sh  -silent -executeConfigTools -responseFile /u01/app/21.3.0/grid/install/response/grid_2021-08-20_04-58-51PM.rsp
 2Launching Oracle Grid Infrastructure Setup Wizard...
 3
 4You can find the logs of this session at:
 5/u01/app/oraInventory/logs/GridSetupActions2021-08-20_05-20-02PM
 6
 7====》 这里至少需要按2次回车
 8
 9 (reconfirmation):
10
11 (reconfirmation):
12
13
14[WARNING] [INS-43080] Some of the configuration assistants failed, were cancelled or skipped.
15   ACTION: Refer to the logs or contact Oracle Support Services.
7.2、静默安装db软件
安装之前可以使用脚本进行校验,确保所有的failed选项都可以忽略。
1su - oracle
2export CVUQDISK_GRP=oinstall
3export CV_NODE_ALL=raclhr-21c-n1,raclhr-21c-n2
4/u01/app/21.3.0/grid/runcluvfy.sh stage -pre dbinst -allnodes -fixup -verbose
静默安装:
 1/u01/app/oracle/product/21.3.0/dbhome_1/runInstaller -silent  -force -noconfig  -ignorePrereq \
 2oracle.install.responseFileVersion=/oracle/install/rspfmt_dbinstall_response_schema_v21.0.0 \
 3oracle.install.option=INSTALL_DB_SWONLY \
 4UNIX_GROUP_NAME=oinstall \
 5INVENTORY_LOCATION=/u01/app/oraInventory \
 6ORACLE_BASE=/u01/app/oracle \
 7oracle.install.db.InstallEdition=EE \
 8oracle.install.db.OSDBA_GROUP=dba \
 9oracle.install.db.OSOPER_GROUP=oper \
10oracle.install.db.OSBACKUPDBA_GROUP=backupdba \
11oracle.install.db.OSDGDBA_GROUP=dgdba \
12oracle.install.db.OSKMDBA_GROUP=kmdba \
13oracle.install.db.OSRACDBA_GROUP=racdba \
14oracle.install.db.CLUSTER_NODES=raclhr-21c-n1,raclhr-21c-n2 \
15oracle.install.db.rootconfig.executeRootScript=false
执行过程:
 1[oracle@raclhr-21c-n1 ~]$ /u01/app/oracle/product/21.3.0/dbhome_1/runInstaller -silent  -force -noconfig  -ignorePrereq \
 2> oracle.install.responseFileVersion=/oracle/install/rspfmt_dbinstall_response_schema_v21.0.0 \
 3> oracle.install.option=INSTALL_DB_SWONLY \
 4> UNIX_GROUP_NAME=oinstall \
 5> INVENTORY_LOCATION=/u01/app/oraInventory \
 6> ORACLE_BASE=/u01/app/oracle \
 7> oracle.install.db.InstallEdition=EE \
 8> oracle.install.db.OSDBA_GROUP=dba \
 9> oracle.install.db.OSOPER_GROUP=oper \
10> oracle.install.db.OSBACKUPDBA_GROUP=backupdba \
11> oracle.install.db.OSDGDBA_GROUP=dgdba \
12> oracle.install.db.OSKMDBA_GROUP=kmdba \
13> oracle.install.db.OSRACDBA_GROUP=racdba \
14> oracle.install.db.CLUSTER_NODES=raclhr-21c-n1,raclhr-21c-n2 \
15> oracle.install.db.rootconfig.executeRootScript=false
16Launching Oracle Database Setup Wizard...
17
18[WARNING] [INS-13001] Oracle Database is not supported on this operating system. Installer will not perform prerequisite checks on the system.
19   CAUSE: This operating system may not have been in the certified list at the time of the release of this software.
20   ACTION: Refer to My Oracle Support portal for the latest certification information for this operating system. Proceed with the installation if the operating system has been certified after the release of this software.
21The response file for this session can be found at:
22 /u01/app/oracle/product/21.3.0/dbhome_1/install/response/db_2021-08-20_09-57-24PM.rsp
23
24You can find the log of this install session at:
25 /u01/app/oraInventory/logs/InstallActions2021-08-20_09-57-24PM/installActions2021-08-20_09-57-24PM.log
26
27As a root user, execute the following script(s):
28        1. /u01/app/oracle/product/21.3.0/dbhome_1/root.sh
29
30Execute /u01/app/oracle/product/21.3.0/dbhome_1/root.sh on the following nodes:
31[raclhr-21c-n1, raclhr-21c-n2]
32
33
34Successfully Setup Software.
35
36[root@raclhr-21c-n1 InstallActions2021-08-20_09-47-27PM]# /u01/app/oracle/product/21.3.0/dbhome_1/root.sh
37Check /u01/app/oracle/product/21.3.0/dbhome_1/install/root_raclhr-21c-n1_2021-08-20_22-03-03-392736813.log for the output of root script
38[root@raclhr-21c-n1 InstallActions2021-08-20_09-47-27PM]# more /u01/app/oracle/product/21.3.0/dbhome_1/install/root_raclhr-21c-n1_2021-08-20_22-03-03-392736813.log
39Performing root user operation.
40
41The following environment variables are set as:
42    ORACLE_OWNER= oracle
43    ORACLE_HOME=  /u01/app/oracle/product/21.3.0/dbhome_1
44   Copying dbhome to /usr/local/bin ...
45   Copying oraenv to /usr/local/bin ...
46   Copying coraenv to /usr/local/bin ...
47
48Entries will be added to the /etc/oratab file as needed by
49Database Configuration Assistant when a database is created
50Finished running generic part of root script.
51Now product-specific root actions will be performed.
节点1和节点2都需要以root
用户执行脚本:/u01/app/oracle/product/21.3.0/dbhome_1/root.sh
至此,grid集群和db软件都已经安装完成了,剩下的就是创建数据库的操作。
7.3、创建DATA和FRA磁盘组
 1su - grid
 2
 3sqlplus / as sysasm
 4
 5create diskgroup DATA external redundancy disk '/dev/asm-diskj','/dev/asm-diskk','/dev/asm-diskl'
 6ATTRIBUTE 'compatible.rdbms' = '21.3', 'compatible.asm' = '21.3';
 7
 8create diskgroup FRA external redundancy disk '/dev/asm-diskm','/dev/asm-diskn','/dev/asm-disko'
 9ATTRIBUTE 'compatible.rdbms' = '21.3', 'compatible.asm' = '21.3';
10
11srvctl start diskgroup -diskgroup data
12srvctl start diskgroup -diskgroup fra
13alter diskgroup all mount;
14
15
16col name format a10
17set line 9999
18col path format a25
19select GROUP_NUMBER,path,name,disk_number,total_mb,free_mb,CREATE_DATE,MOUNT_STATUS,MOUNT_DATE from v$asm_disk order by GROUP_NUMBER desc,disk_number;
20select name,state,free_mb,required_mirror_free_mb,usable_file_mb from v$asm_diskgroup;
查看:
 1SQL> col name format a10
 2SQL> set line 9999
 3SQL> col path format a25
 4SQL> select GROUP_NUMBER,path,name,disk_number,total_mb,free_mb,CREATE_DATE,MOUNT_STATUS,MOUNT_DATE from v$asm_disk order by GROUP_NUMBER desc,disk_number;
 5
 6GROUP_NUMBER PATH                      NAME       DISK_NUMBER   TOTAL_MB    FREE_MB CREATE_DA MOUNT_S MOUNT_DAT
 7------------ ------------------------- ---------- ----------- ---------- ---------- --------- ------- ---------
 8           3 /dev/asm-diskm            FRA_0000             0      10240      10218 20-AUG-21 CACHED  20-AUG-21
 9           3 /dev/asm-diskn            FRA_0001             1      10240      10216 20-AUG-21 CACHED  20-AUG-21
10           3 /dev/asm-disko            FRA_0002             2      10240      10216 20-AUG-21 CACHED  20-AUG-21
11           2 /dev/asm-diskj            DATA_0000            0      15360      15336 20-AUG-21 CACHED  20-AUG-21
12           2 /dev/asm-diskk            DATA_0001            1      15360      15339 20-AUG-21 CACHED  20-AUG-21
13           2 /dev/asm-diskl            DATA_0002            2      15360      15335 20-AUG-21 CACHED  20-AUG-21
14           1 /dev/asm-diskd            OCR_0000             0       1024        692 20-AUG-21 CACHED  20-AUG-21
15           1 /dev/asm-diske            OCR_0001             1       1024        696 20-AUG-21 CACHED  20-AUG-21
16           1 /dev/asm-diskf            OCR_0002             2       1024        696 20-AUG-21 CACHED  20-AUG-21
17           0 /dev/asm-diskg                                 0          0          0           CLOSED
18           0 /dev/asm-diskh                                 1          0          0           CLOSED
19
20GROUP_NUMBER PATH                      NAME       DISK_NUMBER   TOTAL_MB    FREE_MB CREATE_DA MOUNT_S MOUNT_DAT
21------------ ------------------------- ---------- ----------- ---------- ---------- --------- ------- ---------
22           0 /dev/asm-diski                                 2          0          0           CLOSED
23
2412 rows selected.
25
26SQL> select name,state,free_mb,required_mirror_free_mb,usable_file_mb from v$asm_diskgroup;
27
28NAME       STATE          FREE_MB REQUIRED_MIRROR_FREE_MB USABLE_FILE_MB
29---------- ----------- ---------- ----------------------- --------------
30OCR        MOUNTED           2084                    1024            530
31DATA       MOUNTED          46010                       0          46010
32FRA        MOUNTED          30650                       0          30650
33
34
35
36[root@raclhr-21c-n1 ~]# $ORACLE_HOME/bin/kfod disks=all st=true ds=true
37--------------------------------------------------------------------------------
38 Disk          Size Header    Path                                    Disk Group    User     Group
39================================================================================
40   1:       1024 MB MEMBER    /dev/asm-diskd                           OCR          grid     asmadmin
41   2:       1024 MB MEMBER    /dev/asm-diske                           OCR          grid     asmadmin
42   3:       1024 MB MEMBER    /dev/asm-diskf                           OCR          grid     asmadmin
43   4:      10240 MB CANDIDATE /dev/asm-diskg                           #            grid     asmadmin
44   5:      10240 MB CANDIDATE /dev/asm-diskh                           #            grid     asmadmin
45   6:      10240 MB CANDIDATE /dev/asm-diski                           #            grid     asmadmin
46   7:      15360 MB MEMBER    /dev/asm-diskj                           DATA         grid     asmadmin
47   8:      15360 MB MEMBER    /dev/asm-diskk                           DATA         grid     asmadmin
48   9:      15360 MB MEMBER    /dev/asm-diskl                           DATA         grid     asmadmin
49  10:      10240 MB MEMBER    /dev/asm-diskm                           FRA          grid     asmadmin
50  11:      10240 MB MEMBER    /dev/asm-diskn                           FRA          grid     asmadmin
51  12:      10240 MB MEMBER    /dev/asm-disko                           FRA          grid     asmadmin
52--------------------------------------------------------------------------------
53ORACLE_SID ORACLE_HOME
54================================================================================
7.4、静默创建数据库
 1-- rac数据库
 2dbca -silent -ignorePreReqs  -ignorePrereqFailure  -createDatabase -templateName General_Purpose.dbc -responseFile NO_VALUE \
 3-gdbname rac21c  -sid rac21c \
 4-createAsContainerDatabase TRUE \
 5-sysPassword lhr -systemPassword lhr -dbsnmpPassword lhr \
 6-datafileDestination '+DATA' -recoveryAreaDestination '+FRA' \
 7-storageType ASM \
 8-characterset AL32UTF8 \
 9-totalMemory 1024 \
10-databaseType OLTP \
11-emConfiguration none \
12-nodeinfo raclhr-21c-n1,raclhr-21c-n2
13
14-- 单实例
15dbca -silent -createDatabase -templateName General_Purpose.dbc -responseFile NO_VALUE \
16-gdbname LHRCDB  -sid LHRCDB \
17-createAsContainerDatabase TRUE \
18-numberOfPDBs 1 \
19-pdbName pdbxmm \
20-pdbAdminPassword lhr \
21-sysPassword lhr -systemPassword lhr \
22-datafileDestination '/u01/app/oracle/oradata' \
23-recoveryAreaDestination '/u01/app/oracle/flash_recovery_area' \
24-redoLogFileSize 50 \
25-storageType FS \
26-characterset AL32UTF8 -nationalCharacterSet AL16UTF16 \
27-totalMemory 1024 \
28-databaseType OLTP  \
29-emConfiguration NONE
创建过程:
  1[oracle@raclhr-21c-n1 ~]$ dbca -silent -ignorePreReqs  -ignorePrereqFailure  -createDatabase -templateName General_Purpose.dbc -responseFile NO_VALUE \
  2> -gdbname rac21c  -sid rac21c \
  3> -createAsContainerDatabase TRUE \
  4> -sysPassword lhr -systemPassword lhr -dbsnmpPassword lhr \
  5> -datafileDestination '+DATA' -recoveryAreaDestination '+FRA' \
  6> -storageType ASM \
  7> -characterset AL32UTF8 \
  8> -totalMemory 1024 \
  9> -databaseType OLTP \
 10> -emConfiguration none \
 11> -nodeinfo raclhr-21c-n1,raclhr-21c-n2
 12[WARNING] [DBT-06208] The 'SYS' password entered does not conform to the Oracle recommended standards.
 13   CAUSE:
 14a. Oracle recommends that the password entered should be at least 8 characters in length, contain at least 1 uppercase character, 1 lower case character and 1 digit [0-9].
 15b.The password entered is a keyword that Oracle does not recommend to be used as password
 16   ACTION: Specify a strong password. If required refer Oracle documentation for guidelines.
 17[WARNING] [DBT-06208] The 'SYSTEM' password entered does not conform to the Oracle recommended standards.
 18   CAUSE:
 19a. Oracle recommends that the password entered should be at least 8 characters in length, contain at least 1 uppercase character, 1 lower case character and 1 digit [0-9].
 20b.The password entered is a keyword that Oracle does not recommend to be used as password
 21   ACTION: Specify a strong password. If required refer Oracle documentation for guidelines.
 22[WARNING] [DBT-06208] The 'PDBADMIN' password entered does not conform to the Oracle recommended standards.
 23   CAUSE:
 24a. Oracle recommends that the password entered should be at least 8 characters in length, contain at least 1 uppercase character, 1 lower case character and 1 digit [0-9].
 25b.The password entered is a keyword that Oracle does not recommend to be used as password
 26   ACTION: Specify a strong password. If required refer Oracle documentation for guidelines.
 27Prepare for db operation
 287% complete
 29Copying database files
 3027% complete
 31Creating and starting Oracle instance
 3228% complete
 3331% complete
 3435% complete
 3537% complete
 3640% complete
 37Creating cluster database views
 3841% complete
 3953% complete
 40Completing Database Creation
 4157% complete
 4259% complete
 4360% complete
 4480% complete
 45Executing Post Configuration Actions
 46100% complete
 47Database creation complete. For details check the logfiles at:
 48 /u01/app/oracle/cfgtoollogs/dbca/rac21c.
 49Database Information:
 50Global Database Name:rac21c
 51System Identifier(SID) Prefix:rac21c
 52Look at the log file "/u01/app/oracle/cfgtoollogs/dbca/rac21c/rac21c.log" for further details.
 53
 54[oracle@raclhr-21c-n1 ~]$ crsctl stat res -t
 55--------------------------------------------------------------------------------
 56Name           Target  State        Server                   State details
 57--------------------------------------------------------------------------------
 58Local Resources
 59--------------------------------------------------------------------------------
 60ora.LISTENER.lsnr
 61               ONLINE  ONLINE       raclhr-21c-n1            STABLE
 62               ONLINE  ONLINE       raclhr-21c-n2            STABLE
 63ora.chad
 64               ONLINE  ONLINE       raclhr-21c-n1            STABLE
 65               ONLINE  ONLINE       raclhr-21c-n2            STABLE
 66ora.net1.network
 67               ONLINE  ONLINE       raclhr-21c-n1            STABLE
 68               ONLINE  ONLINE       raclhr-21c-n2            STABLE
 69ora.ons
 70               ONLINE  ONLINE       raclhr-21c-n1            STABLE
 71               ONLINE  ONLINE       raclhr-21c-n2            STABLE
 72--------------------------------------------------------------------------------
 73Cluster Resources
 74--------------------------------------------------------------------------------
 75ora.ASMNET1LSNR_ASM.lsnr(ora.asmgroup)
 76      1        ONLINE  ONLINE       raclhr-21c-n1            STABLE
 77      2        ONLINE  ONLINE       raclhr-21c-n2            STABLE
 78ora.DATA.dg(ora.asmgroup)
 79      1        ONLINE  ONLINE       raclhr-21c-n1            STABLE
 80      2        ONLINE  ONLINE       raclhr-21c-n2            STABLE
 81ora.FRA.dg(ora.asmgroup)
 82      1        ONLINE  ONLINE       raclhr-21c-n1            STABLE
 83      2        ONLINE  ONLINE       raclhr-21c-n2            STABLE
 84ora.LISTENER_SCAN1.lsnr
 85      1        ONLINE  ONLINE       raclhr-21c-n1            STABLE
 86ora.LISTENER_SCAN2.lsnr
 87      1        ONLINE  ONLINE       raclhr-21c-n1            STABLE
 88ora.LISTENER_SCAN3.lsnr
 89      1        ONLINE  ONLINE       raclhr-21c-n2            STABLE
 90ora.OCR.dg(ora.asmgroup)
 91      1        ONLINE  ONLINE       raclhr-21c-n1            STABLE
 92      2        ONLINE  ONLINE       raclhr-21c-n2            STABLE
 93ora.asm(ora.asmgroup)
 94      1        ONLINE  ONLINE       raclhr-21c-n1            Started,STABLE
 95      2        ONLINE  ONLINE       raclhr-21c-n2            Started,STABLE
 96ora.asmnet1.asmnetwork(ora.asmgroup)
 97      1        ONLINE  ONLINE       raclhr-21c-n1            STABLE
 98      2        ONLINE  ONLINE       raclhr-21c-n2            STABLE
 99ora.cdp1.cdp
100      1        ONLINE  ONLINE       raclhr-21c-n1            STABLE
101ora.cdp2.cdp
102      1        ONLINE  ONLINE       raclhr-21c-n1            STABLE
103ora.cdp3.cdp
104      1        ONLINE  ONLINE       raclhr-21c-n2            STABLE
105ora.cvu
106      1        ONLINE  ONLINE       raclhr-21c-n1            STABLE
107ora.qosmserver
108      1        ONLINE  ONLINE       raclhr-21c-n1            STABLE
109ora.rac21c.db
110      1        ONLINE  ONLINE       raclhr-21c-n1            Open,HOME=/u01/app/o
111                                                             racle/product/21.3.0
112                                                             /dbhome_1,STABLE
113      2        ONLINE  ONLINE       raclhr-21c-n2            Open,HOME=/u01/app/o
114                                                             racle/product/21.3.0
115                                                             /dbhome_1,STABLE
116ora.raclhr-21c-n1.vip
117      1        ONLINE  ONLINE       raclhr-21c-n1            STABLE
118ora.raclhr-21c-n2.vip
119      1        ONLINE  ONLINE       raclhr-21c-n2            STABLE
120ora.scan1.vip
121      1        ONLINE  ONLINE       raclhr-21c-n1            STABLE
122ora.scan2.vip
123      1        ONLINE  ONLINE       raclhr-21c-n1            STABLE
124ora.scan3.vip
125      1        ONLINE  ONLINE       raclhr-21c-n2            STABLE
126--------------------------------------------------------------------------------
127
128[oracle@raclhr-21c-n1 ~]$ sas
129
130SQL*Plus: Release 21.0.0.0.0 - Production on Mon Aug 23 10:32:50 2021
131Version 21.3.0.0.0
132
133Copyright (c) 1982, 2021, Oracle.  All rights reserved.
134
135
136Connected to:
137Oracle Database 21c Enterprise Edition Release 21.0.0.0.0 - Production
138Version 21.3.0.0.0
139
140SYS@rac21c1> show pdbs
141
142    CON_ID CON_NAME                       OPEN MODE  RESTRICTED
143---------- ------------------------------ ---------- ----------
144         2 PDB$SEED                       READ ONLY  NO
7.5、创建PDB数据库
 1SYS@rac21c1> show parameter db_create_file_dest
 2
 3NAME                                 TYPE                   VALUE
 4------------------------------------ ---------------------- ------------------------------
 5db_create_file_dest                  string                 +DATA
 6SYS@rac21c1> create pluggable database PDBLHR1 admin user lhr identified by lhr;
 7
 8Pluggable database created.
 9
10SYS@rac21c1> show pdbs
11
12    CON_ID CON_NAME                       OPEN MODE  RESTRICTED
13---------- ------------------------------ ---------- ----------
14         2 PDB$SEED                       READ ONLY  NO
15         3 PDBLHR1                        MOUNTED
16SYS@rac21c1> alter pluggable database pdblhr1 open;
17
18Pluggable database altered.
19
20SYS@rac21c1> show pdbs
21
22    CON_ID CON_NAME                       OPEN MODE  RESTRICTED
23---------- ------------------------------ ---------- ----------
24         2 PDB$SEED                       READ ONLY  NO
25         3 PDBLHR1                        READ WRITE NO
26SYS@rac21c1>  alter pluggable database all save state;
27
28Pluggable database altered.
29
30[oracle@raclhr-21c-n1 ~]$ export ORACLE_PDB_SID=PDBLHR1
31[oracle@raclhr-21c-n1 ~]$ sas
32
33SQL*Plus: Release 21.0.0.0.0 - Production on Mon Aug 23 10:45:11 2021
34Version 21.3.0.0.0
35
36Copyright (c) 1982, 2021, Oracle.  All rights reserved.
37
38
39Connected to:
40Oracle Database 21c Enterprise Edition Release 21.0.0.0.0 - Production
41Version 21.3.0.0.0
42
43SYS@rac21c1> show pdbs
44
45    CON_ID CON_NAME                       OPEN MODE  RESTRICTED
46---------- ------------------------------ ---------- ----------
47         3 PDBLHR1                        READ WRITE NO
48SYS@rac21c1> show con_name
49
50CON_NAME
51------------------------------
52PDBLHR1
53
54
55[root@raclhr-21c-n1 ~]# crsctl status resource  -w "TYPE = ora.database.type" -t
56--------------------------------------------------------------------------------
57Name           Target  State        Server                   State details
58--------------------------------------------------------------------------------
59Cluster Resources
60--------------------------------------------------------------------------------
61ora.rac21c.db
62      1        ONLINE  ONLINE       raclhr-21c-n1            Open,HOME=/u01/app/o
63                                                             racle/product/21.3.0
64                                                             /dbhome_1,STABLE
65      2        ONLINE  ONLINE       raclhr-21c-n2            Open,HOME=/u01/app/o
66                                                             racle/product/21.3.0
67                                                             /dbhome_1,STABLE
68--------------------------------------------------------------------------------
69[root@raclhr-21c-n1 ~]# crsctl status resource  -w "TYPE = ora.pdb.type" -t
70--------------------------------------------------------------------------------
71Name           Target  State        Server                   State details
72--------------------------------------------------------------------------------
73Cluster Resources
74--------------------------------------------------------------------------------
75ora.rac21c.pdblhr1.pdb
76      1        ONLINE  ONLINE       raclhr-21c-n1            STABLE
77      2        ONLINE  ONLINE       raclhr-21c-n2            STABLE
78--------------------------------------------------------------------------------
八、修改基本配置
8.1、禁用crs和db的自启动
1-- 禁用crs自启动
2crsctl disable has
3
4-- 禁用db自启动
5crsctl modify resource ora.rac21c.db -attr AUTO_START=never -unsupported
6crsctl stat res ora.rac21c.db -p | grep AUTO_START
8.2、修改SQL提示符
oracle和grid均修改:
1cat >> $ORACLE_HOME/sqlplus/admin/glogin.sql <<"EOF"
2
3set linesize 9999 pagesize 9999
4set sqlprompt "_USER'@'_CONNECT_IDENTIFIER> "
5
6EOF
本文结束。

• 个人博客地址:www.xmmup.com
• 微信公众号:DB宝,作者:小麦苗,作者微信:db_bao
• 作者QQ:646634621,QQ群:230161599、618766405
• 提供Oracle OCP、OCM、高可用(rac+dg+ogg)、MySQL DBA和PostgreSQL DBA培训及其考证事宜
• 版权所有,欢迎分享本文,转载请保留出处• 若有侵权请联系小麦苗删除
长按下图识别二维码,关注小麦苗的微信公众号:DB宝,学习最实用的数据库技术。