


在接下来的几篇hooks的学习中,我们将通过一起实现一些实用的功能,来学习pytest的一些自带的hooks方法。
今天我们先来说一说怎么处理那些失败的case。比方说,如何把我们的失败的测试用例写到一个failures.txt文件,并在terminal_summary中打印出来。
首先,可以准备一个test_sample.py,存放我们的测试用例:
def add(x):return x + 1def test_answer():assert add(3) == 4def test_answer1():assert add(4) == 3def test_answer2():assert add(5) == 3def test_answer3():assert add(6) == 5
准备一个conftest.py存放我们的hooks方法:
import pytestfrom pathlib import Pathfrom _pytest.config import Configfrom _pytest.main import Sessionfrom _pytest.terminal import TerminalReporterFAILURES_FILE = Path() "failures.txt"@pytest.hookimpl()def pytest_sessionstart(session: Session):if FAILURES_FILE.exists():FAILURES_FILE.unlink()FAILURES_FILE.touch()@pytest.hookimpl(hookwrapper=True)def pytest_runtest_makereport(item, call):""" 每个测试用例执行后,制作测试报告:paramitem: 测试用例对象:paramcall: 测试用例的测试步骤先执行when =’setup’ 返回setup的执行结果然后执行when =’call’ 返回call的执行结果最后执行when =’teardown’返回teardown的执行结果:return:"""outcome = yield# 获取钩子方法的调用结果,返回一个result对象result = outcome.get_result()# 获取调用结果的测试报告,返回一个report对象,reportd对象的属性包括:# when(steup, call, teardown三个值)# nodeid(测试用例的名字)# outcome(用例的执行结果,passed,failed)if result.when == "call" and result.failed:try:with open(str(FAILURES_FILE), "a") as f:f.write(result.nodeid + "\n")except Exception as e:print("ERROR", e)pass@pytest.hookimpl(hookwrapper=True)def pytest_terminal_summary(terminalreporter: TerminalReporter, exitstatus: int, config: Config):yieldprint(f"Failures outputted to: {FAILURES_FILE}")print(f"to see run\ncat {FAILURES_FILE}")
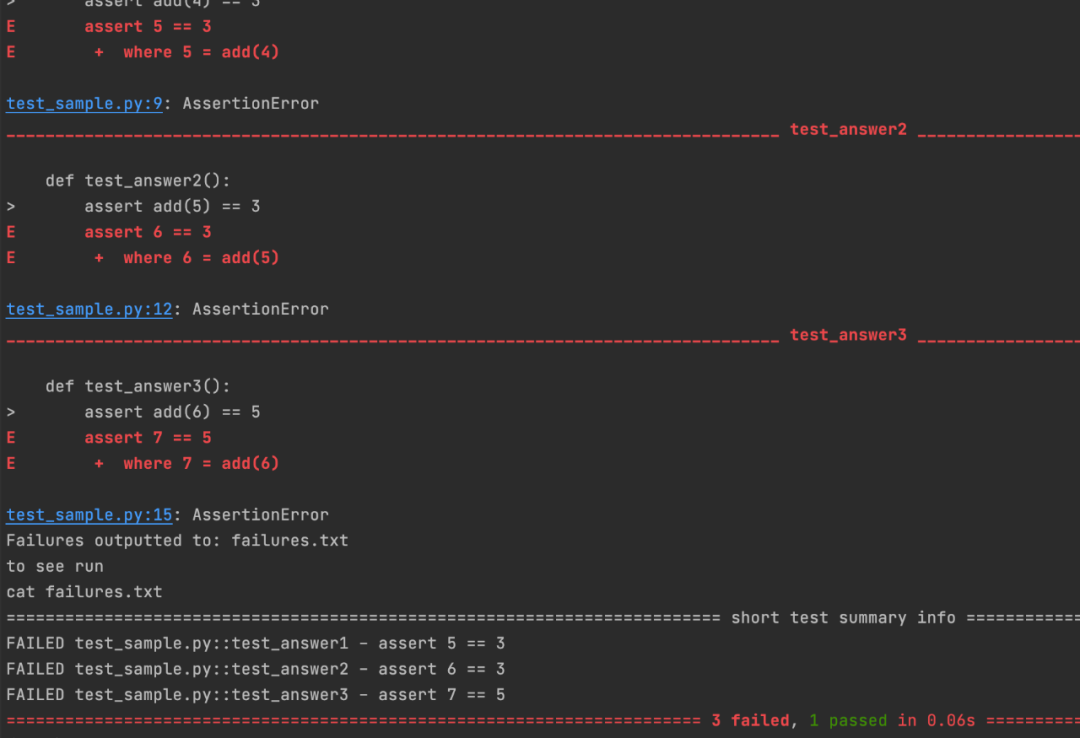
一起来看下执行效果:
我们通过三个hooks方法来实现了这一功能,分别是:
pytest_sessionstart
pytest_runtest_makereport
pytest_terminal_summary
在每个hooks方法上我们都加上了一个@pytest.hookimpl,该注解作用于pytest的钩子函数上,可以获取到测试用例不同执行阶段的结果(setup,call,teardown),也可以获取钩子方法的调用结果(返回一个result对象)和调用结果的测试报告。下面我们具体说明一下:
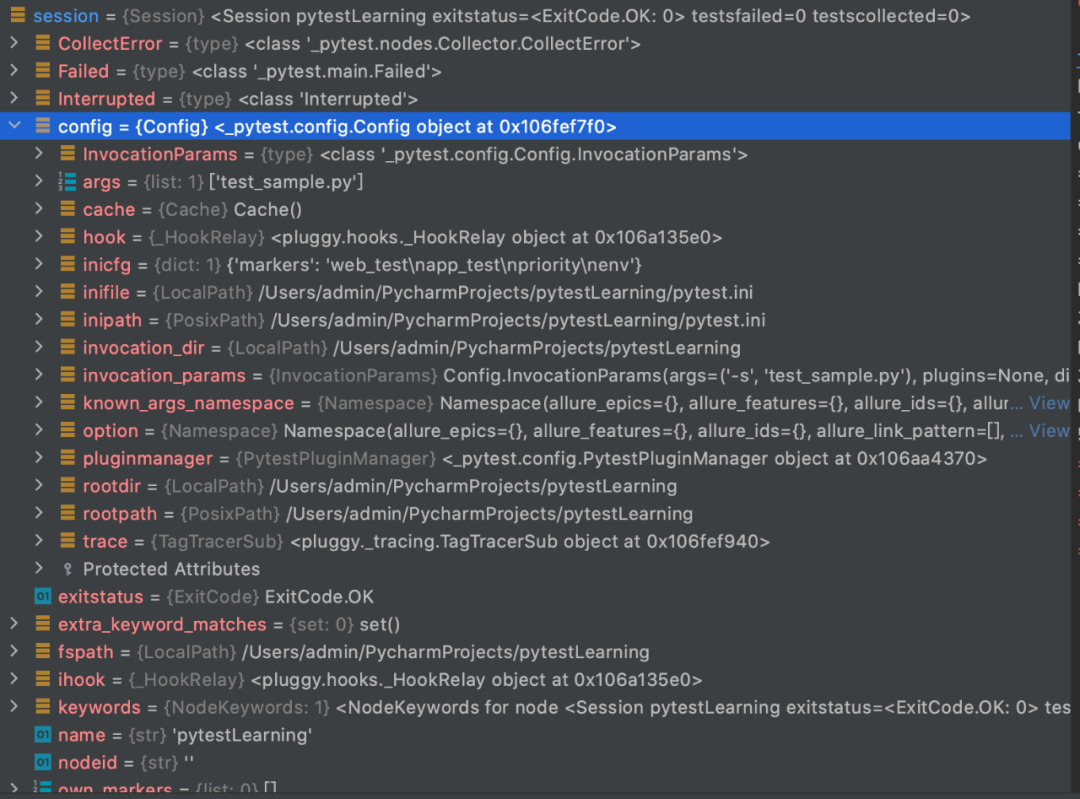
1)pytest_sessionstart这个hook方法是整个测试session开始时会运行一次,在这个方法里,我们会尝试删除已经存在的failure.txt文件,如果没有则重新创建一个。这个方法可以拿到pytest的session对象,我们debug了一下,通过session的对象,我们可以拿到许多信息例如:config,可以动态地做一些pytest ini配置,拿到option等等。
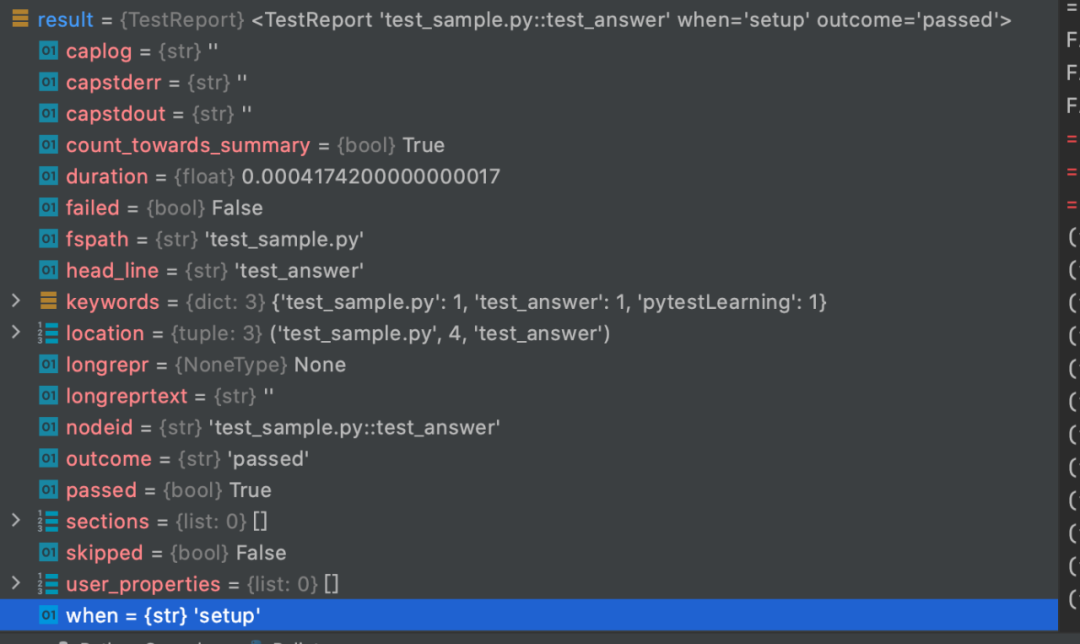
2)pytest_runtest_makereport加上了一个@pytest.hookimpl,该注解作用于pytest的钩子函数上,可以获取到测试用例不同执行阶段的结果(setup,call,teardown),也就是说,每一条测试用例的setup 阶段,call阶段和tear down 阶段都会运行至pytest_runtest_makereport的方法,我们一起debug看一下test_answer这个测试用例分别会进入此hook方法三次。
when = 'setup'
when = 'call'
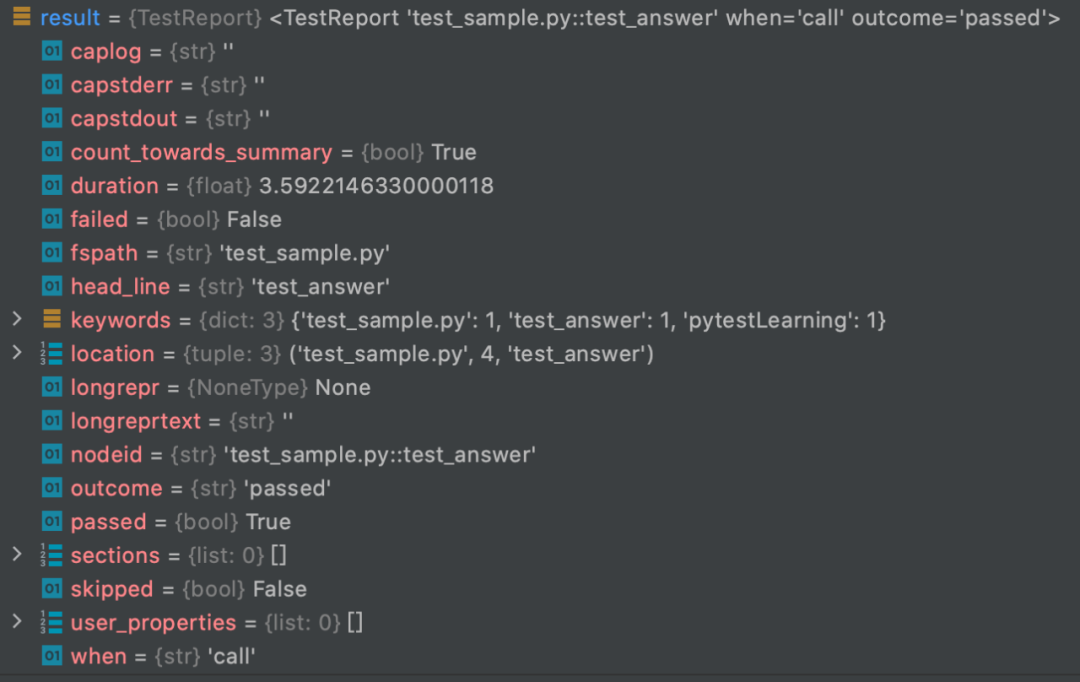
when = 'teardown'
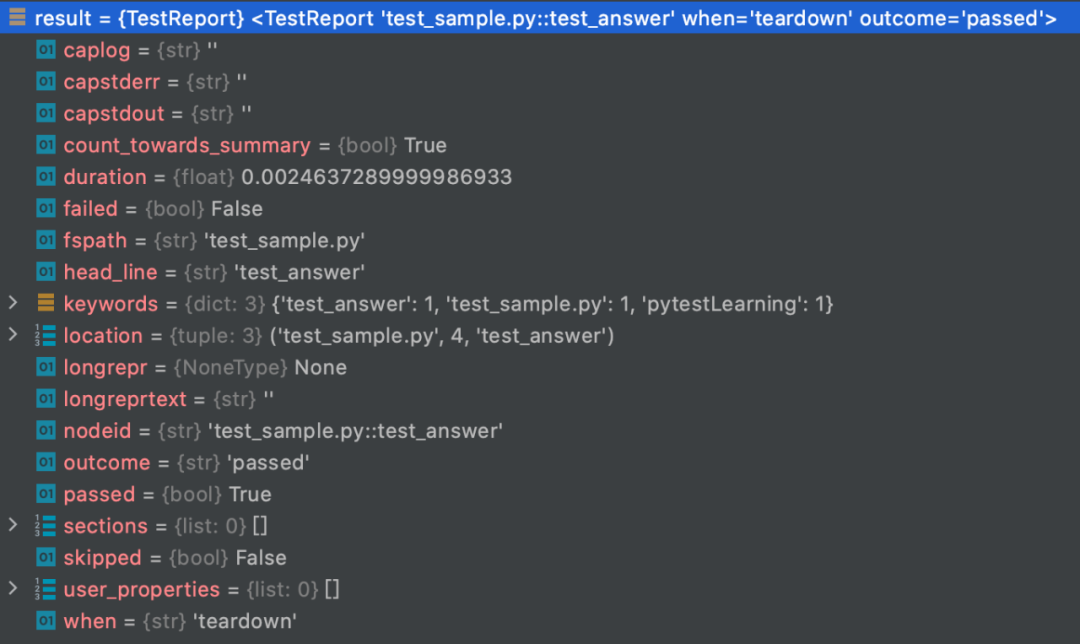
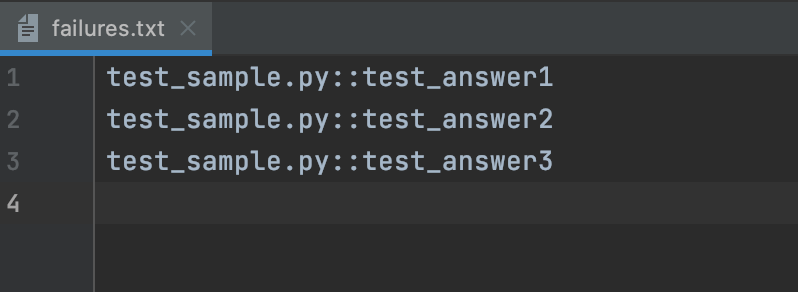
我们可以通过result对象的outcome属性拿到这条case的执行结果是passed还是failed,通过nodeid属性拿到这条case的名称,通过when属性拿到当前case的执行阶段。于是,我们可以在pytest_runtest_makereport中,把failed的case的名字追加写入到failures.txt文件中。
3)pytest_terminal_summary这个方法会在所有的测试用例都执行完成后调用。我们在这个方法中打印了最终的failures.txt的路径。通过这个方法,我们可以拿到三个参数
terminalreporter: TerminalReporter
exitstatus: int
config: Config
我们一起来debug一下,看看具体这些对象有哪些属性
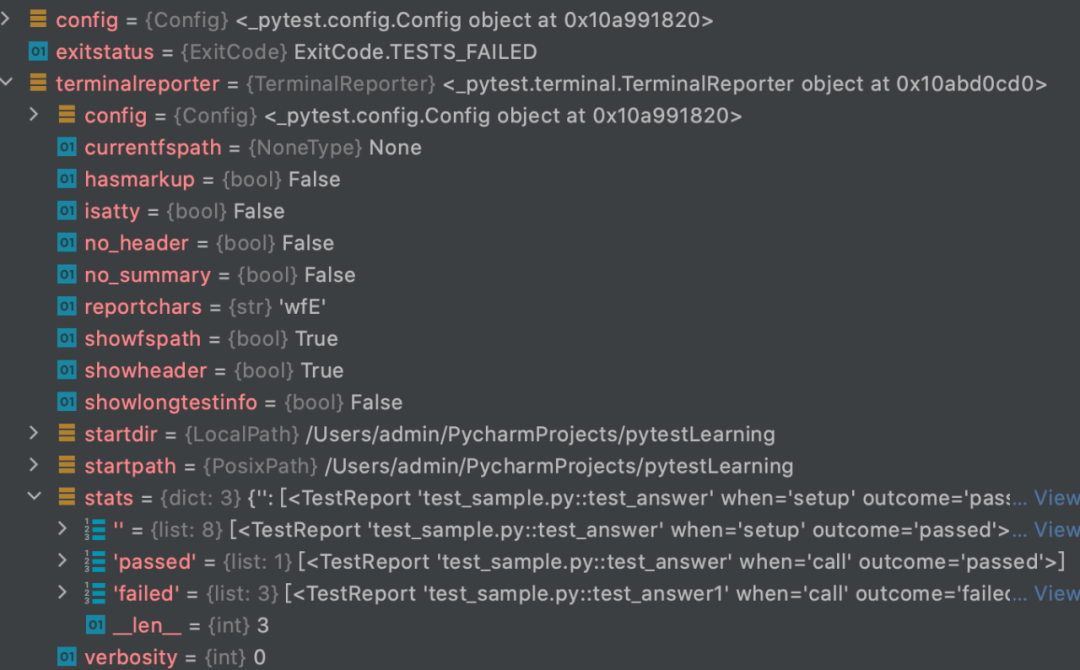
可以看到exitstatus = ExitCode.TESTS_FAILED,因为我们有一部分测试用例失败了,通过stats 的passed dict 和failed dict我们可以拿到所有成功和失败的用例名等等。
我们通常对pytest失败的case会做两个处理,一个是上面例子里提到的收集用于report展示,另一个就是失败重跑。工具美眉在之前的文章中介绍过,pytest提供了很强大的插件rerunfailures,可以用来对失败的case进行重跑。
我们来看看这个插件的源码,学习一下,它是怎么实现失败重跑的功能的。
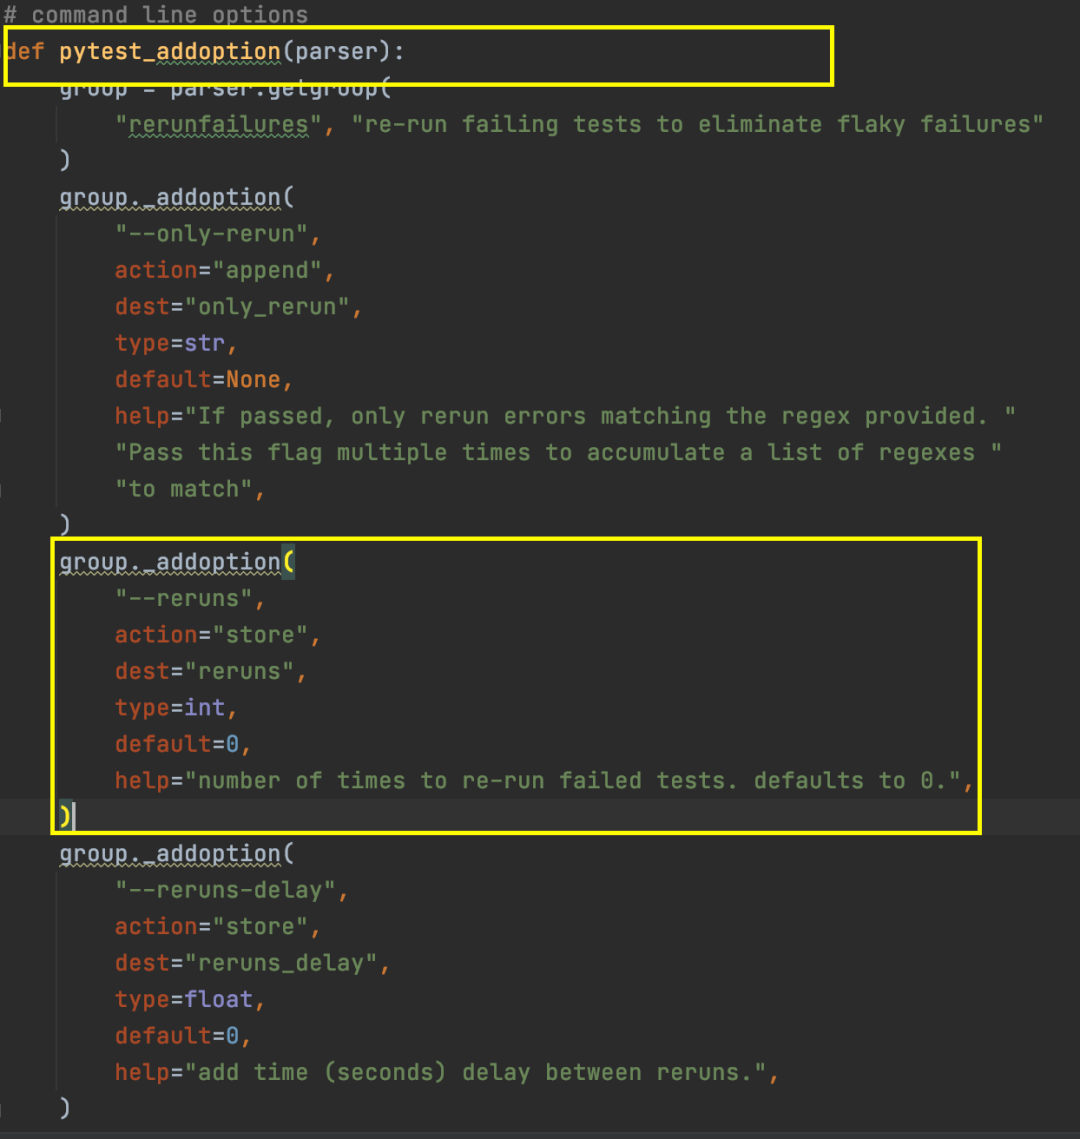
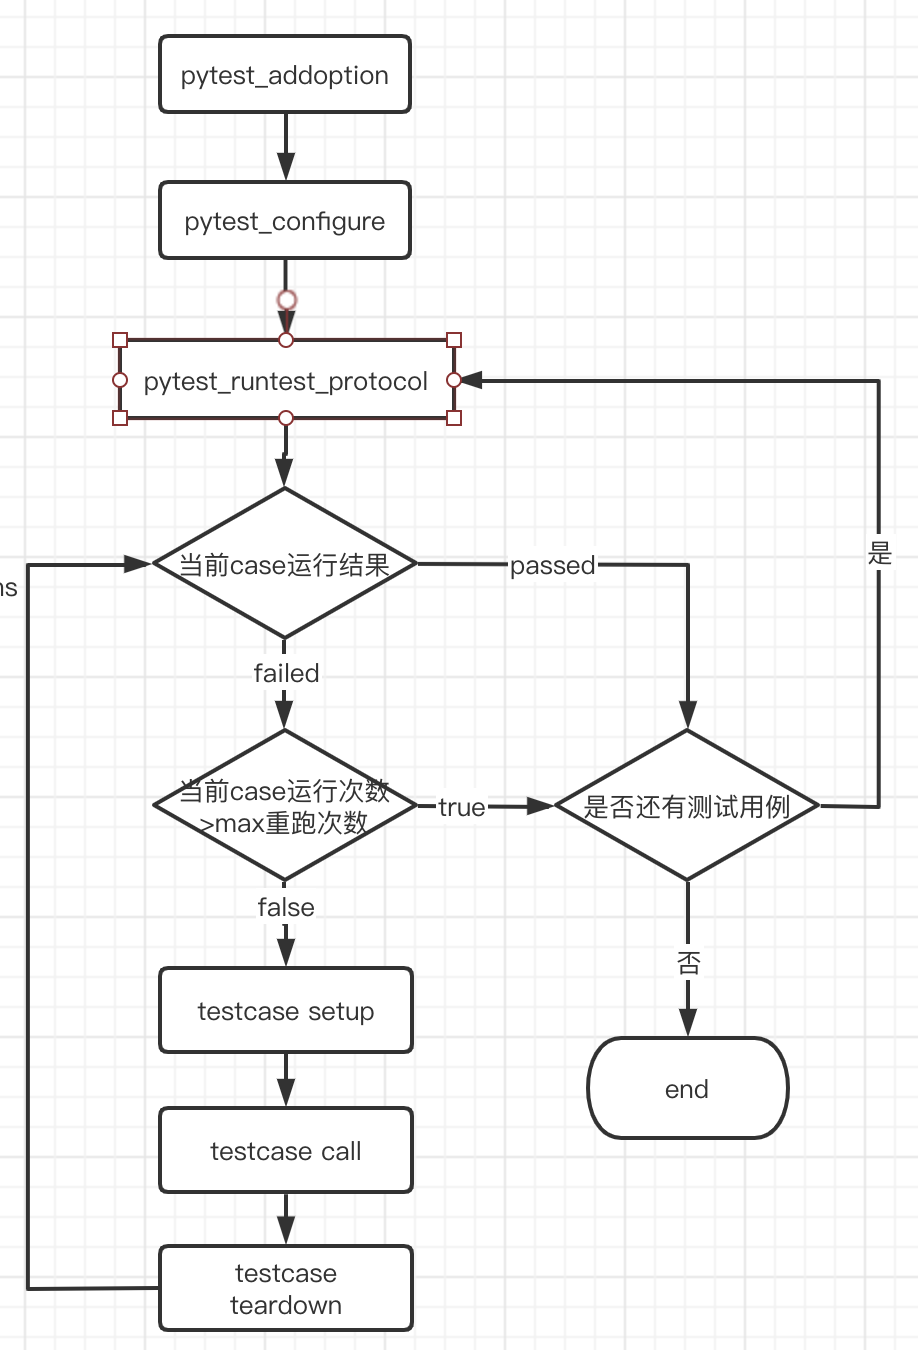
可以看到这个插件通过pytest_addoption方法提供了一系列命令行参数,例如
pytest testcase.py --reruns 5 #对失败的case进行重跑,最多5次
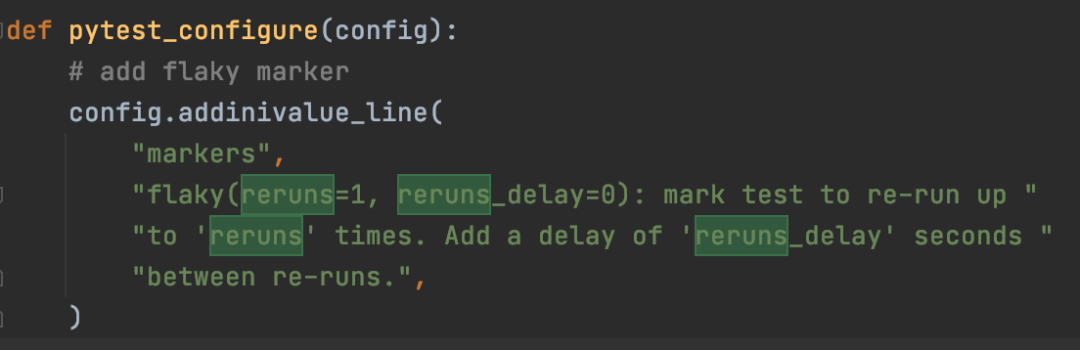
通过pytest_configure这个pytest自带的hook方法,完成了初始化,往pytest.ini中添加了一个marker标签-flaky,flaky有两个参数,一个是rerun次数,另一个是rerun之间的delay时间,可以通过flaky这个mark给某个testcase标注成需要失败重跑。
@pytest.mark.flaky(reruns=3, reruns_delay=5)def test_demo_02():b = 1 + 2assert 2 == b

通过实现了pytest另一个hook方法pytest_runtest_protocol,这个hook方法是在每个测试用例执行之前调用一次,它接收两个参数:
item :要执行的测试用例对象;
nextitem :预计的下一个测试用例对象;
这个插件的核心代码在于以下这段:

这个插件的运行流程图大概长这个样子:
总结一下:
今天主要学习了以下的hook:
pytest_sessionstart
整个测试session开始时会运行一次
pytest_runtest_makereport
每一条测试用例的setup 阶段,call阶段和tear down 阶段都会调用这个方法
pytest_terminal_summary
所有的测试用例都执行完成后调用
pytest_runtest_protocol
在每个测试用例执行之前调用一次,会比pytest_runtest_makereport先执行
今天的学习就到这里,如果这篇文章对你有帮助,请记得点赞和转发哦👍
