在上一篇文章里我们主要介绍worker组件kube-proxy的安装,这里我们开始介绍安装k8s集群内的一些基础服务,所有的基础服务都创建在kube-system这个namesapce里,我们从coredns开始。coredns提供k8s集群内部service的fqdn服务,是以deployment的方式运行在k8s集群内部的。image镜像从我们的private repo pull下来(以前文章里介绍过harbor private repo的创建,以及镜像的push和pull)。当然原始image来源于官方的k8s.gcr.io/coredns:1.3.1,不过要下载它需要科学上网或者搭个梯子。
创建配置文件目录:
由于coredns是以deployment的方式部署在k8s集群里的,一般都会有yaml部署文件,目前都放在此目录里。
mkdir -p opt/application/k8s/core-dnscd /opt/application/k8s/core-dns

创建image pull secret:
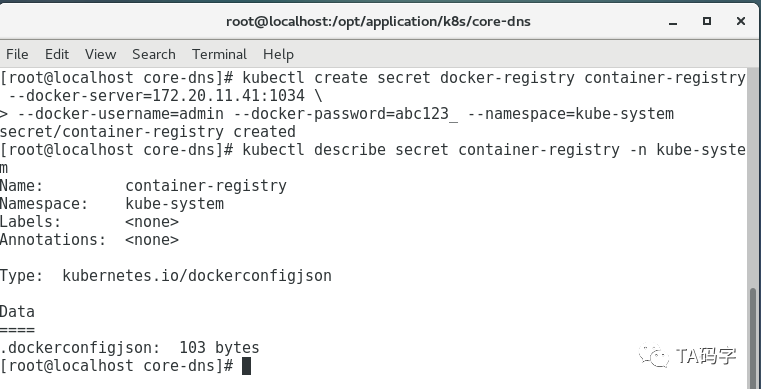
由于我们使用的是private repo的private project里的image,所以k8s在pull image的时候需要repo的认证,这个认证信息就存储在k8s secret资源里。
kubectl create secret docker-registry container-registry --docker-server=172.20.11.41:1034 \--docker-username=admin --docker-password=abc123_ --namespace=kube-systemkubectl describe secret container-registry -n kube-system
创建coredns的service-account:
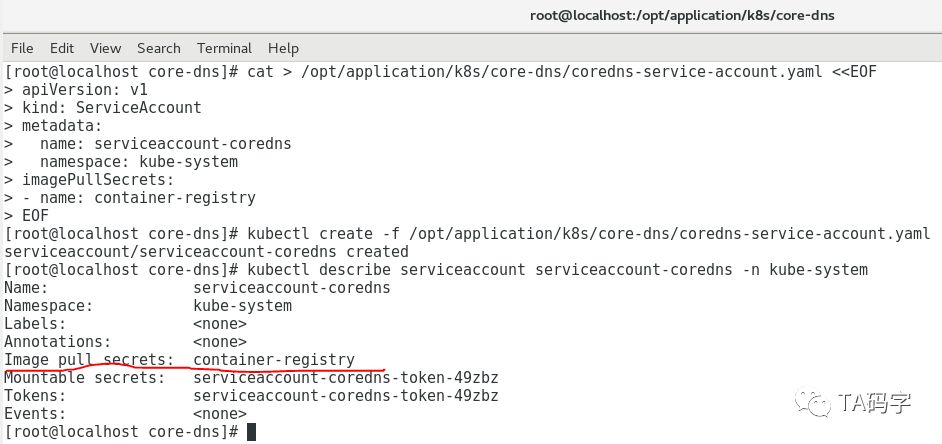
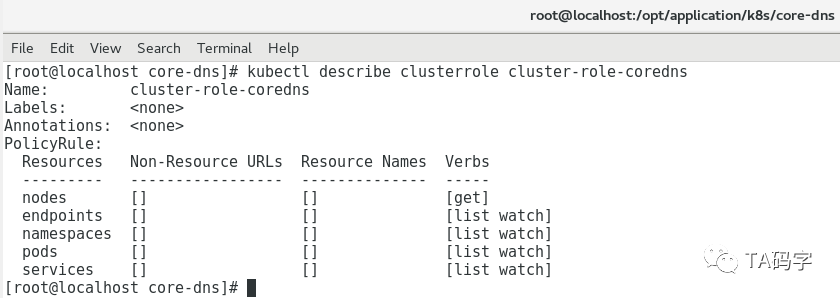
将上个步骤创建的secret赋给这个service-account,另外coredns需要访问kube-apiserver来得到service name和cluster ip,从而建立fqdn服务。对于资源访问,k8s有自己的策略,这里给coredns创建单独的service-account,cluster-role,cluster-role-binding。这里就不详细展开,有兴趣的同学可以看一下k8s的RBAC访问策略。
cat > opt/application/k8s/core-dns/coredns-service-account.yaml <<EOFapiVersion: v1kind: ServiceAccountmetadata:name: serviceaccount-corednsnamespace: kube-systemimagePullSecrets:- name: container-registryEOFkubectl create -f opt/application/k8s/core-dns/coredns-service-account.yamlkubectl describe serviceaccount serviceaccount-coredns -n kube-system
创建coredns的cluster-role:
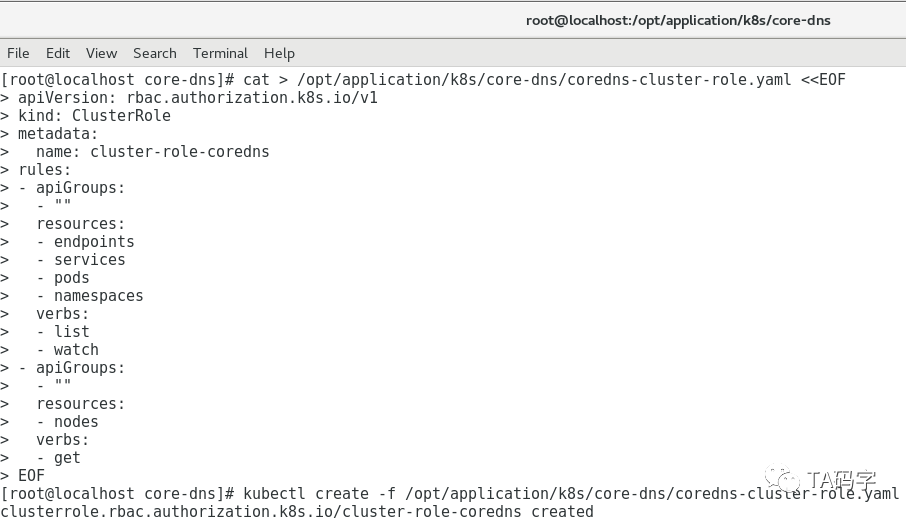
cat > opt/application/k8s/core-dns/coredns-cluster-role.yaml <<EOFapiVersion: rbac.authorization.k8s.io/v1kind: ClusterRolemetadata:name: cluster-role-corednsrules:- apiGroups:- ""resources:- endpoints- services- pods- namespacesverbs:- list- watch- apiGroups:- ""resources:- nodesverbs:- getEOFkubectl create -f opt/application/k8s/core-dns/coredns-cluster-role.yamlkubectl describe clusterrole cluster-role-coredns
创建coredns的cluster-role-binding:
cat > opt/application/k8s/core-dns/coredns-cluster-role-binding.yaml <<EOFapiVersion: rbac.authorization.k8s.io/v1kind: ClusterRoleBindingmetadata:name: cluster-role-binding-corednsroleRef:apiGroup: rbac.authorization.k8s.iokind: ClusterRolename: cluster-role-corednssubjects:- kind: ServiceAccountname: serviceaccount-corednsnamespace: kube-systemEOFkubectl create -f opt/application/k8s/core-dns/coredns-cluster-role-binding.yamlkubectl describe clusterrolebinding cluster-role-binding-coredns -n kube-system
创建coredns的配置configmap:
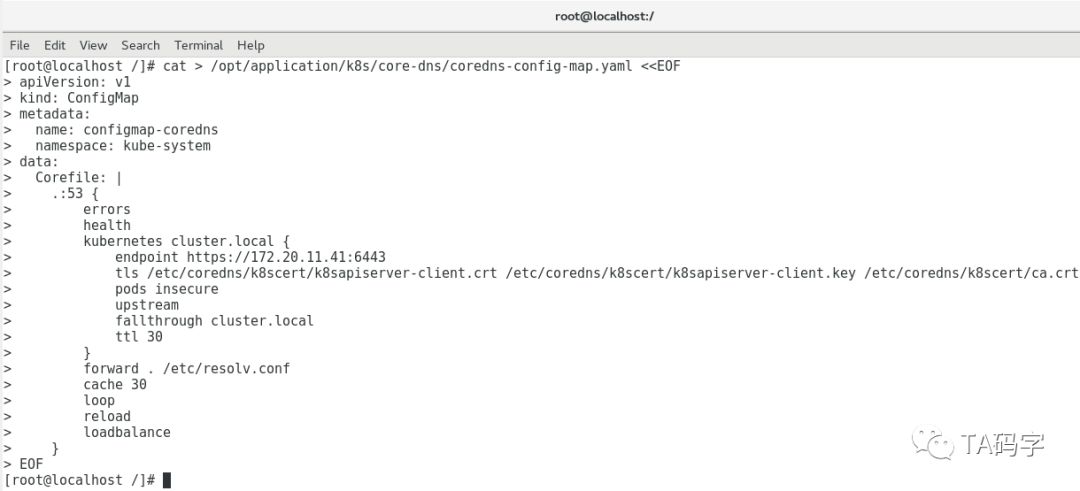
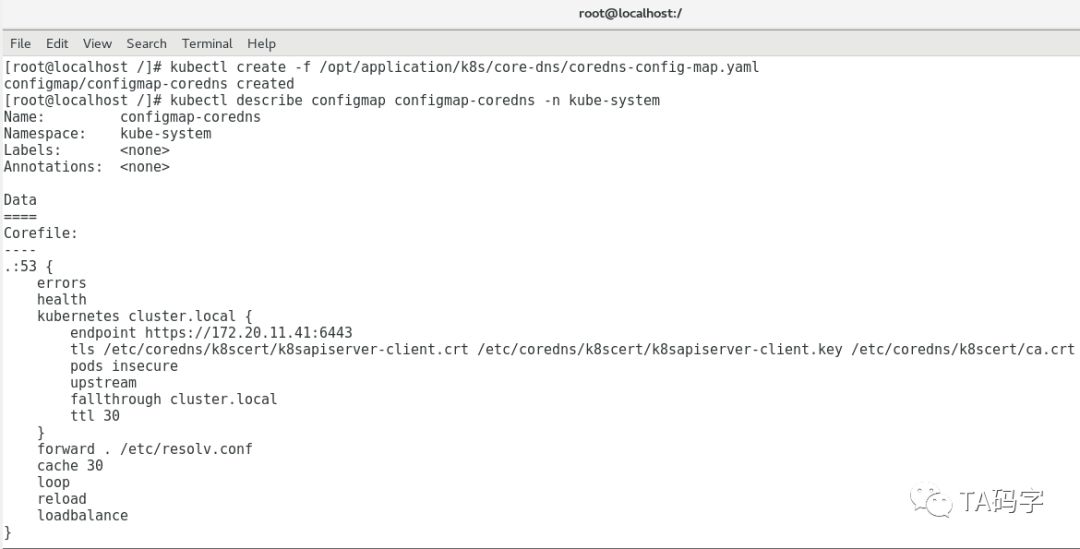
coredns也有自己的配置,我们把它的配置创建在k8s configmap资源里,然后在容器里挂载这个configmap的数据,从而提供给coredns配置。当然配置项比较多,这里就不逐一介绍,有兴趣的同学请参考coredns的配置文档。
cat > opt/application/k8s/core-dns/coredns-config-map.yaml <<EOFapiVersion: v1kind: ConfigMapmetadata:name: configmap-corednsnamespace: kube-systemdata:Corefile: |.:53 {errorshealthkubernetes cluster.local {endpoint https://172.20.11.41:6443tls /etc/coredns/k8scert/k8sapiserver-client.crt etc/coredns/k8scert/k8sapiserver-client.key etc/coredns/k8scert/ca.crtpods insecureupstreamfallthrough cluster.localttl 30}forward . etc/resolv.confcache 30loopreloadloadbalance}EOFkubectl create -f /opt/application/k8s/core-dns/coredns-config-map.yamlkubectl describe configmap configmap-coredns -n kube-system
创建coredns的配置secret :
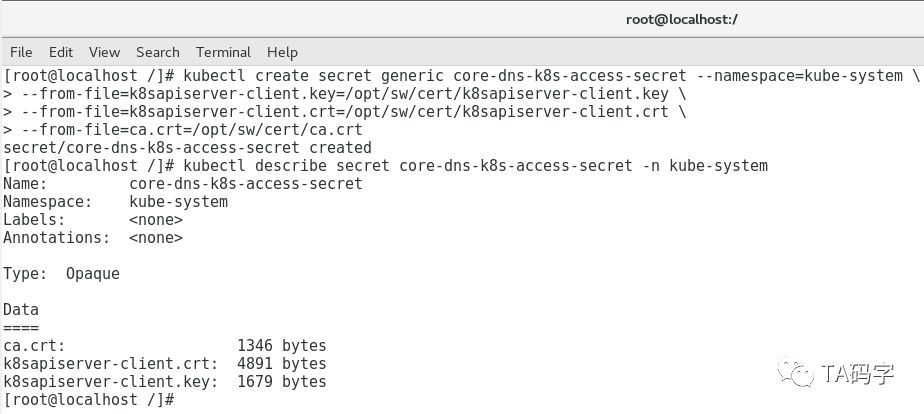
coredns是需要与kube-apiserver交互的,我们的kube-apiserver开启了ssl验证,所以在coredns里也要配置相应的证书,这个请提前制作好(可以参考以前文章制作docker server证书)。对于k8s来说ssl证书可以存储在secret对象里(和configmap相比只是把原文本base64了一下),然后挂载到容器中,给coredns提供配置。
kubectl create secret generic core-dns-k8s-access-secret --namespace=kube-system \--from-file=k8sapiserver-client.key=/opt/sw/cert/k8sapiserver-client.key \--from-file=k8sapiserver-client.crt=/opt/sw/cert/k8sapiserver-client.crt \--from-file=ca.crt=/opt/sw/cert/ca.crtkubectl describe secret core-dns-k8s-access-secret -n kube-system
创建coredns的deployment:
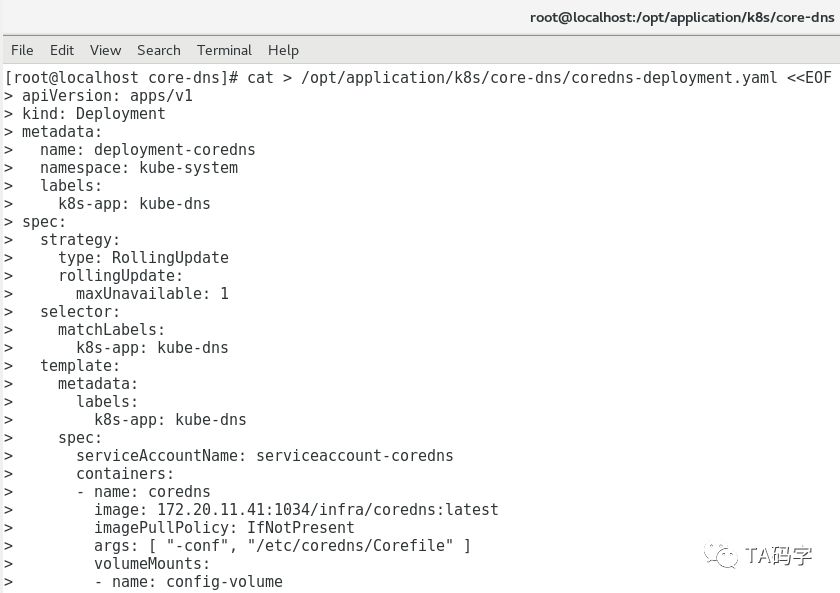
cat > /opt/application/k8s/core-dns/coredns-deployment.yaml <<EOFapiVersion: apps/v1kind: Deploymentmetadata:name: deployment-corednsnamespace: kube-systemlabels:k8s-app: kube-dnsspec:strategy:type: RollingUpdaterollingUpdate:maxUnavailable: 1selector:matchLabels:k8s-app: kube-dnstemplate:metadata:labels:k8s-app: kube-dnsspec:serviceAccountName: serviceaccount-corednscontainers:- name: corednsimage: 172.20.11.41:1034/infra/coredns:latestimagePullPolicy: IfNotPresentargs: [ "-conf", "/etc/coredns/Corefile" ]volumeMounts:- name: config-volumemountPath: /etc/corednsreadOnly: true- name: config-volume-k8s-certmountPath: /etc/coredns/k8scertreadOnly: trueports:- containerPort: 53name: dnsprotocol: UDP- containerPort: 53name: dns-tcpprotocol: TCP- containerPort: 9153name: metricsprotocol: TCPlivenessProbe:httpGet:path: /healthport: 8080scheme: HTTPinitialDelaySeconds: 60timeoutSeconds: 5successThreshold: 1failureThreshold: 5readinessProbe:httpGet:path: /healthport: 8080scheme: HTTPsecurityContext:allowPrivilegeEscalation: falsecapabilities:add:- NET_BIND_SERVICEdrop:- allreadOnlyRootFilesystem: truednsPolicy: Defaultvolumes:- name: config-volumeconfigMap:name: configmap-corednsitems:- key: Corefilepath: Corefile- name: config-volume-k8s-certsecret:secretName: core-dns-k8s-access-secretEOFkubectl create -f /opt/application/k8s/core-dns/coredns-deployment.yamlkubectl describe deployment deployment-coredns -n kube-system
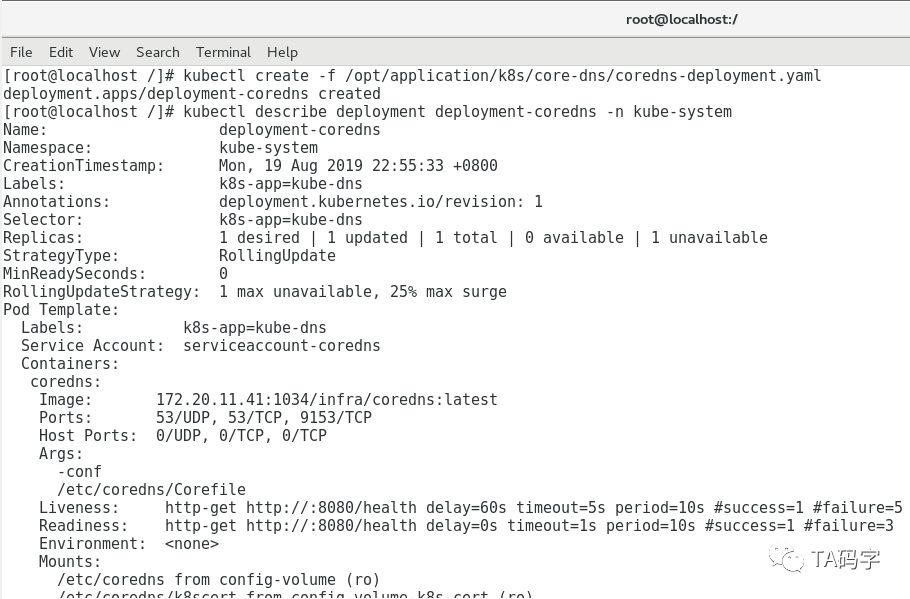
创建coredns的service:
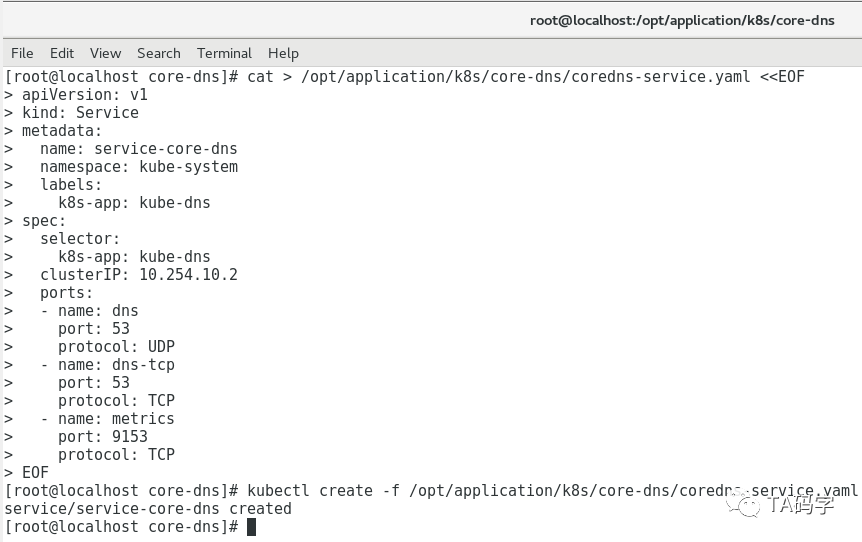
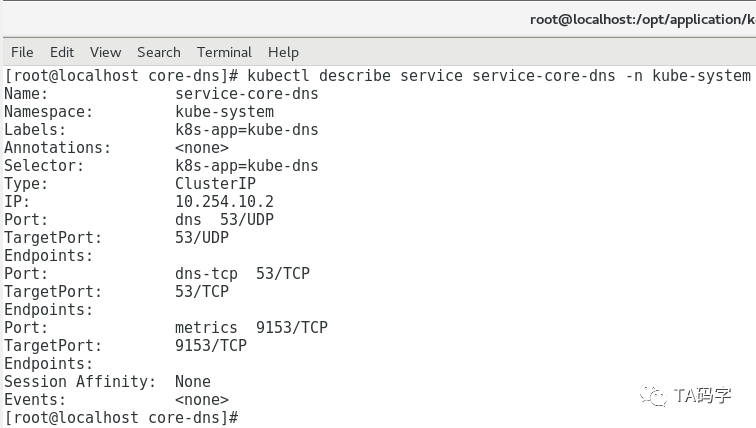
这个service会生成coredns在集群里的cluster-ip,这个cluster-ip在kubetel里配置,然后在kubelet创建容器的时候将这个ip配置为容器的dns服务器地址。所以请在配置文件的clusterIP字段里设置value和以前文章中kubelet的--cluster-dns配置项一致。
cat > /opt/application/k8s/core-dns/coredns-service.yaml <<EOFapiVersion: v1kind: Servicemetadata:name: service-core-dnsnamespace: kube-systemlabels:k8s-app: kube-dnsspec:selector:k8s-app: kube-dnsclusterIP: 10.254.10.2ports:- name: dnsport: 53protocol: UDP- name: dns-tcpport: 53protocol: TCP- name: metricsport: 9153protocol: TCPEOFkubectl create -f /opt/application/k8s/core-dns/coredns-service.yamlkubectl describe service service-core-dns -n kube-system
查看coredns在集群中的pod:
kubectl get pods -n kube-systemkubectl logs deployment-coredns-c58b8b7fc-kp2j8 -n kube-system

目前先写到这里,下一篇文章里我们继续介绍k8s集群内的基础服务kube-dashboard安装。