



服务器:centos7
zabbix:4.0
一、安装部署数据库
本文使用MySQL5.7,如果服务器上有数据库跳过此步骤
下载安装数据库repo文件
wget https://dev.mysql.com/get/mysql80-community-release-el7-2.noarch.rpm
rpm -ivh mysql80-community-release-el7-2.noarch.rpm
修改repo文件 将默认的8.0版本改成5.7
vi etc/yum.repos.d/mysql-community.repo
# Enable to use MySQL 5.7[mysql57-community]name=MySQL 5.7 Community Serverbaseurl=http://repo.mysql.com/yum/mysql-5.7-community/el/7/$basearch/enabled=0gpgcheck=1gpgkey=file:///etc/pki/rpm-gpg/RPM-GPG-KEY-mysql[mysql80-community]name=MySQL 8.0 Community Serverbaseurl=http://repo.mysql.com/yum/mysql-8.0-community/el/7/$basearch/enabled=1gpgcheck=1gpgkey=file:///etc/pki/rpm-gpg/RPM-GPG-KEY-mysql
改为下面的,也就是说启用mysql5.7的版本
# Enable to use MySQL 5.7[mysql57-community]name=MySQL 5.7 Community Serverbaseurl=http://repo.mysql.com/yum/mysql-5.7-community/el/7/$basearch/enabled=1gpgcheck=1gpgkey=file:///etc/pki/rpm-gpg/RPM-GPG-KEY-mysql[mysql80-community]name=MySQL 8.0 Community Serverbaseurl=http://repo.mysql.com/yum/mysql-8.0-community/el/7/$basearch/enabled=0gpgcheck=1gpgkey=file:///etc/pki/rpm-gpg/RPM-GPG-KEY-mysql
查看修改好的版本
yum list |grep mysql
mysql-community-client.x86_64 5.7.26-1.el7 mysql57-community
安装MySQL
yum -y install mysql-community-server.x86_64
启动数据库并设置开机自启动
[root@localhost ~]# systemctl start mysqld
[root@localhost ~]# systemctl enable mysqld
查看mysql密码
[root@localhost ~]# cat var/log/mysqld.log |grep "pass"
2019-07-09T08:39:30.367236Z 1 [Note] A temporary password is generated for root@localhost: pjjAa4zYy9!_
记住初始密码 登录并修改密码
[root@localhost ~]# mysql -u root -p'pjjAa4zYy9!_'
mysql: [Warning] Using a password on the command line interface can be insecure.
Welcome to the MySQL monitor. Commands end with ; or \g.Your MySQL connection id is 3Server version: 5.7.26Copyright (c) 2000, 2019, Oracle and/or its affiliates. All rights reserved.Oracle is a registered trademark of Oracle Corporation and/or itsaffiliates. Other names may be trademarks of their respectiveowners.Type 'help;' or '\h' for help. Type '\c' to clear the current input statement.mysql>mysql> ALTER USER USER() IDENTIFIED BY 123456';Query OK, 0 rows affected (0.00 sec)mysql> flush privileges;Query OK, 0 rows affected (0.00 sec)
二、安装zabbix
rpm -Uvh https://repo.zabbix.com/zabbix/4.0/rhel/7/x86_64/zabbix-release-4.0-1.el7.noarch.rpm
yum clean all
安装Zabbix服务器,前端,代理
yum -y install zabbix-server-mysql zabbix-web-mysql zabbix-agent
创建数据库
mysql> create database zabbix character set utf8 collate utf8_bin;Query OK, 1 row affected (0.00 sec)mysql> grant all privileges on zabbix.* to zabbix@localhost identified by '123456';Query OK, 0 rows affected, 1 warning (0.00 sec)mysql> flush privileges;Query OK, 0 rows affected (0.00 sec)
导入数据
[root@localhost ~]# zcat usr/share/doc/zabbix-server-mysql-4.0.10/create.sql.gz | mysql -uzabbix -p'123456'
mysql: [Warning] Using a password on the command line interface can be insecure.
ERROR 1046 (3D000) at line 1: No database selected
直接导入会报错
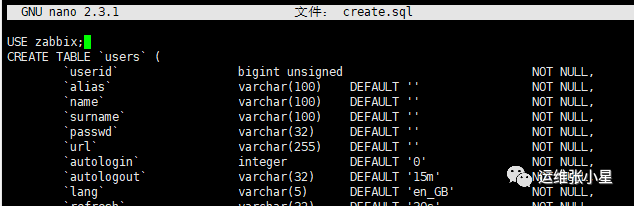
需要编辑下文件
//1,.备份[root@localhost ~]# cd usr/share/doc/zabbix-server-mysql-4.0.11/[root@localhost zabbix-server-mysql-4.0.11]# lsAUTHORS ChangeLog COPYING create.sql.gz NEWS README[root@localhost zabbix-server-mysql-4.0.11]# cp create.sql.gz create.sql.gz.back[root@localhost zabbix-server-mysql-4.0.11]# lsAUTHORS ChangeLog COPYING create.sql.gz create.sql.gz.back NEWS README//2,解压数据库[root@localhost zabbix-server-mysql-4.0.11]# gunzip create.sql.gz//3,安装nano编辑数据库信息[root@localhost zabbix-server-mysql-4.0.11]# yum -y install nano[root@localhost zabbix-server-mysql-4.0.11]# nano create.sql//在第一行加上USE zabbix;//然后重新导入库即可[root@localhost zabbix-server-mysql-4.0.11]# cat create.sql | mysql -uzabbix -p'XXXXX' zabbix
nano图形界面
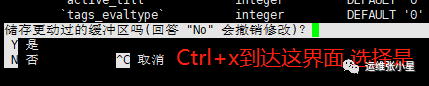
保存

编写配置文件
[root@localhost ~]# vim /etc/zabbix/zabbix_server.conf
[root@localhost ~]# cat /etc/zabbix/zabbix_server.conf |grep -Pv "^(#|$)"
LogFile=/var/log/zabbix/zabbix_server.logLogFileSize=0PidFile=/var/run/zabbix/zabbix_server.pidSocketDir=/var/run/zabbixDBHost=localhostDBName=zabbixDBUser=zabbixDBPassword=XXXXXSNMPTrapperFile=/var/log/snmptrap/snmptrap.logTimeout=4AlertScriptsPath=/usr/lib/zabbix/alertscriptsExternalScripts=/usr/lib/zabbix/externalscriptsLogSlowQueries=3000
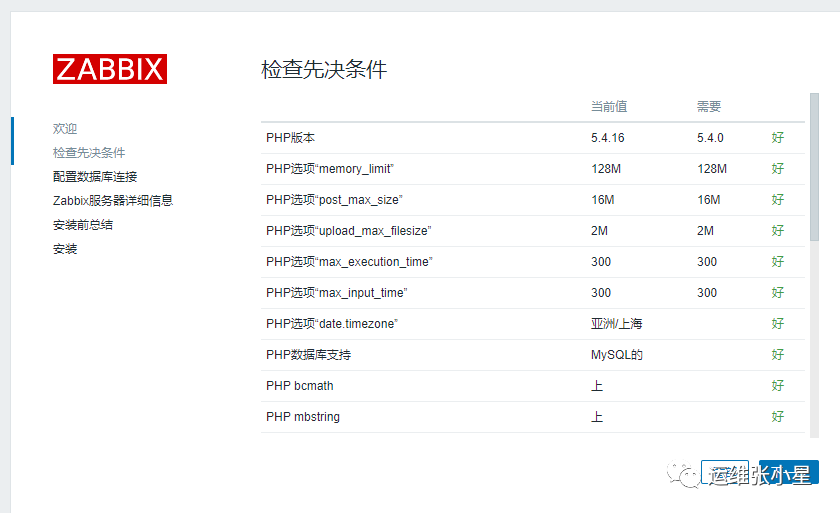
修改PHP时区
[root@localhost ~]# vim /etc/httpd/conf.d/zabbix.conf
将下面这行修改为亚洲上海
php_value date.timezone Asia/Shanghai
启动zabbix
#启动zabbix-server、zabbix-agent、httpd
[root@localhost ~]# systemctl restart zabbix-server zabbix-agent httpd
[root@localhost ~]# systemctl enable zabbix-server zabbix-agent httpd
zabbix页面配置

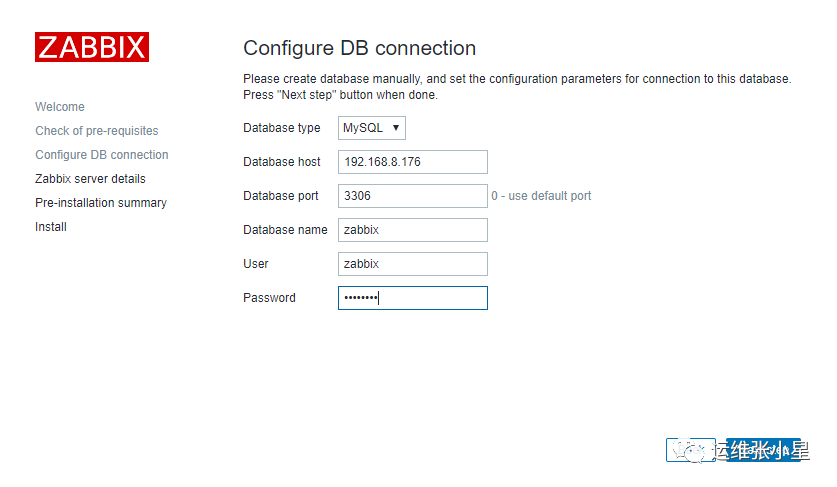
填写数据库相关信息
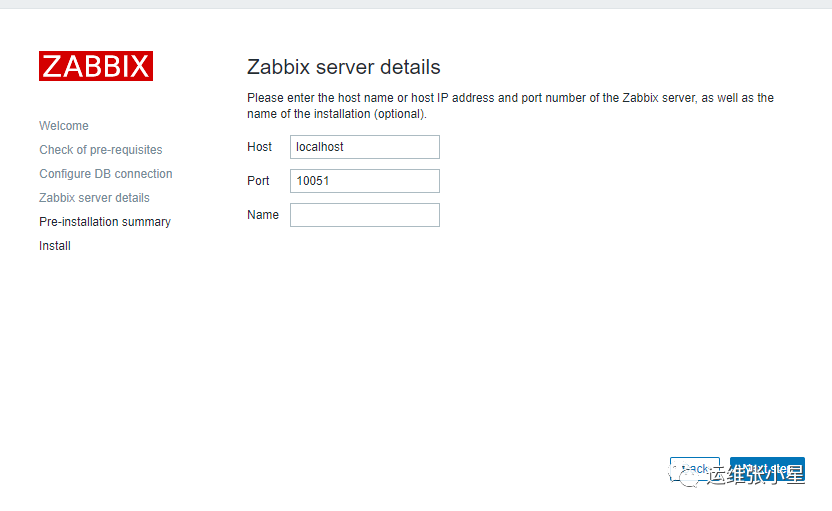
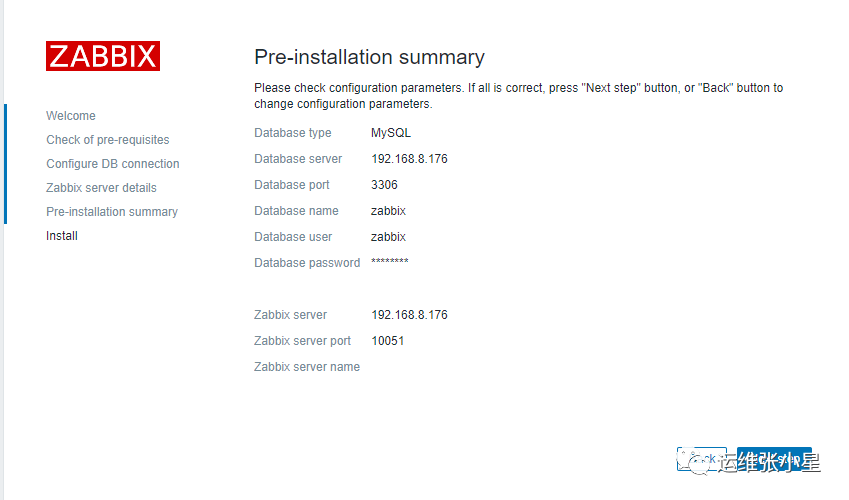
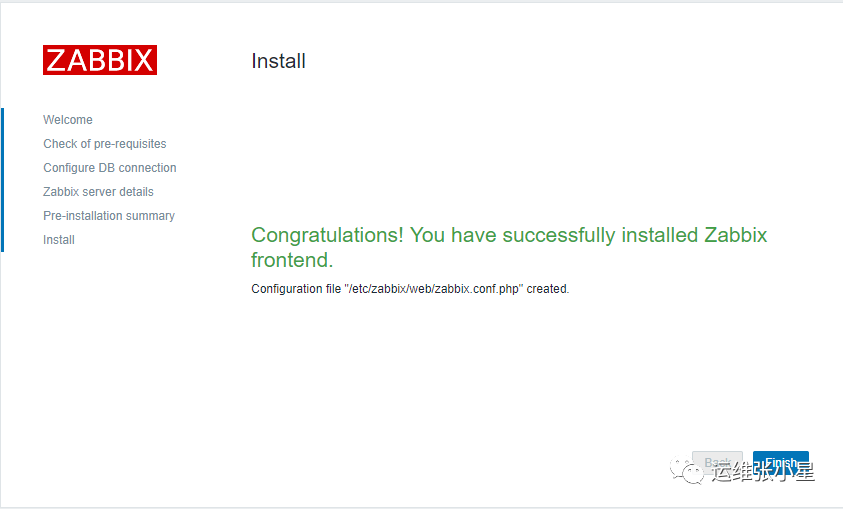
初始账号Admin 密码zabbix
输入访问链接就可以访问zabbix了
192.168.8.176/zabbix
