


Apache Artemis MQ是 Apache ActiveMQ的升级版本。Artemis目前最新为2.x。支持JMS1.2。
这儿给大家一些提示,以帮助大家快速使用 Apache ActiveMQ的最新版本:Artemis。
安装Artemis
步1、下载并解压Artemis
下载地址:http://activemq.apache.org/
http://activemq.apache.org/components/artemis/download/
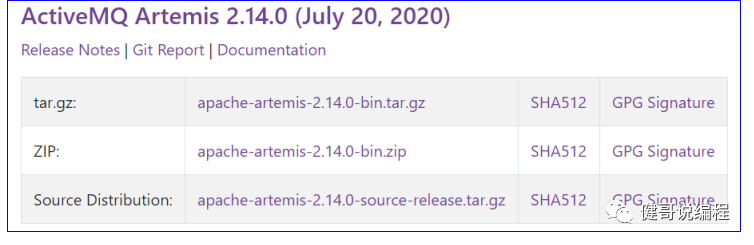
windows上请下载zip格式的文件,linux上请下载tar.gz格式的文件:
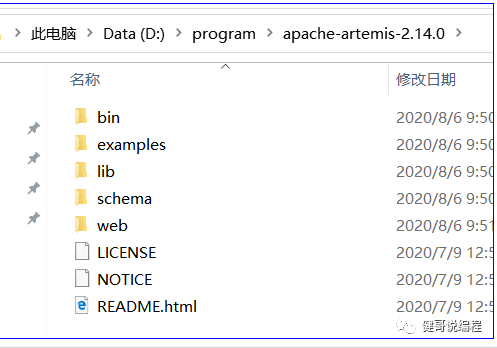
解压到任意目录下(没有中文,没有空格的目录):
步2、创建一个Broker
进入bin目录,执行artemis.cmd就可以看到很多的帮助信息:
D:\program\apache-artemis-2.14.0\bin>artemis.cmd
usage: artemis <command> [<args>]
The most commonly used artemis commands are:
address Address tools group (create|delete|update|show) (example ./artemis address create)
browser It will browse messages on an instance
check Check tools group (node|queue) (example ./artemis check node)
consumer It will consume messages from an instance
create creates a new broker instance
data data tools group (print) (example ./artemis data print)
help Display help information
mask mask a password and print it out
migrate1x Migrates the configuration of a 1.x Artemis Broker
producer It will send messages to an instance
queue Queue tools group (create|delete|update|stat|purge) (example ./artemis queue create)
See 'artemis help <command>' for more information on a specific command.
可见,create为创建broker的命令。查看create的详细帮助说明:
> artemis.cmd help create
详细信息如上:
D:\program\apache-artemis-2.14.0\bin>artemis.cmd help create
NAME
artemis create - creates a new broker instance
SYNOPSIS
artemis create [--addresses <addresses>] [--aio] [--allow-anonymous]
[--autocreate] [--blocking] [--cluster-password <clusterPassword>]
[--cluster-user <clusterUser>] [--clustered] [--data <data>]
[--default-port <defaultPort>] [--disable-persistence]
[--encoding <encoding>] [--etc <etc>] [--failover-on-shutdown] [--force]
[--global-max-size <globalMaxSize>] [--home <home>] [--host <host>]
[--http-host <httpHost>] [--http-port <httpPort>]
[--java-options <javaOptions>] [--jdbc]
[--jdbc-bindings-table-name <jdbcBindings>]
[--jdbc-connection-url <jdbcURL>]
[--jdbc-driver-class-name <jdbcClassName>]
[--jdbc-large-message-table-name <jdbcLargeMessages>]
[--jdbc-lock-expiration <jdbcLockExpiration>]
[--jdbc-lock-renew-period <jdbcLockRenewPeriod>]
[--jdbc-message-table-name <jdbcMessages>]
[--jdbc-network-timeout <jdbcNetworkTimeout>]
[--jdbc-node-manager-table-name <jdbcNodeManager>]
[--jdbc-page-store-table-name <jdbcPageStore>]
[--journal-device-block-size <journalDeviceBlockSize>] [--mapped]
[--max-hops <maxHops>] [--message-load-balancing <messageLoadBalancing>]
[--name <name>] [--nio] [--no-amqp-acceptor] [--no-autocreate]
[--no-autotune] [--no-fsync] [--no-hornetq-acceptor]
[--no-mqtt-acceptor] [--no-stomp-acceptor] [--no-web] [--paging]
[--password <password>] [--ping <ping>] [--port-offset <portOffset>]
[--queues <queues>] [--relax-jolokia] [--replicated] [--require-login]
[--role <role>] [--shared-store] [--silent] [--slave]
[--ssl-key <sslKey>] [--ssl-key-password <sslKeyPassword>]
[--ssl-trust <sslTrust>] [--ssl-trust-password <sslTrustPassword>]
[--staticCluster <staticNode>] [--use-client-auth] [--user <user>]
[--verbose] [--] <directory>
现在我们就创建一个broker,通过输入create <目录名称>来创建一个broker,创建过程中,必须要指定user和password,具体过程如下:
D:\program\apache-artemis-2.14.0\bin>artemis.cmd create D:/a/mybroker
Creating ActiveMQ Artemis instance at: D:\a\mybroker
--user: is a mandatory property!
Please provide the default username:
artemis
--password: is mandatory with this configuration:
Please provide the default password:
--allow-anonymous | --require-login: is a mandatory property!
Allow anonymous access?, valid values are Y,N,True,False
N
Auto tuning journal ...
done! Your system can make 3.21 writes per millisecond, your journal-buffer-timeout will be 312000
You can now start the broker by executing:
"D:\a\mybroker\bin\artemis" run
Or you can setup the broker as Windows service and run it in the background:
"D:\a\mybroker\bin\artemis-service.exe" install
"D:\a\mybroker\bin\artemis-service.exe" start
To stop the windows service:
"D:\a\mybroker\bin\artemis-service.exe" stop
To uninstall the windows service
"D:\a\mybroker\bin\artemis-service.exe" uninstall
步3、启动broker
根据创建时的提示,可以通过 run命令,来启动这个broker。首先进入D:/a/mybroker目录,查看创建的目录结构:
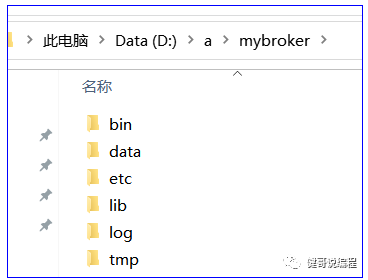
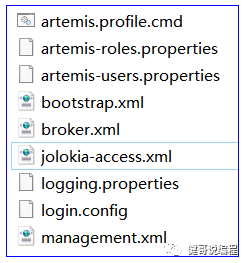
其中etc目录为配置目录,内容如下:
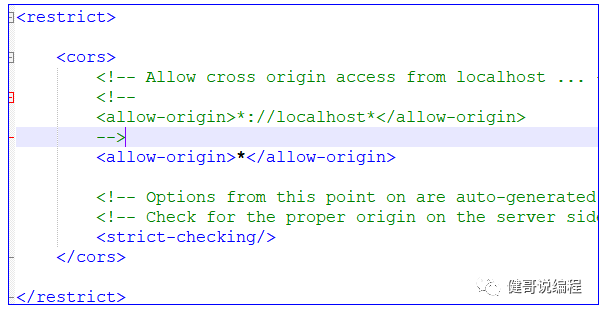
Jolokia-access.xml为访问控制配置文件,修改里面的内容,设置所有地址都可以访问(当然,如果是仅本机访问,则不需要配置),具体修改如下,就是将allow-origin修改为*即可:
现在就可以启动artemis了:
D:\a\mybroker\bin>artemis.cmd run
_ _ _
/ \ ____| |_ ___ __ __(_) _____
/ _ \| _ \ __|/ _ \ \/ | |/ __/
/ ___ \ | \/ |_/ __/ |\/| | |\___ \
/_/ \_\| \__\____|_| |_|_|/___
Apache ActiveMQ Artemis 2.14.0
2020-08-06 10:54:26,620 INFO [org.apache.activemq.artemis] AMQ241001: HTTP Server started at http://localhost:8161
2020-08-06 10:54:26,620 INFO [org.apache.activemq.artemis] AMQ241002: Artemis Jolokia REST API available at http://localhost:8161/console/jolokia
2020-08-06 10:54:26,621 INFO [org.apache.activemq.artemis] AMQ241004: Artemis Console available at http://localhost:8161/console
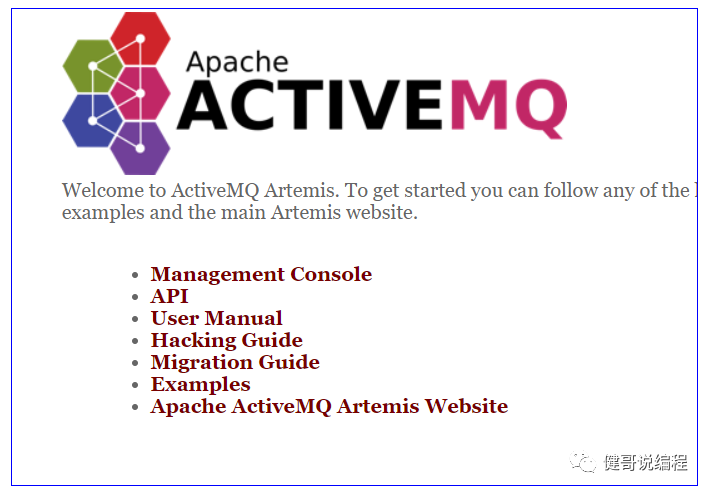
步4、访问console
访问地址 :http://localhost:8161/
然后点:Management Console
输入之前在create时指定的用户名artemis和密码123456登录:
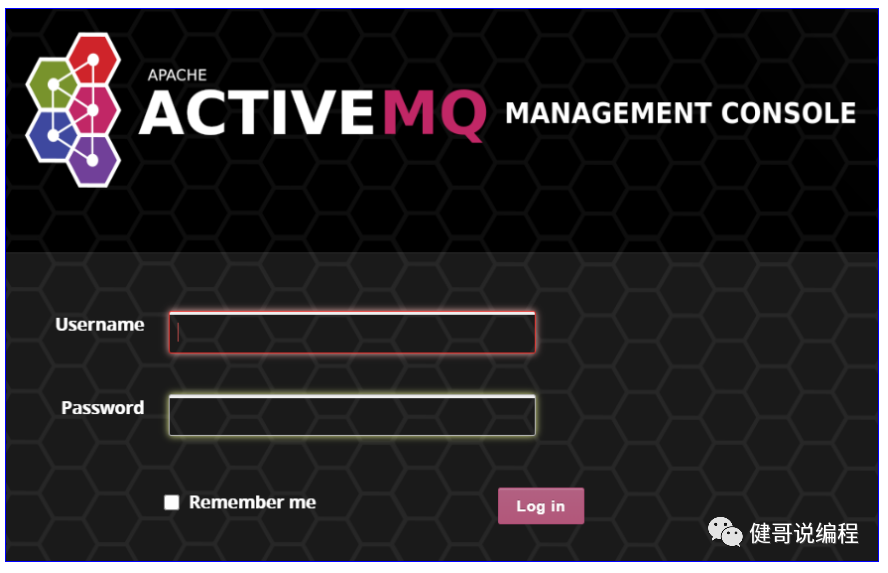
登录之后的界面如下:
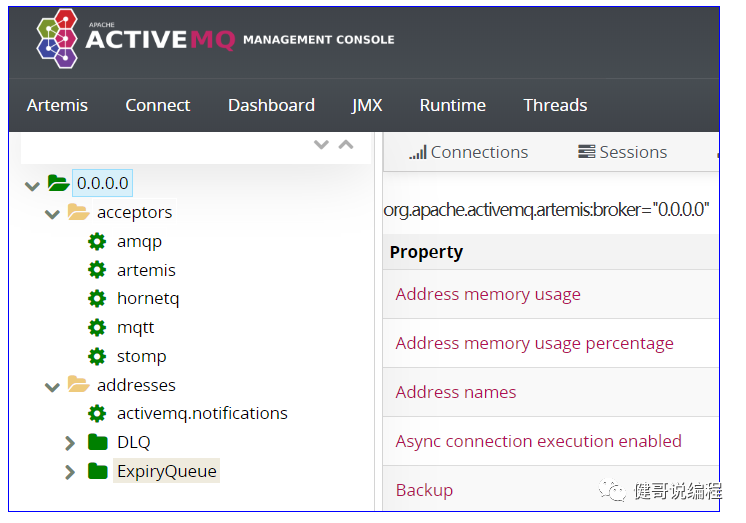
1、Management Console的基本用法
关于Management Console的相关学习,可以参考官网:
http://activemq.apache.org/components/artemis/documentation/latest/management-console.html
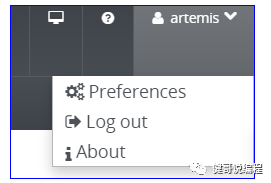
1、用户控制区
右上角为用户控制区:
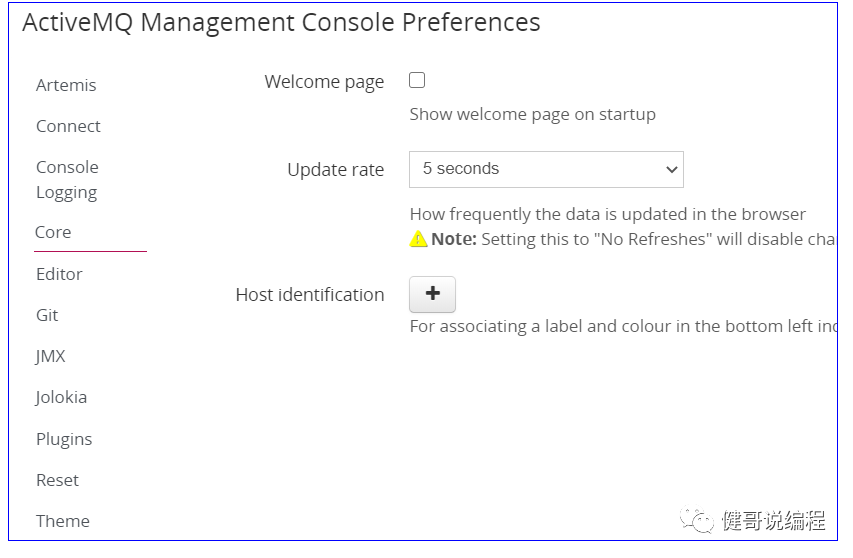
2、个人设置
在上图的用户控制区,点<Preferences>就可以查看它的设置:
3、address地址
可以在address上设置更多address。以下是官司方对address的解释:
Addresses
This expands to show the current configured available addresses.
Under the address you can expand to find the queues for the address exposing attributes
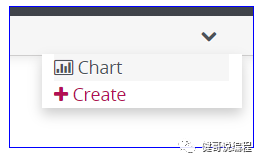
创建一个新的queue:
点address后,在右边可以找到创建:
然后就可以转入address的名称,并可以选择Routing Type,如下所示:
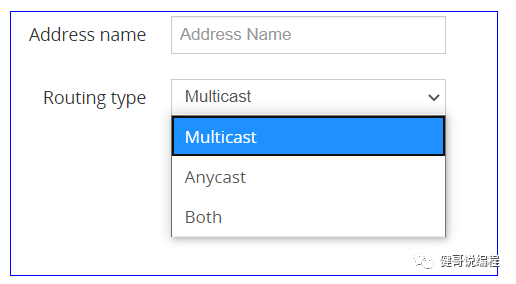
创建一anycast(发送的信息只能一个消费者收到)看上去类似于这样的效果:
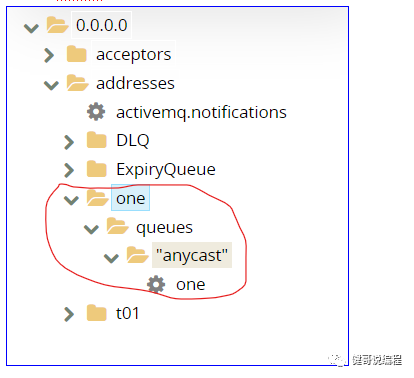
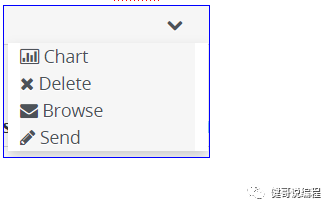
然后就可以选择anycast>one进行发信息了,点send发信息,点browser查看还没有被消费的信:
2、命令行创建消费和生产者
通过artems命令,可以创建消费和生产者。
通过artemis producer可以生产一些数据。
通过artemis consumer可以消费数据。
1、创建一个queue生产和消费示例
步1、创建一个消费者
创建一个消费者,并将读取到的数据写入到指定文件中:
D:\a\mybroker\bin>artemis.cmd consumer --data D:/a.txt --destination queue://myQueue --user artemis --password 123456
Connection brokerURL = tcp://localhost:61616
Consumer:: filter = null
Consumer ActiveMQQueue[myQueue], thread=0 wait until 1000 messages are consumed
参数说明:
Artemis consumer就是创建一个消费者。
--data <file>就是将读取到的数据保存到指定文件中。(注意,没有找到参数可以设置输出到控制台的)
--destination 指定queue的名或是topic的名称。
后面的参数,就是指定用户名和密码.
步2、创建生产者并直接发送数据
通过artemis procuder就可以创建生产者并发送一些数据:
D:\a\mybroker\bin>artemis.cmd producer --message "MyQueue Data" --message-count 1 --user artemis --password 123456 --destination queue://myQueue
Connection brokerURL = tcp://localhost:61616
Producer ActiveMQQueue[myQueue], thread=0 Started to calculate elapsed time ...
Producer ActiveMQQueue[myQueue], thread=0 Produced: 1 messages
Producer ActiveMQQueue[myQueue], thread=0 Elapsed time in second : 0 s
Producer ActiveMQQueue[myQueue], thread=0 Elapsed time in milli second : 26 milli seconds
--messsage 用于指定信息体
--message-count 用于指定此同样的信息,发送几次。
--user和--password是用于提定用户名和密码。
--destination用于指定队列的名称。
步3、查看数据
发送完成数据以后,就可以查看刚才consumer指定的数据文件D:/a.txt,您可以多次发送数据后再查看此文件中的内容:
<?xml version="1.0"?>
<messages>
<message id="3876" priority="4" expiration="0" timestamp="1596723016899" type="text" user-id="8dc641b8-d7ee-11ea-83bf-98af6542a5b8">
<properties>
<property name="__AMQ_CID" value="8dc02735-d7ee-11ea-83bf-98af6542a5b8" type="simple-string"/>
<property name="_AMQ_ROUTING_TYPE" value="1" type="byte"/>
<property name="count" value="0" type="integer"/>
<property name="ThreadSent" value="Producer ActiveMQQueue[myQueue], thread=0" type="simple-string"/>
</properties>
<body>
<![CDATA[MyQueue Data]]>
</body>
</message>
<message id="3963" priority="4" expiration="0" timestamp="1596723237843" type="text" user-id="1177a2fa-d7ef-11ea-b4fe-98af6542a5b8">
<properties>
<property name="__AMQ_CID" value="11718877-d7ef-11ea-b4fe-98af6542a5b8" type="simple-string"/>
<property name="_AMQ_ROUTING_TYPE" value="1" type="byte"/>
<property name="count" value="0" type="integer"/>
<property name="ThreadSent" value="Producer ActiveMQQueue[myQueue], thread=0" type="simple-string"/>
</properties>
<body>
<![CDATA[这是一些中文数据]]>
</body>
</message>
最后:
最后,请注意,在queue/anycast下,如果有多个消费者,只会有一个消费者可以接收到信息。
您可以打开多个consumer进行测试。
