


Orchestrator是一款开源的MySQL复制拓扑管理工具,采用go语言编写,支持MySQL主从复制拓扑关系的调整、支持MySQL主库故障自动切换、手动主从切换等功能。
Orchestrator后台依赖于MySQL或者SQLite存储元数据,能够提供Web界面展示MySQL集群的拓扑关系及实例状态,通过Web界面可更改MySQL实例的部分配置信息,同时也提供命令行和api接口,以便更加灵活的自动化运维管理。
相比于MHA,Orchestrator更加偏重于复制拓扑关系的管理,能够实现MySQL任一复制拓扑关系的调整,并在此基础上,实现MySQL高可用,另外Orchestrator自身可以部署多个节点,通过raft分布式一致性协议,保证自身的高可用。
环境说明
| 后台管理节点 | 被监测MYSQL集群 | |
| IP | 11.11.10.10 | 11.21.193.85:3358 11.42.210.106:3358 |
| 操作系统 | CentOS 7.2 | CentOS 7.2 |
| Orchestrator | orchestrator-3.1.2-1.x86_64.rpm orchestrator-cli-3.1.2-1.x86_64.rpm orchestrator-client-3.1.2-1.x86_64.rpm | |
| MYSQL版本 | 5.7 | 5.6+,开启GTID复制 |
后台管理节点
CentOS Linux release 7.2以上,不然可能会出现缺少依赖包。
安装MySQL数据库,在启动Orchestrator程序的时候,会自动在数据库里创建orchestrator数据库,保存orchestrator的一些数据信息。
下载安装包
服务包wgethttps://github.com/github/orchestrator/releaseswget https://github.com/github/orchestrator/releases/download/v3.1.2/orchestrator-3.1.2-1.x86_64.rpm二进制命令wgethttps://github.com/github/orchestrator/releases/download/v3.1.2/orchestrator-cli-3.1.2-1.x86_64.rpm命令行工具https://github.com/github/orchestrator/releases/download/v3.1.2/orchestrator-client-3.1.2-1.x86_64.rpm
安装
[root@localhost ~]# rpm -ivh orchestrator-*Preparing... ################################# [100%]Updating / installing... 1:orchestrator-cli-1:3.1.2-1 ################################# [100%]Preparing... ################################# [100%]Updating / installing... 1:orchestrator-1:3.1.2-1 ################################# [100%]
安装后会在/usr/local下生成orchestrator目录,包含以下文件和目录:
| orchestrator-sample-sqlite.conf.json | 采用SQLite库模板 |
| orchestrator-sample.conf.json | 默认的配置模板 |
| orchestrator | 应用程序 |
| resources | orchestrator相关的文件:client、web、伪GTID等相关文件 |
创建后台管理节点的库和用户
CREATE DATABASE IF NOT EXISTS orchestrator;GRANT ALL PRIVILEGES ON `orchestrator`.* TO 'orc_server_user'@'%' IDENTIFIED BY 'server_passwd';
被监测的MYSQL授权
GRANT SUPER, PROCESS, REPLICATION SLAVE, RELOAD ON *.* TO 'orc_client_user'@'%' IDENTIFIED BY 'client_passwd';
修改配置文件
cp orchestrator-sample.conf.json orchestrator.conf.json
"Debug": false, #设置Debug方式"EnableSyslog": false, #是否把日志输出到系统日志里"ListenAddress": ":3000", #web端口"MySQLTopologyUser": "orc_client_user", #被监测的MYSQL实例用户"MySQLTopologyPassword": "client_passwd", #被监测的MYSQL实例密码"MySQLOrchestratorHost": "11.11.10.10", #后台管理主机"MySQLOrchestratorPort": 3306, #后台管理库端口"MySQLOrchestratorDatabase": "orchestrator", #后台管理库名"MySQLOrchestratorUser": "orc_server_user", #后台管理库用户"MySQLOrchestratorPassword": "server_passwd", #后台管理库密码"MySQLHostnameResolveMethod": "@@report_host",#解析主机名方式"DetectClusterAliasQuery": "SELECT concat(@@report_host,':',@@port)", #集群别名
配置参数解释:Orchestrator配置说明
启动
/usr/local/orchestrator/orchestrator -config=/usr/local/orchestrator/orchestrator.conf.json http &
查看端口
netstat -nltp|grep 3000tcp6 0 0 :::3000 :::* LISTEN 574969/orchestrator
命令行注册集群
orchestrator -config=/usr/local/orchestrator/orchestrator.conf.json -c discover -i 192.168.1.2:3306
命令行查看集群
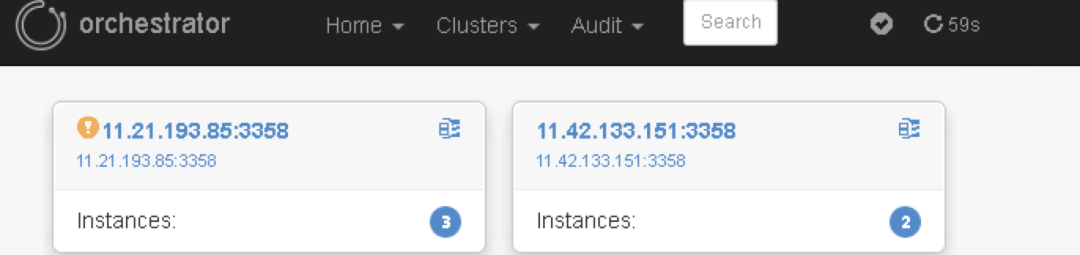
orchestrator -c clusters
通过web访问
http://11.11.10.10:3000
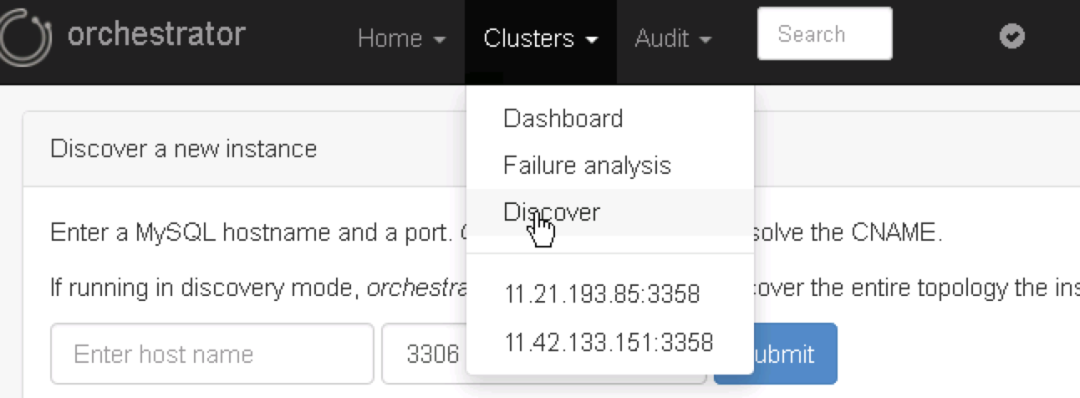
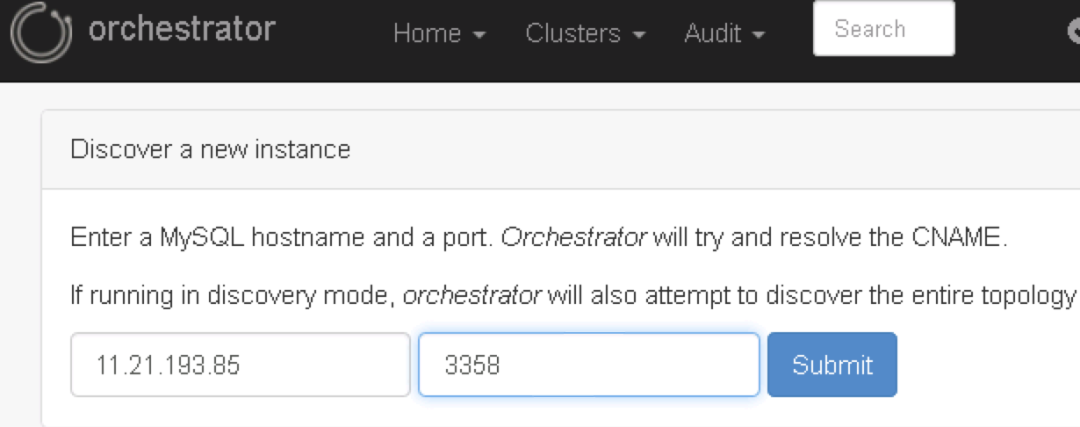
页面中discover
查看集群架构
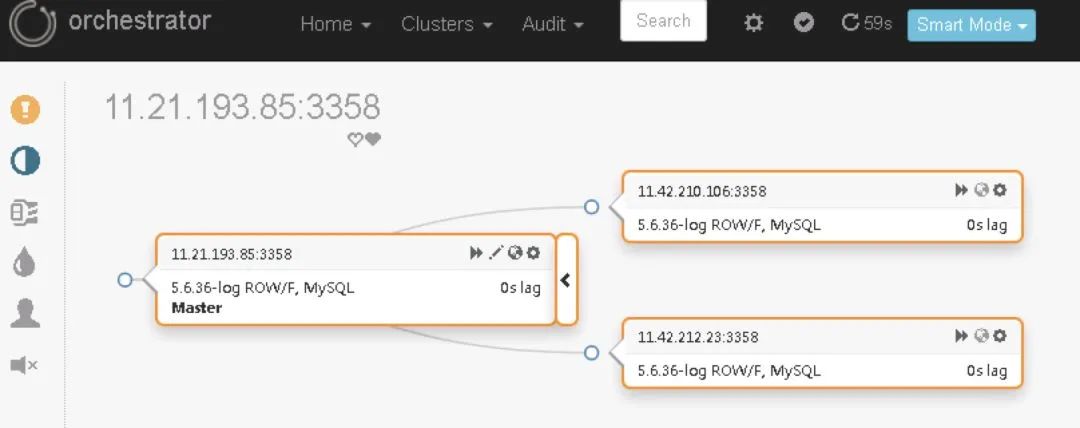
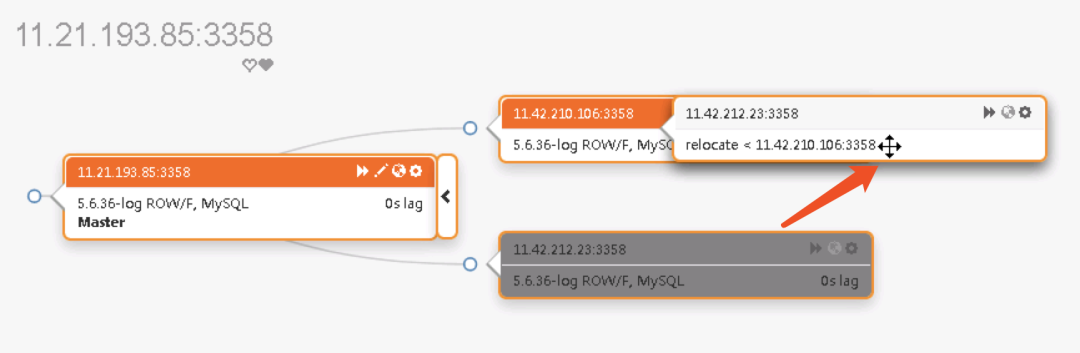
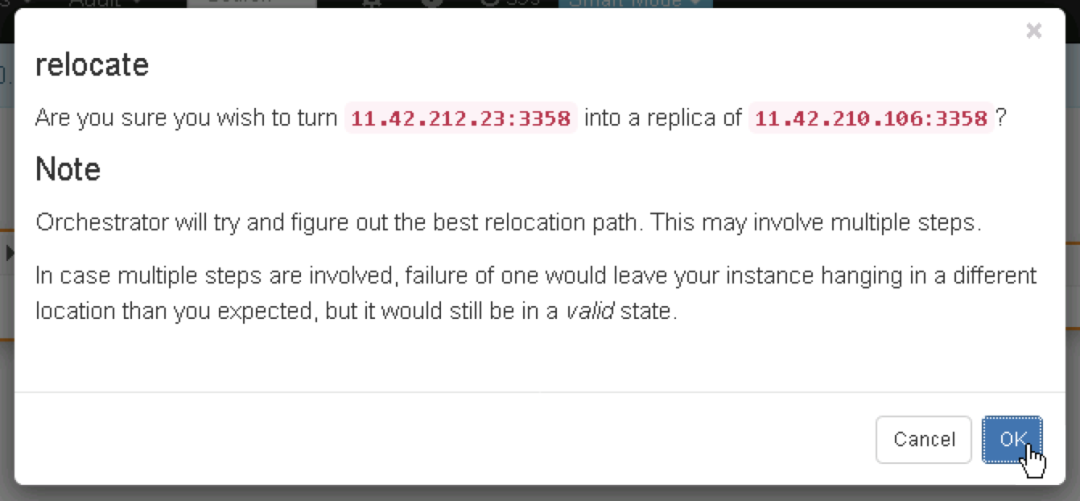
拖动更改架构


—完—
文章转载自MYSQL轻松学,如果涉嫌侵权,请发送邮件至:contact@modb.pro进行举报,并提供相关证据,一经查实,墨天轮将立刻删除相关内容。
