


声明:本栏目所使用的素材都是凯哥学堂VIP学员所写,学员有权匿名,对文章有最终解释权;凯哥学堂旨在促进VIP学员互相学习的基础上公开笔记。
在web工程里配置SpringMVC
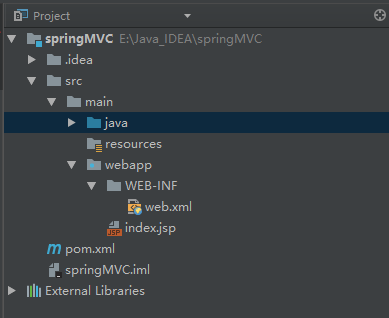
首先创建一个Maven的Web工程:
在pom.xml文件里配置如下依赖:
    <dependencies>
        <dependency>
            <groupId>org.springframework</groupId>
            <artifactId>spring-context</artifactId>
            <version>4.3.14.RELEASE</version>
        </dependency>
        <dependency>
            <groupId>org.springframework</groupId>
            <artifactId>spring-webmvc</artifactId>
            <version>4.3.14.RELEASE</version>
        </dependency>
        <dependency>
            <groupId>javax</groupId>
            <artifactId>javaee-api</artifactId>
            <version>7.0</version>
            <scope>provided</scope>
        </dependency>
        <dependency>
            <groupId>javax.servlet</groupId>
            <artifactId>jstl</artifactId>
            <version>1.2</version>
        </dependency>
    </dependencies>
然后在resource目录下创建spring的配置文件,配置内容如下:
<?xml version="1.0" encoding="UTF-8"?>
<beans xmlns="http://www.springframework.org/schema/beans"
       xmlns:xsi="http://www.w3.org/2001/XMLSchema-instance"
       xmlns:context="http://www.springframework.org/schema/context"
       xmlns:mvc="http://www.springframework.org/schema/mvc"
       xsi:schemaLocation="http://www.springframework.org/schema/beans http://www.springframework.org/schema/beans/spring-beans.xsd http://www.springframework.org/schema/context http://www.springframework.org/schema/context/spring-context.xsd http://www.springframework.org/schema/mvc http://www.springframework.org/schema/mvc/spring-mvc.xsd">
    <context:annotation-config/>
    <context:component-scan base-package="org.zero01.test"/>
    <mvc:annotation-driven/>
</beans>
接着就是配置SpringMVC的前端控制器:DispatcherServlet,这个Servlet需要在web.xml中配置,配置内容如下:
<?xml version="1.0" encoding="UTF-8"?>
<web-app xmlns="http://java.sun.com/xml/ns/javaee"
         xmlns:xsi="http://www.w3.org/2001/XMLSchema-instance"
         xsi:schemaLocation="http://java.sun.com/xml/ns/javaee
          http://java.sun.com/xml/ns/javaee/web-app_3_0.xsd"
         version="3.0">
    <!-- 配置DispatcherServlet在服务器启动时加载,以及其初始化参数 -->
    <servlet>
        <servlet-name>dispatcherServlet</servlet-name>
        <servlet-class>org.springframework.web.servlet.DispatcherServlet</servlet-class>
        <init-param>
            <param-name>contextConfigLocation</param-name>
            <param-value>classpath:applicationContext.xml</param-value>
        </init-param>
        <load-on-startup>1</load-on-startup>
    </servlet>
    <servlet-mapping>
        <servlet-name>dispatcherServlet</servlet-name>
        <!-- 注意,这里不能写/*,不然会把jsp给匹配了,导致无法访问jsp -->
        <url-pattern>/</url-pattern>
    </servlet-mapping>
</web-app>
最后编写一个测试类,用于测试SpringMVC是否能够正常把请求传递到控制器上:
package org.zero01.test;
import org.springframework.stereotype.Controller;
import org.springframework.web.bind.annotation.RequestMapping;
// 控制器注解,声明这是一个控制器
@Controller
public class Test {
    // 处理器映射注解,映射URL访问名称
    @RequestMapping("/test.do")
    public void method(){
        System.out.println("This is a test output");
    }
}
在浏览器里访问 http://localhost:8080/test.do 后,控制台输出内容如下:
This is a test output
除了以上这种通过web.xml文件配置SpringMVC之外,我们还可以通过Java类来进行配置,不过这种配置方式要求Web3.0以上的版本才行。以下简单介绍一下这种基于Java类的配置方式:
首先把之前在web.xml里配置的内容注释掉,然后创建一个Java类:
package org.zero01.test;
import org.springframework.web.servlet.support.AbstractAnnotationConfigDispatcherServletInitializer;
public class WebAppInitial extends AbstractAnnotationConfigDispatcherServletInitializer{
    protected Class<?>[] getRootConfigClasses() {
        // 指定根配置类
        return new Class[]{RootConfig.class};
    }
    protected Class<?>[] getServletConfigClasses() {
        // 指定配置类
        return new Class[]{WebConfig.class};
    }
    protected String[] getServletMappings() {
        // 将DispatcherServlet映射到 "/" 上
        return new String[]{"/"};
    }
}
编写配置类:
package org.zero01.test;
import org.springframework.context.annotation.ComponentScan;
import org.springframework.context.annotation.Configuration;
import org.springframework.web.servlet.config.annotation.EnableWebMvc;
import org.springframework.web.servlet.config.annotation.WebMvcConfigurerAdapter;
@Configuration
@EnableWebMvc  // 启动SpringMVC
@ComponentScan("org.zero01.test")  // 启动组件扫描
public class WebConfig extends WebMvcConfigurerAdapter{
}
编写根配置类:
package org.zero01.test;
import org.springframework.context.annotation.ComponentScan;
import org.springframework.context.annotation.Configuration;
import org.springframework.context.annotation.FilterType;
import org.springframework.web.servlet.config.annotation.EnableWebMvc;
@Configuration
@ComponentScan(basePackages = {"org.zero01.test"}, excludeFilters = {
        @ComponentScan.Filter(type = FilterType.ANNOTATION, value = EnableWebMvc.class)
})
public class RootConfig {
}
控制器类和之前一样,重启服务器访问 http://localhost:8080/test.do 后,控制台输出内容如下:
This is a test output
如上,介绍了两种配置SpringMVC的方式,不过这样我们只能算是完成了最基本、最简单的配置,其中还有视图、视图解析器等还没有进行配置,这些到下一篇再进行介绍。
文章转载自凯哥学堂,如果涉嫌侵权,请发送邮件至:contact@modb.pro进行举报,并提供相关证据,一经查实,墨天轮将立刻删除相关内容。
