


今天给各位带来一个新的 Spring 组件 , Spring Cloud Stream
用官方文档解释 Spring Cloud Stream is a framework for building message-driven microservice applications. Spring Cloud Stream builds upon Spring Boot to create standalone, production-grade Spring applications and uses Spring Integration to provide connectivity to message brokers
, 译文Spring Cloud Stream是用于构建消息驱动的微服务应用程序的框架。Spring Cloud Stream基于Spring Boot来创建独立的生产级Spring应用程序,并使用Spring Integration提供与消息代理的连接。
,
通俗解释 , Spring Cloud Stream
对 Spring Integration (以前文章提过不再赘述)
做了封装 , 提供了多家消息中间件的内置配置 , 隐藏了具体执行代码的中间件厂商 。几乎所有的消息中间件分为 发送消息 、接收消息 , 只是各自厂商执行的代码不同 , 通过 Spring 的配置可切换不同的中间件厂商 ,从而只用关注 Spring Cloud Stream
层面
需求环境要求安装 kafka | rabbitMQ
任选其一或都可安装 , 安装过程不再讲解贴出链接参考 , 下面直接建立项目演示 , 项目中用 kafka
演示 , gradle
搭建(用 maven 的不影响)
kafka: https://blog.csdn.net/no_can_no_bb_/article/details/85232790
rabbitMQ: https://blog.csdn.net/newbie_907486852/article/details/79788471
创建 Spring Boot 项目 , 依赖如下
    implementation 'org.springframework.cloud:spring-cloud-stream'
    testImplementation 'org.springframework.cloud:spring-cloud-stream-test-support'
    compile 'org.springframework.cloud:spring-cloud-starter-stream-kafka'
    compile 'org.springframework.boot:spring-boot-starter-web'
既然是 Spring Cloud Stream 用 Kafka 的消息渠道来做消息的发送那就是整合 Kafka , 下面是整合 Kafka 的配置文件 , 演示需要 , 消息发送和接收就在同一个项目上运行 , 安装 Kafka 的可以开启消费者窗口查看自己演示结果
spring:
  application:
    name: test-stream
  cloud:
    stream:
      default-binder: kafka #绑定默认的消息中间件
      bindings:
        input:
          destination: test #绑定消息的输入通道的主题(订阅等 , 不同的消息中间件叫法不同 , 同下)
        output:
          destination: test #绑定消息的输出通道的主题(...)
      kafka:
        binder:
          brokers: localhost:9092  #zookeeper 服务器地址
          replication-factor: 1    #主题的副本数量 , 不能超过 zookeeper 的服务器数量
          auto-create-topics: true #是否开启自动创建主题
server:
  port: 8085 #tomcat 端口
创建一个类来表示消息的发送者
package com.ys.teststresm;

import org.springframework.beans.factory.annotation.Autowired;
import org.springframework.cloud.stream.messaging.Source;
import org.springframework.messaging.support.MessageBuilder;
import org.springframework.stereotype.Component;

/**
 * @author 云生何处不见风
 * @version 1.0
 * @date 2019/11/15 10:45
 * @singature 自古风云出我辈 , 一入江湖代码催
 * @description todo
 */
@Component
public class TestStream
{
    /**
     * Spring Cloud Stream 内置的 Sink 、Source 、Processor 三个消息通道(输入或输出或兼具)
     */
    @Autowired
    private Source source;


    void send(String str){
        source.output().send(MessageBuilder.withPayload(str).build());
    }
}
好了 , 创建了发送者我们再来建立一个 Controller , 更方便的看到消息的发送
package com.ys.teststresm;

import org.springframework.beans.factory.annotation.Autowired;
import org.springframework.cloud.stream.annotation.StreamListener;
import org.springframework.cloud.stream.messaging.Processor;
import org.springframework.web.bind.annotation.PathVariable;
import org.springframework.web.bind.annotation.RequestMapping;
import org.springframework.web.bind.annotation.RestController;

/**
 * @author 云生何处不见风
 * @version 1.0
 * @date 2019/11/15 10:53
 * @singature 自古风云出我辈 , 一入江湖代码催
 * @description todo
 */
@RestController
public class TestController
{
    /**
     * 自动注入创建的 消息发送者 类
     */
    @Autowired
    private TestStream testStream;

    /**
    * 访问发送消息
    * {s} 为访问路径携带的变量
    */
    @RequestMapping("/t/{s}")
    public String test(@PathVariable String s)
    {
        testStream.send(s);
        return "ok";
    }

    /**
     * 注解 @StreamListener(Processor.OUTPUT) 为 Spring Cloud Stream 的消息监听器 , 参数为要监听的输入通道或输出通道
     * @param str 传递的消息
     */
    @StreamListener(Processor.OUTPUT)
    private void monitor(String str){
        System.out.println("监听到消息:" + str);
    }
}
附上启动类
package com.ys.teststresm;

import org.springframework.boot.SpringApplication;
import org.springframework.boot.autoconfigure.SpringBootApplication;
import org.springframework.cloud.stream.annotation.EnableBinding;
import org.springframework.cloud.stream.messaging.Processor;

/**
 * @author 云生何处不见风
 */
@SpringBootApplication
@EnableBinding(Processor.class)
public class TestStreamApplication {
    public static void main(String[] args) {
        SpringApplication.run(TestStreamApplication.class, args);
    }
}
项目启动之前必须启动 Zookeeper 和 Kafka 服务 , Kafka 为消息队列运行在 Zookeeper 环境
项目启动好后 , 访问 localhost:8085/t/hello
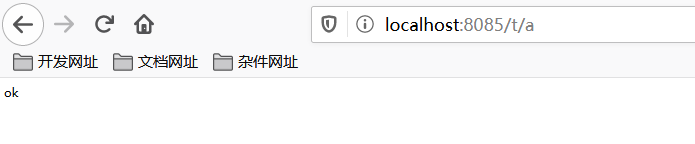
看到访问成功 , 接着看下控制台输出
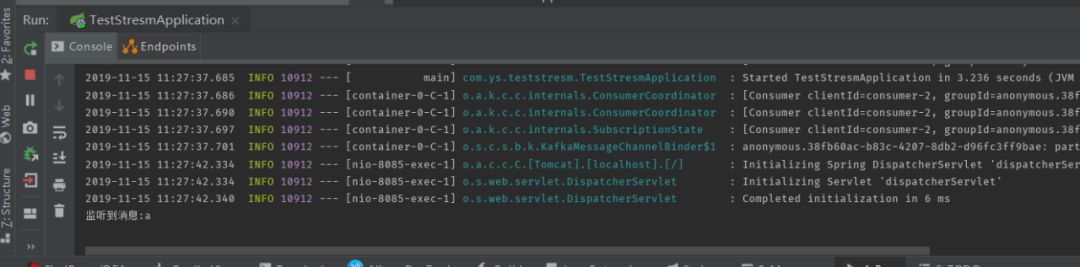
Spring Cloud Stream
也已经监听到输出通道中的消息
至此Spring Cloud Stream
整合kafka
已经完毕 , 以上只是最简单方便的一种整合方式 , 有兴趣的同学可以查看官网 , Spring Cloud Stream
可以整合大部分消息中间件 , Spring Cloud Stream
封装了 Spring Boot 和 Spring integration
从而屏蔽中间件只关注于某个层面(Spring Cloud Stream 定义的规范)
就可进行系统间的轻量级通信(相对), 从而可以看出 Spring integration
支持的协议、中间件等Spring Cloud Stream
大都会都会支持
有没有同学觉得 Spring Cloud Stream
有什么用 , 这个组件定义了规范来规定消息如何发送接收 , 具体的代码实现交由中间件厂商实现 , 再两个系统之间互相通信而消息中间件不同的情况下如何通信呢 ? Spring Cloud Stream
解决了这个问题(包括不限于) , 消息的发送和接收的规范都用我定义好的 , 至于发送和接受的中间件交给配置文件中的中间件厂商信息(个人理解 , 有误私信)
有兴趣的同学可以结合官网或上方的简单示例进一步的开发 , 今天的技能点同学们觉得怎么样? 欢迎留言讨论 ,下期再见 (有疑问或觉得文章有问题的同学可以产教融合班 QQ 群中回复 , 或私信我 QQ:930565758)
