


1. 部署环境
| IP | 主机名 | 组件 | 系统 | 配置 |
|---|---|---|---|---|
| 172.30.0.6 | tbase01 | cn gtm osscenter tstudio Etcd | centos 7.8 | 8c16g + 150g |
| 172.30.0.10 | tbase02 | cn gtm osscenter confdb Alarm | centos 7.8 | 8c16g + 150g |
| 172.30.0.12 | tbase03 | dn | centos 7.8 | 8c16g + 150g |
| 172.30.0.14 | tbase04 | dn | centos 7.8 | 8c16g + 150g |
2.环境准备
2.1. 测试磁盘随机写入性能
使用dd测试磁盘的随机写入性能
[root@tbase01 data]# time dd if=/dev/zero of=test bs=8k count=51200 oflag=dsync
51200+0 records in
51200+0 records out
419430400 bytes (419 MB) copied, 116.432 s, 3.6 MB/s

real    1m56.435s
user    0m0.252s
sys     0m4.980s
2.2. 配置时间服务器
服务器为云主机,已经配置好ntp服务器。
[root@tbase01 ~]# cat /etc/ntp.conf | grep -v '^#' | grep -v '^$'
driftfile /var/lib/ntp/drift
restrict default nomodify notrap nopeer noquery
restrict 127.0.0.1
restrict ::1
includefile /etc/ntp/crypto/pw
keys /etc/ntp/keys
disable monitor
server time1.tencentyun.com iburst
server time2.tencentyun.com iburst
server time3.tencentyun.com iburst
server time4.tencentyun.com iburst
server time5.tencentyun.com iburst
interface ignore wildcard
interface listen eth0
2.3. 关闭selinux, 防火墙
[root@tbase01 ~]# cat /etc/selinux/config  | grep -v '^#' | grep -v '^$'
SELINUX=disabled
SELINUXTYPE=targeted
[root@tbase01 ~]# systemctl stop firewalld
[root@tbase01 ~]# systemctl disable firewalld
2.4. 修改limits.conf参数
# vim /etc/security/limits.conf
#准许单个用户打开文件数
* soft nofile 655350
* hard nofile 655350
#准放单个用运行的进程数
* soft nproc 655350
* hard nproc 655350
#限制内核文件的大小
* soft core unlimited
* hard core unlimited
# rm /etc/security/limits.d/* -f
2.5. 修改内核参数
# vim /etc/sysctl.conf
kernel.msgmnb = 65536
kernel.msgmax = 65536
kernel.shmall = 4294967296
kernel.shmmax=137438953472
kernel.shmmni = 4096
kernel.sem = 50100 64128000 50100 1280 fs.file-max = 6553600
fs.aio-max-nr = 1048576
net.ipv4.ip_local_port_range = 32768 65535
net.ipv4.tcp_keepalive_time = 60
net.ipv4.tcp_keepalive_probes = 6 net.ipv4.tcp_keepalive_intvl = 10
net.ipv6.conf.all.forwarding=1
net.ipv4.ip_forward=1
vm.dirty_background_bytes = 102400000
vm.dirty_background_ratio = 5
vm.dirty_ratio = 10 vm.min_free_kbytes = 262144
kernel.core_pattern = core.%p
2.6. 修改system.conf
# vim /etc/systemd/system.conf
DefaultLimitCORE=infinity
DefaultLimitNOFILE=131072
DefaultLimitNPROC=131072
生效
# systemctl daemon-reexec
2.7. 确认/dev/shm内存盘已经挂载
tbase实例启动时需要创建内存段,必须挂载tmpfs到/dev/shm
[root@tbase01 ~]# df -h
Filesystem      Size  Used Avail Use% Mounted on
devtmpfs        7.6G     0  7.6G   0% /dev
tmpfs           7.6G   24K  7.6G   1% /dev/shm
tmpfs           7.6G  536K  7.6G   1% /run
tmpfs           7.6G     0  7.6G   0% /sys/fs/cgroup
/dev/vda1        79G  3.3G   73G   5% /
tmpfs           1.6G     0  1.6G   0% /run/user/0
2.8. 修改OS编码和umask
# 确保字符集是en_US.utf8 :
[root@tbase01 ~]# echo $LANG
en_US.utf8
# 如果不是,在/etc/profile中设置环境变量
[root@tbase01 ~]# echo "export LANG=en_US.utf8" >> /etc/ptofile

# 确保umask是0022
[root@tbase01 ~]# umask
0022
# 如果不是,在/etc/profile中定义
[root@tbase01 ~]# echo "umask 0022" >> /etc/ptofile
2.9. 关闭swap
[root@tbase01 ~]# swapoff -a
[root@tbase01 ~]# free -g
              total        used        free      shared  buff/cache   available
Mem:             15           0          12           0           2          14
Swap:             0           0           0
3. tbase软件部署
3.1. 上传并解压包
[root@tbase01 data]# pwd
/data
[root@tbase01 data]# tar -zxf Centos7.tar.gz
[root@tbase01 data]# mv tbase_pgxz-5.06.4.4-i.x86_64.rpm /data/Centos7/tbase_mirror/pgxzm/
[root@tbase01 data]# mv tbase_oss-2.15.21.0-i.x86_64.rpm /data/Centos7/tbase_mirror/pgxzm/
[root@tbase01 data]# ll /data/Centos7/tbase_mirror/pgxzm/
total 701012
-rw-r--r-- 1  501 games   5421772 Jul 28  2022 pgxzm_confdb-9.6.2-1.x86_64.rpm
-rw-r--r-- 1  501 games 141824252 Jul 28  2022 pgxzm_jdk-7-60.x86_64.rpm
-rw-r--r-- 1  501 games  34265888 Jul 28  2022 pgxz_monitor_alarm_service-1.0.6-1.noarch.rpm
-rw-r--r-- 1  501 games  19364992 Jul 28  2022 pgxz_monitor_web_service-1.0.2-1.noarch.rpm
-rw-r--r-- 1 root root   57552772 Jul 21 10:07 tbase_oss-2.15.21.0-i.x86_64.rpm
-rw-r--r-- 1 root root  391065072 Jul 21 10:02 tbase_pgxz-5.06.4.4-i.x86_64.rpm
-rw-r--r-- 1  501 games   3167700 Jul 28  2022 tbase_zookeeper-3.4.12-i.x86_64.rpm
-rw------- 1  501 games  65163048 Jul 28  2022 tstudio-0-1.6.1.x86_64.rpm
3.2. 配置安装选项
[root@tbase01 conf]# pwd
/data/Centos7/tbase_mgr/conf
[root@tbase01 conf]# cat role.info
#eth ip ssh_port idc_name root password role( OssCenterMaster OssCenterSlave OssAgent Confdb Alarm TStudio Etcd)
#Notice: The machine that will be installed OssCenterMaster or OssCenterSlave can't be installed OssAgent

eth0 172.30.0.6  22 idc_1 root xxxxxx OssCenterMaster|TStudio|Etcd
eth0 172.30.0.10 22 idc_1 root xxxxxx OssCenterSlave|Confdb|Alarm
eth0 172.30.0.12 22 idc_1 root xxxxxx OssAgent
eth0 172.30.0.14 22 idc_1 root xxxxxx OssAgent
3.3. 运行安装程序
[root@tbase01 tbase_mgr]# pwd
/data/Centos7/tbase_mgr
[root@tbase01 tbase_mgr]# ./tbase_mgr.sh install
[ 2023-07-21 10:16:29 ] [ do_install ] for user root, through script tbase_mgr_root.sh
find: ‘%shellLocation/’: No such file or directory

Hey, Welcome and now we will install TBase OSS by the flowing steps:

        0.  Check role configuration read from conf/role.info ...

        1.  Install some base rpm packages such as dos2unix/createrepo/expect and so on ...

        2.  Check root password and do some initalization on all machines read from conf/role.info ...

······

        12. Now start to write etcd keys ...

        13. Now start to install TStudio ...


##################################################
#                                                #
#            ^_^ Congratulations ^_^             #
#                                                #
##################################################


Successed to install TBase OSS, visit http://172.30.0.6:8080 to continue ...


Failed to install TStudio, but doesn't affect to use, you can install it after by yourself
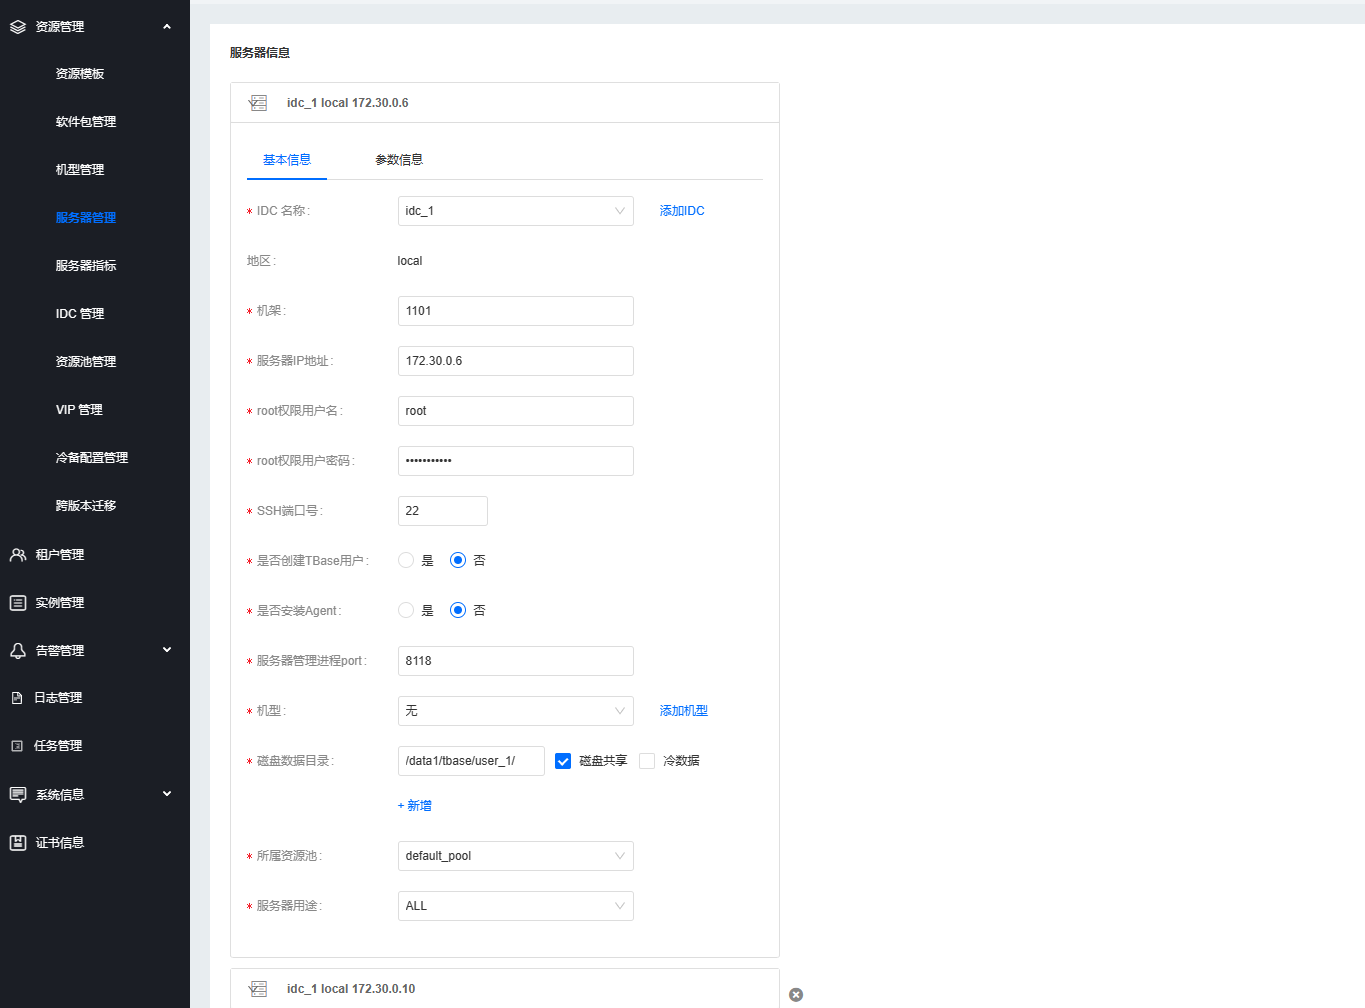
3.4. 添加服务器
admin用户进入管控,添加4台服务器。
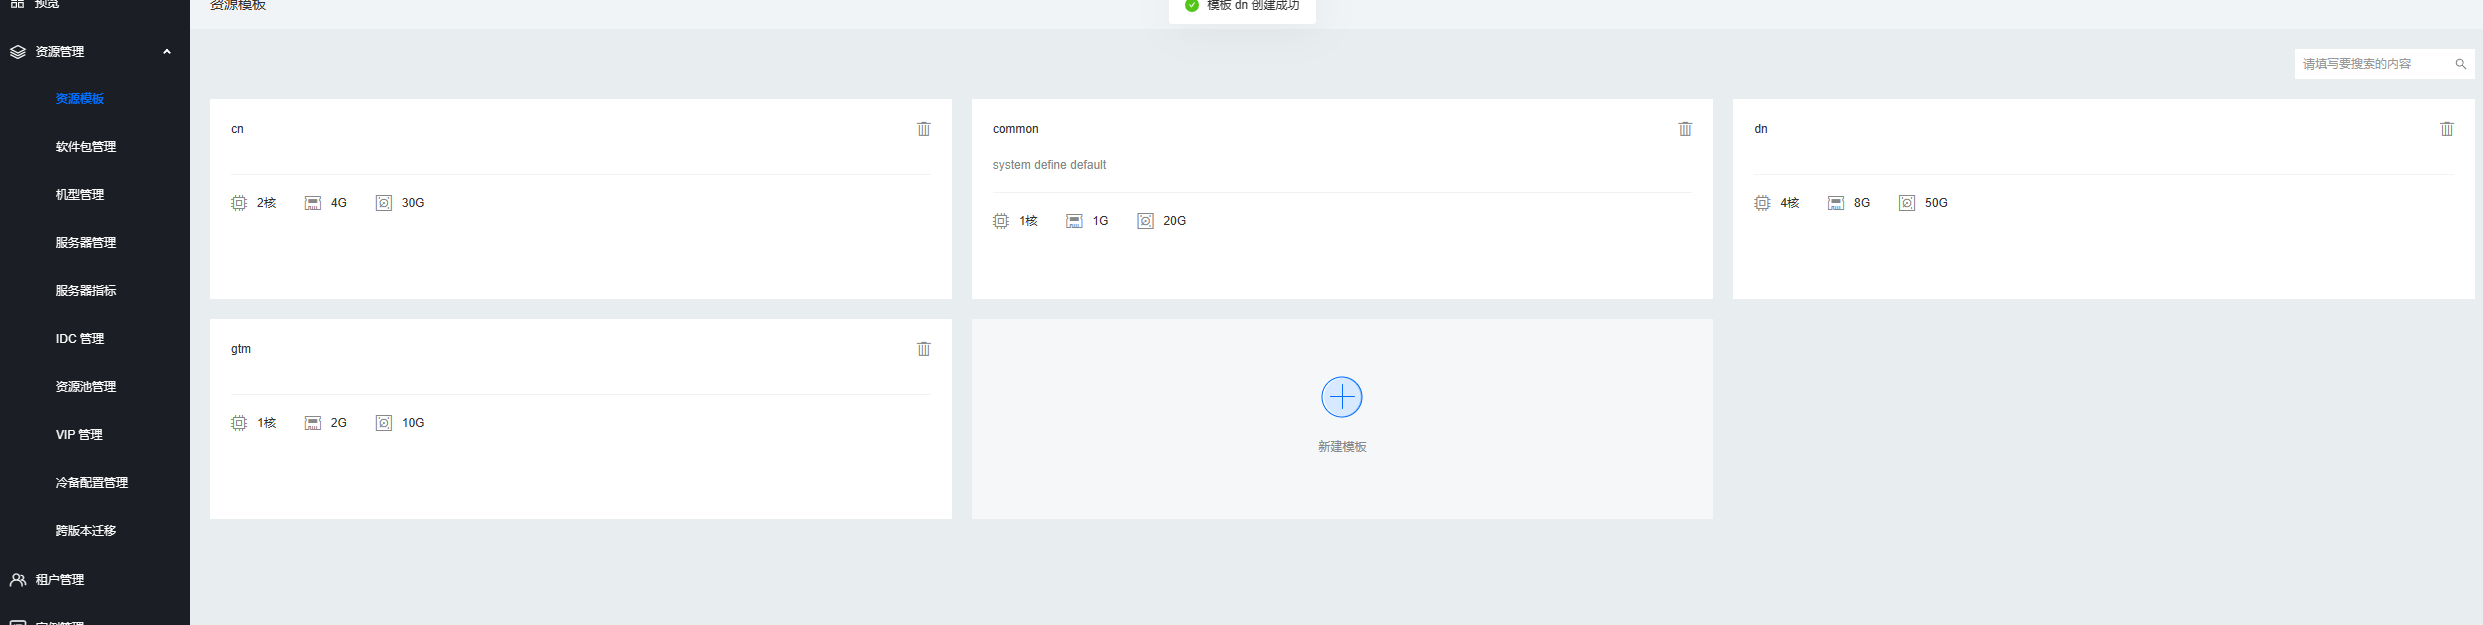
3.5. 创建资源模版
分别创建dn,cn,gtm的资源模版
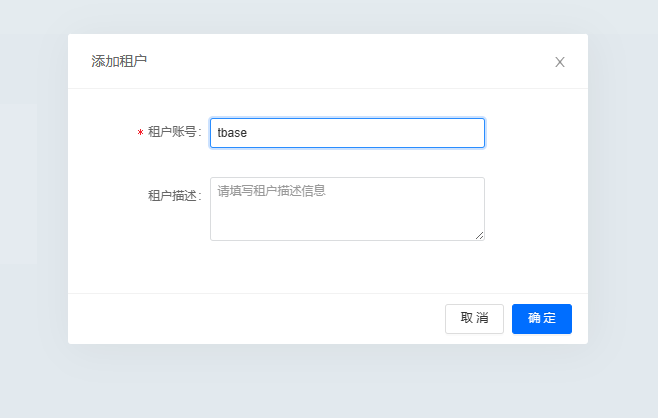
3.6.添加租户
3.7. 添加实例
登录刚才创建的租户,添加实例

3.8. 审批实例
admin用户审批实例

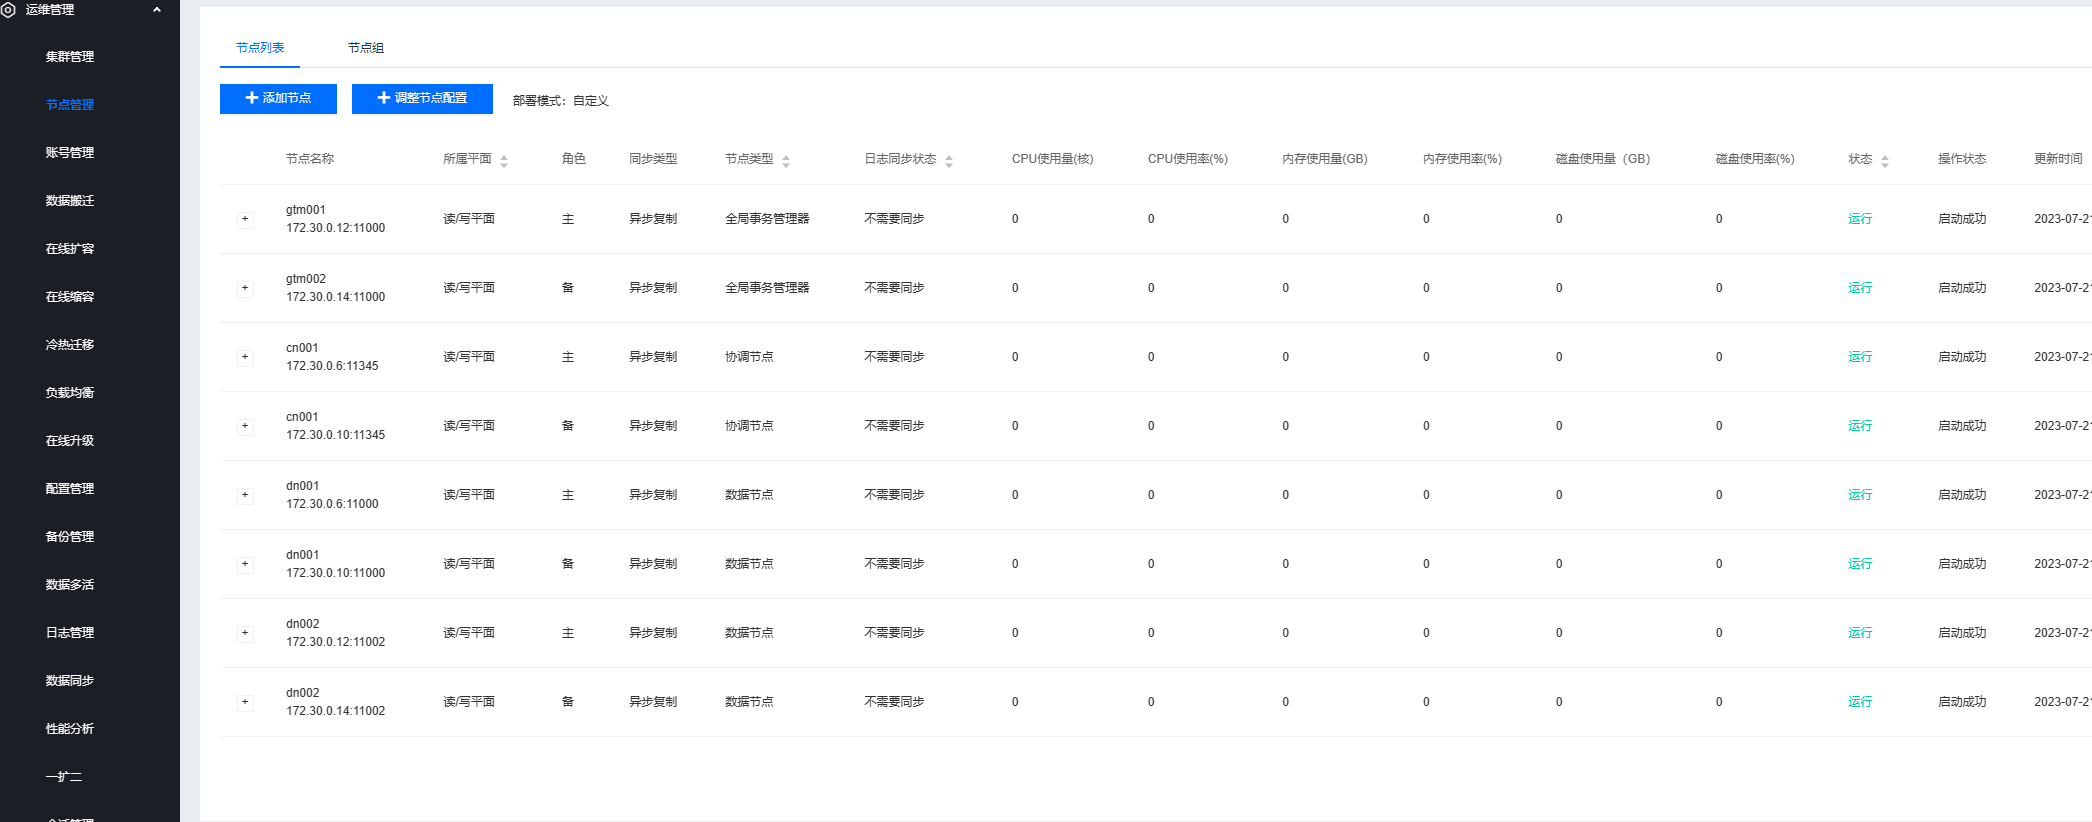
3.9. 查看实例
登录实例管理员tbase_admin查看节点
3.10. 创建默认的default group
使用tbase前,需要配置数据表默认分布的数据节点(DN),下面创建一个default group
## 配置运行环境变量
[tbase@tbase01 ~]$ export PATH=/data1/tbase/user_1/tdata_01/test_2/5.06.4.4/install/tbase_pgxz/bin:$PATH;export LD_LIBRARY_PATH=/data1/tbase/user_1/tdata_01/test_2/5.06.4.4/install/tbase_pgxz/lib
[tbase@tbase01 ~]$ psql -h 172.30.0.6 -p 11345 -U tbase -d postgres
psql (PostgreSQL 10.0 @ Tbase_v5.06.4.4 (commit: 3feebab58))
Type "help" for help.

## 查看有哪些DN
postgres@cn001=# select * from pgxc_node where node_type = 'D';
 node_name | node_type | node_port |  node_host  | nodeis_primary | nodeis_preferred |  node_id   | node_cluster_name
-----------+-----------+-----------+-------------+----------------+------------------+------------+-------------------
 dn001     | D         |     11000 | 172.30.0.6  | f              | f                | 2142761564 | tbase_cluster
 dn002     | D         |     11002 | 172.30.0.12 | f              | f                |  -17499968 | tbase_cluster
(2 rows)

## 创建group
postgres@cn001=# create default node group default_group with (dn001, dn002);
CREATE NODE GROUP

## 为default group 创建shardmap
postgres@cn001=# create sharding group to group default_group;
CREATE SHARDING GROUP
postgres@cn001=# clean sharding;
CLEAN SHARDING
4. 建表测试
4.1. 不指定分片键,默认以第一个键值作为分片键。
postgres@cn001=# create table t(id int, value text);
CREATE TABLE
postgres@cn001=# \d+ t
                                     Table "public.t"
 Column |  Type   | Collation | Nullable | Default | Storage  | Stats target | Description
--------+---------+-----------+----------+---------+----------+--------------+-------------
 id     | integer |           | not null |         | plain    |              |
 value  | text    |           |          |         | extended |              |
Distribute By: SHARD(id)
Location Nodes: ALL DATANODES
4.2. 手工指定分片键
postgres@cn001=# drop table t;
DROP TABLE                                                 ^
postgres@cn001=# create table t(id serial not null, name text) distribute by shard(name);
CREATE TABLE
postgres@cn001=# \d+ t
                                                Table "public.t"
 Column |  Type   | Collation | Nullable |            Default            | Storage  | Stats target | Description
--------+---------+-----------+----------+-------------------------------+----------+--------------+-------------
 id     | integer |           | not null | nextval('t_id_seq'::regclass) | plain    |              |
 name   | text    |           | not null |                               | extended |              |
Distribute By: SHARD(name)
Location Nodes: ALL DATANODES
4.3. 查看执行计划
postgres@cn001=# DO $$
postgres$# BEGIN
postgres$#     FOR i IN 1..5000 LOOP
postgres$#         insert into t(name) values(uuid_generate_v4());
postgres$#     END LOOP;
postgres$# END $$
postgres-# ;
DO
postgres@cn001=# select count(*) from t;
 count
-------
  5000
(1 row)

postgres@cn001=# explain analyze select * from t;
                                                 QUERY PLAN
------------------------------------------------------------------------------------------------------------
 Remote Fast Query Execution  (cost=0.00..0.00 rows=0 width=0) (actual time=3.123..3.671 rows=5000 loops=1)
   Node/s: dn001, dn002
 Planning time: 0.063 ms
 Execution time: 3.937 ms
(4 rows)
「喜欢这篇文章,您的关注和赞赏是给作者最好的鼓励」
关注作者
【版权声明】本文为墨天轮用户原创内容,转载时必须标注文章的来源(墨天轮),文章链接,文章作者等基本信息,否则作者和墨天轮有权追究责任。如果您发现墨天轮中有涉嫌抄袭或者侵权的内容,欢迎发送邮件至:contact@modb.pro进行举报,并提供相关证据,一经查实,墨天轮将立刻删除相关内容。
