


Tutorialspoint Spring AOP 教程
来源:易百教程
Spring AOP教程™
Spring框架的关键组件之一是面向方面编程(AOP)框架。 面向方面的编程需要将程序逻辑分解成不同的部分。
此教程将通过简单实用的方法来学习Spring框架提供的AOP/面向方面编程。
读者
本教程主要是为Spring 面向方面编程(AOP)初学者准备的,帮助他们了解与Spring的AOP框架相关的基础到高级概念。
前提条件
在开始练习本教程系列文章中给出的各种类型的示例之前,我们假设您已经了解了计算机程序和计算机编程语言。
Spring AOP 概述
Spring框架的关键组件之一是面向方面编程(AOP)。 面向方面的编程需要将程序逻辑分解成不同的部分。 跨越应用程序的多个点的功能被称为交叉切割问题,这些交叉关切在概念上与应用程序的业务逻辑分开。有如:日志记录,审计,声明式事务,安全性和缓存等方面的各种常见的的例子。
OOP模块化的关键单位是类,而在AOP中,模块化单位是方面。 依赖注入可帮助您将应用程序对象彼此分离,并且AOP可帮助您将交叉问题与其影响的对象分离。AOP就像Perl,.NET,Java等编程语言中的触发器。
Spring AOP模块提供截取拦截应用程序的拦截器,例如,当执行方法时,可以在执行方法之前或之后添加额外的功能。
本站代码下载:http://www.yiibai.com/siteinfo/download.html
本文属作者原创,转载请注明出处:易百教程 » Spring AOP教程
Spring AOP环境安装设置 - Spring AOP教程™
本章将介绍在Windows和Linux系统上设置Spring AOP的过程。 Spring AOP可以通过以下几个简单的步骤安装和集成到您当前的Java环境和MAVEN中,而无需任何复杂的设置过程。安装时需要用户权限。
系统要求及工具
- JDK1.5及以上版本
- Maven 3及以上版本
- Eclipse最新版本
步骤1:Java安装
首先,您需要在系统上安装Java软件开发工具包(SDK)。要验证这一点,请根据使用的操作系统执行以下对应的命令。例如,这里使用使用的是Windows 10 64位,打开命令提示符输入以下命令 -
Microsoft Windows [版本 10.0.10586]
(c) 2015 Microsoft Corporation。保留所有权利。
C:\Users\Administrator>java -version
java version "1.8.0_65"
Java(TM) SE Runtime Environment (build 1.8.0_65-b17)
Java HotSpot(TM) 64-Bit Server VM (build 25.65-b01, mixed mode)
C:\Users\Administrator>
将环境变量JAVA_HOME设置为指向机器上安装Java的目录位置。参考以下网址:
http://www.yiibai.com/java/java_environment_setup.html
步骤2:安装Maven
从 http://maven.apache.org/download.cgi 下载Maven 3.3.3并安装,参考以下网址:
http://www.yiibai.com/maven/maven_environment_setup.html
步骤3:安装Eclipse IDE
本教程中的所有示例都使用Eclipse IDE编写。 所以建议你应该在您的机器上安装最新版本的Eclipse。
要安装Eclipse IDE,请从 http://www.eclipse.org/downloads/ 下载最新的Eclipse二进制文件。 下载安装后,将二进制文件分解解压到一个方便的位置。 例如在Windows上的C:\eclipse或Linux/Unix上的/usr/local/eclipse中,最后设置适当的PATH变量。
可以通过在Windows机器上可以直接双击eclipse.exe 来启动Eclipse IDE -
完成最后一步之后,您可以继续进行下一章的第一个AOP应用示例了。
本站代码下载:http://www.yiibai.com/siteinfo/download.html
本文属作者原创,转载请注明出处:易百教程 » Spring AOP环境安装设置
Spring AOP核心概念 - Spring AOP教程™
在开始使用AOP之前,让我们先来熟悉AOP的概念和术语。 这些术语不是Spring特有的,而是与面向方面编程(AOP)有关。
术语 | 描述 |
方面/切面(Aspect) | 一个具有一组API的模块,提供交叉要求。例如,日志记录模块被称为AOP方面用于记录。应用程序可以根据需要具有任意数量的方面。 |
加入点(Join point) | 这表示您的应用程序中可以插入AOP方面的一点。也可以说,这是应用程序中使用Spring AOP框架采取操作的实际位置。 |
通知(Advice) | 这是在方法执行之前或之后采取的实际操作。 这是在Spring AOP框架的程序执行期间调用的实际代码片段。 |
切入点(Pointcut) | 这是一组一个或多个连接点,其中应该执行通知(Advice)。 您可以使用表达式或模式指定切入点,我们将在AOP示例中看到。 |
介绍(Introduction) | 介绍允许向现有类添加新的方法或属性。 |
目标对象(Target object) | 对象被一个或多个方面通知(Advice),该对象将始终是代理的对象。也称为通知(Advice)对象。 |
编织(Weaving) | 编织是将方面与其他应用程序类型或对象进行链接以创建通知(Advice)对象的过程。 这可以在编译时,加载时间或运行时完成。 |
本站代码下载:http://www.yiibai.com/siteinfo/download.html
本文属作者原创,转载请注明出处:易百教程 » Spring AOP核心概念
Spring AOP通知类型 - Spring AOP教程™
Spring AOP中可以使用以下五种建议:
通知 | 描述 |
before | 在方法执行之前运行通知。 |
after | 在方法执行后运行通知,无论其结果如何。 |
after-returning | 只有方法成功完成后才能在方法执行后运行通知。 |
after-throwing | 只有在方法通过抛出异常而退出方法执行之后才能运行通知。 |
around | 在调用通知方法之前和之后运行通知。 |
本站代码下载:http://www.yiibai.com/siteinfo/download.html
本文属作者原创,转载请注明出处:易百教程 » Spring AOP通知类型
Spring AOP实现 - Spring AOP教程™
Spring支持使用@AspectJ注释样式方法和基于模式的方法来实现自定义方面。
基于XML模式
方面(Aspects)使用常规类以及基于XML的配置来实现。
要使用本节中描述的aop命名空间标签,您需要按照以下所述导入spring-aop模式:
<?xml version="1.0" encoding="UTF-8"?>
<beans xmlns="http://www.springframework.org/schema/beans"
xmlns:xsi="http://www.w3.org/2001/XMLSchema-instance"
xmlns:aop="http://www.springframework.org/schema/aop"
xsi:schemaLocation="http://www.springframework.org/schema/beans
http://www.springframework.org/schema/beans/spring-beans-3.0.xsd
http://www.springframework.org/schema/aop
http://www.springframework.org/schema/aop/spring-aop-3.0.xsd ">
<!-- bean definition & AOP specific configuration -->
</beans>
声明一个方面(Aspects)
使用<aop:aspect>元素声明一个方面(Aspects),并使用ref属性引用后台bean,如下所示:
<aop:config>
<aop:aspect id="myAspect" ref="aBean">
...
</aop:aspect>
</aop:config>
<bean id="aBean" class="...">
...
</bean>
这个“aBean”将被配置和依赖注入就像任何其他的Spring Bean一样,就像在前几章中看到的一样。
声明一个切入点
切入点(pointcut)有助于确定要用不同建议执行的关联点(即方法)。 在使用基于XML模式的配置时,切入点将定义如下:
<aop:config>
<aop:aspect id="myAspect" ref="aBean">
<aop:pointcut id="businessService"
expression="execution(* com.xyz.myapp.service.*.*(..))"/>
...
</aop:aspect>
</aop:config>
<bean id="aBean" class="...">
...
</bean>
以下示例定义了一个名为“businessService”的切入点,该切入点将匹配com.yiibai包中Student类中的getName()方法的执行:
<aop:config>
<aop:aspect id="myAspect" ref="aBean">
<aop:pointcut id="businessService"
expression="execution(* com.yiibai.Student.getName(..))"/>
...
</aop:aspect>
</aop:config>
<bean id="aBean" class="...">
...
</bean>
声明通知
您可以使用<aop:{ADVICE NAME}>元素在<aop:aspect>内的五个通知中的任何一个声明如下:
<aop:config>
<aop:aspect id="myAspect" ref="aBean">
<aop:pointcut id="businessService"
expression="execution(* com.xyz.myapp.service.*.*(..))"/>
<!-- a before advice definition -->
<aop:before pointcut-ref="businessService"
method="doRequiredTask"/>
<!-- an after advice definition -->
<aop:after pointcut-ref="businessService"
method="doRequiredTask"/>
<!-- an after-returning advice definition -->
<!--The doRequiredTask method must have parameter named retVal -->
<aop:after-returning pointcut-ref="businessService"
returning="retVal"
method="doRequiredTask"/>
<!-- an after-throwing advice definition -->
<!--The doRequiredTask method must have parameter named ex -->
<aop:after-throwing pointcut-ref="businessService"
throwing="ex"
method="doRequiredTask"/>
<!-- an around advice definition -->
<aop:around pointcut-ref="businessService"
method="doRequiredTask"/>
...
</aop:aspect>
</aop:config>
<bean id="aBean" class="...">
...
</bean>
可以对不同的通知使用相同doRequiredTask或不同的方法。 这些方法将被定义为方面模块的一部分。
基于@AspectJ
@AspectJ是指将Java方法注释为Java 5注释的常规Java类的方式。 @AspectJ是指将Java方法注释为Java 5注释的常规Java类的方式。通过在基于XML Schema的配置文件中包含以下元素来启用@AspectJ支持。
<aop:aspectj-autoproxy/>
声明一个方面(aspect)
方面(aspect)的类就像任何其他正常的bean一样,并且可以像任何其他类一样具有方法和字段,不过它们使用@Aspect进行注释,如下所示:
package org.xyz;
import org.aspectj.lang.annotation.Aspect;
@Aspect
public class AspectModule {
}
它们就像任何其他以XML格式配置的bean一样,如下所示:
<bean id="myAspect" class="org.xyz.AspectModule">
<!-- configure properties of aspect here as normal -->
</bean>
声明一个切入点
切入点(pointcut)有助于确定要用不同通知执行的关联点(即方法)。 在使用基于@AspectJ的配置时,切入点声明有两部分:
- 一个切入点表达式,确定哪些方法执行。
- 切入点签名包括名称和任意数量的参数。 该方法的实体是无关紧要的,也可以是空的。
以下示例定义了一个名为“businessService”的切入点,该切入点将匹配com.xyz.myapp.service包下的类中可用的每个方法的执行:
import org.aspectj.lang.annotation.Pointcut;
@Pointcut("execution(* com.xyz.myapp.service.*.*(..))") // expression
private void businessService() {} // signature
以下示例定义了一个名为“getname”的切入点,该切入点将与com.yiibai包下的Student类中的getName()方法的执行相匹配:
import org.aspectj.lang.annotation.Pointcut;
@Pointcut("execution(* com.yiibai.Student.getName(..))")
private void getname() {}
声明通知
您可以使用@{ADVICE-NAME}注释在以下所述的五个建议中声明任何一个。假设您已经定义了一个切入点签名方法为businessService(),参考以下配置:
@Before("businessService()")
public void doBeforeTask(){
...
}
@After("businessService()")
public void doAfterTask(){
...
}
@AfterReturning(pointcut = "businessService()", returning="retVal")
public void doAfterReturnningTask(Object retVal){
// you can intercept retVal here.
...
}
@AfterThrowing(pointcut = "businessService()", throwing="ex")
public void doAfterThrowingTask(Exception ex){
// you can intercept thrown exception here.
...
}
@Around("businessService()")
public void doAroundTask(){
...
}
可以为任何通知定义切入点内嵌。 下面是一个为之前通知定义的内联切入点的示例:
@Before("execution(* com.xyz.myapp.service.*.*(..))")
public doBeforeTask(){
...
}
本站代码下载:http://www.yiibai.com/siteinfo/download.html
本文属作者原创,转载请注明出处:易百教程 » Spring AOP实现
Spring AOP基于XML的应用程序 - Spring AOP教程™
从这篇文章开始,我们使用Spring-AOP框架编写实际的AOP应用程序。在开始使用Spring-WS框架编写第一个示例之前,必须确保已经按照Spring AOP安装配置教程中的说明正确设置了Spring-AOP开发运行环境。
现在我们继续来编写一个简单的基于控制台的Spring AOP应用程序,它用于演示AOP的概念。
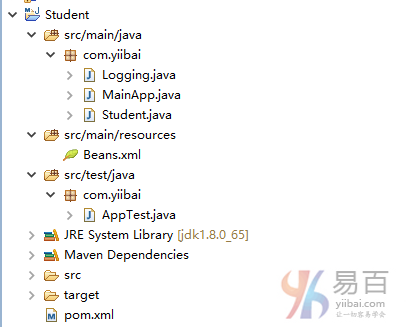
先来看看要创建的项目的目录结构 -
创建项目
打开命令控制台,进入D:\MVN目录并执行下面的mvn命令。
D:\MVN> mvn archetype:generate -DgroupId=com.yiibai -DartifactId=Student -DarchetypeArtifactId=maven-archetype-quickstart -DinteractiveMode=false
上面命令执行后,Maven将开始处理,并将创建完整的java应用程序项目结构。您可能会看到一堆下载的东西,但是不要惊慌,耐心等待下载和构建完成,如下所示 -
Downloaded: http://repo.maven.apache.org/maven2/org/apache/maven/archetypes/maven-archetype-quickstart/1.0/maven-archetype-quickstart-1.0.jar (5 KB at 7.7 KB/sec)
[INFO] ----------------------------------------------------------------------------
[INFO] Using following parameters for creating project from Old (1.x) Archetype: maven-archetype-quickstart:1.0
[INFO] ----------------------------------------------------------------------------
[INFO] Parameter: basedir, Value: D:\mvn
[INFO] Parameter: package, Value: com.yiibai
[INFO] Parameter: groupId, Value: com.yiibai
[INFO] Parameter: artifactId, Value: Student
[INFO] Parameter: packageName, Value: com.yiibai
[INFO] Parameter: version, Value: 1.0-SNAPSHOT
[INFO] project created from Old (1.x) Archetype in dir: D:\mvn\Student
[INFO] ------------------------------------------------------------------------
[INFO] BUILD SUCCESS
[INFO] ------------------------------------------------------------------------
[INFO] Total time: 09:20 min
[INFO] Finished at: 2017-04-12T03:05:53+08:00
[INFO] Final Memory: 14M/99M
[INFO] ------------------------------------------------------------------------
D:\mvn>
现在打开C:\MVN目录。您将看到一个名为student的java应用程序项目(在artifactId中指定)。更新POM.xml以包含Spring-AOP依赖关系。添加MainApp.java,Student.java和Logging.java这几个代码文件。
文件 - POM.xml 的内容如下 -
<project xmlns="http://maven.apache.org/POM/4.0.0"
xmlns:xsi="http://www.w3.org/2001/XMLSchema-instance"
xsi:schemaLocation="http://maven.apache.org/POM/4.0.0
http://maven.apache.org/maven-v4_0_0.xsd">
<modelVersion>4.0.0</modelVersion>
<groupId>com.yiibai</groupId>
<artifactId>Student</artifactId>
<packaging>jar</packaging>
<version>1.0-SNAPSHOT</version>
<name>Student</name>
<url>http://maven.apache.org</url>
<dependencies>
<dependency>
<groupId>junit</groupId>
<artifactId>junit</artifactId>
<version>3.8.1</version>
<scope>test</scope>
</dependency>
<dependency>
<groupId>org.springframework</groupId>
<artifactId>spring-aop</artifactId>
<version>4.1.0.RELEASE</version>
</dependency>
<dependency>
<groupId>org.springframework</groupId>
<artifactId>spring-context</artifactId>
<version>4.1.4.RELEASE</version>
</dependency>
<dependency>
<groupId>org.aspectj</groupId>
<artifactId>aspectjweaver</artifactId>
<version>1.6.8</version>
</dependency>
</dependencies>
</project>
文件 - Logging.java 的内容如下 -
package com.yiibai;
public class Logging {
/**
* This is the method which I would like to execute
* before a selected method execution.
*/
public void beforeAdvice(){
System.out.println("Going to setup student profile.");
}
/**
* This is the method which I would like to execute
* after a selected method execution.
*/
public void afterAdvice(){
System.out.println("Student profile has been setup.");
}
/**
* This is the method which I would like to execute
* when any method returns.
*/
public void afterReturningAdvice(Object retVal){
System.out.println("Returning:" + retVal.toString() );
}
/**
* This is the method which I would like to execute
* if there is an exception raised.
*/
public void AfterThrowingAdvice(IllegalArgumentException ex){
System.out.println("There has been an exception: " + ex.toString());
}
}
文件 - Student.java 的内容如下 -
package com.yiibai;
public class Student {
private Integer age;
private String name;
public void setAge(Integer age) {
this.age = age;
}
public Integer getAge() {
System.out.println("Age : " + age );
return age;
}
public void setName(String name) {
this.name = name;
}
public String getName() {
System.out.println("Name : " + name );
return name;
}
public void printThrowException(){
System.out.println("Exception raised");
throw new IllegalArgumentException();
}
}
文件 - MainApp.java 的内容如下 -
package com.yiibai;
import org.springframework.context.ApplicationContext;
import org.springframework.context.support.ClassPathXmlApplicationContext;
public class MainApp {
public static void main(String[] args) {
ApplicationContext context =
new ClassPathXmlApplicationContext("Beans.xml");
Student student = (Student) context.getBean("student");
student.getName();
student.getAge();
student.printThrowException();
}
}
在src/main/resources文件夹下添加配置文件Beans.xml:
<?xml version="1.0" encoding="UTF-8"?>
<beans xmlns="http://www.springframework.org/schema/beans"
xmlns:xsi="http://www.w3.org/2001/XMLSchema-instance"
xmlns:aop="http://www.springframework.org/schema/aop"
xsi:schemaLocation="http://www.springframework.org/schema/beans
http://www.springframework.org/schema/beans/spring-beans-3.0.xsd
http://www.springframework.org/schema/aop
http://www.springframework.org/schema/aop/spring-aop-3.0.xsd ">
<aop:config>
<aop:aspect id="log" ref="logging">
<aop:pointcut id="selectAll"
expression="execution(* com.yiibai.*.*(..))"/>
<aop:before pointcut-ref="selectAll" method="beforeAdvice"/>
<aop:after pointcut-ref="selectAll" method="afterAdvice"/>
<aop:after-returning pointcut-ref="selectAll"
returning="retVal"
method="afterReturningAdvice"/>
<aop:after-throwing pointcut-ref="selectAll"
throwing="ex"
method="AfterThrowingAdvice"/>
</aop:aspect>
</aop:config>
<!-- Definition for student bean -->
<bean id="student" class="com.yiibai.Student">
<property name="name" value="Maxsu" />
<property name="age" value="21"/>
</bean>
<!-- Definition for logging aspect -->
<bean id="logging" class="com.yiibai.Logging"/>
</beans>
打开命令控制台,进入D:\MVN目录并执行下面的mvn命令。
D:\MVN>Student> mvn package
Maven将开始处理并下载所需的库。
Downloading: http://repo.maven.apache.org/maven2/commons-lang/commons-lang/2.1/commons-lang-2.1.jar
Downloading: http://repo.maven.apache.org/maven2/org/codehaus/plexus/plexus-utils/3.0/plexus-utils-3.0.jar
Downloaded: http://repo.maven.apache.org/maven2/org/apache/maven/maven-archiver/2.5/maven-archiver-2.5.jar (22 KB at 25.9 KB/sec)
Downloaded: http://repo.maven.apache.org/maven2/org/codehaus/plexus/plexus-io/2.0.2/plexus-io-2.0.2.jar (57 KB at 54.3 KB/sec)
Downloaded: http://repo.maven.apache.org/maven2/commons-lang/commons-lang/2.1/commons-lang-2.1.jar (203 KB at 188.7 KB/sec)
Downloaded: http://repo.maven.apache.org/maven2/org/codehaus/plexus/plexus-utils/3.0/plexus-utils-3.0.jar (221 KB at 145.8 KB/sec)
Downloaded: http://repo.maven.apache.org/maven2/org/codehaus/plexus/plexus-archiver/2.1/plexus-archiver-2.1.jar (181 KB at 100.8 KB/sec)
[INFO] Building jar: D:\mvn\Student\target\Student-1.0-SNAPSHOT.jar
[INFO] ------------------------------------------------------------------------
[INFO] BUILD SUCCESS
[INFO] ------------------------------------------------------------------------
[INFO] Total time: 43.164 s
[INFO] Finished at: 2017-04-12T05:11:44+08:00
[INFO] Final Memory: 19M/158M
[INFO] ------------------------------------------------------------------------
D:\mvn\Student>
在Eclipse中导入项目
打开Eclipse IDE,导入项目目录。
选择文件>导入>选项。
选择Maven项目选项。点击下一步按钮。
选择项目位置,其中使用Maven创建Student项目。
单击完成按钮。
运行项目
完成创建源代码和配置文件后,运行应用程序。 右键单击应用程序中的MainApp.java,并使用运行方式作为Java应用程序命令。 如果您的应用程序没有问题,将打印以下消息:
四月 12, 2017 5:19:04 上午 org.springframework.context.support.ClassPathXmlApplicationContext prepareRefresh
信息: Refreshing org.springframework.context.support.ClassPathXmlApplicationContext@300ffa5d: startup date [Wed Apr 12 05:19:04 CST 2017]; root of context hierarchy
四月 12, 2017 5:19:04 上午 org.springframework.beans.factory.xml.XmlBeanDefinitionReader loadBeanDefinitions
信息: Loading XML bean definitions from class path resource [Beans.xml]
Going to setup student profile.
Exception in thread "main" Name : Maxsu
Student profile has been setup.
Returning:Maxsu
Going to setup student profile.
Age : 21
Student profile has been setup.
Returning:21
Going to setup student profile.
Exception raised
Student profile has been setup.
There has been an exception: java.lang.IllegalArgumentException
java.lang.IllegalArgumentException
at com.yiibai.Student.printThrowException(Student.java:25)
at com.yiibai.Student$$FastClassBySpringCGLIB$$e9280b4b.invoke(<generated>)
at org.springframework.cglib.proxy.MethodProxy.invoke(MethodProxy.java:204)
at org.springframework.aop.framework.CglibAopProxy$CglibMethodInvocation.invokeJoinpoint(CglibAopProxy.java:717)
at org.springframework.aop.framework.ReflectiveMethodInvocation.proceed(ReflectiveMethodInvocation.java:157)
at org.springframework.aop.framework.adapter.MethodBeforeAdviceInterceptor.invoke(MethodBeforeAdviceInterceptor.java:52)
at org.springframework.aop.framework.ReflectiveMethodInvocation.proceed(ReflectiveMethodInvocation.java:179)
at org.springframework.aop.aspectj.AspectJAfterAdvice.invoke(AspectJAfterAdvice.java:43)
at org.springframework.aop.framework.ReflectiveMethodInvocation.proceed(ReflectiveMethodInvocation.java:179)
at org.springframework.aop.framework.adapter.AfterReturningAdviceInterceptor.invoke(AfterReturningAdviceInterceptor.java:52)
at org.springframework.aop.framework.ReflectiveMethodInvocation.proceed(ReflectiveMethodInvocation.java:179)
at org.springframework.aop.aspectj.AspectJAfterThrowingAdvice.invoke(AspectJAfterThrowingAdvice.java:58)
at org.springframework.aop.framework.ReflectiveMethodInvocation.proceed(ReflectiveMethodInvocation.java:179)
at org.springframework.aop.interceptor.ExposeInvocationInterceptor.invoke(ExposeInvocationInterceptor.java:92)
at org.springframework.aop.framework.ReflectiveMethodInvocation.proceed(ReflectiveMethodInvocation.java:179)
at org.springframework.aop.framework.CglibAopProxy$DynamicAdvisedInterceptor.intercept(CglibAopProxy.java:653)
at com.yiibai.Student$$EnhancerBySpringCGLIB$$92ccc3c2.printThrowException(<generated>)
at com.yiibai.MainApp.main(MainApp.java:16)
本站代码下载:http://www.yiibai.com/siteinfo/download.html
本文属作者原创,转载请注明出处:易百教程 » Spring AOP基于XML的应用程序
Spring AOP基于XML的切入点 - Spring AOP教程™
切入点(JoinPoint)代表示您的应用程序中可以插入AOP方面的某个点。 您也可以说,这是应用程序中使用Spring AOP框架执行操作的实际位置。 请考虑以下示例:
- 包中包含的所有方法类。
- 一个类的特定方法。
切入点
切入点(PointCut)是一组一个或多个连接点,其中它用来执行通知。可以使用表达式或模式指定切入点,我们将在下面AOP示例中看到。 在Spring,切入点有助于使用特定的连接点来应用通知。 请考虑以下示例:
- expression="execution(* com.yiibai.*.*(..))"
- expression="execution(* com.yiibai.Student.getName(..))"
语法
<aop:config>
<aop:aspect id="log" ref="adviceClass">
<aop:pointcut id="pointcut-id" expression="execution( expression )"/>
</aop:aspect>
</aop:config>
在上面语法中 -
- adviceClass - 关联(ref)的类包含通知方法。
- pointcut-id - 切入点的ID。
- execution( expression) - 涵盖应用通知的方法的表达式。
要了解上面提到的连接点(JoinPoint)和切入点(PointCut)相关的概念,我们来写一个例子来实现一些切入点。为了方便编写这个例子,让我们使用Eclipse IDE,并按照以下步骤创建一个Spring应用程序:
- 更新在Spring AOP应用实例中创建过的Student项目。
- 更新bean配置并运行应用程序,如下所述。
这是Logging.java文件的内容。这实际上是一个Aspect模块的样本,它定义了在各个点被调用的方法。
package com.yiibai;
public class Logging {
/**
* This is the method which I would like to execute
* before a selected method execution.
*/
public void beforeAdvice(){
System.out.println("[beforeAdvice]Going to setup student profile.");
}
}
以下是 Student.java 文件的内容:
package com.yiibai;
public class Student {
private Integer age;
private String name;
public void setAge(Integer age) {
this.age = age;
}
public Integer getAge() {
System.out.println("Age : " + age );
return age;
}
public void setName(String name) {
this.name = name;
}
public String getName() {
System.out.println("Name : " + name );
return name;
}
public void printThrowException(){
System.out.println("Exception raised");
throw new IllegalArgumentException();
}
}
以下是 MainApp.java 文件的内容:
package com.yiibai;
import org.springframework.context.ApplicationContext;
import org.springframework.context.support.ClassPathXmlApplicationContext;
public class MainApp {
public static void main(String[] args) {
ApplicationContext context =
new ClassPathXmlApplicationContext("Beans.xml");
Student student = (Student) context.getBean("student");
student.getName();
student.getAge();
}
}
以下是 Beans.xml 文件的内容:
<?xml version="1.0" encoding="UTF-8"?>
<beans xmlns="http://www.springframework.org/schema/beans"
xmlns:xsi="http://www.w3.org/2001/XMLSchema-instance"
xmlns:aop="http://www.springframework.org/schema/aop"
xsi:schemaLocation="http://www.springframework.org/schema/beans
http://www.springframework.org/schema/beans/spring-beans-3.0.xsd
http://www.springframework.org/schema/aop
http://www.springframework.org/schema/aop/spring-aop-3.0.xsd ">
<aop:config>
<aop:aspect id="log" ref="logging">
<aop:pointcut id="selectAll"
expression="execution(* com.yiibai.*.*(..))"/>
<aop:before pointcut-ref="selectAll" method="beforeAdvice"/>
</aop:aspect>
</aop:config>
<!-- Definition for student bean -->
<bean id="student" class="com.yiibai.Student">
<property name="name" value="Maxsu" />
<property name="age" value="24"/>
</bean>
<!-- Definition for logging aspect -->
<bean id="logging" class="com.yiibai.Logging"/>
</beans>
完成创建源和bean配置文件后,让我们运行应用程序。 如果您的应用程序一切正常,这将打印以下消息:
四月 12, 2017 5:56:10 上午 org.springframework.context.support.ClassPathXmlApplicationContext prepareRefresh
信息: Refreshing org.springframework.context.support.ClassPathXmlApplicationContext@300ffa5d: startup date [Wed Apr 12 05:56:10 CST 2017]; root of context hierarchy
四月 12, 2017 5:56:10 上午 org.springframework.beans.factory.xml.XmlBeanDefinitionReader loadBeanDefinitions
信息: Loading XML bean definitions from class path resource [Beans.xml]
[beforeAdvice]Going to setup student profile.
Name : Maxsu
[beforeAdvice]Going to setup student profile.
Age : 23
[beforeAdvice]Going to setup student profile.
Exception raised
让我解释一下,上面定义的<aop:pointcut>可以选择com.yiibai包中定义的所有方法。假设要在特定方法之前或之后执行您的通知,可以通过用切入点定义中的星(*)替换实际的类和方法名称来定义切入点来缩小执行范围。 下面是一个修改后的XML配置文件来显示这个概念:
<?xml version="1.0" encoding="UTF-8"?>
<beans xmlns="http://www.springframework.org/schema/beans"
xmlns:xsi="http://www.w3.org/2001/XMLSchema-instance"
xmlns:aop="http://www.springframework.org/schema/aop"
xsi:schemaLocation="http://www.springframework.org/schema/beans
http://www.springframework.org/schema/beans/spring-beans-3.0.xsd
http://www.springframework.org/schema/aop
http://www.springframework.org/schema/aop/spring-aop-3.0.xsd ">
<aop:config>
<aop:aspect id="log" ref="logging">
<aop:pointcut id="selectAll"
expression="execution(* com.yiibai.Student.getName(..))"/>
<aop:before pointcut-ref="selectAll" method="beforeAdvice"/>
</aop:aspect>
</aop:config>
<!-- Definition for student bean -->
<bean id="student" class="com.yiibai.Student">
<property name="name" value="Maxsu" />
<property name="age" value="24"/>
</bean>
<!-- Definition for logging aspect -->
<bean id="logging" class="com.yiibai.Logging"/>
</beans>
运行项目
完成创建源代码和配置文件后,运行应用程序。右键单击应用程序中的MainApp.java,并使用运行方式作为Java应用程序命令。 如果您的应用程序一切正常,这将打印以下消息:
[beforeAdvice]Going to setup student profile.
Name : Maxsu
Age : 24
本站代码下载:http://www.yiibai.com/siteinfo/download.html
本文属作者原创,转载请注明出处:易百教程 » Spring AOP基于XML的切入点
Spring AOP基于XML的Before Advice - Spring AOP教程™
之前(Before)是一种通知类型,可以确保在方法执行前运行通知。以下是之前(Before)的通知语法:
语法
<aop:config>
<aop:aspect id="log" ref="logging">
<aop:pointcut id="pointcut-id" expression="execution( expression )"/>
<aop:before pointcut-ref="pointcut-id" method="methodName"/>
</aop:aspect>
</aop:config>
在上面配置中,
- pointcut-id - 切入点的id。
- methodName - 在调用函数之前调用的函数的方法名称。
要了解上述与之前通知(Before Advice)相关的概念,写一个在实现之前通知(Before Advice)的示例。为了简单,可直接复制之前上一篇文章中的例子,打开并使用Eclipse IDE,并按照以下步骤创建一个Spring应用程序:
- 更新在Spring AOP应用实例中创建过的Student项目。
- 更新bean配置并运行应用程序,如下所述。
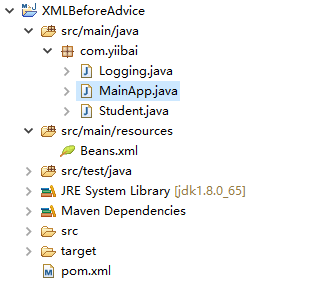
整个项目的目录结构如下所示 -
下面是Logging.java文件的内容。 这实际上是一个Aspect模块的样本,它定义了在各个点被调用的方法。
package com.yiibai;
public class Logging {
/**
* This is the method which I would like to execute
* before a selected method execution.
*/
public void beforeAdvice(){
System.out.println("[beforeAdvice]Going to setup student profile.");
}
}
以下是Student.java文件的内容:
package com.yiibai;
public class Student {
private Integer age;
private String name;
public void setAge(Integer age) {
this.age = age;
}
public Integer getAge() {
System.out.println("Age : " + age );
return age;
}
public void setName(String name) {
this.name = name;
}
public String getName() {
System.out.println("Name : " + name );
return name;
}
public void printThrowException(){
System.out.println("Exception raised");
throw new IllegalArgumentException();
}
}
以下是MainApp.java文件的内容:
package com.yiibai;
import org.springframework.context.ApplicationContext;
import org.springframework.context.support.ClassPathXmlApplicationContext;
public class MainApp {
public static void main(String[] args) {
ApplicationContext context =
new ClassPathXmlApplicationContext("Beans.xml");
Student student = (Student) context.getBean("student");
student.getName();
student.getAge();
}
}
以下是配置文件Beans.xml文件的内容:
<?xml version="1.0" encoding="UTF-8"?>
<beans xmlns="http://www.springframework.org/schema/beans"
xmlns:xsi="http://www.w3.org/2001/XMLSchema-instance"
xmlns:aop="http://www.springframework.org/schema/aop"
xsi:schemaLocation="http://www.springframework.org/schema/beans
http://www.springframework.org/schema/beans/spring-beans-3.0.xsd
http://www.springframework.org/schema/aop
http://www.springframework.org/schema/aop/spring-aop-3.0.xsd ">
<aop:config>
<aop:aspect id="log" ref="logging">
<aop:pointcut id="selectAll"
expression="execution(* com.yiibai.Student.getName(..))"/>
<aop:before pointcut-ref="selectAll" method="beforeAdvice"/>
</aop:aspect>
</aop:config>
<!-- Definition for student bean -->
<bean id="student" class="com.yiibai.Student">
<property name="name" value="Maxsu" />
<property name="age" value="26"/>
</bean>
<!-- Definition for logging aspect -->
<bean id="logging" class="com.yiibai.Logging"/>
</beans>
运行项目
完成创建源代码和配置文件后,运行应用程序。右键单击应用程序中的MainApp.java,并使用运行方式作为Java应用程序命令。 如果您的应用程序一切正常,这将打印以下消息:
[beforeAdvice]Going to setup student profile.
Name : Maxsu
Age : 26
Exception raised
本站代码下载:http://www.yiibai.com/siteinfo/download.html
本文属作者原创,转载请注明出处:易百教程 » Spring AOP基于XML的Before Advice
Spring AOP基于XML的After Advice - Spring AOP教程™
之后(After)是一种通知类型,可以确保在方法执行前运行通知。以下是之后(After)的通知语法:
语法
<aop:config>
<aop:aspect id="log" ref="logging">
<aop:pointcut id="pointcut-id" expression="execution( expression )"/>
<aop:after pointcut-ref="pointcut-id" method="methodName"/>
</aop:aspect>
</aop:config>
在上面配置中,
- pointcut-id - 切入点的id。
- methodName - 在调用函数之前调用的函数的方法名称。
要了解上述与之后通知(After Advice)相关的概念,写一个在实现之后通知(After Advice)的示例。为了简单,可直接复制之前上一篇文章中的例子,打开并使用Eclipse IDE,并按照以下步骤创建一个Spring应用程序:
- 更新在Spring AOP应用实例中创建过的Student项目。
- 更新bean配置并运行应用程序,如下所述。
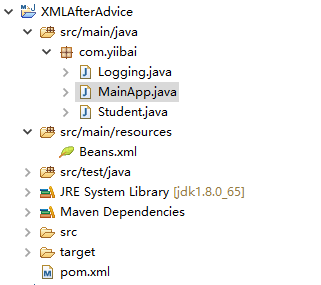
整个项目的目录结构如下所示 -
下面是Logging.java文件的内容。 这实际上是一个Aspect模块的样本,它定义了在各个点被调用的方法。
package com.yiibai;
public class Logging {
/**
* This is the method which I would like to execute
* after a selected method execution.
*/
public void afterAdvice(){
System.out.println("[After]Student profile setup complete.");
}
}
以下是Student.java文件的内容:
package com.yiibai;
public class Student {
private Integer age;
private String name;
public void setAge(Integer age) {
this.age = age;
}
public Integer getAge() {
System.out.println("Age : " + age );
return age;
}
public void setName(String name) {
this.name = name;
}
public String getName() {
System.out.println("Name : " + name );
return name;
}
public void printThrowException(){
System.out.println("Exception raised");
throw new IllegalArgumentException();
}
}
以下是MainApp.java文件的内容:
package com.yiibai;
import org.springframework.context.ApplicationContext;
import org.springframework.context.support.ClassPathXmlApplicationContext;
public class MainApp {
public static void main(String[] args) {
ApplicationContext context =
new ClassPathXmlApplicationContext("Beans.xml");
Student student = (Student) context.getBean("student");
student.getName();
student.getAge();
}
}
以下是配置文件Beans.xml文件的内容:
<?xml version="1.0" encoding="UTF-8"?>
<beans xmlns="http://www.springframework.org/schema/beans"
xmlns:xsi="http://www.w3.org/2001/XMLSchema-instance"
xmlns:aop="http://www.springframework.org/schema/aop"
xsi:schemaLocation="http://www.springframework.org/schema/beans
http://www.springframework.org/schema/beans/spring-beans-3.0.xsd
http://www.springframework.org/schema/aop
http://www.springframework.org/schema/aop/spring-aop-3.0.xsd ">
<aop:config>
<aop:aspect id="log" ref="logging">
<aop:pointcut id="selectAll"
expression="execution(* com.yiibai.Student.getAge(..))"/>
<aop:after pointcut-ref="selectAll" method="afterAdvice"/>
</aop:aspect>
</aop:config>
<!-- Definition for student bean -->
<bean id="student" class="com.yiibai.Student">
<property name="name" value="Maxsu" />
<property name="age" value="26"/>
</bean>
<!-- Definition for logging aspect -->
<bean id="logging" class="com.yiibai.Logging"/>
</beans>
运行项目
完成创建源代码和配置文件后,运行应用程序。右键单击应用程序中的MainApp.java,并使用运行方式作为Java应用程序命令。 如果您的应用程序一切正常,这将打印以下消息:
Name : Maxsu
Age : 26
[After]Student profile setup complete.
Exception raised
本站代码下载:http://www.yiibai.com/siteinfo/download.html
本文属作者原创,转载请注明出处:易百教程 » Spring AOP基于XML的After Advice
Spring AOP基于XML的After Returning Advice - Spring AOP教程™
之后(After)是一种通知类型,只有在方法成功完成后,确保方法执行后才能运行通知。 以下是之后通知(after advice)的语法:
语法
<aop:config>
<aop:aspect id="log" ref="logging">
<aop:pointcut id="pointcut-id" expression="execution( expression )"/>
<aop:after-returning pointcut-ref="pointcut-id" returning="retVal" method="methodName"/>
</aop:aspect>
</aop:config>
在上面配置中,
- pointcut-id - 切入点的id。
- methodName - 在调用函数之前调用的函数的方法名称。
要了解上述与之后返回通知(After Returning Advice)相关的概念,写一个在实现之后返回通知(After Returning Advice)的示例。为了简单,可直接复制之前上一篇文章中的例子,打开并使用Eclipse IDE,并按照以下步骤创建一个Spring应用程序:
- 更新在Spring AOP应用实例中创建过的Student项目。
- 更新bean配置并运行应用程序,如下所述。
整个项目的目录结构如下所示 -
下面是Logging.java文件的内容。 这实际上是一个Aspect模块的样本,它定义了在各个点被调用的方法。
package com.yiibai;
public class Logging {
/**
* This is the method which I would like to execute
* when any method returns.
*/
public void afterReturningAdvice(Object retVal){
System.out.println("[afterReturningAdvice] Returning: " + retVal.toString());
}
}
以下是Student.java文件的内容:
package com.yiibai;
public class Student {
private Integer age;
private String name;
public void setAge(Integer age) {
this.age = age;
}
public Integer getAge() {
System.out.println("Age : " + age );
System.out.println("Exception raised");
throw new IllegalArgumentException();
return age;
}
public void setName(String name) {
this.name = name;
}
public String getName() {
System.out.println("Name : " + name );
return name;
}
public void printThrowException(){
System.out.println("Exception raised");
throw new IllegalArgumentException();
}
}
以下是MainApp.java文件的内容:
package com.yiibai;
import org.springframework.context.ApplicationContext;
import org.springframework.context.support.ClassPathXmlApplicationContext;
public class MainApp {
public static void main(String[] args) {
ApplicationContext context =
new ClassPathXmlApplicationContext("Beans.xml");
Student student = (Student) context.getBean("student");
student.getName();
student.getAge();
}
}
以下是配置文件Beans.xml文件的内容:
<?xml version="1.0" encoding="UTF-8"?>
<beans xmlns="http://www.springframework.org/schema/beans"
xmlns:xsi="http://www.w3.org/2001/XMLSchema-instance"
xmlns:aop="http://www.springframework.org/schema/aop"
xsi:schemaLocation="http://www.springframework.org/schema/beans
http://www.springframework.org/schema/beans/spring-beans-3.0.xsd
http://www.springframework.org/schema/aop
http://www.springframework.org/schema/aop/spring-aop-3.0.xsd ">
<aop:config>
<aop:aspect id="log" ref="logging">
<aop:pointcut id="selectAll"
expression="execution(* com.yiibai.*.*(..))"/>
<aop:after-returning pointcut-ref="selectAll" method="afterReturningAdvice" returning="retVal"/>
</aop:aspect>
</aop:config>
<!-- Definition for student bean -->
<bean id="student" class="com.yiibai.Student">
<property name="name" value="Zara" />
<property name="age" value="11"/>
</bean>
<!-- Definition for logging aspect -->
<bean id="logging" class="com.yiibai.Logging"/>
</beans>
运行项目
完成创建源代码和配置文件后,运行应用程序。右键单击应用程序中的MainApp.java,并使用运行方式作为Java应用程序命令。 如果您的应用程序一切正常,这将打印以下消息:
Name : Maxsu
[afterReturningAdvice] Returning: Maxsu
Age : 26
[afterReturningAdvice] Returning: 26
本站代码下载:http://www.yiibai.com/siteinfo/download.html
本文属作者原创,转载请注明出处:易百教程 » Spring AOP基于XML的After Returning Advice
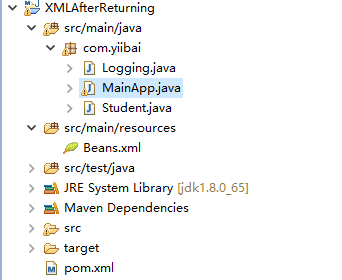
Spring AOP基于XML的After Throwing Advice - Spring AOP教程™
after-throwing是一种通知类型,只有在方法通过抛出异常退出时才能确保方法执行后才能运行通知。 以下是after-throwing通知的语法:
语法
<aop:config>
<aop:aspect id="log" ref="logging">
<aop:pointcut id="pointcut-id" expression="execution( expression )"/>
<aop:after-throwing pointcut-ref="pointcut-id" throwing="ex" method="methodName"/>
</aop:aspect>
</aop:config>
在上面配置中,
- pointcut-id - 切入点的id。
- ex - 要被被抛出例外。
- methodName - 在调用函数之前调用的函数的方法名称。
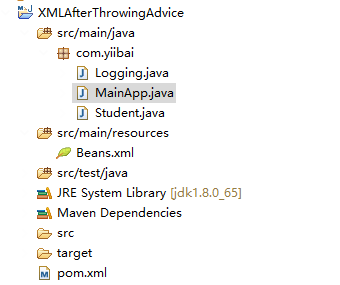
要了解上述与之后抛出通知(After Throwing Advice)相关的概念,写一个在实现之后抛出通知(After Throwing Advice)的示例。为了简单,可直接复制之前上一篇文章中的例子,打开并使用Eclipse IDE,并按照以下步骤创建一个Spring应用程序:
- 更新在Spring AOP应用实例中创建过的Student项目。
- 更新bean配置并运行应用程序,如下所述。
整个项目的目录结构如下所示 -
下面是Logging.java文件的内容。 这实际上是一个Aspect模块的样本,它定义了在各个点被调用的方法。
package com.yiibai;
public class Logging {
/**
* This is the method which I would like to execute
* if there is an exception raised.
*/
public void afterThrowingAdvice(IllegalArgumentException ex){
System.out.println("[afterThrowingAdvice] There has been an exception: " + ex.toString());
}
}
以下是Student.java文件的内容:
package com.yiibai;
public class Student {
private Integer age;
private String name;
public void setAge(Integer age) {
this.age = age;
}
public Integer getAge() {
System.out.println("Age : " + age );
System.out.println("Exception raised");
throw new IllegalArgumentException();
return age;
}
public void setName(String name) {
this.name = name;
}
public String getName() {
System.out.println("Name : " + name );
return name;
}
public void printThrowException(){
System.out.println("Exception raised");
throw new IllegalArgumentException();
}
}
以下是MainApp.java文件的内容:
package com.yiibai;
import org.springframework.context.ApplicationContext;
import org.springframework.context.support.ClassPathXmlApplicationContext;
public class MainApp {
public static void main(String[] args) {
ApplicationContext context =
new ClassPathXmlApplicationContext("Beans.xml");
Student student = (Student) context.getBean("student");
student.printThrowException();
}
}
以下是配置文件Beans.xml文件的内容:
<?xml version="1.0" encoding="UTF-8"?>
<beans xmlns="http://www.springframework.org/schema/beans"
xmlns:xsi="http://www.w3.org/2001/XMLSchema-instance"
xmlns:aop="http://www.springframework.org/schema/aop"
xsi:schemaLocation="http://www.springframework.org/schema/beans
http://www.springframework.org/schema/beans/spring-beans-3.0.xsd
http://www.springframework.org/schema/aop
http://www.springframework.org/schema/aop/spring-aop-3.0.xsd ">
<aop:config>
<aop:aspect id="log" ref="logging">
<aop:pointcut id="selectAll"
expression="execution(* com.yiibai.*.*(..))"/>
<aop:after-throwing pointcut-ref="selectAll" throwing="ex" method="afterThrowingAdvice"/>
</aop:aspect>
</aop:config>
<!-- Definition for student bean -->
<bean id="student" class="com.yiibai.Student">
<property name="name" value="maxsu" />
<property name="age" value="25" />
</bean>
<!-- Definition for logging aspect -->
<bean id="logging" class="com.yiibai.Logging"/>
</beans>
运行项目
完成创建源代码和配置文件后,运行应用程序。右键单击应用程序中的MainApp.java,并使用运行方式作为Java应用程序命令。 如果您的应用程序一切正常,这将打印以下消息:
Exception raised
[afterThrowingAdvice] There has been an exception: java.lang.IllegalArgumentException
Exception in thread "main" java.lang.IllegalArgumentException
at com.yiibai.Student.printThrowException(Student.java:27)
at com.yiibai.Student$$FastClassBySpringCGLIB$$e9280b4b.invoke(<generated>)
at org.springframework.cglib.proxy.MethodProxy.invoke(MethodProxy.java:204)
at org.springframework.aop.framework.CglibAopProxy$CglibMethodInvocation.invokeJoinpoint(CglibAopProxy.java:717)
at org.springframework.aop.framework.ReflectiveMethodInvocation.proceed(ReflectiveMethodInvocation.java:157)
at org.springframework.aop.aspectj.AspectJAfterThrowingAdvice.invoke(AspectJAfterThrowingAdvice.java:58)
at org.springframework.aop.framework.ReflectiveMethodInvocation.proceed(ReflectiveMethodInvocation.java:179)
at org.springframework.aop.interceptor.ExposeInvocationInterceptor.invoke(ExposeInvocationInterceptor.java:92)
at org.springframework.aop.framework.ReflectiveMethodInvocation.proceed(ReflectiveMethodInvocation.java:179)
at org.springframework.aop.framework.CglibAopProxy$DynamicAdvisedInterceptor.intercept(CglibAopProxy.java:653)
at com.yiibai.Student$$EnhancerBySpringCGLIB$$47620070.printThrowException(<generated>)
at com.yiibai.MainApp.main(MainApp.java:13)
本站代码下载:http://www.yiibai.com/siteinfo/download.html
本文属作者原创,转载请注明出处:易百教程 » Spring AOP基于XML的After Throwing Advice
Spring AOP基于XML的Around Advice - Spring AOP教程™
Around是一种通知类型,可以确保方法执行前后的通知运行。 以下是Around通知的语法:
语法
<aop:config>
<aop:aspect id="log" ref="logging">
<aop:pointcut id="pointcut-id" expression="execution( expression )"/>
<aop:around pointcut-ref="pointcut-id" method="methodName"/>
</aop:aspect>
</aop:config>
在上面配置中,
- pointcut-id - 切入点的id。
- methodName - 在调用函数之前调用的函数的方法名称。
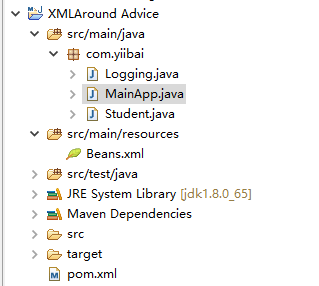
要了解上述与周围通知(Around Advice)相关的概念,写一个在实现周围通知(Around Advice)的示例。为了简单,可直接复制之前上一篇文章中的例子,打开并使用Eclipse IDE,并按照以下步骤创建一个Spring应用程序:
- 更新在Spring AOP应用实例中创建过的Student项目。
- 更新bean配置并运行应用程序,如下所述。
整个项目的目录结构如下所示 -

下面是Logging.java文件的内容。 这实际上是一个Aspect模块的样本,它定义了在各个点被调用的方法。
package com.yiibai;
import org.aspectj.lang.ProceedingJoinPoint;
public class Logging {
/**
* This is the method which I would like to execute
* around a selected method execution.
*/
public String aroundAdvice(ProceedingJoinPoint jp) throws Throwable{
System.out.println("【In Around advice】");
Object[] args=jp.getArgs();
if(args.length>0){
System.out.print("Arguments passed: " );
for (int i = 0; i < args.length; i++) {
System.out.print("arg "+(i+1)+": "+args[i]);
}
}
Object result=jp.proceed(args);
System.out.println("Returning :" + result);
return result.toString();
}
}
以下是Student.java文件的内容:
package com.yiibai;
public class Student {
private Integer age;
private String name;
public void setAge(Integer age) {
this.age = age;
}
public Integer getAge() {
System.out.println("Age : " + age );
System.out.println("Exception raised");
throw new IllegalArgumentException();
return age;
}
public void setName(String name) {
this.name = name;
}
public String getName() {
System.out.println("Name : " + name );
return name;
}
public void printThrowException(){
System.out.println("Exception raised");
throw new IllegalArgumentException();
}
}
以下是MainApp.java文件的内容:
package com.yiibai;
import org.springframework.context.ApplicationContext;
import org.springframework.context.support.ClassPathXmlApplicationContext;
public class MainApp {
public static void main(String[] args) {
ApplicationContext context =
new ClassPathXmlApplicationContext("Beans.xml");
Student student = (Student) context.getBean("student");
student.getName();
}
}
以下是配置文件Beans.xml文件的内容:
<?xml version="1.0" encoding="UTF-8"?>
<beans xmlns="http://www.springframework.org/schema/beans"
xmlns:xsi="http://www.w3.org/2001/XMLSchema-instance"
xmlns:aop="http://www.springframework.org/schema/aop"
xsi:schemaLocation="http://www.springframework.org/schema/beans
http://www.springframework.org/schema/beans/spring-beans-3.0.xsd
http://www.springframework.org/schema/aop
http://www.springframework.org/schema/aop/spring-aop-3.0.xsd ">
<aop:config>
<aop:aspect id="log" ref="logging">
<aop:pointcut id="selectName"
expression="execution(* com.yiibai.Student.getName(..))"/>
<aop:around pointcut-ref="selectName" method="aroundAdvice"/>
</aop:aspect>
</aop:config>
<!-- Definition for student bean -->
<bean id="student" class="com.yiibai.Student">
<property name="name" value="maxsu" />
<property name="age" value="26"/>
</bean>
<!-- Definition for logging aspect -->
<bean id="logging" class="com.yiibai.Logging"/>
</beans>
运行项目
完成创建源代码和配置文件后,运行应用程序。右键单击应用程序中的MainApp.java,并使用运行方式作为Java应用程序命令。 如果您的应用程序一切正常,这将打印以下消息:
【In Around advice】
Name : maxsu
Returning :maxsu
本站代码下载:http://www.yiibai.com/siteinfo/download.html
本文属作者原创,转载请注明出处:易百教程 » Spring AOP基于XML的Around Advice
Spring AOP基于XML的Around Advice - Spring AOP教程™
Around是一种通知类型,可以确保方法执行前后的通知运行。 以下是Around通知的语法:
语法
<aop:config>
<aop:aspect id="log" ref="logging">
<aop:pointcut id="pointcut-id" expression="execution( expression )"/>
<aop:around pointcut-ref="pointcut-id" method="methodName"/>
</aop:aspect>
</aop:config>
在上面配置中,
- pointcut-id - 切入点的id。
- methodName - 在调用函数之前调用的函数的方法名称。
要了解上述与周围通知(Around Advice)相关的概念,写一个在实现周围通知(Around Advice)的示例。为了简单,可直接复制之前上一篇文章中的例子,打开并使用Eclipse IDE,并按照以下步骤创建一个Spring应用程序:
- 更新在Spring AOP应用实例中创建过的Student项目。
- 更新bean配置并运行应用程序,如下所述。
整个项目的目录结构如下所示 -
下面是Logging.java文件的内容。 这实际上是一个Aspect模块的样本,它定义了在各个点被调用的方法。
package com.yiibai;
import org.aspectj.lang.ProceedingJoinPoint;
public class Logging {
/**
* This is the method which I would like to execute
* around a selected method execution.
*/
public String aroundAdvice(ProceedingJoinPoint jp) throws Throwable{
System.out.println("【In Around advice】");
Object[] args=jp.getArgs();
if(args.length>0){
System.out.print("Arguments passed: " );
for (int i = 0; i < args.length; i++) {
System.out.print("arg "+(i+1)+": "+args[i]);
}
}
Object result=jp.proceed(args);
System.out.println("Returning :" + result);
return result.toString();
}
}
以下是Student.java文件的内容:
package com.yiibai;
public class Student {
private Integer age;
private String name;
public void setAge(Integer age) {
this.age = age;
}
public Integer getAge() {
System.out.println("Age : " + age );
System.out.println("Exception raised");
throw new IllegalArgumentException();
return age;
}
public void setName(String name) {
this.name = name;
}
public String getName() {
System.out.println("Name : " + name );
return name;
}
public void printThrowException(){
System.out.println("Exception raised");
throw new IllegalArgumentException();
}
}
以下是MainApp.java文件的内容:
package com.yiibai;
import org.springframework.context.ApplicationContext;
import org.springframework.context.support.ClassPathXmlApplicationContext;
public class MainApp {
public static void main(String[] args) {
ApplicationContext context =
new ClassPathXmlApplicationContext("Beans.xml");
Student student = (Student) context.getBean("student");
student.getName();
}
}
以下是配置文件Beans.xml文件的内容:
<?xml version="1.0" encoding="UTF-8"?>
<beans xmlns="http://www.springframework.org/schema/beans"
xmlns:xsi="http://www.w3.org/2001/XMLSchema-instance"
xmlns:aop="http://www.springframework.org/schema/aop"
xsi:schemaLocation="http://www.springframework.org/schema/beans
http://www.springframework.org/schema/beans/spring-beans-3.0.xsd
http://www.springframework.org/schema/aop
http://www.springframework.org/schema/aop/spring-aop-3.0.xsd ">
<aop:config>
<aop:aspect id="log" ref="logging">
<aop:pointcut id="selectName"
expression="execution(* com.yiibai.Student.getName(..))"/>
<aop:around pointcut-ref="selectName" method="aroundAdvice"/>
</aop:aspect>
</aop:config>
<!-- Definition for student bean -->
<bean id="student" class="com.yiibai.Student">
<property name="name" value="maxsu" />
<property name="age" value="26"/>
</bean>
<!-- Definition for logging aspect -->
<bean id="logging" class="com.yiibai.Logging"/>
</beans>
运行项目
完成创建源代码和配置文件后,运行应用程序。右键单击应用程序中的MainApp.java,并使用运行方式作为Java应用程序命令。 如果您的应用程序一切正常,这将打印以下消息:
【In Around advice】
Name : maxsu
Returning :maxsu
本站代码下载:http://www.yiibai.com/siteinfo/download.html
本文属作者原创,转载请注明出处:易百教程 » Spring AOP基于XML的Around Advice
Spring AOP基于注解的应用 - Spring AOP教程™
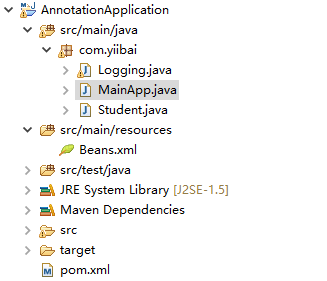
让我们写一个Spring AOP基于注解的应用例子,它将使用基于注解的配置实现通知。打开并使用Eclipse IDE,并按照以下步骤创建一个Spring应用程序:
- 更新在Spring AOP应用实例中创建过的Student项目。
- 更新bean配置并运行应用程序,如下所述。
整个项目的目录结构如下所示 -
下面是Logging.java文件的内容。 这实际上是一个Aspect模块的样本,它定义了在各个点被调用的方法。
package com.yiibai;
import org.aspectj.lang.annotation.Aspect;
import org.aspectj.lang.annotation.Before;
import org.aspectj.lang.annotation.Pointcut;
@Aspect
public class Logging {
/** Following is the definition for a pointcut to select
* all the methods available. So advice will be called
* for all the methods.
*/
@Pointcut("execution(* com.yiibai.*.*(..))")
private void selectAll(){}
/**
* This is the method which I would like to execute
* before a selected method execution.
*/
@Before("selectAll()")
public void beforeAdvice(){
System.out.println("[beforeAdvice] Going to setup student profile.");
}
}
以下是Student.java文件的内容:
package com.yiibai;
public class Student {
private Integer age;
private String name;
public void setAge(Integer age) {
this.age = age;
}
public Integer getAge() {
System.out.println("Age : " + age );
return age;
}
public void setName(String name) {
this.name = name;
}
public String getName() {
System.out.println("Name : " + name );
return name;
}
public void printThrowException(){
System.out.println("Exception raised");
throw new IllegalArgumentException();
}
}
以下是MainApp.java文件的内容:
package com.yiibai;
import org.springframework.context.ApplicationContext;
import org.springframework.context.support.ClassPathXmlApplicationContext;
public class MainApp {
public static void main(String[] args) {
ApplicationContext context =
new ClassPathXmlApplicationContext("Beans.xml");
Student student = (Student) context.getBean("student");
student.getName();
student.getAge();
}
}
以下是配置文件Beans.xml文件的内容:
<?xml version="1.0" encoding="UTF-8"?>
<beans xmlns="http://www.springframework.org/schema/beans"
xmlns:xsi="http://www.w3.org/2001/XMLSchema-instance"
xmlns:aop="http://www.springframework.org/schema/aop"
xsi:schemaLocation="http://www.springframework.org/schema/beans
http://www.springframework.org/schema/beans/spring-beans-3.0.xsd
http://www.springframework.org/schema/aop
http://www.springframework.org/schema/aop/spring-aop-3.0.xsd ">
<aop:aspectj-autoproxy/>
<!-- Definition for student bean -->
<bean id="student" class="com.yiibai.Student">
<property name="name" value="minsu" />
<property name="age" value="25"/>
</bean>
<!-- Definition for logging aspect -->
<bean id="logging" class="com.yiibai.Logging"/>
</beans>
运行项目
完成创建源代码和配置文件后,运行应用程序。右键单击应用程序中的MainApp.java,并使用运行方式作为Java应用程序命令。 如果您的应用程序一切正常,这将打印以下消息:
[beforeAdvice] Going to setup student profile.
Name : minsu
[beforeAdvice] Going to setup student profile.
Age : 25
本站代码下载:http://www.yiibai.com/siteinfo/download.html
本文属作者原创,转载请注明出处:易百教程 » Spring AOP基于注解的应用
Spring AOP基于注解的切入点 - Spring AOP教程™
连接点
连接点(JoinPoint)代表您的应用程序中可以插入AOP方面的一个点/位置。 您也可以说,这是应用程序中使用Spring AOP框架执行操作的实际位置。 请考虑以下示例:
- 包中包含的所有方法类。
- 一个类的特定方法。
切入点
切入点(PointCut)是一组一个或多个连接点,在其中应该执行的通知。 您可以使用表达式或模式指定切入点,我们将在AOP示例中看到。 在Spring中切入点有助于使用特定的连接点来应用通知。 请考虑以下示例:
- @Pointcut("execution(* com.yiibai.*.*(..))")
- @Pointcut("execution(* com.yiibai.Student.getName(..))")
语法
@Aspect
public class Logging {
@Pointcut("execution(* com.yiibai.*.*(..))")
private void selectAll(){}
}
在上面的语法示例中 -
要了解上面提到的连接点(JoinPoint)和切入点(PointCut)相关的概念,我们写一个Spring AOP基于注解的应用例子,它将使用基于注解配置实现通知。打开并使用Eclipse IDE,并按照以下步骤创建一个Spring应用程序:
- 更新在Spring AOP应用实例中创建过的Student项目。
- 更新bean配置并运行应用程序,如下所述。
整个项目的目录结构如下所示 -

下面是Logging.java文件的内容。 这实际上是一个Aspect模块的样本,它定义了在各个点被调用的方法。
package com.yiibai;
import org.aspectj.lang.annotation.Aspect;
import org.aspectj.lang.annotation.Pointcut;
import org.aspectj.lang.annotation.Before;
@Aspect
public class Logging {
/** Following is the definition for a pointcut to select
* all the methods available. So advice will be called
* for all the methods.
*/
@Pointcut("execution(* com.yiibai.*.*(..))")
private void selectAll(){}
/**
* This is the method which I would like to execute
* before a selected method execution.
*/
@Before("selectAll()")
public void beforeAdvice(){
System.out.println("[beforeAdvice] Going to setup student profile.");
}
}
以下是Student.java文件的内容:
package com.yiibai;
public class Student {
private Integer age;
private String name;
public void setAge(Integer age) {
this.age = age;
}
public Integer getAge() {
System.out.println("Age : " + age );
return age;
}
public void setName(String name) {
this.name = name;
}
public String getName() {
System.out.println("Name : " + name );
return name;
}
public void printThrowException(){
System.out.println("Exception raised");
throw new IllegalArgumentException();
}
}
以下是MainApp.java文件的内容:
package com.yiibai;
import org.springframework.context.ApplicationContext;
import org.springframework.context.support.ClassPathXmlApplicationContext;
public class MainApp {
public static void main(String[] args) {
ApplicationContext context =
new ClassPathXmlApplicationContext("Beans.xml");
Student student = (Student) context.getBean("student");
student.getName();
student.getAge();
}
}
以下是配置文件Beans.xml文件的内容:
<?xml version="1.0" encoding="UTF-8"?>
<beans xmlns="http://www.springframework.org/schema/beans"
xmlns:xsi="http://www.w3.org/2001/XMLSchema-instance"
xmlns:aop="http://www.springframework.org/schema/aop"
xsi:schemaLocation="http://www.springframework.org/schema/beans
http://www.springframework.org/schema/beans/spring-beans-3.0.xsd
http://www.springframework.org/schema/aop
http://www.springframework.org/schema/aop/spring-aop-3.0.xsd ">
<aop:aspectj-autoproxy/>
<!-- Definition for student bean -->
<bean id="student" class="com.yiibai.Student">
<property name="name" value="minsu" />
<property name="age" value="25"/>
</bean>
<!-- Definition for logging aspect -->
<bean id="logging" class="com.yiibai.Logging"/>
</beans>
运行项目
完成创建源代码和配置文件后,运行应用程序。右键单击应用程序中的MainApp.java,并使用运行方式作为Java应用程序命令。 如果您的应用程序一切正常,这将打印以下消息:
[beforeAdvice]Going to setup student profile.
Name : minsu
[beforeAdvice]Going to setup student profile.
Age : 25
本站代码下载:http://www.yiibai.com/siteinfo/download.html
本文属作者原创,转载请注明出处:易百教程 » Spring AOP基于注解的切入点
Spring AOP基于注解的Before Advice - Spring AOP教程™
@Before是一种通知类型,可以确保在方法执行之前运行通知。 以下是@Before通知(advice)的语法:
语法
@Pointcut("execution(* com.yiibai.Student.getName(..))")
private void selectGetName(){}
@Before("selectGetName()")
public void beforeAdvice(){
System.out.println("Going to setup student profile.");
}
在上面的语法示例中 -
要了解上面提到的连接点(JoinPoint)和切入点(PointCut)相关的概念,我们写一个Spring AOP基于注解的应用例子,它将使用基于注解配置实现通知。打开并使用Eclipse IDE,并按照以下步骤创建一个Spring应用程序:
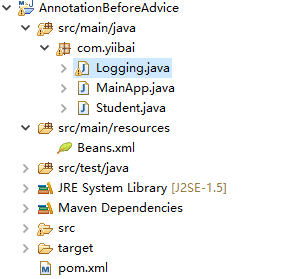
- 更新在Spring AOP应用实例中创建过的Student项目。
- 更新bean配置并运行应用程序,如下所述。
整个项目的目录结构如下所示 -
下面是Logging.java文件的内容。 这实际上是一个Aspect模块的样本,它定义了在各个点被调用的方法。
package com.yiibai;
import org.aspectj.lang.annotation.Aspect;
import org.aspectj.lang.annotation.Pointcut;
import org.aspectj.lang.annotation.Before;
@Aspect
public class Logging {
/** Following is the definition for a pointcut to select
* all the methods available. So advice will be called
* for all the methods.
*/
@Pointcut("execution(* com.yiibai.Student.getName(..))")
private void selectGetName(){}
/**
* This is the method which I would like to execute
* before a selected method execution.
*/
@Before("selectGetName()")
public void beforeAdvice(){
System.out.println("[beforeAdvice]Going to setup student profile.");
}
}
以下是Student.java文件的内容:
package com.yiibai;
public class Student {
private Integer age;
private String name;
public void setAge(Integer age) {
this.age = age;
}
public Integer getAge() {
System.out.println("Age : " + age );
return age;
}
public void setName(String name) {
this.name = name;
}
public String getName() {
System.out.println("Name : " + name );
return name;
}
public void printThrowException(){
System.out.println("Exception raised");
throw new IllegalArgumentException();
}
}
以下是MainApp.java文件的内容:
package com.yiibai;
import org.springframework.context.ApplicationContext;
import org.springframework.context.support.ClassPathXmlApplicationContext;
public class MainApp {
public static void main(String[] args) {
ApplicationContext context =
new ClassPathXmlApplicationContext("Beans.xml");
Student student = (Student) context.getBean("student");
student.getName();
student.getAge();
}
}
以下是配置文件Beans.xml文件的内容:
<?xml version="1.0" encoding="UTF-8"?>
<beans xmlns="http://www.springframework.org/schema/beans"
xmlns:xsi="http://www.w3.org/2001/XMLSchema-instance"
xmlns:aop="http://www.springframework.org/schema/aop"
xsi:schemaLocation="http://www.springframework.org/schema/beans
http://www.springframework.org/schema/beans/spring-beans-3.0.xsd
http://www.springframework.org/schema/aop
http://www.springframework.org/schema/aop/spring-aop-3.0.xsd ">
<aop:aspectj-autoproxy/>
<!-- Definition for student bean -->
<bean id="student" class="com.yiibai.Student">
<property name="name" value="minsu" />
<property name="age" value="25"/>
</bean>
<!-- Definition for logging aspect -->
<bean id="logging" class="com.yiibai.Logging"/>
</beans>
运行项目
完成创建源代码和配置文件后,运行应用程序。右键单击应用程序中的MainApp.java,并使用运行方式作为Java应用程序命令。 如果您的应用程序一切正常,这将打印以下消息:
[beforeAdvice]Going to setup student profile.
Name : minsu
Age : 25
这里简单解释一下上面定义的@Pointcut,它使用一个表达式来选择在com.yiibai包中定义的类中定义的方法getName()。 @Before通知使用上面定义的切入点作为参数。 在上述切入点覆盖的每个方法之前,都将调用beforeAdvice()方法。
本站代码下载:http://www.yiibai.com/siteinfo/download.html
本文属作者原创,转载请注明出处:易百教程 » Spring AOP基于注解的Before Advice
Spring AOP基于注解的After Advice - Spring AOP教程™
@After是一种通知类型,可确保在方法执行后运行通知。 以下是@After通知类的语法:
语法
@Pointcut("execution(* com.yiibai.Student.getAge(..))")
private void selectGetName(){}
@After("selectGetAge()")
public void afterAdvice(){
System.out.println("Student profile setup completed.");
}
在上面的语法示例中 -
要了解上面提到的@After通知(Advice)相关的概念,我们写一个Spring AOP基于注解的应用例子,它将使用基于注解配置实现通知。打开并使用Eclipse IDE,并按照以下步骤创建一个Spring应用程序:
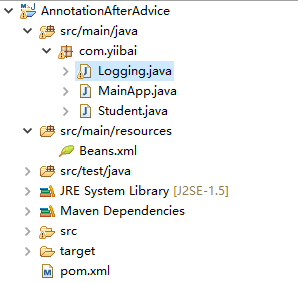
- 更新在Spring AOP应用实例中创建过的Student项目。
- 更新bean配置并运行应用程序,如下所述。
整个项目的目录结构如下所示 -
下面是Logging.java文件的内容。 这实际上是一个Aspect模块的样本,它定义了在各个点被调用的方法。
package com.yiibai;
import org.aspectj.lang.annotation.Aspect;
import org.aspectj.lang.annotation.Pointcut;
import org.aspectj.lang.annotation.After;
@Aspect
public class Logging {
/** Following is the definition for a pointcut to select
* all the methods available. So advice will be called
* for all the methods.
*/
@Pointcut("execution(* com.yiibai.Student.getAge(..))")
private void selectGetAge(){}
/**
* This is the method which I would like to execute
* after a selected method execution.
*/
@After("selectGetAge()")
public void afterAdvice(){
System.out.println("[afterAdvice] Student profile setup completed.");
}
}
以下是Student.java文件的内容:
package com.yiibai;
public class Student {
private Integer age;
private String name;
public void setAge(Integer age) {
this.age = age;
}
public Integer getAge() {
System.out.println("Age : " + age );
return age;
}
public void setName(String name) {
this.name = name;
}
public String getName() {
System.out.println("Name : " + name );
return name;
}
public void printThrowException(){
System.out.println("Exception raised");
throw new IllegalArgumentException();
}
}
以下是MainApp.java文件的内容:
package com.yiibai;
import org.springframework.context.ApplicationContext;
import org.springframework.context.support.ClassPathXmlApplicationContext;
public class MainApp {
public static void main(String[] args) {
ApplicationContext context =
new ClassPathXmlApplicationContext("Beans.xml");
Student student = (Student) context.getBean("student");
student.getName();
student.getAge();
}
}
以下是配置文件Beans.xml文件的内容:
<?xml version="1.0" encoding="UTF-8"?>
<beans xmlns="http://www.springframework.org/schema/beans"
xmlns:xsi="http://www.w3.org/2001/XMLSchema-instance"
xmlns:aop="http://www.springframework.org/schema/aop"
xsi:schemaLocation="http://www.springframework.org/schema/beans
http://www.springframework.org/schema/beans/spring-beans-3.0.xsd
http://www.springframework.org/schema/aop
http://www.springframework.org/schema/aop/spring-aop-3.0.xsd ">
<aop:aspectj-autoproxy/>
<!-- Definition for student bean -->
<bean id="student" class="com.yiibai.Student">
<property name="name" value="minsu" />
<property name="age" value="24"/>
</bean>
<!-- Definition for logging aspect -->
<bean id="logging" class="com.yiibai.Logging"/>
</beans>
运行项目
完成创建源代码和配置文件后,运行应用程序。右键单击应用程序中的MainApp.java,并使用运行方式作为Java应用程序命令。 如果您的应用程序一切正常,这将打印以下消息:
Name : minsu
Age : 24
[afterAdvice] Student profile setup completed.
这里简单解释一下上面定义的@Pointcut,它使用一个表达式来选择在com.yiibai包中定义的类中定义的方法getName()。 @After通知使用上面定义的切入点作为参数。 在上述切入点覆盖的每个方法之后,都将调用afterAdvice()方法。
本站代码下载:http://www.yiibai.com/siteinfo/download.html
本文属作者原创,转载请注明出处:易百教程 » Spring AOP基于注解的After Advice
Spring AOP基于注解的After Returning Advice - Spring AOP教程™
@AfterReturning是一种通知类型,可确保方法执行成功后运行通知。 以下是@AfterReturning通知的语法:
语法
@AfterReturning(pointcut="execution(* com.yiibai.Student.*(..))", returning="retVal")
public void afterReturningAdvice(JoinPoint jp, Object retVal){
System.out.println("Method Signature: " + jp.getSignature());
System.out.println("Returning:" + retVal.toString() );
}
在上面的语法示例中 -
- @AfterReturning - 如果方法返回成功,则将函数标记为在切入点覆盖的方法之前执行的通知。
- @Pointcut - 将函数标记为切入点
- @After - 将函数标记为在切入点覆盖的方法之后执行的通知。
- execution( expression ) - 涵盖应用通知的方法的表达式。
- returning - 要返回的变量的名称。
要了解上面提到的@AfterReturning Advice通知相关的概念,我们写一个Spring AOP基于注解的应用例子,它将使用基于注解配置实现通知。打开并使用Eclipse IDE,并按照以下步骤创建一个Spring应用程序:
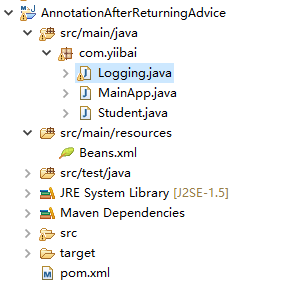
- 更新在Spring AOP应用实例中创建过的Student项目。
- 更新bean配置并运行应用程序,如下所述。
整个项目的目录结构如下所示 -
下面是Logging.java文件的内容。 这实际上是一个Aspect模块的样本,它定义了在各个点被调用的方法。
package com.yiibai;
import org.aspectj.lang.annotation.Aspect;
import org.aspectj.lang.JoinPoint;
import org.aspectj.lang.annotation.AfterReturning;
@Aspect
public class Logging {
/**
* This is the method which I would like to execute
* after a selected method execution.
*/
@AfterReturning(pointcut="execution(* com.yiibai.Student.*(..))", returning="retVal")
public void afterReturningAdvice(JoinPoint jp, Object retVal){
System.out.println("[afterReturningAdvice] Method Signature: " + jp.getSignature());
System.out.println("[afterReturningAdvice] Returning: " + retVal.toString() );
}
}
以下是Student.java文件的内容:
package com.yiibai;
public class Student {
private Integer age;
private String name;
public void setAge(Integer age) {
this.age = age;
}
public Integer getAge() {
System.out.println("Age : " + age );
return age;
}
public void setName(String name) {
this.name = name;
}
public String getName() {
System.out.println("Name : " + name );
return name;
}
public void printThrowException(){
System.out.println("Exception raised");
throw new IllegalArgumentException();
}
}
以下是MainApp.java文件的内容:
package com.yiibai;
import org.springframework.context.ApplicationContext;
import org.springframework.context.support.ClassPathXmlApplicationContext;
public class MainApp {
public static void main(String[] args) {
ApplicationContext context =
new ClassPathXmlApplicationContext("Beans.xml");
Student student = (Student) context.getBean("student");
student.getAge();
}
}
以下是配置文件Beans.xml文件的内容:
<?xml version="1.0" encoding="UTF-8"?>
<beans xmlns="http://www.springframework.org/schema/beans"
xmlns:xsi="http://www.w3.org/2001/XMLSchema-instance"
xmlns:aop="http://www.springframework.org/schema/aop"
xsi:schemaLocation="http://www.springframework.org/schema/beans
http://www.springframework.org/schema/beans/spring-beans-3.0.xsd
http://www.springframework.org/schema/aop
http://www.springframework.org/schema/aop/spring-aop-3.0.xsd ">
<aop:aspectj-autoproxy/>
<!-- Definition for student bean -->
<bean id="student" class="com.yiibai.Student">
<property name="name" value="minsu" />
<property name="age" value="26"/>
</bean>
<!-- Definition for logging aspect -->
<bean id="logging" class="com.yiibai.Logging"/>
</beans>
运行项目
完成创建源代码和配置文件后,运行应用程序。右键单击应用程序中的MainApp.java,并使用运行方式作为Java应用程序命令。 如果您的应用程序一切正常,这将打印以下消息:
Age : 24
[afterReturningAdvice] Method Signature: Integer com.yiibai.Student.getAge()
[afterReturningAdvice] Returning: 24
本站代码下载:http://www.yiibai.com/siteinfo/download.html
本文属作者原创,转载请注明出处:易百教程 » Spring AOP基于注解的After Returning Advice
Spring AOP基于注解的AfterThrowing - Spring AOP教程™
@AfterThrowing是一种通知类型,可以确保在方法抛出异常时运行一个通知。 以下是@AfterThrowing通知的语法:
语法
@AfterThrowing(pointcut="execution(* com.yiibai.Student.*(..))", throwing= "error")
public void afterThrowingAdvice(JoinPoint jp, Throwable error){
System.out.println("Method Signature: " + jp.getSignature());
System.out.println("Exception: "+error);
}
在上面的语法示例中 -
- @AfterReturning - 如果方法返回成功,则将函数标记为在切入点覆盖的方法之前执行的通知。
- @Pointcut - 将函数标记为切入点
- @After - 将函数标记为在切入点覆盖的方法之后执行的通知。
- execution( expression ) - 涵盖应用通知的方法的表达式。
- throwing - 返回的异常名称。
要了解上面提到的@AfterThrowing通知相关的概念,我们写一个Spring AOP基于注解的应用例子,它将使用基于注解配置实现通知。打开并使用Eclipse IDE,并按照以下步骤创建一个Spring应用程序:
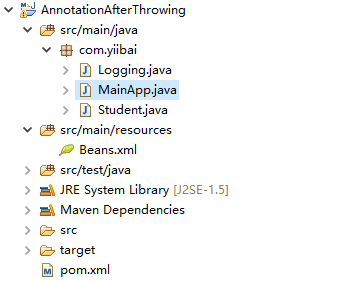
- 更新在Spring AOP应用实例中创建过的Student项目。
- 更新bean配置并运行应用程序,如下所述。
整个项目的目录结构如下所示 -
下面是Logging.java文件的内容。 这实际上是一个Aspect模块的样本,它定义了在各个点被调用的方法。
package com.yiibai;
import org.aspectj.lang.annotation.Aspect;
import org.aspectj.lang.JoinPoint;
import org.aspectj.lang.annotation.AfterThrowing;
@Aspect
public class Logging {
/**
* This is the method which I would like to execute
* after a selected method execution throws exception.
*/
@AfterThrowing(pointcut="execution(* com.yiibai.Student.*(..))", throwing= "error")
public void afterThrowingAdvice(JoinPoint jp, Throwable error){
System.out.println("[afterThrowingAdvice] Method Signature: " + jp.getSignature());
System.out.println("[afterThrowingAdvice] Exception: "+error);
}
}
以下是Student.java文件的内容:
package com.yiibai;
import org.springframework.context.ApplicationContext;
import org.springframework.context.support.ClassPathXmlApplicationContext;
public class MainApp {
public static void main(String[] args) {
ApplicationContext context =
new ClassPathXmlApplicationContext("Beans.xml");
Student student = (Student) context.getBean("student");
student.printThrowException();
}
}
以下是MainApp.java文件的内容:
package com.yiibai;
import org.springframework.context.ApplicationContext;
import org.springframework.context.support.ClassPathXmlApplicationContext;
public class MainApp {
public static void main(String[] args) {
ApplicationContext context =
new ClassPathXmlApplicationContext("Beans.xml");
Student student = (Student) context.getBean("student");
student.printThrowException();
}
}
以下是配置文件Beans.xml文件的内容:
<?xml version="1.0" encoding="UTF-8"?>
<beans xmlns="http://www.springframework.org/schema/beans"
xmlns:xsi="http://www.w3.org/2001/XMLSchema-instance"
xmlns:aop="http://www.springframework.org/schema/aop"
xsi:schemaLocation="http://www.springframework.org/schema/beans
http://www.springframework.org/schema/beans/spring-beans-3.0.xsd
http://www.springframework.org/schema/aop
http://www.springframework.org/schema/aop/spring-aop-3.0.xsd ">
<aop:aspectj-autoproxy/>
<!-- Definition for student bean -->
<bean id="student" class="com.yiibai.Student">
<property name="name" value="minsu" />
<property name="age" value="24"/>
</bean>
<!-- Definition for logging aspect -->
<bean id="logging" class="com.yiibai.Logging"/>
</beans>
运行项目
完成创建源代码和配置文件后,运行应用程序。右键单击应用程序中的MainApp.java,并使用运行方式作为Java应用程序命令。 如果您的应用程序一切正常,这将打印以下消息:
Exception raised
[afterThrowingAdvice] Method Signature: void com.yiibai.Student.printThrowException()
[afterThrowingAdvice] Exception: java.lang.IllegalArgumentException
Exception in thread "main" java.lang.IllegalArgumentException
at com.yiibai.Student.printThrowException(Student.java:25)
at com.yiibai.Student$$FastClassBySpringCGLIB$$e9280b4b.invoke(<generated>)
at org.springframework.cglib.proxy.MethodProxy.invoke(MethodProxy.java:204)
at org.springframework.aop.framework.CglibAopProxy$CglibMethodInvocation.invokeJoinpoint(CglibAopProxy.java:717)
at org.springframework.aop.framework.ReflectiveMethodInvocation.proceed(ReflectiveMethodInvocation.java:157)
at org.springframework.aop.aspectj.AspectJAfterThrowingAdvice.invoke(AspectJAfterThrowingAdvice.java:58)
at org.springframework.aop.framework.ReflectiveMethodInvocation.proceed(ReflectiveMethodInvocation.java:179)
at org.springframework.aop.interceptor.ExposeInvocationInterceptor.invoke(ExposeInvocationInterceptor.java:92)
at org.springframework.aop.framework.ReflectiveMethodInvocation.proceed(ReflectiveMethodInvocation.java:179)
at org.springframework.aop.framework.CglibAopProxy$DynamicAdvisedInterceptor.intercept(CglibAopProxy.java:653)
at com.yiibai.Student$$EnhancerBySpringCGLIB$$bb5ffc0.printThrowException(<generated>)
at com.yiibai.MainApp.main(MainApp.java:16)
本站代码下载:http://www.yiibai.com/siteinfo/download.html
本文属作者原创,转载请注明出处:易百教程 » Spring AOP基于注解的AfterThrowing
Spring AOP基于注解的Around通知 - Spring AOP教程™
@Around是一种建议类型,可确保方法执行前后的通知可以运行。 以下是@Around通知的语法:
语法
@Pointcut("execution(* com.yiibai.Student.getAge(..))")
private void selectGetName(){}
@Around("selectGetAge()")
public void aroundAdvice(ProceedingJoinPoint proceedingJoinPoint){
System.out.println("[aroundAdvice] Around advice");
Object[] args=jp.getArgs();
if(args.length>0){
System.out.print("[aroundAdvice] Arguments passed: " );
for (int i = 0; i < args.length; i++) {
System.out.print("[aroundAdvice] arg "+(i+1)+": "+args[i]);
}
}
Object result=jp.proceed(args);
System.out.println("[aroundAdvice] Returning " + result);
return result.toString();
}
在上面的语法示例中 -
要了解上面提到的@Around通知相关的概念,我们写一个Spring AOP基于注解的应用例子,它将使用基于注解配置实现通知。打开并使用Eclipse IDE,并按照以下步骤创建一个Spring应用程序:
- 更新在Spring AOP应用实例中创建过的Student项目。
- 更新bean配置并运行应用程序,如下所述。
整个项目的目录结构如下所示 -
下面是Logging.java文件的内容。 这实际上是一个Aspect模块的样本,它定义了在各个点被调用的方法。
package com.yiibai;
import org.aspectj.lang.annotation.Aspect;
import org.aspectj.lang.annotation.Pointcut;
import org.aspectj.lang.annotation.Around;
import org.aspectj.lang.ProceedingJoinPoint;
@Aspect
public class Logging {
/** Following is the definition for a pointcut to select
* all the methods available. So advice will be called
* for all the methods.
*/
@Pointcut("execution(* com.yiibai.Student.getAge(..))")
private void selectGetAge(){}
/**
* This is the method which I would like to execute
* around a selected method execution.
*/
@Around("selectGetAge()")
public void aroundAdvice(ProceedingJoinPoint proceedingJoinPoint) throws Throwable{
System.out.println("Around advice");
Object[] args=proceedingJoinPoint.getArgs();
if(args.length>0){
System.out.print("Arguments passed: " );
for (int i = 0; i < args.length; i++) {
System.out.print("arg "+(i+1)+": "+args[i]);
}
}
Object result=proceedingJoinPoint.proceed(args);
System.out.println("Returning " + result);
}
}
以下是Student.java文件的内容:
package com.yiibai;
public class Student {
private Integer age;
private String name;
public void setAge(Integer age) {
this.age = age;
}
public Integer getAge() {
System.out.println("Age : " + age );
return age;
}
public void setName(String name) {
this.name = name;
}
public String getName() {
System.out.println("Name : " + name );
return name;
}
public void printThrowException(){
System.out.println("Exception raised");
throw new IllegalArgumentException();
}
}
以下是MainApp.java文件的内容:
package com.yiibai;
import org.springframework.context.ApplicationContext;
import org.springframework.context.support.ClassPathXmlApplicationContext;
public class MainApp {
public static void main(String[] args) {
ApplicationContext context =
new ClassPathXmlApplicationContext("Beans.xml");
Student student = (Student) context.getBean("student");
student.getAge();
}
}
以下是配置文件Beans.xml文件的内容:
<?xml version="1.0" encoding="UTF-8"?>
<beans xmlns="http://www.springframework.org/schema/beans"
xmlns:xsi="http://www.w3.org/2001/XMLSchema-instance"
xmlns:aop="http://www.springframework.org/schema/aop"
xsi:schemaLocation="http://www.springframework.org/schema/beans
http://www.springframework.org/schema/beans/spring-beans-3.0.xsd
http://www.springframework.org/schema/aop
http://www.springframework.org/schema/aop/spring-aop-3.0.xsd ">
<aop:aspectj-autoproxy/>
<!-- Definition for student bean -->
<bean id="student" class="com.yiibai.Student">
<property name="name" value="minsu" />
<property name="age" value="24"/>
</bean>
<!-- Definition for logging aspect -->
<bean id="logging" class="com.yiibai.Logging"/>
</beans>
运行项目
完成创建源代码和配置文件后,运行应用程序。右键单击应用程序中的MainApp.java,并使用运行方式作为Java应用程序命令。 如果您的应用程序一切正常,这将打印以下消息:
[aroundAdvice]Around advice
Age : 24
[aroundAdvice] Returning 24
本站代码下载:http://www.yiibai.com/siteinfo/download.html
本文属作者原创,转载请注明出处:易百教程 » Spring AOP基于注解的Around通知
Spring AOP代理 - Spring AOP教程™
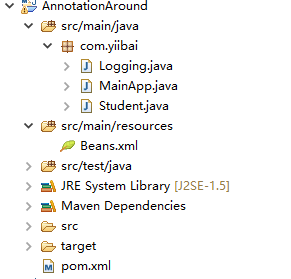
到目前为止,我们学习过如何使用<aop:config>或<aop:aspectj-autoproxy>声明方面。也可以通过编程方式创建代理,并使用代理对象以编程方式调用方面。
语法
//Create object to be proxied
Student student = new Student();
//Create the Proxy Factory
AspectJProxyFactory proxyFactory = new AspectJProxyFactory(student);
//Add Aspect class to the factory
proxyFactory.addAspect(Logging.class);
//Get the proxy object
Student proxyStudent = proxyFactory.getProxy();
//Invoke the proxied method.
proxyStudent.getAge();
在上面的语法示例中 -
- AspectJProxyFactory - 用于创建代理对象的工厂类。
- Logging.class - 包含通知的方面类
- Student - 将被通知的业务类。
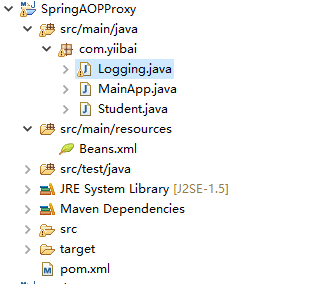
要了解上面提到与代理相关的概念,我们写一个Spring AOP基于注解的应用例子,它将使用基于注解配置实现通知。打开并使用Eclipse IDE,并按照以下步骤创建一个Spring应用程序:
- 更新在Spring AOP应用实例中创建过的Student项目。
- 更新bean配置并运行应用程序,如下所述。
整个项目的目录结构如下所示 -
下面是Logging.java文件的内容。 这实际上是一个Aspect模块的样本,它定义了在各个点被调用的方法。
package com.yiibai;
import org.aspectj.lang.annotation.Aspect;
import org.aspectj.lang.annotation.Pointcut;
import org.aspectj.lang.annotation.Before;
@Aspect
public class Logging {
/** Following is the definition for a pointcut to select
* all the methods available. So advice will be called
* for all the methods.
*/
@Pointcut("execution(* com.yiibai.Student.getAge(..))")
private void selectGetAge(){}
/**
* This is the method which I would like to execute
* before a selected method execution.
*/
@Before("selectGetAge()")
public void beforeAdvice(){
System.out.println("[beforeAdvice] Going to setup student profile.");
}
}
以下是Student.java文件的内容:
package com.yiibai;
public class Student {
private Integer age;
public void setAge(Integer age) {
this.age = age;
}
public Integer getAge() {
System.out.println("Age : " + age );
return age;
}
}
以下是MainApp.java文件的内容:
package com.yiibai;
import org.springframework.context.ApplicationContext;
import org.springframework.context.support.ClassPathXmlApplicationContext;
import org.springframework.aop.aspectj.annotation.AspectJProxyFactory;
public class MainApp {
public static void main(String[] args) {
ApplicationContext context =
new ClassPathXmlApplicationContext("Beans.xml");
Student student = (Student) context.getBean("student");
//Create the Proxy Factory
AspectJProxyFactory proxyFactory = new AspectJProxyFactory(student);
//Add Aspect class to the factory
proxyFactory.addAspect(Logging.class);
//Get the proxy object
Student proxyStudent = proxyFactory.getProxy();
//Invoke the proxied method.
proxyStudent.getAge();
}
}
以下是配置文件Beans.xml文件的内容:
<?xml version="1.0" encoding="UTF-8"?>
<beans xmlns="http://www.springframework.org/schema/beans"
xmlns:xsi="http://www.w3.org/2001/XMLSchema-instance"
xmlns:aop="http://www.springframework.org/schema/aop"
xsi:schemaLocation="http://www.springframework.org/schema/beans
http://www.springframework.org/schema/beans/spring-beans-3.0.xsd
http://www.springframework.org/schema/aop
http://www.springframework.org/schema/aop/spring-aop-3.0.xsd ">
<!-- Definition for student bean -->
<bean id="student" class="com.yiibai.Student">
<property name="age" value="26"/>
</bean>
<!-- Definition for logging aspect -->
<bean id="logging" class="com.yiibai.Logging"/>
</beans>
运行项目
完成创建源代码和配置文件后,运行应用程序。右键单击应用程序中的MainApp.java,并使用运行方式作为Java应用程序命令。 如果您的应用程序一切正常,这将打印以下消息:
[beforeAdvice] Going to setup student profile.
Age : 26
本站代码下载:http://www.yiibai.com/siteinfo/download.html
本文属作者原创,转载请注明出处:易百教程 » Spring AOP代理
Spring AOP自定义注解 - Spring AOP教程™
根据切入点表达式可能会将它们应用到其他不需要通知的其他bean。 例如,考虑以下表达式:
execution(* com.yiibai.*.getAge(..))
如果一个新的spring bean添加了getAge()方法,并且通知将开始应用到它,尽管它可能不需要应用通知。要实现不需要它,我们可以创建一个自定义注解并注解要应用到通知的方法。
@Before("@annotation(com.yiibai.Loggable)")
要了解上面提到的关于@BeforeAdvice的概念,现在我们来写一个实现@BeforeAdvice的例子。打开并使用Eclipse IDE,并按照以下步骤创建一个Spring应用程序:
- 更新在Spring AOP应用实例中创建过的Student项目。
- 更新bean配置并运行应用程序,如下所述。
整个项目的目录结构如下所示 -
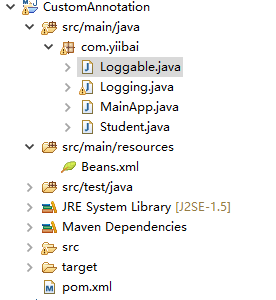
下面是Logging.java文件的内容。 这实际上是一个Aspect模块的样本,它定义了在各个点被调用的方法。
package com.yiibai;
import org.aspectj.lang.annotation.Aspect;
import org.aspectj.lang.annotation.Before;
@Aspect
public class Logging {
/**
* This is the method which I would like to execute
* before a selected method execution.
*/
@Before("@annotation(com.yiibai.Loggable)")
public void beforeAdvice(){
System.out.println("Going to setup student profile.");
}
}
以下是Loggable.java文件的内容:
package com.yiibai;
public @interface Loggable {
}
以下是Student.java文件的内容:
package com.yiibai;
public class Student {
private Integer age;
private String name;
public void setAge(Integer age) {
this.age = age;
}
public Integer getAge() {
System.out.println("Age : " + age );
return age;
}
public void setName(String name) {
this.name = name;
}
@Loggable
public String getName() {
System.out.println("Name : " + name );
return name;
}
public void printThrowException(){
System.out.println("Exception raised");
throw new IllegalArgumentException();
}
}
以下是MainApp.java文件的内容:
package com.yiibai;
import org.springframework.context.ApplicationContext;
import org.springframework.context.support.ClassPathXmlApplicationContext;
public class MainApp {
public static void main(String[] args) {
ApplicationContext context =
new ClassPathXmlApplicationContext("Beans.xml");
Student student = (Student) context.getBean("student");
student.getName();
student.getAge();
}
}
以下是配置文件Beans.xml文件的内容:
<?xml version="1.0" encoding="UTF-8"?>
<beans xmlns="http://www.springframework.org/schema/beans"
xmlns:xsi="http://www.w3.org/2001/XMLSchema-instance"
xmlns:aop="http://www.springframework.org/schema/aop"
xsi:schemaLocation="http://www.springframework.org/schema/beans
http://www.springframework.org/schema/beans/spring-beans-3.0.xsd
http://www.springframework.org/schema/aop
http://www.springframework.org/schema/aop/spring-aop-3.0.xsd ">
<aop:aspectj-autoproxy/>
<!-- Definition for student bean -->
<bean id="student" class="com.yiibai.Student">
<property name="name" value="minsu" />
<property name="age" value="26"/>
</bean>
<!-- Definition for logging aspect -->
<bean id="logging" class="com.yiibai.Logging"/>
</beans>
运行项目
完成创建源代码和配置文件后,运行应用程序。右键单击应用程序中的MainApp.java,并使用运行方式作为Java应用程序命令。 如果您的应用程序一切正常,这将打印以下消息:
Going to setup student profile.
Name : minsu
Age : 26
本站代码下载:http://www.yiibai.com/siteinfo/download.html
本文属作者原创,转载请注明出处:易百教程 » Spring AOP自定义注解
