



Tutorialspoint SVG 教程
来源:易百教程
SVG教程™
SVG表示可缩放矢量图形,它是一种基于XML格式,用于绘制矢量图像的技术。 它可用于绘制两维矢量图像。
本教程将介绍SVG的基础知识。包含讨论SVG所有基本组件的章节,并附有合适的示例。
面向读者
此教程资料已为初学者准备,以帮助他们了解与SVG相关的基本概念。 本教程也提供足够的SVG理解,从这里您可以进阶到SVG更高水平的专业知识。
前提条件
在继续本教程之前,要求读者应该具备XML,HTML和Javascript的基本知识。
问题反馈
我们不能保证您在学习此SVG教程的过程中不会遇到任何问题。本教程中的讲解,示例和代码等只是根据作者的理解来概括写出。由于作者水平和能力有限,因此不保正所有编写的文章都准确无误。但是如果有遇到任何错误或问题,请反馈给我们,我们会及时纠正以方便后续读者阅读。
易百教程移动端:请扫描本页面底部(右侧)二维码并关注微信公众号,回复:"教程" 选择相关教程阅读或直接访问:http://m.yiibai.com 。
SVG简介 - SVG教程™
SVG是一种以快速开发和高性能为目标来开发图形的Google XML格式语言。
它有以下特点 -
- SVG(Scalable Vector Graphics)是一种基于XML的语言,用于定义基于矢量的图形。
- SVG旨在通过网络显示图像。
- 作为矢量图像,无论SVG图像如何缩小或调整大小,都不会丢失质量。
- SVG图像支持交互性和动画。
- SVG是W3C标准。
- 其他图像格式(如光栅图像)也可以用SVG图像杵着。
- SVG与HTML的XSLT和DOM很好地集成。
优点
SVG有以下优点 -
- 使用任何文本编辑器来创建和编辑SVG图像。
- 基于XML,SVG图像是可搜索的,可索引的,并且可以被脚本化和压缩。
- SVG图像具有高度的可扩展性,因为不管它们如何缩小或调整大小,它们都不会丢失质量。
- 在任何分辨率下都有良好的打印质量。
- SVG是一个开放标准。
缺点
SVG有以下缺点 -
- 与二进制格式的光栅图像相比,文本格式大小更大。
- 即使对于小图像,尺寸也可能很大。
示例
以下XML片段可用于在Web浏览器中绘制圆圈。
<svg width="100" height="100">
<circle cx="50" cy="50" r="40" stroke="red" stroke-width="2" fill="green" />
</svg>
将SVG XML直接嵌入HTML页面 - test-svg.html
<html>
<title>SVG Image</title>
<body>
<h1>Sample SVG Image</h1>
<svg width="100" height="100">
<circle cx="50" cy="50" r="40" stroke="red" stroke-width="2" fill="green" />
</svg>
</body>
</html>
保存上面代码,并使用浏览器浏览 -
注意:可以使用Chrome/Firefox/Opera直接查看SVG图像,无需任何插件。 在Internet Explorer中,需要使用activeX控件才能查看SVG图像。
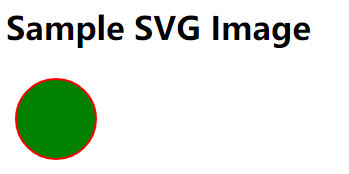
SVG如何与HTML集成
- <svg>元素表示SVG图像的开始。
- <svg>元素的width和height属性定义了SVG图像的高度和宽度。
- 在上面的例子中,使用了一个<circle>元素来绘制一个圆。
- cx和cy属性表示圆的中心。 默认值是(0,0)。 r属性表示圆的半径。
- 其他属性描边和描边宽度控制圆的轮廓。
- fill属性定义了圆的填充颜色。
- 闭合</ svg>标记指示SVG图像的结束。
易百教程移动端:请扫描本页面底部(右侧)二维码并关注微信公众号,回复:"教程" 选择相关教程阅读或直接访问:http://m.yiibai.com 。
SVG形状 - SVG教程™
SVG提供了许多可用于绘制图像的形状。 以下是常见的形状。
编号 | 形状类型 | 描述 |
1 | 用于绘制一个矩形。 | |
2 | 用于绘制一个圆圈。 | |
3 | 用于绘制椭圆。 | |
4 | 用于绘制一条线 | |
5 | 用于绘制由连接的直线组成的闭合形状。 | |
6 | 用于绘制由连接的直线组成的开放形状。 | |
7 | 用于绘制任何路径。 |
易百教程移动端:请扫描本页面底部(右侧)二维码并关注微信公众号,回复:"教程" 选择相关教程阅读或直接访问:http://m.yiibai.com 。
SVG文本 - SVG教程™
<text>元素用于绘制文本。
声明
以下是<text>元素的语法声明。 这里只显示了一些主要属性。
<text
x="x-cordinates"
y="y-cordinates"
dx="list of lengths"
dy="list of lengths"
rotate="list of numbers"
textlength="length"
lengthAdjust="spacing" >
</text>
属性
编号 | 属性 | 描述 |
1 | x | 文本的x轴的坐标。 |
2 | y | 文本的y轴的坐标。 |
3 | dx | 随着x轴移动的坐标。 |
4 | dy | 随着y轴移动的坐标。 |
5 | rotate | 旋转应用于所有字形。 |
6 | textlength | 渲染文本的长度。 |
7 | lengthAdjust | 调整类型与文本的渲染长度。 |
示例
文件:testSVG.html -
<html>
<title>SVG文本</title>
<body>
<h1>简单SVG文本图片</h1>
<svg width="800" height="800">
<g>
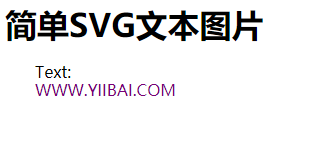
<text x="30" y="12" >Text: </text>
<text x="30" y="30" fill="rgb(121,0,121)">WWW.YIIBAI.COM</text>
</g>
</svg>
</body>
</html>
在Chrome网络浏览器中打开testSVG.html ,可以使用Chrome/Firefox/Opera直接查看SVG图像,无需任何插件。 Internet Explorer 9及更高版本还支持SVG图像呈现。
使用旋转
<html>
<title>SVG文本</title>
<body>
<h1>简单SVG文本图片</h1>
<svg width="800" height="800">
<g>
<text x="30" y="12" >Multiline Text: </text>
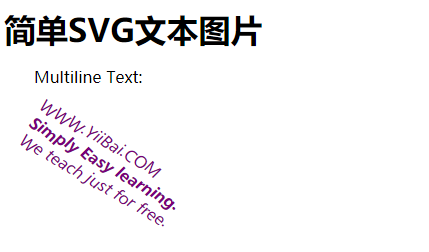
<text x="30" y="30" rotate="15" transform="rotate(30 20,40)" fill="rgb(121,0,121)">WWW.YiiBai.COM
<tspan x="30" y="50" font-weight="bold">Simply Easy learning.</tspan>
<tspan x="30" y="70">We teach just for free.</tspan>
</text>
</g>
</svg>
</body>
</html>
在浏览器打开上面示例代码文件,得到以下结果 -
超链接文本
<html>
<title>SVG文本</title>
<body>
<h1>简单SVG文本图片</h1>
<svg width="800" height="800">
<g>
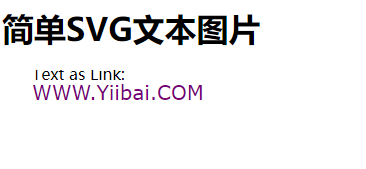
<text x="30" y="10" >Text as Link: </text>
<a xlink:href="http://www.yiibai.com/svg/" target="_blank">
<text font-family="Verdana" font-size="20" x="30" y="30"
fill="rgb(121,0,121)">WWW.Yiibai.COM</text>
</a>
</g>
</svg>
</body>
</html>
在浏览器打开上面示例代码文件,得到以下结果 -
易百教程移动端:请扫描本页面底部(右侧)二维码并关注微信公众号,回复:"教程" 选择相关教程阅读或直接访问:http://m.yiibai.com 。
SVG stroke属性 - SVG教程™
SVG支持多个笔画(stroke)属性。
以下是一些经常使用的stroke属性。
编号 | Stroke类型 | 描述 |
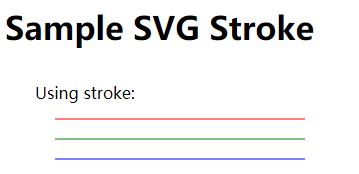
1 | stroke | 定义元素的文本,线条或轮廓的颜色。 |
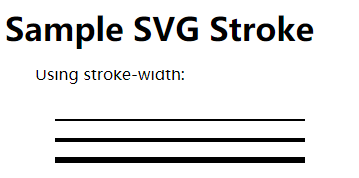
2 | stroke-width | 定义任何元素的文本,线条或轮廓的粗细。 |
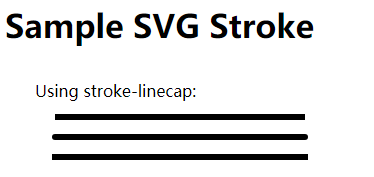
3 | stroke-linecap | 定义不同类型的结束行或任何路径的轮廓。 |
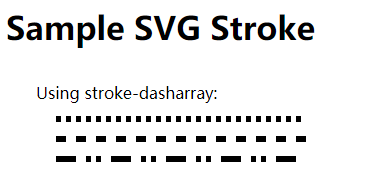
4 | stroke-dasharray | 用于创建虚线。 |
示例
文件:testSVG.html -
<html>
<title>SVG Stroke</title>
<body>
<h1>Sample SVG Stroke</h1>
<svg width="800" height="800">
<g>
<text x="30" y="30" >Using stroke: </text>
<path stroke="red" d="M 50 50 L 300 50" />
<path stroke="green" d="M 50 70 L 300 70" />
<path stroke="blue" d="M 50 90 L 300 90" />
</g>
</svg>
</body>
</html>
在Chrome网络浏览器中打开testSVG.html,应该看到以下结果 -
stroke width 属性
<html>
<title>SVG Stroke</title>
<body>
<h1>Sample SVG Stroke</h1>
<svg width="800" height="800">
<text x="30" y="10" >Using stroke-width: </text>
<path stroke-width="2" stroke="black" d="M 50 50 L 300 50" />
<path stroke-width="4" stroke="black" d="M 50 70 L 300 70" />
<path stroke-width="6" stroke="black" d="M 50 90 L 300 90" />
</svg>
</body>
</html>
在Chrome网络浏览器中打开testSVG.html,应该看到以下结果 -
stroke-linecap属性
<html>
<title>SVG Stroke</title>
<body>
<h1>Sample SVG Stroke</h1>
<svg width="800" height="800">
<g>
<text x="30" y="30" >Using stroke-linecap: </text>
<path stroke-linecap="butt" stroke-width="6"
stroke="black" d="M 50 50 L 300 50" />
<path stroke-linecap="round" stroke-width="6"
stroke="black" d="M 50 70 L 300 70" />
<path stroke-linecap="square" stroke-width="6"
stroke="black" d="M 50 90 L 300 90" />
</g>
</svg>
</body>
</html>
在Chrome网络浏览器中打开testSVG.html,应该看到以下结果 -
stroke-dasharray属性
<html>
<title>SVG Stroke</title>
<body>
<h1>Sample SVG Stroke</h1>
<svg width="800" height="800">
<g>
<text x="30" y="30" >Using stroke-dasharray: </text>
<path stroke-dasharray="5,5" stroke-width="6"
stroke="black" d="M 50 50 L 300 50" />
<path stroke-dasharray="10,10" stroke-width="6"
stroke="black" d="M 50 70 L 300 70" />
<path stroke-dasharray="20,10,5,5,5,10" stroke-width="6"
stroke="black" d="M 50 90 L 300 90" />
</g>
</svg>
</body>
</html>
在Chrome网络浏览器中打开testSVG.html,应该看到以下结果 -
易百教程移动端:请扫描本页面底部(右侧)二维码并关注微信公众号,回复:"教程" 选择相关教程阅读或直接访问:http://m.yiibai.com 。
SVG <filter>元素 - SVG教程™
SVG使用<filter>元素来定义滤镜。 <filter>元素使用一个id属性来唯一标识它。滤镜在<def>元素中定义,然后由它们的id通过图形元素引用。
SVG提供了一组丰富的滤镜。 以下是常用滤镜的列表。
- feBlend
- feColorMatrix
- feComponentTransfer
- feComposite
- feConvolveMatrix
- feDiffuseLighting
- feDisplacementMap
- feFlood
- feGaussianBlur
- feImage
- feMerge
- feMorphology
- feOffset - filter for drop shadows
- feSpecularLighting
- feTile
- feTurbulence
- feDistantLight
- fePointLight
- feSpotLight
声明
以下是<filter>元素的语法声明。这里只显示一些主要属性。
<filter
filterUnits="units to define filter effect region"
primitiveUnits="units to define primitive filter subregion"
x="x-axis co-ordinate"
y="y-axis co-ordinate"
width="length"
height="length"
filterRes="numbers for filter region"
xlink:href="reference to another filter" >
</filter>
属性
编号 | 名称 | 描述 |
1 | filterUnits | 用来定义滤镜效果区域的单位。 它为滤镜中的各种长度值以及定义滤镜子区域的属性指定了坐标系。 如果filterUnits =“userSpaceOnUse”,则值表示使用'filter'元素时当前用户坐标系中的值。 如果filterUnits =“objectBoundingBox”,值表示在使用'filter'元素时就地引用元素上边界框的分数或百分比值。 默认是userSpaceOnUse。 |
2 | primitiveUnits | 用来定义滤镜效果区域的单位。 它为滤镜中的各种长度值以及定义滤镜子区域的属性指定了坐标系。 如果filterUnits =“userSpaceOnUse”,则值表示使用'filter'元素时当前用户坐标系中的值。 如果filterUnits =“objectBoundingBox”,值表示在使用'filter'元素时就地引用元素上边界框的分数或百分比值。 默认是userSpaceOnUse。 |
3 | x | 滤镜边界框的x轴坐标。 缺省值是0。 |
4 | y | 滤镜边界框的y轴坐标。 缺省值是0。 |
5 | width | 滤镜边界框的宽度。 缺省值是0。 |
6 | height | 滤镜边界框的高度。 缺省值是0。 |
7 | filterRes | 代表滤镜区域的数字。 |
8 | xlink:href | 用于指另一个滤镜。 |
示例
文件:testSVG.html -
<html>
<title>SVG Filter</title>
<body>
<h1>Sample SVG Filter</h1>
<svg width="800" height="800">
<defs>
<filter id="filter1" x="0" y="0">
<feGaussianBlur in="SourceGraphic" stdDeviation="8" />
</filter>
<filter id="filter2" x="0" y="0" width="200%" height="200%">
<feOffset result="offOut" in="SourceAlpha" dx="20" dy="20" />
<feGaussianBlur result="blurOut" in="offOut" stdDeviation="10" />
<feBlend in="SourceGraphic" in2="blurOut" mode="normal" />
</filter>
</defs>
<g>
<text x="30" y="50" >Using Filters (Blur Effect): </text>
<rect x="100" y="100" width="90" height="90" stroke="green" stroke-width="3"
fill="green" filter="url(#filter1)" />
</g>
</svg>
</body>
</html>
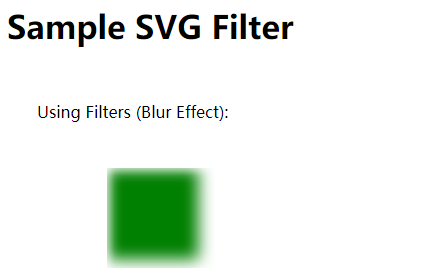
以下是上述代码的一些说明 -
- 两个<filter>元素定义为filter1和filter2。
- feGaussianBlur滤镜效果使用stdDeviation模糊量定义模糊效果。
- in="SourceGraphic"定义该效果适用于整个元素。
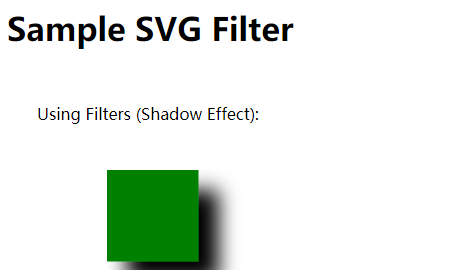
- feOffset滤镜效果用于创建阴影效果。 in =“SourceAlpha”定义该效果适用于RGBA图形的Alpha部分。
- <rect>元素使用filter属性链接过滤器。
在Chrome浏览器中打开文件:textSVG.html,结果如下 -
滤镜与阴影效果
<html>
<title>SVG Filter</title>
<body>
<h1>Sample SVG Filter</h1>
<svg width="800" height="800">
<defs>
<filter id="filter1" x="0" y="0">
<feGaussianBlur in="SourceGraphic" stdDeviation="8" />
</filter>
<filter id="filter2" x="0" y="0" width="200%" height="200%">
<feOffset result="offOut" in="SourceAlpha" dx="20" dy="20" />
<feGaussianBlur result="blurOut" in="offOut" stdDeviation="10" />
<feBlend in="SourceGraphic" in2="blurOut" mode="normal" />
</filter>
</defs>
<g>
<text x="30" y="50" >Using Filters (Shadow Effect): </text>
<rect x="100" y="100" width="90" height="90" stroke="green" stroke-width="3"
fill="green" filter="url(#filter2)" />
</g>
</svg>
</body>
</html>
在Chrome浏览器中打开文件:textSVG.html,结果如下 -
易百教程移动端:请扫描本页面底部(右侧)二维码并关注微信公众号,回复:"教程" 选择相关教程阅读或直接访问:http://m.yiibai.com 。
SVG <pattern>元素 - SVG教程™
SVG使用<pattern>元素来定义模式。 模式使用<pattern>元素定义,并用于以平铺方式填充图形元素。
声明
以下是<pattern>元素的语法声明。 我们只显示一些主要属性。
<pattern
patternUnits="units to define x,y, width and height attributes."
patternContentUnits ="units to define co-ordinate system of contents of pattern"
patternTransform = "definition of an additional transformation from the pattern coordinate system onto the target coordinate system"
x="x-axis co-ordinate"
y="y-axis co-ordinate"
width="length"
height="length"
preserveAspectRatio="to preserve width/height ratio of original content"
xlink:href="reference to another pattern" >
</pattern>
属性
编号 | 名称 | 描述 |
1 | patternUnits | 用来定义图案效果区域的单位。 它为模式内的各种长度值以及定义模式子区域的属性指定坐标系。 如果patternUnits =“userSpaceOnUse”,则值表示使用'pattern'元素时当前用户坐标系中的值。 如果patternUnits =“objectBoundingBox”,则值表示在使用'pattern'元素时就地引用元素上的边界框的分数或百分比的值。 默认是userSpaceOnUse。 |
2 | patternContentUnits | 用来定义模式内容区域的单位。 它为模式内的各种长度值以及定义模式子区域的属性指定坐标系。 如果patternContentUnits =“userSpaceOnUse”,则值表示使用'pattern'元素时当前用户坐标系中的值。 如果patternContentUnits =“objectBoundingBox”,则值表示在使用'pattern'元素时就地引用元素上的边界框的分数或百分比值。 默认是userSpaceOnUse。 |
3 | x | 模式边界框的x轴坐标。 缺省值是0。 |
4 | y | 模式边界框的y轴坐标。 缺省值是0。 |
5 | width | 模式边界框的宽度。 缺省值是0。 |
6 | height | 图案边界框的高度。 默认是0。 |
7 | preserveAspectRatio | 以保留原始内容的宽高比。 |
8 | xlink:href | 用于指另一种模式。 |
示例
文件:testSVG.html -
<html>
<title>SVG Pattern</title>
<body>
<h1>Sample SVG Pattern</h1>
<svg width="800" height="800">
<defs>
<pattern id="pattern1" patternUnits="userSpaceOnUse"
x="0" y="0" width="100" height="100"
viewBox="0 0 4 4" >
<path d="M 0 0 L 3 0 L 1.5 3 z" fill="blue" stroke="green" />
</pattern>
</defs>
<g>
<text x="30" y="50" >Using Pattern (Triangles): </text>
<rect x="100" y="100" width="300" height="300" stroke="green"
stroke-width="3" fill="url(#pattern1)" />
</g>
</svg>
</body>
</html>
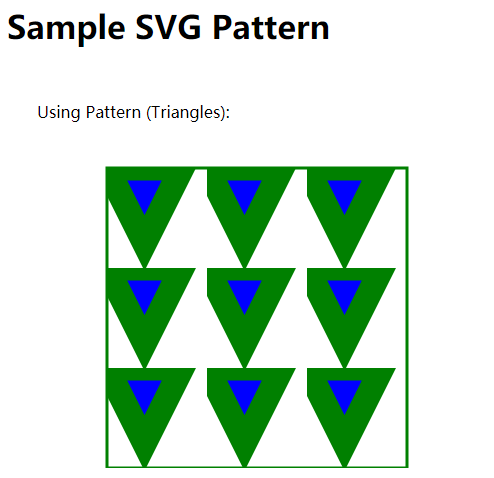
以下是上面代码的说明 -
- 有一个<pattern>元素定义为pattern1。
- 在模式中,定义了一个视框,并定义了一个将被用作模式的路径。
- 在rect元素中,在填充属性中,指定了模式的url,以使用之前创建的模式填充矩形。
在Chrome浏览器中打开文件:textSVG.html ,得到以下结果 -
易百教程移动端:请扫描本页面底部(右侧)二维码并关注微信公众号,回复:"教程" 选择相关教程阅读或直接访问:http://m.yiibai.com 。
SVG渐变 - SVG教程™
渐变是指形状内一种颜色平滑过渡到另一种颜色。 SVG提供了两种类型的渐变。
- 线性渐变 - 表示从一个方向到另一个方向的一种颜色到另一种颜色的线性转换。
- 径向渐变 - 表示从一个方向到另一个方向的一种颜色到另一种颜色的圆形过渡。
线性渐变
以下是<linearGradient>元素的语法声明。 我们只显示了一些主要的属性。
<linearGradient
gradientUnits ="units to define co-ordinate system of contents of gradient"
gradientTransform = "definition of an additional transformation from the gradient coordinate system onto the target coordinate system"
x1="x-axis co-ordinate"
y1="y-axis co-ordinate"
x2="x-axis co-ordinate"
y2="y-axis co-ordinate"
spreadMethod="indicates method of spreading the gradient within graphics element"
xlink:href="reference to another gradient" >
</linearGradient>
属性
编号 | 名称 | 描述 |
1 | gradientUnits | 用来定义梯度内各种长度值的坐标系的单位。 如果gradientUnits =“userSpaceOnUse”,则值表示使用渐变元素时当前用户坐标系中的值。 如果patternContentUnits =“objectBoundingBox”,则值表示在使用渐变元素时就地引用元素上的边界框的分数或百分比值。 默认是userSpaceOnUse。 |
2 | x1 | 梯度向量的x轴坐标,缺省值是0。 |
3 | y2 | 梯度向量的y轴坐标,缺省值是0。 |
4 | x2 | 梯度向量的x轴坐标。 缺省值是0。 |
5 | y2 | y轴坐标的梯度向量。 缺省值是0。 |
6 | spreadMethod | 指示在图形元素内散布渐变的方法。 默认是'pad'。 |
7 | xlink:href | 用于指另一个渐变。 |
示例
文件:testSVG.html -
<html>
<title>SVG Linear Gradient</title>
<body>
<h1>Sample SVG Linear Gradient</h1>
<svg width="600" height="600">
<defs>
<linearGradient id="sampleGradient">
<stop offset="0%" stop-color="#FF0000" />
<stop offset="100%" stop-color="#00FFF00" />
</linearGradient>
</defs>
<g>
<text x="30" y="50" >Using Linear Gradient: </text>
<rect x="100" y="100" width="200" height="200" stroke="green" stroke-width="3"
fill="url(#sampleGradient)" />
</g>
</svg>
</body>
</html>
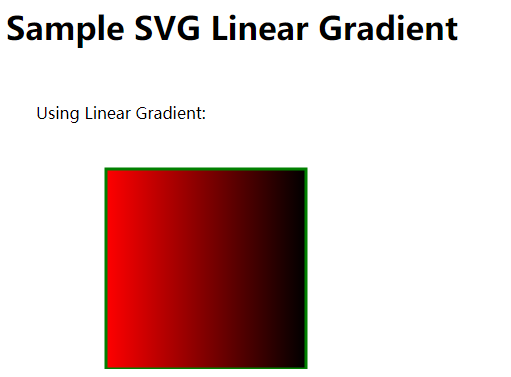
以下是对上面代码的一些解释 -
- 定义为sampleGradient的一个<linearGradient>元素。
- 在linearGradient中,两个偏移量用两种颜色定义。
- 在rect元素中,在填充属性中,指定渐变的URL以使用之前创建的渐变填充矩形。
在Chrome浏览器中打开文件:testSVG.html,得到以下结果 -
径向渐变
以下是<radialGradient>元素的语法声明。 我们只显示了一些主要属性。
<radialGradient
gradientUnits ="units to define co-ordinate system of contents of gradient"
gradientTransform = "definition of an additional transformation from the gradient coordinate system onto the target coordinate system"
cx="x-axis co-ordinate of center of circle."
cy="y-axis co-ordinate of center of circle."
r="radius of circle"
fx="focal point for the radial gradient"
fy="focal point for the radial gradient"
spreadMethod="indicates method of spreading the gradient within graphics element"
xlink:href="reference to another gradient" >
</radialGradient>
属性
编号 | 名称 | 描述 |
1 | gradientUnits | 用来定义梯度内各种长度值的坐标系的单位。 如果gradientUnits =“userSpaceOnUse”,则值表示使用渐变元素时当前用户坐标系中的值。 如果patternContentUnits =“objectBoundingBox”,则值表示在使用渐变元素时就地引用元素上的边界框的分数或百分比值。 默认是userSpaceOnUse。 |
2 | cx | 最大圆梯度矢量中心的x轴坐标。 缺省值是0。 |
3 | cy | 最大的圆梯度矢量中心的y轴坐标。 缺省值是0。 |
4 | r | 梯度矢量最大圆的中心的半径。 缺省值是0。 |
5 | fx | 径向渐变的焦点,缺省值是0。 |
6 | fy | 径向渐变的焦点。 缺省值是0。 |
7 | spreadMethod | 指示在图形元素内散布渐变的方法。 默认是'pad'。 |
8 | xlink:href | 用于指另一个渐变。 |
示例
文件:testSVG.html -
<html>
<title>SVG Radial Gradient</title>
<body>
<h1>Sample SVG Radial Gradient</h1>
<svg width="600" height="600">
<defs>
<radialGradient id="sampleGradient">
<stop offset="0%" stop-color="#FF0000" />
<stop offset="100%" stop-color="#00FFF00" />
</radialGradient>
</defs>
<g>
<text x="30" y="50" >Using Radial Gradient: </text>
<rect x="100" y="100" width="200" height="200" stroke="green" stroke-width="3"
fill="url(#sampleGradient)" />
</g>
</svg>
</body>
</html>
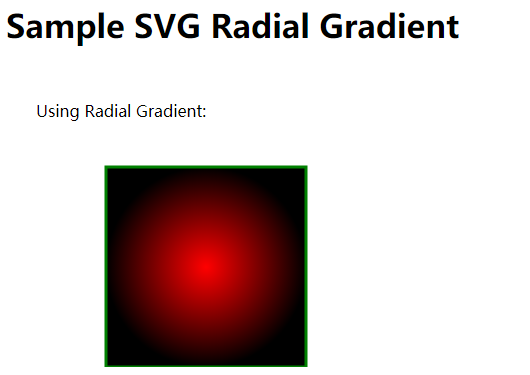
- 定义为sampleGradient的一个<radialGradient>元素。
- 在radialGradient中,两个偏移量用两种颜色定义。
- 在rect元素中,在填充属性中,指定渐变的URL以使用之前创建的渐变填充矩形。
在Chrome浏览器中打开文件:textSVG.html -
易百教程移动端:请扫描本页面底部(右侧)二维码并关注微信公众号,回复:"教程" 选择相关教程阅读或直接访问:http://m.yiibai.com 。
SVG交互 - SVG教程™
SVG图像可以响应用户的操作。 SVG支持指针事件,键盘事件和文档事件。看看下面的例子。
实例
文件:testSVG.html -
<html>
<title>SVG Interactivity</title>
<body>
<h1>Sample Interactivity</h1>
<svg width="600" height="600">
<script type="text/JavaScript">
<![CDATA[
function showColor() {
alert("Color of the Rectangle is: "+
document.getElementById("rect1").getAttributeNS(null,"fill"));
}
function showArea(event){
var width = parseFloat(event.target.getAttributeNS(null,"width"));
var height = parseFloat(event.target.getAttributeNS(null,"height"));
alert("Area of the rectangle is: " +width +"x"+ height);
}
function showRootChildrenCount() {
alert("Total Children: "+document.documentElement.childNodes.length);
}
]]>
</script>
<g>
<text x="30" y="50" onClick="showColor()">Click me to show rectangle color.</text>
<rect id="rect1" x="100" y="100" width="200" height="200"
stroke="green" stroke-width="3" fill="red"
onClick="showArea(event)"/>
<text x="30" y="400" onClick="showRootChildrenCount()">
Click me to print child node count.</text>
</g>
</svg>
</body>
</html>
上述代码说明 -
- SVG支持JavaScript/ECMAScript函数。脚本块是在CDATA块中考虑XML中的字符数据支持。
- SVG元素支持鼠标事件,键盘事件。使用onClick事件来调用javascript函数。
- 在javascript函数中,文档表示SVG文档,可用于获取SVG元素。
- 在javascript函数中,1event1表示当前事件,可用于获取引发事件的目标元素。
在Chrome浏览器中打开文件:textSVG.html ,得到以下结果 -
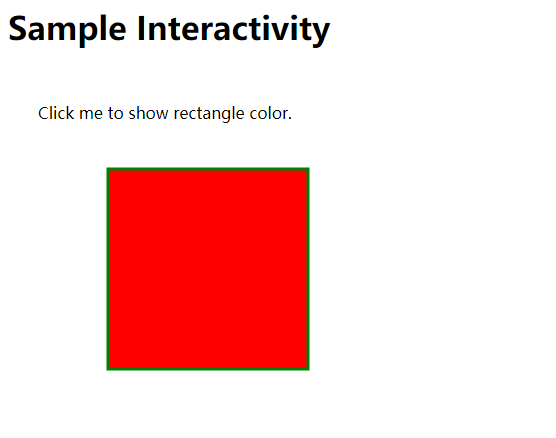
点击上面图片可以提示子节点数。
易百教程移动端:请扫描本页面底部(右侧)二维码并关注微信公众号,回复:"教程" 选择相关教程阅读或直接访问:http://m.yiibai.com 。
SVG链接 - SVG教程™
<a>元素用于创建超链接。 xlink:href属性用于传递与URI(统一资源标识符)互补的IRI(国际化资源标识符)。
声明
以下是<a>元素的语法声明。 我们只显示了一些主要的属性。
<a
xlink:show = "new" | "replace"
xlink:actuate = "onRequest"
xlink:href = "<IRI>"
target = "_replace" | "_self" | "_parent" | "_top" | "_blank" | "<XML-Name>" >
</a>
属性
编号 | 名称 | 描述 |
1 | xlink:show | 用于XLink识别处理器的文档目的。 默认是new。 |
2 | xlink:actuate | 用于XLink识别处理器的文档目的。 |
3 | xlink:href | 被引用对象的位置。 |
4 | target | 当结束资源的时候使用。 |
示例
文件:testSVG.html -
<html>
<title>SVG Linking</title>
<body>
<h1>Sample Link</h1>
<svg width="800" height="800">
<g>
<a xlink:href="http://www.yiibai.com">
<text x="0" y="15" fill="black" >
Click me to load Yiibai DOT COM.</text>
</a>
</g>
<g>
<text x="0" y="65" fill="black" >
Click in the rectangle to load Yiibai DOT COM</text>
<a xlink:href="http://www.yiibai.com">
<rect x="100" y="80" width="300" height="100"
style="fill:rgb(121,0,121);stroke-width:3;stroke:rgb(0,0,0)" />
</a>
</g>
</svg>
</body>
</html>
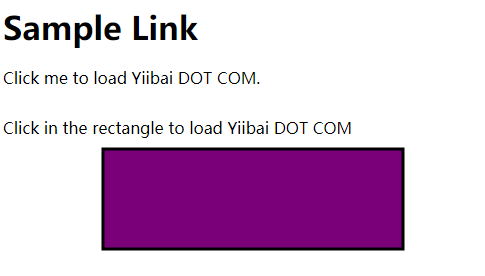
在Chrome浏览器中打开:textSVG.html 文件。
易百教程移动端:请扫描本页面底部(右侧)二维码并关注微信公众号,回复:"教程" 选择相关教程阅读或直接访问:http://m.yiibai.com 。
SVG实例
SVG加载器示例 - SVG教程™
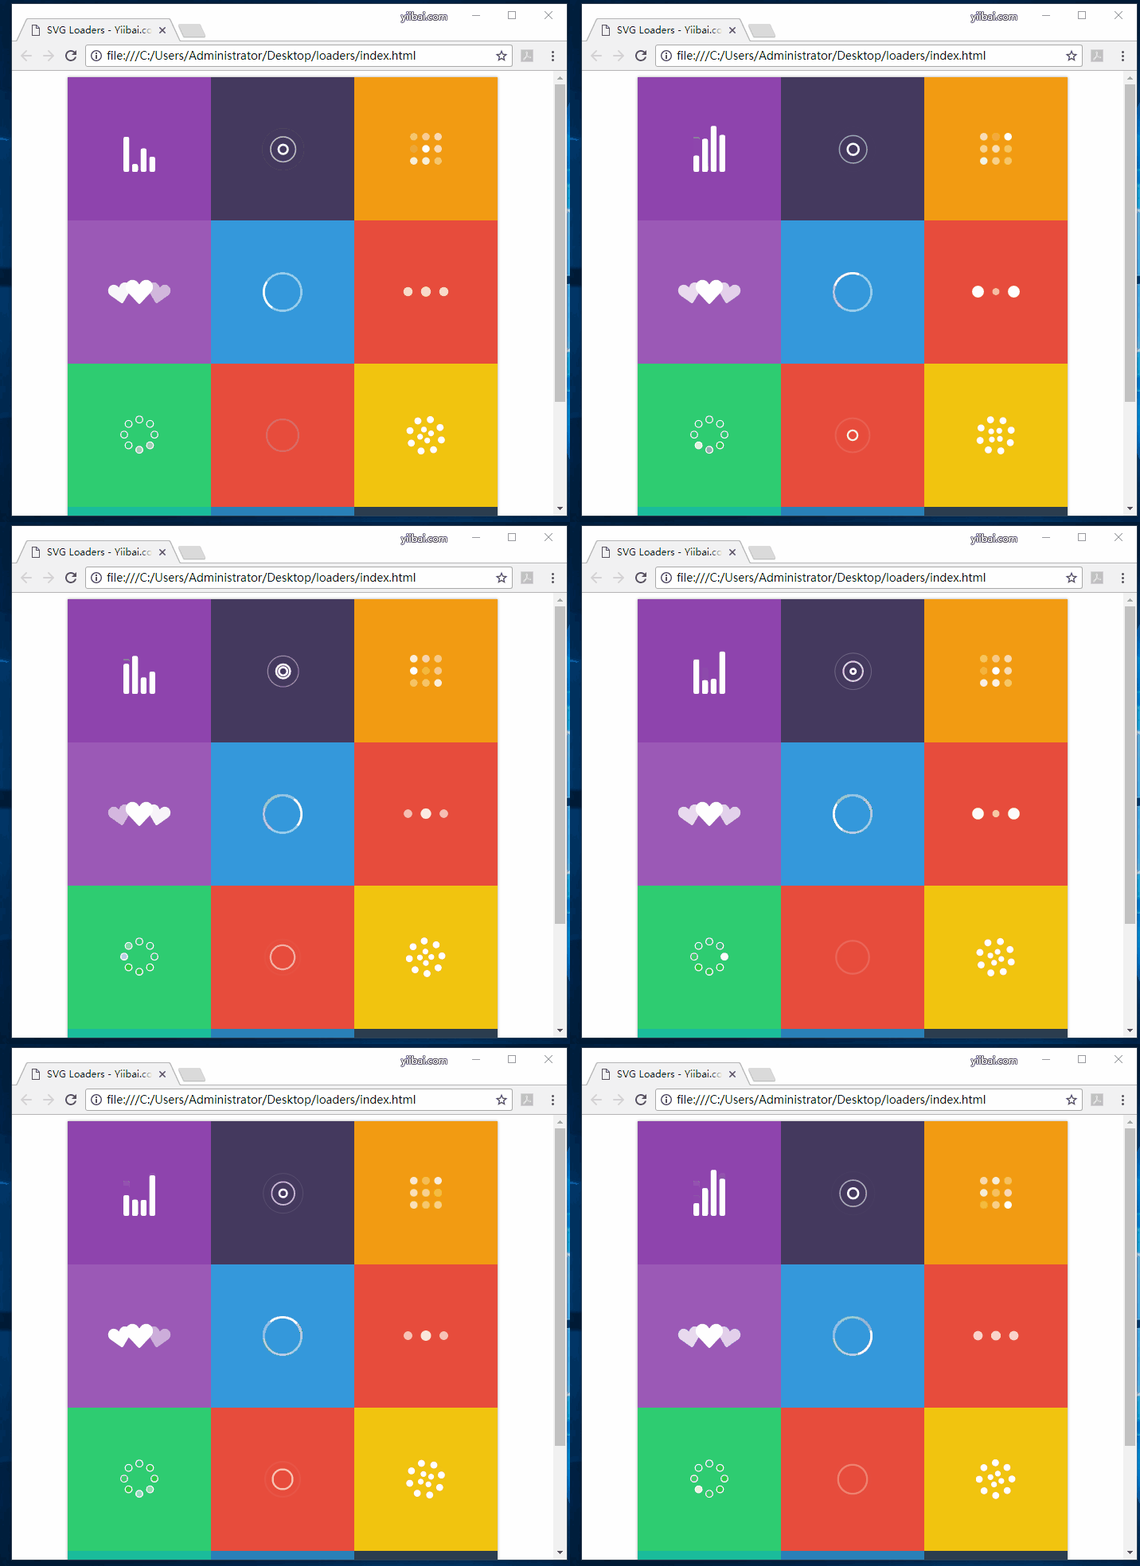
页面加载器是Web开发的一部分,负责加载页面。 下面显示了带有SVG的页面加载器示例 -
<!doctype html>
<head>
<meta charset="utf-8"/>
<title>SVG Loaders - Yiibai.com</title>
<link href='//fonts.googleapis.com/css?family=Open+Sans:300' rel='stylesheet' type='text/css'>
<style>
html {
height: 100%;
background-attachment: fixed;
}
body {
font-family: "Open Sans";
font-weight: 300;
}
a {
color: #fff;
}
ul {
background: #fff;
width: 540px;
margin: auto;
margin-top: 0px;
list-style: none;
padding: 0px 0px 0px 0px;
-moz-box-shadow: 0px 0px 4px 0px rgba(0,0,0,0.37);
box-shadow: 0px 0px 4px 0px rgba(0,0,0,0.37);
}
ul li {
width: 180px;
height: 180px;
line-height: 176px;
text-align: center;
float: left;
background-repeat: no-repeat;
background-position: center;
}
ul li img {
vertical-align: middle;
}
li:nth-child(1) {
background-color: #8E44AD;
}
li:nth-child(2) {
background-color: #44395E;
}
li:nth-child(3) {
background-color: #F39C12;
}
li:nth-child(4) {
background-color: #9B59B6;
}
li:nth-child(5) {
background-color: #3498DB;
}
li:nth-child(6) {
background-color: #E74C3C;
}
li:nth-child(7) {
background-color: #2ECC71;
}
li:nth-child(8) {
background-color: #E74C3C;
}
li:nth-child(9) {
background-color: #F1C40F;
}
li:nth-child(10) {
background-color: #1ABC9C;
}
li:nth-child(11) {
background-color: #2980B9;
}
li:nth-child(12) {
background-color: #2C3E50;
}
.actions {
margin: auto;
margin-top: 45px;
width: 325px;
}
.actions a {
width: 150px;
height: 46px;
background-repeat: no-repeat;
background-size: 150px 46px;
display: block;
text-indent: -9999px;
float: left;
}
a.download {
background-image: url(site-assets/images/download-btn.png);
}
a.tweet {
background-image: url(site-assets/images/tweet-btn.png);
margin-left: 25px;
}
.attr {
color: #fff;
text-align: center;
font-size: 0.875rem;
margin-top: 20px;
}
</style>
</head>
<body>
<ul>
<li>
<img src="svg-loaders/audio.svg" width="40" alt="">
</li>
<li>
<img src="svg-loaders/rings.svg" width="60" alt="">
</li>
<li>
<img src="svg-loaders/grid.svg" width="40" alt="">
</li>
<li>
<img src="svg-loaders/hearts.svg" width="80" alt="">
</li>
<li>
<img src="svg-loaders/oval.svg" width="50" alt="">
</li>
<li>
<img src="svg-loaders/three-dots.svg" width="60" alt="">
</li>
<li>
<img src="svg-loaders/spinning-circles.svg" width="50" alt="">
</li>
<li>
<img src="svg-loaders/puff.svg" width="50" alt="">
</li>
<li>
<img src="svg-loaders/circles.svg" width="50" alt="">
</li>
<li>
<img src="svg-loaders/tail-spin.svg" width="50" alt="">
</li>
<li>
<img src="svg-loaders/bars.svg" width="40" alt="">
</li>
<li>
<img src="svg-loaders/ball-triangle.svg" width="50" alt="">
</li>
<div style="clear: both"></div>
</ul>
</body>
</html>
使用浏览器打开,应该会看到类似下面的效果 -
源码下载:https://www.yiibai.com/downloads/svg/loaders.zip
易百教程移动端:请扫描本页面底部(右侧)二维码并关注微信公众号,回复:"教程" 选择相关教程阅读或直接访问:http://m.yiibai.com 。
SVG对话框效果 - SVG教程™
对话框用于提示用户提供菜单项的附加信息。下面的示例基于带SVG和CSS动画的HTML对话框工作。
参考以下示例代码 -
<!DOCTYPE html>
<html lang="en" class="no-js">
<head>
<meta charset="UTF-8" />
<meta http-equiv="X-UA-Compatible" content="IE=edge">
<meta name="viewport" content="width=device-width, initial-scale=1">
<title>对话框效果</title>
<meta name="description" content="A Collection of Dialog Effects" />
<meta name="keywords" content="dialog, effect, modal, overlay, animation, web design" />
<meta name="author" content="Codrops" />
<link rel="shortcut icon" href="../favicon.ico">
<link rel="stylesheet" type="text/css" href="css/normalize.css" />
<link rel="stylesheet" type="text/css" href="css/demo.css" />
<!-- common styles -->
<link rel="stylesheet" type="text/css" href="css/dialog.css" />
<!-- individual effect -->
<link rel="stylesheet" type="text/css" href="css/dialog-sandra.css" />
<script src="js/modernizr.custom.js"></script>
</head>
<body>
<div class="container">
<div class="content">
<header class="codrops-header">
<h1><span>Yiibai.com</span> 对话框效果</h1>
<div class="button-wrap"><button data-dialog="somedialog" class="trigger">打开对话框</button></div>
</header>
<nav id="menu" class="menu">
<div>
<ul>
<li><a href="laura.html">Laura</a></li>
<li><a href="jamie.html">Jamie</a></li>
<li><a href="henry.html">Henry</a></li>
<li><a href="jim.html">Jim</a></li>
<li><a href="wilma.html">Wilma</a></li>
</ul>
</div>
</nav>
<div id="somedialog" class="dialog">
<div class="dialog__overlay"></div>
<div class="dialog__content">
<h2><strong>Howdy</strong>, I'm a dialog box</h2><div><button class="action" data-dialog-close>Close</button></div>
</div>
</div>
<!-- Related demos -->
</div><!-- /content -->
</div><!-- /container -->
<script src="js/classie.js"></script>
<script src="js/dialogFx.js"></script>
<script>
(function() {
var dlgtrigger = document.querySelector( '[data-dialog]' ),
somedialog = document.getElementById( dlgtrigger.getAttribute( 'data-dialog' ) ),
dlg = new DialogFx( somedialog );
dlgtrigger.addEventListener( 'click', dlg.toggle.bind(dlg) );
})();
</script>
</body>
</html>
执行上面示例代码,得到以下结果 -
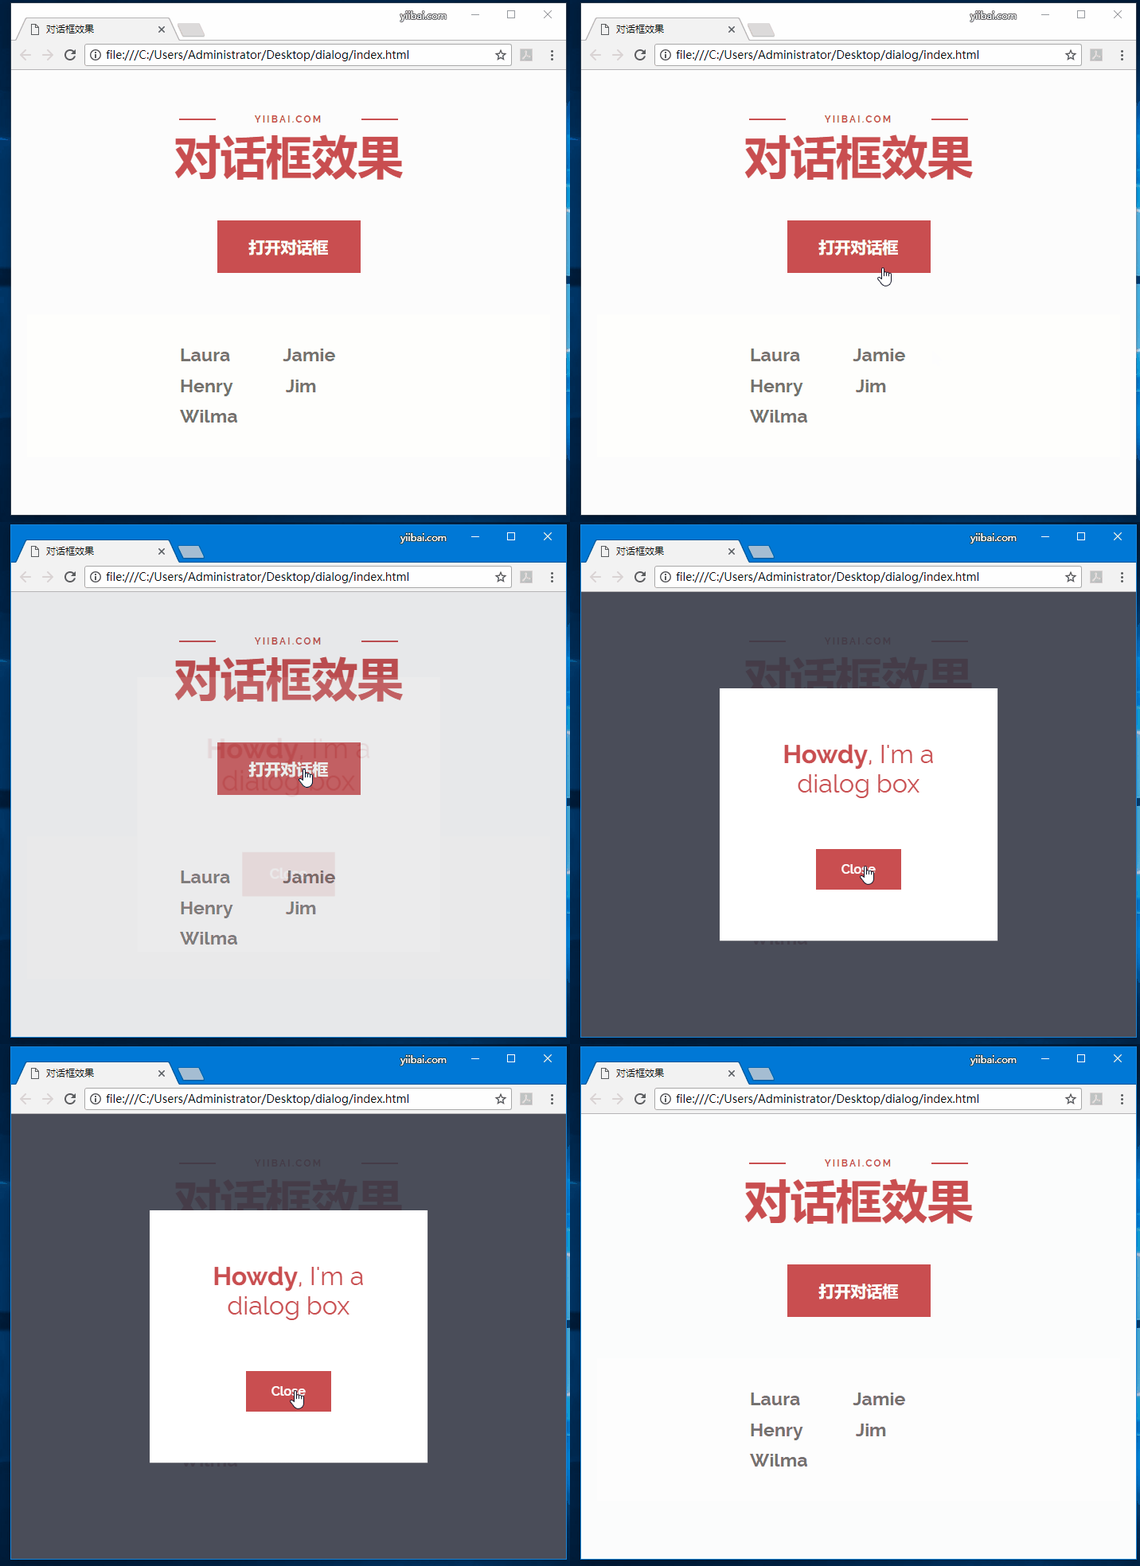
代码下载:https://www.yiibai.com/downloads/svg/dialog.zip
易百教程移动端:请扫描本页面底部(右侧)二维码并关注微信公众号,回复:"教程" 选择相关教程阅读或直接访问:http://m.yiibai.com 。
SVG图标 - SVG教程™
支付网关图标对电子商务应用程序服务提供商很有用。 有些授权为电子商务,在线零售商,点击图或传统图块公司图标提供信用卡付款。效果如下所示 -

品牌图标
参考以下实现代码 -
<!DOCTYPE html>
<html lang="en">
<head>
<meta charset="utf-8">
<meta name="viewport" content="width=device-width, initial-scale=1.0">
<!-- Bootstrap core CSS -->
<link href="css/bootstrap.css" rel="stylesheet">
<!-- Add custom CSS here -->
<link href="css/demo.css" rel="stylesheet">
<link href="style.css" rel="stylesheet">
<!--[if lt IE 8]><!-->
<link rel="stylesheet" href="ie7.css">
<!--<![endif]-->
</head>
<body>
<div class="site-wrapper">
<div class="site-wrapper-inner">
<div class="cover-container">
<div class="inner cover">
<ul class="list-inline payments">
<li><i class="pw pw-clickandbuy"></i></li>
<li><i class="pw pw-westernunion"></i></li>
<li><i class="pw pw-braintree"></i></li>
<li><i class="pw pw-paysafecard"></i></li>
<li><i class="pw pw-ideal"></i></li>
<li><i class="pw pw-paypal-new"></i></li>
<li><i class="pw pw-skrill"></i></li>
<li><i class="pw pw-gittip"></i></li>
<li><i class="pw pw-flattr"></i></li>
<li><i class="pw pw-cb"></i></li>
<li><i class="pw pw-bitcoin"></i></li>
<li><i class="pw pw-bitcoin-sign"></i></li>
<li><i class="pw pw-ripple"></i></li>
<li><i class="pw pw-sofort"></i></li>
<li><i class="pw pw-diners"></i></li>
<li><i class="pw pw-mastercard"></i></li>
<li><i class="pw pw-trust-e"></i></li>
<li><i class="pw pw-amazon"></i></li>
<li><i class="pw pw-jcb"></i></li>
<li><i class="pw pw-google-wallet"></i></li>
<li><i class="pw pw-stripe"></i></li>
<li><i class="pw pw-square"></i></li>
<li><i class="pw pw-ogone"></i></li>
<li><i class="pw pw-verisign"></i></li>
<li><i class="pw pw-discover"></i></li>
<li><i class="pw pw-american-express"></i></li>
<li><i class="pw pw-paypal"></i></li>
<li><i class="pw pw-maestro"></i></li>
<li><i class="pw pw-visa"></i></li>
<li><i class="pw pw-visa-electron"></i></li>
<li><i class="pw pw-postepay"></i></li>
<li><i class="pw pw-cartasi"></i></li>
<li><i class="pw pw-unionpay"></i></li>
<li><i class="pw pw-ec"></i></li
</ul>
</div>
</div>
</div>
</div>
<!-- JavaScript -->
<script src="js/jquery-1.10.2.js"></script>
<script src="js/bootstrap.js"></script>
</body>
</html>
执行上面示例代码,得到以下结果 -

代码下载:https://www.yiibai.com/downloads/svg/icons.zip
易百教程移动端:请扫描本页面底部(右侧)二维码并关注微信公众号,回复:"教程" 选择相关教程阅读或直接访问:http://m.yiibai.com 。
SVG时钟 - SVG教程™
时钟示例是基于clock.js和snap.svg.js来实现的。 样品采集如下所示。
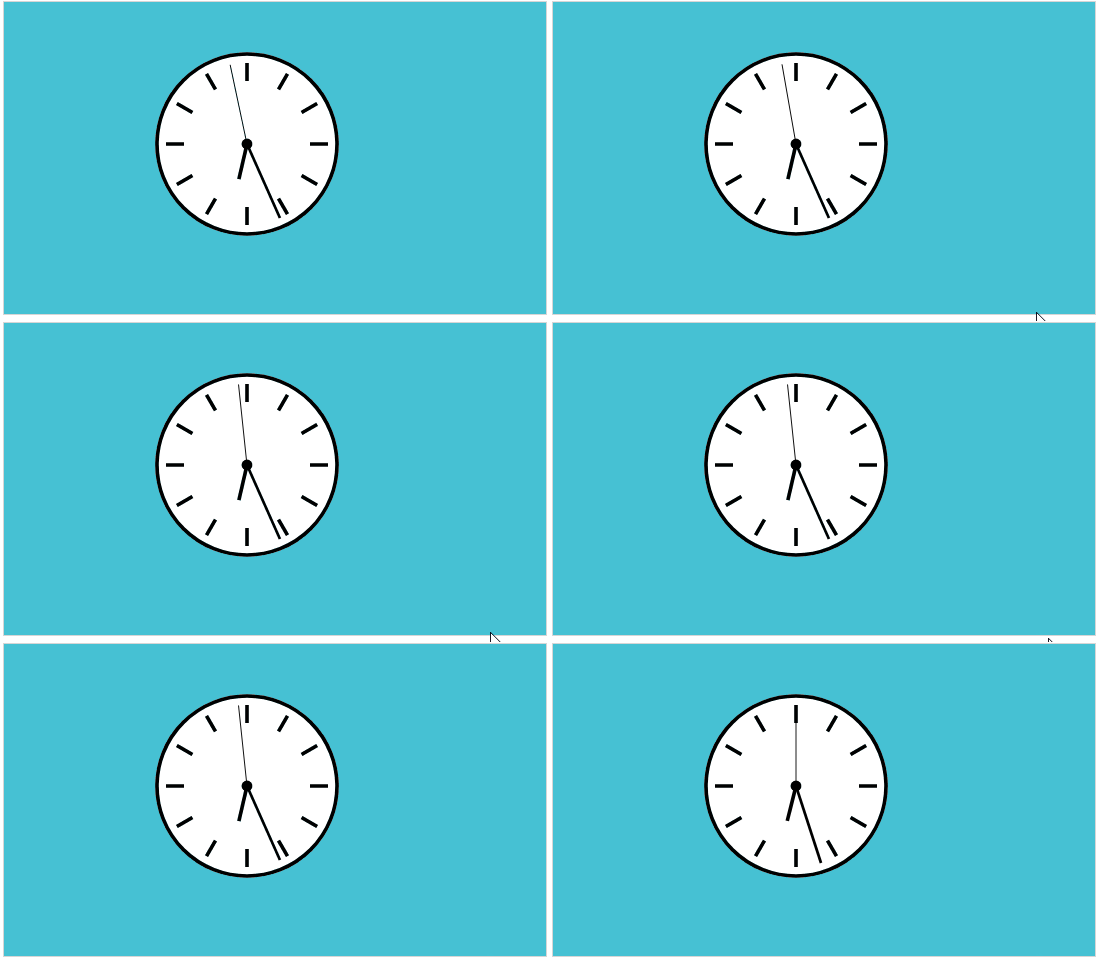
代码实现 -
<!DOCTYPE html>
<html>
<head>
<script src="snap.svg-min.js"></script>
<script src="clock.js"></script>
<style>
body { font-family: sans-serif;background-color: #46C2D4; }
div { width: 300px; heigth: 350px; float: left; text-align: center; margin-bottom: 2em; }
h1 { font-size: 1.6em; }
h2 { font-size: 1.2em; }
p { font-size: 0.9em; }
p.clear{ clear: left; }
</style>
</head>
<body>
<div>
<svg id="clockUK" width="300" height="300" style="
margin-left: 112px;
">
</div>
<script>
// Start clocks
var uk = new Clock("clockUK");
uk.startClock();
var ukbounce = new Clock("clockUKBounce", { showSeconds: true, offset: 2, movement: "bounce" });
ukbounce.startClock();
var nyc = new Clock("clockNYC", -5);
nyc.startClock();
var clock = new Clock("clock", 21, 39);
clock.hideSecondHand();
</script>
</body>
</html>
代码下载:
https://www.yiibai.com/downloads/svg/clock.zip
易百教程移动端:请扫描本页面底部(右侧)二维码并关注微信公众号,回复:"教程" 选择相关教程阅读或直接访问:http://m.yiibai.com 。
SVG拖动 - SVG教程™
通过点击并拖动它来移动屏幕上的元素的能力。 这在SVG中可以比较容易实现,如下所示。
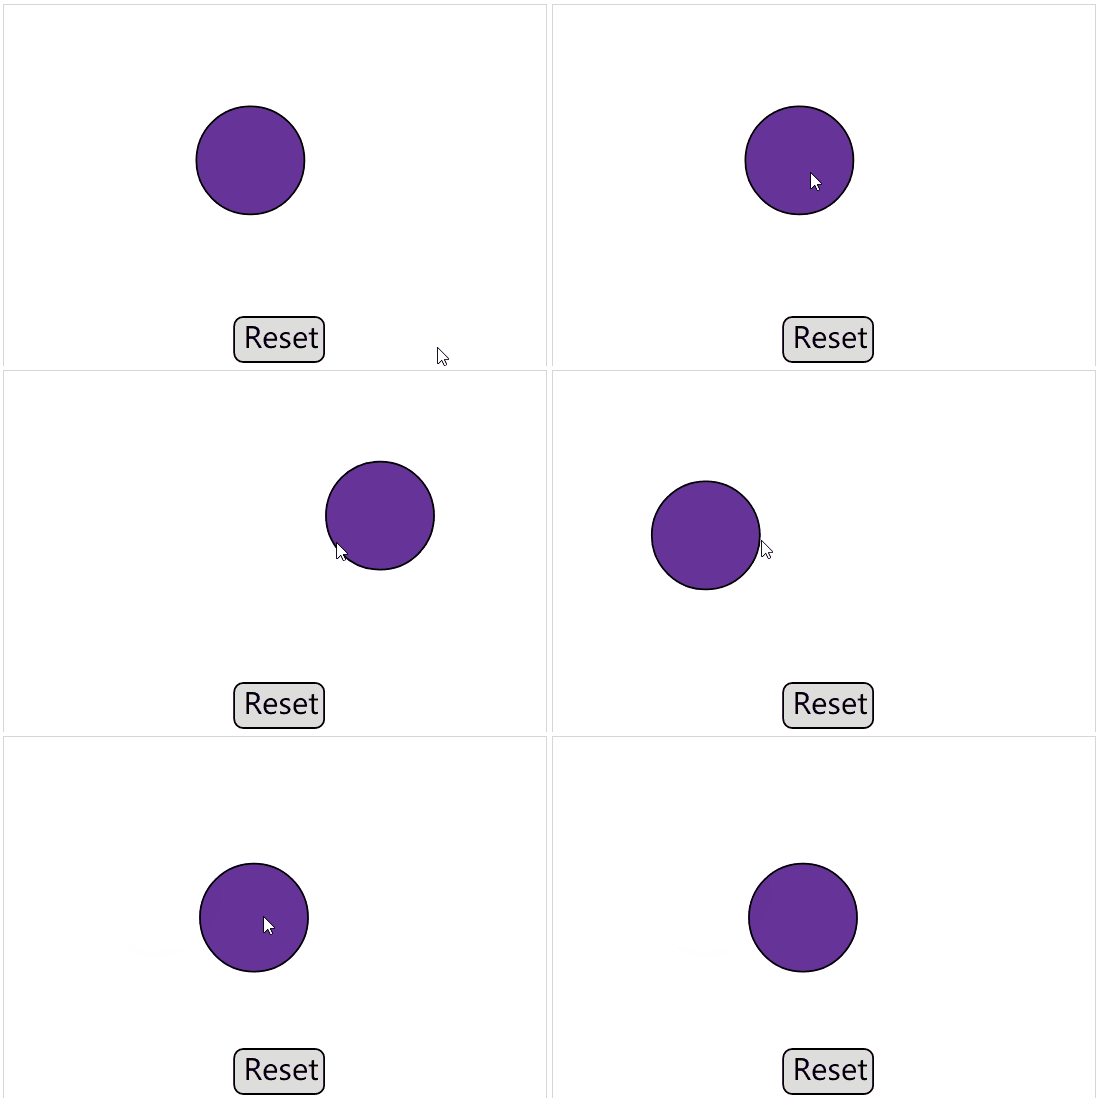
实现代码如下所示 -
<html xml:lang="en" lang="en"
xmlns="http://www.w3.org/1999/xhtml">
<head>
<meta http-equiv="Content-Type" content="text/html; charset=utf-8" />
<script type="text/javascript" src="snap.svg-min.js"></script>
<script type="text/javascript">
var startX = 100;
var startY = 100;
function init() {
Snap("#button").click(resetFcn);
Snap("#buttonText").click(resetFcn);
Snap("#circle").drag(dragMove, dragStart, dragEnd);
}
function resetFcn(evt) {
Snap("#circle").attr({cx: 100, cy: 100});
}
function dragStart(x, y, evt) {
// figure out where the circle currently is
startX = parseInt(Snap("#circle").attr("cx"), 10);
startY = parseInt(Snap("#circle").attr("cy"), 10);
}
function dragMove(dx, dy, x, y, evt) {
Snap("#circle").attr({cx: (startX + dx), cy: (startY + dy)});
}
function dragEnd(evt) {
// no action required
}
</script>
</head>
<body onload="init()">
<div style="text-align:center">
<svg width="600" height="400" viewBox="0 0 200 200"
xmlns="http://www.w3.org/2000/svg"
xmlns:xlink="http://www.w3.org/1999/xlink">
<circle id="circle" cx="100" cy="100" r="30"
style="fill:#663399; stroke: black"/>
<rect id="button" x="74" y="170"
rx="5" ry="5" width="50" height="25"
style="stroke:black; fill:#ddd; cursor:pointer"/>
<text id="buttonText" x="100" y="187" class="buttonText"
style="fill:black; stroke:none;
font-family: sans-serif; font-size: 12pt;
text-anchor:middle; cursor:pointer">Reset</text>
</svg>
</div>
</body>
</html>
代码下载:https://www.yiibai.com/downloads/svg/drag.zip
易百教程移动端:请扫描本页面底部(右侧)二维码并关注微信公众号,回复:"教程" 选择相关教程阅读或直接访问:http://m.yiibai.com 。
SVG图表 - SVG教程™
图表是使用SVG过滤器创建的,此图表的背景是应用了模糊过滤器的真实图形(不仅仅是图像)-
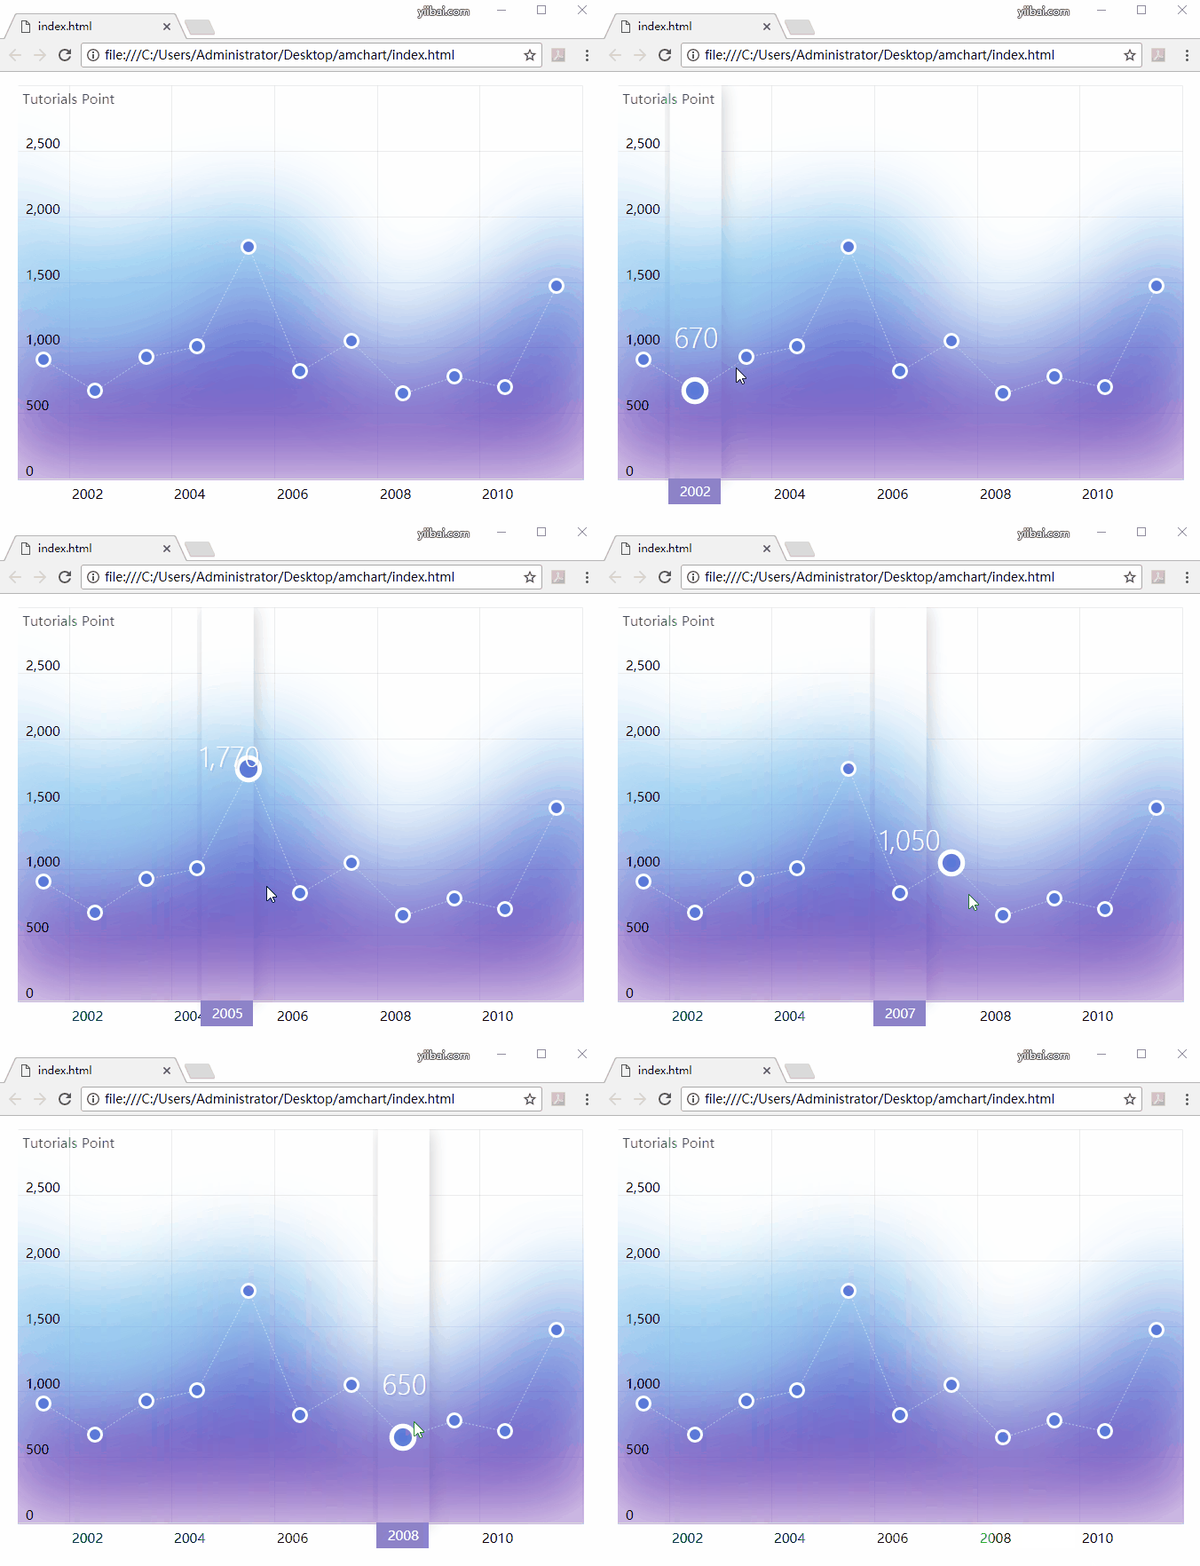
参考以下实现代码 -
<html>
<head>
<style>
#chartdiv {
width : 96%;
height : 475px;
font-size : 11px;
margin-left: auto;
margin-right: auto;
margin-top:15px;
}
.amcharts-graph-g1 .amcharts-graph-fill {
filter: url(#blur);
}
.amcharts-graph-g2 .amcharts-graph-fill {
filter: url(#blur);
}
.amcharts-cursor-fill {
filter: url(#shadow);
}
</style>
<script src="amcharts.js"></script>
<script src="serial.js"></script>
<script src="none.js"></script>
<script>
var chartData = [{
"year": "2000",
"cars": 1691,
"motorcycles": 737
}, {
"year": "2001",
"cars": 1098,
"motorcycles": 680,
"bicycles": 910
}, {
"year": "2002",
"cars": 975,
"motorcycles": 664,
"bicycles": 670
}, {
"year": "2003",
"cars": 1246,
"motorcycles": 648,
"bicycles": 930
}, {
"year": "2004",
"cars": 1218,
"motorcycles": 637,
"bicycles": 1010
}, {
"year": "2005",
"cars": 1913,
"motorcycles": 133,
"bicycles": 1770
}, {
"year": "2006",
"cars": 1299,
"motorcycles": 621,
"bicycles": 820
}, {
"year": "2007",
"cars": 1110,
"motorcycles": 10,
"bicycles": 1050
}, {
"year": "2008",
"cars": 765,
"motorcycles": 232,
"bicycles": 650
}, {
"year": "2009",
"cars": 1145,
"motorcycles": 219,
"bicycles": 780
}, {
"year": "2010",
"cars": 1163,
"motorcycles": 201,
"bicycles": 700
}, {
"year": "2011",
"cars": 1780,
"motorcycles": 85,
"bicycles": 1470
}, {
"year": "2012",
"cars": 1580,
"motorcycles": 285
}];
var chart = AmCharts.makeChart("chartdiv", {
"type": "serial",
"fontFamily": "Lato",
"autoMargins": true,
"addClassNames": true,
"zoomOutText": "",
"defs": {
"filter": [
{
"x": "-50%",
"y": "-50%",
"width": "200%",
"height": "200%",
"id": "blur",
"feGaussianBlur": {
"in": "SourceGraphic",
"stdDeviation": "50"
}
},
{
"id": "shadow",
"width": "150%",
"height": "150%",
"feOffset": {
"result": "offOut",
"in": "SourceAlpha",
"dx": "2",
"dy": "2"
},
"feGaussianBlur": {
"result": "blurOut",
"in": "offOut",
"stdDeviation": "10"
},
"feColorMatrix": {
"result": "blurOut",
"type": "matrix",
"values": "0 0 0 0 0 0 0 0 0 0 0 0 0 0 0 0 0 0 .2 0"
},
"feBlend": {
"in": "SourceGraphic",
"in2": "blurOut",
"mode": "normal"
}
}
]
},
"fontSize": 15,
"pathToImages": "../amcharts/images/",
"dataProvider": chartData,
"dataDateFormat": "YYYY",
"marginTop": 0,
"marginRight": 1,
"marginLeft": 0,
"autoMarginOffset": 5,
"categoryField": "year",
"categoryAxis": {
"gridAlpha": 0.07,
"axisColor": "#DADADA",
"startOnAxis": true,
"tickLength": 0,
"parseDates": true,
"minPeriod": "YYYY"
},
"valueAxes": [
{
"ignoreAxisWidth":true,
"stackType": "regular",
"gridAlpha": 0.07,
"axisAlpha": 0,
"inside": true
}
],
"graphs": [
{
"id": "g1",
"type": "line",
"title": "Cars",
"valueField": "cars",
"fillColors": [
"#0066e3",
"#802ea9"
],
"lineAlpha": 0,
"fillAlphas": 0.8,
"showBalloon": false
},
{
"id": "g2",
"type": "line",
"title": "Motorcycles",
"valueField": "motorcycles",
"lineAlpha": 0,
"fillAlphas": 0.8,
"lineColor": "#5bb5ea",
"showBalloon": false
},
{
"id": "g3",
"title": "Bicycles",
"valueField": "bicycles",
"lineAlpha": 0.5,
"lineColor": "#FFFFFF",
"bullet": "round",
"dashLength": 2,
"bulletBorderAlpha": 1,
"bulletAlpha": 1,
"bulletSize": 15,
"stackable": false,
"bulletColor": "#5d7ad9",
"bulletBorderColor": "#FFFFFF",
"bulletBorderThickness": 3,
"balloonText": "<div style='margin-bottom:30px;text-shadow: 2px 2px rgba(0, 0, 0, 0.1); font-weight:200;font-size:30px; color:#ffffff'>[[value]]</div>"
}
],
"chartCursor": {
"cursorAlpha": 1,
"zoomable": false,
"cursorColor": "#FFFFFF",
"categoryBalloonColor": "#8d83c8",
"fullWidth": true,
"categoryBalloonDateFormat": "YYYY",
"balloonPointerOrientation": "vertical"
},
"balloon": {
"borderAlpha": 0,
"fillAlpha": 0,
"shadowAlpha": 0,
"offsetX": 40,
"offsetY": -50
}
});
// we zoom chart in order to have better blur (form side to side)
chart.addListener("dataUpdated", zoomChart);
function zoomChart(){
chart.zoomToIndexes(1, chartData.length - 2);
}
</script>
</head>
<body>
<div id="chartdiv"></div>
</body>
</html>
代码下载:https://www.yiibai.com/downloads/svg/amchart.zip
易百教程移动端:请扫描本页面底部(右侧)二维码并关注微信公众号,回复:"教程" 选择相关教程阅读或直接访问:http://m.yiibai.com 。
SVG图形 - SVG教程™
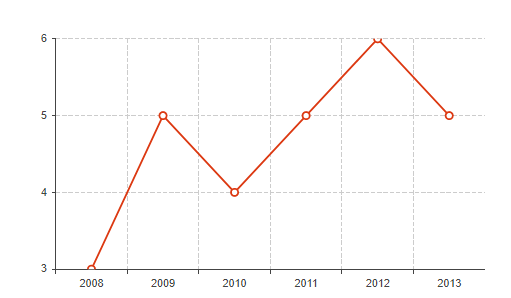
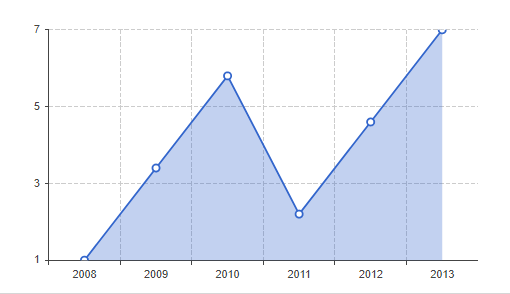
可以使用SVG制作图表,SVG图示例如下所示。
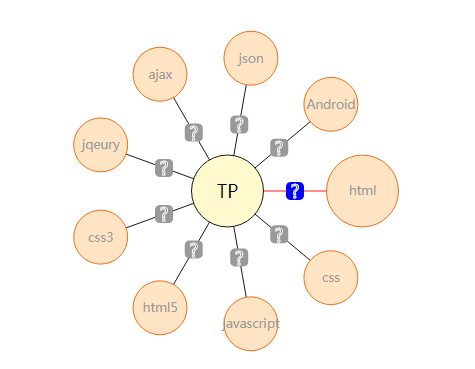
参考以下代码 -
<!DOCTYPE html>
<html>
<head>
<meta charset="utf-8">
<style type="text/css">
#div1{
width: 588px;
height: 396px;
margin: 19px -21px 0;
}
</style>
</head>
<body>
<div id="div1"></div>
</body>
<script type="text/javascript">
window.onload = function(){
var oDiv = document.getElementById("div1");
var svgNs = "http://www.w3.org/2000/svg";
var center = {
X:oDiv.offsetWidth/2,
Y:oDiv.offsetHeight/2
}
var circleNum = 9;
var angle = 360/circleNum;
var centerR = 150;
var data = {
centerNode:{text:"TP"},
otherNode:[{text:"html"},{text:"css"},{text:"javascript"},{text:"html5"},{text:"css3"},{text:"jqeury"},{text:"ajax"},{text:"json"},{text:"Android"}]
};
for(var i=0;i<circleNum;i++){
data["otherNode"][i].x = center.X + centerR*Math.cos(i*angle*Math.PI/180);
data["otherNode"][i].y = center.Y + centerR*Math.sin(i*angle*Math.PI/180);
}
function creatSvgTage(tage,json){
var oTage = document.createElementNS(svgNs,tage);
for(var attr in json){
oTage.setAttribute(attr,json[attr]);
}
return oTage;
}
function addTage(){
var oSvg = creatSvgTage("svg",{xmlns:"http://www.w3.org/2000/svg", width:"100%", height:"100%"});
for(var i=0;i<data["otherNode"].length;i++){
addOtherTage(oSvg,data["otherNode"][i]);
}
var oG = creatSvgTage("g",{style:"cursor:pointer"});
var oCircle = creatSvgTage("circle",{cx:center.X,cy:center.Y,r:40,fill:"lemonchiffon",stroke:"black","stroke-width":"1"});
var oText = creatSvgTage("text",{x:center.X,y:center.Y+8,"font-size":"20",'text-anchor':'middle'});
oG.appendChild(oCircle);
oG.appendChild(oText);
oText.innerHTML = data["centerNode"].text;
oSvg.appendChild(oG);
oDiv.appendChild(oSvg);
}
addTage();
function addOtherTage(oParent,json){
var oG = creatSvgTage("g",{style:"cursor:pointer",class:"Line"});
var oLine1 = creatSvgTage("line",{x1:json.x,y1:json.y,x2:center.X,y2:center.Y,stroke:"black"});
var oLine2 = creatSvgTage("line",{x1:json.x,y1:json.y,x2:center.X,y2:center.Y,stroke:"transparent","stroke-width":"10"});
var oRect = creatSvgTage('rect',{'x': (json.x + center.X)/2 - 10 ,'y': (json.y + center.Y)/2 - 10 ,'fill':'#999','width':'20','height':'20','rx':'5'});
var oText = creatSvgTage("text",{x:(json.x+center.X)/2,y:(json.y+center.Y)/2+8,"font-size":"20",stroke:"white",'text-anchor':'middle'});
oG.appendChild(oLine1);
oG.appendChild(oLine2);
oG.appendChild(oRect);
oG.appendChild(oText);
oText.innerHTML = "?";
oParent.appendChild(oG);
var oG = creatSvgTage("g",{style:"cursor:pointer",class:"circle"});
var oCircle = creatSvgTage("circle",{cx:json.x,cy:json.y,r:30,fill:"bisque",stroke:"#eb6100","stroke-width":"1"});
var oText = creatSvgTage("text",{x:json.x,y:json.y+5,"font-size":"14",fill:"#999",'text-anchor':'middle'});
oG.appendChild(oCircle);
oG.appendChild(oText);
oText.innerHTML = json.text;
oParent.appendChild(oG);
}
effect();
function effect(){
var doc = document;
var oLineObj = doc.getElementsByClassName("Line");
var oCircleObj = doc.getElementsByClassName("circle");
for(var i=0;i<oCircleObj.length;i++){
oCircleObj[i].onmouseenter = function(){
startMove(this.getElementsByTagName("circle")[0],30,40);
var prev = this.previousElementSibling;
prev.getElementsByTagName("line")[0].setAttribute("stroke","red");
prev.getElementsByTagName("rect")[0].setAttribute("fill","blue");
}
oCircleObj[i].onmouseleave = function(){
startMove(this.getElementsByTagName("circle")[0],40,30);
var prev = this.previousElementSibling;
prev.getElementsByTagName("line")[0].setAttribute("stroke","black");
prev.getElementsByTagName("rect")[0].setAttribute("fill","#999");
}
}
for(var j=0;j<oLineObj.length;j++){
oLineObj[j].onmouseenter = function(){
this.getElementsByTagName("line")[0].setAttribute("stroke","red");
this.getElementsByTagName("rect")[0].setAttribute("fill","blue");
var next = this.nextElementSibling;
startMove(next.getElementsByTagName("circle")[0],30,40);
}
oLineObj[j].onmouseleave = function(){
this.getElementsByTagName("line")[0].setAttribute("stroke","black");
this.getElementsByTagName("rect")[0].setAttribute("fill","#999");
var next = this.nextElementSibling;
startMove(next.getElementsByTagName("circle")[0],30,40);
}
}
}
function startMove(obj,r1,r2){
var nowR = r1;
var targetR = r2;
this.speed = 0;
clearInterval(obj.timer);
obj.timer = setInterval(function(){
this.speed += (targetR - nowR)/6;
this.speed *= 0.9;
if(Math.abs(targetR - nowR)<=1 && Math.abs(this.speed)<=1){
clearInterval(obj.timer);
obj.setAttribute("r",targetR);
}else{
nowR += this.speed;
obj.setAttribute("r",nowR);
}
},30);
}
}
</script>
</html>
齐诺图
齐诺曲面图
全部代码下载:https://www.yiibai.com/downloads/svg/graph.zip
易百教程移动端:请扫描本页面底部(右侧)二维码并关注微信公众号,回复:"教程" 选择相关教程阅读或直接访问:http://m.yiibai.com 。
SVG平面阴影 - SVG教程™
渲染器获取场景中的所有信息并将其渲染到上下文中。 目前浮动表面阴影支持WebGL,Canvas 2D和SVG。
横幅平坦的效果 -
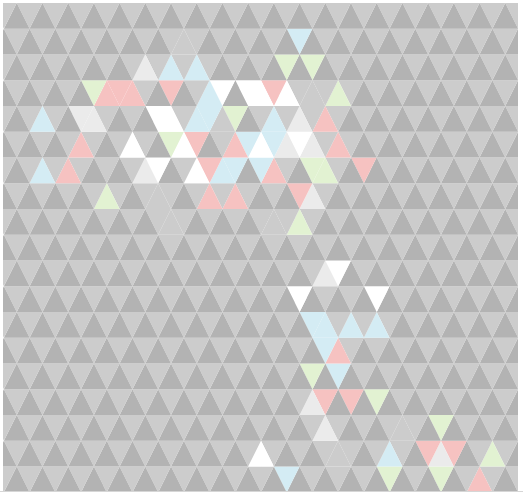
全部代码下载:代码下载:https://www.yiibai.com/downloads/svg/flat.zip
易百教程移动端:请扫描本页面底部(右侧)二维码并关注微信公众号,回复:"教程" 选择相关教程阅读或直接访问:http://m.yiibai.com 。
SVG脚本(JavaScript) - SVG教程™
使用JavaScript,可以编写SVG脚本。 通过脚本,您可以修改SVG元素,为它们设置动画或在形状上监听鼠标事件。
当SVG嵌入到HTML页面中时,可以在JavaScript中使用SVG元素。
示例
<!DOCTYPE html>
<html>
<body>
<svg width="500" height="150">
<rect id="rect1" x="20" y="20" width="70" height="80"
style="stroke: black; stroke-width: 2; fill:purple; fill-opacity: .5;"/>
</svg>
<input id="button1" type="button" value="Change Dimensions"
onclick="changeDimensions()"/>
<script>
function changeDimensions() {
document.getElementById("rect1").setAttribute("width", "120");
document.getElementById("rect1").setAttribute("height", "100");
}
</script>
</body>
</html>
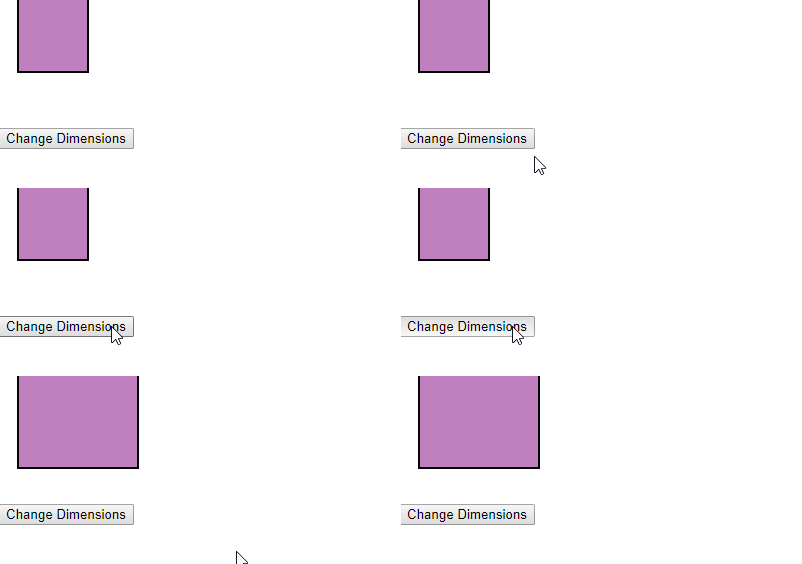
说明:
- 使用document.getElementById()函数,可以获得对SVG形状的引用。
- setAttribute()函数用于更改属性的值。
执行上面示例代码,得到以下结果 -
易百教程移动端:请扫描本页面底部(右侧)二维码并关注微信公众号,回复:"教程" 选择相关教程阅读或直接访问:http://m.yiibai.com 。
SVG事件监听器 - SVG教程™
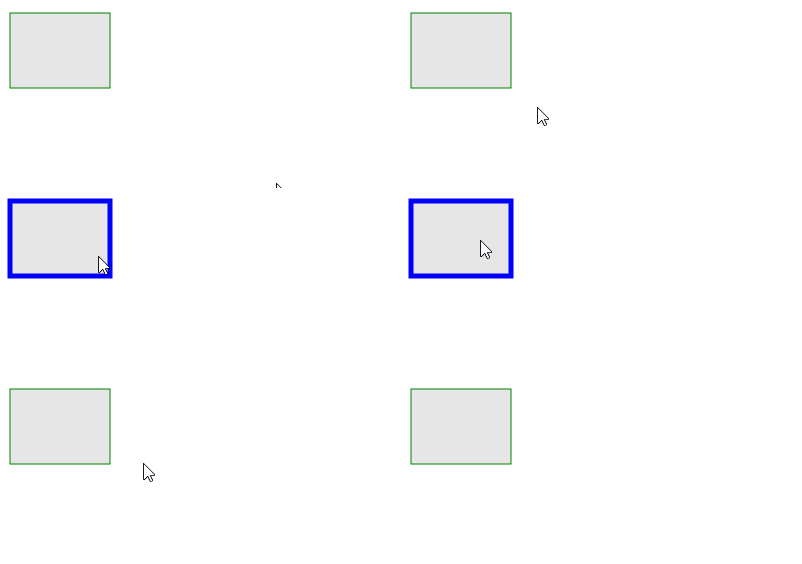
在SVG中,可以直接将各种事件监听器添加到SVG shape 。
示例:
<!DOCTYPE html>
<html>
<body>
<svg width="500" height="150">
<rect x="10" y="10" width="100" height="75"
style="stroke: black; fill: silver; fill-opacity: .4;"
onmouseover="this.style.stroke = 'blue'; this.style['stroke-width'] = 5;"
onmouseout="this.style.stroke = 'green'; this.style['stroke-width'] = 1;"/>
</svg>
</body>
</html>
转换坐标系
- 使用transform属性,可以将图形移动到新位置。 也可以旋转或缩放图形。 必须将transform属性添加到适当的SVG元素以转换坐标系。
上面示例代码,执行效果如下所示 -
易百教程移动端:请扫描本页面底部(右侧)二维码并关注微信公众号,回复:"教程" 选择相关教程阅读或直接访问:http://m.yiibai.com 。
SVG模糊效果 - SVG教程™
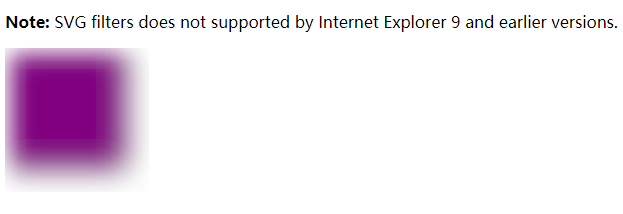
SVG使用<feGaussianBlur>元素来显示模糊效果。 Internet Explorer 9和更早版本不支持SVG筛选器
示例
<!DOCTYPE html>
<html>
<body>
<svg height="250" width="250">
<defs>
<filter id="p1" x="0" y="0">
<feGaussianBlur in="SourceGraphic" stdDeviation="15" />
</filter>
</defs>
<rect width="120" height="120" stroke="green" stroke-width="3" fill="purple" filter="url(#p1)" />
</svg>
</body>
</html>
解析
- <filter>的id属性为模式定义了一个唯一的名称。
- <feGaussianBlur>元素用于定义模糊效果。
- <feGaussianBlur>元素的in =“SourceGraphic”部分用于定义为整个元素创建的效果。
- stdDeviation属性用于定义模糊量。
- <rect>元素的filter属性用于将元素链接到“p1”过滤器。
执行上面示例代码,得到以下结果 -
易百教程移动端:请扫描本页面底部(右侧)二维码并关注微信公众号,回复:"教程" 选择相关教程阅读或直接访问:http://m.yiibai.com 。
SVG阴影效果 - SVG教程™
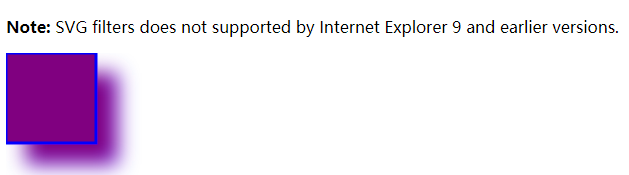
在SVG中,为了显示阴影效果,使用<feOffset>元素。 要做到这一点,请使用SVG图形并将其在x-y平面上稍稍移动一点。
示例代码
<!DOCTYPE html>
<html>
<body>
<svg height="250" width="250">
<defs>
<filter id="p1" x="0" y="0" width="200%" height="200%">
<feOffset result="offOut" in="SourceGraphic" dx="20" dy="20" />
<feGaussianBlur result="blurOut" in="offOut" stdDeviation="10" />
<feBlend in="SourceGraphic" in2="blurOut" mode="normal" />
</filter>
</defs>
<rect width="90" height="90" stroke="blue" stroke-width="3" fill="purple" filter="url(#p1)" />
</svg>
</body>
</html>
说明
- <filter>的id属性为模式定义了一个唯一的名称。
- <rect>元素的filter属性用于将元素链接到“p1”滤镜。
上面代码,在浏览器中显示如下 -
易百教程移动端:请扫描本页面底部(右侧)二维码并关注微信公众号,回复:"教程" 选择相关教程阅读或直接访问:http://m.yiibai.com 。
SVG线性渐变 - SVG教程™
SVG线性渐变用于表示一种颜色到另一种颜色的线性转换。
<linearGradient>元素定义线性渐变。可以使用<defs>元素中的<linearGradient>元素。
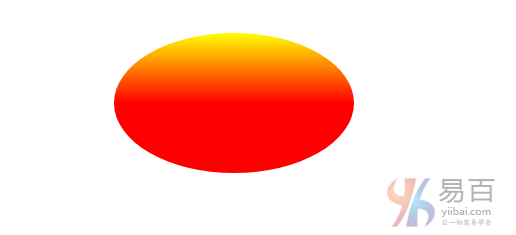
线性渐变可以是垂直,水平或角度渐变:
- 当x1和x2不同且y1和y2相等时,会创建水平渐变。
- 垂直梯度在y1和y2不同且x1和x2相等时创建。
- 当y1,y2和x1,x2不同时会产生角度梯度。
示例代码
<!DOCTYPE html>
<html>
<body>
<svg height="500" width="500">
<defs>
<linearGradient id="grad1" x1="0%" y1="0%" x2="0%" y2="100%">
<stop offset="0%" style="stop-color:rgb(255,255,0);stop-opacity:1" />
<stop offset="50%" style="stop-color:rgb(255,0,0);stop-opacity:1" />
</linearGradient>
</defs>
<ellipse cx="250" cy="100" rx="120" ry="70" fill="url(#grad1)" />
</svg>
</body>
</html>
说明
- id属性定义了渐变的唯一名称。
- x1,x2,y1,y2属性定义了渐变的开始和结束位置。
- 渐变颜色范围可以由两种或更多种颜色组成,并且每种颜色包含标签。 offset属性定义了渐变颜色开始和结束的位置。
- fill属性用于将eclipse的元素链接到渐变。
上面代码执行后,显示效果如下 -
易百教程移动端:请扫描本页面底部(右侧)二维码并关注微信公众号,回复:"教程" 选择相关教程阅读或直接访问:http://m.yiibai.com 。
SVG径向渐变 - SVG教程™
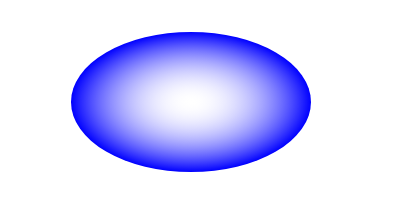
SVG径向渐变用于表示一种颜色到另一种颜色的循环过渡。
<radialGradient>元素定义径向渐变。 我们可以使用<defs>元素中的<radialGradient>元素。
示例代码
<!DOCTYPE html>
<html>
<body>
<svg height="450" width="450">
<defs>
<radialGradient id="grad1" cx="50%" cy="50%" r="50%" fx="50%" fy="50%">
<stop offset="0%" style="stop-color:rgb(255,255,255);stop-opacity:0" />
<stop offset="100%" style="stop-color:rgb(0,0,255);stop-opacity:1" />
</radialGradient>
</defs>
<ellipse cx="250" cy="100" rx="120" ry="70" fill="url(#grad1)" />
</svg>
</body>
</html>
说明
- id属性定义了渐变的唯一名称。
- fx和fy定义最内层的圆,cx,cy和r属性定义最外层的圆。
- 渐变颜色范围可以由两种或更多种颜色组成,并且每种颜色包含标签。 offset属性定义了渐变颜色开始和结束的位置。
- fill属性用于将eclipse的元素链接到渐变。
上面代码执行后,显示效果如下 -
易百教程移动端:请扫描本页面底部(右侧)二维码并关注微信公众号,回复:"教程" 选择相关教程阅读或直接访问:http://m.yiibai.com 。
