


一、前言
二、环境准备
三、集群安装
四、数据库启停
五、卸载
六、连接和 SQL 测试
七、常见问题与解决
一、前言
GBase 8c 是 GBASE公司(天津南大通用数据技术股份有限公司)自主研发的一款多模多态的企业级分布式数据库:支持行存、列存、内存等多种存储模式;支持单机、主备式、分布式等多种部署形态。
GBase 8c 具备高性能、高可用、弹性伸缩、高安全性等特性,可以部署在物理机、虚拟机、容器、私有云和公有云,为关键行业核心系统、互联网业务系统和政企业务系统提供安全、稳定、可靠的数据存储和管理服务。
本文记录集群版安装部署步骤、卸载、连接测试和常见问题与解决方法。
二、环境准备
0、标识符约定:
命令前的 # 表示以 root 账户执行;
命令前的 $ 表示以 gbase 账户执行。
1、节点软硬件配置
三台华为云服务器
主机名 IP地址
peixun-0043 172.168.10.168
peixun-0044 172.168.10.33
peixun-0043 172.168.10.220
硬件 配置
CPU Intel(R) Xeon(R) Gold 6278C CPU @ 2.60GHz,2核
Memory 4G
Disk 60G
操作系统
CentOS Linux release 7.9.2009 (Core)
SSH工具推荐MobaXterm (可点击)
下载地址:https://mobaxterm.mobatek.net/download-home-edition.html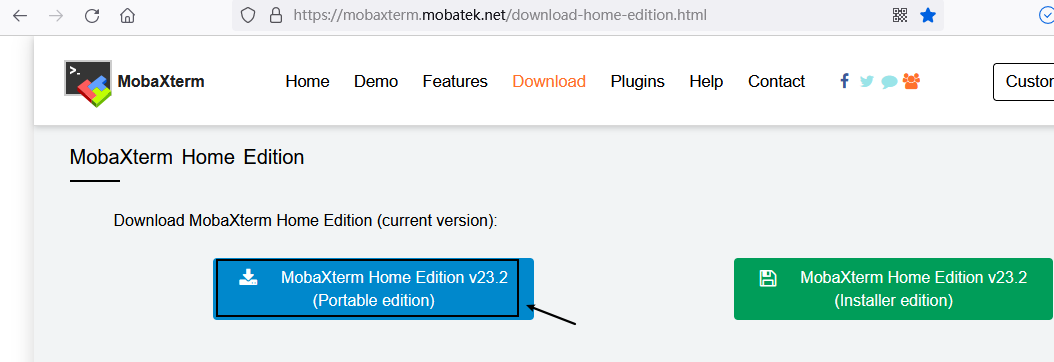
左边的版本解压后,就可以使用。右边的需要安装后可使用
针对内存 4G 的节点(三台服务器都要操作),需要增加 8G SWAP 才能安装成功。具体步骤:
① 创建 8G 的 Swap 文件
# dd if=/dev/zero of=/etc/swapfile bs=1024 count=8192000
[root@peixun-0043 ~]# dd if=/dev/zero of=/etc/swapfile bs=1024 count=8192000
8192000+0 records in
8192000+0 records out
8388608000 bytes (8.4 GB) copied, 71.4922 s, 117 MB/s[root@peixun-0044 ~]# dd if=/dev/zero of=/etc/swapfile bs=1024 count=8192000
8192000+0 records in
8192000+0 records out
8388608000 bytes (8.4 GB) copied, 70.7799 s, 119 MB/s
[root@peixun-0045 ~]# dd if=/dev/zero of=/etc/swapfile bs=1024 count=8192000
8192000+0 records in
8192000+0 records out
8388608000 bytes (8.4 GB) copied, 71.44 s, 117 MB/s
② 制作为 Swap 文件
# mkswap /etc/swapfile
[root@peixun-0043 ~]# mkswap /etc/swapfile
Setting up swapspace version 1, size = 8191996 KiB
no label, UUID=f23756df-43ce-4f6f-a28b-17a3dd97a323
[root@peixun-0044 ~]# mkswap /etc/swapfile
Setting up swapspace version 1, size = 8191996 KiB
no label, UUID=23a56de9-f819-4eaa-9331-c6c712ddffc3
[root@peixun-0045 ~]# swapon /etc/swapfile
swapon: /etc/swapfile: insecure permissions 0644, 0600 suggested.
③ 使Swap 文件生效
# swapon /etc/swapfile
[root@peixun-0043 ~]# swapon /etc/swapfile
swapon: /etc/swapfile: insecure permissions 0644, 0600 suggested.
[root@peixun-0044 ~]# swapon /etc/swapfile
swapon: /etc/swapfile: insecure permissions 0644, 0600 suggested.
[root@peixun-0045 ~]# swapon /etc/swapfile
swapon: /etc/swapfile: insecure permissions 0644, 0600 suggested.
④ 查看当前Swap
# swapon -s
[root@peixun-0043 ~]# swapon -s
Filename                                Type            Size    Used    Priority
/etc/swapfile                           file    8191996 0       -2
[root@peixun-0044 ~]# swapon -s
Filename                                Type            Size    Used    Priority
/etc/swapfile                           file    8191996 0       -2
[root@peixun-0045 ~]# swapon -s
Filename                                Type            Size    Used    Priority
/etc/swapfile                           file    8191996 0       -2
⑤ 自动挂载
编辑/etc/fstab,将以下行追加到文件末尾
/etc/swapfile swap swap defaults 0 0
[root@peixun-0043 ~]# echo "/etc/swapfile swap swap defaults 0 0" >> /etc/fstab[root@peixun-0044 ~]# echo "/etc/swapfile swap swap defaults 0 0" >> /etc/fstab
[root@peixun-0045 ~]# echo "/etc/swapfile swap swap defaults 0 0" >> /etc/fstab
⑥ 使用free -h查看创建好的 SWAP
[root@peixun-0043 ~]# free -h
              total        used        free      shared  buff/cache   available
Mem:           3.7G        186M        103M        152M        3.4G        3.1G
Swap:          7.8G          0B        7.8G
[root@peixun-0044 ~]# free -h
              total        used        free      shared  buff/cache   available
Mem:           3.7G        194M        108M         16M        3.4G        3.2G
Swap:          7.8G          0B        7.8G
[root@peixun-0045 ~]# free -h
              total        used        free      shared  buff/cache   available
Mem:           3.7G        183M        122M         32M        3.4G        3.2G
Swap:          7.8G          0B        7.8G
[root@peixun-0045 ~]# free -h
              total        used        free      shared  buff/cache   available
Mem:           3.7G        183M        122M         32M        3.4G        3.2G
Swap:          7.8G          0B        7.8G
安装必需的包(所有节点都要安装):
# yum -y install libaio-devel ncurses-devel bison flex patch bzip2 libaio需要修改操作系统配置(所有节点都要修改):
# echo "kernel.sem = 40960 2048000 40960 20480" >> /etc/sysctl.conf
# sysctl -p
# sysctl -w kernel.sem="40960 2048000 40960 20480"
2、集群服务配置(三个节点):
IP 角色
172.168.10.168 gha_server(高可用服务)、dcs(分布式配置存储)、gtm(全局事务管理)、coordinator(协调器)
172.168.10.33 datanode1(数据节点)、dcs(分布式配置存储)
172.168.10.220 datanode2(数据节点)、dcs(分布式配置存储)
(1) 检查每个节点的防火墙状态
# systemctl status firewalld.service
如果系统提示以下信息说明防火墙已被禁用
● firewalld.service - firewalld - dynamic firewall daemon
Loaded: loaded (/usr/lib/systemd/system/firewalld.service; disabled; vendor preset: enabled)
Active: inactive (dead)
Docs: man:firewalld(1)
[root@peixun-0043 ~]# systemctl status firewalld.service
● firewalld.service - firewalld - dynamic firewall daemon
   Loaded: loaded (/usr/lib/systemd/system/firewalld.service; disabled; vendor preset: enabled)
   Active: inactive (dead)
     Docs: man:firewalld(1)
[root@peixun-0044 ~]# systemctl status firewalld.service
● firewalld.service - firewalld - dynamic firewall daemon
   Loaded: loaded (/usr/lib/systemd/system/firewalld.service; disabled; vendor preset: enabled)
   Active: inactive (dead)
     Docs: man:firewalld(1)
[root@peixun-0045 ~]# systemctl status firewalld.service
● firewalld.service - firewalld - dynamic firewall daemon
   Loaded: loaded (/usr/lib/systemd/system/firewalld.service; disabled; vendor preset: enabled)
   Active: inactive (dead)
     Docs: man:firewalld(1)
# systemctl stop firewalld.service
# systemctl disable firewalld.service
以上两条命令关闭防火墙并禁止防火墙开机自启动。
4、确保每个节点的 SELINUX 是关闭的
(1) 检查每个节点的 SELINUX 状态
# sestatus
如果系统提示以下信息说明 selinux 已被禁用
SELinux status: disabled
[root@peixun-0043 ~]# sestatus
SELinux status:                 disabled
[root@peixun-0044 ~]# sestatus
SELinux status:                 disabled
[root@peixun-0045 ~]# sestatus
SELinux status:                 disabled
(2) 如果 SELINUX 没有关闭,需要编辑当前节点的 selinux 配置文件
# vi /etc/selinux/config
将 SELINUX=enforcing修改为SELINUX=disabled,存盘退出,执行
# setenforce 0
5、三个节点重新设置主机名,并重启服务器
[root@peixun-0043 ~]# hostnamectl set-hostname gbase8c_0001
[root@peixun-0043 ~]# reboot[root@peixun-0044 ~]# hostnamectl set-hostname gbase8c_0002
[root@peixun-0044 ~]# reboot
[root@peixun-0045 ~]# hostnamectl set-hostname gbase8c_0003
[root@peixun-0045 ~]# reboot
6、配置三个节点的 IP 主机名映射:
编辑三个节点的 hosts 文件
# vi /etc/hosts
将以下三行信息追加到 hosts 文件中
172.168.10.168  gbase8c_0001
172.168.10.33   gbase8c_0002
172.168.10.220  gbase8c_0003
三、集群安装
1、每个节点都要创建 gbase用户
# useradd gbase
# passwd gbase
[root@gbase8c_0001 ~]# useradd gbase
[root@gbase8c_0001 ~]# passwd gbase
Changing password for user gbase.
New password:
BAD PASSWORD: The password contains the user name in some form
Retype new password:
passwd: all authentication tokens updated successfully.
[root@gbase8c_0002 ~]# useradd gbase
[root@gbase8c_0002 ~]# passwd gbase
Changing password for user gbase.
New password:
BAD PASSWORD: The password contains the user name in some form
Retype new password:
passwd: all authentication tokens updated successfully.
[root@gbase8c_0003 ~]# useradd gbase
[root@gbase8c_0003 ~]# passwd gbase
Changing password for user gbase.
New password:
BAD PASSWORD: The password contains the user name in some form
Retype new password:
passwd: all authentication tokens updated successfully.
2、添加gbase 用户至sudoer 列表
三个节点都要执行如下操作
# visudo
打开 sudoer 配置文件,找到 “root ALL=(ALL) ALL” 在第100行,在下方增加
gbase ALL=(ALL) NOPASSWD: ALL增加后的配置部分
     99 ## Allow root to run any commands anywhere
    100 root    ALL=(ALL)       ALL
    101 gbase   ALL=(ALL)       NOPASSWD: ALL
完成 sudoer 配置后,数据库安装就可以用 gbase 用户了。本文使用的安装包是不能在 root 账户下安装的。
个别操作系统,经过以上的设置后,gbase 用户执行 sudo 命令时,第一次还是有密码提示。需要有以下补救措施:
(1) root 账户下进入 /etc/sudoers.d/ 目录
# cd /etc/sudoers.d/
(2) 生成新文件 gbase:
# vi gbase
添加如下信息后,存盘即可:
gbase ALL=(ALL) NOPASSWD: ALL
3、配置gbase用户ssh互信:
每个节点都要执行以下命令
(1) 切换到 gbase 用户下
# su - gbase
(2) 生成秘钥文件(连续回车即可)
$ ssh-keygen -t rsa
[gbase@gbase8c_0001 ~]$ ssh-keygen -t rsa
Generating public/private rsa key pair.
Enter file in which to save the key (/home/gbase/.ssh/id_rsa):
Created directory '/home/gbase/.ssh'.
Enter passphrase (empty for no passphrase):
Enter same passphrase again:
Your identification has been saved in /home/gbase/.ssh/id_rsa.
Your public key has been saved in /home/gbase/.ssh/id_rsa.pub.
The key fingerprint is:
[gbase@gbase8c_0002 ~]$ ssh-keygen -t rsa
Generating public/private rsa key pair.
Enter file in which to save the key (/home/gbase/.ssh/id_rsa):
Created directory '/home/gbase/.ssh'.
Enter passphrase (empty for no passphrase):
Enter same passphrase again:
Your identification has been saved in /home/gbase/.ssh/id_rsa.
Your public key has been saved in /home/gbase/.ssh/id_rsa.pub.
The key fingerprint is:
[gbase@gbase8c_0003 ~]$ ssh-keygen -t rsa
Generating public/private rsa key pair.
Enter file in which to save the key (/home/gbase/.ssh/id_rsa):
Created directory '/home/gbase/.ssh'.
Enter passphrase (empty for no passphrase):
Enter same passphrase again:
Your identification has been saved in /home/gbase/.ssh/id_rsa.
Your public key has been saved in /home/gbase/.ssh/id_rsa.pub.
The key fingerprint is:
(4) 将公钥文件上传至其他节点即可实现免密登录:
在操作ssh-copy-id需输入 gbase 的密码,所有节点都要执行
$ ssh-copy-id gbase@172.168.10.168
$ ssh-copy-id gbase@172.168.10.33
$ ssh-copy-id gbase@172.168.10.220
$ echo 'StrictHostKeyChecking no' >> ~/.ssh/config; echo 'UserKnownHostsFile ~/.ssh/known_hosts' >> ~/.ssh/config; chmod 644 ~/.ssh/config
4、配置系统时间同步(如果是云服务器一般都已经配置,如有这步可以跳过)
通过查看/etc/chrony.conf配置和服务(systemctl status chronyd)
[gbase@gbase8c_0001 ~]$ egrep -v "^#|^$" /etc/chrony.conf
server ntp.myhuaweicloud.com minpoll 4 maxpoll 10 iburst
stratumweight 0.05
driftfile /var/lib/chrony/drift
rtcsync
makestep 10 3
bindcmdaddress 127.0.0.1
bindcmdaddress ::1
noclientlog
logchange 0.5
logdir /var/log/chrony
[gbase@gbase8c_0001 ~]$ systemctl status chronyd
● chronyd.service - NTP client/server
   Loaded: loaded (/usr/lib/systemd/system/chronyd.service; enabled; vendor preset: enabled)
   Active: active (running) since Mon 2023-09-18 20:09:47 CST; 44min ago
     Docs: man:chronyd(8)
           man:chrony.conf(5)
  Process: 522 ExecStartPost=/usr/libexec/chrony-helper update-daemon (code=exited, status=0/SUCCESS)
  Process: 510 ExecStart=/usr/sbin/chronyd $OPTIONS (code=exited, status=0/SUCCESS)
 Main PID: 515 (chronyd)
   CGroup: /system.slice/chronyd.service
           └─515 /usr/sbin/chronyd
5、下载安装包(官网下载地址:https://www.gbase.cn/download/gbase-8c?category=INSTALL_PACKAGE):
[gbase@gbase8c_0001 ~]$ mkdir -p /home/gbase/gbase_package
[gbase@gbase8c_0001 ~]$ cd /home/gbase/gbase_package/
[gbase@gbase8c_0001 gbase_package]$ wget -c https://cdn.gbase.cn/products/34/INSTALL_PACKAGE/GBase8cV5_S3.0.0_%E5%88%86%E5%B8%83%E5%BC%8F%E7%89%88_x86_64.zip
6、解压安装包
[gbase@gbase8c_0001 gbase_package]$ ls -lh
total 256M
-rw-rw-r-- 1 gbase gbase 256M May 12 01:14 GBase8cV5_S3.0.0_分布式版_x86_64.zip
[gbase@gbase8c_0001 gbase_package]$ unzip GBase8cV5_S3.0.0_分布式版_x86_64.zip
Archive:  GBase8cV5_S3.0.0_分布式版_x86_64.zip
 extracting: GBase8cV5_S3.0.0B78_centos7.8_x86_64.tar.gz
[gbase@gbase8c_0001 gbase_package]$ ls
GBase8cV5_S3.0.0B78_centos7.8_x86_64.tar.gz  GBase8cV5_S3.0.0_分布式版_x86_64.zip
[gbase@gbase8c_0001 gbase_package]$ ls -lh
total 511M
-rw-rw-r-- 1 gbase gbase 256M Mar  6  2023 GBase8cV5_S3.0.0B78_centos7.8_x86_64.tar.gz
-rw-rw-r-- 1 gbase gbase 256M May 12 01:14 GBase8cV5_S3.0.0_分布式版_x86_64.zip
[gbase@gbase8c_0001 gbase_package]$ tar -xf GBase8cV5_S3.0.0B78_centos7.8_x86_64.tar.gz
[gbase@gbase8c_0001 gbase_package]$ ls -lh
total 768M
-rw-rw-r-- 1 gbase gbase  256M Mar  6  2023 GBase8cV5_S3.0.0B78_centos7.8_x86_64.tar.gz
-rw-rw-r-- 1 gbase gbase    65 Mar  6  2023 GBase8cV5_S3.0.0B78_CentOS_x86_64_om.sha256
-rw-rw-r-- 1 gbase gbase  100M Mar  6  2023 GBase8cV5_S3.0.0B78_CentOS_x86_64_om.tar.gz
-rw-rw-r-- 1 gbase gbase 1012K Mar  6  2023 GBase8cV5_S3.0.0B78_CentOS_x86_64_pgpool.tar.gz
-rw-rw-r-- 1 gbase gbase    65 Mar  6  2023 GBase8cV5_S3.0.0B78_CentOS_x86_64.sha256
-rw-rw-r-- 1 gbase gbase  157M Mar  6  2023 GBase8cV5_S3.0.0B78_CentOS_x86_64.tar.bz2
-rw-rw-r-- 1 gbase gbase  256M May 12 01:14 GBase8cV5_S3.0.0_分布式版_x86_64.zip
$ tar -xf GBase8cV5_S3.0.0B78_CentOS_x86_64_om.tar.gz[gbase@gbase8c_0001 gbase_package]$ tar -xf GBase8cV5_S3.0.0B78_CentOS_x86_64_om.tar.gz
[gbase@gbase8c_0001 gbase_package]$ ls -lh
total 768M
drwxrwxr-x 5 gbase gbase 4.0K Mar 6 2023 dependency
-rw-rw-r-- 1 gbase gbase 256M Mar 6 2023 GBase8cV5_S3.0.0B78_centos7.8_x86_64.tar.gz
-rw-rw-r-- 1 gbase gbase 65 Mar 6 2023 GBase8cV5_S3.0.0B78_CentOS_x86_64_om.sha256
-rw-rw-r-- 1 gbase gbase 100M Mar 6 2023 GBase8cV5_S3.0.0B78_CentOS_x86_64_om.tar.gz
-rw-rw-r-- 1 gbase gbase 1012K Mar 6 2023 GBase8cV5_S3.0.0B78_CentOS_x86_64_pgpool.tar.gz
-rw-rw-r-- 1 gbase gbase 65 Mar 6 2023 GBase8cV5_S3.0.0B78_CentOS_x86_64.sha256
-rw-rw-r-- 1 gbase gbase 157M Mar 6 2023 GBase8cV5_S3.0.0B78_CentOS_x86_64.tar.bz2
-rw-rw-r-- 1 gbase gbase 256M May 12 01:14 GBase8cV5_S3.0.0_分布式版_x86_64.zip
-rw-rw-r-- 1 gbase gbase 2.6K Mar 6 2023 gbase.yml
drwxrwxr-x 11 gbase gbase 4.0K Mar 6 2023 gha
-rw-rw-r-- 1 gbase gbase 188 Mar 6 2023 gha_ctl.ini
drwxrwxr-x 2 gbase gbase 4.0K Mar 6 2023 lib
-rw-rw-r-- 1 gbase gbase 750 Mar 6 2023 package_info.json
drwxr-xr-x 4 gbase gbase 4.0K Mar 16 2021 python3.8
drwxrwxr-x 10 gbase gbase 4.0K Mar 6 2023 script
drwxrwxr-x 2 gbase gbase 4.0K Mar 6 2023 simpleInstall
-rw-rw-r-- 1 gbase gbase 118 Mar 6 2023 ubuntu_version.json
drwx------ 6 gbase gbase 4.0K Jul 2 2022 venv
-rw-rw-r-- 1 gbase gbase 36 Mar 6 2023 version.cfg
7、开始安装
(1) 编辑集群部署文件 gbase8c.yml:
[10.168.10.70]$ vi /home/gbase/gbase_package/gbase.yml
修改小技巧:进入vi后,按Shift+: ,使用以下方法进行批量替换,172开头是替换的IP
host和agent_host可以为同一个IP地址
:1,$s/10.0.1.17/172.168.10.168/g

:1,$s/100.0.1.17/172.168.10.168/g

:1,$s/10.0.1.18/172.168.10.33/g

:1,$s/100.0.1.17/172.168.10.33/g

:1,$s/10.0.1.18/172.168.10.220/g

:1,$s/100.0.1.18/172.168.10.220/g
修改(因服务器配置低,-d2的配置都注释,配置高可以不用注释)后的配置如下:
[gbase@gbase8c_0001 gbase_package]$ cat gbase.yml
gha_server:
  - gha_server1:
      host: 172.168.10.168
      port: 20001
dcs:
  - host: 172.168.10.168
    port: 2379
  - host: 172.168.10.33
    port: 2379
  - host: 172.168.10.220
    port: 2379
gtm:
  - gtm1:
      host: 172.168.10.168
      agent_host: 172.168.10.168
      role: primary
      port: 6666
      agent_port: 8001
      work_dir: /home/gbase/data/gtm/gtm1
  - gtm2:
      host: 172.168.10.33
      agent_host: 172.168.10.33
      role: standby
      port: 6666
      agent_port: 8002
      work_dir: /home/gbase/data/gtm/gtm2
coordinator:
  - cn1:
      host: 172.168.10.33
      agent_host: 172.168.10.33
      role: primary
      port: 5432
      agent_port: 8003
      work_dir: /home/gbase/data/coord/cn1
  - cn2:
      host: 172.168.10.220
      agent_host: 172.168.10.220
      role: primary
      port: 5432
      agent_port: 8004
      work_dir: /home/gbase/data/coord/cn2
datanode:
  - dn1:
      - dn1_1:
          host: 172.168.10.33
          agent_host: 172.168.10.33
          role: primary
          port: 15432
          agent_port: 8005
          work_dir: /home/gbase/data/dn1/dn1_1
      - dn1_2:
          host: 172.168.10.220
          agent_host: 172.168.10.220
          role: standby
          port: 15433
          agent_port: 8006
          work_dir: /home/gbase/data/dn1/dn1_2
      - dn1_3:
          host: 172.168.10.168
          agent_host: 172.168.10.168
          role: standby
          port: 15433
          agent_port: 8006
          work_dir: /home/gbase/data/dn1/dn1_3
  #- dn2:
      #- dn2_1:
          #host: 172.168.10.220
          #agent_host: 172.168.10.220
          #role: primary
          #port: 20010
          #agent_port: 8007
          #work_dir: /home/gbase/data/dn2/dn2_1
          # numa:
          #   cpu_node_bind: 0,1
          #   mem_node_bind: 0,1
      #- dn2_2:
          #host: 172.168.10.168
          #agent_host: 172.168.10.168
          #role: standby
          #port: 20010
          #agent_port: 8008
          #work_dir: /home/gbase/data/dn2/dn2_2
          # numa:
          #   cpu_node_bind: 2
          #   mem_node_bind: 2
      #- dn2_3:
          #host: 172.168.10.33
          #agent_host: 172.168.10.33
          #role: standby
          #port: 20010
          #agent_port: 8009
          #work_dir: /home/gbase/data/dn2/dn2_3
          # numa:
          #   cpu_node_bind: 3
          #   mem_node_bind: 3
env:
  # cluster_type allowed values: multiple-nodes, single-inst, default is multiple-nodes
  cluster_type: multiple-nodes
  pkg_path: /home/gbase/gbase_package
  prefix: /home/gbase/gbase_db
  version: V5_S3.0.0B78
  user: gbase
  port: 22
# constant:
#   virtual_ip: 100.0.1.254/24
(2) 执行安装脚本:
[gbase@gbase8c_0001 ~]$ cd /home/gbase/gbase_package/script/
[gbase@gbase8c_0001 script]$ ls
base_diff     gha_agent   gs_check      gs_deploy     gs_om             gs_restorenode  gs_upgradectl  local         xlog_parse
base_utils    gha_ctl     gs_checkos    gs_dropnode   gs_postuninstall  gs_ssh          impl           os_platform
config        gha_server  gs_checkperf  gs_expansion  gs_preinstall     gs_sshexkey     __init__.py    py_pstree.py
domain_utils  gs_backup   gs_collector  gs_install    gspylib           gs_uninstall    killall        transfer.py
[gbase@gbase8c_0001 script]$ ./gha_ctl install -c gbase -p /home/gbase/gbase_package/
A. -c 参数:数据库名称,缺省 gbase;
B. -p 参数:配置文件路径,缺省 /home/gbase/gbase_package。
执行时间 3+ 分钟,安装结束后,脚本会提示
{
    "ret":0,
    "msg":"Success"
}
集群安装成功!
!!!异常处理
在没有安装开发组件的操作系统上,执行安装脚本可能出现以下现象:
[gbase@gbase8c_0001 script]$ ./gha_ctl install -c gbase -p /home/gbase/gbase_package
{
    "ret":-1,
    "msg":"Host localhost install or upgrade dependency {'libaio': None} failed!  Host 172.168.10.33 install or upgrade dependency {'libaio': None} failed!  Host "
}
在集群所有节点在root用户下安装 libaio 组件
# yum -y install libaio安装时遇见资源占用,集群已存在等问题时:
1,卸载数据库(只要在安装的节点执行)
[gbase@gbase8c_0001 script]$ ./gha_ctl uninstall -l http://172.168.10.168:2379
{
    "ret":0,
    "msg":"Success"
}
2,删除相关目录(所有节点都要检查)
[gbase@gbase8c_0001 script]$ rm -rf /home/gbase/data/
[gbase@gbase8c_0001 script]$ ls /home/gbase/
gbase_package
[gbase@gbase8c_0002 ~]$ rm -rf data/ gbase_package/
[gbase@gbase8c_0002 ~]$ ls
[gbase@gbase8c_0002 ~]$
[gbase@gbase8c_0003 ~]$ rm -rf data/ gbase_package/
[gbase@gbase8c_0003 ~]$ ls
[gbase@gbase8c_0003 ~]$
3,清理gbase相关进程(所有节点都要检查)
[gbase@gbase8c_0001 script]$ ps -ef |grep gbase
root      8543  7703  0 21:42 pts/0    00:00:00 su - gbase
gbase     8544  8543  0 21:42 pts/0    00:00:00 -bash
gbase    22783     1  2 21:45 ?        00:00:21 /home/gbase/gbase_db/app/bin/gaussdb --gtm -D /home/gbase/data/gtm/gtm1 -M primary
gbase    23648  8544  0 22:02 pts/0    00:00:00 ps -ef
gbase    23649  8544  0 22:02 pts/0    00:00:00 grep --color=auto gbase
[gbase@gbase8c_0001 script]$
[gbase@gbase8c_0001 script]$ kill -9 22783
[gbase@gbase8c_0001 script]$ ps -ef |grep gbase
root      8543  7703  0 21:42 pts/0    00:00:00 su - gbase
gbase     8544  8543  0 21:42 pts/0    00:00:00 -bash
gbase    23653  8544  0 22:02 pts/0    00:00:00 ps -ef
gbase    23654  8544  0 22:02 pts/0    00:00:00 grep --color=auto gbase
[gbase@gbase8c_0002 ~]$ ps -ef |grep gbase
gbase    18188     1  1 21:45 ?        00:00:19 /home/gbase/gbase_db/app/bin/gaussdb --coordinator -D /home/gbase/data/coord/cn1
root     18808  7641  0 21:59 pts/0    00:00:00 su - gbase
gbase    18809 18808  0 21:59 pts/0    00:00:00 -bash
gbase    18861 18809  0 22:02 pts/0    00:00:00 ps -ef
gbase    18862 18809  0 22:02 pts/0    00:00:00 grep --color=auto gbase
[gbase@gbase8c_0002 ~]$ kill -9 18188
[gbase@gbase8c_0002 ~]$ ps -ef |grep gbase
root     18808  7641  0 21:59 pts/0    00:00:00 su - gbase
gbase    18809 18808  0 21:59 pts/0    00:00:00 -bash
gbase    18866 18809  0 22:03 pts/0    00:00:00 ps -ef
gbase    18867 18809  0 22:03 pts/0    00:00:00 grep --color=auto gbase
[gbase@gbase8c_0003 ~]$ ps -ef |grep gbase
gbase    17101     1  1 21:45 ?        00:00:15 /home/gbase/gbase_db/app/bin/gaussdb --coordinator -D /home/gbase/data/coord/cn2
root     17299  7639  0 21:48 pts/0    00:00:00 su - gbase
gbase    17300 17299  0 21:48 pts/0    00:00:00 -bash
gbase    17773 17300  0 22:03 pts/0    00:00:00 ps -ef
gbase    17774 17300  0 22:03 pts/0    00:00:00 grep --color=auto gbase
[gbase@gbase8c_0003 ~]$ kill -9 17101
[gbase@gbase8c_0003 ~]$ ps -ef |grep gbase
root     17299  7639  0 21:48 pts/0    00:00:00 su - gbase
gbase    17300 17299  0 21:48 pts/0    00:00:00 -bash
gbase    17779 17300  0 22:03 pts/0    00:00:00 ps -ef
gbase    17780 17300  0 22:03 pts/0    00:00:00 grep --color=auto gbase
4,清除相关服务(所有节点都要检查)
[gbase@gbase8c_0001 script]$ systemctl list-units |grep gbase5,再进行重装
[gbase@gbase8c_0001 script]$ ./gha_ctl install -c gbase -p /home/gbase/gbase_package/
(3) 节点状态检查
在主安装节点上执行
[gbase@gbase8c_0001 script]$ exit
logout
[root@gbase8c_0001 ~]# su - gbase
Last login: Mon Sep 18 22:33:38 CST 2023 on pts/0
以上两个命令是保证环境变量生效
[gbase@gbase8c_0001 ~]$ gha_ctl monitor -l http://172.168.10.168:2379 -H结果如下,说明集群安装正常,数据服务启动中
+----+-------------+----------------+-------+---------+--------+
| No |     name    |      host      |  port |  state  | leader |
+----+-------------+----------------+-------+---------+--------+
| 0  | gha_server1 | 172.168.10.168 | 20001 | running |  True  |
+----+-------------+----------------+-------+---------+--------+
+----+------+----------------+------+---------------------------+---------+---------+
| No | name |      host      | port |          work_dir         |  state  |   role  |
+----+------+----------------+------+---------------------------+---------+---------+
| 0  | gtm1 | 172.168.10.168 | 6666 | /home/gbase/data/gtm/gtm1 | running | primary |
| 1  | gtm2 | 172.168.10.33  | 6666 | /home/gbase/data/gtm/gtm2 | running | standby |
+----+------+----------------+------+---------------------------+---------+---------+
+----+------+----------------+------+----------------------------+---------+---------+
| No | name |      host      | port |          work_dir          |  state  |   role  |
+----+------+----------------+------+----------------------------+---------+---------+
| 0  | cn1  | 172.168.10.33  | 5432 | /home/gbase/data/coord/cn1 | running | primary |
| 1  | cn2  | 172.168.10.220 | 5432 | /home/gbase/data/coord/cn2 | running | primary |
+----+------+----------------+------+----------------------------+---------+---------+
+----+-------+-------+----------------+-------+----------------------------+---------+---------+
| No | group |  name |      host      |  port |          work_dir          |  state  |   role  |
+----+-------+-------+----------------+-------+----------------------------+---------+---------+
| 0  |  dn1  | dn1_1 | 172.168.10.33  | 15432 | /home/gbase/data/dn1/dn1_1 | running | primary |
| 1  |  dn1  | dn1_2 | 172.168.10.220 | 15433 | /home/gbase/data/dn1/dn1_2 | running | standby |
| 2  |  dn1  | dn1_3 | 172.168.10.168 | 15433 | /home/gbase/data/dn1/dn1_3 | running | standby |
+----+-------+-------+----------------+-------+----------------------------+---------+---------+
+----+----------------------------+--------+---------+----------+
| No |            url             |  name  |  state  | isLeader |
+----+----------------------------+--------+---------+----------+
| 0  | http://172.168.10.33:2379  | node_1 | healthy |  False   |
| 1  | http://172.168.10.220:2379 | node_2 | healthy |  False   |
| 2  | http://172.168.10.168:2379 | node_0 | healthy |   True   |
+----+----------------------------+--------+---------+----------+
四、数据库停用和启动
停用数据库服务
[gbase@gbase8c_0001 ~]$/home/gbase/script/gha_ctl stop all -l http://172.168.10.168:2379
启动数据库服务
[gbase@gbase8c_0001 ~]$/home/gbase/script/gha_ctl start all -l http://172.168.10.168:2379
五、卸载
在主节点(172.168.10.168)执行以下命令——
1、停止所有节点的集群服务
$ gha_ctl stop all -l http://172.168.10.168:2379
示例:
[gbase@gbase8c_0001 ~]$ gha_ctl stop all -l http://172.168.10.168:2379
{
    "ret":0,
    "msg":"Success"
}
2、集群程序的卸载:
$ gha_ctl uninstall -l http://172.168.10.168:2379
示例:
[gbase@gbase8c_0001 ~]$ gha_ctl uninstall -l http://172.168.10.168:2379
{
    "ret":0,
    "msg":"Success"
}
3、移除 dcs 集群:
$ cd /home/gbase/script
$ ./gha_ctl destroy dcs -l http://172.168.10.168:2379
示例:
[gbase@gbase8c_0001 ~]$ cd /home/gbase/gbase_package/script/
[gbase@gbase8c_0001 script]$ ./gha_ctl destroy dcs -l http://172.168.10.168:2379
{
    "ret":0,
    "msg":"Success"
}
六、连接和 SQL 测试
在cn节点执行
[root@gbase8c_0003 ~]# su - gbase
Last login: Mon Sep 18 22:27:55 CST 2023 on pts/0
[gbase@gbase8c_0003 ~]$ gsql -d postgres
gsql ((multiple_nodes GBase8cV5 3.0.0B78 build f35d85c7) compiled at 2023-03-06 17:14:54 commit 0 last mr 1247 )
Non-SSL connection (SSL connection is recommended when requiring high-security)
Type "help" for help.

postgres=# create database testdb;
CREATE DATABASE
postgres=# create table student(ID int,Name varchar(10));
CREATE TABLE
postgres=# insert into student values(1,'Mike'),(2,'John');
INSERT 0 2
postgres=# select * from student;
 id | name
----+------
  1 | Mike
  2 | John
(2 rows)
