


1、安装概述
PG安装方法很多,和MySQL类似,给用户提供很大的选择空间。如:RPM包安装(在线、离线)、源码编译安装、系统自带、二进制、NDB安装等。
官网:https://www.postgresql.org/
rpm包:https://yum.postgresql.org/rpmchart.php
yum源:https://yum.postgresql.org/repopackages.php
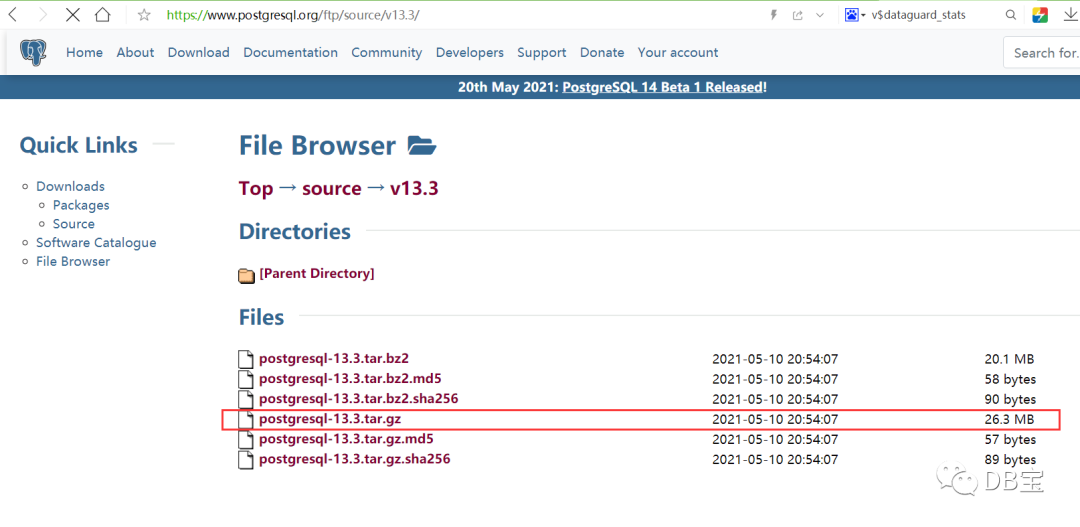
源码包:https://www.postgresql.org/ftp/source/
打开 PostgreSQL 官网 https://www.postgresql.org/,点击菜单栏上的 Download ,可以看到这里包含了很多平台的安装包,包括 Linux、Windows、Mac OS等 。

生产库建议源码安装,以下方法已在9.4到16版本测试过。
2、下载源码包
源码下载地址:https://www.postgresql.org/ftp/source/
 1-- 下载源码包
 2wget https://ftp.postgresql.org/pub/source/v16.0/postgresql-16.0.tar.gz
 3wget https://ftp.postgresql.org/pub/source/v15.4/postgresql-15.4.tar.gz
 4wget https://ftp.postgresql.org/pub/source/v14.9/postgresql-14.9.tar.gz
 5wget https://ftp.postgresql.org/pub/source/v13.3/postgresql-13.3.tar.gz
 6wget https://ftp.postgresql.org/pub/source/v12.6/postgresql-12.6.tar.gz
 7wget https://ftp.postgresql.org/pub/source/v11.11/postgresql-11.11.tar.gz
 8wget https://ftp.postgresql.org/pub/source/v10.16/postgresql-10.16.tar.gz
 9wget https://ftp.postgresql.org/pub/source/v9.6.21/postgresql-9.6.21.tar.gz
10wget https://ftp.postgresql.org/pub/source/v9.4.26/postgresql-9.4.26.tar.gz
3、创建用户和安装目录
 1-- 创建用户
 2groupadd -g 60000 pgsql
 3useradd -u 60000 -g pgsql pgsql
 4echo "lhr" | passwd --stdin pgsql
 5
 6
 7-- 创建目录
 8mkdir -p /postgresql/{pgdata,archive,scripts,backup,pg13,soft}
 9chown -R pgsql:pgsql /postgresql
10chmod -R 775 /postgresql
4、编译PG
 1-- 安装一些依赖包
 2yum install -y cmake make gcc zlib gcc-c++ perl readline readline-devel zlib zlib-devel \
 3perl python36 tcl openssl ncurses-devel openldap pam perl-IPC-Run libicu-devel
 4
 5
 6-- 编译
 7su - pgsql
 8cd /postgresql/soft
 9tar zxvf postgresql-13.3.tar.gz
10cd postgresql-13.3
11./configure --prefix=/postgresql/pg13
12make -j 8 && make install
13make world -j 8 && make install-world
5、配置环境变量
 1-- 配置环境变量
 2cat >>  ~/.bash_profile <<"EOF"
 3export LANG=en_US.UTF-8
 4export PS1="[\u@\h \W]\$ "
 5export PGPORT=5432
 6export PGDATA=/postgresql/pgdata
 7export PGHOME=/postgresql/pg13
 8export LD_LIBRARY_PATH=$PGHOME/lib:/lib64:/usr/lib64:/usr/local/lib64:/lib:/usr/lib:/usr/local/lib:$LD_LIBRARY_PATH
 9export PATH=$PGHOME/bin:$PATH:.
10export DATE=`date +"%Y%m%d%H%M"`
11export MANPATH=$PGHOME/share/man:$MANPATH
12export PGHOST=$PGDATA
13export PGUSER=postgres
14export PGDATABASE=postgres
15EOF
16
17source  ~/.bash_profile
6、初始化数据库
1-- 初始化
2su - pgsql
3/postgresql/pg13/bin/initdb -D /postgresql/pgdata -E UTF8 --locale=en_US.utf8 -U postgres --data-checksums
7、配置远程登陆
 1-- 修改参数
 2cat >> /postgresql/pgdata/postgresql.conf <<"EOF"
 3listen_addresses = '*'
 4port=5432
 5unix_socket_directories='/postgresql/pgdata'
 6logging_collector = on
 7log_directory = 'pg_log'
 8log_filename = 'postgresql-%a.log'
 9log_truncate_on_rotation = on
10EOF
11
12cat   >> /postgresql/pgdata/pg_hba.conf << EOF
13# TYPE  DATABASE    USER    ADDRESS       METHOD
14local     all       all                    trust
15host      all       all   127.0.0.1/32     trust
16host      all       all    0.0.0.0/0        md5
17host   replication  all    0.0.0.0/0        md5
18EOF
19
20-- 启动
21su - pgsql
22pg_ctl start
23pg_ctl status
24pg_ctl stop
25
26-- 修改密码
27pg_ctl start
28psql
29alter user postgres with  password 'lhr';
30exit
31
32
33-- 或:
34nohup /postgresql/pg13/bin/postgres -D /postgresql/pgdata > /postgresql/pg13/pglog.out 2>&1 &
8、配置系统服务
 1-- 配置系统服务
 2cat > /etc/systemd/system/PG13.service <<"EOF"
 3[Unit]
 4Description=PostgreSQL database server
 5Documentation=man:postgres(1)
 6After=network.target
 7
 8[Service]
 9Type=forking
10User=pgsql
11Group=pgsql
12Environment=PGPORT=5432
13Environment=PGDATA=/postgresql/pgdata
14OOMScoreAdjust=-1000
15ExecStart=/postgresql/pg13/bin/pg_ctl start -D ${PGDATA} -s -o "-p ${PGPORT}" -w -t 300
16ExecStop=/postgresql/pg13/bin/pg_ctl stop -D ${PGDATA} -s -m fast
17ExecReload=/postgresql/pg13/bin/pg_ctl reload -D ${PGDATA} -s
18KillMode=mixed
19KillSignal=SIGINT
20TimeoutSec=0
21
22[Install]
23WantedBy=multi-user.target
24EOF
使用systemctl启动PG:
1systemctl daemon-reload
2systemctl enable PG13
3systemctl start PG13
4systemctl status PG13
已启动:
 1[root@lhrpg postgresql]# systemctl status PG13
 2● PG13.service - PostgreSQL database server
 3   Loaded: loaded (/etc/systemd/system/PG13.service; enabled; vendor preset: disabled)
 4   Active: active (running) since Wed 2021-05-26 21:32:26 CST; 1s ago
 5     Docs: man:postgres(1)
 6  Process: 12473 ExecStart=/postgresql/pg13/bin/pg_ctl start -D ${PGDATA} -s -o -p ${PGPORT} -w -t 300 (code=exited, status=0/SUCCESS)
 7 Main PID: 12475 (postgres)
 8   CGroup: /docker/ea25b97cfa732f1ec6f188098898e8f26b64cd1bf1e9b408898d722c8a5917fb/system.slice/PG13.service
 9           ├─12475 /postgresql/pg13/bin/postgres -D /postgresql/pgdata -p 5433
10           ├─12476 postgres: logger
11           ├─12478 postgres: checkpointer
12           ├─12479 postgres: background writer
13           ├─12480 postgres: walwriter
14           ├─12481 postgres: autovacuum launcher
15           ├─12482 postgres: stats collector
16           └─12483 postgres: logical replication launcher
17
18May 26 21:32:26 lhrpg systemd[1]: Starting PostgreSQL database server...
19May 26 21:32:26 lhrpg pg_ctl[12473]: 2021-05-26 21:32:26.617 CST [12475] LOG:  redirecting log output to logging collector process
20May 26 21:32:26 lhrpg pg_ctl[12473]: 2021-05-26 21:32:26.617 CST [12475] HINT:  Future log output will appear in directory "pg_log".
21May 26 21:32:26 lhrpg systemd[1]: Started PostgreSQL database server.
9、登陆测试
1-- 远程登陆
2psql -U postgres -h 192.168.66.35 -d postgres -p5432
3
4-- 从Postgresql 9.2开始,还可以使用URI格式进行远程连接:psql postgresql://myuser:mypasswd@myhost:5432/mydb
5psql postgresql://postgres:lhr@192.168.66.35:5432/postgres
其中-h参数指定服务器地址,默认为127.0.0.1,默认不指定即可,-d指定连接之后选中的数据库,默认也是postgres,-U指定用户,默认是当前用户,-p 指定端口号,默认是"5432",其它更多的参数选项可以执行: ./bin/psql --help 查看。
 1C:\Users\lhrxxt>psql -U postgres -h 192.168.66.35 -d postgres -p5432
 2Password for user postgres:
 3psql (13.3)
 4Type "help" for help.
 5
 6postgres=# \l
 7                                        List of databases
 8   Name    |  Owner   | Encoding |      Collate      |       Ctype       |   Access privileges
 9-----------+----------+----------+-------------------+-------------------+-----------------------
10 postgres  | postgres | UTF8     | Chinese_China.936 | Chinese_China.936 |
11 template0 | postgres | UTF8     | Chinese_China.936 | Chinese_China.936 | =c/postgres          +
12           |          |          |                   |                   | postgres=CTc/postgres
13 template1 | postgres | UTF8     | Chinese_China.936 | Chinese_China.936 | =c/postgres          +
14           |          |          |                   |                   | postgres=CTc/postgres
15(3 rows)
16
17
18postgres=# CREATE DATABASE lhrdb WITH OWNER=postgres ENCODING='UTF-8';
19CREATE DATABASE
20postgres=# \c lhrdb
21You are now connected to database "lhrdb" as user "postgres".
22lhrdb=#
23lhrdb=# create table student (
24lhrdb(#   id integer not null,
25lhrdb(#   name character(32),
26lhrdb(#   number char(5),
27lhrdb(#   constraint student_pkey primary key (id)
28lhrdb(# );
29CREATE TABLE
30lhrdb=#
31lhrdb=# \d student
32                 Table "public.student"
33 Column |     Type      | Collation | Nullable | Default
34--------+---------------+-----------+----------+---------
35 id     | integer       |           | not null |
36 name   | character(32) |           |          |
37 number | character(5)  |           |          |
38Indexes:
39    "student_pkey" PRIMARY KEY, btree (id)
40
41
42lhrdb=#
43lhrdb=# INSERT INTO student (id, name, number) VALUES (1, '张三', '1023');
44INSERT 0 1
45lhrdb=# SELECT * FROM student WHERE id=1;
46 id |                name                | number
47----+------------------------------------+--------
48  1 | 张三                               | 1023
49(1 row)
50
安装配置完成,若有不懂,可以私聊麦老师。
源码编译脚本汇总
  1groupadd postgres
  2groupadd pg15
  3useradd -g pg15 pg15
  4echo "lhr" | passwd --stdin pg15
  5
  6
  7
  8mkdir -p /pg15/{pgdata,archive,scripts,backup,pg15,soft}
  9chown -R pg15:postgres /pg15
 10chmod -R 775 /pg15
 11
 12
 13
 14
 15yum install -y cmake make gcc zlib gcc-c++ perl readline readline-devel zlib zlib-devel \
 16perl python36 tcl openssl ncurses-devel openldap pam
 17
 18
 19su - pg15
 20cd /pg15/soft
 21tar zxvf postgresql-14.9.tar.gz
 22cd postgresql-14.9/
 23./configure --prefix=/pg15/pg15
 24make -j 16 && make install
 25make world -j 16 && make install-world
 26
 27
 28
 29cat >>  ~/.bash_profile <<"EOF"
 30export LANG=en_US.UTF-8
 31export PS1="[\u@\h \W]\$ "
 32export PGPORT=5440
 33export PGDATA=/pg15/pgdata
 34export PGHOME=/pg15/pg15
 35export LD_LIBRARY_PATH=$PGHOME/lib:/lib64:/usr/lib64:/usr/local/lib64:/lib:/usr/lib:/usr/local/lib:$LD_LIBRARY_PATH
 36export PATH=$PGHOME/bin:$PATH:.
 37export DATE=`date +"%Y%m%d%H%M"`
 38export MANPATH=$PGHOME/share/man:$MANPATH
 39export PGHOST=$PGDATA
 40export PGUSER=postgres
 41export PGDATABASE=postgres
 42
 43EOF
 44
 45source  ~/.bash_profile
 46
 47
 48
 49
 50
 51/pg15/pg15/bin/initdb -D /pg15/pgdata -E UTF8 --locale=en_US.utf8 -U postgres -k
 52
 53
 54
 55cat >> /pg15/pgdata/postgresql.conf <<"EOF"
 56listen_addresses = '*'
 57port=5440
 58unix_socket_directories='/pg15/pgdata'
 59logging_collector = on
 60log_directory = 'pg_log'
 61log_filename = 'postgresql-%a.log'
 62log_truncate_on_rotation = on
 63EOF
 64
 65cat   >> /pg15/pgdata/pg_hba.conf << EOF
 66# TYPE  DATABASE    USER    ADDRESS       METHOD
 67local     all       all                    trust
 68host      all       all   127.0.0.1/32     trust
 69host      all       all    0.0.0.0/0        md5
 70host   replication  all    0.0.0.0/0        md5
 71EOF
 72
 73
 74su - pg15
 75pg_ctl start
 76pg_ctl status
 77psql
 78alter user postgres with  password 'lhr';
 79exit
 80pg_ctl stop
 81
 82
 83
 84
 85
 86-- 或:
 87nohup /pg15/pg15/bin/postgres -D /pg15/pgdata > /pg15/pg15/pglog.out 2>&1 &
 88
 89
 90
 91cat > /etc/systemd/system/pg15.service <<"EOF"
 92[Unit]
 93Description=PostgreSQL database server
 94Documentation=man:postgres(1)
 95After=network.target
 96
 97[Service]
 98Type=forking
 99User=pg15
100Group=postgres
101Environment=PGPORT=5440
102Environment=PGDATA=/pg15/pgdata
103OOMScoreAdjust=-1000
104ExecStart=/pg15/pg15/bin/pg_ctl start -D ${PGDATA} -s -o "-p ${PGPORT}" -w -t 300
105ExecStop=/pg15/pg15/bin/pg_ctl stop -D ${PGDATA} -s -m fast
106ExecReload=/pg15/pg15/bin/pg_ctl reload -D ${PGDATA} -s
107KillMode=mixed
108KillSignal=SIGINT
109TimeoutSec=0
110
111[Install]
112WantedBy=multi-user.target
113EOF
114
115
116
117systemctl daemon-reload
118systemctl enable pg15
119systemctl start pg15
120systemctl status pg15
121
122
123
124psql -U postgres -h 192.168.66.35 -d postgres -p5432
PG环境汇总
麦老师的镜像中包括了PG 9.4、9.6、10、11、12、13、14、15各个版本,都是采用源码安装,可以直接使用,满足各类测试要求:
 1docker rm -f lhrpgall
 2docker run -itd --name lhrpgall -h lhrpgall \
 3  -p 25432-25445:5432-5445  -p 122:22 -p 189:3389 \
 4  -v /sys/fs/cgroup:/sys/fs/cgroup \
 5  --restart=always \
 6  --privileged=true lhrbest/lhrpgall:3.0 \
 7  /usr/sbin/init
 8docker exec -it lhrpgall bash
 9
10systemctl status pg94 pg96 pg10 pg11 pg12 pg13 pg14 pg15
11systemctl status postgresql-13.service
12
13
14[root@lhrpgall /]# ps -ef|grep postgres | grep bin
15pg15         229       1  0 12:11 ?        00:00:00 /pg15/pg15/bin/postgres -D /pg15/pgdata -p 5440
16pg10         231       1  0 12:11 ?        00:00:00 /pg10/pg10/bin/postgres -D /pg10/pgdata -p 5436
17pg13         232       1  0 12:11 ?        00:00:00 /pg13/pg13/bin/postgres -D /pg13/pgdata -p 5433
18pg14         235       1  0 12:11 ?        00:00:00 /pg14/pg14/bin/postgres -D /pg14/pgdata -p 5439
19pg94         243       1  0 12:11 ?        00:00:00 /pg94/pg94/bin/postgres -D /pg94/pgdata -p 5438
20pg11         244       1  0 12:11 ?        00:00:00 /pg11/pg11/bin/postgres -D /pg11/pgdata -p 5435
21pg96         247       1  0 12:11 ?        00:00:00 /pg96/pg96/bin/postgres -D /pg96/pgdata -p 5437
22pg12         249       1  0 12:11 ?        00:00:00 /pg12/pg12/bin/postgres -D /pg12/pgdata -p 5434
docker版本
参考:https://www.xmmup.com/dbbao69zaidockerzhongkuaisushiyonggegebanbendepostgresqlshujuku.html
yum安装版本
参考:https://www.xmmup.com/dbbao67shiyongyumlaianzhuangpostgresql13-3shujuku.html
总结
1、已在centos 7.6,openEuler 22.03 LTS系统测试
