


一、准备工作
1、准备C的编译环境
[root@host-192-168-0-153 local]# yum install make cmake gcc gcc-c++[root@host-192-168-0-153 nginx-1.20.1]# yum -y install pcre-devel[root@host-192-168-0-153 nginx-1.20.1]# yum install -y zlib-devel
二、安装libfastcommon
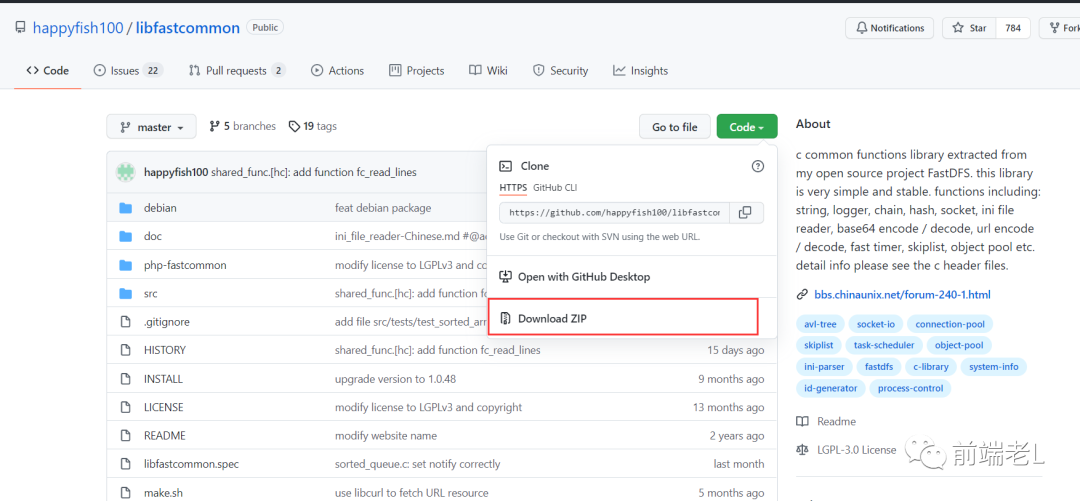
1、在Github下载libfastcommon-master.zip
2、上传libfastcommon-master.zip到/usr/local下
3、进行解压libfastcommon-master.zip
[root@host-192-168-0-153 local]# unzip libfastcommon-master.zip -d /usr/local/fast/
4、进入目录
[root@host-192-168-0-153 local]# cd /usr/local/fast/libfastcommon-master/
5、进行编译和安装
[root@host-192-168-0-153 libfastcommon-master]# ./make.sh[root@host-192-168-0-153 libfastcommon-master]# ./make.sh install
注意:看默认安装的路径:libfastcommon默认安装到了/usr/lib64/这个位置

6、进行软件创建。FastDFS主程序设置的目录为/usr/local/lib/,所以我们需要创建/usr/lib64/下的一些核心执行程序的软连接文件
[root@host-192-168-0-153 libfastcommon-master]# ln -s /usr/lib64/libfastcommon.so /usr/local/lib/libfastcommon.so[root@host-192-168-0-153 libfastcommon-master]# ln -s /usr/lib64/libfastcommon.so /usr/lib/libfastcommon.soln: 无法创建符号链接'/usr/lib/libfastcommon.so': 文件已存在[root@host-192-168-0-153 libfastcommon-master]# ln -s /usr/lib64/libfdfsclient.so /usr/local/lib/libfdfsclient.so[root@host-192-168-0-153 libfastcommon-master]# ln -s /usr/lib64/libfdfsclient.so /usr/lib/libfdfsclient.so[root@host-192-168-0-153 libfastcommon-master]#
三、安装FastDFS
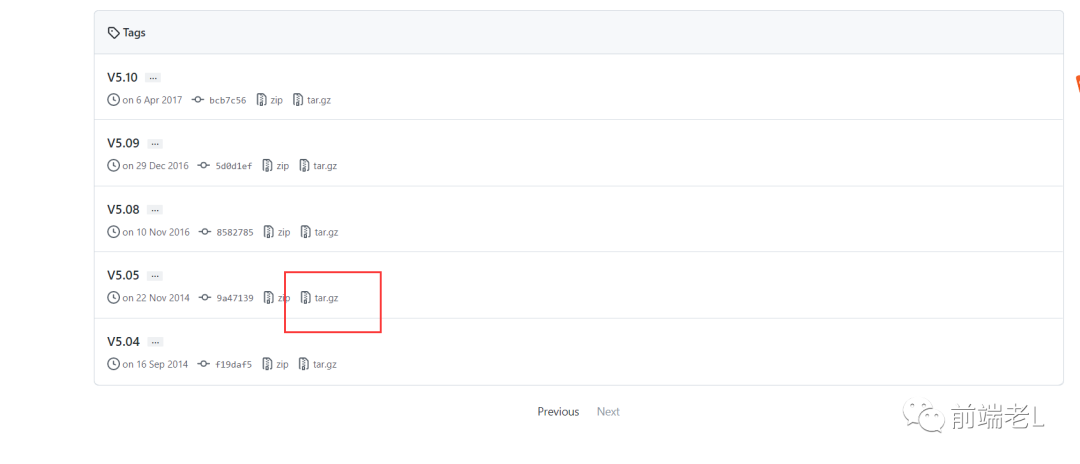
1、在Github下载fastdfs-5.05.tar.gz
2、上传fastdfs-5.05.tar.gz到/usr/local下
3、进入到/usr/local下,解压fastdfs-5.05.tar.gz文件
[root@host-192-168-0-153 local]# cd /usr/local/[root@host-192-168-0-153 local]# tar -zxvf fastdfs-5.05.tar.gz -C /usr/local/fast/
4、安装编译
[root@host-192-168-0-153 local]# cd /usr/local/fast/fastdfs-5.05/[root@host-192-168-0-153 fastdfs-5.05]# ./make.sh[root@host-192-168-0-153 fastdfs-5.05]# ./make.sh install

5、采用默认安装方式脚本文件说明
1.服务脚本在
[root@host-192-168-0-153 fastdfs-5.05]# cd /etc/init.d && ls | grep fdfsfdfs_storagedfdfs_trackerd[root@host-192-168-0-153 init.d]#
1.配置文件在
[root@host-192-168-0-153 init.d]# cd /etc/fdfs && lsclient.conf.sample storage.conf.sample tracker.conf.sample[root@host-192-168-0-153 fdfs]#
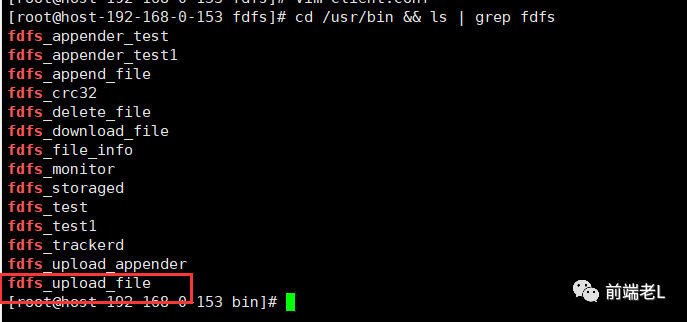
1.命令行工具在/usr/bin/目录下
[root@host-192-168-0-153 fdfs]# cd /usr/bin && ls | grep fdfsfdfs_appender_testfdfs_appender_test1fdfs_append_filefdfs_crc32fdfs_delete_filefdfs_download_filefdfs_file_infofdfs_monitorfdfs_storagedfdfs_testfdfs_test1fdfs_trackerdfdfs_upload_appenderfdfs_upload_file[root@host-192-168-0-153 bin]#
1.因为FastDFS服务脚本设置的bin目录为/usr/local/bin/下,但是实际我们安装在了/usr/bin/下面。所以我们需要修改FastDFS配置文件中的路径,也就是需要修改两个配置文件:
[root@host-192-168-0-153 bin]# vim /etc/init.d/fdfs_storaged[root@host-192-168-0-153 bin]# vim /etc/init.d/fdfs_trackerd[root@host-192-168-0-153 bin]#
上述打开的两个文件都进行如下全局替换命令:
:%s+/usr/local/bin+/usr/bin
四、配置跟踪器(注意是tracker的节点)
1、进入 cd/etc/fdfs/目录配置跟踪器文件(注意是tracker节点),把tracker.conf.sample文件进行cope一份,去修改tracker.conf文件
[root@host-192-168-0-153 bin]# cd /etc/fdfs/[root@host-192-168-0-153 fdfs]# cp tracker.conf.sample tracker.conf[root@host-192-168-0-153 fdfs]#
2、修改tracker.conf文件
[root@host-192-168-0-153 fdfs]# vim tracker.conf
如下图所示:我们暂时修改配置文件里的base_path、http.server_port即可。

修改为自己的路径地址:
base_path=/home/fastdfs/tracker

修改为自己的服务端口:
http.server_port=9999
3、最后我们一定要创建之前定义好的目录(也就是/home/fastdfs/tracker)
[root@host-192-168-0-153 fdfs]# mkdir -p /home/fastdfs/tracker[root@host-192-168-0-153 fdfs]#
4、查看配置目录下是否有数据
[root@host-192-168-0-153 fdfs]# cd /home/fastdfs/tracker/ && ll总用量 0[root@host-192-168-0-153 tracker]#
5、启动tracker命令(启动跟踪器)
[root@host-192-168-0-153 tracker]# /etc/init.d/fdfs_trackerd startReloading systemd: [ 确定 ]正在启动 fdfs_trackerd (via systemctl): [ 确定 ][root@host-192-168-0-153 tracker]#
6、查看进程命令
[root@host-192-168-0-153 tracker]# ps -el | grep fdfs1 S 0 238237 1 0 80 0 - 20691 - ? 00:00:00 fdfs_trackerd[root@host-192-168-0-153 tracker]#
7、继续查看配置目录
[root@host-192-168-0-153 tracker]# cd /home/fastdfs/tracker/ && ll总用量 0drwxr-xr-x. 2 root root 60 11月 3 09:51 datadrwxr-xr-x. 2 root root 26 11月 3 09:51 logs[root@host-192-168-0-153 tracker]#
8、停止tracker命令
[root@host-192-168-0-153 tracker]# /etc/init.d/fdfs_trackerd stop正在停止fdfs_trackerd(透过 systemctl): [ 确定 ][root@host-192-168-0-153 tracker]#
9、设置开机启动跟踪器
[root@host-192-168-0-153 tracker]# vim /etc/rc.d/rc.local
加入配置
/etc/init.d/fdfs_trackerd start
五、配置FastDFS存储(另外一个非tracker节点!)
1、进入 cd/etc/fdfs/目录配置FastDFS存储文件(注意是非tracker节点),把storage.conf.sample文件进行cope一份,去修改storage.conf文件
[root@host-192-168-0-153 tracker]# cd /etc/fdfs/[root@host-192-168-0-153 fdfs]# cp storage.conf.sample storage.conf[root@host-192-168-0-153 fdfs]#
2、修改storage.conf文件
[root@host-192-168-0-153 fdfs]# vim /etc/fdfs/storage.conf[root@host-192-168-0-153 fdfs]#
修改内容
# the base path to store data and log filesbase_path=/home/yuqing/fastdfs# store_path#, based 0, if store_path0 not exists, it's value is base_path# the paths must be existstore_path0=/home/yuqing/fastdfs# tracker_server can ocur more than once, and tracker_server format is# "host:port", host can be hostname or ip addresstracker_server=192.168.209.121:22122# the port of the web server on this storage serverhttp.server_port=8888
我这里暂时修改为如下
# the base path to store data and log filesbase_path=/home/fastdfs/storage# store_path#, based 0, if store_path0 not exists, it's value is base_path# the paths must be existstore_path0=/home/fastdfs/file# tracker_server can ocur more than once, and tracker_server format is# "host:port", host can be hostname or ip addresstracker_server=10.200.9.145:22122# the port of the web server on this storage serverhttp.server_port=9999
3、创建存储目录
[root@host-192-168-0-153 fdfs]# mkdir -p /home/fastdfs/storage[root@host-192-168-0-153 fdfs]# mkdir -p /home/fastdfs/file[root@host-192-168-0-153 fdfs]#
4、启动存储(storage)
[root@host-192-168-0-153 fdfs]# /etc/init.d/fdfs_storaged start正在启动 fdfs_storaged (via systemctl): [ 确定 ][root@host-192-168-0-153 fdfs]#
(初次启动成功后会在/home/fastdfs/storage 目录下创建 data、logs俩个目录)
5、查看FastDFS storage 是否启动成功
[root@host-192-168-0-153 fdfs]# ps -ef | grep fdfsroot 238581 1 0 09:55 ? 00:00:00 /usr/bin/fdfs_trackerd /etc/fdfs/tracker.confroot 239883 1 0 10:15 ? 00:00:00 /usr/bin/fdfs_storaged /etc/fdfs/storage.confroot 239894 233791 0 10:15 pts/1 00:00:00 grep --color=auto fdfs
6、我们进入到/home/fastdfs/file/data/文件夹下会看到一些目录文件(256*256)如下
[root@host-192-168-0-153 fdfs]# cd /home/fastdfs/file/data/ && ls

7、关闭存储(storage)
[root@host-192-168-0-153 data]# /etc/init.d/fdfs_storaged stop正在停止fdfs_storaged(透过 systemctl): [ 确定 ][root@host-192-168-0-153 data]#
8、设置开机启动存储器
[root@host-192-168-0-153 data]# vim /etc/rc.d/rc.local
加入如下配置:
/etc/init.d/fdfs_storaged start
到此为止我们的FastDFS环境已经搭建完成!
六、测试
我们先使用命令上传一个文件。注意:是在tracker(跟踪器)中上传。
1、我们在跟踪器(tracker节点)里copy一份client.conf文件。
[root@host-192-168-0-153 data]# cd /etc/fdfs[root@host-192-168-0-153 fdfs]# cp client.conf.sample client.conf[root@host-192-168-0-153 fdfs]#
2、编辑client.conf文件
[root@host-192-168-0-153 fdfs]# vim client.conf
修改内容:
# the base path to store log filesbase_path=/home/yuqing/fastdfs# tracker_server can ocur more than once, and tracker_server format is# "host:port", host can be hostname or ip addresstracker_server=192.168.0.197:22122
修改为如下内容:
# the base path to store log filesbase_path=/home/fastdfs/file# tracker_server can ocur more than once, and tracker_server format is# "host:port", host can be hostname or ip address# tracker_server=it.876view.com:22122tracker_server=localhost:22122
3、我们找到命令的脚本位置,并且使用命令,进行文件的上传:
[root@host-192-168-0-153 fdfs]# cd /usr/bin && ls | grep fdfs
4、使用命令fdfs_upload_file进行上传操作
我们先看一下存储器,进入到data下,在进入00文件夹下,发现00文件夹下还有一堆文件夹,然后继续进入00文件夹下,最终我们所进入的文件夹为:cd /home/fastdfs/file/data/00/00/里面什么文件都没有。
我们进行上传操作,比如把之前的/usr/local/文件夹下的某一个 文件上传到FastDFS系统中去,在跟踪器(trancker节点)中上传文件
[root@host-192-168-0-153 00]# /usr/bin/fdfs_upload_file /etc/fdfs/client.conf /usr/local/nanzhu.jpggroup1/M00/00/00/wKgAmWGB-KaAQK3oAAHc0rT8DzQ241.jpg[root@host-192-168-0-153 00]#
命令执行完毕后,返回一个group1/M00/00/00/wKgAmWGB-KaAQK3oAAHc0rT8DzQ241.jpg的ID,其实就是返回当前所上传的文件在存储器(storeage节点)中的哪一个组、哪一个目录位置,所以我们查看存储器中的/home/fastdfs/file/data/00/00/文件夹位置,发现已经存在了刚才上传的文件,到此为止,我们的测试上传文件已经OK了。

七、安装fastdfs-nginx-module
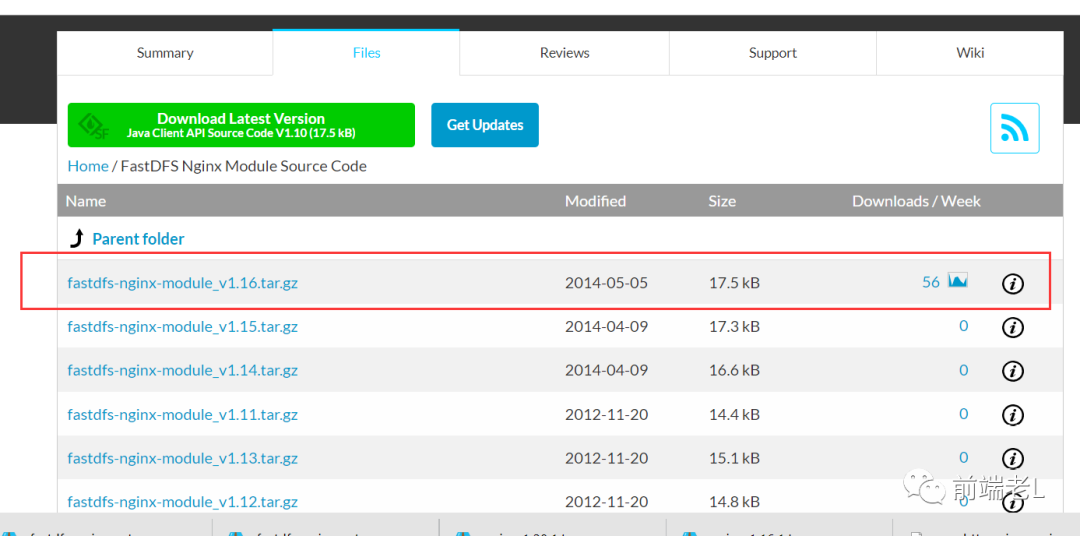
1、在sourceforge下载fastdfs-nginx-module_v1.16.tar.gz
2、上传fastdfs-nginx-module_v1.16.tar.gz到/usr/local下
3、进行解压fastdfs-nginx-module_v1.16.tar.gz
[root@host-192-168-0-153 00]# tar -zxvf /usr/local/fastdfs-nginx-module_v1.16.tar.gz -C /usr/local/fast/
4、进入目录
[root@host-192-168-0-153 00]# cd /usr/local/fast/fastdfs-nginx-module/
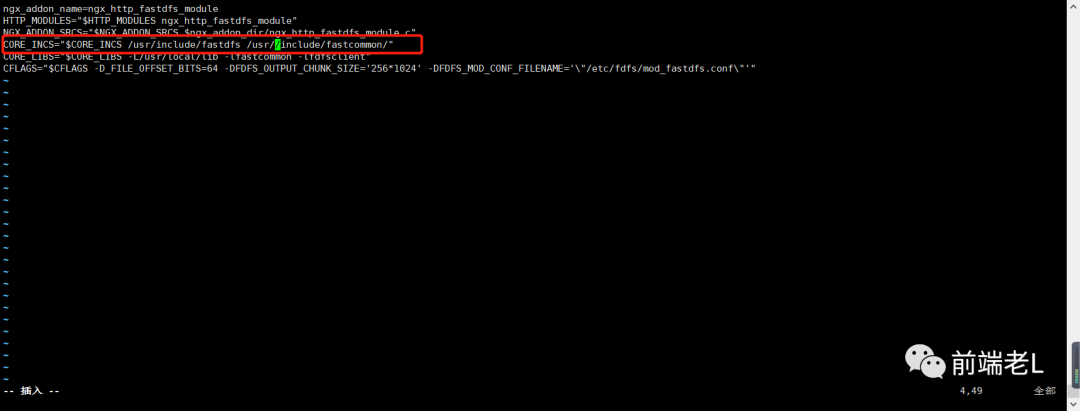
5、编辑配置文件config
[root@host-192-168-0-153 fastdfs-nginx-module]# vim /usr/local/fast/fastdfs-nginx-module/src/config[root@host-192-168-0-153 fastdfs-nginx-module]#
修改内容:去掉下图中的local文件层次

修改完毕为
八、FastDFS与Nginx整合
1、在官网下载nginx-1.20.1.tar.gz
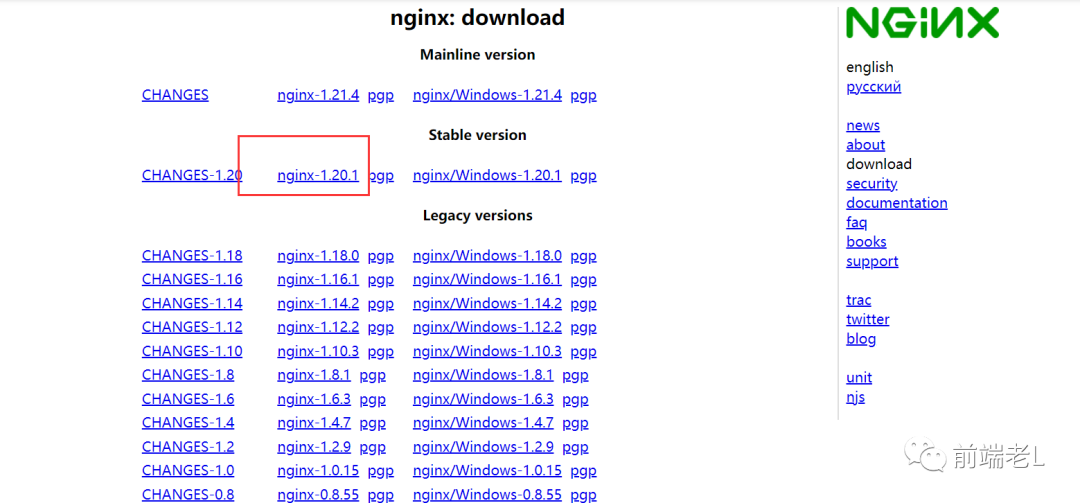
2、上传nginx-1.20.1.tar.gz到/usr/local下
3、进行解压nginx-1.20.1.tar.gz
[root@host-192-168-0-153 fastdfs-nginx-module]# cd /usr/local/[root@host-192-168-0-153 local]# tar -zxvf nginx-1.20.1.tar.gz
4、进入到nginx目录命令
[root@host-192-168-0-153 local]# cd nginx-1.20.1/
5、加入模块命令
[root@host-192-168-0-153 nginx-1.20.1]# ./configure --add-module=/usr/local/fast/fastdfs-nginx-module/src/
6、编译命令
[root@host-192-168-0-153 nginx-1.20.1]# make && make install
7、复制fastdfs-ngin-module中的配置文件,到/etc/fdfs目录中
[root@host-192-168-0-153 nginx-1.20.1]# cp /usr/local/fast/fastdfs-nginx-module/src/mod_fastdfs.conf /etc/fdfs/[root@host-192-168-0-153 nginx-1.20.1]#
8、进行修改 /etc/fdfs/ 目录下,我们刚刚copy过来的mod_fastdfs.conf 文件
[root@host-192-168-0-153 nginx-1.20.1]# vim /etc/fdfs/mod_fastdfs.conf
需要修改的内容
# FastDFS tracker_server can ocur more than once, and tracker_server format is# "host:port", host can be hostname or ip address# valid only when load_fdfs_parameters_from_tracker is truetracker_server=tracker:22122# if the url / uri including the group name# set to false when uri like /M00/00/00/xxx# set to true when uri like ${group_name}/M00/00/00/xxx, such as group1/M00/xxx# default value is falseurl_have_group_name = false# store_path#, based 0, if store_path0 not exists, it's value is base_path# the paths must be exist# must same as storage.confstore_path0=/home/yuqing/fastdfs
修改完后的内容
# FastDFS tracker_server can ocur more than once, and tracker_server format is# "host:port", host can be hostname or ip address# valid only when load_fdfs_parameters_from_tracker is truetracker_server=10.200.9.145:22122# if the url / uri including the group name# set to false when uri like /M00/00/00/xxx# set to true when uri like ${group_name}/M00/00/00/xxx, such as group1/M00/xxx# default value is falseurl_have_group_name = true# store_path#, based 0, if store_path0 not exists, it's value is base_path# the paths must be exist# must same as storage.confstore_path0=/home/fastdfs/file
9、复制FastDFS里的2个文件,到/etc/fdfs目录中
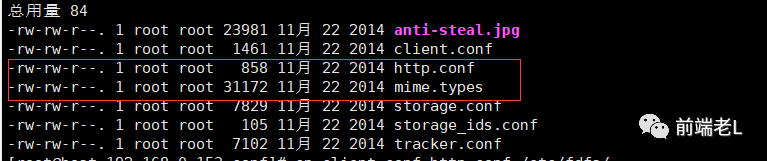
[root@host-192-168-0-153 nginx-1.20.1]# cd /usr/local/fast/fastdfs-5.05/conf[root@host-192-168-0-153 conf]# cp mime.types http.conf /etc/fdfs/
10、创建一个软连接,在/home/fastdfs/file文件存储目录下创建软连接,将其链接到实际存放数据的目录
[root@host-192-168-0-153 conf]# ln -s /home/fastdfs/file/data/ /home/fastdfs/file/data/M00
11、修改Nginx配置文件
[root@host-192-168-0-153 conf]# cd /usr/local/nginx/conf/[root@host-192-168-0-153 conf]# vim nginx.conf[root@host-192-168-0-153 conf]#
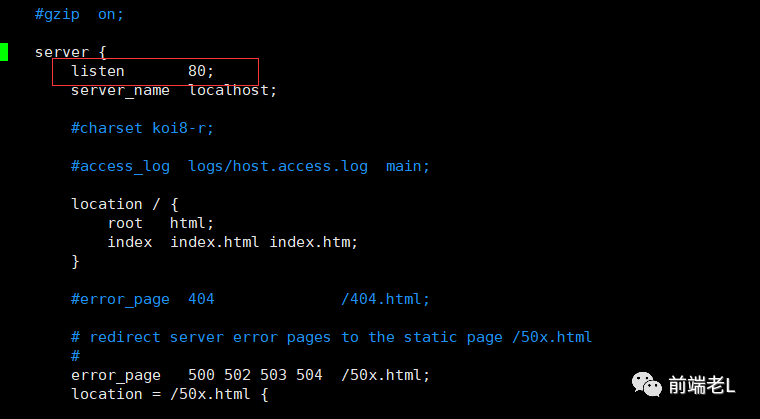
listen 9999;server_name localhost;location ~/group([0-9])/M00 {ngx_fastdfs_module;}
注意:nginx里的端口要和第五步 配置FastDFS存储中的storage.conf文件配置一致,也就是(http.server_port=9999)
12、启动nginx服务
[root@host-192-168-0-153 conf]# /usr/local/nginx/sbin/nginxngx_http_fastdfs_set pid=8204[root@host-192-168-0-153 conf]#
现在我们使用这个ID用浏览器访问地址:【访问storeage节点的nginx!!!】
http://10.200.9.145:9999/group1/M00/00/00/wKgAmWGB-KaAQK3oAAHc0rT8DzQ241.jpg 我们就可以下载这个文件了,如果是图片及直接会显示。

到此,我们的FastDFS与Nginx整合完毕。
九、nginx配置成服务并开机自启动
1、在/lib/systemd/system/下创建文件nginx
[root@host-192-168-0-153 conf]# vim /lib/systemd/system/nginx.service
其内容参考nginx官方文档
需要注意的配置:
PIDFile=/run/nginx.pidExecStartPre=/usr/sbin/nginx -tExecStart=/usr/sbin/nginxExecReload=/usr/sbin/nginx -s reload
修改为
PIDFile=/var/run/nginx.pidExecStartPre=/usr/local/nginx/sbin/nginx -tExecStart=/usr/local/nginx/sbin/nginxExecReload=/usr/local/nginx/sbin/nginx -s reload
2、保存后设置文件的执行权限,就可以通过下面指令控制启动停止
[root@host-192-168-0-153 conf]# systemctl start nginx.service[root@host-192-168-0-153 conf]# systemctl stop nginx.service[root@host-192-168-0-153 conf]# systemctl restart nginx.service[root@host-192-168-0-153 conf]# systemctl status nginx.service[root@host-192-168-0-153 conf]# systemctl disable nginx.service 停止开机自启动
3、设置开机自动启动
[root@host-192-168-0-153 conf]# systemctl enable nginx.serviceSynchronizing state of nginx.service with SysV service script with /usr/lib/systemd/systemd-sysv-install.Executing: /usr/lib/systemd/systemd-sysv-install enable nginxCreated symlink /etc/systemd/system/multi-user.target.wants/nginx.service → /usr/lib/systemd/system/nginx.service.[root@host-192-168-0-153 conf]#
十:启动停止服务步骤如下
1、启动命令:
启动tracker命令:/etc/init.d/fdfs_trackerd start查看进程命令:ps -el | grep fdfs启动storage命令:/etc/init.d/fdfs_storaged start查看进程命令:ps -el | grep fdfs启动nginx命令:/usr/local/nginx/sbin/nginx
2、停止命令:
停止tracker命令:/etc/init.d/fdfs_trackerd stop关闭storage命令:/etc/init.d/fdfs_storaged stop关闭nginx命令:/usr/local/nginx/sbin/nginx -s stop
参考文献:
1.【FastDFS篇】FastDFS单节点安装及使用2.Nginx设置成服务并开机自动启动
