


一、背景
为了封禁某些爬虫或者恶意用户对服务器的请求,我们需要建立一个动态的 IP 黑名单。对于黑名单之内的 IP ,拒绝提供服务。
二、架构
实现 IP 黑名单的功能有很多途径:
1、在操作系统层面,配置 iptables,拒绝指定 IP 的网络请求;
2、在 Web Server 层面,通过 Nginx 自身的 deny 选项 或者 lua 插件 配置 IP 黑名单;
3、在应用层面,在请求服务之前检查一遍客户端 IP 是否在黑名单。
为了方便管理和共享,通过 Nginx+Lua+Redis 的架构实现WAF引用web防火墙动态封禁访问频繁的IP。
[root@hd03 ~]# tar -xf LuaJIT-2.0.5.tar.gz -C /opt/
[root@hd03 ~]# cd /opt/LuaJIT-2.0.5/
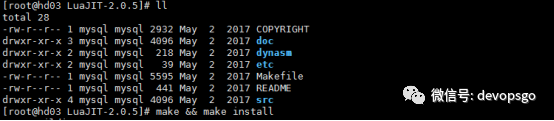
[root@hd03 LuaJIT-2.0.5]# make && make install

[root@hd03 LuaJIT-2.0.5]# more ~/.bash_profile
export LUAJIT_LIB=/usr/local/lib export LUAJIT_INC=/usr/local/include/luajit-2.0
[root@hd03 LuaJIT-2.0.5]# source ~/.bash_profile
[root@hd03 LuaJIT-2.0.5]# ln -s /usr/local/lib/libluajit-5.1.so.2 /lib64/libluajit-5.1.so.2
[root@hd03 ~]# tar -xf v0.3.0.tar.gz -C /usr/local/
[root@hd03 ~]# tar -xf v0.10.13.tar.gz -C /usr/local/
[root@hd03 ~]# tar -xf nginx-1.20.2.tar.gz -C /opt/
[root@hd03 nginx-1.20.2]# ./configure --user=nginx --group=nginx --prefix=/usr/local/nginx --sbin-path=/usr/local/nginx/bin/nginx --conf-path=/usr/local/nginx/conf/nginx.conf --pid-path=/usr/local/nginx/logs/nginx.pid --lock-path=/usr/local/nginx/run/nginx.lock --error-log-path=/usr/local/nginx/logs/error.log --http-log-path=/usr/local/nginx/logs/access.log --http-client-body-temp-path=/var/cache/client_temp --http-proxy-temp-path=/var/cache/proxy_temp --http-fastcgi-temp-path=/var/cache/fastcgi_temp --http-uwsgi-temp-path=/var/cache/uwsgi_temp --http-scgi-temp-path=/var/cache/scgi_temp --with-http_v2_module --with-http_ssl_module --with-http_realip_module --with-http_addition_module --with-http_sub_module --with-http_dav_module --with-http_flv_module --with-http_mp4_module --with-http_gunzip_module --with-http_gzip_static_module --with-http_random_index_module --with-http_secure_link_module --with-http_stub_status_module --with-http_auth_request_module --with-mail --with-mail_ssl_module --with-file-aio --with-http_v2_module --with-threads --with-stream --with-stream_ssl_module --without-mail_pop3_module --without-mail_imap_module --without-mail_smtp_module --add-module=/usr/local/ngx_devel_kit-0.3.0 --add-module=/usr/local/lua-nginx-module-0.10.13
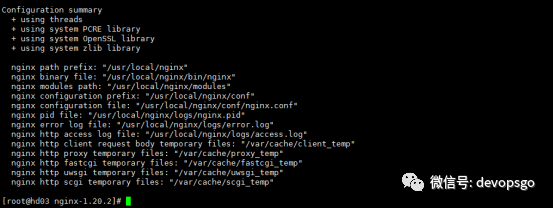
[root@hd03 nginx-1.20.2]# make && make install
[root@hd03 nginx-1.20.2]# ln -s /usr/local/nginx/bin/nginx /usr/bin/
启动nginx
[root@hd03 nginx-1.20.2]# nginx
WAF部署
[root@hd03 lua-resty-redis]# pwd
/usr/local/lua-resty-redis
[root@hd03 local]# cd lua-resty-redis/
[root@hd03 lua-resty-redis]# ll
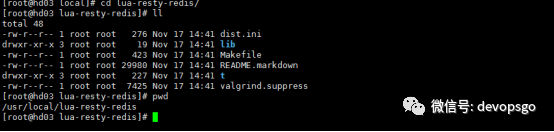
[root@hd03 lua-resty-redis]# make && make install
redis部署
[root@hd03 ~]# yum install redis -y
[root@hd03 ~]# cat /etc/redis.conf |egrep -v "^$|#"
bind 0.0.0.0
daemonize yes
logfile /var/log/redis/redis.log
requirepass 123456
dir /data/redis
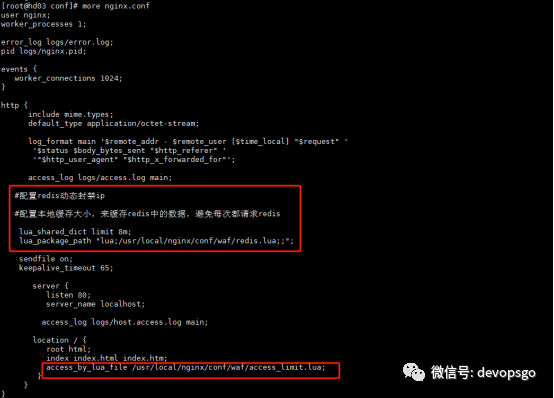
修改Nginx配置文件引用WAF功能
#配置redis动态封禁ip
#配置本地缓存大小,来缓存redis中的数据,避免每次都请求redis
lua_shared_dict limit 8m;
lua_package_path "lua;/usr/local/nginx/conf/waf/redis.lua;;";
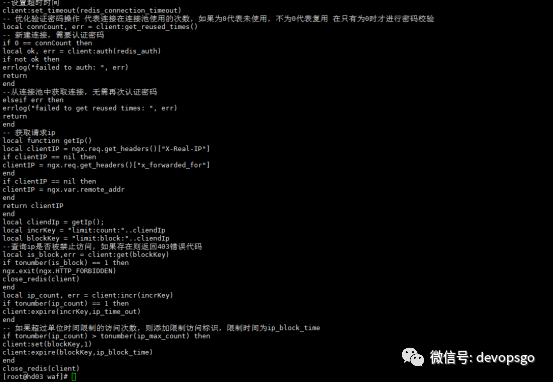
编写access_limit.lua文件,可以实现自动将访问频次过高的
[root@hd03 waf]# pwd
/usr/local/nginx/conf/waf
[root@hd03 waf]# nginx -t
nginx: the configuration file /usr/local/nginx/conf/nginx.conf syntax is ok
nginx: configuration file /usr/local/nginx/conf/nginx.conf test is successful
[root@hd03 waf]# nginx -s reload
通过浏览器访问http://ip/index.html,连续刷新10次,在1分钟以内访问此站点超过10次,会将ip动态缓存到redis库中,并自动封禁ip5分钟,出现以下403状态码,5分钟以后自动解除ip封禁。

登陆redis查看数据,出现“1”表示已经缓存在reids库中9次了,出现“(nil)”表示没有缓存在reids库中。
1.登陆rdis
redis-cli -h 192.167.16.8 -a 123456
192.167.16.8:6379> get USER-COUNT-192.167.16.8
"9"
2.获取黑名单IP:
192.167.16.8:6379> smembers limit:ip:blacklist
1) "192.167.16.8"
3.手动添加黑名单 IP:
sadd limit:ip:blacklist 192.167.16.8
----------------------end---------------------
推荐阅读
1、K8s最佳实践Kubernetes-Rancher2.x持续交付与自动化运维
5、第4节 Kubernetes标签Label和标签选择器实战

如果本文对你有帮助的话,欢迎点赞&在看&转发,这对我继续分享&创作优质文章非常重要。感谢🙏🏻
请点赞→点亮“在看”→分享
↓↓↓
