


Table of Contents
如何裁剪 CSS/JS 文件(使用 UglifyJS 和 UglifyCSS)
如何使用 YUI Compressor 裁剪 Javascripts 和 Stylesheets
如何使用 Assetic 和 Twig Functions 进行图像优化
如何将 Assetic Filter 应用到具体的文件扩展名上
(configuration)如何在数据库中使用 PdoSessionHandler 存储 Sessions
第 14 章 src/Acme/TaskBundle/Resources/config/doctrine/Task.orm.yml
如何在路由中使用除了 GET 和 POST 的 HTTP 方法
如何在 Bundle 中使用 Compiler Passes
(configuration)如何在数据库中使用 PdoSessionHandler 存储 Sessions
"XXX is deprecated" E-USER-DEPRECATED 的警告是什么意思?
如何在一个 Symfony 控制器中创建一个 SOAP 的 Web 服务
如何在 SubVersion 中创建并保存一个 Symfony 项目
前言
Symfony2 是一个基于 MVC 模式的面向对象的 PHP5 框架,有着开发速度快、性能高等特点。Symfony 的目的是加速 Web 应用的创建与维护。它的特点如下:
- 缓存管理
- 自定义 URLs
- 搭建了一些基础模块
- 多语言与 I18N 支持
- 采用对象模型与 MVC 分离
- Ajax 支持
- 适用于企业应用开发
《Symfony2 Cookbook》 用具体的示例和代码将 Symfony2 的基本概念和常见问题进行了非常详尽的解释和说明,使开发者可以快速上手使用 Symfony2 解决各种问题。
Symfony 2.7.0 LTS(长期支持版本)正式版于 2015 年 5 月 31 日正式发布,增加了 100 多条新特性和加强特性。本课程是对官方文档 Symfony2 Cookbook 的中文译本,基于最新的 Symfony 2.7.0 LTS 版本。
官方文档地址:http://symfony.com/doc/current/cookbook/index.html
适用人群
本教程主要适用于希望通过具体的示例和代码来快速上手使用 Symfony2 进行 Web 开发并解决各种问题的开发者。
学习前提
在学习本课程之前,我们假设你对 PHP 的基本语法和语言特点有所了解,能使用 PHP 编写程序。
版本信息
书中演示代码基于以下版本:
语言/框架 | 版本信息 |
Symfony | 2.7.0 LTS |
版权声明:
本译文版权属于极客学院。转载及商业合作请联系 wiki@jikexueyuan.com
1
Assetic
Assetic 结合了两种主要的观点:资产和过滤器。资产文件如 CSS、JavaScript 和图像文件。过滤器是一种可以在文件被应用到浏览器之前就应用到文件上的东西。这样就会将存储在应用程序中的资产文件与呈献给用户的文件分开。
没有 Assetic,你就需要直接提供存储在应用程序之中的文件:
Twig:
<script src="
{
{
asset
(
'js/script.js'
)
}
}
"></script>
PHP:
<script src="
<?php
echo
$view
[
'assets'
]
->
getUrl
(
'js/script.js'
)
?>
"></script>
但是有了 Assetic,你就可以随心所欲地操纵这些资产了(或者可以从任何地方加载他们)。这就意味着你能:
- 压缩和合并你所有的 CSS 和 JS 文件
- 通过一些类型的编译器来运行所有(或者部分)你的 CSS 或 JS 文件,如 LESS, SASS 或者 CoffeeScript
- 在你的图片上运行图片优化
资产
利用 Assetic 比直接提供文件拥有更多的优点。文件没必要储存在它们需要被提供的地方并且它们可以从各种各样的源中被取出来,例如可以从 bundle 中取出来。
你可以运用 Assetic 处理 CSS 模板, JavaScript 文件和图片。添加的原理基本上是相同的,但语法略有不同。
包含 JavaScript 文件
为了包含 JavaScript 文件,可以在任何模板中应用 javascripts 标签:
Twig:
``` Twig {% javascripts '@AppBundle/Resources/public/js/*' %} {% endjavascripts %}
PHP:
```PHP
<?php foreach ($view['assetic']->javascripts(
array('@AppBundle/Resources/public/js/*')
) as $url): ?>
<script src="<?php echo $view->escape($url) ?>"></script>
<?php endforeach ?>
如果你的应用程序模板应用的是 Symfony 的标准版本的默认的区域名称,javascripts 标签将会出现在 javascripts 区域:
{# ... #}
{% block javascripts %}
{% javascripts '@AppBundle/Resources/public/js/*' %}
{% endjavascripts %}
{% endblock %}
{# ... #}
你也可以包含 CSS 模板:参见包含 CSS 模板。
在本例中,所有的 AppBundle 在 Resources/public/js/ 目录下的文件将会被加载并且从不同的地点被提供。实际的渲染过的标签就像这样:
<script src="/app_dev.php/js/abcd123.js"></script>
这是一个关键点:一旦你允许 Assetic 来处理你的资产,文件就将会从不同的地方提供。这就会引起 CSS 文件的关联图片的相对路径问题。参见用 cssrewrite 过滤器修复 CSS 路径。
包含 CSS 模板
为了引进 CSS 模板,你可以使用上面介绍的技术手段,除了使用 stylesheets 标签:
Twig:
{
%
stylesheets
'bundles/app/css/*'
filter
=
'cssrewrite'
%
}
<link rel="stylesheet" href="
{
{
asset_url
}
}
" />
{
%
endstylesheets
%
}
PHP:
<?php
foreach
(
$view
[
'assetic'
]
->
stylesheets
(
array
(
'bundles/app/css/*'
)
,
array
(
'cssrewrite'
)
)
as
$url
)
:
?>
<link rel="stylesheet" href="
<?php
echo
$view
->
escape
(
$url
)
?>
" />
<?php
endforeach
?>
如果你的应用程序模板应用的是 Symfony 的标准版本的默认的区域名称, stylesheets 标签将会大多数出现在 stylesheets 区域:
{# ... #}
{% block stylesheets %}
{% stylesheets 'bundles/app/css/*' filter='cssrewrite' %}
<link rel="stylesheet" href="{{ asset_url }}" />
{% endstylesheets %}
{% endblock %}
{# ... #}
但是由于 Assetic 改变了你的资产的路径,这将会打乱所有的使用相对路径的背景图片(或者其它路径),除非你使用了 cssrewrite 过滤器。
注意在最初的例子里包含的 JavaScript 文件,你可以应用像 @AppBundle/Resources/public/file.js 这样的路径来引用,但是在这个例子里,你要使用它们实际的公开访问的路径:bundles/app/css 来引用 CSS 文件。你可以使用任意一个,除非那个已知的当为 CSS 模板使用 @AppBundle 语法时会引起 cssrewrite 过滤器出问题。
包括图片
为了包括图片你可以使用 image 标签。
Twig:
{
%
image
'@AppBundle/Resources/public/images/example.jpg'
%
}
<img src="
{
{
asset_url
}
}
" alt="Example" />
{
%
endimage
%
}
PHP:
<?php
foreach
(
$view
[
'assetic'
]
->
image
(
array
(
'@AppBundle/Resources/public/images/example.jpg'
)
)
as
$url
)
:
?>
<img src="
<?php
echo
$view
->
escape
(
$url
)
?>
" alt="Example" />
<?php
endforeach
?>
你也可以使用 Assetic 来优化图片。更多信息详见如何使用 Assetic 和 Twig Functions 进行图像优化。
代替使用 Assetic 来包括图片,你可以考虑使用 LiipImagineBundle bundle,这个允许压缩和操控图片(旋转,调整大小,加水印等等)。
使用 cssrewrite 过滤器修复 CSS 路径
由于 Assetic 为你的资产产生新的链接,你的 CSS 文件中的任何的相对路径都会被破坏。为了修复这个问题,确保你在 stylesheets 标签中使用了 cssrewrite 过滤器。这个解析了你的 CSS 文件并且在内部修正了其路径来反映新的位置。
你可以在以前的章节看到一个例子。
当你使用 cssrewrite 过滤器时,不要用 @AppBundle 语法关联你的 CSS 文件。你可以在上面的章节的笔记里找到更详细的解释。
组合资产
Assetic 的一个特征就是它将会把很多文件组合成一个。这有助于减少 HTTP 请求的数量,这给前端的性能带来很多好处。它也会允许你更容易地维护文件,通过把它们分割成可管理的部分。这将有助于再利用,你可以很轻松地将特定的工程文件分离出来用于其它的应用程序,但是仍然将它们作为一个简单的文件提供:
Twig:
{
%
javascripts
'@AppBundle/Resources/public/js/*'
'@AcmeBarBundle/Resources/public/js/form.js'
'@AcmeBarBundle/Resources/public/js/calendar.js'
%
}
<script src="
{
{
asset_url
}
}
"></script>
{
%
endjavascripts
%
}
PHP:
<?php
foreach
(
$view
[
'assetic'
]
->
javascripts
(
array
(
'@AppBundle/Resources/public/js/*'
,
'@AcmeBarBundle/Resources/public/js/form.js'
,
'@AcmeBarBundle/Resources/public/js/calendar.js'
,
)
)
as
$url
)
:
?>
<script src="
<?php
echo
$view
->
escape
(
$url
)
?>
"></script>
<?php
endforeach
?>
在 dev 环境下,每一个文件仍然单独存放,如此你就可以更容易地找出问题。然而,在 prod 环境下(或者特定地,在 debug 标记为 false 时),这个将会作为 script 标签渲染,这个标签包含了所有的 JavaScript 文件的目录。
如果你是刚开始学习 Assetic 并且试着在 prod 环境下(使用 app.php 控制器)应用你的应用程序,那么你很可能看到你的所有的 CSS 和 JS 中断。不要担心!就是这么设计的。在 prod 环境下使用 Assetic 的相关细节知识可以参见转储资产文件。
合并文件并不是只能应用于你自己的文件。你也可以使用 Assetic 来将第三方资产,比如 jQuery, 和你自己的文件合并为一个文件:
Twig:
{
%
javascripts
'@AppBundle/Resources/public/js/thirdparty/jquery.js'
'@AppBundle/Resources/public/js/*'
%
}
<script src="
{
{
asset_url
}
}
"></script>
{
%
endjavascripts
%
}
PHP:
<?php
foreach
(
$view
[
'assetic'
]
->
javascripts
(
array
(
'@AppBundle/Resources/public/js/thirdparty/jquery.js'
,
'@AppBundle/Resources/public/js/*'
,
)
)
as
$url
)
:
?>
<script src="
<?php
echo
$view
->
escape
(
$url
)
?>
"></script>
<?php
endforeach
?>
使用已命名的资产
AsseticBundle 配置指令允许你定义已经命名的资产集。你可以在 assetic 节的设置中通过定义输入文件,过滤器和输出文件来进行配置。你可以在 assetic 设置指南中详细学习。
YAML:
# app/config/config.yml
assetic
:
assets
:
jquery_and_ui
:
inputs
:
- '@AppBundle/Resources/public/js/thirdparty/jquery.js'
- '@AppBundle/Resources/public/js/thirdparty/jquery.ui.js'
XML:
<!-- app/config/config.xml -->
<?xml
version
=
"1.0"
encoding
=
"UTF-8"
?>
<container
xmlns
=
"http://symfony.com/schema/dic/services"
xmlns:assetic
=
"http://symfony.com/schema/dic/assetic"
>
<assetic:config
>
<assetic:asset
name
=
"jquery_and_ui"
>
<assetic:input
>
@AppBundle/Resources/public/js/thirdparty/jquery.js
</assetic:input
>
<assetic:input
>
@AppBundle/Resources/public/js/thirdparty/jquery.ui.js
</assetic:input
>
</assetic:asset
>
</assetic:config
>
</container
>
PHP:
// app/config/config.php
$container
->
loadFromExtension
(
'assetic'
,
array
(
'assets'
=>
array
(
'jquery_and_ui'
=>
array
(
'inputs'
=>
array
(
'@AppBundle/Resources/public/js/thirdparty/jquery.js'
,
'@AppBundle/Resources/public/js/thirdparty/jquery.ui.js'
,
)
,
)
,
)
,
)
;
在你定义了已命名的资产之后,你可以在你的模板中通过 @named_asset 注释引用它们:
Twig:
{
%
javascripts
'@jquery_and_ui'
'@AppBundle/Resources/public/js/*'
%
}
<script src="
{
{
asset_url
}
}
"></script>
{
%
endjavascripts
%
}
PHP:
<?php
foreach
(
$view
[
'assetic'
]
->
javascripts
(
array
(
'@jquery_and_ui'
,
'@AppBundle/Resources/public/js/*'
,
)
)
as
$url
)
:
?>
<script src="
<?php
echo
$view
->
escape
(
$url
)
?>
"></script>
<?php
endforeach
?>
过滤器
一旦它们被 Assetic 所管理,你就可以在提供你的资产前应用过滤器。这包括了压缩你的资产使其输出更小的文件的过滤器(同时有更好的前端性能)。其它的过滤器可以从 CoffeeScript 文件编译 JavaScript 文件并且将 SASS 变成 CSS。实际上,Assetic 有很多的可用的过滤器。
大多数的过滤器不是直接工作的,但是使用现存的第三方函数库做最主要的处理。这就意味着你将经常需要安装第三方函数库来使用过滤器。使用 Assetic 调用这些函数库(而不是直接使用它们)的最大的优点就是在你调试完文件之后你不用人为地运行它们,Assetic 可以帮你打理这一切并且将这些步骤从你的开发部署过程中一起剔除。
使用过滤器,你首先需要在 Assetic 设置中进行指定。在这里添加一个过滤器并不意味着它已经被使用——它只是意味着过滤器可以使用(你将会在以后使用)。
举例来说,使用 UglifyJS JavaScript minifier 就需要做如下的定义:
YAML:
# app/config/config.yml
assetic
:
filters
:
uglifyjs2
:
bin
:
/usr/local/bin/uglifyjs
XML:
<!-- app/config/config.xml -->
<assetic:config
>
<assetic:filter
name
=
"uglifyjs2"
bin
=
"/usr/local/bin/uglifyjs"
/>
</assetic:config
>
PHP:
// app/config/config.php
$container
->
loadFromExtension
(
'assetic'
,
array
(
'filters'
=>
array
(
'uglifyjs2'
=>
array
(
'bin'
=>
'/usr/local/bin/uglifyjs'
,
)
,
)
,
)
)
;
现在,实际在一组 JavaScript 文件上使用过滤器,把它添加到你的模板上:
Twig:
{
%
javascripts
'@AppBundle/Resources/public/js/*'
filter
=
'uglifyjs2'
%
}
<script src="
{
{
asset_url
}
}
"></script>
{
%
endjavascripts
%
}
PHP:
<?php
foreach
(
$view
[
'assetic'
]
->
javascripts
(
array
(
'@AppBundle/Resources/public/js/*'
)
,
array
(
'uglifyjs2'
)
)
as
$url
)
:
?>
<script src="
<?php
echo
$view
->
escape
(
$url
)
?>
"></script>
<?php
endforeach
?>
更详细地关于设置和使用 Assetic 过滤器,同时也是 Assetic 的调试模式指导的资料详见如何减小 CSS/JS 文件(应用 UglifyJS 和 UglifyCSS)
控制已用的链接
如果你想,那么你就可以控制 Assetic 产生的链接。这个是由模板做好的并且和公共文档的根相关:
Twig:
{
%
javascripts
'@AppBundle/Resources/public/js/*'
output
=
'js/compiled/main.js'
%
}
<script src="
{
{
asset_url
}
}
"></script>
{
%
endjavascripts
%
}
PHP:
<?php
foreach
(
$view
[
'assetic'
]
->
javascripts
(
array
(
'@AppBundle/Resources/public/js/*'
)
,
array
(
)
,
array
(
'output'
=>
'js/compiled/main.js'
)
)
as
$url
)
:
?>
<script src="
<?php
echo
$view
->
escape
(
$url
)
?>
"></script>
<?php
endforeach
?>
Symfony 也包括了一种缓存溢出方法,这种方法中 Assetic 产生的最终的链接中包含了一个查询变量,这个变量可以通过在每个配置上设置来增加。获取更多信息,详见资产版本设置选项。
转储资产文件
在 dev 环境下,Assetic 为 CSS 和 JavaScript 文件产生的路径并不是真实存在于你的电脑上。但是尽管如此它们也可供渲染,因为内部的 Symfony 控制器打开文件并且提供内容(在运行任意过滤器之后)。
这种动态的提供加工过的资产的方法非常好,因为这就意味着你可以立刻看到你所更改的任何资产文件的最新状态。这样做也有缺点,因为这样做可能会很慢。如果你用了很多过滤器,它可能彻底让人沮丧。
幸运的是,Assetic 提供了一种方法来将你的资产转储成真正的文件,而不是动态的产生。
在 prod 环境下转储资产文件
在 prod 环境下,你的 JS 和 CSS 文件会被每个简单的标签所代表。换句话说,替代看到每一个你包含在你的源中的 JavaScript 文件,你将会看到如下的东西:
<script src="/js/abcd123.js"></script>
除此之外,那个文件并不是真实存在,也不是由 Symfony 动态渲染的(由于资产文件在 dev 环境下)。这个是故意的——让 Symfony 产生这些动态的文件在生产环境太慢了。
作为替代,每次你在 prod 环境下使用(并且因此,每次你部署)你的应用程序时,你需要运行如下的命令:
$ php app/console assetic:dump --env=prod --no-debug
这个将会物理的产生并且写入你需要的每一个文件(例如 /js/abcd123.js)。如果你更新你的任意的资产,你都需要再次运行这个命令来重新产生文件。
在开发环境下转储资产文件
在默认设置下,每一个资产在 dev 环境下的路径的产生是由 Symfony 进行动态处理的。这样做没有缺点(你可以迅速看见你的改动),除了资产可以明显的缓慢加载。如果你感觉你的资产加载的很慢,看看下面的指导。
首先,让 Symfony 停止尝试动态地操作这些文件。在你的 config_dev.yml 文件中做如下改动:
YAML:
# app/config/config_dev.yml
assetic
:
use_controller
:
false
XML:
<!-- app/config/config_dev.xml -->
<assetic:config
use-controller
=
"false"
/>
PHP:
// app/config/config_dev.php
$container
->
loadFromExtension
(
'assetic'
,
array
(
'use_controller'
=>
false
,
)
)
;
接下来,由于 Symfony 不再为你产生这些资产,你将会需要手动转储这些文件。运行下列命令来完成这项工作:
$ php app/console assetic:dump
这样做写了所有的你的 dev 环境需要的资产文件。这个最大的缺点就是你需要每次更新资产文件的时候运行一次。幸运的是,通过采用 assetic:watc 命令,当他们改变的时候资产文件会自动重新生成:
$ php app/console assetic:watch
assetic:watch 命令在 AsseticBundle 2.4. 的测试版本中被引进,你必须用 assetic:dump 命令的 --watch 选项来达到相同效果。
由于在 dev 环境下运行这个命令可能产生一批文件,这通常是一个好的想法来将你产生的资产文件指向一些隔离的区域(例如 /js/compiled),来使这些看起来组织的更好:
Twig:
{
%
javascripts
'@AppBundle/Resources/public/js/*'
output
=
'js/compiled/main.js'
%
}
<script src="
{
{
asset_url
}
}
"></script>
{
%
endjavascripts
%
}
PHP:
<?php
foreach
(
$view
[
'assetic'
]
->
javascripts
(
array
(
'@AppBundle/Resources/public/js/*'
)
,
array
(
)
,
array
(
'output'
=>
'js/compiled/main.js'
)
)
as
$url
)
:
?>
<script src="
<?php
echo
$view
->
escape
(
$url
)
?>
"></script>
<?php
endforeach
?>
Symfony 官方的最佳实践推荐使用 Assetic 来管理网页资产,除非你用的习惯基于 JavaScript 的前端工具。
即使那些基于 JavaScript 的解决方案大多数适用于那些从技术角度来说的案例,使用纯的 PHP 可选函数库在一些脚本中也会很有用:
- 如果你不能安装或者使用 npm 和其他的 JavaScript 解决方案;
- 如果你更喜欢限制你的应用程序中使用不同技术的数量;
- 如果你想要简化程序开发。
在这篇文章中,你将学会如何合并和裁剪 CSS 和 JavaScript 文件,同时学会如何用 Assetic 应用单一的 PHP 函数库来编译 Sass 文件。
安装第三方压缩函数库
Assetic 包含了很多可以使用的过滤器,但是并不包括与它们相联系的函数库。因此,在本文中你使用这些过滤器之前,你必须安装两个函数库。打开命令控制台,浏览你的工程目录并执行下列命令:
$ composer require leafo/scssphp
$ composer require patchwork/jsqueeze:"~1.0"
为 jsqueeze 添加一个 ~1.0 的版本限制很重要,因为大多数最近稳定的版本都和 Assetic 不兼容。
组织你的网页资产文件
这个例子将会包括一个使用 Bootstrap CSS 框架,jQuery, FontAwesome 和一些常规的 CSS 和 JavaScript 应用程序文件(被称为 main.css 和 main.js)。这个设置的推荐的目录结构如下所示:
web/assets/
├── css
│ ├── main.css
│ └── code-highlight.css
├── js
│ ├── bootstrap.js
│ ├── jquery.js
│ └── main.js
└── scss
├── bootstrap
│ ├── _alerts.scss
│ ├── ...
│ ├── _variables.scss
│ ├── _wells.scss
│ └── mixins
│ ├── _alerts.scss
│ ├── ...
│ └── _vendor-prefixes.scss
├── bootstrap.scss
├── font-awesome
│ ├── _animated.scss
│ ├── ...
│ └── _variables.scss
└── font-awesome.scss
合并和裁剪 CSS 和 JavaScript 文件
首先,设置一个新的 scssphp Assetic 过滤器:
YAML:
# app/config/config.yml
assetic
:
filters
:
scssphp
:
formatter
:
'Leafo\ScssPhp\Formatter\Compressed'
# ...
XML:
<!-- app/config/config.xml -->
<?xml
version
=
"1.0"
charset
=
"UTF-8"
?>
<container
xmlns
=
"http://symfony.com/schema/dic/services"
xmlns:assetic
=
"http://symfony.com/schema/dic/assetic"
>
<assetic:config
>
<filter
name
=
"scssphp"
formatter
=
"Leafo\ScssPhp\Formatter\Compressed"
/>
<!-- ... -->
</assetic:config
>
</container
>
PHP:
// app/config/config.php
$container
->
loadFromExtension
(
'assetic'
,
array
(
'filters'
=>
array
(
'scssphp'
=>
array
(
'formatter'
=>
'Leafo\ScssPhp\Formatter\Compressed'
,
)
,
// ...
)
,
)
)
;
formatter 选项的值是过滤器用来产生编译过的 CSS 文件的格式器的完全保留的类名称。使用压缩格式器将会缩小最终文件,不管原始文件是平常的 CSS 文件还是 SCSS 文件。
接下来,更新你的 Twig 模板,添加由 Assetic 定义的 {% stylesheets %} 标签:
{# app/Resources/views/base.html.twig #}
<!DOCTYPE html>
<html>
<head>
<!-- ... -->
{% stylesheets filter="scssphp" output="css/app.css"
"assets/scss/bootstrap.scss"
"assets/scss/font-awesome.scss"
"assets/css/*.css"
%}
<link rel="stylesheet" href="{{ asset_url }}" />
{% endstylesheets %}
这个简单的设置编译,合并,压缩了 SCSS 文件使之成为普通的可以放进 web/css/app.css 文件夹的 CSS 文件。这是唯一的一个提供给你的访问者的 CSS 文件。
合并和压缩 JavaScript 文件
首先,按照下面步骤设置一个新的 jsqueeze Assetic 过滤器:
YAML:
# app/config/config.yml
assetic
:
filters
:
jsqueeze
:
~
# ...
XML:
<!-- app/config/config.xml -->
<?xml
version
=
"1.0"
charset
=
"UTF-8"
?>
<container
xmlns
=
"http://symfony.com/schema/dic/services"
xmlns:assetic
=
"http://symfony.com/schema/dic/assetic"
>
<assetic:config
>
<filter
name
=
"jsqueeze"
/>
<!-- ... -->
</assetic:config
>
</container
>
PHP:
// app/config/config.php
$container
->
loadFromExtension
(
'assetic'
,
array
(
'filters'
=>
array
(
'jsqueeze'
=>
null
,
// ...
)
,
)
)
;
接下来,更新你的 Twig 模板,添加由 Assetic 定义的 {% javascripts %} 标签:
<!-- ... -->
{% javascripts filter="?jsqueeze" output="js/app.js"
"assets/js/jquery.js"
"assets/js/bootstrap.js"
"assets/js/main.js"
%}
<script src="{{ asset_url }}"></script>
{% endjavascripts %}
</body>
</html>
这个简单的设置合并了所有的 JavaScript 文件,压缩了目录并且保存输出于 web/js/app.js 文件,这是唯一的一个提供给你的访问者的文件。
jsqueeze 过滤器中的前导符 ? 告诉 Assetic 在非 调试 模式下只应用这个过滤器。在实践中,这就意味着你将会在 prod 环境下开发和压缩文件时看到没有压缩过的文件。
如何裁剪 CSS/JS 文件(使用 UglifyJS 和 UglifyCSS)
UglifyJS 是一个 JavaScript 的集合了 parser/compressor/beautifier 的工具包。它可以用来合并压缩 JavaScript 资产从而减少 HTTP 的请求的数量并且加快你的网站的加载速度。UglifyCSS 是一个和 UglifyJS 十分相似的 CSS compressor/beautifier。
在本指导中,对 UglifyJS 的安装,配置以及使用都进行了详细的讲解。UglifyCSS 的工作原理和 UglifyJS 很相似,所以只是在这里进行简单介绍。
安装 UglifyJS
UglifyJS 是作为 Node.js 的模块使用。首先,你需要安装 Node.js 然后决定安装方式:全局或者局部。
全局安装
全局的安装方法可以使得你的所有工程都使用相同的 UglifyJS 版本,这大大简化了维护环节。打开你的命令控制台执行下列命令(你可能需要以超级用户和身份运行):
$ npm install -g uglify-js
现在你可以在你的系统的任何地方执行全局 uglifyjs 命令:
$ uglifyjs --help
局部安装
只在你的工程中安装 UglifyJS 也是可以的,当你的工程需要特定的版本的时候这就会很有用。为了完成这个,不带 -g 选项安装并且制定放置模块的路径:
$ cd /path/to/your/symfony/project
$ npm install uglify-js --prefix app/Resources
我们建议你将 UglifyJS 安装在你的 app/Resources 文件夹并且添加 node_modules 来进行版本控制。或者,你也可以创建一个 npm package.json 文件并且在那里声明你的依赖性。
现在你可以执行位于 node_modules 目录下的 uglifyjs 命令:
$ "./app/Resources/node_modules/.bin/uglifyjs" --help
设置 uglifyjs2 过滤器
现在你需要设置 Symfony 在编辑 JavaScripts 时来使用 uglifyjs2 过滤器:
YAML:
# app/config/config.yml
assetic
:
filters
:
uglifyjs2
:
# the path to the uglifyjs executable
bin
:
/usr/local/bin/uglifyjs
XML:
<!-- app/config/config.xml -->
<assetic:config>
<!-- bin: the path to the uglifyjs executable -->
<assetic:filter
name="uglifyjs2"
bin="/usr/local/bin/uglifyjs" />
</assetic:config>
PHP:
// app/config/config.php
$container->loadFromExtension('assetic', array(
'filters' => array(
'uglifyjs2' => array(
// the path to the uglifyjs executable
'bin' => '/usr/local/bin/uglifyjs',
),
),
));
UglifyJS 安装的路径可能取决于你的系统。为了找出 bin 文件夹中的 npm 的储存位置。可以执行下列命令:
$ npm bin -g
这会在你的系统中输出一个文件夹,在这个文件夹中你能够找到可执行的 UglifyJS。
如果你是局部安装 UglifyJS,你可以在 node_modules 文件夹中的 bin 文件夹中找到。在这里它叫做 .bin。
现在你就拥有了在你的应用程序中访问 uglifyjs2 过滤器的权限。
设置 node Binary
Assetic 会尝试自动寻找 node Binary。如果它找不到,你可以使用 node 键对它的位置进行设置:
YAML:
# app/config/config.yml
assetic
:
# the path to the node executable
node
:
/usr/bin/nodejs
filters
:
uglifyjs2
:
# the path to the uglifyjs executable
bin
:
/usr/local/bin/uglifyjs
XML:
<!-- app/config/config.xml -->
<assetic:config
node
=
"/usr/bin/nodejs"
>
<assetic:filter
name
=
"uglifyjs2"
bin
=
"/usr/local/bin/uglifyjs"
/>
</assetic:config
>
PHP:
// app/config/config.php
$container
->
loadFromExtension
(
'assetic'
,
array
(
'node'
=>
'/usr/bin/nodejs'
,
'uglifyjs2'
=>
array
(
// the path to the uglifyjs executable
'bin'
=>
'/usr/local/bin/uglifyjs'
,
)
,
)
)
;
压缩你的资产
为了在你的资产上应用 UglifyJS,在你的模板的资产标签上添加 filter 选项告诉 Assetic 来使用 uglifyjs2 过滤器:
Twig:
{
%
javascripts
'@AppBundle/Resources/public/js/*'
filter
=
'uglifyjs2'
%
}
<script src="
{
{
asset_url
}
}
"></script>
{
%
endjavascripts
%
}
PHP:
<?php
foreach
(
$view
[
'assetic'
]
->
javascripts
(
array
(
'@AppBundle/Resources/public/js/*'
)
,
array
(
'uglifyj2s'
)
)
as
$url
)
:
?>
<script src="
<?php
echo
$view
->
escape
(
$url
)
?>
"></script>
<?php
endforeach
?>
上述的例子假设你拥有一个名为 AppBundle 的 bundle 并且你的 JavaScript 文件位于你的 bundle 的 Resources/public/js 目录下。然而你可以包含 JavaScript 文件无论它们在哪。
随着以上在你的资产标签上添加 uglifyjs2 过滤器,现在你将会看到压缩过的 JavaScripts 在线路中传输的更快了。
在调试模式下禁用压缩
压缩过的 JavaScripts 很难被读取,更别说是调试模式了。正是因为这个,Assetic 要求你在你的应用程序处于调试(例如 app_dev.php)模式时禁用一些特定的过滤器。你可以通过预先添加问号:?修改你的模板中的过滤器的名称来达到这个目的。这就可以告诉 Assetic 只有在调试模式关闭的时候才开启这些过滤器(例如 app.php)。
Twig:
{% javascripts '@AppBundle/Resources/public/js/*' filter='?uglifyjs2' %}
<script src="{{ asset_url }}"></script>
{% endjavascripts %}
PHP:
<?php foreach ($view['assetic']->javascripts(
array('@AppBundle/Resources/public/js/*'),
array('?uglifyjs2')
) as $url): ?>
<script src="<?php echo $view->escape($url) ?>"></script>
<?php endforeach ?>
为了做出这个,要切换到你的 prod 环境(app.php)。但是你切换之前,不要忘了清空你的缓存并且转储你的 assetic 资产。
为了替代在资产标签添加过滤器,你也可以在应用程序配置文件中设置你的应用程序的每一个文件所使用的过滤器。更多信息参见基于文件扩展的过滤器应用。
安装,设置和使用 UglifyCSS
UglifyCSS 的使用和 UglifyJS 是一样的。首先,确保节点包已经安装:
# global installation
$ npm install -g uglifycss
# local installation
$ cd /path/to/your/symfony/project
$ npm install uglifycss --prefix app/Resources
接下来,在这个过滤器中添加设置:
YAML:
# app/config/config.yml
assetic
:
filters
:
uglifycss
:
bin
:
/usr/local/bin/uglifycss
XML:
<!-- app/config/config.xml -->
<assetic:config
>
<assetic:filter
name
=
"uglifycss"
bin
=
"/usr/local/bin/uglifycss"
/>
</assetic:config
>
PHP:
// app/config/config.php
$container
->
loadFromExtension
(
'assetic'
,
array
(
'filters'
=>
array
(
'uglifycss'
=>
array
(
'bin'
=>
'/usr/local/bin/uglifycss'
,
)
,
)
,
)
)
;
在你的 CSS 文件上应用这个过滤器,需要在 Assetic 的 stylesheets 助手上添加这个过滤器:
Twig:
{
%
stylesheets
'bundles/App/css/*'
filter
=
'uglifycss'
filter
=
'cssrewrite'
%
}
<link rel="stylesheet" href="
{
{
asset_url
}
}
" />
{
%
endstylesheets
%
}
PHP:
<?php
foreach
(
$view
[
'assetic'
]
->
stylesheets
(
array
(
'bundles/App/css/*'
)
,
array
(
'uglifycss'
)
,
array
(
'cssrewrite'
)
)
as
$url
)
:
?>
<link rel="stylesheet" href="
<?php
echo
$view
->
escape
(
$url
)
?>
" />
<?php
endforeach
?>
就好像 uglifyjs2 过滤器一样,如果你事先在过滤器的名称前加了 ?(例如 ?uglifycss),压缩将只在非调试模式下进行。
如何使用 YUI Compressor 裁剪 Javascripts 和 Stylesheets
YUI Compressor 不再归属于雅虎。这就是为什么除非特别必要,否则强烈建议你避免使用 YUI 实用程序。阅读如何裁剪 CSS/JS 文件(使用 UglifyJS 和 UglifyCSS)来寻求一种更新的现代的的替代品。
雅虎提供了一款优秀的压缩 JavaScripts 和 stylesheets 的实用工具这样他们就可以在线路中传输的更快了,这就是 YUI Compressor。多亏了 Assetic,你可以很好的很容易的利用这个工具。
下载 YUI Compressor JAR
YUI Compressor 是由 Java 编写的并且以 JAR 文件格式发布。从雅虎的网站下载 JAR 文件将它保存到 app/Resources/java/yuicompressor.jar。
设置 YUI Filters
现在你需要在你的应用程序中设置两个 Assetic 过滤器,一个用来使用 YUI Compressor 来压缩 JavaScripts,另一个用来压缩 stylesheets:
YAML:
# app/config/config.yml
assetic
:
# java: "/usr/bin/java"
filters
:
yui_css
:
jar
:
"%kernel.root_dir%/Resources/java/yuicompressor.jar"
yui_js
:
jar
:
"%kernel.root_dir%/Resources/java/yuicompressor.jar"
XML:
<!-- app/config/config.xml -->
<assetic:config
>
<assetic:filter
name
=
"yui_css"
jar
=
"%kernel.root_dir%/Resources/java/yuicompressor.jar"
/>
<assetic:filter
name
=
"yui_js"
jar
=
"%kernel.root_dir%/Resources/java/yuicompressor.jar"
/>
</assetic:config
>
PHP:
// app/config/config.php
$container
->
loadFromExtension
(
'assetic'
,
array
(
// 'java' => '/usr/bin/java',
'filters'
=>
array
(
'yui_css'
=>
array
(
'jar'
=>
'%kernel.root_dir%/Resources/java/yuicompressor.jar'
,
)
,
'yui_js'
=>
array
(
'jar'
=>
'%kernel.root_dir%/Resources/java/yuicompressor.jar'
,
)
,
)
,
)
)
;
Windows 用户需要记住升级设置来适应 Java 位置。在 Windows 7 64 位系统中默认目录是 C:\Program Files (x86)\Java\jre6\bin\java.exe。
现在你可以在你的应用程序中访问两个新的 Assetic 过滤器:yui_css 和 yui_js。这些将会使用 YUI Compressor 来分别压缩 stylesheets 和 JavaScripts。
压缩你的资产
现在你已经设置了 YUI Compressor,但是在你的资产上应用这些过滤器之前什么都不会发生。由于你的资产是视图层的一部分,这个工作已经在你的模板中做完了:
Twig:
{
%
javascripts
'@AppBundle/Resources/public/js/*'
filter
=
'yui_js'
%
}
<script src="
{
{
asset_url
}
}
"></script>
{
%
endjavascripts
%
}
PHP:
<?php
foreach
(
$view
[
'assetic'
]
->
javascripts
(
array
(
'@AppBundle/Resources/public/js/*'
)
,
array
(
'yui_js'
)
)
as
$url
)
:
?>
<script src="
<?php
echo
$view
->
escape
(
$url
)
?>
"></script>
<?php
endforeach
?>
上述例子假设你已经有了名为 AppBundle 的 bundle 并且你的 JavaScript 文件在你的 bundle 下的 Resources/public/js 目录下。尽管这并不是很重要——你可以包括 JavaScript 文件无论它们在哪。
在为上述的 asset 标签增加了 yui_js 过滤器之后,你应该可以看到压缩过的 JavaScript 文件在线路中传输的更快了。可以采用相同的过程来压缩你的 stylesheets。
Twig:
{
%
stylesheets
'@AppBundle/Resources/public/css/*'
filter
=
'yui_css'
%
}
<link rel="stylesheet" type="text/css" media="screen" href="
{
{
asset_url
}
}
" />
{
%
endstylesheets
%
}
PHP:
<?php
foreach
(
$view
[
'assetic'
]
->
stylesheets
(
array
(
'@AppBundle/Resources/public/css/*'
)
,
array
(
'yui_css'
)
)
as
$url
)
:
?>
<link rel="stylesheet" type="text/css" media="screen" href="
<?php
echo
$view
->
escape
(
$url
)
?>
" />
<?php
endforeach
?>
在调试模式下禁用压缩
压缩过的 JavaScripts 和 stylesheets 文件很难被读取,更不必说是调试模式。因为这个,当你的应用程序在调试模式的时候资产需要你禁用一些过滤器。你可以通过预先添加问号:?修改你的模板中的过滤器的名称来达到这个目的。这就可以告诉 Assetic 只有在调试模式关闭的时候才开启这些过滤器。
Twig:
{
%
javascripts
'@AppBundle/Resources/public/js/*'
filter
=
'?yui_js'
%
}
<script src="
{
{
asset_url
}
}
"></script>
{
%
endjavascripts
%
}
PHP:
<?php
foreach
(
$view
[
'assetic'
]
->
javascripts
(
array
(
'@AppBundle/Resources/public/js/*'
)
,
array
(
'?yui_js'
)
)
as
$url
)
:
?>
<script src="
<?php
echo
$view
->
escape
(
$url
)
?>
"></script>
<?php
endforeach
?>
为了替代在 asset 标签添加过滤器,你也可以通过添加过滤器设置中的 apply_to 来通通禁用,例如在 yui_js 过滤器的 apply_to: ".js$"。在产品中仅仅使用过滤器,添加这个到 config_prod 文件而不是通用设置文件。更多详细的通过文件扩展应用过滤器,参见基于文件扩展的过滤器应用。
如何使用 Assetic 和 Twig Functions 进行图像优化
在众多的过滤器之中,Assetic 拥有四个可以用作动态的图像优化的过滤器。这就让你可以在没有应用图片编辑器以及没有编辑每一张图片的情况下就可以享受小尺寸图片的好处。这个结果可以是缓存也可以进行产出转储,所以你的最终用户也没有备份。
使用 Jpegoptim
Jpegoptim 是一款优化 JPEG 格式文件的实用工具。在 Assetic 下应用它,首先要确保它安装在你的系统中,然后使用 jpegoptim 过滤器中的 bin 选项设置它的位置:
YAML:
# app/config/config.yml
assetic
:
filters
:
jpegoptim
:
bin
:
path/to/jpegoptim
XML:
<!-- app/config/config.xml -->
<assetic:config
>
<assetic:filter
name
=
"jpegoptim"
bin
=
"path/to/jpegoptim"
/>
</assetic:config
>
PHP:
// app/config/config.php
$container
->
loadFromExtension
(
'assetic'
,
array
(
'filters'
=>
array
(
'jpegoptim'
=>
array
(
'bin'
=>
'path/to/jpegoptim'
,
)
,
)
,
)
)
;
它现在可以从模板中应用:
{% image '@AppBundle/Resources/public/images/example.jpg'
filter='jpegoptim' output='/images/example.jpg' %}
<img src="{{ asset_url }}" alt="Example"/>
{% endimage %}
<?php foreach ($view['assetic']->image(
array('@AppBundle/Resources/public/images/example.jpg'),
array('jpegoptim')
) as $url): ?>
<img src="<?php echo $view->escape($url) ?>" alt="Example"/>
<?php endforeach ?>
移除所有 EXIF 数据
默认设置下,jpegoptim 过滤器移除了一些存储在图片中的元信息。为了移除所有的 EXIF 数据和评论,将 strip_all 选项设置为 true:
YAML:
# app/config/config.yml
assetic
:
filters
:
jpegoptim
:
bin
:
path/to/jpegoptim
strip_all
:
true
XML:
<!-- app/config/config.xml -->
<assetic:config
>
<assetic:filter
name
=
"jpegoptim"
bin
=
"path/to/jpegoptim"
strip_all
=
"true"
/>
</assetic:config
>
PHP:
// app/config/config.php
$container
->
loadFromExtension
(
'assetic'
,
array
(
'filters'
=>
array
(
'jpegoptim'
=>
array
(
'bin'
=>
'path/to/jpegoptim'
,
'strip_all'
=>
'true'
,
)
,
)
,
)
)
;
降低最大的质量
默认设置下,jpegoptim 过滤器不会在 JPEG 图片的品质层面进行选择。使用 max 选项来设置最大的质量值(在 0-100 这个区间)。图像尺寸的减小必然是以降低它的质量为代价的:
YAML:
# app/config/config.yml
assetic
:
filters
:
jpegoptim
:
bin
:
path/to/jpegoptim
max
:
70
XML:
<!-- app/config/config.xml -->
<assetic:config
>
<assetic:filter
name
=
"jpegoptim"
bin
=
"path/to/jpegoptim"
max
=
"70"
/>
</assetic:config
>
PHP:
// app/config/config.php
$container
->
loadFromExtension
(
'assetic'
,
array
(
'filters'
=>
array
(
'jpegoptim'
=>
array
(
'bin'
=>
'path/to/jpegoptim'
,
'max'
=>
'70'
,
)
,
)
,
)
)
;
缩短语法:Twig Function
如果你正在用 Twig,通过应用一个 Twig 的特殊功能你很可能完成这些实现一个更短的语法。从添加下列设置开始:
YAML:
# app/config/config.yml
assetic
:
filters
:
jpegoptim
:
bin
:
path/to/jpegoptim
twig
:
functions
:
jpegoptim
:
~
XML:
<!-- app/config/config.xml -->
<assetic:config
>
<assetic:filter
name
=
"jpegoptim"
bin
=
"path/to/jpegoptim"
/>
<assetic:twig
>
<assetic:twig_function
name
=
"jpegoptim"
/>
</assetic:twig
>
</assetic:config
>
PHP:
// app/config/config.php
$container
->
loadFromExtension
(
'assetic'
,
array
(
'filters'
=>
array
(
'jpegoptim'
=>
array
(
'bin'
=>
'path/to/jpegoptim'
,
)
,
)
,
'twig'
=>
array
(
'functions'
=>
array
(
'jpegoptim'
)
,
)
,
)
,
)
)
;
Twig 的模板现在被修改成了以下这样:
<img src="{{ jpegoptim('@AppBundle/Resources/public/images/example.jpg') }}" alt="Example"/>
你也可以在 Assetic 的设置文件中指定图片的输出目录:
YAML:
# app/config/config.yml
assetic
:
filters
:
jpegoptim
:
bin
:
path/to/jpegoptim
twig
:
functions
:
jpegoptim
:
{
output
:
images/*.jpg
}
XML:
<!-- app/config/config.xml -->
<assetic:config
>
<assetic:filter
name
=
"jpegoptim"
bin
=
"path/to/jpegoptim"
/>
<assetic:twig
>
<assetic:twig_function
name
=
"jpegoptim"
output
=
"images/*.jpg"
/>
</assetic:twig
>
</assetic:config
>
PHP:
// app/config/config.php
$container
->
loadFromExtension
(
'assetic'
,
array
(
'filters'
=>
array
(
'jpegoptim'
=>
array
(
'bin'
=>
'path/to/jpegoptim'
,
)
,
)
,
'twig'
=>
array
(
'functions'
=>
array
(
'jpegoptim'
=>
array
(
output
=>
'images/*.jpg'
)
,
)
,
)
,
)
)
;
上传图片,你可以使用 LiipImagineBundle community bundle 来压缩和操作它们。
如何将 Assetic Filter 应用到具体的文件扩展名上
Assetic 的过滤器可以应用到独立的文件上,甚至一组文件,就像你看到的这样,文件都有特定的扩展名。为了向你展示如何处理每一个选项,假设你想使用 Assetic 的 CoffeeScript 过滤器,这个过滤器将 CoffeeScript 文件编译成 JavaScript 文件。
主要的设置就是 coffee, node 和 node_modules 的路径。设置的例子如下所示:
YAML:
# app/config/config.yml
assetic
:
filters
:
coffee
:
bin
:
/usr/bin/coffee
node
:
/usr/bin/node
node_paths
:
[
/usr/lib/node_modules/
]
XML:
<!-- app/config/config.xml -->
<assetic:config
>
<assetic:filter
name
=
"coffee"
bin
=
"/usr/bin/coffee/"
node
=
"/usr/bin/node/"
>
<assetic:node-path
>
/usr/lib/node_modules/
</assetic:node-path
>
</assetic:filter
>
</assetic:config
>
PHP:
// app/config/config.php
$container
->
loadFromExtension
(
'assetic'
,
array
(
'filters'
=>
array
(
'coffee'
=>
array
(
'bin'
=>
'/usr/bin/coffee'
,
'node'
=>
'/usr/bin/node'
,
'node_paths'
=>
array
(
'/usr/lib/node_modules/'
)
,
)
,
)
,
)
)
;
过滤一个简单的文件
现在你可以从你的模板中建立一个简单的 CoffeeScript 作为 JavaScript:
Twig:
{
%
javascripts
'@AppBundle/Resources/public/js/example.coffee'
filter
=
'coffee'
%
}
<script src="
{
{
asset_url
}
}
"></script>
{
%
endjavascripts
%
}
PHP:
<?php
foreach
(
$view
[
'assetic'
]
->
javascripts
(
array
(
'@AppBundle/Resources/public/js/example.coffee'
)
,
array
(
'coffee'
)
)
as
$url
)
:
?>
<script src="
<?php
echo
$view
->
escape
(
$url
)
?>
"></script>
<?php
endforeach
?>
这些都需要编译 CoffeeScript 文件并且作为编译过的 JavaScript 提供。
过滤多个文件
你也可以将多个 CoffeeScript 文件合并成一个单一的输出文件:
Twig:
{
%
javascripts
'@AppBundle/Resources/public/js/example.coffee'
'@AppBundle/Resources/public/js/another.coffee'
filter
=
'coffee'
%
}
<script src="
{
{
asset_url
}
}
"></script>
{
%
endjavascripts
%
}
PHP:
<?php
foreach
(
$view
[
'assetic'
]
->
javascripts
(
array
(
'@AppBundle/Resources/public/js/example.coffee'
,
'@AppBundle/Resources/public/js/another.coffee'
,
)
,
array
(
'coffee'
)
)
as
$url
)
:
?>
<script src="
<?php
echo
$view
->
escape
(
$url
)
?>
"></script>
<?php
endforeach
?>
两个文件现在都被合并成一个文件并编译成普通的 JavaScript。
基于文件扩展名的过滤
使用 Assetic 来减少资产文件数量的一个优点就是降低了 HTTP 请求的数量。为了更好地应用这一点,将你的所有的 JavaScript 和 CoffeeScript 文件合并在一起会更好,因为它们将会最终作为 JavaScript 提供。不幸的是仅仅将 JavaScript 添加到将被合并的文件中将不会像正常的一样 JavaScript 文件将不会和 CoffeeScript 编译。
这个问题可以通过使用 apply_to 选项避免,这个选项可以允许你确定哪一个过滤器应当总是被应用于特定的文件扩展名。这样你可以指定 coffee 过滤器是应用于所有的 .coffee 文件:
YAML:
# app/config/config.yml
assetic
:
filters
:
coffee
:
bin
:
/usr/bin/coffee
node
:
/usr/bin/node
node_paths
:
[
/usr/lib/node_modules/
]
apply_to
:
"\.coffee$"
XML:
<!-- app/config/config.xml -->
<assetic:config
>
<assetic:filter
name
=
"coffee"
bin
=
"/usr/bin/coffee"
node
=
"/usr/bin/node"
apply_to
=
"\.coffee$"
/>
<assetic:node-paths
>
/usr/lib/node_modules/
</assetic:node-path
>
</assetic:config
>
PHP:
// app/config/config.php
$container
->
loadFromExtension
(
'assetic'
,
array
(
'filters'
=>
array
(
'coffee'
=>
array
(
'bin'
=>
'/usr/bin/coffee'
,
'node'
=>
'/usr/bin/node'
,
'node_paths'
=>
array
(
'/usr/lib/node_modules/'
)
,
'apply_to'
=>
'\.coffee$'
,
)
,
)
,
)
)
;
使用这个选项,你不再需要在模板中指定 coffee 过滤器。你也可以列出普通的 JavaScript 文件,所有这些都会被合并并且渲染成一个简单的 JavaScript 文件(伴随着 .coffee 文件仅仅通过 CoffeeScript 过滤器运行):
Twig:
{
%
javascripts
'@AppBundle/Resources/public/js/example.coffee'
'@AppBundle/Resources/public/js/another.coffee'
'@AppBundle/Resources/public/js/regular.js'
%
}
<script src="
{
{
asset_url
}
}
"></script>
{
%
endjavascripts
%
}
PHP:
<?php
foreach
(
$view
[
'assetic'
]
->
javascripts
(
array
(
'@AppBundle/Resources/public/js/example.coffee'
,
'@AppBundle/Resources/public/js/another.coffee'
,
'@AppBundle/Resources/public/js/regular.js'
,
)
)
as
$url
)
:
?>
<script src="
<?php
echo
$view
->
escape
(
$url
)
?>
"></script>
<?php
endforeach
?>
2
Bundles
大多数的 bundles 都提供自己的安装指南,然而,基本的 bundles 安装步骤都是一样的:
- A)添加 Composer 依赖
- B)启用 Bundle
- C)设置 Bundle
A)添加 Composer 依赖
依赖是由 Composer 管理的,所以如果你不太了解 Composer,你可以在[它的相关文档href="https://getcomposer.org/doc/00-intro.md")中学习一些基本理论。这包括了两步:
1) 找出 Packagist 上的 Bundle 的名字
bundle 的 README 文件(例如 FOSUserBundle通常会告诉你它的名字(例如 friendsofsymfony/user-bundle)。如果不行,你可以在 Packagist.org 网站上搜索 bundle。
寻找 bundle?试一试在 KnpBundles.com 网站上搜索:非官方的 Symfony Bundles 的档案馆。
2)通过 Composer 安装 Bundle
既然你知道了包的名字,你可以通过 Composer 安装它:
$ composer require friendsofsymfony/user-bundle
这个将会为你的工程选择最佳的版本,添加到 composer.json 并且下载它的代码到 vendor/ 目录下。如果你需要特定的版本,将它作为 [composer requirehref="https://getcomposer.org/doc/03-cli.md") 命令的第二个参数:
$ composer require friendsofsymfony/user-bundle "~2.0"
B)启用 Bundle
这时候,bundle 已经安装在你的 Symfony 工程(在 vendor/friendsofsymfony/ 之中) 并且自动装载识别出了它的类。现在你需要做的唯一一件事就是在 AppKernel 中注册 bundle:
// app/AppKernel.php
// ...
class AppKernel extends Kernel
{
// ...
public function registerBundles()
{
$bundles = array(
// ...
new FOS\UserBundle\FOSUserBundle(),
);
// ...
}
}
在一些特别的案例中,你可能想让 bundle 仅仅在开发环境下可用。举例来说,DoctrineFixturesBundle 帮助你来加载虚拟数据——一些你可能只想在开发的时候做的。只是在 dev 和 test 环境下装载 bundle,按照下面的方法来注册 bundle:
// app/AppKernel.php
// ...
class AppKernel extends Kernel
{
// ...
public function registerBundles()
{
$bundles = array(
// ...
);
if (in_array($this->getEnvironment(), array('dev', 'test'))) {
$bundles[] = new Doctrine\Bundle\FixturesBundle\DoctrineFixturesBundle();
}
// ...
}
}
C)设置 Bundle
对于 bundle 来说需要一些额外的设置或者在 app/config/config.yml 的调整是很正常的事。bundle 的说明文档会告诉你有关的设置,但是你也需要通过 config:dump-reference 命令来获取一些 bundle 的设置指导:
$ app/console config:dump-reference AsseticBundle
代替 bundle 的全名,你也可以用使用过的短名字作为 bundle 的设置的根:
$ app/console config:dump-reference assetic
输出结果如下所示:
assetic:
debug: %kernel.debug%
use_controller:
enabled: %kernel.debug%
profiler: false
read_from: %kernel.root_dir%/../web
write_to: %assetic.read_from%
java: /usr/bin/java
node: /usr/local/bin/node
node_paths: []
# ...
其它的安装
在这里,阅读你的全新的 bundle 的 README 文件来看看接下来做什么。玩的开心!
这里有两种类型的 bundle:
- 特定应用程序的 bundle:只应用于建立你的应用程序;
- 可复用的 bundle:意味着可以在多个工程中共享。
这篇文章就是要告诉你如何构建你的可复用 bundle 从而它们可以很方便的进行设置和扩展。这些建议的大多数都不会应用在应用程序的 bundle,因为你总是希望让它们保持尽可能的简单。对于应用程序的 bundle,只要跟着书中和本手册中的实践案例就好。
特定应用程序的 bundle 的最佳实践在 Symfony 框架最佳实践中讨论。
Bundle 名称
bundle 也是 PHP 命名空间。命名空间必须遵循 PHP 命名空间和类名称的 PSR-0 或 PSR-4 互通标准:它是由供应商的字段开始,随后是零或者更多的分类字段,并且以命名空间的缩写结束,缩写必须以 Bundle 的后缀结尾。
命名空间在你向其添加了一个 bundle 类之后就会变成 bundle。bundle 类名称必须遵循以下的这些简单的规则:
- 只能使用字母数字以及下划线;
- 使用骆驼拼写形式的名称;
- 使用描述性的且短的名称(不能超过两个单词);
- 名字的前缀要用与供应商关联的(并且随意选择种类命名空间);
- 名字后缀为 Bundle。
这里有一些有效的 bundle 命名空间和类名称:
命名空间 | Bundle 类名称 |
Acme\Bundle\BlogBundle | AcmeBlogBundle |
Acme\BlogBundle | AcmeBlogBundle |
按照惯例,bundle 的 getName() 方法应该返回类的名称。
如果你公开分享你的 bundle,你必须使用 bundle 的类名称作为库的名称(AcmeBlogBundle 和非 BlogBundle 的实例)。
Symfony 的核心 Bundle 不会以 Symfony 作为 Bundle 类的前缀并且经常添加 Bundle 附属命名空间;例如: FrameworkBundle。
每一个 bundle 都有一个别名,这个别名是小写字母的 bundle 名称,其使用下划线的短的版本(acme_blog 是 AcmeBlogBundle 的别名)。这个别名是为了加强工程中的独特性并且用来定义 bundle 的设置选项(下文将会有一些有用的例子)。
目录结构
AcmeBlogBundle 的基本的目录结构必须如下所示:
<your-bundle>/
├─ AcmeBlogBundle.php
├─ Controller/
├─ README.md
├─ Resources/
│ ├─ meta/
│ │ └─ LICENSE
│ ├─ config/
│ ├─ doc/
│ │ └─ index.rst
│ ├─ translations/
│ ├─ views/
│ └─ public/
└─ Tests/
下列文件是强制的,因为它们确保了自动化的工具可以依赖的结构约定性:
- AcmeBlogBundle.php:这是一个将无格式的目录转换成 Symfony bundle 的类(在你的 bundle 的名称中更改这个);
- README.md:这个文件包含了基本的 bundle 的描述并且它经常展示一些基本的例子和它的完整的文档的链接(它可以使用 GitHub 支持的任何格式标记,例如 README.rst);
- Resources/meta/LICENSE:代码的完整许可。这个许可文件可以储存在 bundle 的根目录从而为了包通用的方便;
- Resources/doc/index.rst:Bundle 的文档根文件。
子目录的深度应当保持在最常用的类和文件的最小数量(最大两层)。
bundle 的目录是只读的。如果你需要写临时文件,把它们存放在主应用程序的 cache/ 或者 log/ 目录下。工具可以在 bundle 目录结构中产生文件,但是只有当产生的文件将要成为库的一部分时。
下列的类和文件有特定的位置:
类型 | 目录 |
Commands | Command/ |
Controllers | Controller/ |
Service Container Extensions | DependencyInjection/ |
Event Listeners | EventListener/ |
Model classes [1] | Model/ |
Configuration | Resources/config/ |
Web Resources (CSS, JS, images) | Resources/public/ |
Translation files | Resources/translations/ |
Templates | Resources/views/ |
Unit and Functional Tests | Tests/ |
[1] 你可以从如何提供为多个Doctrine的实现提供模型类之中找到如何使用 compiler pass 处理映射。
类
bundle 的目录结构使用的是命名空间等级。目前来说,ContentController 的控制器储存在 Acme/BlogBundle/Controller/ContentController.php 并且完整有效的类名称是 Acme\BlogBundle\Controller\ContentController。
所有的类和文件必须遵循 Symfony 编码标准。
一些类应当见名知意并且应当尽可能的短,就像 Commands, Helpers, Listeners, 和 Controllers 一样。
和事件分发器相连接的类必须以 Listener 作为后缀。
其它的类必须存储在 Exception 为名称的子命名空间中。
厂商
bundle 一定不能嵌在第三方的 PHP 函数库中。它需要依赖标准的 Symfony 自动加载作为替代。
bundle 一定不能嵌在第三方的用 JavaScript, CSS, 或者其它语言编写的函数库中。
测试
bundle 应当携带一个由 PHPUnit 编写的存储在 Tests/ 目录下的测试组件。测试必须遵循以下的原则:
- 测试组件必须可以用应用程序中的简单的 phpunit 命令来执行;
- 功能测试必须只能够测试反应输出和一些性能分析信息如果你有的话;
- 测试必须覆盖至少 95 % 的代码基础。
测试组件必须不能够包含 AllTests.php 脚本,但是必须依靠 phpunit.xml.dist 文件的存在。
文档
所有的类和功能都必须由完整的 PHPDoc 产生。
大量的文档应该在 Resources/doc/ 目录下以 reStructuredText 格式文件的形式提供,Resources/doc/index.rst 文件是唯一的强制性文件并且必须是文档的入口。
安装须知
为了简化安装第三方的 bundle。你可以考虑在你的 README.md 应用下列标准的须知。
Markdown:
#
Installation
## Step 1: Download the Bundle
Open a command console, enter your project directory and execute the
following command to download the latest stable version of this bundle:
\`\`\`bash
$ composer require <package-name> "~1"
\`\`\`
This command requires you to have Composer installed globally, as explained
in the [installation chapterhref="https://getcomposer.org/doc/00-intro.md")
of the Composer documentation.
## Step 2: Enable the Bundle
Then, enable the bundle by adding it to the list of registered bundles
in the `app/AppKernel.php` file of your project:
\`\`\`php
<?php
// app/AppKernel.php
// ...
class AppKernel extends Kernel
{
public function registerBundles()
{
$bundles = array(
// ...
new <vendor>\<bundle-name>\<bundle-long-name>(),
);
// ...
}
// ...
}
\`\`\`
reStructuredText:
#
Installation
## Step 1: Download the Bundle
Open a command console, enter your project directory and execute the
following command to download the latest stable version of this bundle:
.. code-block:: bash
$ composer require <package-name> "~1"
This command requires you to have Composer installed globally, as explained
in the `installation chapter`_ of the Composer documentation.
## Step 2: Enable the Bundle
Then, enable the bundle by adding it to the list of registered bundles
in the ``app/AppKernel.php`` file of your project:
.. code-block:: php
<?php
// app/AppKernel.php
// ...
class AppKernel extends Kernel
{
public function registerBundles()
{
$bundles = array(
// ...
new <vendor>\<bundle-name>\<bundle-long-name>(),
);
// ...
}
// ...
}
.. _`installation chapter`: https://getcomposer.org/doc/00-intro.md
上述的例子假设你至少安装了 bundle 的稳定版本,这样你就不用提供包的版本号(例如 composer require friendsofsymfony/user-bundle)。如果安装须知提及到一些过去的 bundle 版本或者不稳定的版本,就要包含这个版本的约束条件(例如 composer require friendsofsymfony/user-bundle "~2.0@dev")。
视情况而定,你可以添加更多的安装步骤(第三步,第四步等等)来解释其它需要解释的任务,如注册路由或者转存资产。
路由选择
如果 bundle 提供路由,那么它必须有 bundle 的别名前缀。举例来说,如果你的 bundle 叫做 AcmeBlogBundle,那么它的所有的前缀必须是 acme_blog_。
模板
如果 bundle 提供了模板,他们一定是用的 Twig。bundle 不能提供主要设计,如果它提供了完全运行的应用程序除外。
翻译文件
如果 bundle 提供了信息翻译,它们必须用 XLIFF 格式定义;域必须是以 bundle 的名称命名(acme_blog)。
bundle 一定不能推翻另外一个 bundle 的已经存在的信息。
设置
为了提供更多的灵活性,bundle 通过使用 Symfony 的 built-in 机制能够提供可配置的设置。
对于简单配置的设置,依赖于 Symfony 设置的默认的 parameters 入口。Symfony 参数是简单的键、值的组合;一个有效的 PHP 的值。每一个参数的名称都应该用 bundle 的别名开始,虽然这只是一个好的实践的建议。剩余变量的名称将会使用句号(.)来分开不同的部分(例如 acme_blog.author.email)。
最终使用者可以在任意的设置文件中提供值:
YAML:
# app/config/config.yml
parameters
:
acme_blog.author.email
:
fabien@example.com
XML:
<!-- app/config/config.xml -->
<parameters
>
<parameter
key
=
"acme_blog.author.email"
>
fabien@example.com
</parameter
>
</parameters
>
PHP:
// app/config/config.php
$container
->
setParameter
(
'acme_blog.author.email'
,
'fabien@example.com'
)
;
从容器中取回你的代码的设置参数:
$container->getParameter('acme_blog.author.email');
即使这个机制足够简单,你也需要考虑使用更先进的 semantic bundle configuration。
版本化
Bundle 必须根据 Semantic Versioning Standard 进行版本化。
服务
如果 bundle 定义了服务,它们必须用 bundle 的别名作为前缀。举例来说,AcmeBlogBundle 服务必须用 acme_blog 作为前缀。
除此之外,服务不一定就是意味着应用程序直接用的,应当被定义为私有的。
你可以通过阅读这篇名为如何在 Bundle 内部加载服务配置的文章来学习更多有关于在 bundle 中加载服务的知识。
Composer 元数据
composer.json 文件应当至少包括以下的元数据:
name 由供应商和短的 bundle 名组成。如果你自己发布了一个 bundle 而不是代表一个公司的话,使用你自己的名字(例如 johnsmith/blog-bundle)。bundle 的短名字包括了供应商的名字并且用连字符分开每一个单词。举例来说:AcmeBlogBundle 被转换成 blog-bundle,AcmeSocialConnectBundle 被转换成 social-connect-bundle。
description 一个对于 bundle 目的的简短解释。
type
使用 symfony-bundle 的值。
license
MIT 是 Symfony 的最受欢迎的证书,但是你也可以应用其它的证书。
autoload 这个信息是 Symfony 用来加载 bundle 的类的。PSR-4 自动加载标准推荐用于现代的 bundle,但是 PSR-0 标准也是推荐的。
为了让开发者更加容易的找到自己的 bundle,在 Packagist 上注册,它是 Composer 包的仓库。
自定义验证约束条件
从 Symfony 2.5 版本开始,一个新的验证 API 被引进。实际上,一共有三个使用者可以在自己的工程中进行设置的模型:
- 2.4:最原始的 2.4 和早期的验证 API;
- 2.5:新的 2.5 和接下来的验证 API;
- 2.5-BC:具有向后兼容性的新的 2.5,这样 2.4 的 API 依旧能用。这个只是在 PHP 5.3.9+ 上可用。
从 Symfony 2.7 开始,对于 2.4 API 的支持被舍弃并且最小的 Symfony PHP 版本也已经增加到 5.3.9。如果你的 bundle 需要 Symfony 的版本在 2.7 及以上,你就不用再关心 2.4 API 了。
作为一个 bundle 作者,你想要支持所有的 API,因为有的用户依旧在使用 2.4 API。特别的,如果你的 bundle 直接违反了 ExecutionContext (例如就像自定义验证约束条件),你需要检查哪个 API 被应用了。下面的代码,将会对所有的用户有用:
use Symfony\Component\Validator\ConstraintValidator;
use Symfony\Component\Validator\Constraint;
use Symfony\Component\Validator\Context\ExecutionContextInterface;
// ...
class ContainsAlphanumericValidator extends ConstraintValidator
{
public function validate($value, Constraint $constraint)
{
if ($this->context instanceof ExecutionContextInterface) {
// the 2.5 API
$this->context->buildViolation($constraint->message)
->setParameter('%string%', $value)
->addViolation()
;
} else {
// the 2.4 API
$this->context->addViolation(
$constraint->message,
array('%string%' => $value)
);
}
}
}
从指导书中学到更多
在使用第三方 bundle 的时候,你很可能有这样一个想法,就是你想用你自己的 bundle 文件重写那个第三方的 bundle 文件。Symfony 为你提供了一个非常方便的方法来重写诸如 controllers, templates 以及其它的在 bundle 的 Resources/ 目录中的文件。
举例来说,假如你正在安装 FOSUserBundle,但是你想重写它的基础的 layout.html.twig 模板,同时也是它的一个控制台,假设你也拥有自己的 UserBundle,在那里你想要让重写文件存在。这就要通过将你的 FOSUserBundle 注册成你的 bundle 的“父类”开始:
// src/UserBundle/UserBundle.php
namespace UserBundle;
use Symfony\Component\HttpKernel\Bundle\Bundle;
class UserBundle extends Bundle
{
public function getParent()
{
return 'FOSUserBundle';
}
}
通过这个细小的改动,你可以通过简单的创建同名文件的方式来重写 FOSUserBundle 的一些部分。
不管方法的名称,bundle 之间没有父子关系,这就是一种扩展和重写已经存在的 bundle 的一种方法。
重写 Controllers
假设你想向 FOSUserBundle 内部的 RegistrationController 中的 registerAction 添加一些功能。这样做,就创建你自己的 RegistrationController.php 文件,重写 bundle 的原始方法并且改变它的功能:
// src/UserBundle/Controller/RegistrationController.php
namespace UserBundle\Controller;
use FOS\UserBundle\Controller\RegistrationController as BaseController;
class RegistrationController extends BaseController
{
public function registerAction()
{
$response = parent::registerAction();
// ... do custom stuff
return $response;
}
}
基于你需要如何改变行为的程度,你可能调用 parent::registerAction() 或者完全用你自己的逻辑替换它。
以这种方式重写 controller 只是在 bundle 引用了在路由和模板中使用标准 FOSUserBundle:Registration:register 语法的 controller 的情况下是有效的。这是最好的实践案例。
重写资源:模板, 路由等等
大多数的资源也可以被重写,只需要简单地在你的父 bundle 相同的位置创建一个文件。
举例来说,通常都需要重写 FOSUserBundle 的 layout.html.twig 模板这样你就可以应用你自己的应用程序的基础布局。由于这个文件在 FOSUserBundle 的 Resources/views/layout.html.twig 目录下,你可以在 UserBundle 的相同位置创建你自己的文件。Symfony 将会完全忽视 FOSUserBundle 内的文件,并且用你的文件作为替代。
路由文件以及一些其它的资源也是如此。
重写资源文件只是会在应用 @FOSUserBundle/Resources/config/routing/security.xml 方法的资源上起作用。如果你的资源没有应用 @BundleName 快捷键,那么将不能应用这种方法重写。
Translation 和 validation 文件并不是像上述描述的一样工作。如果你想重写 translations,请阅读"Translations",阅读"Validation Metadata" 获取关于重写 validation 的方法。
这篇文档是教你如何重写第三方 bundle 的不同部分的快速指南。
模板
获取有关于重写模板的信息参见
路由
在 Symfony 中路由是不会自动输入的,如果你想要从任何的 bundle 中包含路由,那么它们必须从你的应用程序的某个地方人工输入(例如 app/config/routing.yml)。
最简单的“重写”路由的方法就是根本就不要输入。代替输入一个第三方 bundle 的路由,只需简单的将路由文件复制到你的应用程序中修正,然后输入。
控制器
假设第三方的 bundle 使用无服务的控制器(这是大多数的情况),你可以使用 bundle 的继承来很容易地重写控制器。获取更多信息,你可以参考如何使用 Bundle 的继承来重写部分 Bundle。如果控制器是一个服务,下一节我们将教你如何进行重写。
服务和配置
为了重写、扩展服务,这里有两个选项。第一个,你可以通过在 app/config/config.yml 中设置参数的方式将服务的类的名称保留到你自己的类的名称中。如果类的名称是作为包含服务的 bundle 服务设置的一个参数被定义的,这就是唯一可能的方法。举例来说,为了重写 Symfony 的 translator 服务所使用的类,你需要重写 translator.class 变量。找到哪个参数需要重写可能需要花费一些精力。对于翻译器,参数被定义与使用于核心的 FrameworkBundle 的 Resources/config/translation.xml 文件中:
YAML:
# app/config/config.yml
parameters
:
translator.class
:
Acme\HelloBundle\Translation\Translator
XML:
<!-- app/config/config.xml -->
<parameters
>
<parameter
key
=
"translator.class"
>
Acme\HelloBundle\Translation\Translator
</parameter
>
</parameters
>
PHP:
// app/config/config.php
$container
->
setParameter
(
'translator.class'
,
'Acme\HelloBundle\Translation\Translator'
)
;
第二个,如果类不是作为一个参数,当你的 bundle 使用时或者你需要修正除了类的名称之外的东西时你需要确保类一直被重写,你可以应用一个编译器通过:
// src/Acme/DemoBundle/DependencyInjection/Compiler/OverrideServiceCompilerPass.php
namespace Acme\DemoBundle\DependencyInjection\Compiler;
use Symfony\Component\DependencyInjection\Compiler\CompilerPassInterface;
use Symfony\Component\DependencyInjection\ContainerBuilder;
class OverrideServiceCompilerPass implements CompilerPassInterface
{
public function process(ContainerBuilder $container)
{
$definition = $container->getDefinition('original-service-id');
$definition->setClass('Acme\DemoBundle\YourService');
}
}
本例中你从原始的服务中取得服务定义,并且将它的名称设置成你的类的名称。
阅读如何在 Bundle 中使用 Compiler Passes 来获取关于如何使用 compiler passes 的信息。如果你想要进行一些重写类之外的事情,比如说添加方法调用,那么你就能应用 compiler passe 方法了。
实体和实体映射
由于 Doctrine 工作的原理,重写 bundle 的实体映射是不可能的。然而,如果一个 bundle 提供了映射的超级类(就好像 FOSUserBundle 中的 User 实体)我们就能重写属性和关联。你可以在 Doctrine 的文档中学习有关这个的特征以及限制。
表单
为了重写表单类型,它必须作为服务注册(就是意味着它要有 form.type 标签)。然后你就可以重写像服务和配置中介绍的那样重写任何服务了。当然,这个只有在用别名的时候才会起作用而不是被实例化,例如:
$builder->add('name', 'custom_type');
而不是:
$builder->add('name', new CustomType());
校验元数据
Symfony 从每一个 bundle 中加载所有的校验配置文件然后将它们合并成一个校验树。这就意味着你可以向属性中添加新的限制,但是你不能重写它们。
为了重写这个,第三方 bundle 需要有校验组的配置。例如,FOSUserBundle 有这个设置。创建你自己的校验,向新的校验组中添加限制:
YAML:
# src/Acme/UserBundle/Resources/config/validation.yml
FOS\UserBundle\Model\User
:
properties
:
plainPassword
:
- NotBlank
:
groups
:
[
AcmeValidation
]
- Length
:
min
:
6
minMessage
:
fos_user.password.short
groups
:
[
AcmeValidation
]
XML:
<!-- src/Acme/UserBundle/Resources/config/validation.xml -->
<?xml
version
=
"1.0"
encoding
=
"UTF-8"
?>
<constraint-mapping
xmlns
=
"http://symfony.com/schema/dic/constraint-mapping"
xmlns:xsi
=
"http://www.w3.org/2001/XMLSchema-instance"
xsi:schemaLocation
=
"http://symfony.com/schema/dic/constraint-mapping
http://symfony.com/schema/dic/constraint-mapping/constraint-mapping-1.0.xsd"
>
<class
name
=
"FOS\UserBundle\Model\User"
>
<property
name
=
"plainPassword"
>
<constraint
name
=
"NotBlank"
>
<option
name
=
"groups"
>
<value
>
AcmeValidation
</value
>
</option
>
</constraint
>
<constraint
name
=
"Length"
>
<option
name
=
"min"
>
6
</option
>
<option
name
=
"minMessage"
>
fos_user.password.short
</option
>
<option
name
=
"groups"
>
<value
>
AcmeValidation
</value
>
</option
>
</constraint
>
</property
>
</class
>
</constraint-mapping
>
现在,更新 FOSUserBundle 的配置,因此它就会应用你的校验组来替代原始的那个。
翻译
翻译和 bundle 并不相关,但是和域相关。这就意味着你可以从任何的翻译文件中重写翻译,只要它在正确的域中。
最终的翻译文件总是会成功。这就意味着你需要确保包含你的翻译的 bundle 在你重写了翻译的那些 bundle 之后被加载。这个在 AppKernel 中完成。
翻译文件也不会知道 bundle 继承。如果你想从父 bundle 重写翻译,要确保父 bundle 在 AppKernel 类中在子 bundle 之前加载。
经常成功的文件位于 app/Resources/translations,因为那些文件总是最后加载。
Symfony 的标准版本来自于一个完整的 demo,这个 demo 位于一个名叫 AcmeDemoBundle 的 bundle 中。在开始一个工程的时候它是一个很好的可以引用的样板文件,但是最终你可能会想要移除它。
这篇文章使用 AcmeDemoBundle 作为例子,但是你可以使用这些步骤移除任何的 bundle。
1.在 AppKernel 中移除 bundle 的注册
为了从框架中解除 bundle 的联系,你应当从 AppKernel::registerBundles() 方法中移除 bundle。bundle 通常会出现在 $bundles 数组之中但是 AcmeDemoBundle 是唯一的在开发环境中注册的并且你可以在下面的声明中找到它:
// app/AppKernel.php
// ...
class AppKernel extends Kernel
{
public function registerBundles()
{
$bundles = array(...);
if (in_array($this->getEnvironment(), array('dev', 'test'))) {
// comment or remove this line:
// $bundles[] = new Acme\DemoBundle\AcmeDemoBundle();
// ...
}
}
}
2.移除 Bundle 的配置
既然 Symfony 不知道 bundle,那么你需要移除在 app/config 之中的有关 bundle 的任何配置以及路由配置。
2.1 移除 bundle 的路由配置
AcmeDemoBundle 的路由配置可以在 app/config/routing_dev.yml 中找到。移除位于文件根部的 _acme_demo 入口。
2.2 移除 bundle 的配置
一些 bundle 的配置包含在 app/config/config*.yml 文件的其中之一。你要确保从这些文件中移除了相关的配置。你可以通过寻找配置文件中的 acme_demo 字符串(或者不论 bundle 的名称是什么,例如 FOSUserBundle 的 fos_user)来发现 bundle 的配置。
AcmeDemoBundle 没有配置。然而,bundle 被用于 app/config/security.yml 文件的配置。你可以用它作为你的样板文件为了你自己的安全,但是你也可以移除所有的东西:对于 Symfony 来说你是否移除都是无所谓的。
3.从文件系统中移除 bundle
现在你已经从你的应用程序中移除了所有有关的 bundle 的东西,你还需要从文件系统中移除它。bundle 位于 src/Acme/DemoBundle 的目录之下。你应当移除这个目录,同时你也可以移除 Acme 目录。
如果你不知道 bundle 的目录,你可以使用 getPath() 方法来获取 bundle 的目录:
dump($this->container->get('kernel')->getBundle('AcmeDemoBundle')->getPath());
die();
3.1 移除 bundle 资产
移除位于网页或目录(例如 AcmeDemoBundle 的 web/bundles/acmedemo)中的资产。
4.移除与其他 Bundle 的集合
这个并不适用于 AcmeDemoBundle 因为没有 bundle 依赖于它,所以你可以跳过这一步。
一些 bundle 依赖于其它的 bundle,如果你移除了它们其中之一,那么另外一个很可能也就不可用了。确保没有其它的第三方的或者自己做的 bundle 依赖于你所要移除的 bundle。
如果一个 bundle 依赖于另一个 bundle 的话,在大多数情况下这就意味着它从 bundle 中应用服务。寻找 bundle 的别名有助于你发现这种关系(例如 bundle 的 acme_demo 别名就依赖于 AcmeDemoBundle)。 如果一个第三方的 bundle 依赖于另一个 bundle 的话,你可以在 bundle 目录的 composer.json 文件中找到所提及的 bundle。
在 Symfony 中,你可以通过应用很多的服务来找到你自己。这些服务可以在你的应用程序的 app/config/ 目录下注册。但是如果当你想要分离 bundle 让它们应用于其它的工程中时,你就会想要让 bundle 自己拥有服务配置。这篇文章将会教你如何实现这个目标。
建立一个 Extension 类
为了加载服务配置,你必须为你的 bundle 建立一个 Dependency Injection (DI) Extension。这个类在被自动检测方面有着一些约定。但是接下来你将会看到你可以如何让它转变成你喜好的样子。默认情况下,Extension 类必须符合下列约定:
- 它必须位于 bundle 的 DependencyInjection 命名空间之中;
- 它的名称要和 bundle 的一样,只是后缀由 Bundle 换成了 Extension(例如 AppBundle 的 Extension 类就会叫做 AppExtension,同时 AcmeHelloBundle 就会被叫做 AcmeHelloExtension)。
Extension 类应当执行 ExtensionInterface,但是通常情况下你只会简单的扩展 Extension 类:
// src/Acme/HelloBundle/DependencyInjection/AcmeHelloExtension.php
namespace Acme\HelloBundle\DependencyInjection;
use Symfony\Component\HttpKernel\DependencyInjection\Extension;
use Symfony\Component\DependencyInjection\ContainerBuilder;
class AcmeHelloExtension extends Extension
{
public function load(array $configs, ContainerBuilder $container)
{
// ... you'll load the files here later
}
}
手动注册 Extension 类
当不遵守这些约定时,你必须手动注册你的 Extension 类。为了完成这个,你必须重写 Bundle::getContainerExtension() 方法来返回 extension 的实例:
// ...
use Acme\HelloBundle\DependencyInjection\UnconventionalExtensionClass;
class AcmeHelloBundle extends Bundle
{
public function getContainerExtension()
{
return new UnconventionalExtensionClass();
}
}
由于新的 Extension 类没有遵循命名规则,你还需要重写 Extension::getAlias() 来返回正确的 DI 别名。DI 别名是用来标识容器中的 bundle 的(例如在 app/config/config.yml 文件中)。默认设置下,这个是通过移除 Extension 后缀并且将类名称转换成下划线的形式来完成的。(例如 AcmeHelloExtension 的 DI 别名是 acme_hello)。
使用 load() 方法
在 load() 方法中,所有关于这个 extension 的参数和服务都会被加载。这个方法不会获得实际的容器实例,但是是一个副本。这个容器只有从实际容器中取来的参数。在加载服务和参数之后,副本就会变成实际的容器,来保证所有的服务和变量也添加到实际的容器之中。
在 load() 方法中,你可以应用 PHP 代码来进行服务定义的注册,但是通常的做法都是将这些定义放到配置文件之中(使用 Yaml,XML,或者 PHP 格式)。幸运的是,你可以在 extension 中使用文件加载器。
目前来讲,假设在你的 bundle 中的 Resources/config 目录中有一个名为 services.xml 的文件,你加载的方法如下所示:
use Symfony\Component\DependencyInjection\Loader\XmlFileLoader;
use Symfony\Component\Config\FileLocator;
// ...
public function load(array $configs, ContainerBuilder $container)
{
$loader = new XmlFileLoader(
$container,
new FileLocator(__DIR__.'/../Resources/config')
);
$loader->load('services.xml');
}
其它可用的加载器是 YamlFileLoader, PhpFileLoader 和 IniFileLoader。
IniFileLoader 只能被用于加载参数并且它只能将参数作为字符串加载。
使用配置更改服务
Extension 也是处理 bundle 的特定的配置(例如 app/config/config.yml 中的配置)的类。 你可以通过阅读“如何为一个 Bundle 创建友好的配置”这篇文章来更加深入地学习。
如果你打开你的应用程序配置文件(通常是 app/config/config.yml),你将会看到一些不同设置的部分,例如 framework, twig 和 doctrine。这些配置的每一个都有特定的 bundle,允许基于你的设置定义高级的选项并且让 bundle 设置为低级的,复杂的。
举例来说,下列的配置使得 FrameworkBundle 启用表集合,这个包含了一些服务以及其它相关组件的集合的定义:
YAML:
framework
:
form
:
true
XML:
<?xml
version
=
"1.0"
encoding
=
"UTF-8"
?>
<container
xmlns
=
"http://symfony.com/schema/dic/services"
xmlns:framework
=
"http://symfony.com/schema/dic/symfony"
xsi:schemaLocation
=
"http://symfony.com/schema/dic/services
http://symfony.com/schema/dic/services/services-1.0.xsd
http://symfony.com/schema/dic/symfony
http://symfony.com/schema/dic/symfony/symfony-1.0.xsd"
>
<framework:config
>
<framework:form
/>
</framework:config
>
</container
>
PHP:
$container
->
loadFromExtension
(
'framework'
,
array
(
'form'
=>
true
,
)
)
;
使用参数设置你的 Bundle 如果你不打算在你的工程中间共享 bundle,那么用这么高级的配置方法就是没有意义的。因为你只是在一个工程中使用 bundle,你每次都更改服务设置就好。 如果你确实想在 config.yml 中设置一些东西,你可以在那里创建一个参数并且在其它地方应用这个参数。
使用 Bundle Extension
基本的思想是不要让用户重写个人的参数,而是可以让用户设置一些,尤其是创建,选项。作为 bundle 的开发者,你以后会通过分析配置以及加载 “Extension” 类中的正确的服务和参数。
作为一个例子,试想你正在创建一个公共 bundle,这个 bundle 集合了 Twitter 等等。为了能够再次利用你的 bundle,你必须使得 client_id 和 client_secret 变量可配置。你的 bundle 可能如下所示:
YAML:
# app/config/config.yml
acme_social
:
twitter
:
client_id
:
123
client_secret
:
$ecret
XML:
<!-- app/config/config.xml -->
<?xml
version
=
"1.0"
?>
<container
xmlns
=
"http://symfony.com/schema/dic/services"
xmlns:acme-social
=
"http://example.org/dic/schema/acme_social"
xsi:schemaLocation
=
"http://symfony.com/schema/dic/services
http://symfony.com/schema/dic/services/services-1.0.xsd"
>
<acme-social:config
>
<twitter
client-id
=
"123"
client-secret
=
"$ecret"
/>
</acme-social:config
>
<!-- ... -->
</container
>
PHP:
// app/config/config.php
$container
->
loadFromExtension
(
'acme_social'
,
array
(
'client_id'
=>
123
,
'client_secret'
=>
'$ecret'
,
)
)
;
在如何在 Bundle 内部加载服务配置这篇文章中深入学习。
如果一个 bundle 提供 Extension 类,那么你就不应该重写那个 bundle 中的任何服务容器参数。这个的思想是如果存在 Extension 类,所有的设置都应该是配置的,是这个类使得所有的选项可配置。换句话说,extension 类定义了所有的公共配置设置,这些配置应当向后兼容。
在依赖注入容器中处理参数的问题可以阅读在依赖注入类中使用参数。
处理 $configs 数组
先说重要的,你必须创建一个 extension 类,就像如何在 Bundle 内部加载服务配置这篇文章中说的那样。
无论何时当一个用户在设置文件中包含 acme_social 键值(这是一个 DI 别名)时,在它之下的配置就会添加到一个配置的数组中并且传到你的 extension 的 load() 方法中(Symfony 会自动将 XML 和 YAML 转换到数组)。
在以前部分配置的例子中,数组传递到你的 load() 方法如下所示:
array(
array(
'twitter' => array(
'client_id' => 123,
'client_secret' => '$ecret',
),
),
)
你会注意到这是一个数组的数组,不是一个简单的扁平的具有配置值的数组。这是有意为之的,实际上它允许 Symfony 分析几个配置资源。举例来说,如果 acme_social 出现在其它的配置文件比如 config_dev.yml 中并且在它下面有不同的值,进来的数组可能就如下所示:
array(
// values from config.yml
array(
'twitter' => array(
'client_id' => 123,
'client_secret' => '$secret',
),
),
// values from config_dev.yml
array(
'twitter' => array(
'client_id' => 456,
),
),
)
两个数组的顺序取决于哪个先被设置。
但是不用担心!Symfony 的设置组件将会帮助你合并这些值,提供默认的值并且对用户的错误的设置进行校验。下面介绍它是如何运行的。在 DependencyInjection 目录下创建一个 Configuration 类然后创建一个定义了你的 bundle 配置结构的树。
Configuration 类处理简单的配置如下所示:
// src/Acme/SocialBundle/DependencyInjection/Configuration.php
namespace Acme\SocialBundle\DependencyInjection;
use Symfony\Component\Config\Definition\Builder\TreeBuilder;
use Symfony\Component\Config\Definition\ConfigurationInterface;
class Configuration implements ConfigurationInterface
{
public function getConfigTreeBuilder()
{
$treeBuilder = new TreeBuilder();
$rootNode = $treeBuilder->root('acme_social');
$rootNode
->children()
->arrayNode('twitter')
->children()
->integerNode('client_id')->end()
->scalarNode('client_secret')->end()
->end()
->end() // twitter
->end()
;
return $treeBuilder;
}
}
Configuration 类可以比上面展示的复杂很多,支持“原型”节点,高级的验证,特定 XML 的正常化以及高级合并。你可以通过阅读组件设置文档来学习更多相关知识。你也可以通过实际检查一些核心的 Configuration 类,比如 FrameworkBundle Configuration 中的或者 TwigBundle Configuration 中的。
这个类可以在你的 load() 方法下应用来合并配置以及强力验证(例如如果附加选项通过,异常就会被抛出):
public function load(array $configs, ContainerBuilder $container)
{
$configuration = new Configuration();
$config = $this->processConfiguration($configuration, $configs);
// ...
}
processConfiguration() 方法使用了你已经在 Configuration 类中定义的配置树来验证,正常化以及将配置数组合并在一起。
代替每次在你提供的配置选项的扩展中调用 processConfiguration(),你可能想要使用 ConfigurableExtension 来帮你自动完成这件事:
>// src/Acme/HelloBundle/DependencyInjection/AcmeHelloExtension.php
namespace Acme\HelloBundle\DependencyInjection;
use Symfony\Component\DependencyInjection\ContainerBuilder;
use Symfony\Component\HttpKernel\DependencyInjection\ConfigurableExtension;
class AcmeHelloExtension extends ConfigurableExtension
{
// note that this method is called loadInternal and not load
protected function loadInternal(array $mergedConfig, ContainerBuilder $container)
{
// ...
}
}
这个类使用了方法来获取 Configuration 实例,如果你的 Configuration 类不叫做 Configuration 或者它没有和你的扩展放在同一个命名空间内,那么你应当重写它。
自己处理 Configuration 使用 Config 组件是可选择的。load() 方法获得了一个具有配置值的数组。你可以简单地自己分析这些数组(例如重写配置并且应用 isset 来检测值是否存在)。你要知道支持 XML 是很困难的。
public function load(array $configs, ContainerBuilder $container)
{
$config = array();
// let resources override the previous set value
foreach ($configs as $subConfig) {
$config = array_merge($config, $subConfig);
}
// ... now use the flat $config array
}
修正另外的 bundle 的配置
如果你有很多 bundle 它们互相依赖,允许一个 Extension 类去修正传递到另外一个 bundle 的 Extension 类的配置将会非常有用,就好像最终开发者的配置文件实际放在了 app/config/config.yml 文件中。这可以通过预先的扩展来完成。获取更多细节,你可以参考如何简化多个 Bundle 的配置。
转储配置
config:dump-reference 命令将控制台中的 bundle 的默认配置使用 Yaml 格式转储。
只要你的 bundle 的配置位于标准的位置(YourBundle\DependencyInjection\Configuration)并且对于传到构造器没有争议那么这将会自动进行。如果你有一些不同,你的 Extension 类必须重写 Extension::getConfiguration() 方法并且返回 Configuration 的一个实例。
支持 XML
Symfony 允许人们提供三种不同格式的配置:Yaml, XML 和 PHP。Yaml 和 PHP 应用的相同的语法并且当使用 Config 组件时都是默认支持的。支持 XML 需要你多做一些事情。但是当和别人共享你的 bundle 时,建议你遵循以下的步骤。
使你的 Config Tree 做好支持 XML 的准备
Config 组件提供了一些默认的方法来修正编辑 XML 配置。详见“正常化”组件的文档。然而,你也可以做一些选择,这将会提升使用 XML 配置的体验。
选择一个 XML 命名空间
在 XML 中,XML 命名空间是用来决定哪个元素属于特定的 bundle 的配置。命名空间是由 Extension::getNamespace() 方法返回的。按照惯例,命名空间是一个链接(它并不必须是一个有效的链接且不一定需要存在)。默认情况下,bundle 的命名空间是 http://example.org/dic/schema/DI_ALIAS,这里的 DI_ALIAS 是扩展的 DI 别名。你可能想要将其改成更加专业的链接:
// src/Acme/HelloBundle/DependencyInjection/AcmeHelloExtension.php
// ...
class AcmeHelloExtension extends Extension
{
// ...
public function getNamespace()
{
return 'http://acme_company.com/schema/dic/hello';
}
}
提供一个 XML 架构
XML 具有一个非常有用的特征叫做 XML 架构。这个允许在 XML Schema Definition (一个 xsd 文件)中描述所有的可能的元素和属性以及它们的值。这个 XSD 文件被 IDEs 使用用作智能完成,同时也被 Config 组件用来验证元素。
为了使用这个架构,XML 配置文件必须提供一个 xsi:schemaLocation 附件指向 XSD 文件作为一个特定的 XML 命名空间。这个 XML 命名空间之后将会被从 Extension::getXsdValidationBasePath() 方法返回的 XSD 验证基本路径所取代。这个命名空间将会跟随其它的从基本路径到文件的路径。
按照惯例,XSD 文件存在于 Resources/config/schema,但是你可以把它放在任何你想放的地方。你需要将这个路径作为基本路径返回:
// src/Acme/HelloBundle/DependencyInjection/AcmeHelloExtension.php
// ...
class AcmeHelloExtension extends Extension
{
// ...
public function getXsdValidationBasePath()
{
return __DIR__.'/../Resources/config/schema';
}
}
假设 XSD 文件叫做 hello-1.0.xsd,框架的位置就会是 http://acme_company.com/schema/dic/hello/hello-1.0.xsd:
<!-- app/config/config.xml -->
<?xml version="1.0" ?>
<container xmlns="http://symfony.com/schema/dic/services"
xmlns:xsi="http://www.w3.org/2001/XMLSchema-instance"
xmlns:acme-hello="http://acme_company.com/schema/dic/hello"
xsi:schemaLocation="http://acme_company.com/schema/dic/hello
http://acme_company.com/schema/dic/hello/hello-1.0.xsd">
<acme-hello:config>
<!-- ... -->
</acme-hello:config>
<!-- ... -->
</container>
当创建可重复利用以及可扩展的应用程序时,开发者经常面临一个选择:创建一个简单的大的 bundle 还是创建多个小的 bundle。创建一个简单的 bundle 的缺点就是不能让用户选择移除他们不需要的功能。创建多个 bundle 的缺点就是配置会变得很繁杂无聊,很多设置都需要对不同的 bundle 重复设置。
使用下列方法,通过一个单一的扩展来预先设置所有的 bundle,可以移除多个 bundle 的缺点。可以使用 app/config/config.yml 中定义的设置来预先设置就好像它们被用户在应用程序配置中明确写出来。
举例来说,这个可以用来设置在多个 bundle 中应用的实体管理器的名称。或者它也可以用来启用依赖于另一个 bundle 加载的可选特征。
为了有扩展能力来完成这个工作,你需要实现 PrependExtensionInterface:
// src/Acme/HelloBundle/DependencyInjection/AcmeHelloExtension.php
namespace Acme\HelloBundle\DependencyInjection;
use Symfony\Component\HttpKernel\DependencyInjection\Extension;
use Symfony\Component\DependencyInjection\Extension\PrependExtensionInterface;
use Symfony\Component\DependencyInjection\ContainerBuilder;
class AcmeHelloExtension extends Extension implements PrependExtensionInterface
{
// ...
public function prepend(ContainerBuilder $container)
{
// ...
}
}
在 prepend() 方法中,开发者可以在每个注册的 bundle 的扩展调用 load() 方法之前完全访问 ContainerBuilder 实例。为了预先设置 bundle 的扩展开发者可以在 ContainerBuilder 实例上使用 prependExtensionConfig() 方法。由于这个方法仅仅预先设置,其它的在 app/config/config.yml 中的设置会重写这些以前的设置。
下面的例子说明了如何在多个 bundle 中预先配置,同时如何在一个特定的其它 bundle 没有被注册时禁用多个 bundle 的标志:
public function prepend(ContainerBuilder $container)
{
// get all bundles
$bundles = $container->getParameter('kernel.bundles');
// determine if AcmeGoodbyeBundle is registered
if (!isset($bundles['AcmeGoodbyeBundle'])) {
// disable AcmeGoodbyeBundle in bundles
$config = array('use_acme_goodbye' => false);
foreach ($container->getExtensions() as $name => $extension) {
switch ($name) {
case 'acme_something':
case 'acme_other':
// set use_acme_goodbye to false in the config of
// acme_something and acme_other note that if the user manually
// configured use_acme_goodbye to true in the app/config/config.yml
// then the setting would in the end be true and not false
$container->prependExtensionConfig($name, $config);
break;
}
}
}
// process the configuration of AcmeHelloExtension
$configs = $container->getExtensionConfig($this->getAlias());
// use the Configuration class to generate a config array with
// the settings "acme_hello"
$config = $this->processConfiguration(new Configuration(), $configs);
// check if entity_manager_name is set in the "acme_hello" configuration
if (isset($config['entity_manager_name'])) {
// prepend the acme_something settings with the entity_manager_name
$config = array('entity_manager_name' => $config['entity_manager_name']);
$container->prependExtensionConfig('acme_something', $config);
}
}
上面所说的将会和在 AcmeGoodbyeBundle 没有被注册以及 acme_hello 的 entity_manager_name 设置成了 non_default 的情况下将以下代码写入 app/config/config.yml 等同:
YAML:
# app/config/config.yml
acme_something
:
# ...
use_acme_goodbye
:
false
entity_manager_name
:
non_default
acme_other
:
# ...
use_acme_goodbye
:
false
XML:
<!-- app/config/config.xml -->
<acme-something:config
use-acme-goodbye
=
"false"
>
<acme-something:entity-manager-name
>
non_default
</acme-something:entity-manager-name
>
</acme-something:config
>
<acme-other:config
use-acme-goodbye
=
"false"
/>
PHP:
// app/config/config.php
$container
->
loadFromExtension
(
'acme_something'
,
array
(
// ...
'use_acme_goodbye'
=>
false
,
'entity_manager_name'
=>
'non_default'
,
)
)
;
$container
->
loadFromExtension
(
'acme_other'
,
array
(
// ...
'use_acme_goodbye'
=>
false
,
)
)
;
3
缓存
由于 Symfony 的缓存使用的是标准的 HTTP 缓存头文件,Symfony 反向代理 可以很容易地就被其它的反向代理取代。Varnish 是一个强大的,开源的,HTTP 加速器可以提供缓存内容加速并且包括支持 Edge Side Includes。
使 Symfony 信任反向代理
Varnish 自动在请求中将 IP 地址作为 X-Forwarded-For 转发并且去掉 X-Forwarded-Proto 的头信息。如果你不将 Varnish 设置为可信的代理,Symfony 将会把所有的从 Varnish 主机发出的请求看作是不安全的 HTTP 连接而不是真正的客户。
记得在 Symfony 的配置中设置 framework.trusted_proxies 以便于 Varnish 可以被看做是可信的代理并且要使用 X-Forwarded 头信息。
路由和 X-FORWARDED 头文件
为了确保 Symfony 路由使用 Varnish 产生正确的链接地址,要在 X-Forwarded-Port 的头信息中添加正确的端口数字。这个端口取决于你的设置。
假设外部连接来自于默认的 HTTP 80 端口。对于 HTTPS 连接,有另外一个代理(由于 Varnish 并不是自己代理 HTTPS )位于默认的 HTTPS 端口 443 处理 SSL 终止然后将请求作为 HTTP 请求转发到 Varnish 伴随一个 X-Forwarded-Proto 文件头。在这种情况下,向你的 Varnish 添加如下配置:
sub vcl_recv {
if (req.http.X-Forwarded-Proto == "https" ) {
set req.http.X-Forwarded-Port = "443";
} else {
set req.http.X-Forwarded-Port = "80";
}
}
Cookies 和缓存
默认设置下,一个安全的缓存代理不会缓存任何东西当请求发送的信息中含有 cookies 或者一个基本的身份验证头文件。这是因为页面的内容应该是依赖 cookie 的值或者身份验证头文件。
如果你确定知道后端从来不使用会话或者基本的身份验证,Varnish 从请求中移除了相应的头文件组织客户绕过缓存。在实践中,你网站的部分将会需要会话,例如使用 CSRF Protection 的形式。在这种情况下,确保只有在需要的时候才开启一个会话并且在不再需要这个会话的时候清除它。或者,你也可以阅读包含 CSRF Protection 表单的缓存页面。
由 JavaScript 创建的 Cookies 只能应用于前端,例如当使用 Google Analytics 时,还是要发送到服务器。这些 cookies 和后端没有关系并且也不应该影响缓存决策。设置你的 Varnish 缓存来清除 cookies 的头文件。你想要留着会话 cookie,如果有一个的话,并且摆脱其它的 cookie,这样如果没有活动的会话页面就可以缓存了。除非你更改 PHP 的默认配置,否则你的会话 cookie 也会有相同的 PHPSESSID:
sub vcl_recv {
// Remove all cookies except the session ID.
if (req.http.Cookie) {
set req.http.Cookie = ";" + req.http.Cookie;
set req.http.Cookie = regsuball(req.http.Cookie, "; +", ";");
set req.http.Cookie = regsuball(req.http.Cookie, ";(PHPSESSID)=", "; \1=");
set req.http.Cookie = regsuball(req.http.Cookie, ";[^ ][^;]*", "");
set req.http.Cookie = regsuball(req.http.Cookie, "^[; ]+|[; ]+$", "");
if (req.http.Cookie == "") {
// If there are no more cookies, remove the header to get page cached.
remove req.http.Cookie;
}
}
}
如果每一个用户的内容不同,但是依赖于用户的角色,解决办法就是分开每组的缓存。这个模式由 User Context 名称下的 FOSHttpCacheBundle 负责实现和解释。
确保一致的缓存行为
Varnish 根据你的应用程序发出的缓存头文件来决定如何缓存内容。然而,Varnish 4 之前的 versions 不遵循 Cache-Control: no-cache, no-store 和 private。为了确保一致的行为,如果你还在用 Varnish 3 的话就要使用如下的配置:
sub vcl_fetch {
/* By default, Varnish3 ignores Cache-Control: no-cache and private
https://www.varnish-cache.org/docs/3.0/tutorial/increasing_your_hitrate.html#cache-control
*/
if (beresp.http.Cache-Control ~ "private" ||
beresp.http.Cache-Control ~ "no-cache" ||
beresp.http.Cache-Control ~ "no-store"
) {
return (hit_for_pass);
}
}
你可以在一个 VCL 文件中看到 Varnish 的默认行为:Varnish 3 的 default.vcl,Varnish 4 的 builtin.vcl。
启用 Edge Side Includes (ESI)
就像在 Edge Side Includes 一节中介绍的那样,Symfony 侦测它是否和理解 ESI 保留的代理进行会话。当你使用 Symfony 的反向代理时,你不需要做任何事。但是如果你想要使用 Varnish 替代 Symfony 解决 ESI 标签,你需要在 Varnish 中进行一些设置。Symfony 使用 Akamai 描述的 Edge Architecture 中 Surrogate-Capability 头文件。
Varnish 只支持 ESI 标签下的 src 属性(onerror 和 alt 被忽视了)。
首先,设置 Varnish 从而使得向后端应用程序转移的请求通过添加 Surrogate-Capability 头文件的方式获得它的 ESI 支持:
sub vcl_recv {
// Add a Surrogate-Capability header to announce ESI support.
set req.http.Surrogate-Capability = "abc=ESI/1.0";
}
头文件的 abc 部分不是很重要,除非你有需要宣传它们的能力的多个“代理”。阅读 Surrogate-Capability Header 获取更多信息。
接下来,优化 Varnish 从而使得它仅仅在存在至少一个 ESI 标签时通过检查 Symfony 自动添加的 Surrogate-Control 头文件解析回复内容:
Varnish4:
sub vcl_backend_response {
// Check for ESI acknowledgement and remove Surrogate-Control header
if (beresp.http.Surrogate-Control ~ "ESI/1.0") {
unset beresp.http.Surrogate-Control;
set beresp.do_esi = true;
}
}
Varnish3:
sub vcl_fetch {
// Check for ESI acknowledgement and remove Surrogate-Control header
if (beresp.http.Surrogate-Control ~ "ESI/1.0") {
unset beresp.http.Surrogate-Control;
set beresp.do_esi = true;
}
}
如果你遵循有关确保缓存一致性的建议,那些 VCL 函数已经存在。你只需将代码添加到函数的末尾,他们不会互相干扰。
缓存失效
如果你想要缓存的内容经常更改并且还能为用户最近的版本服务,你需要使那些内容失效。然而缓存失效允许你在过期前清除你的代理内容,这会增加你的缓存设置的复杂性。
开源的 FOSHttpCacheBundle 将缓存失效的痛苦通过帮助你组织你的缓存和失效设置减轻。 FOSHttpCacheBundle 的文档解释了如何设置 Varnish 和其它的反向代理的缓存失效。
CSRF 令牌意味着每一个用户都是不同的。这就是为什么如果你尝试缓存带有表单的页面时需要注意这点。
获取更多有关于 Symfony 中 CSRF 保护如何运作的信息,请查阅 CSRF 保护。
为什么缓存带有 CSRF 令牌的页面会出现问题
典型地,每个用户都被分配了一个特定的 CSRF 令牌,这个令牌储存在校验的会话中。这就意味着如果你确实想要缓存一个带有 CSRF 令牌的页面,你只能缓存第一个用户的 CSRF 令牌。当一个用户提交表单时,令牌就不会和储存在校验的会话中的令牌相匹配并且所有用户(除了第一个用户)都会在提交表单时 CSRF 校验失败。
实际上,很多的反向代理(如 Varnish)都拒绝缓存包含 CSRF 保护表单的页面。这是因为 cookie 被发出从而为了阻止 PHP 会话打开并且 Varnish 的默认行为是不用 cookie 缓存 HTTP 请求。
如何在应用 CSRF 保护的情况下缓存大多数页面
为了缓存包含 CSRF 令牌的页面,你可以使用像 ESI fragments 一样的更先进的缓存技术,这样你可以缓存整个页面并且将表单嵌入到 ESI tag 并且根本不用缓存。
另外的一个选择就是通过未缓存的 AJAX 请求加载表单,但是缓存其余的 HTML 响应。
或者你甚至可以通过未缓存的 AJAX 请求加载 CSRF 令牌并且用它替换表单中失效的值。
4
Composer
Composer 是一个现代的应用程序所使用的封包管理器。使用 Composer 来管理你的 Symfony 应用程序的相关性并且在你的 PHP 工程中安装 Components。
推荐在你的操作系统中像下面介绍的那样全局安装 Composer。
在 Linux 和 Mac OS X 上安装 Composer
在 Linux 和 Mac OS X 上安装 Composer,执行下列两条命令:
$ curl -sS https://getcomposer.org/installer | php
$ sudo mv composer.phar /usr/local/bin/composer
如果你没有安装 curl,你也可以在 https://getcomposer.org/installer 手动下载安装文件然后运行:
$ php installer
$ sudo mv composer.phar /usr/local/bin/composer
在 Windows 中安装 Composer
从 getcomposer.org/download 下载安装文件,按照提示安装。
学习更多
阅读 [Composer 文档href="https://getcomposer.org/doc/00-intro.md")来学习更多关于它的使用以及特点的知识。
5
配置
每一个应用程序都是代码和一系列规定了代码如何执行相应功能的设置的集合。设置可能定义了使用的数据库或者有些东西是否应该被缓存又或者冗长的日志应该如何处理。在 Symfony 中,“环境”的思想就是可以使用很多不同的设置运行相同的代码库。举例来说,dev 环境应当使用从而使得开发简单并且有好的设置,然而 prod 环境就应当使用优化速度的设置。
不同的环境,不同的配置文件
一个典型的 Symfony 应用程序都是从以下三种环境开始的:dev,prod 以及 test。就像上面提到的,每一个环境就是简单的代表着用不同的配置执行相同的代码库的方式。那么也不用奇怪每一个环境都要加载自己独立的配置文件了。如果你使用的是 YAML 配置格式,将会用到下列文件:
- 在 dev 环境下:app/config/config_dev.yml
- 在 prod 环境下:app/config/config_prod.yml
- 在 test 环境下:app/config/config_test.yml
这个工作通过 AppKernel 类中默认使用的一个简单的标准起作用:
// app/AppKernel.php
// ...
class AppKernel extends Kernel
{
// ...
public function registerContainerConfiguration(LoaderInterface $loader)
{
$loader->load($this->getRootDir().'/config/config_'.$this->getEnvironment().'.yml');
}
}
正如你所见的那样,当 Symfony 被加载时,它就会使用给定的环境来决定加载哪一个配置文件。它通过一种简洁,有效并且通俗易懂的方式达到了目标。
当然,在现实情况下,每一个环境都会和其它的有一些不同。一般来讲,所有的环境都会共享很多共同的配置。打开 config_dev.yml 配置文件,你可以看到这是如何轻而易举地完成的:
YAML:
imports
:
- { resource
:
config.yml
}
# ...
XML:
<imports
>
<import
resource
=
"config.xml"
/>
</imports
>
<!-- ... -->
PHP:
$loader
->
import
(
'config.php'
)
;
// ...
为了共享相同的配置每一个环境的配置文件首先会从核心配置文件(config.yml)输入。文件的 remainder 可以通过重写个别的参数的方式分离默认配置。举例来说,默认情况下,web_profiler 工具栏是不可用的。然而,在 dev 环境下,这个工具栏通过修正 config_dev.yml 配置文件的 toolbar 选项的值来激活:
YAML:
# app/config/config_dev.yml
imports
:
- { resource
:
config.yml
}
web_profiler
:
toolbar
:
true
# ...
XML:
<!-- app/config/config_dev.xml -->
<imports
>
<import
resource
=
"config.xml"
/>
</imports
>
<webprofiler:config
toolbar
=
"true"
/>
PHP:
// app/config/config_dev.php
$loader
->
import
(
'config.php'
)
;
$container
->
loadFromExtension
(
'web_profiler'
,
array
(
'toolbar'
=>
true
,
// ...
)
)
;
在不同的环境下执行应用程序
在每一种环境下执行应用程序,使用前端控制器的 app.php(对于 prod 环境) 或者 app_dev.php(对于 dev 环境) 来加载应用程序:
http://localhost/app.php -> *prod* environment
http://localhost/app_dev.php -> *dev* environment
上面给定的链接地址是假设你的网页服务器设置使用应用程序的 web/ 目录作为其根目录。获取更多信息详见安装 Symfony。
如果你打开了这些目录中的一些文件,你将会看到每个使用过的环境被分别设置:
// web/app.php
// ...
$kernel = new AppKernel('prod', false);
// ...
prod 主键表明这个应用程序需要在 prod 环境下运行。Symfony 的应用程序可以通过这个代码在任何环境下运行并且可以改变环境字符串。
test 环境是用来编写功能性测试的并且不能直接通过前端的浏览器直接访问。换句话说,不像其它的环境那样,这里的前端控制器没有 app_test.php 文件。
调试模式
重要的,但是和环境的问题并不相关的是 false 的争论作为 AppKernel constructor 的第二个争论。这个争论指出应用程序是否应当在“调试模式”下运行。不管环境,Symfony 应用程序可以通过调试模式设置成 true 或者 false 的情况下运行。这会影响到程序的很多东西,比如错误是否应该被展示,或者缓存文件需要在每一个请求上动态重新建立。尽管不是要求,调试模式通常只在 dev 和 test 环境下被设置成 true,在 prod 环境下被设置成 false。
内在的,调试模式的值变成了 service container 中使用过的 kernel.debug 参数。如果你看应用程序内部的配置文件,你就会看到过使用过的参数,举例来说,使用 Doctrine DBAL 打开或者关闭日志:
YAML
doctrine:
dbal:
logging: "%kernel.debug%"
# ...
XML
<doctrine:dbal logging="%kernel.debug%" />
PHP
$container->loadFromExtension('doctrine', array(
'dbal' => array(
'logging' => '%kernel.debug%',
// ...
),
// ...
));
Symfony 2.3 之中,是否展示错误不再依赖于调试模式。你需要在前端控制器中调用 enable()。
为控制台命令选择环境
默认情况下,Symfony 的命令在 dev 环境下执行并且在调试模式下可用。使用 --env 和 --no-debug 选项可以修正这一行为:
# 'dev' environment and debug enabled
$ php app/console command_name
# 'prod' environment (debug is always disabled for 'prod')
$ php app/console command_name --env=prod
# 'test' environment and debug disabled
$ php app/console command_name --env=test --no-debug
除了 --env 和 --no-debug 选项之外,Symfony 命令的行为也可以通过环境变量控制。Symfony 控制应用程序在执行任何命令之前都会检查环境变量的存在以及值:
SYMFONY_ENV 将命令的执行环境设置成这个变量的值(dev, prod, test,等等);
SYMFONY_DEBUG 如果是 0,调试模式就是不可用。否则,调试模式就是可用。
这些环境变量对于服务器的产品有很大用处因为他们能保证在不添加任何命令选项的情况下命令一直运行在 prod 环境下。
创建新的环境
在默认情况下,Symfony 应用程序拥有三个处理大多数情况的环境。当然,自从环境只不过是一个配置的字符串时,创建一个新的环境就变得很容易。
举例来说,假设在开发之前,你需要用基准问题测试你的应用程序。一种方法是用基准问题测试应用程序使用接近的产品设置,但是要启用 Symfony 的 web_profiler。这就会允许 Symfony 记录关于你的应用程序在用基准问题测试时的信息。
通过调用新的环境是完成这件事的最好的方法,举例来说,benchmark。以创建一个新的配置文件开始:
YAML:
# app/config/config_benchmark.yml
imports
:
- { resource
:
config_prod.yml
}
framework
:
profiler
:
{
only_exceptions
:
false
}
XML:
<!-- app/config/config_benchmark.xml -->
<imports
>
<import
resource
=
"config_prod.xml"
/>
</imports
>
<framework:config
>
<framework:profiler
only-exceptions
=
"false"
/>
</framework:config
>
PHP:
// app/config/config_benchmark.php
$loader
->
import
(
'config_prod.php'
)
$container
->
loadFromExtension
(
'framework'
,
array
(
'profiler'
=>
array
(
'only-exceptions'
=>
false
)
,
)
)
;
由于参数被分解的方式,你不能使用它们来动态建立输入路径。这也就意味着类似于下列的东西不会工作:
# app/config/config.yml
imports
:
- { resource
:
"%kernel.root_dir%/parameters.yml"
}
<!-- app/config/config.xml -->
<?xml
version
=
"1.0"
encoding
=
"UTF-8"
?>
<container
xmlns
=
"http://symfony.com/schema/dic/services"
xmlns:xsi
=
"http://www.w3.org/2001/XMLSchema-instance"
xsi:schemaLocation
=
"http://symfony.com/schema/dic/services
http://symfony.com/schema/dic/services/services-1.0.xsd"
>
<imports
>
<import
resource
=
"%kernel.root_dir%/parameters.yml"
/>
</imports
>
</container
>
// app/config/config.php
$loader
->
import
(
'%kernel.root_dir%/parameters.yml'
)
;
这个简单的添加,应用程序现在支持了一个名叫 benchmark 的新环境。
这个新的配置文件从 prod 环境输入配置并且修正了它。这就保证了新的环境和 prod 环境是完全一致的,除了一些这里做出的一些明确的改变。
因为你将想要通过浏览器访问这个环境,你还需要为它创建一个前端控制器。复制 web/app.php 文件到 web/app_benchmark.php 并且编辑环境成为 benchmark:
// web/app_benchmark.php
// ...
// change just this line
$kernel = new AppKernel('benchmark', false);
// ...
这个新的环境现在可以通过下面的代码访问:
http://localhost/app_benchmark.php
一些环境,像 dev 环境,从来都不是为了任何公共部署的服务器的访问。这是因为确定的环境,为了调试的目的,可能给出了太多的关于应用程序或者基础的结构的信息。为了确保这些环境不能被访问,前端控制器通常通过控制器顶端的下列代码来保护它不受外部 IP 地址的伤害:
if (!in_array(@$_SERVER['REMOTE_ADDR'], array('127.0.0.1', '::1'))) {
die('You are not allowed to access this file. Check '.basename(__FILE__).' for more information.');
}
环境和缓存目录
Symfony 利用缓存的方法有很多种:应用程序配置,路由配置,Twig 模板以及很多都缓存到文件系统中储存的 PHP 对象文件中。
默认设置下,这些缓存文件大多储存在 app/cache 目录下。然而,每个环境缓存有它自己的文件集合:
<your-project>/
├─ app/
│ ├─ cache/
│ │ ├─ dev/ # cache directory for the *dev* environment
│ │ └─ prod/ # cache directory for the *prod* environment
│ ├─ ...
有时候,当在调试的时候,看懂缓存文件如何工作很有帮助。当这么做的时候,记住要看看正在使用的环境的目录(大多数的开发与调试都是在 dev 环境下)。然而也可能不是, app/cache/dev 目录下包含了以下文件:
appDevDebugProjectContainer.php
缓存的"service container"代表了缓存的应用程序配置。
appDevUrlGenerator.php
从路由配置中产生的 PHP 类并且在产生链接时使用。
appDevUrlMatcher.php
路由匹配使用的 PHP 类——看这里来了解编译的普通的匹配收到的链接的不同路由的逻辑。
twig/
这个目录包含了所有缓存的 Twig 模板。
你可以很方便的改变目录位置和名称。获取更多信息可以阅读名为如何重写 Symfony 的默认目录结构的文章。
更深入的学习
Symfony 自动与默认目录结构建立联系。你可以轻松地重写这个目录来建立你自己的。默认目录结构如下:
your-project/
├─ app/
│ ├─ cache/
│ ├─ config/
│ ├─ logs/
│ └─ ...
├─ src/
│ └─ ...
├─ vendor/
│ └─ ...
└─ web/
├─ app.php
└─ ...
重写缓存目录
你可以通过重写你的应用程序的 AppKernel 类中的 getCacheDir 方法来改变缓存的默认目录:
// app/AppKernel.php
// ...
class AppKernel extends Kernel
{
// ...
public function getCacheDir()
{
return $this->rootDir.'/'.$this->environment.'/cache';
}
}
$this->rootDir 是 app 目录的绝对路径 $this->environment,其是现在的运行环境(换言之就是 dev)。在这种情况下你可以将缓存目录改为 app/{environment}/cache。
你应当保持不同环境下的缓存目录不同,否则有些不好的行为可能发生。每一个环境都会产生缓存配置文件,所以每个环境都需要自己的目录来存储那些缓存文件。
重写日志目录
重写日志目录和重写缓存目录一样。唯一的不同就是你需要重写 getLogDir 方法:
// app/AppKernel.php
// ...
class AppKernel extends Kernel
{
// ...
public function getLogDir()
{
return $this->rootDir.'/'.$this->environment.'/logs';
}
}
这里你将目录改成了 app/{environment}/logs。
重写网页目录
如果你需要重命名或者移动你的网页目录,你需要做的唯一的事情就是保证在你的 app.php 和 app_dev.php 前端控制器中通向 app 目录的路径可访问。如果你简单的重命名这些目录,就不会有问题。但是如果你将它以某种方式移动了,那么你需要在这些文件中修正这些路径:
require_once __DIR__.'/../Symfony/app/bootstrap.php.cache';
require_once __DIR__.'/../Symfony/app/AppKernel.php';
你也需要在 composer.json 文件中改变 extra.symfony-web-dir 选项:
{
...
"extra": {
...
"symfony-web-dir": "my_new_web_dir"
}
}
一些共享的主机具有 public_html 网页目录的根。保持你的网页由 web 到 public_html 是一个使得你的 Symfony 工程在你的共享主机上工作的方法。另外一个把你的应用程序从你的网页根中分离的方法是,删除你的 public_html 目录,然后在你的工程中的链接到网页的 symbolic 链接替换它。
如果你使用 AsseticBundle,你需要设置 read_from 选项指向正确的网页目录:
```
# ... assetic: # ... read_from: "%kernel.root_dir%/../../public_html" ```
<assetic:config read-from="%kernel.root_dir%/../../public_html" />
// app/config/config.php
// ...
$container->loadFromExtension('assetic', array(
// ...
'read_from' => '%kernel.root_dir%/../../public_html',
));
现在你只需要清空缓存然后再一次转储资产然后你的应用程序就应该工作了:
$ php app/console cache:clear --env=prod
$ php app/console assetic:dump --env=prod --no-debug
重写供应商目录
为了重写供应商目录,你需要在 app/autoload.php 和 composer.json 文件中进行更改。
在 composer.json 文件中进行更改如下所示:
{
...
"config": {
"bin-dir": "bin",
"vendor-dir": "/some/dir/vendor"
},
...
}
在 app/autoload.php 中,你需要修正 vendor/autoload.php 文件的路径:
// app/autoload.php
// ...
$loader = require '/some/dir/vendor/autoload.php';
如果你在虚拟环境下这个修正可能会很有意思并且不能使用 NFS。举例来说,如果你在客户操作系统中使用虚拟机运行 Symfony 应用程序。
你已经在 Symfony 服务容器中看到如何使用配置参数了。举例来说,存在特殊的情形比如当你想使用 %kernel.debug% 参数使得你的 bundle 中的服务进入调试模式。对于这种情况来说为了使系统理解参数的值你需要做很多工作。默认情况下你的 %kernel.debug% 参数将会被认为是简单的字符串。看看下面这个例子:
// inside Configuration class
$rootNode
->children()
->booleanNode('logging')->defaultValue('%kernel.debug%')->end()
// ...
->end()
;
// inside the Extension class
$config = $this->processConfiguration($configuration, $configs);
var_dump($config['logging']);
现在检查结果进一步看看:
YAML:
my_bundle
:
logging
:
true
# true, as expected
my_bundle
:
logging
:
"%kernel.debug%"
# true/false (depends on 2nd parameter of AppKernel),
# as expected, because %kernel.debug% inside configuration
# gets evaluated before being passed to the extension
my_bundle
:
~
# passes the string "%kernel.debug%".
# Which is always considered as true.
# The Configurator does not know anything about
# "%kernel.debug%" being a parameter.
XML:
<?xml
version
=
"1.0"
encoding
=
"UTF-8"
?>
<container
xmlns
=
"http://symfony.com/schema/dic/services"
xmlns:my-bundle
=
"http://example.org/schema/dic/my_bundle"
>
<my-bundle:config
logging
=
"true"
/>
<!-- true, as expected -->
<my-bundle:config
logging
=
"%kernel.debug%"
/>
<!-- true/false (depends on 2nd parameter of AppKernel),
as expected, because %kernel.debug% inside configuration
gets evaluated before being passed to the extension -->
<my-bundle:config
/>
<!-- passes the string "%kernel.debug%".
Which is always considered as true.
The Configurator does not know anything about
"%kernel.debug%" being a parameter. -->
</container
>
PHP:
$container
->
loadFromExtension
(
'my_bundle'
,
array
(
'logging'
=>
true
,
// true, as expected
)
)
;
$container
->
loadFromExtension
(
'my_bundle'
,
array
(
'logging'
=>
"%kernel.debug%"
,
// true/false (depends on 2nd parameter of AppKernel),
// as expected, because %kernel.debug% inside configuration
// gets evaluated before being passed to the extension
)
)
;
$container
->
loadFromExtension
(
'my_bundle'
)
;
// passes the string "%kernel.debug%".
// Which is always considered as true.
// The Configurator does not know anything about
// "%kernel.debug%" being a parameter.
为了支持这个用例,Configuration 类必须通过以下的扩展注入参数:
namespace AppBundle\DependencyInjection;
use Symfony\Component\Config\Definition\Builder\TreeBuilder;
use Symfony\Component\Config\Definition\ConfigurationInterface;
class Configuration implements ConfigurationInterface
{
private $debug;
public function __construct($debug)
{
$this->debug = (bool) $debug;
}
public function getConfigTreeBuilder()
{
$treeBuilder = new TreeBuilder();
$rootNode = $treeBuilder->root('my_bundle');
$rootNode
->children()
// ...
->booleanNode('logging')->defaultValue($this->debug)->end()
// ...
->end()
;
return $treeBuilder;
}
}
并且通过 Extension 类在 Configuration 的构造器中设置:
namespace AppBundle\DependencyInjection;
use Symfony\Component\DependencyInjection\ContainerBuilder;
use Symfony\Component\HttpKernel\DependencyInjection\Extension;
class AppExtension extends Extension
{
// ...
public function getConfiguration(array $config, ContainerBuilder $container)
{
return new Configuration($container->getParameter('kernel.debug'));
}
}
在 Extension 中设置默认
在 TwigBundle 和 AsseticBundle 中的 Configurator 类中有一些 %kernel.debug% 的应用实例。然而这是因为默认的参数值是由 Extension 类设置的。例如在 AsseticBundle 中,你可以找到:
$container->setParameter('assetic.debug', $config['debug']);
%kernel.debug% 字符串作为争论处理的解释者通过向进行评估的容器进行解释。这两种方法达到同一个目标。AsseticBundle 不会使用 %kernel.debug% ,相反的会使用新的 %assetic.debug% 参数。
在如何掌握并创建新的环境这一节中我们解释了 Symfony 如何在不同的配置之下使用环境来运行的应用程序的基本思想。这一节我们将会更加深入地介绍当你的应用程序自我启动时会发生什么。为了理解这一过程,你必须理解一起运行的三个部分:
通常情况下,你不需要定义你自己的前端控制器或者 AppKernel 类由于 Symfony 的标准版本提供了默认的安装设置。
这一节的文档就是来解释表象之后发生的事情的。
前端控制器
前端控制器是人们所熟知的设计样式;它是由一些应用程序运行的代码的所有请求形成的代码组成的。
在 Symfony 的标准版本中,这个角色被 web/ 目录下的 app.php 和 app_dev.php 文件所取代。这些是当一个请求被处理时最先执行的 PHP 脚本。
前端控制器的主要目的就是创建一个 AppKernel 的实例(稍后再作更多的介绍),使得它可以处理请求并且向浏览器返回处理结果。
由于每一个请求都是经过它按路径发送的,前端控制器可以被用来全局的优先初始化来建立 kernel 或者使用附加特征装饰 kernel。例子包括:
- 设置自动加载或者添加自动加载机制;
- 通过使用 AppCache 的实例封装添加 HTTP 层的缓存;
- 启用(或者跳过)ClassCache;
- 启用 Debug Component。
前端控制器可能被请求链接地址选择,就像下面所示:
http://localhost/app_dev.php/some/path/...
正如你所见,这个链接包含了用来作为前端控制器的 PHP 脚本。你可以用它轻松地切换前端控制器或者使用一个放置在 web/ 目录中的定制的控制器(例如 app_cache.php)。
当使用 Apache 以及由 Symfony 的标准版本所定义的 RewriteRule 时,你可以忽略链接中的文件名并且 RewriteRule 会将 app.php 作为默认的。
基本上每一个其它的网页服务器都应该可以表现出一种和上面描述的 RewriteRule 相似的行为。阅读你的服务器文档查看更多细节或者可以看配置网页服务器。
确保你的前端控制器不被未授权访问。举例来说,你不想对于任意你的生产环境的用户都开放调试模式。
从技术层面来讲,在命令行运行 Symfony 时使用的 app/console 脚本也是前端控制器,只是不是为网页应用,而是命令行请求。
Kernel 类
Kernel 类是 Symfony 的核心。它负责建立组成你的应用程序的所有 bundle,并且向它们提供应用程序的设置。然后它用它的 handle() 方法在服务请求之前创建服务容器。
KernelInterface 中声明了在 Kernel 没有应用的两种方法并且因此将它们作为模板方法提供。
registerBundles()
它必须返回一批运行应用程序所需要的所有 bundle。
registerContainerConfiguration()
它负责加载应用程序配置。
为了填补这些(小的)空白,你的应用程序需要把 Kernel 划为子类并且实现这些方法。按照惯例结果类叫做 AppKernel。
除此之外,Symfony 标准版本在 app/ 目录下提供了 AppKernel。这个类是使用了环境的名称——环境的名称是传给 Kernel 的 constructor 方法以及可以使用 getEnvironment() 方法获得的——来决定创建哪个 bundle。这个的逻辑是在 registerBundles() 中,当你向你的应用程序中添加 bundle 时意味着你在扩展方法。
当然,你也可以自己创建,有选择性的或者附加的 AppKernel 不同版本。你所需要的就是适应(或者添加新的)前端控制器并且会使用新的 Kernel。
AppKernel 的名称和位置不能修复。当将多个 Kernel 放入一个简单的应用程序中时,这也许会使得添加附加的子目录变得有意义,举例来说 app/admin/AdminKernel.php 和 app/api/ApiKernel.php。所有这些重要的就是你的前端控制器可以创建适当的 kernel 实例。
拥有不同的 AppKernels 可能会对于启用不同的前端控制器(可能在不同的服务器上)来独立运行你的应用程序的部分很有用(举例来说,admin UI, front-end UI 和数据库迁移)。
AppKernel 还可以干很多事,例如重写默认目录结构。但是你实施几个 AppKernel 不需要像这样忙忙碌碌改变的几率是很高的。
环境
就像刚才提到的,AppKernel 必须要调用其它方法——registerContainerConfiguration()。这个方法是从正确的环境中加载应用程序的设置的。
环境已经在前面的章节中详细介绍过了,你可能也记得 Standard 标准版本有三种环境——dev, prod 和 test。
更技术的讲,这些名称只不过是从前端控制器传递到 AppKernel 的构造器的字符串。这个名称之后可以应用在 registerContainerConfiguration() 方法中来决定加载哪个文件。
Symfony 标准版本中的 AppKernel 类只是简单地通过加载 app/config/config_environment.yml 文件来实施这个方法。当然,你如果需要更加精确的加载你的应用程序的方法的话也可以区别地使用这个方法。
在如何掌握并创建新的环境一章中,你学会了如何管理你的应用程序的配置。有些时候,在你的工程代码之外储存证书会对你的应用程序有好处。数据库配置就是这样一个例子。Symfony 的服务容器的灵活性使得你很容易这么做。
环境变量
Symfony 将会抓取以 SYMFONY__ 作为前缀的变量并且将其设置成为服务容器中的参数。结果的参数名称都应用了一些转换:
- SYMFONY__ 前缀被移除;
- 参数名称小写;
- 双下划线被替换成句号,由于句号在环境变量名称中不是有效的字符。
举例来说,如果你使用 Apache,环境变量可以使用下面的 VirtualHost 配置进行设置:
<VirtualHost *:80>
ServerName Symfony
DocumentRoot "/path/to/symfony_2_app/web"
DirectoryIndex index.php index.html
SetEnv SYMFONY__DATABASE__USER user
SetEnv SYMFONY__DATABASE__PASSWORD secret
<Directory "/path/to/symfony_2_app/web">
AllowOverride All
Allow from All
</Directory>
</VirtualHost>
上述的例子是 Apache 中的设置,使用的是 SetEnv 指令。然而,这个将会为支持环境变量设置的任何网页服务器工作。
同时,为了使你的控制台工作(那个不使用 Apache 的),你必须将这些作为 shell 变量输出。在 Unix 系统下,你可以运行如下代码:
$ export SYMFONY__DATABASE__USER=user
$ export SYMFONY__DATABASE__PASSWORD=secret
既然你已经声明了环境变量,它将会在 PHP $_SERVER 全局变量中出现。之后 Symfony 将会自动将以 SYMFONY__ 为前缀的所有 $_SERVER 变量设置成服务容器中的参数。
现在你可以在你需要的时候随时使用这些参数。
YAML:
doctrine
:
dbal
:
driver pdo_mysql
dbname
:
symfony_project
user
:
"%database.user%"
password
:
"%database.password%"
XML:
<!-- xmlns:doctrine="http://symfony.com/schema/dic/doctrine" -->
<!-- xsi:schemaLocation="http://symfony.com/schema/dic/doctrine http://symfony.com/schema/dic/doctrine/doctrine-1.0.xsd"> -->
<doctrine:config
>
<doctrine:dbal
driver
=
"pdo_mysql"
dbname
=
"symfony_project"
user
=
"%database.user%"
password
=
"%database.password%"
/>
</doctrine:config
>
PHP:
$container
->
loadFromExtension
(
'doctrine'
,
array
(
'dbal'
=>
array
(
'driver'
=>
'pdo_mysql'
,
'dbname'
=>
'symfony_project'
,
'user'
=>
'%database.user%'
,
'password'
=>
'%database.password%'
,
)
)
)
;
常量
容器也支持设置 PHP 常量作为参数。更多细节详见常量作为参数。
其它参数的设置
imports 指令可以用来将存储在各处的参数拉出来。输入 PHP 文件使得你在添加容器所需要的东西时更加的灵活。下面的例子就是输入一个名为 parameters.php 的文件。
YAML:
# app/config/config.yml
imports
:
- { resource
:
parameters.php
}
XML:
<!-- app/config/config.xml -->
<imports
>
<import
resource
=
"parameters.php"
/>
</imports
>
PHP:
// app/config/config.php
$loader
->
import
(
'parameters.php'
)
;
资源文件可以有很多类型。PHP, XML, YAML, INI,同时闭包资源都支持 imports 指令。
在 parameters.php 之中,告诉了服务容器你想要设置的参数。当重要的配置文件没有标准的格式时很有用。下面的例子包含了 Symfony 服务容器中的 Drupal 数据库配置。
// app/config/parameters.php
include_once('/path/to/drupal/sites/default/settings.php');
$container->setParameter('drupal.database.url', $db_url);
(configuration)如何在数据库中使用 PdoSessionHandler 存储 Sessions
在 Symfony 2.6 中有一个后向兼容:数据库模式稍作改变。更多细节请见 Symfony 2.6 的改变。
默认的 Symfony 的 session 存储将 session 信息写进文件。大多数的中到大型的网页使用一个数据库储存 session 的值而不是文件,因为数据库很好用并且适应多线程网页服务器环境。
Symfony 有一个内建的数据库 session 的存储解决方案名为 PdoSessionHandler。使用这个,你只需要在主配置文件中改变一些参数:
YAML:
# app/config/config.yml
framework
:
session
:
# ...
handler_id
:
session.handler.pdo
services
:
session.handler.pdo
:
class
:
Symfony\Component\HttpFoundation\Session\Storage\Handler\PdoSessionHandler
public
:
false
arguments
:
-
"mysql:dbname=mydatabase"
- { db_username
:
myuser, db_password
:
mypassword
}
XML:
<!-- app/config/config.xml -->
<framework:config
>
<framework:session
handler-id
=
"session.handler.pdo"
cookie-lifetime
=
"3600"
auto-start
=
"true"
/>
</framework:config
>
<services
>
<service
id
=
"session.handler.pdo"
class
=
"Symfony\Component\HttpFoundation\Session\Storage\Handler\PdoSessionHandler"
public
=
"false"
>
<argument
>
mysql:dbname=mydatabase
</agruement
>
<argument
type
=
"collection"
>
<argument
key
=
"db_username"
>
myuser
</argument
>
<argument
key
=
"db_password"
>
mypassword
</argument
>
</argument
>
</service
>
</services
>
PHP:
// app/config/config.php
use
Symfony\Component\DependencyInjection\Definition
;
use
Symfony\Component\DependencyInjection\Reference
;
$container
->
loadFromExtension
(
'framework'
,
array
(
...,
'session'
=>
array
(
// ...,
'handler_id'
=>
'session.handler.pdo'
,
)
,
)
)
;
$storageDefinition
=
new
Definition
(
'Symfony\Component\HttpFoundation\Session\Storage\Handler\PdoSessionHandler'
,
array
(
'mysql:dbname=mydatabase'
,
array
(
'db_username'
=>
'myuser'
,
'db_password'
=>
'mypassword'
)
)
)
;
$container
->
setDefinition
(
'session.handler.pdo'
,
$storageDefinition
)
;
设置表和列名称
这将会产生一个有着很多不同列的 sessions 表。表的名称以及所有的列名称,可以通过向 PdoSessionHandler 传递一个第二数组参数的方式设置:
YAML:
# app/config/config.yml
services
:
# ...
session.handler.pdo
:
class
:
Symfony\Component\HttpFoundation\Session\Storage\Handler\PdoSessionHandler
public
:
false
arguments
:
-
"mysql:dbname=mydatabase"
- { db_table
:
sessions, db_username
:
myuser, db_password
:
mypassword
}
XML:
<!-- app/config/config.xml -->
<services
>
<service
id
=
"session.handler.pdo"
class
=
"Symfony\Component\HttpFoundation\Session\Storage\Handler\PdoSessionHandler"
public
=
"false"
>
<argument
>
mysql:dbname=mydatabase
</agruement
>
<argument
type
=
"collection"
>
<argument
key
=
"db_table"
>
sessions
</argument
>
<argument
key
=
"db_username"
>
myuser
</argument
>
<argument
key
=
"db_password"
>
mypassword
</argument
>
</argument
>
</service
>
</services
>
PHP:
// app/config/config.php
use
Symfony\Component\DependencyInjection\Definition
;
// ...
$storageDefinition
=
new
Definition
(
'Symfony\Component\HttpFoundation\Session\Storage\Handler\PdoSessionHandler'
,
array
(
'mysql:dbname=mydatabase'
,
array
(
'db_table'
=>
'sessions'
,
'db_username'
=>
'myuser'
,
'db_password'
=>
'mypassword'
)
)
)
;
$container
->
setDefinition
(
'session.handler.pdo'
,
$storageDefinition
)
;
db_lifetime_col 是在 Symfony 2.6 中被引进的。2.6 之前的版本并不存在。
下列这些参数你必须设置:
db_table (默认为 sessions):
你的数据库中的 session 表的名称;
db_id_col (默认为 sess_id):
你的 session 表的 id 列的名称(文本类型(128));
db_data_col (默认为 sess_data):
你的 session 表的 value 列的名称 (二进制大对象);
db_time_col (默认为 sess_time): 你的 session 表的 time 列的名称(整型);
db_lifetime_col (默认为 sess_lifetime): T你的 session 表的 lifetime 列的名称(整型).
共享你的数据库连接信息
根据给定的设置,数据库的连接只是为了 session 存储连接而设置的。当你为 session 数据使用分离的数据库时这个是可以的。
但是如果你想要将 session 数据像你的工程的其它的数据一样储存在同一个数据库中,你可以使用通过引用数据库的 parameters.yml 文件的连接设置——相关的参数在如下定义:
YAML:
services
:
session.handler.pdo
:
class
:
Symfony\Component\HttpFoundation\Session\Storage\Handler\PdoSessionHandler
public
:
false
arguments
:
-
"mysql:host=%database_host%;port=%database_port%;dbname=%database_name%"
- { db_username
:
%database_user%, db_password: %database_password% }
XML:
<service
id
=
"session.handler.pdo"
class
=
"Symfony\Component\HttpFoundation\Session\Storage\Handler\PdoSessionHandler"
public
=
"false"
>
<argument
>
mysql:host=%database_host%;port=%database_port%;dbname=%database_name%
</agruement
>
<argument
type
=
"collection"
>
<argument
key
=
"db_username"
>
%database_user%
</argument
>
<argument
key
=
"db_password"
>
%database_password%
</argument
>
</argument
>
</service
>
PHP:
$storageDefinition
=
new
Definition
(
'Symfony\Component\HttpFoundation\Session\Storage\Handler\PdoSessionHandler'
,
array
(
'mysql:host=%database_host%;port=%database_port%;dbname=%database_name%'
,
array
(
'db_username'
=>
'%database_user%'
,
'db_password'
=>
'%database_password%'
)
)
)
;
SQL 语句案例
当升级到 Symfony 2.6 时模式就需要改变了
如果你使用 PdoSessionHandler 是 Symfony 2.6 之前的版本然后进行了升级,你的 session 表需要做出一些改变:
- 需要添加新的 session lifetime (sess_lifetime 默认)整型列; - data 列(sess_data 默认)需要改成二进制大对象型。
更多细节详见下面的 SQL 语句。
为了保存以前(2.5 以及更早的)版本的功能,将你的类的名称由 PdoSessionHandler 改成 LegacyPdoSessionHandler(Symfony 2.6.2 中添加的旧的类)。
MySQL
创建新的数据库的表的 SQL 语句如下所示(MySQL):
CREATE TABLE `sessions` (
`sess_id` VARBINARY(128) NOT NULL PRIMARY KEY,
`sess_data` BLOB NOT NULL,
`sess_time` INTEGER UNSIGNED NOT NULL,
`sess_lifetime` MEDIUMINT NOT NULL
) COLLATE utf8_bin, ENGINE = InnoDB;
二进制大对象类型的栏目只能储存到 64 kb。如果存储的用户的 session 数据超过这个值,可能就会出现异常或者它们的 session 会被重置。如果你需要更多的存储空间可以考虑使用 MEDIUMBLOB。
PostgreSQL
对于 PostgreSQL,代码如下所示:
CREATE TABLE sessions (
sess_id VARCHAR(128) NOT NULL PRIMARY KEY,
sess_data BYTEA NOT NULL,
sess_time INTEGER NOT NULL,
sess_lifetime INTEGER NOT NULL
);
微软的 SQL Server
对于微软的 SQL Server,代码如下所示:
CREATE TABLE [dbo].[sessions](
[sess_id] [nvarchar](255) NOT NULL,
[sess_data] [ntext] NOT NULL,
[sess_time] [int] NOT NULL,
[sess_lifetime] [int] NOT NULL,
PRIMARY KEY CLUSTERED(
[sess_id] ASC
) WITH (
PAD_INDEX = OFF,
STATISTICS_NORECOMPUTE = OFF,
IGNORE_DUP_KEY = OFF,
ALLOW_ROW_LOCKS = ON,
ALLOW_PAGE_LOCKS = ON
) ON [PRIMARY]
) ON [PRIMARY] TEXTIMAGE_ON [PRIMARY]
使用 Apache Router 不再是一个明智之举。应用程序的路由选择的小小的增加不至于大费周章地升级路由配置。
Apache Router 将会在 Symfony 3 中移除,我们强烈建议不要在你的应用程序中应用它。
Symfony 也快速的提供了各种各样的方法来通过一些微小的调整增加速度。其中的一种方法就是让 Apache 直接处理路由,而不是由 Symfony 直接处理。
Apache Router 在 Symfony 2.5 中被弃用并且将在 Symfony 3.0 中移除。因为 Router 的 PHP 安装启用被提升时,而得到的效果不再那么明显(然而很难复制这种行为)。
改变 Router 配置参数
为了转储 Apache route 你必须调整一些配置参数来告诉 Symfony 使用默认的 ApacheUrlMatcher 作为替代:
YAML:
# app/config/config_prod.yml
parameters
:
router.options.matcher.cache_class
:
~
# disable router cache
router.options.matcher_class
:
Symfony\Component\Routing\Matcher\ApacheUrlMatcher
XML:
<!-- app/config/config_prod.xml -->
<parameters
>
<parameter
key
=
"router.options.matcher.cache_class"
>
null
</parameter
>
<!-- disable router cache -->
<parameter
key
=
"router.options.matcher_class"
>
Symfony\Component\Routing\Matcher\ApacheUrlMatcher
</parameter
>
</parameters
>
PHP:
// app/config/config_prod.php
$container
->
setParameter
(
'router.options.matcher.cache_class'
,
null
)
;
// disable router cache
$container
->
setParameter
(
'router.options.matcher_class'
,
'Symfony\Component\Routing\Matcher\ApacheUrlMatcher'
)
;
记得 ApacheUrlMatcher 扩展了 UrlMatcher 所以即使你不更新 mod_rewrite 规则,所有的也能正常工作(因为在 ApacheUrlMatcher::match() 末尾 parent::match() 的调用已经完成)。
生成 mod_rewrite 规则
为了检验已经生效,为 AppBundle 创建一个基本的路由:
YAML:
# app/config/routing.yml
hello
:
path
:
/hello/
{
name
}
defaults
:
{
_controller
:
AppBundle:Greet:hello
}
XML:
<!-- app/config/routing.xml -->
<route
id
=
"hello"
path
=
"/hello/{name}"
>
<default
key
=
"_controller"
>
AppBundle:Greet:hello
</default
>
</route
>
PHP:
// app/config/routing.php
$collection
->
add
(
'hello'
,
new
Route
(
'/hello/{name}'
,
array
(
'_controller'
=>
'AppBundle:Greet:hello'
,
)
)
)
;
现在生成 mod_rewrite 规则:
$ php app/console router:dump-apache -e=prod --no-debug
输出应该大致如下所示:
# skip "real" requests
RewriteCond %{REQUEST_FILENAME} -f
RewriteRule .* - [QSA,L]
# hello
RewriteCond %{REQUEST_URI} ^/hello/([^/]+?)$
RewriteRule .* app.php [QSA,L,E=_ROUTING__route:hello,E=_ROUTING_name:%1,E=_ROUTING__controller:AppBundle\:Greet\:hello]
现在你可以使用新规则重写 web/.htaccess,因此这个例子就会变成下面所示的样子:
<IfModule mod_rewrite.c>
RewriteEngine On
# skip "real" requests
RewriteCond %{REQUEST_FILENAME} -f
RewriteRule .* - [QSA,L]
# hello
RewriteCond %{REQUEST_URI} ^/hello/([^/]+?)$
RewriteRule .* app.php [QSA,L,E=_ROUTING__route:hello,E=_ROUTING_name:%1,E=_ROUTING__controller:AppBundle\:Greet\:hello]
</IfModule>
如果你想要充分利用这个设置,上述的过程应当在每次你添加或者改变路由的时候进行。
就这样!现在你可以准备好使用 Apache routes 了。
附加调整
为了保存一点处理的时间,将 web/app.php 中的 Request 的出现改变成 ApacheRequest:
// web/app.php
require_once __DIR__.'/../app/bootstrap.php.cache';
require_once __DIR__.'/../app/AppKernel.php';
// require_once __DIR__.'/../app/AppCache.php';
use Symfony\Component\HttpFoundation\ApacheRequest;
$kernel = new AppKernel('prod', false);
$kernel->loadClassCache();
// $kernel = new AppCache($kernel);
$kernel->handle(ApacheRequest::createFromGlobals())->send();
最好的开发你的 Symfony 应用程序的方法就是使用 PHP 的内部网页服务器。然而,当使用老版本的 PHP 时或者当在开发环境运行应用程序时,你就会需要一个全功能的网页服务器。这篇文章介绍了在 Symfony 中使用 Apache 或者 Nginx 的一些方法。
当使用 Apache 时。你可以将 PHP 设置成 Apache module 或者使用 PHP FPM FastCGI。FastCGI 也是用 Nginx 使用 PHP 的最好的方法。
网页目录
网页目录是你的所有应用程序的公共以及静态文件的根目录,包括图片,样式表和 JavaScript 文件。它也是前端控制器(app.php 和 app_dev.php)存在的地方。
当你配置你的网页目录时,网页目录作为文档的根。在下面的例子中,web/ 目录将会是文档的根。这个目录是 /var/www/project/web/。
如果你的虚拟主机请求你将 web/ 目录更改到另外的位置(例如 public_html/),确保你重写了 web/ 的位置。
使用 mod_php/PHP-CGI 的 Apache
使得你的应用程序在 Apache 下运行的最小配置是:
<VirtualHost *:80>
ServerName domain.tld
ServerAlias www.domain.tld
DocumentRoot /var/www/project/web
<Directory /var/www/project/web>
AllowOverride All
Order Allow,Deny
Allow from All
</Directory>
# uncomment the following lines if you install assets as symlinks
# or run into problems when compiling LESS/Sass/CoffeScript assets
# <Directory /var/www/project>
# Options FollowSymlinks
# </Directory>
ErrorLog /var/log/apache2/project_error.log
CustomLog /var/log/apache2/project_access.log combined
</VirtualHost>
如果你的系统支持 APACHE_LOG_DIR 变量,你就可能想要使用 ${APACHE_LOG_DIR}/ 来代替硬编码 /var/log/apache2/。
使用下面的可选配置来禁用 .htaccess 支持从而增加网页服务器的效率:
<VirtualHost *:80>
ServerName domain.tld
ServerAlias www.domain.tld
DocumentRoot /var/www/project/web
<Directory /var/www/project/web>
AllowOverride None
Order Allow,Deny
Allow from All
<IfModule mod_rewrite.c>
Options -MultiViews
RewriteEngine On
RewriteCond %{REQUEST_FILENAME} !-f
RewriteRule ^(.*)$ app.php [QSA,L]
</IfModule>
</Directory>
# uncomment the following lines if you install assets as symlinks
# or run into problems when compiling LESS/Sass/CoffeScript assets
# <Directory /var/www/project>
# Options FollowSymlinks
# </Directory>
ErrorLog /var/log/apache2/project_error.log
CustomLog /var/log/apache2/project_access.log combined
</VirtualHost>
如果你使用 php-cgi,Apache 将默认不会通过 HTTP 基本的 PHP 的用户名和密码。为了取消这个限制,你应当使用下面这一小段配置代码:
RewriteRule .* - [E=HTTP_AUTHORIZATION:%{HTTP:Authorization}]
在 Apache 2.4 下使用 mod_php/PHP-CGI
在 Apache 2.4 下,Order Allow,Deny 已经被 Require all granted 所取代。因此,你需要像下面这样修正你的目录权限设置:
<Directory /var/www/project/web>
Require all granted
# ...
</Directory>
获取更多的有关于 Apache 配置的选项,阅读官方的 Apache 文档。
Apache 的 PHP-FPM
为了使用 Apache 的 PHP5-FPM,首先你必须确定你有安装二进制的 php-fpm FastCGI 进程管理器以及 Apache 的 FastCGI 模块(例如,在基于 Debian 的系统中你已经安装 libapache2-mod-fastcgi 和 php5-fpm 包)。
PHP-FPM 使用一种叫做 pools 的东西处理输入的 FastCGI 请求。你可以在 FPM 中设置任意的 pools 的数量。在 pool 中你可以配置监听 TCP 套接字(IP 和 端口)或者 Unix 主机套接字。每一个 pool 也可以在不同的 UID 和 GID 下运行:
; a pool called www
[www]
user = www-data
group = www-data
; use a unix domain socket
listen = /var/run/php5-fpm.sock
; or listen on a TCP socket
listen = 127.0.0.1:9000
Apache 2.4 下使用 mod_proxy_fcgi
如果你使用的是 Apache 2.4,你可以轻松应用 mod_proxy_fcgi 来向 PHP-FPM 传递内部请求。配置 PHP-FPM 监听 TCP 套接字(mod_proxy 目前暂时不支持 Unix 套接字),在你的 Apache 配置中启用 mod_proxy 和 mod_proxy_fcgi 并且使用 SetHandler 直接将 PHP 文件的请求传递给 PHP FPM:
<VirtualHost *:80>
ServerName domain.tld
ServerAlias www.domain.tld
# Uncomment the following line to force Apache to pass the Authorization
# header to PHP: required for "basic_auth" under PHP-FPM and FastCGI
#
# SetEnvIfNoCase ^Authorization$ "(.+)" HTTP_AUTHORIZATION=$1
# For Apache 2.4.9 or higher
# Using SetHandler avoids issues with using ProxyPassMatch in combination
# with mod_rewrite or mod_autoindex
<FilesMatch \.php$>
SetHandler proxy:fcgi://127.0.0.1:9000
</FilesMatch>
# If you use Apache version below 2.4.9 you must consider update or use this instead
# ProxyPassMatch ^/(.*\.php(/.*)?)$ fcgi://127.0.0.1:9000/var/www/project/web/$1
# If you run your Symfony application on a subpath of your document root, the
# regular expression must be changed accordingly:
# ProxyPassMatch ^/path-to-app/(.*\.php(/.*)?)$ fcgi://127.0.0.1:9000/var/www/project/web/$1
DocumentRoot /var/www/project/web
<Directory /var/www/project/web>
# enable the .htaccess rewrites
AllowOverride All
Require all granted
</Directory>
# uncomment the following lines if you install assets as symlinks
# or run into problems when compiling LESS/Sass/CoffeScript assets
# <Directory /var/www/project>
# Options FollowSymlinks
# </Directory>
ErrorLog /var/log/apache2/project_error.log
CustomLog /var/log/apache2/project_access.log combined
</VirtualHost>
Apache 2.2 的 PHP-FPM
在 Apache 2.2 或者更低的版本中,你不能使用 mod_proxy_fcgi。你必须使用 FastCgiExternalServer 来代替这个。因此,你的 Apache 配置应当像下面所示:
<VirtualHost *:80>
ServerName domain.tld
ServerAlias www.domain.tld
AddHandler php5-fcgi .php
Action php5-fcgi /php5-fcgi
Alias /php5-fcgi /usr/lib/cgi-bin/php5-fcgi
FastCgiExternalServer /usr/lib/cgi-bin/php5-fcgi -host 127.0.0.1:9000 -pass-header Authorization
DocumentRoot /var/www/project/web
<Directory /var/www/project/web>
# enable the .htaccess rewrites
AllowOverride All
Order Allow,Deny
Allow from all
</Directory>
# uncomment the following lines if you install assets as symlinks
# or run into problems when compiling LESS/Sass/CoffeScript assets
# <Directory /var/www/project>
# Options FollowSymlinks
# </Directory>
ErrorLog /var/log/apache2/project_error.log
CustomLog /var/log/apache2/project_access.log combined
</VirtualHost>
如果你更喜欢使用 Unix 套接字,你必须使用 -socket 作为替代:
FastCgiExternalServer /usr/lib/cgi-bin/php5-fcgi -socket /var/run/php5-fpm.sock -pass-header Authorization
Nginx
使得你的应用程序可以在 Nginx 运行的最小配置如下所示:
server {
server_name domain.tld www.domain.tld;
root /var/www/project/web;
location / {
# try to serve file directly, fallback to app.php
try_files $uri /app.php$is_args$args;
}
# DEV
# This rule should only be placed on your development environment
# In production, don't include this and don't deploy app_dev.php or config.php
location ~ ^/(app_dev|config)\.php(/|$) {
fastcgi_pass unix:/var/run/php5-fpm.sock;
fastcgi_split_path_info ^(.+\.php)(/.*)$;
include fastcgi_params;
fastcgi_param SCRIPT_FILENAME $document_root$fastcgi_script_name;
fastcgi_param HTTPS off;
}
# PROD
location ~ ^/app\.php(/|$) {
fastcgi_pass unix:/var/run/php5-fpm.sock;
fastcgi_split_path_info ^(.+\.php)(/.*)$;
include fastcgi_params;
fastcgi_param SCRIPT_FILENAME $document_root$fastcgi_script_name;
fastcgi_param HTTPS off;
# Prevents URIs that include the front controller. This will 404:
# http://domain.tld/app.php/some-path
# Remove the internal directive to allow URIs like this
internal;
}
error_log /var/log/nginx/project_error.log;
access_log /var/log/nginx/project_access.log;
}
依赖于你的 PHP-FPM 配置,fastcgi_pass 也可以是 fastcgi_pass 127.0.0.1:9000。
这个只是在网页目录下执行 app.php, app_dev.php 和 config.php。所有其他的文件都会以文本形式存在。你必须确保如果你确实配置 app_dev.php 或者 config.php 使得这些文件安全且不能被任何外界使用者使用(每个文件顶部的 IP 地址检查码默认完成此项工作)。
如果在你的网页目录下你有其它的 PHP 文件需要被执行,确保它们包含在上述的 location 区域。
获取更多的 Nginx 配置选项,阅读官方的 Nginx 文档。
Symfony 的标准版本默认定义了三种运行环境名为 dev, prod 和 test。环境简单的代表了用不同的配置执行相同的基础代码的方式。
为了选择每个环境需要加载的配置文件,Symfony 执行 AppKernel 类的 registerContainerConfiguration() 方法:
// app/AppKernel.php
use Symfony\Component\HttpKernel\Kernel;
use Symfony\Component\Config\Loader\LoaderInterface;
class AppKernel extends Kernel
{
// ...
public function registerContainerConfiguration(LoaderInterface $loader)
{
$loader->load($this->getRootDir().'/config/config_'.$this->getEnvironment().'.yml');
}
}
这个方法为 dev 环境加载 app/config/config_dev.yml 文件等等。反过来,这个文件加载位于 app/config/config.yml 的普通配置文件。因此,Symfony 的标准版本中的配置文件的结构如下所示:
<your-project>/
├─ app/
│ └─ config/
│ ├─ config.yml
│ ├─ config_dev.yml
│ ├─ config_prod.yml
│ ├─ config_test.yml
│ ├─ parameters.yml
│ ├─ parameters.yml.dist
│ ├─ routing.yml
│ ├─ routing_dev.yml
│ └─ security.yml
├─ src/
├─ vendor/
└─ web/
默认的结构就是为了它的简便而选择的——每个环境一个文件。但是由于 Symfony 的其它的特征,你可以将其设置成更加适合你需要的。下面一节将会介绍组织你的配置文件的不同方法。为了简化这个例子,只考虑 dev 和 prod 环境。
每个环境下的不同的目录
代替在文件加 _dev 和 _prod 后缀,这个技术将所有相关的配置文件组织在和环境相同名称的目录之下:
<your-project>/
├─ app/
│ └─ config/
│ ├─ common/
│ │ ├─ config.yml
│ │ ├─ parameters.yml
│ │ ├─ routing.yml
│ │ └─ security.yml
│ ├─ dev/
│ │ ├─ config.yml
│ │ ├─ parameters.yml
│ │ ├─ routing.yml
│ │ └─ security.yml
│ └─ prod/
│ ├─ config.yml
│ ├─ parameters.yml
│ ├─ routing.yml
│ └─ security.yml
├─ src/
├─ vendor/
└─ web/
为了使这个起作用,改变 registerContainerConfiguration() 方法的代码:
// app/AppKernel.php
use Symfony\Component\HttpKernel\Kernel;
use Symfony\Component\Config\Loader\LoaderInterface;
class AppKernel extends Kernel
{
// ...
public function registerContainerConfiguration(LoaderInterface $loader)
{
$loader->load($this->getRootDir().'/config/'.$this->getEnvironment().'/config.yml');
}
}
然后确保每一个 config.yml 文件都加载剩下的配置文件,包括普通文件。举例来说,这将是 app/config/dev/config.yml 文件的输入需要:
YAML:
# app/config/dev/config.yml
imports
:
- { resource
:
'../common/config.yml'
}
- { resource
:
'parameters.yml'
}
- { resource
:
'security.yml'
}
# ...
XML:
<!-- app/config/dev/config.xml -->
<?xml
version
=
"1.0"
encoding
=
"UTF-8"
?>
<container
xmlns
=
"http://symfony.com/schema/dic/services"
xmlns:xsi
=
"http://www.w3.org/2001/XMLSchema-instance"
xsi:schemaLocation
=
"http://symfony.com/schema/dic/services
http://symfony.com/schema/dic/services/services-1.0.xsd
http://symfony.com/schema/dic/symfony
http://symfony.com/schema/dic/symfony/symfony-1.0.xsd"
>
<imports
>
<import
resource
=
"../common/config.xml"
/>
<import
resource
=
"parameters.xml"
/>
<import
resource
=
"security.xml"
/>
</imports
>
<!-- ... -->
</container
>
PHP:
// app/config/dev/config.php
$loader
->
import
(
'../common/config.php'
)
;
$loader
->
import
(
'parameters.php'
)
;
$loader
->
import
(
'security.php'
)
;
// ...
由于参数解析的方式,你不能使用它们来动态建立输入路径。这也就意味着下列所示的一些将不起作用:
# app/config/config.yml
imports
:
- { resource
:
"%kernel.root_dir%/parameters.yml"
}
<!-- app/config/config.xml -->
<?xml
version
=
"1.0"
encoding
=
"UTF-8"
?>
<container
xmlns
=
"http://symfony.com/schema/dic/services"
xmlns:xsi
=
"http://www.w3.org/2001/XMLSchema-instance"
xsi:schemaLocation
=
"http://symfony.com/schema/dic/services
http://symfony.com/schema/dic/services/services-1.0.xsd"
>
<imports
>
<import
resource
=
"%kernel.root_dir%/parameters.yml"
/>
</imports
>
</container
>
// app/config/config.php
$loader
->
import
(
'%kernel.root_dir%/parameters.yml'
)
;
语意性的配置文件
不同的组织策略可能需要应用程序有复杂的配置文件。举例来说,你可以每个 bundle 创建一个文件并且将几个文件定义为所有的应用程序服务:
<your-project>/
├─ app/
│ └─ config/
│ ├─ bundles/
│ │ ├─ bundle1.yml
│ │ ├─ bundle2.yml
│ │ ├─ ...
│ │ └─ bundleN.yml
│ ├─ environments/
│ │ ├─ common.yml
│ │ ├─ dev.yml
│ │ └─ prod.yml
│ ├─ routing/
│ │ ├─ common.yml
│ │ ├─ dev.yml
│ │ └─ prod.yml
│ └─ services/
│ ├─ frontend.yml
│ ├─ backend.yml
│ ├─ ...
│ └─ security.yml
├─ src/
├─ vendor/
└─ web/
除此之外,改变 registerContainerConfiguration() 方法的代码以确保 Symfony 知道新的文件组织方式:
// app/AppKernel.php
use Symfony\Component\HttpKernel\Kernel;
use Symfony\Component\Config\Loader\LoaderInterface;
class AppKernel extends Kernel
{
// ...
public function registerContainerConfiguration(LoaderInterface $loader)
{
$loader->load($this->getRootDir().'/config/environments/'.$this->getEnvironment().'.yml');
}
}
顺着以前章节所说的相同的技术,确保从每一个主文件(common.yml, dev.yml 和 prod.yml)输入恰当的配置文件。
高级技术
Symfony 使用 Config 组件来加载配置文件,这提供了一些高级的特征。
混合和匹配配置格式
配置文件可以输入使用内建配置格式(.yml, .xml, .php, .ini)定义的文件:
YAML:
# app/config/config.yml
imports
:
- { resource
:
'parameters.yml'
}
- { resource
:
'services.xml'
}
- { resource
:
'security.yml'
}
- { resource
:
'legacy.php'
}
# ...
XML:
<!-- app/config/config.xml -->
<?xml
version
=
"1.0"
encoding
=
"UTF-8"
?>
<container
xmlns
=
"http://symfony.com/schema/dic/services"
xmlns:xsi
=
"http://www.w3.org/2001/XMLSchema-instance"
xsi:schemaLocation
=
"http://symfony.com/schema/dic/services
http://symfony.com/schema/dic/services/services-1.0.xsd
http://symfony.com/schema/dic/symfony
http://symfony.com/schema/dic/symfony/symfony-1.0.xsd"
>
<imports
>
<import
resource
=
"parameters.yml"
/>
<import
resource
=
"services.xml"
/>
<import
resource
=
"security.yml"
/>
<import
resource
=
"legacy.php"
/>
</imports
>
<!-- ... -->
</container
>
PHP:
// app/config/config.php
$loader
->
import
(
'parameters.yml'
)
;
$loader
->
import
(
'services.xml'
)
;
$loader
->
import
(
'security.yml'
)
;
$loader
->
import
(
'legacy.php'
)
;
// ...
IniFileLoader 解释了使用 parse_ini_file 功能的文件内容。因此,你只能将参数设置成字符串的值。如果你想要使用其它的数据类型(例如布尔型,整型等等)那么请使用其它的加载器。
如果你使用其它的配置格式,你必须自己定义你的加载器类将它从 FileLoader 扩展。当配置的值是动态时,你可以使用 PHP 配置来执行你自己的逻辑。除此之外,你可以定义你自己的服务来从数据库或者网页服务器加载配置。
全局配置文件
一些系统管理员可能更喜欢将敏感的参数储存在工程目录之外的文件中。可以想象你网页的数据库正数储存在 /etc/sites/mysite.com/parameters.yml 文件中。当你从其它的配置文件中输入时,加载这个文件就好像指出整个文件路径一样简单:
YAML:
# app/config/config.yml
imports
:
- { resource
:
'parameters.yml'
}
- { resource
:
'/etc/sites/mysite.com/parameters.yml'
}
# ...
XML:
<!-- app/config/config.xml -->
<?xml
version
=
"1.0"
encoding
=
"UTF-8"
?>
<container
xmlns
=
"http://symfony.com/schema/dic/services"
xmlns:xsi
=
"http://www.w3.org/2001/XMLSchema-instance"
xsi:schemaLocation
=
"http://symfony.com/schema/dic/services
http://symfony.com/schema/dic/services/services-1.0.xsd
http://symfony.com/schema/dic/symfony
http://symfony.com/schema/dic/symfony/symfony-1.0.xsd"
>
<imports
>
<import
resource
=
"parameters.yml"
/>
<import
resource
=
"/etc/sites/mysite.com/parameters.yml"
/>
</imports
>
<!-- ... -->
</container
>
PHP:
// app/config/config.php
$loader
->
import
(
'parameters.yml'
)
;
$loader
->
import
(
'/etc/sites/mysite.com/parameters.yml'
)
;
// ...
大多数的时候,本地开发者不会在开发服务器上存储相同文件。由于这个原因,Config 组件提供了 ignore_errors 选项来在加载文件不存在时悄悄忽视错误:
YAML:
# app/config/config.yml
imports
:
- { resource
:
'parameters.yml'
}
- { resource
:
'/etc/sites/mysite.com/parameters.yml', ignore_errors
:
true
}
# ...
XML:
<!-- app/config/config.xml -->
<?xml
version
=
"1.0"
encoding
=
"UTF-8"
?>
<container
xmlns
=
"http://symfony.com/schema/dic/services"
xmlns:xsi
=
"http://www.w3.org/2001/XMLSchema-instance"
xsi:schemaLocation
=
"http://symfony.com/schema/dic/services
http://symfony.com/schema/dic/services/services-1.0.xsd
http://symfony.com/schema/dic/symfony
http://symfony.com/schema/dic/symfony/symfony-1.0.xsd"
>
<imports
>
<import
resource
=
"parameters.yml"
/>
<import
resource
=
"/etc/sites/mysite.com/parameters.yml"
ignore-errors
=
"true"
/>
</imports
>
<!-- ... -->
</container
>
PHP:
<!-- app/config/config.xml -->
<?
xml version
=
"1.0"
encoding
=
"UTF-8"
?>
<container xmlns="http://symfony.com/schema/dic/services"
xmlns:xsi="http://www.w3.org/2001/XMLSchema-instance"
xsi:schemaLocation="http://symfony.com/schema/dic/services
http://symfony.com/schema/dic/services/services-1.0.xsd
http://symfony.com/schema/dic/symfony
http://symfony.com/schema/dic/symfony/symfony-1.0.xsd">
<imports>
<import resource="parameters.yml" />
<import resource="/etc/sites/mysite.com/parameters.yml" ignore-errors="true" />
</imports>
<!-- ... -->
</container>
正如你所看到的那样,有很多组织你的配置文件的方法。你可以选择其中一种或者你甚至也可以创建你自己风格的组织文件的方式。不要被由 Symfony 产生的 Symfony 标准版本所限制。更多的个性化信息,参见“如何重写 Symfony 的默认目录结构”。
6
控制台
组件一节(The Console Component)的控制台页介绍了如何创建控制台命令。这个指导文章介绍了在 Symfony 框架下创建控制台命令的不同之处。
自动注册命令
为了使得控制台命令在 Symfony 下自动可用,在你的 bundle 中创建一个 Command 目录并且以 Command.php 为后缀创建你想要的命令。举例来说,如果你想要扩展 AppBundle 来在命令行运行,那么创建 GreetCommand.php 并且将下列代码添加进去:
// src/AppBundle/Command/GreetCommand.php
namespace AppBundle\Command;
use Symfony\Bundle\FrameworkBundle\Command\ContainerAwareCommand;
use Symfony\Component\Console\Input\InputArgument;
use Symfony\Component\Console\Input\InputInterface;
use Symfony\Component\Console\Input\InputOption;
use Symfony\Component\Console\Output\OutputInterface;
class GreetCommand extends ContainerAwareCommand
{
protected function configure()
{
$this
->setName('demo:greet')
->setDescription('Greet someone')
->addArgument(
'name',
InputArgument::OPTIONAL,
'Who do you want to greet?'
)
->addOption(
'yell',
null,
InputOption::VALUE_NONE,
'If set, the task will yell in uppercase letters'
)
;
}
protected function execute(InputInterface $input, OutputInterface $output)
{
$name = $input->getArgument('name');
if ($name) {
$text = 'Hello '.$name;
} else {
$text = 'Hello';
}
if ($input->getOption('yell')) {
$text = strtoupper($text);
}
$output->writeln($text);
}
}
现在这个命令将会自动运行:
$ php app/console demo:greet Fabien
在服务容器中注册命令
就像控制器一样,命令也可以被作为服务声明。详见专门的指导书条目。
从服务容器中获取服务
通过使用 ContainerAwareCommand 作为命令的基础类(而不是更基本的命令),你就可以访问服务容器。换句话说,你可以访问任何设置的服务:
protected function execute(InputInterface $input, OutputInterface $output)
{
$name = $input->getArgument('name');
$logger = $this->getContainer()->get('logger');
$logger->info('Executing command for '.$name);
// ...
}
然而,由于容器的范围这个代码并不能对一些服务起作用。举例来说,如果你想要获得 request 服务或者其它和它相关的服务,你会看到下列错误:
You cannot create a service ("request") of an inactive scope ("request").
假设下面的例子使用了 translator 服务通过控制台命令翻译一些内容:
protected function execute(InputInterface $input, OutputInterface $output)
{
$name = $input->getArgument('name');
$translator = $this->getContainer()->get('translator');
if ($name) {
$output->writeln(
$translator->trans('Hello %name%!', array('%name%' => $name))
);
} else {
$output->writeln($translator->trans('Hello!'));
}
}
如果你深入挖掘 Translator 组件类的话,你将看到 request 服务被要求获得局部进入内容被翻译的地方:
// vendor/symfony/symfony/src/Symfony/Bundle/FrameworkBundle/Translation/Translator.php
public function getLocale()
{
if (null === $this->locale && $this->container->isScopeActive('request')
&& $this->container->has('request')) {
$this->locale = $this->container->get('request')->getLocale();
}
return $this->locale;
}
因此,当使用命令中的 translator 服务时,你将会收到前述的 “You cannot create a service of an inactive scope” 的错误信息。这种情况的解决方法就像在翻译之前设置区域值一样容易:
protected function execute(InputInterface $input, OutputInterface $output)
{
$name = $input->getArgument('name');
$locale = $input->getArgument('locale');
$translator = $this->getContainer()->get('translator');
$translator->setLocale($locale);
if ($name) {
$output->writeln(
$translator->trans('Hello %name%!', array('%name%' => $name))
);
} else {
$output->writeln($translator->trans('Hello!'));
}
}
然而对于其它的服务的解决方法就可能有些复杂了。获取更多细节信息,详见如何使用范围。
调用其他命令
如果你需要启用一个需要运行其他命令的命令的话详见调用存在的命令。
测试命令
当测试满堆栈框架的部分命令时,Symfony\Bundle\FrameworkBundle\Console\Application 应当被使用而不是 Symfony\Component\Console\Application:
use Symfony\Component\Console\Tester\CommandTester;
use Symfony\Bundle\FrameworkBundle\Console\Application;
use AppBundle\Command\GreetCommand;
class ListCommandTest extends \PHPUnit_Framework_TestCase
{
public function testExecute()
{
// mock the Kernel or create one depending on your needs
$application = new Application($kernel);
$application->add(new GreetCommand());
$command = $application->find('demo:greet');
$commandTester = new CommandTester($command);
$commandTester->execute(
array(
'name' => 'Fabien',
'--yell' => true,
)
);
$this->assertRegExp('/.../', $commandTester->getDisplay());
// ...
}
}
在上述特定的情况下,name 参数和 --yell 选项对于命令执行不是强制的,但是进行展示这样你就可以理解在调用命令时如何自定义他们。
为了能够完全使用服务容器为你的控制台测试服务你可以从 KernelTestCase 扩展你的测试:
use Symfony\Component\Console\Tester\CommandTester;
use Symfony\Bundle\FrameworkBundle\Console\Application;
use Symfony\Bundle\FrameworkBundle\Test\KernelTestCase;
use AppBundle\Command\GreetCommand;
class ListCommandTest extends KernelTestCase
{
public function testExecute()
{
$kernel = $this->createKernel();
$kernel->boot();
$application = new Application($kernel);
$application->add(new GreetCommand());
$command = $application->find('demo:greet');
$commandTester = new CommandTester($command);
$commandTester->execute(
array(
'name' => 'Fabien',
'--yell' => true,
)
);
$this->assertRegExp('/.../', $commandTester->getDisplay());
// ...
}
}
组件文档的使用控制台命令,快捷键和内建命令页全局的看控制台选项。当你使用控制台作为全栈框架的一部分时,一些附加的全局选项也是可用的。
默认情况下,控制台命令在 dev 环境中运行,你可能要对某些命令改变这种情况。举例来说,你可能由于性能的原因想要在 prod 环境下运行一些命令。除此之外,一些命令的结果可能会由于环境的不同而不同。举例来说,cache:clear 命令将会在特定的环境下清空和加载缓存。为了清空和加载 prod 缓存,你需要运行下列代码:
$ php app/console cache:clear --env=prod
或者同样的代码:
$ php app/console cache:clear -e prod
除了改变环境,你也可以选择禁用调试模式。在 dev 环境中你想要运行命令避免收集调试数据的性能损失的话这个可能有用:
$ php app/console list --no-debug
有一个交互的 shell,这个 shell 每次允许你在没有区分 php app/console 的情况下输入命令,如果你需要应用几个命令这个将会很有用。输入下列代码进入 shell:
$ php app/console --shell
$ php app/console -s
现在你就可以使用命令名称运行命令:
Symfony > list
当你使用 shell 的时候你可以选择在分开的进程中运行每个命令:
$ php app/console --shell --process-isolation
$ php app/console -s --process-isolation
当你做这个的时候,输出结果将不会被修饰并且不支持交互因此你需要清晰地传递所有的命令参数。
除非你使用隔离的进程,否则在 shell 中清空缓存将不会在随后运行的命令中有效果,这是因为原始的缓存文件还在使用。
控制台组件文档讲解了如何创建控制台命令。本指导文章将会讲解如何直接从 Controller 调用一个控制台命令。
你可能有执行只有在控制台命令中可用的某些功能的需要。通常情况下,你应该重构命令然后向服务中移动一些能够在 controller 中应用的逻辑。然而,当命令是第三方函数库的一部分时,你就会不想修正或者复制它们的代码。作为替代你可以直接执行命令。
和直接从控制台的直接调用相比,由于请求堆栈总开销,所以从 controller 调用命令稍微有一些性能上的影响。
试想你想要将假脱机的 Swift Mailer 的信息通过使用 swiftmailer:spool:send 命令发送。通过下列代码从你的 controller 的内部运行这个命令:
// src/AppBundle/Controller/SpoolController.php
namespace AppBundle\Controller;
use Symfony\Bundle\FrameworkBundle\Console\Application;
use Symfony\Bundle\FrameworkBundle\Controller\Controller;
use Symfony\Component\Console\Input\ArrayInput;
use Symfony\Component\Console\Output\BufferedOutput;
use Symfony\Component\HttpFoundation\Response;
class SpoolController extends Controller
{
public function sendSpoolAction($messages = 10)
{
$kernel = $this->get('kernel');
$application = new Application($kernel);
$application->setAutoExit(false);
$input = new ArrayInput(array(
'command' => 'swiftmailer:spool:send',
'--message-limit' => $messages,
));
// You can use NullOutput() if you don't need the output
$output = new BufferedOutput();
$application->run($input, $output);
// return the output, don't use if you used NullOutput()
$content = $output->fetch();
// return new Response(""), if you used NullOutput()
return new Response($content);
}
}
显示彩色的命令输出
通过第二个参数告诉 BufferedOutput 这是可以装饰的,这将会返回 Ansi 颜色编码内容。 SensioLabs AnsiToHtml 转换器可以用于将这个转化成彩色的 HTML。
首先,请求包:
$ composer require sensiolabs/ansi-to-html
现在在你的 controller 中应用:
// src/AppBundle/Controller/SpoolController.php
namespace AppBundle\Controller;
use SensioLabs\AnsiConverter\AnsiToHtmlConverter;
use Symfony\Component\Console\Output\BufferedOutput;
use Symfony\Component\Console\Output\OutputInterface;
use Symfony\Component\HttpFoundation\Response;
// ...
class SpoolController extends Controller
{
public function sendSpoolAction($messages = 10)
{
// ...
$output = new BufferedOutput(
OutputInterface::VERBOSITY_NORMAL,
true // true for decorated
);
// ...
// return the output
$converter = new AnsiToHtmlConverter();
$content = $output->fetch();
return new Response($converter->convert($content));
}
}
AnsiToHtmlConverter 也可以注册成为 Twig 扩展,并且支持可选的主题。
不幸的是,命令行环境不知道你的虚拟主机或者域的名称。这就意味着如果你使用控制台命令生成了绝对的 URL 你将可能像 http://localhost/foo/bar 一样结束而并没有什么用。
为了解决这个问题,你需要配置“请求环境”,这是一种受欢迎的说明方式也就是你需要设置你的环境使得它知道当生成 URL 的时候该用哪一个。
这里有两种设置请求环境的方法:在应用程序层面上以及每一个命令层面。
全局地设置请求环境
为了设置被 URL 生成器所使用的请求环境,你可以将它所使用的参数定义成默认值来改变默认的 host (localhost)和策略(http)。你也可以设置基本路径如果 Symfony 不在根目录运行。
记住这个不是通过简单的网页请求影响 URL 生成器,由于那些会重写默认值。
YAML:
# app/config/parameters.yml
parameters
:
router.request_context.host
:
example.org
router.request_context.scheme
:
https
router.request_context.base_url
:
my/path
XML:
<!-- app/config/parameters.xml -->
<?xml
version
=
"1.0"
encoding
=
"UTF-8"
?>
<container
xmlns
=
"http://symfony.com/schema/dic/services"
xmlns:xsi
=
"http://www.w3.org/2001/XMLSchema-instance"
>
<parameters
>
<parameter
key
=
"router.request_context.host"
>
example.org
</parameter
>
<parameter
key
=
"router.request_context.scheme"
>
https
</parameter
>
<parameter
key
=
"router.request_context.base_url"
>
my/path
</parameter
>
</parameters
>
</container
>
PHP:
// app/config/config_test.php
$container
->
setParameter
(
'router.request_context.host'
,
'example.org'
)
;
$container
->
setParameter
(
'router.request_context.scheme'
,
'https'
)
;
$container
->
setParameter
(
'router.request_context.base_url'
,
'my/path'
)
;
为每个命令配置请求环境
只在一个命令中改变你可以简单地将请求环境从 router 服务中取出然后重写它的设置:
// src/AppBundle/Command/DemoCommand.php
// ...
class DemoCommand extends ContainerAwareCommand
{
protected function execute(InputInterface $input, OutputInterface $output)
{
$context = $this->getContainer()->get('router')->getContext();
$context->setHost('example.com');
$context->setScheme('https');
$context->setBaseUrl('my/path');
// ... your code here
}
}
使用内存假脱机
当使用 Symfony 2.3+ 和 SwiftmailerBundle 2.3.5+ 时,内存假脱机现在是在 CLI 中自动处理的,下列代码就不再需要了。
在控制台命令中发送邮件和如何发送邮件指导中描述的一样除了内存假脱机被占用。
当使用内存假脱机时(更多信息详见如何假脱机邮件指导),你必须知道由于 Symfony 处理控制台命令的方式,邮件将不会被自动发送。你必须自己处理队列。使用下列代码发送你的控制台命令中的邮件:
$message = new \Swift_Message();
// ... prepare the message
$container = $this->getContainer();
$mailer = $container->get('mailer');
$mailer->send($message);
// now manually flush the queue
$spool = $mailer->getTransport()->getSpool();
$transport = $container->get('swiftmailer.transport.real');
$spool->flushQueue($transport);
另外的一个选项是创建一个只用于控制台命令的环境并且使用一种不同的假脱机方法。
只有当内存假脱机被使用时才考虑假脱机。如果你使用文件假脱机(或者不完全假脱机),没必要手动在命令中清除队列。
控制台组件没有提供任何的立即可用的日志能力。正常来讲,你可以手动运行控制台命令观察输出结果,这就是为什么不提供日志的原因。然而,有些时候你就需要日志。举例来说,如果你是自动运行控制台命令,例如从工作或者开发脚本,很容易使用 Symfony 的日志能力而不是配置其它工具去收集控制台的输出并且编辑它。这个特别顺手如果你已经具有一些存在的聚合并且分析 Symfony 日志的设置。
这里有两种日志的情况你将会需要:
- 从你的命令中手动地记录一些信息;
- 记录未被发现的错误。
从控制台命令手动记录
这个真的很简单。当你像“如何创建控制台命令”中描述的那样在全堆栈框架下创建一个控制台命令时,你的命令扩展 ContainerAwareCommand。这也就意味着你可以很容易的通过容器访问标准日志服务并且使用它做记录:
// src/AppBundle/Command/GreetCommand.php
namespace AppBundle\Command;
use Symfony\Bundle\FrameworkBundle\Command\ContainerAwareCommand;
use Symfony\Component\Console\Input\InputArgument;
use Symfony\Component\Console\Input\InputInterface;
use Symfony\Component\Console\Input\InputOption;
use Symfony\Component\Console\Output\OutputInterface;
use Psr\Log\LoggerInterface;
class GreetCommand extends ContainerAwareCommand
{
// ...
protected function execute(InputInterface $input, OutputInterface $output)
{
/** @var $logger LoggerInterface */
$logger = $this->getContainer()->get('logger');
$name = $input->getArgument('name');
if ($name) {
$text = 'Hello '.$name;
} else {
$text = 'Hello';
}
if ($input->getOption('yell')) {
$text = strtoupper($text);
$logger->warning('Yelled: '.$text);
} else {
$logger->info('Greeted: '.$text);
}
$output->writeln($text);
}
}
依赖于你运行命令的(以及你的日志设置的)环境你会看到在 app/logs/dev.log 或者 app/logs/prod.log 中的日志条目。
启用自动错误记录
为了使得你的控制台自动记录你的所有命令的未捕获的错误,你可以使用 console events。
Console events 于 Symfony 2.3 中引入。
首先在服务容器中配置一个控制台异常事件的监听器:
YAML:
# app/config/services.yml
services
:
kernel.listener.command_dispatch
:
class
:
AppBundle\EventListener\ConsoleExceptionListener
arguments
:
logger
:
"@logger"
tags
:
- { name
:
kernel.event_listener, event
:
console.exception
}
XML:
<!-- app/config/services.xml -->
<?xml
version
=
"1.0"
encoding
=
"UTF-8"
?>
<container
xmlns
=
"http://symfony.com/schema/dic/services"
xmlns:xsi
=
"http://www.w3.org/2001/XMLSchema-instance"
xsi:schemaLocation
=
"http://symfony.com/schema/dic/services http://symfony.com/schema/dic/services/services-1.0.xsd"
>
<services
>
<service
id
=
"kernel.listener.command_dispatch"
class
=
"AppBundle\EventListener\ConsoleExceptionListener"
>
<argument
type
=
"service"
id
=
"logger"
/>
<tag
name
=
"kernel.event_listener"
event
=
"console.exception"
/>
</service
>
</services
>
</container
>
PHP:
// app/config/services.php
use
Symfony\Component\DependencyInjection\Definition
;
use
Symfony\Component\DependencyInjection\Reference
;
$definitionConsoleExceptionListener
=
new
Definition
(
'AppBundle\EventListener\ConsoleExceptionListener'
,
array
(
new
Reference
(
'logger'
)
)
)
;
$definitionConsoleExceptionListener
->
addTag
(
'kernel.event_listener'
,
array
(
'event'
=>
'console.exception'
)
)
;
$container
->
setDefinition
(
'kernel.listener.command_dispatch'
,
$definitionConsoleExceptionListener
)
;
然后启用实际的监听器:
// src/AppBundle/EventListener/ConsoleExceptionListener.php
namespace AppBundle\EventListener;
use Symfony\Component\Console\Event\ConsoleExceptionEvent;
use Psr\Log\LoggerInterface;
class ConsoleExceptionListener
{
private $logger;
public function __construct(LoggerInterface $logger)
{
$this->logger = $logger;
}
public function onConsoleException(ConsoleExceptionEvent $event)
{
$command = $event->getCommand();
$exception = $event->getException();
$message = sprintf(
'%s: %s (uncaught exception) at %s line %s while running console command `%s`',
get_class($exception),
$exception->getMessage(),
$exception->getFile(),
$exception->getLine(),
$command->getName()
);
$this->logger->error($message, array('exception' => $exception));
}
}
在上述的代码中,当任何命令出现异常,监听器都会收到一个事件。你可以简单的通过服务配置传递日志服务的方式来记录它。你的方法会收到一个 ConsoleExceptionEvent 对象,这个对象有获得事件和异常信息的能力。
记录非 0 的退出状态
控制台的日志记录功能可以通过记录非 0 的 退出状态被进一步扩展。这样你就会知道一个命令是否有任何错误,即使没有异常出现。
首先在服务容器中创建控制台终止事件监听器:
YAML:
# app/config/services.yml
services
:
kernel.listener.command_dispatch
:
class
:
AppBundle\EventListener\ErrorLoggerListener
arguments
:
logger
:
"@logger"
tags
:
- { name
:
kernel.event_listener, event
:
console.terminate
}
XML:
<!-- app/config/services.xml -->
<?xml
version
=
"1.0"
encoding
=
"UTF-8"
?>
<container
xmlns
=
"http://symfony.com/schema/dic/services"
xmlns:xsi
=
"http://www.w3.org/2001/XMLSchema-instance"
xsi:schemaLocation
=
"http://symfony.com/schema/dic/services http://symfony.com/schema/dic/services/services-1.0.xsd"
>
<services
>
<service
id
=
"kernel.listener.command_dispatch"
class
=
"AppBundle\EventListener\ErrorLoggerListener"
>
<argument
type
=
"service"
id
=
"logger"
/>
<tag
name
=
"kernel.event_listener"
event
=
"console.terminate"
/>
</service
>
</services
>
</container
>
PHP:
// app/config/services.php
use
Symfony\Component\DependencyInjection\Definition
;
use
Symfony\Component\DependencyInjection\Reference
;
$definitionErrorLoggerListener
=
new
Definition
(
'AppBundle\EventListener\ErrorLoggerListener'
,
array
(
new
Reference
(
'logger'
)
)
)
;
$definitionErrorLoggerListener
->
addTag
(
'kernel.event_listener'
,
array
(
'event'
=>
'console.terminate'
)
)
;
$container
->
setDefinition
(
'kernel.listener.command_dispatch'
,
$definitionErrorLoggerListener
)
;
然后启用实际监听器:
// src/AppBundle/EventListener/ErrorLoggerListener.php
namespace AppBundle\EventListener;
use Symfony\Component\Console\Event\ConsoleTerminateEvent;
use Psr\Log\LoggerInterface;
class ErrorLoggerListener
{
private $logger;
public function __construct(LoggerInterface $logger)
{
$this->logger = $logger;
}
public function onConsoleTerminate(ConsoleTerminateEvent $event)
{
$statusCode = $event->getExitCode();
$command = $event->getCommand();
if ($statusCode === 0) {
return;
}
if ($statusCode > 255) {
$statusCode = 255;
$event->setExitCode($statusCode);
}
$this->logger->warning(sprintf(
'Command `%s` exited with status code %d',
$command->getName(),
$statusCode
));
}
}
默认情况下,Symfony 将会在每一个 bundle 的 Command 目录下进行检查并且自动登录你的命令。如果一个命令扩展 ContainerAwareCommand,Symfony 将会甚至注入这个容器。然而为了使得这个更容易,它有一些限制:
- 你的命令必须在 Command 目录下;
- 基于你的环境或者依赖性的可用性没有注册你的服务的条件;
- 你不能使用 configure() 方法服务容器(因为 setContainer 还没有调用);
- 你不能使用同一个类创建很多命令(例如每一个都有不同的配置)。
为了解决这个问题,你可以将你的命令注册为服务并且给它加上 console.command 的标签:
YAML:
# app/config/config.yml
services
:
app.command.my_command
:
class
:
AppBundle\Command\MyCommand
tags
:
- { name
:
console.command
}
XML:
<!-- app/config/config.xml -->
<?xml
version
=
"1.0"
encoding
=
"UTF-8"
?>
<container
xmlns
=
"http://symfony.com/schema/dic/services"
xmlns:xsi
=
"http://www.w3.org/2001/XMLSchema-instance"
xsi:schemaLocation
=
"http://symfony.com/schema/dic/services
http://symfony.com/schema/dic/services/services-1.0.xsd"
>
<services
>
<service
id
=
"app.command.my_command"
class
=
"AppBundle\Command\MyCommand"
>
<tag
name
=
"console.command"
/>
</service
>
</services
>
</container
>
PHP:
// app/config/config.php
$container
->
register
(
'app.command.my_command'
,
'AppBundle\Command\MyCommand'
)
->
addTag
(
'console.command'
)
;
使用依赖和参数设置默认选项的值
试想你想要给 name 选项一个默认值。你可以传递下面的一个作为 addOption() 的第五个参数:
- 一个 hardcoded 字符串;
- 一个容器参数(例如 parameters.yml 中的一些);
- 服务计算过的值(例如一个仓库)。
通过扩展 ContainerAwareCommand,只有第一个是可能的,由于你不能在 configure() 方法中访问容器。作为替代,你需要注入 constructor 任何参数或者服务。举例来说,假设你将默认值储存在一些 %command.default_name% 参数中:
// src/AppBundle/Command/GreetCommand.php
namespace AppBundle\Command;
use Symfony\Component\Console\Command\Command;
use Symfony\Component\Console\Input\InputInterface;
use Symfony\Component\Console\Input\InputOption;
use Symfony\Component\Console\Output\OutputInterface;
class GreetCommand extends Command
{
protected $defaultName;
public function __construct($defaultName)
{
$this->defaultName = $defaultName;
parent::__construct();
}
protected function configure()
{
// try to avoid work here (e.g. database query)
// this method is *always* called - see warning below
$defaultName = $this->defaultName;
$this
->setName('demo:greet')
->setDescription('Greet someone')
->addOption(
'name',
'-n',
InputOption::VALUE_REQUIRED,
'Who do you want to greet?',
$defaultName
)
;
}
protected function execute(InputInterface $input, OutputInterface $output)
{
$name = $input->getOption('name');
$output->writeln($name);
}
}
现在,仅仅像往常一样更新你的服务配置的参数来注入 command.default_name 参数:
YAML:
# app/config/config.yml
parameters
:
command.default_name
:
Javier
services
:
app.command.my_command
:
class
:
AppBundle\Command\MyCommand
arguments
:
[
"%command.default_name%"
]
tags
:
- { name
:
console.command
}
XML:
<!-- app/config/config.xml -->
<?xml
version
=
"1.0"
encoding
=
"UTF-8"
?>
<container
xmlns
=
"http://symfony.com/schema/dic/services"
xmlns:xsi
=
"http://www.w3.org/2001/XMLSchema-instance"
xsi:schemaLocation
=
"http://symfony.com/schema/dic/services
http://symfony.com/schema/dic/services/services-1.0.xsd"
>
<parameters
>
<parameter
key
=
"command.default_name"
>
Javier
</parameter
>
</parameters
>
<services
>
<service
id
=
"app.command.my_command"
class
=
"AppBundle\Command\MyCommand"
>
<argument
>
%command.default_name%
</argument
>
<tag
name
=
"console.command"
/>
</service
>
</services
>
</container
>
PHP:
// app/config/config.php
$container
->
setParameter
(
'command.default_name'
,
'Javier'
)
;
$container
->
register
(
'app.command.my_command'
,
'AppBundle\Command\MyCommand'
,
)
->
setArguments
(
array
(
'%command.default_name%'
)
)
->
addTag
(
'console.command'
)
;
很好,你现在有了动态的默认值!
注意不要在 configure 中做任何工作(例如做出数据库请求),由于你的代码将会运行,即使你在使用控制台执行不同的命令。
7
Controller
在 Symfony 应用程序中,所有的错误都会被认为是异常,不论只是一个 404 Not Found 错误还是你的代码中的一些异常引起的重大错误。
在开发环境中,Symfony 缓存所有的异常并且通过一个拥有很多调试信息的异常页来帮助你发现问题的根源:
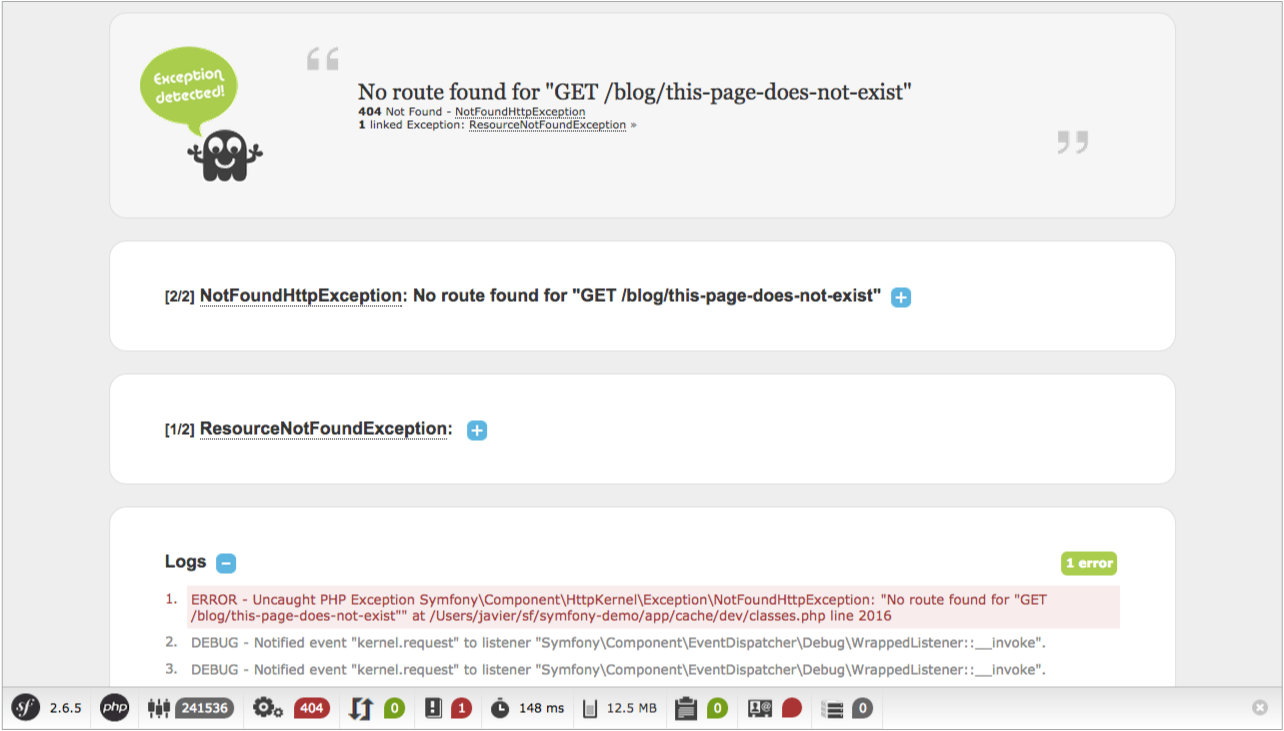
由于这个页面包含了很多敏感的内部信息,Symfony 不会将其在产品环境中展示。作为替代,它只会展示一个普通的简单的错误页:
产品环境下产生的错误页可以按照你的要求进行不同方式的定制:
- 如果你想要改变你的错误页的内容和风格来适应你的应用程序,那么就重写默认错误页模板;
- 如果你想要引入 Symfony 使用的逻辑来产生错误页,那么就重写默认异常控制器;
- 如果你需要完全控制异常处理执行你自己的逻辑,那么使用 kernel.exception 事件。
重写默认错误页模板
当加载错误页的时候,内部的 ExceptionController 被用来产生一个 Twig 模板给用户显示。
这个控制器使用的是 HTTP 状态代码,请求格式和下列逻辑决定了模板文件名:
- 找一个给定的格式和状态代码的模板(就像 error404.json.twig 或者 error500.html.twig);
- 如果不存在以前的模板,抛弃状态代码寻找给定格式的一般的模板(就像 error.json.twig 或者 error.xml.twig);
- 如果上述所说的模板都不存在,那就用普通的 HTML 模板(error.html.twig)。
为了重写这些模板,简单的依靠标准的 Symfony 的重写 bundle 内部的模板的方法:将它们放到 app/Resources/TwigBundle/views/Exception/ 目录。
典型的工程返回的 HTML 和 JSON 页面,可能像下面那样:
app/
└─ Resources/
└─ TwigBundle/
└─ views/
└─ Exception/
├─ error404.html.twig
├─ error403.html.twig
├─ error.html.twig # All other HTML errors (including 500)
├─ error404.json.twig
├─ error403.json.twig
└─ error.json.twig # All other JSON errors (including 500)
404 错误模板的例子
将 404 错误模板重写成 HTML 页,创建一个位于 app/Resources/TwigBundle/views/Exception/ 的新的 error404.html.twig 模板:
{# app/Resources/TwigBundle/views/Exception/error404.html.twig #}
{% extends 'base.html.twig' %}
{% block body %}
<h1>Page not found</h1>
{# example security usage, see below #}
{% if app.user and is_granted('IS_AUTHENTICATED_FULLY') %}
{# ... #}
{% endif %}
<p>
The requested page couldn't be located. Checkout for any URL
misspelling or <a href="{{ path('homepage') }}">return to the homepage</a>.
</p>
{% endblock %}
万一你需要它们,ExceptionController 通过分别储存在 HTTP 状态代码和信息中的 status_code 和 status_text 变量向错误页传递一些信息。
你可以通过执行 HttpExceptionInterface 来定制状态代码并且需要 getStatusCode() 方法。除此之外,**status_code ** 将会默认成 500。
在开发环境中展示的异常页可以和错误页一样被自定义。为标准的 HTML 异常页创建一个新的 exception.html.twig 模板或者为 JSON 异常页创建一个 exception.json.twig。
当在错误模板中使用安全功能时避免异常出现
自定义设计模板时的最常见的一个误区就是在错误模板(或者是其它错误模板所继承的模板)中使用 is_granted() 功能。如果你那样做了,你将会看到 Symfony 出现异常。
这个问题的原因就是路由在安全层之前完成了。如果 404 错误出现,安全层不能够加载并且因此 is_granted() 功能未定义。解决方法就是在使用这个功能之前添加下列的检查:
{% if app.user and is_granted('...') %}
{# ... #}
{% endif %}
在开发环境测试错误页
当你在开发环境的时候,Symfony 将会展示出一个大大的异常页而不是你新的自定义错误页。所以,你如何看到错误页长什么样子并且调试它呢?
推荐的解决方法就是使用名为 WebfactoryExceptionsBundle 的第三方 bundle。这个 bundle 提供了一个特殊的测试控制器可以允许你以任意的 HTTP 状态代码显示自定义的错误页甚至当 kernel.debug 设置为 true 也可以。
在开发环境测试错误页
默认的 ExceptionController 也允许在开发环境下预览你的错误页。
这个特征是在 Symfony 2.6 中引进的,在以前,第三方的 bundle WebfactoryExceptionsBundle 可以起到相同的作用。
使用这一特征,你需要在你的 routing_dev.yml 中进行如下定义:
YAML:
# app/config/routing_dev.yml
_errors
:
resource
:
"@TwigBundle/Resources/config/routing/errors.xml"
prefix
:
/_error
XML:
<!-- app/config/routing_dev.xml -->
<?xml
version
=
"1.0"
encoding
=
"UTF-8"
?>
<routes
xmlns
=
"http://symfony.com/schema/routing"
xmlns:xsi
=
"http://www.w3.org/2001/XMLSchema-instance"
xsi:schemaLocation
=
"http://symfony.com/schema/routing
http://symfony.com/schema/routing/routing-1.0.xsd"
>
<import
resource
=
"@TwigBundle/Resources/config/routing/errors.xml"
prefix
=
"/_error"
/>
</routes
>
PHP:
// app/config/routing_dev.php
use
Symfony\Component\Routing\RouteCollection
;
$collection
=
new
RouteCollection
(
)
;
$collection
->
addCollection
(
$loader
->
import
(
'@TwigBundle/Resources/config/routing/errors.xml'
)
)
;
$collection
->
addPrefix
(
"/_error"
)
;
return
$collection
;
如果你是用老版本的 Symfony,你可能需要像你的 routing_dev.yml 文件中添加这个。如果你是从 scratch 开始的,那么 Symfony 标准版本已经包含这个了。
添加了这条路径,你可以像以下那样使用网址来用给定的 HTML 状态代码或者给定的状态代码和格式预览错误页:
http://localhost/app_dev.php/_error/{statusCode}
http://localhost/app_dev.php/_error/{statusCode}.{format}
重写默认的 ExceptionController
如果你需要更多的,超出仅仅重写模板的灵活性,那么你可以改变产生错误页的控制器。举例来说,你可能需要向你的模板中传递一些附加变量。
为了完成这个,在你的应用程序的任意的地方创建一个新的控制器并且设置 twig.exception_controller 配置选项来指向它:
YAML:
# app/config/config.yml
twig
:
exception_controller
:
AppBundle:Exception:showException
XML:
<!-- app/config/config.xml -->
<?xml
version
=
"1.0"
encoding
=
"UTF-8"
?>
<container
xmlns
=
"http://symfony.com/schema/dic/services"
xmlns:xsi
=
"http://www.w3.org/2001/XMLSchema-instance"
xmlns:twig
=
"http://symfony.com/schema/dic/twig"
xsi:schemaLocation
=
"http://symfony.com/schema/dic/services
http://symfony.com/schema/dic/services/services-1.0.xsd
http://symfony.com/schema/dic/twig
http://symfony.com/schema/dic/twig/twig-1.0.xsd"
>
<twig:config
>
<twig:exception-controller
>
AppBundle:Exception:showException
</twig:exception-controller
>
</twig:config
>
</container
>
PHP:
// app/config/config.php
$container
->
loadFromExtension
(
'twig'
,
array
(
'exception_controller'
=>
'AppBundle:Exception:showException'
,
// ...
)
)
;
TwigBundle 使用的 ExceptionListener 类作为 kernel.exception 事件的监听器创建了会发送到你的控制器的请求。除此之外,你的控制器还会被传递两个参数:
exception 由被处理的异常所创建的 FlattenException 实例。
logger 一个在默认环境下可能为空的 DebugLoggerInterface 实例。
代替创建你能从 scratch 创建的新的异常控制器,当然,也可以扩展默认的 ExceptionController。这种情况下,你可能想要重写 showAction() 和 findTemplate() 方法中的一个或者都重写。后一个方法定位了将要使用的模板。
错误页预览对你自己建立控制器也可以使用。
处理 kernel.exception 事件
当出现异常的时候,HttpKernel 类就会抓住它并且发送 kernel.exception 事件。这给你将异常以不同的方式转换成 Response 的方法。
处理这类事件确实比以前所介绍的更加有效果,而且需要对 Symfony 的内部构件有全面的了解。假设你的代码出现特殊的异常并且对于你的应用程序的域有特殊意义会怎样。
为 kernel.exception 事件编写你自己的监听器使得你可以近距离观察异常并且依据它采取不同的行动。这些行为可能包括记录异常,将用户重新定向到另一个页面或者调用特定的错误页。
如果你的监听器在 GetResponseForExceptionEvent 调用 setResponse() 事件,传播将会被禁止并且将会向客户发出回应。
这个方法使得你可以创建集中化和层次化的错误处理:而不是一次又一次的在不同的控制器抓取(处理)相同的异常,你只需要一个(或者几个)监听器来处理他们。
参见 ExceptionListener 类的代码作为一个先进的这个类型的监听器的真实案例。这个监听器处理各种各样的你的应用程序出现的安全相关的异常(如 AccessDeniedException)并且采取像将用户重新定向到登录页,退出以及其它的方法。
在本书中,你已经学习了当扩展基本的 Controller 类时如何轻松使用 controller 了。除此之外,controllers 也可以被指定为服务。
将 controller 指定为服务将会花费一番功夫。最基本的优点就是整个 controller 或其它传递到 controller 的服务可以通过服务容器配置修正。当开发开放的 bundle 或者在不同的工程中使用 bundle 时将会很有用。
第二个优点就是你的 controller 更加“沙箱化”。通过观察构造器变元,很容易看到 controller 可以做或者不可以做什么。并且因为每个依赖性需要手动注入,很显然(例如你有很多的构造器变元)当你的 controller 变得太大时。最佳的实践案例也推荐将 controller 定义为服务:避免将你的商业逻辑放到 controller 中。相反,注入服务是工作的主要内容。
因此,即使你不将你的 controllers 指定为服务,你将会看到这个会在一些开源的 Symfony 中完成。理解两种方法的利弊也很重要。
把 Controller 定义为服务
controller 可以像其它类一样被定义为服务。举例来说,如果你有如下的简单的 controller:
// src/AppBundle/Controller/HelloController.php
namespace AppBundle\Controller;
use Symfony\Component\HttpFoundation\Response;
class HelloController
{
public function indexAction($name)
{
return new Response('<html><body>Hello '.$name.'!</body></html>');
}
}
接下来你就可以按下列步骤将它定义为服务:
YAML:
# app/config/services.yml
services
:
app.hello_controller
:
class
:
AppBundle\Controller\HelloController
XML:
<!-- app/config/services.xml -->
<services
>
<service
id
=
"app.hello_controller"
class
=
"AppBundle\Controller\HelloController"
/>
</services
>
PHP:
// app/config/services.php
use
Symfony\Component\DependencyInjection\Definition
;
$container
->
setDefinition
(
'app.hello_controller'
,
new
Definition
(
'AppBundle\Controller\HelloController'
)
)
;
参照服务
为了提及定义为服务的 controller,可以使用冒号(:)。举例来说,将上述定义的服务的 indexAction() 方法使用 app.hello_controller id 转发:
$this->forward('app.hello_controller:indexAction', array('name' => $name));
当使用这个语法时你不能丢弃方法名称的 Action 部分。
当定义路由 _controller 值的时候,你也可以通过使用相同的符号将服务路由:
YAML:
# app/config/routing.yml
hello
:
path
:
/hello
defaults
:
{
_controller
:
app.hello_controller:indexAction
}
XML:
<!-- app/config/routing.xml -->
<route
id
=
"hello"
path
=
"/hello"
>
<default
key
=
"_controller"
>
app.hello_controller:indexAction
</default
>
</route
>
PHP:
// app/config/routing.php
$collection
->
add
(
'hello'
,
new
Route
(
'/hello'
,
array
(
'_controller'
=>
'app.hello_controller:indexAction'
,
)
)
)
;
你也可以使用定义为服务的 controller 符号来配置路由。细节详见 FrameworkExtraBundle 文档。
如果 controller 服务调用 __invoke 方法,你可以简单的提及服务 id(app.hello_controller)。
基本 Controller 方法的替代品
当使用定义为服务的 Controller 时,大多会扩展基本的 Controller 类。代替依赖于它的快捷的方法,你将会直接交互你需要的服务。幸运的是,这个通常很简单并且基础的 Controller 类的源代码是如何执行普通任务的很好的资源。
举例来说,如果你想要渲染一个模板而不是直接创建 Response 对象,之后如果你扩展了 Symfony 的基本 controller 你的代码就会看起来像这样:
// src/AppBundle/Controller/HelloController.php
namespace AppBundle\Controller;
use Symfony\Bundle\FrameworkBundle\Controller\Controller;
class HelloController extends Controller
{
public function indexAction($name)
{
return $this->render(
'AppBundle:Hello:index.html.twig',
array('name' => $name)
);
}
}
如果你看过 Symfony 的基本 Controller 类源代码的 render 功能,你将会看到这个方法实际上使用了 templating 服务:
public function render($view, array $parameters = array(), Response $response = null)
{
return $this->container->get('templating')->renderResponse($view, $parameters, $response);
}
在定义为服务的 controller 中,你可以注入 templating 服务并且直接使用它:
// src/AppBundle/Controller/HelloController.php
namespace AppBundle\Controller;
use Symfony\Bundle\FrameworkBundle\Templating\EngineInterface;
use Symfony\Component\HttpFoundation\Response;
class HelloController
{
private $templating;
public function __construct(EngineInterface $templating)
{
$this->templating = $templating;
}
public function indexAction($name)
{
return $this->templating->renderResponse(
'AppBundle:Hello:index.html.twig',
array('name' => $name)
);
}
}
这个服务定义也需要修正从而区分构造器变元:
YAML:
# app/config/services.yml
services
:
app.hello_controller
:
class
:
AppBundle\Controller\HelloController
arguments
:
[
"@templating"
]
XML:
<!-- app/config/services.xml -->
<services
>
<service
id
=
"app.hello_controller"
class
=
"AppBundle\Controller\HelloController"
>
<argument
type
=
"service"
id
=
"templating"
/>
</service
>
</services
>
PHP:
// app/config/services.php
use
Symfony\Component\DependencyInjection\Definition
;
use
Symfony\Component\DependencyInjection\Reference
;
$container
->
setDefinition
(
'app.hello_controller'
,
new
Definition
(
'AppBundle\Controller\HelloController'
,
array
(
new
Reference
(
'templating'
)
)
)
)
;
代替从容器中抓取 templating 服务,你可以只向 controller 中直接注入你需要的特定的服务。
这并不意味着你不能从你自己的基础 controller 扩展这些 controller。从标准的基础 controller 移出去是因为它的帮助方法依靠可用的容器,这个容器不是被定义为服务的 controller 的情形。将注入服务的普通代码提取出来而不是将这个代码放到你扩展的 controller 之中是一个好主意。这两种方法都可行,你想如何组织你的可重复利用代码完全取决于你。
基础 Controller 方法以及它们的服务的替代
这个列表解释了基础 Controller 的方便的方法:
createForm()(服务:form.factory)
$formFactory->create($type, $data, $options);
createFormBuilder()(服务:form.factory)
$formFactory->createBuilder('form', $data, $options);
new NotFoundHttpException($message, $previous);
forward()(服务:http_kernel)
use Symfony\Component\HttpKernel\HttpKernelInterface;
// ...
$request = ...;
$attributes = array_merge($path, array('_controller' => $controller));
$subRequest = $request->duplicate($query, null, $attributes);
$httpKernel->handle($subRequest, HttpKernelInterface::SUB_REQUEST);
generateUrl()(服务:router)
$router->generate($route, $params, $absolute);
getDoctrine()(服务:doctrine)
简单的注入 doctrine 而不是从容器中抓取它
getUser()(服务:security.token_storage)
$user = null;
$token = $tokenStorage->getToken();
if (null !== $token && is_object($token->getUser())) {
$user = $token->getUser();
}
isGranted()(服务:security.authorization_checker)
$authChecker->isGranted($attributes, $object);
use Symfony\Component\HttpFoundation\RedirectResponse;
return new RedirectResponse($url, $status);
render()(服务:templating)
$templating->renderResponse($view, $parameters, $response);
renderView()(服务:templating)
$templating->render($view, $parameters);
stream()(服务:templating)
use Symfony\Component\HttpFoundation\StreamedResponse;
$templating = $this->templating;
$callback = function () use ($templating, $view, $parameters) {
$templating->stream($view, $parameters);
}
return new StreamedResponse($callback);
getRequest 已经被弃用了。作为替代,你的 controller 有一个处理方法叫做 Request $request。参数的排序并不重要,但是必须提供 typehint。
代替你自己处理文件上传,你可以考虑使用 VichUploaderBundle bundle。这个 bundle 提供所有的一般选项(例如文件重命名,保存和删除)并且整合了 Doctrine ORM, MongoDB ODM, PHPCR ODM 和 Propel。
试想在你的应用程序中有一个 Product 实体并且你想为你的每一个产品添加一个 PDF 格式的小册子。为了完成这个,在你的 Product 实体中添加一个名为 brochure (小册子)的属性:
// src/AppBundle/Entity/Product.php
namespace AppBundle\Entity;
use Doctrine\ORM\Mapping as ORM;
use Symfony\Component\Validator\Constraints as Assert;
class Product
{
// ...
/**
* @ORM\Column(type="string")
*
* @Assert\NotBlank(message="Please, upload the product brochure as a PDF file.")
* @Assert\File(mimeTypes={ "application/pdf" })
*/
private $brochure;
public function getBrochure()
{
return $this->brochure;
}
public function setBrochure($brochure)
{
$this->brochure = $brochure;
return $this;
}
}
记住 brochure 列的类型是字符串而不是二进制或者二进制大对象因为这个只是储存 PDF 的文件名并不是储存文件内容。
然后向管理 Product 实体的表中添加一个新的 brochure 字段:
// src/AppBundle/Form/ProductType.php
namespace AppBundle\Form;
use Symfony\Component\Form\AbstractType;
use Symfony\Component\Form\FormBuilderInterface;
use Symfony\Component\OptionsResolver\OptionsResolver;
class ProductType extends AbstractType
{
public function buildForm(FormBuilderInterface $builder, array $options)
{
$builder
// ...
->add('brochure', 'file', array('label' => 'Brochure (PDF file)'))
// ...
;
}
public function configureOptions(OptionsResolver $resolver)
{
$resolver->setDefaults(array(
'data_class' => 'AppBundle\Entity\Product',
));
}
public function getName()
{
return 'product';
}
}
现在,更新你的模板从而渲染表格来显示新的 brochure 字段(添加确切的模板代码依赖于你的应用程序以个性化表格渲染所用的方法):
{# app/Resources/views/product/new.html.twig #}
<h1>Adding a new product</h1>
{{ form_start() }}
{# ... #}
{{ form_row(form.brochure) }}
{{ form_end() }}
最后,你需要更新处理表格的 controller 的代码:
// src/AppBundle/Controller/ProductController.php
namespace AppBundle\ProductController;
use Sensio\Bundle\FrameworkExtraBundle\Configuration\Route;
use Symfony\Bundle\FrameworkBundle\Controller\Controller;
use Symfony\Component\HttpFoundation\Request;
use AppBundle\Entity\Product;
use AppBundle\Form\ProductType;
class ProductController extends Controller
{
/**
* @Route("/product/new", name="app_product_new")
*/
public function newAction(Request $request)
{
$product = new Product();
$form = $this->createForm(new ProductType(), $product);
$form->handleRequest($request);
if ($form->isValid()) {
// $file stores the uploaded PDF file
/** @var Symfony\Component\HttpFoundation\File\UploadedFile $file */
$file = $product->getBrochure()
// Generate a unique name for the file before saving it
$fileName = md5(uniqid()).'.'.$file->guessExtension();
// Move the file to the directory where brochures are stored
$brochuresDir = $this->container->getParameter('kernel.root_dir').'/../web/uploads/brochures';
$file->move($brochuresDir, $fileName);
// Update the 'brochure' property to store the PDF file name
// instead of its contents
$product->setBrochure($filename);
// persist the $product variable or any other work...
return $this->redirect($this->generateUrl('app_product_list'));
}
return $this->render('product/new.html.twig', array(
'form' => $form->createView()
));
}
}
下面是一些有关于上述代码的注意事项:
- 当表格上传时,brochure 属性包含了整个 PDF 文件的内容。因为这个属性仅仅储存了文件名,所以在保存实体更改前你必须设置新的值。
- 在 Symfony 应用程序中,上传文件是 UploadedFile 对象的类,这个对象提供了处理上传文件时大多数操作的方法。
- 一个好的安全实践就是不要信任用户输入的东西。这也适用于访问者上传的文件。Uploaded 类提供了获取原始文件扩展名(getExtension()()),原始文件大小(getSize()())以及原始文件名(getClientOriginalName()())的方法。然而,这些方法并不是安全的,因为恶意使用者会篡改那些信息。这就是为什么最好产生一个特定的名称然后使用 guessExtension()() 方法让 Symfony 根据文件的 MIME 类型去猜测正确的扩展名。
- UploadedFile 类也提供 move()() 方法来储存在预先的目录下的文件。将这个目录路径定义为一个应用程序的配置选项是很好的选择并且这也简化了代码:$this->container->getParameter('brochures_dir')。
现在你可以使用下列代码来为你的产品链接一个 PDF 小册子了:
<a href="{{ asset('uploads/brochures' ~ product.brochure) }}">View brochure (PDF)</a>
8
调试
当您在本地机器上运行一个 Symfony 工程时,您应该使用 dev 环境(app dev .php 前端控制器)。优化此配置主要有两个目的:
- 在任何时候有不当情况发生(网页调试工具栏,nice 异常页面,分析器…)时,给开发者正确的反馈;
- 尽可能与生产环境相似来避免在部署项目过程中的问题。
禁用引导文件和类缓存
并且,为了让生产环境尽可能的快,Symfony 在您的缓存中创建大型的 PHP 文件,包含您项目所需的每个请求的 PHP 类的聚集。然而,此行为可以混淆您的 IDE 或者您的调试器。此教程显示了当您需要调试含有 Symfony 类的代码时如何微调此缓存机制让它更加友好。
app_dev.php 前端控制器在默认情况下按照以下读出:
/ ...
$loader = require_once __DIR__.'/../app/bootstrap.php.cache';
require_once __DIR__.'/../app/AppKernel.php';
$kernel = new AppKernel('dev', true);
$kernel->loadClassCache();
$request = Request::createFromGlobals();
为了您的调试器更配合一点儿,移除 loadClassCache() 的请求从而禁用所有的 PHP 类缓存,并按照以下进行替换所需的语句:
// ...
// $loader = require_once __DIR__.'/../app/bootstrap.php.cache';
$loader = require_once __DIR__.'/../app/autoload.php';
require_once __DIR__.'/../app/AppKernel.php';
$kernel = new AppKernel('dev', true);
// $kernel->loadClassCache();
$request = Request::createFromGlobals();
如果您禁用 PHP 缓存,在您调试会话后不要忘记复原。
一些 IDEs 不喜欢一些类储存在不同的地点。为了避免问题,您可以选择让您的 IDE 忽略 PHP 缓存文件,或者您可以改变 Symfony 为这些文件使用的扩展。
$kernel->loadClassCache('classes', '.php.cache');
9
部署
部署的过程是一个复杂且多样的任务,它依靠于您应用的设置及需求的任务。本文不是按部就班的指导,而是一个关于部署大部分的需求和想法的大概的列表。
Symfony 部署基础
在部署一个 Symfony 应用时采取的典型步骤包括:
- 加载您的代码到成品服务器;
- 安装您的供应商依赖(基本上通过 Composer 完成也可能是在加载前就完成);
- 运行数据库迁移或者相似的任务来更新任何发生变化的数据结构;
- 清除(或者选择性地预热)缓存。
部署也可能包括其他任务,例如:
- 标记一个特别版本的代码作为您源代码控制存储库;
- 创建一个临时的集结待命区来创建您的更新设置“脱机”;
- 运行任何可用的测试来确保代码和/或者服务器的稳定性;
- 从 web/ 目录中移除任何不必要文件来保持您的生产环境的洁净;
- 清除外部缓存系统(例如 Memcached 或者 Redis)
如何部署一个 Symfony 应用程序
部署 Symfony 应用程序有几种方式。首先从一些基本的部署策略开始然后由此开始创建。
基本文件转移
部署应用程序的最基本的方式是通过 ftp/scp (或相似的方法)手动复制文件。此方法也有弊端,因为您缺少在升级进度中对系统的控制。这个方法同样也需要您在转移文件后采取一些手动步骤(参见 Common Post-Deployment Tasks)
使用源代码控件
如果您正只用源代码控件(例如 Git 或者 SVN),您可以通过安装现场储存库的副本来简化。当您准备去升级的话这非常简单,只需从您的源代码控制系统中获取最新的更新即可。
这会使您的文件更新更简单,但是您仍然需要担心手动采取其他步骤(参见 Common Post-Deployment Tasks)。
使用构建脚本和其他工具
同样也有工具来减轻部署的负担。其中的一些明确符合 Symfony 的要求。
这个基于 Ruby 的工具在 Capistrano 顶端提供了一整套专门的工具,专门针对 Symfony 项目定制。
帮助您为您的 Symfony 项目创建一个本地 Debian 包装。
这个如同 Capotrano 的部署工具在 PHP 中创建,并且或许对于 PHP 开发者延伸他们的需要来说更简单一点。
这个基于 Python 的库提供了一套操作的基本套件,来执行当地的或者远程的 shell 命令,还有加载/下载文件。
Bundles
有一些 bundles 可以直接添加部署特点到您的 Symfony 控制台上。
基本脚本
您当然可以使用 shell, Ant 或者任何其他创建工具来编写您项目的部署脚本。
作为服务提供者的平台
Symfony Cookbook 包括一些最著名的服务(PaaS)提供商的平台的细节文章:
• Heroku
常见的后期部署任务
在部署了您实际的源代码之后,有许多您需要做的常规的事情:
A) 检查要求
检查您的服务器是否在运行中符合要求:
$ php app/check.php
B) 配置您的 app/config/parameters.yml 文件
这个文件不应被部署,而是通过由 Symfony 提供的自动工具管理。
C) 安装/升级您的 Vendors
您的供应商可以在转移源代码之前进行升级(例如:升级 vendor/ 库,然后利用源代码进行转移)或者之后在服务器上升级。另一种方式就是,直接按平常的做法升级您的供应商。
$ composer install --no-dev --optimize-autoloader
--optimize-autoloader 标记通过创建一个“类映射”显著地提高了 Composer 的自动装载机性能。--no-dev 标记确保开发软件包不安装在生产环境中。
如果您在此步骤中得到“未找到类”错误,您可能就需要在运行此命令前运行 export SYMFONY_ENV=prod 从而使 post-install-cmd 脚本在 prod 环境中运行。
D) 清除您的 Symfony 缓存
确保您清除(并预热)您的 symfony 缓存:
$ php app/console cache:clear --env=prod --no-debug
E) 清除您的 Assestic 资产
如果您正在使用 Assetic,您同样要清除您的资产:
$ php app/console assetic:dump --env=prod --no-debug
F) 其他事情!
您需要做的事情还有很多,取决于您的设置:
- 运行任意数据库移植
- 清除您的 APC 缓存
- 运行 assets:install (已在 composer install 中处理)
- 添加/编辑 CRON 工作
- 推动资产到 CDN
- …
应用程序生命周期:持续集成,QA,等等
虽然此条目涵盖了部署的技术细节,从开发到生产代码的完整生命周期或许需要更多的步骤(考虑部署到筹划,QA(质量保证),运行测试,等等)。
分段、测试、QA、持续集成、数据库合并以及回滚功能是防止失败而强烈建议使用的。有一些简单的以及更复杂的工具可以让部署像您环境所要求的那般简单(复杂)。
不要忘记部署应用程序同样包括更新任何依赖项(一般通过 Composer),合并您的数据库,清除您的缓存以及其他潜在的东西,如推动资产到 CDN 上(参见 Common Post-Deployment Tasks)。
这个按部就班的教程描述了如何在 Microsoft Azure 云平台上部署一个小型的 Symfony 网页应用。它将会解释如何设置一个新的 Azure 网页,包括设置正确的 PHP 版本和全局环境变量。文件还展示了您如何可以利用 Git 和 Composer 在云上部署您的 Symfony 应用。
建立 Azure 网站
建立一个新的 Microsoft Azure 网站,首先注册 Azure 或者用证书注册。一旦您连接到了 Azure Portal 的界面,向下滚动到按钮然后选择 New 面板。在此面板上,点击 Web Site 然后选择 Custome Create:

图片 9.1 image
步骤 1:创建 Web Site
这里,系统将提示您填写一些基本信息。
图片 9.2 image
对于 URL 来说,进入您将会用于 Symfony 应用程序的 URL,然后在您想要的区域内挑选 Create new web hosting plan。默认情况下,在下拉列表中的数据库中选择 free 20 MB SQL datebase。在本教程中,Symfony 应用程序将会连接到 MySQL 数据库上。在下拉列表的数据库中选择 Create a new MySQL database。您可以保持 DefaultConnection 的字符串名称。最后,确认会话框中的 Publish from source control 来启动 Git 库然后进入下一步。
步骤 2:新的 MySQL 数据库
在此步骤中,系统将会提示您建立您的 MySQL 数据库存储,有数据库名称和区域。MySQL 数据库存储由 Microsoft 和 ClearDB 联合提供。选择与您上一步为主机计划配置选择的相同的区域。
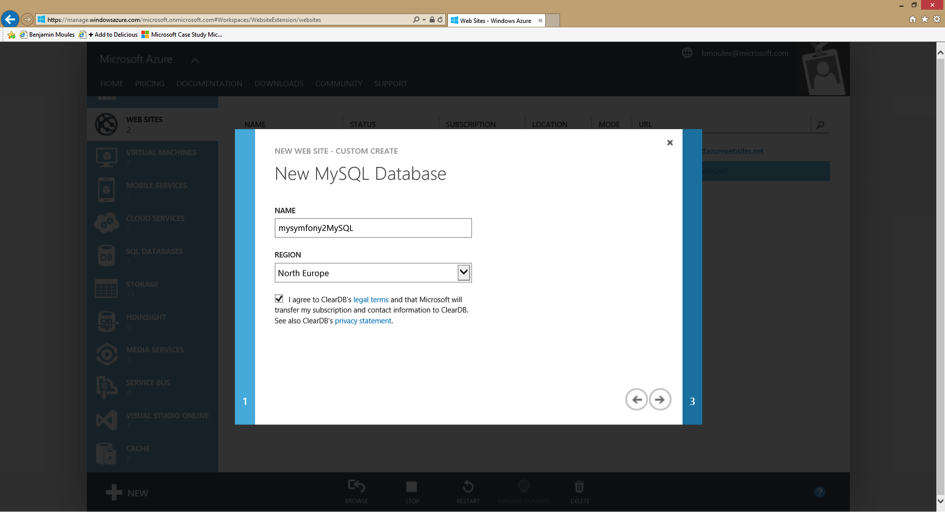
图片 9.3 image
同意条款和条件后,点击向右箭头继续。
步骤3:您的源代码在哪里
现在,第三步,选择 Local Git repository 项目,然后点击右箭头来配置您的 Azure 网站证书。
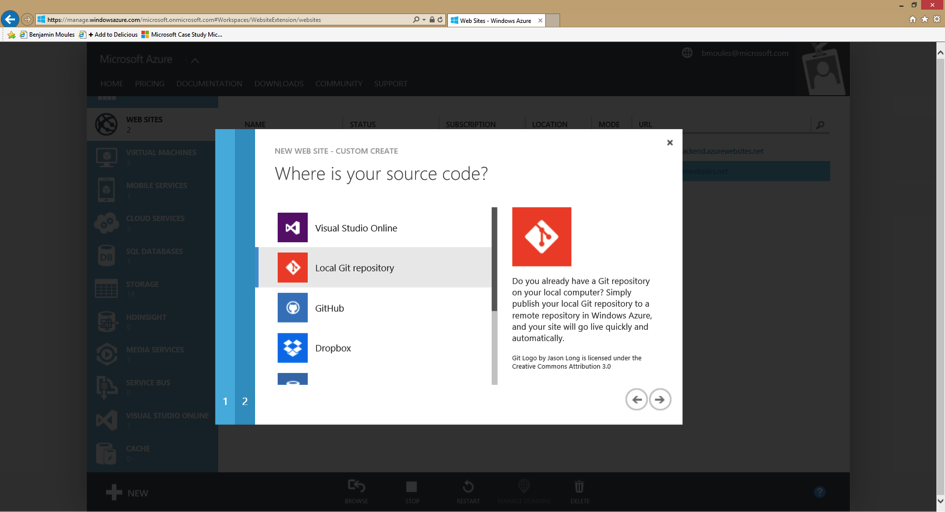
图片 9.4 image
步骤4:新的用户名与密码
太棒了!您现在在最后一步。创建一个用户名和一个安全密码:这些将成为连接到 FTP 服务器最根本的身份标识,并且也能推动您的应用程序代码到 Git 库。
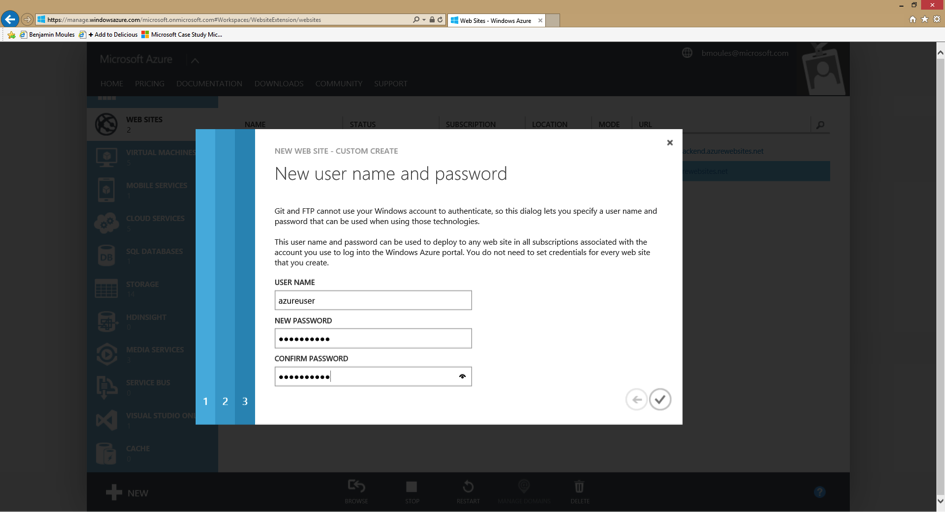
图片 9.5 image
祝贺!您的 Azure 网站现在已建立并正在运行了。您可以通过浏览您在第一步中配置的网站 url 来进行验证。您应该在您的网页浏览器看到以下显示:
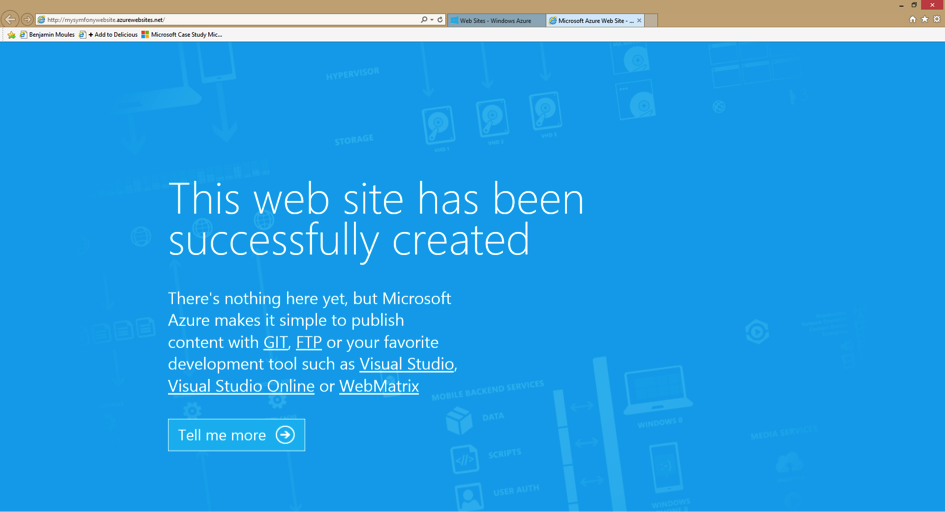
图片 9.6 image
Microsoft Azure 门户同样为 Azure Website 提供了一个完整的控制面板。
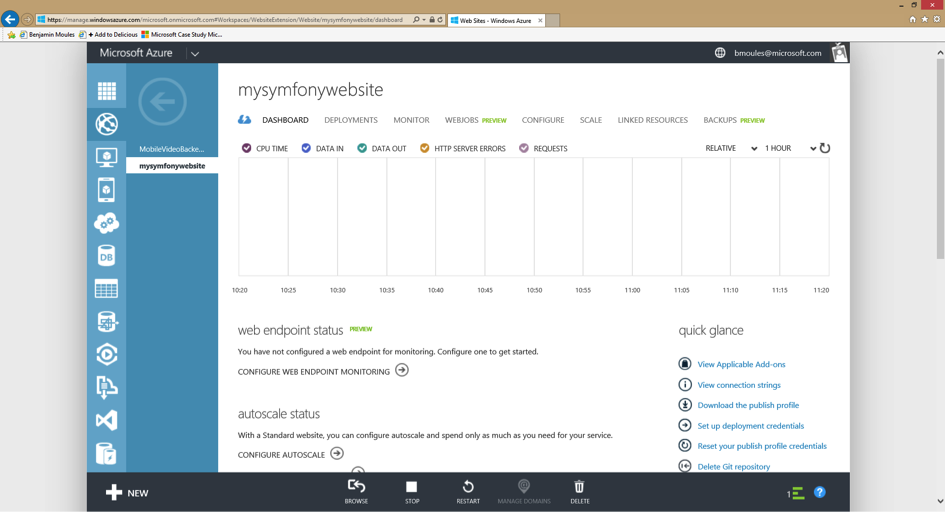
图片 9.7 image
您的 Azure Website 已经做好准备!但是要运行一个 Symfony 网址,您需要配置一些其他的东西。
为 Symfony 配置 Azure Website
教程的这个部分详细地展示了怎样配置正确的 PHP 版本来运行 Symfony。它同样也展示了您怎样启动一些强制性的 PHP 扩张以及如何适当地为生产环境配置 PHP。
配置最新的 PHP 运行时间
尽管 Symfony 只需要 PHP 5.3.9 来运行,但还总是会建议使用最新的 PHP 版本。PHP 5.3 不再由 PHP 核心团队所支持,但是您可以在 Azure 里很容易地升级。
在 Azure 里升级您的 PHP 版本,在控制面板内找到 Configure 标记,然后选择您想要的版本。
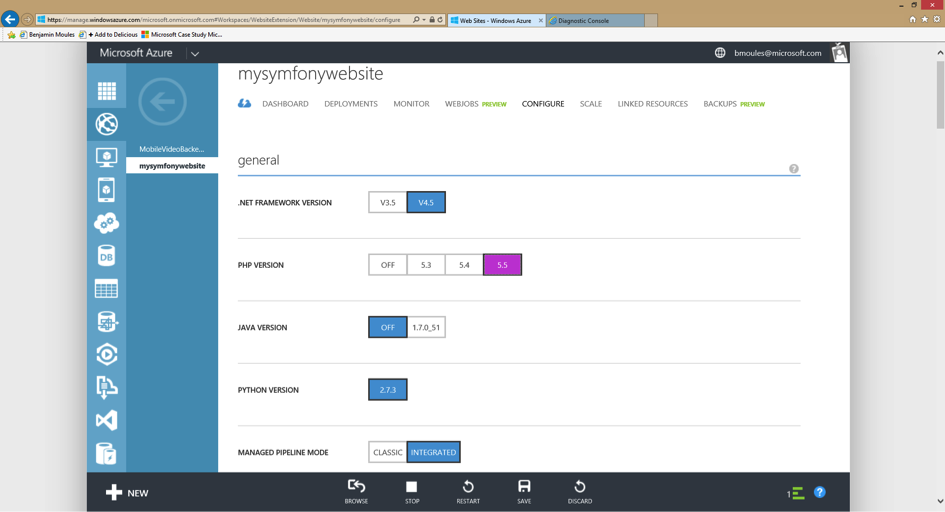
图片 9.8 image
在视窗下方点击 Save 按钮来保存您的变化,然后重启网页服务器。
选择一个较新一点的 PHP 版本可以极大地提高运行时性能。PHP 5.5 装载了一个新植入的 PHP 加速器称作 OPCache,替代了 APC。在 Azure Website 上,OPCache 已经被启动并且无需再安装和建立 APC 了。
以下的截屏显示了在 Azure Website 上运行的 phpinfo 脚本的输出,来验证 PHP 5.5 是在启动了 OPCache 的情况下运行的。
图片 9.9 image
对 php.ini 配置设置微调
Microsoft Azure 允许您覆盖掉 php.ini 全局配置设置,通过在项目根目录(site/wwwroot)创建一个自定义文件 .user.ini。
; .user.ini
expose_php = Off
memory_limit = 256M
upload_max_filesize = 10M
这些设置均不需要覆盖。默认 PHP 配置已经足够好,所以只是一个例子来展示如何通过加载您的自定义文件 .ini 来轻松地微调 PHP 内部设置。
您也可以在您的 Azure Website 服务器上手动创建此文件,在 site/wwwroot 目录下或者用 Git 部署。您可以从 Azure Website Control 面板上获取您的 FTP 服务器证书,它在右侧侧边栏的 Dashboard 标记下。如果您想使用 Git,仅需要把您的 .user.ini 文件放置在您本地存储库的根目录下,然后在您的 Azure Website 库中启动提交。
本教程有一个部分专门解释如何配置您的 Azure Website Git 存储库以及如何启动部署提交。参见 Deploying from Git。 您也可以在官方网页 PHP MSDN documentation 获取更多关于配置 PHP 内部设置的信息。
启动 PHP intl 扩展
这是教程中很有趣的部分!在写这本教程的时候,Microsoft Azure Website 提供了 intl 扩展,但不是在默认情况下被启动。要启动 intl 扩展的话,无需加载任何 DLL 文件因为 php_intl.dll 文件已存在于 Azure 中。实际上,此文件只需要被移动至自定义网站的扩展目录。
Microsoft Azure 团队如今致力于在默认情况下启动 intl PHP 扩展。在不久的将来,接下来的步骤架构不再是必要的了。
为了在 site/wwwroot 目录中获取 php_intl.dll 文件,只需要浏览以下网址就可以连接到在线 Kudu 工具:
https://[your-website-name].scm.azurewebsites.net
Kudu 是一套管理应用程序的工具。它带有一个文件资源管理器,一个命令行提示,一个日志流以及一个配置设置总结页面。当然,这个部分只有当您注册进入到您的 Azure Website 账号才可以访问。
图片 9.10 image
在 Kudu 的头版,在主目录上点击 Debug Console 导航条目,然后选择 CMD。这将打开 Debug Console 页面,展示一个文件资源管理器和下方的控制台提示符。
在控制台提示符中,输入以下三个命令来复制原有的 php_intl.dll 扩展文件到自定义网站 ext/ 目录。这个新的目录必须在主目录 site/wwwroot 下创建。
$ cd site\wwwroot
$ mkdir ext
$ copy "D:\Program Files (x86)\PHP\v5.5\ext\php_intl.dll" ext
整个过程和输出应该如此:
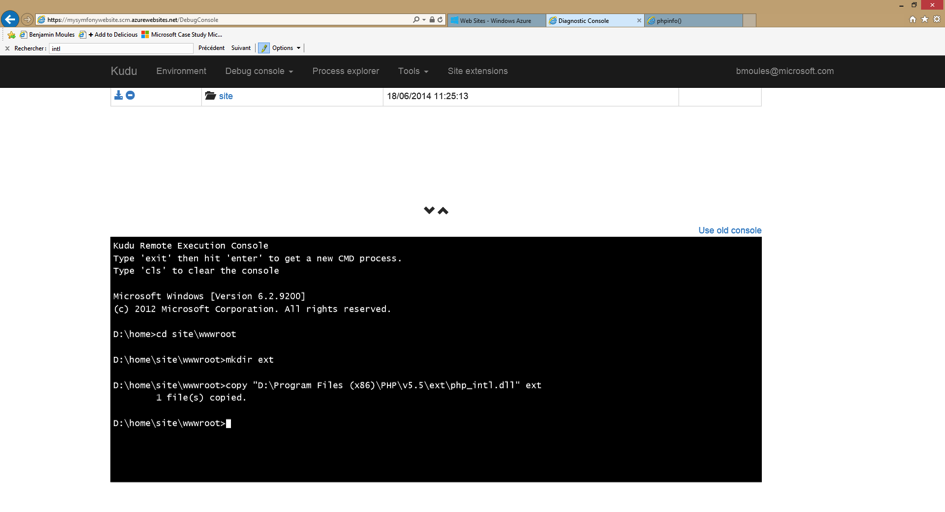
图片 9.11 image
为了完成 php_intl.dll 扩展的启动,您必须让 Azure Website 从新创建的 ext 目录中加载。这个可以通过在 Azure Website Control 的主面板上的 Configure 标记上注册一个全局 PHP_EXTENSIONS 环境变量来完成。
在 app settings 部分,用值 ext\php_intl.dll 注册 PHP_EXTENSIONS 环境变量,如截屏所示:
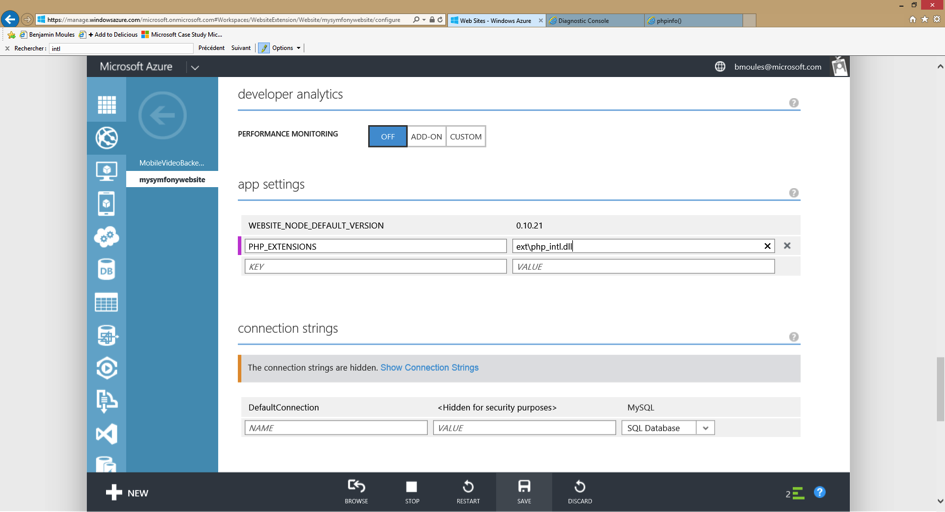
图片 9.12 image
点击 “save” 来确认您的变化并且重新启动网页服务器。PHP Intl 扩展应该在您的网页服务器环境是可用的了。接下来 phpinfo 页面的截屏验证了 intl 扩展被正确启动。
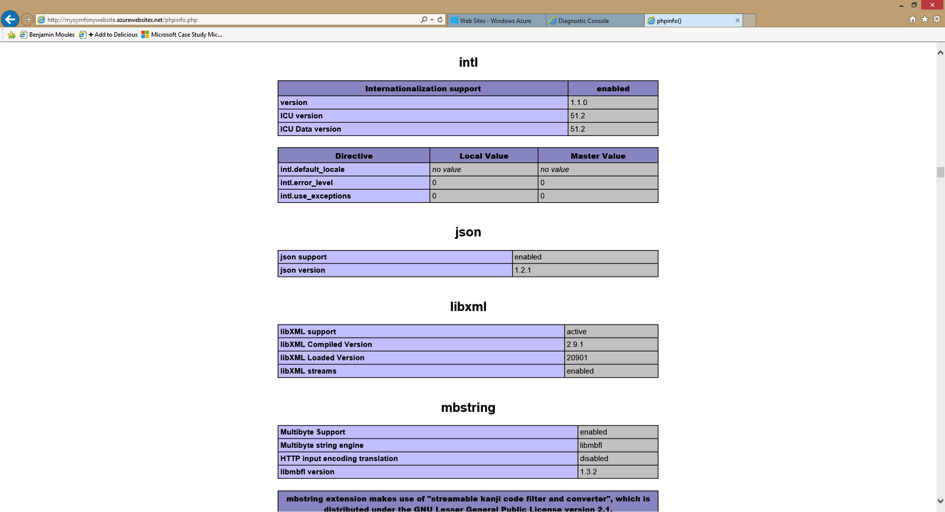
图片 9.13 image
太棒了!PHP 环境建立现已完成。接下来,您将学习如何配置 Git 存储库以及推动代码去产出。您将会学习到在部署之后如何安装和配置 Symfony 应用程序。
在 Git 中部署
首先,确保在您的终端使用以下命令使 Git 正确地安装在您本地机器中:
$ git --version
从 git-scm.com 网站中获取您的 Git,并且按照指示在您本地机器上安装配置。
在 Azure Website Control 面板上,浏览 Deployment 标记来获取 Git 存储库 URL,即您应该启动代码的地方。
图片 9.14 image
现在,您将要把您本地的 Symfony 应用程序与在 Azure Website 的远程 Git 存储库连接起来。如果您的 Symfony 应用程序还没有存储到库中,您必须首先在您的 Symfony 应用程序目录中用 git init 命令创建一个 GIt 存储库,然后用 git commit 命令提交。
同样,确保您的 Symfony 存储库有一个 .gitignore 文件在其根目录中,并至少含有一下内容:
/app/bootstrap.php.cache
/app/cache/*
/app/config/parameters.yml
/app/logs/*
!app/cache/.gitkeep
!app/logs/.gitkeep
/app/SymfonyRequirements.php
/build/
/vendor/
/bin/
/composer.phar
/web/app_dev.php
/web/bundles/
/web/config.php
.gitignore 文件要求 Git 不跟踪匹配这些模式的任何文件或目录。这意味着这些文件不被部署到 Azure Website 中。
现在,在您本地机器中的命令行中,在您的 Symfony 项目的根目录中输入以下:
$ git remote add azure https://<username>@<your-website-name>.scm.azurewebsites.net:443/<your-website-name>.git
$ git push azure master
不要忘记替换值,即在您的 Azure Website 面板上的 Deployment 展示的默认设置下由 < and > 封闭的值。git remote 命令连接了 Azure Website 远程 Git 存储库并分配其一个替换入口 azure。第二个 git push 命令启动所有对您的远程 azure Git 存储库的远程 master 分支的提交。
用 Git 部署应该产生与以下截屏相似的输出:
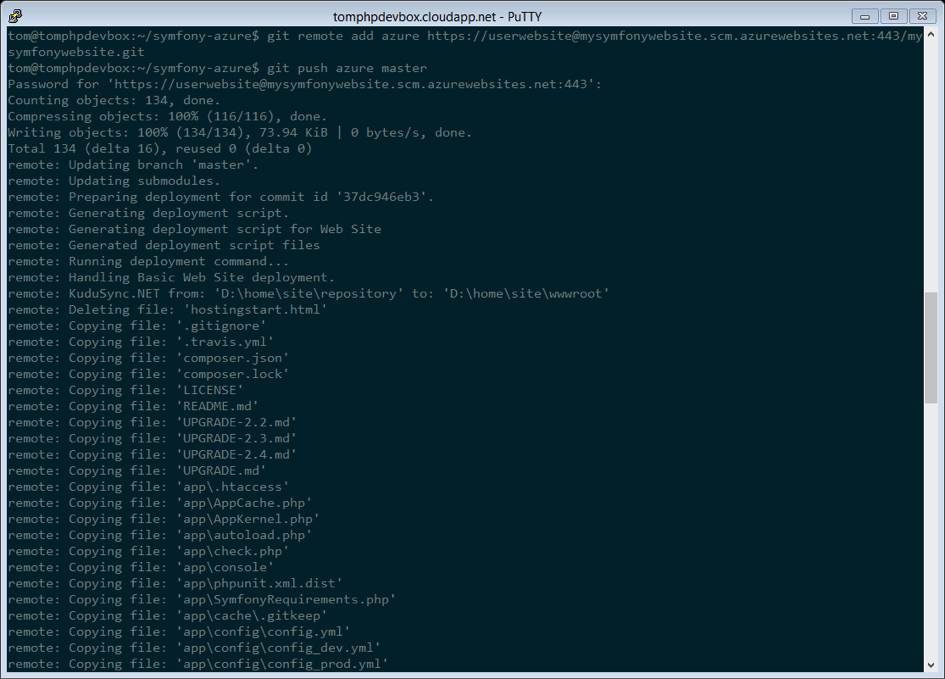
图片 9.15 image
Symfony 应用程序的代码现在已被部署到 Azure Website,您可以在 Kudu 应用程序的文件资源管理器中浏览。您应该在 Azure Webiste 文件系统中您的 site/wwwroot 目录下看到目录 app/, src/ 和 web/。
配置 Symfony 应用程序
PHP 已被配置,您的代码也已用 Git 启动。最后一步就是来配置应用程序并安装它所需要的第三方依赖,并不被 Git 追踪到。转回到在线 Kudu 应用程序的 Console 并在其中执行以下命令:
$ cd site\wwwroot
$ curl -sS https://getcomposer.org/installer | php
$ php -d extension=php_intl.dll composer.phar install
curl 命令检索并下载 Composer 命令行工具并在根目录 site/wwwroot 安装。然后,运行 Composer 命令下载并安装所有必要的三方库。
这样可能会花费一些时间,取决于您配置在 composer.json 文件中第三方依赖的数量。
-d 开关允许您快速地重置或添加任何 php.ini 设置。在这个命令中,我们强制 PHP 使用 intl 扩展,因为此时此刻不是在 Azure Website 默认情况下启动的。不久,将不再需要 -d 选项因为 Microsoft 会在默认情况下启动 intl 扩展。
在 composer install 命令的结尾,系统将提示您填写一些 Symfony 设置的值,比如说数据库证书,区域设置,邮件程序证书,CSRF 保护盾牌等等。这些参数来自 app/config/parameters.yml.dist 文件。
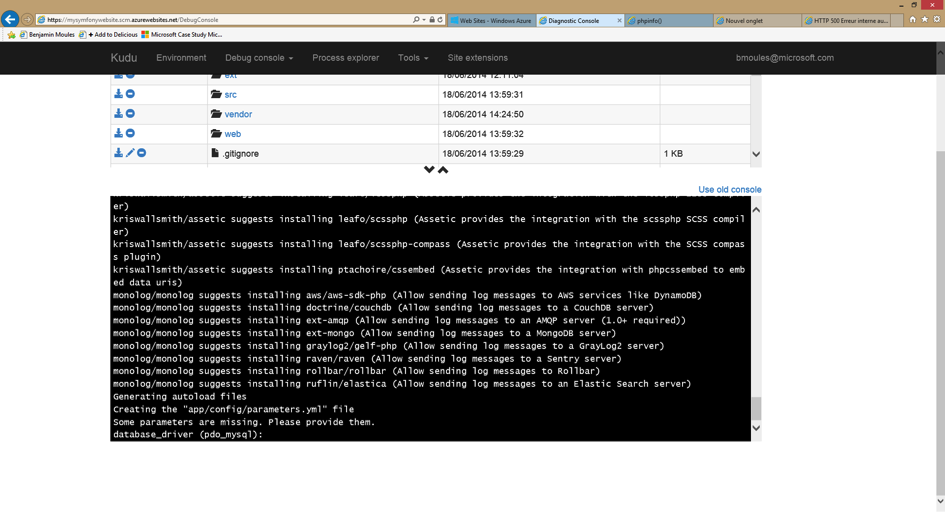
图片 9.16 image
本教程中最重要的事情是正确地建立您的数据库设置,您可以在 Azure Website Dashboard 面板的右侧边栏获取您的 MYSQL 数据库设置。简单地点击 View Connection Strings 链接来让它们突然出现。
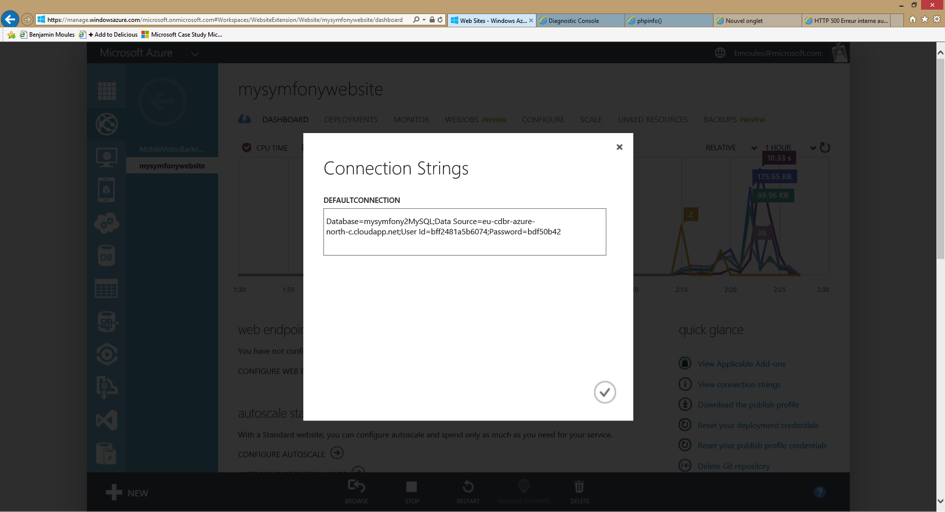
图片 9.17 image
所显示的 MySQL 数据库设置应该是和下面代码相似的一些东西。当然,每一个值取决于您的配置。
Database=mysymfonyMySQL;Data Source=eu-cdbr-azure-north-c.cloudapp.net;User Id=bff2481a5b6074;Password=bdf50b42
转换回控制台并回答提示的问题,并提供以下答案。不要忘记根据您在 MySQL 连接字符串里真实的值来调整以下的值。
database_driver: pdo_mysql
database_host: u-cdbr-azure-north-c.cloudapp.net
database_port: null
database_name: mysymfonyMySQL
database_user: bff2481a5b6074
database_password: bdf50b42
// ...
不要忘记回答所有的问题。为 secret 变量设置一个独立任意的字符串是很重要的。对于邮件程序配置来说,Azure Website 不提供一个内置的邮件程序服务。如果您的应用程序需要发送邮件,那么您应该考虑配置一些其他三方的邮件服务的主机名和证书。

图片 9.18 image
您的 Symfony 应用程序现已配置完毕,应该几乎是可操作的了。最终的步骤就是建立数据库模式。如果您正在使用 Doctrine,那么用命令行界面很容易完成这个。Kudu 应用程序的在线 Console 工具中,运行以下命令将表格加载到您的 MySQL 数据库中。
$ php app/console doctrine:schema:update --force
这个命令为您的 MySQL 数据库建立表格和表单。如果您的 Symfony 应用程序比起基本的 Symfony 标准版本更复杂一些,您或许需要附加的命令来执行建立。(参见 How to Deploy a Symfony Application)
确保您的应用程序是通过使用您的网页浏览器和以下网址浏览 app.php 前端控制器来运行。
http://<your-website-name>.azurewebsites.net/web/app.php
如果 Symfony 是正确安装的,您应该看一下您的 Symfony 应用程序显示的首页。
配置网页服务器
此刻,Symfony 应用程序已被部署并且在 Azure Website 上顺利工作。然而,web 文件夹仍然是网址的一部分,即您肯定不会想要的。但是不要担心!您可以轻松地配置网页服务器来指到 web 文件夹并移除 URL 中的 web(并确保没有人可以读取 web 目录中的外部文件。)
为了做这件事,创造并部署(参见关于 Git 前面的部分)以下 web.config 文件。这个文件必须位于 composer.json 文件旁边的根项目中。这个文件是 Microsoft IIS Server,它等同于 Apache 著名的 .htaccess 文件。对于一个 Symfony 应用程序来说,用以下内容配置:
<!-- web.config -->
<?xml version="1.0" encoding="UTF-8"?>
<configuration>
<system.webServer>
<rewrite>
<rules>
<clear />
<rule name="BlockAccessToPublic" patternSyntax="Wildcard" stopProcessing="true">
<match url="*" />
<conditions logicalGrouping="MatchAll" trackAllCaptures="false">
<add input="{URL}" pattern="/web/*" />
</conditions>
<action type="CustomResponse" statusCode="403" statusReason="Forbidden: Access is denied." statusDescription="You do not have permission to view this directory or page using the credentials that you supplied." />
</rule>
<rule name="RewriteAssetsToPublic" stopProcessing="true">
<match url="^(.*)(\.css|\.js|\.jpg|\.png|\.gif)$" />
<conditions logicalGrouping="MatchAll" trackAllCaptures="false">
</conditions>
<action type="Rewrite" url="web/{R:0}" />
</rule>
<rule name="RewriteRequestsToPublic" stopProcessing="true">
<match url="^(.*)$" />
<conditions logicalGrouping="MatchAll" trackAllCaptures="false">
</conditions>
<action type="Rewrite" url="web/app.php/{R:0}" />
</rule>
</rules>
</rewrite>
</system.webServer>
</configuration>
正如您可以看到的,最新的规则 RewriteRequestsToPublic 负责重新编写任何网址到 web/app.php 前端控制器,可以允许您跳过 URL 的 web/ 文件夹。第一条规则叫做 BlockAccessToPublic,匹配所有的网址模式,包括 web/ 文件夹并提供一个 403 Forbidden HTTP 响应。这个例子是基于 Benjamin Eberlei 的样例,您可以在 [SymfonyAzureEditionhref="https://github.com/icodeu/symfony-cookbook/blob/master/TOC.md") bundle 的 GitHub 中找到。
在 Azure Website 中的 site/wwwroot 目录中部署此文件并且在您的应用程序中浏览,不需要 URL 中的 web/app.php 片段。
总结
很好!您现在已经完成了在 Microsoft Azure Website 云平台上部署您的 Symfony 应用程序。您同样看到 Symfony 可以简单地在 Microsoft IIS 网页服务器上配置并执行。整个过程是简洁并易于实施的。作为奖励,Microsoft 将继续减少所需步骤的数量使部署变得更加简单。
这本按部就班的教程描述了如何在 Heroku 云平台上部署一个 Symfony 网页应用程序。其内容基于在 Heroku 上出版的原创文章。
设置
创建一个新的 Heroku 网站,首先用 Heroku 注册或者用您自己的证书注册。然后在您的本地计算机上下载并安装 Heroku Toolbelt。
您也可以查看在 Heroku 上开始使用 PHP 的指导来获取更多的对于在 Heroku 上使用 PHP 应用程序的细节的熟悉度。
准备您的应用程序
在 Heroku 上部署一个 Symfony 应用程序不需要其代码的任何变化,但是需要对其配置的一些轻微调整。
默认情况下,Symfony 应用程序会登录进入您应用程序的 app/log/ 目录。这不是很理想的因为 Heroku 使用的是短暂的文件系统。在 Heroku 中,处理登录的最好方法是使用 Logplex。并且发送登录数据到 Logplex 最好的方式是通过编写 STDERR 或者 STDOUT。幸运的是,Symfony 使用的是非常好的 Monolog 库来登录。因此,一个新的日志目的就是仅仅改变一个配置文件。
打开 app/config/config_prod.yml 文件,把 monolog/handlers/nested 片段(若还未存在就创建一个)并改变 path 的值,从 "%kernel.logs_dir%/%kernel.environment%.log" 到 "php://stderr":
# app/config/config_prod.yml
monolog:
# ...
handlers:
# ...
nested:
# ...
path: "php://stderr"
一旦应用程序被部署,运行 heroku logs –tail 使 Heroku 中的日志流在您的终端保持开启状态。
在 Heroku 中创建一个新的应用程序
创建一个您可以启动的新的 Heroku 应用程序,使用 CLI create 命令:
$ heroku create
Creating mighty-hamlet-1981 in organization heroku... done, stack is cedar
http://mighty-hamlet-1981.herokuapp.com/ | git@heroku.com:mighty-hamlet-1981.git
Git remote heroku added
现在您已经准备好部署应用程序,如同在下一个部分解释的那样。
在 Heroku 上部署您的应用程序
在您的首次部署前,您仅需要再做三件事,解释如下:
1)创建一个 Procfile
默认情况下,Heroku 会开启一个 Apache 网页服务器和 PHP 一并来服务应用程序。然而,有两个特殊情况适用于 Symfony 应用程序:
1.文件根是在 web/ 目录中,而不是在用应用程序的根目录中。
2.Composer bin-dir,即供应商的二进制文件(Heroku 自身的引导脚本)放置的地方,是 bin/,不是默认的 vendor/bin。
供应商的二进制文件一般由 Composer 安装在 vendor/bin,但是有些时候(例如:当运行一个 Symfony 标准版本项目!),定位是不同的。如果有疑问的话,您可以运行 composer config bin-dir 来找出正确的位置。
在应用程序的根目录创建一个新的文件叫做 Procfile(没有任何扩展),并且仅添加以下内容:
b: bin/heroku-php-apache2 web/
如果您更喜欢使用 Nginx,在 Heroku 同样是可以使用的,您可以创建一个配置文件或者按照在 Heroku documentation 描述的那样从 Procfile 指向它:
web: bin/heroku-php-nginx -C nginx_app.conf web/
如果您更喜欢使用命令控制台工作,执行以下命令来创建 Procfile 文件,并且将其添加到存储库中:
$ echo "web: bin/heroku-php-apache2 web/" > Procfile
$ git add .
$ git commit -m "Procfile for Apache and PHP"
[master 35075db] Procfile for Apache and PHP
1 file changed, 1 insertion(+)
2) 设置环境 prod
在部署中,Heroku 运行 composer install --no-dev 来安装应用程序所需要的所有依赖。然而,一般在 composer.json [安装后命令href="https://getcomposer.org/doc/articles/scripts.md"),例如:安装资产或者清除(或预热)缓存,在默认情况下运行使用 Symfony 的 dev 环境。
这明显不是您想要的—应用程序在“生成”中运行(尽管您只是用它来做个试验,或者作为一个过渡环境),所以任何构建的步骤也应该使用同样的 prod 环境。
幸好这个问题的解决方案是很简单的:Symfony 将会选择一个环境变量称 SYMFONY_ENV 并且如果没有其他特别的设置就会使用此环境。当 Heroku 公开所有配置变量作为环境变量,您可以发出一个单独命令来为您的应用程序做部署的准备:
$ heroku config:set SYMFONY_ENV=prod
注意在 require-dev 区段 composer.json 列出的依赖在 Heroku 中部署的过程中从不被安装。如果您的 Symfony 环境依赖这些包的话可能会引发问题。解决方案就是从 require-dev 移除这些包到 require 区段。
3)启动 Heroku 的代码
下一步,终于到了在 Heroku 部署您的应用程序的时间。如果您是第一次做这个的话,您将会看到像如下的信息:
The authenticity of host 'heroku.com (50.19.85.132)' can't be established.
RSA key fingerprint is 8b:48:5e:67:0e:c9:16:47:32:f2:87:0c:1f:c8:60:ad.
Are you sure you want to continue connecting (yes/no)?
这个情况下,您需要通过输入 yes 并点击 按键来确认—理想的情况是您验证了 RSA 秘钥指纹是正确的。
然后,执行这个命令部署您的应用程序:
$ git push heroku master
Initializing repository, done.
Counting objects: 130, done.
Delta compression using up to 4 threads.
Compressing objects: 100% (107/107), done.
Writing objects: 100% (130/130), 70.88 KiB | 0 bytes/s, done.
Total 130 (delta 17), reused 0 (delta 0)
-----> PHP app detected
-----> Setting up runtime environment...
- PHP 5.5.12
- Apache 2.4.9
- Nginx 1.4.6
-----> Installing PHP extensions:
- opcache (automatic; bundled, using 'ext-opcache.ini')
-----> Installing dependencies...
Composer version 64ac32fca9e64eb38e50abfadc6eb6f2d0470039 2014-05-24 20:57:50
Loading composer repositories with package information
Installing dependencies from lock file
- ...
Generating optimized autoload files
Creating the "app/config/parameters.yml" file
Clearing the cache for the dev environment with debug true
Installing assets using the hard copy option
Installing assets for Symfony\Bundle\FrameworkBundle into web/bundles/framework
Installing assets for Acme\DemoBundle into web/bundles/acmedemo
Installing assets for Sensio\Bundle\DistributionBundle into web/bundles/sensiodistribution
-----> Building runtime environment...
-----> Discovering process types
Procfile declares types -> web
-----> Compressing... done, 61.5MB
-----> Launching... done, v3
http://mighty-hamlet-1981.herokuapp.com/ deployed to Heroku
To git@heroku.com:mighty-hamlet-1981.git
* [new branch] master -> master
就是这样!如果您现在打开您的浏览器,要不就手动指向 heroku create 给您的 URL,或者也可以使用 Heroku Toolbelt,应用程序将会响应:
$ heroku open
Opening mighty-hamlet-1981... done
您应该在您的浏览器中看到 Symfony 应用程序。
如果您第一步在 Heroku 上安装全新的 Symfony 标准版本,您或许会遇到一个 404 页面没有找到错误。这是因为 / 的路径是由 AcmeDemoBundle 定义的,但是 AcmeDemoBundle 只在 dev 环境中加载(查看您的 AppKernel 类)。尝试从 AppBundle 打开 /app/example。
自定义编译步骤
如果您想在创建过程中执行另外的自定义命令,您可以利用 Heroku 的[自定义编译步骤href="https://devcenter.heroku.com/articles/php-support#custom-compile-step)。想象您为了避免潜在的易损性想从 Heroku 中的产出环境移除 dev 前端控件。添加一个命令来移除 web/app_dev.php,Composer 的安装后命令就会工作,但是它也会分别地移除本地 composer install 或 composer update 开发环境中的控件。相反,您可以在您的 composer.json 的 scripts 区段里添加一个自定义 Composer 命令叫做 compile (这个关键的名字是 Heroku 惯例)。列出的命令钩挂到 Heroku 的部署过程:
{
"scripts": {
"compile": [
"rm web/app_dev.php"
]
}
}
对于在产出系统中创建资产也是很有用的,例如:用 Assetic:
{
"scripts": {
"compile": [
"app/console assetic:dump"
]
}
}
Node.js 依赖
构建资产可能取决于节点包,例如 uglifyjs 或 uglifycss 资产缩小。在部署过程中安装节点包需要节点的安装。但是现在,Heroku 使用 PHP 构建包编译您的应用程序,是由 composer.json 文件的存在而自动侦测,不包括节点安装。因为 Node.js 构建包比 PHP 构建包(参见 Heroku 构建包)更优先,添加 package.json 列出您的节点依赖从而使 Heroku 选择 Node.js 构建包:
{
"name": "myApp",
"engines": {
"node": "0.12.x"
},
"dependencies": {
"uglifycss": "*",
"uglify-js": "*"
}
}
根据下一次部署,Heroku 使用 Node.js 构建包来编译应用程序并且安装您的 npm 包。另一方面,composer.json 现在被忽略。用两个构建包,Node.js 和 PHP 编译您的应用程序的话,您可以使用一个特殊的多样构建。为了覆盖构建包自动侦测,您需要明确地设置构建包 URL:
$ heroku buildpacks:set https://github.com/ddollar/heroku-buildpack-multi.git
接下来,添加 .buildpacks 文件到您的项目中,列出您所需要的构建包:
ttps://github.com/heroku/heroku-buildpack-nodejs.git
https://github.com/heroku/heroku-buildpack-php.git
有了下一次部署,您可以从两个构建包获益。此设置也启动您的 Heroku 环境,充分使用像 Grunt 或者 gulp 这些基于自动构建工具的结点。
此按部就班的指导书描述如何将 Symfony 网页应用程序部署到 Platform.sh。你可以在官方的 Platform.sh 文件中阅读更多关于在 Platform.sh 上使用 Symfony 的说明。
部署已存在的网站
本指南中已假设您的代码库的版本中包含 Git。
获取一个 Platform.sh 项目
您需要订阅一个 Platform.sh 项目。选择发展计划并完成校验过程。一旦您的项目准备好了,为其命名并选择: Import an existing site。
准备应用程序
若要在 Platform.sh 上部署 Symfony 应用程序,您只需在 Git 存储库的根目录里添加一个 platform.app.yamlat,存储库会使 Platform.sh 部署您的应用程序 (阅读更多关于 Platform.sh 配置文件)。
# .platform.app.yaml
# This file describes an application. You can have multiple applications
# in the same project.
# The name of this app. Must be unique within a project.
name: myphpproject
# The toolstack used to build the application.
toolstack: "php:symfony"
# The relationships of the application with services or other applications.
# The left-hand side is the name of the relationship as it will be exposed
# to the application in the PLATFORM_RELATIONSHIPS variable. The right-hand
# side is in the form `<service name>:<endpoint name>`.
relationships:
database: "mysql:mysql"
# The configuration of app when it is exposed to the web.
web:
# The public directory of the app, relative to its root.
document_root: "/web"
# The front-controller script to send non-static requests to.
passthru: "/app.php"
# The size of the persistent disk of the application (in MB).
disk: 2048
# The mounts that will be performed when the package is deployed.
mounts:
"/app/cache": "shared:files/cache"
"/app/logs": "shared:files/logs"
# The hooks that will be performed when the package is deployed.
hooks:
build: |
rm web/app_dev.php
app/console --env=prod assetic:dump --no-debug
deploy: |
app/console --env=prod cache:clear
最佳的做法是,您应该在 Git 存储库的根目录下面添加一个包含以下文件的 .platform 文件夹:
# .platform/routes.yaml
"http://{default}/":
type: upstream
# the first part should be your project name
upstream: "myphpproject:php"
# .platform/services.yaml
mysql:
type: mysql
disk: 2048
您可以在 GitHub 上找到此类配置的示例。Platform.sh 文件中包含有可用服务列表:
配置数据库入口
Platform.sh 将通过导入以下文件重写您数据库的特定配置 (您需要自主添加下列文件到您的代码库):
// app/config/parameters_platform.php
<?php
$relationships = getenv("PLATFORM_RELATIONSHIPS");
if (!$relationships) {
return;
}
$relationships = json_decode(base64_decode($relationships), true);
foreach ($relationships['database'] as $endpoint) {
if (empty($endpoint['query']['is_master'])) {
continue;
}
$container->setParameter('database_driver', 'pdo_' . $endpoint['scheme']);
$container->setParameter('database_host', $endpoint['host']);
$container->setParameter('database_port', $endpoint['port']);
$container->setParameter('database_name', $endpoint['path']);
$container->setParameter('database_user', $endpoint['username']);
$container->setParameter('database_password', $endpoint['password']);
$container->setParameter('database_path', '');
}
# Store session into /tmp.
ini_set('session.save_path', '/tmp/sessions');
请确保此文件列于您的 Imports 中:
# app/config/config.yml
imports:
- { resource: parameters_platform.php }
部署您的应用程序
现在您需要在 Git 代码库中添加一个 Platform.sh 的远程指令(复制您在 Platform.sh web UI 上看到的指令):
$ git remote add platform [PROJECT-ID]@git.[CLUSTER].platform.sh:[PROJECT-ID].git
PROJECT-ID
给您的项目添加唯一标识符。就像 kjh43kbobssae 一样。
CLUSTER
部署您项目所在的服务器位置。它可以是 eu 或 us。
执行前一节中创建的 Platform.sh 特定文件:
$ git add .platform.app.yaml .platform/*
$ git add app/config/config.yml app/config/parameters_platform.php
$ git commit -m "Adding Platform.sh configuration files."
将您的代码库推送给新添加的远程指令:
$ git push platform master
就是这样!您的应用程序正在被部署到 Platform.sh 上,您很快就能够在您的浏览器中访问它了。
从现在起,您做出的每一个代码变更都将会推送到 Git,以便重新调配您的 Platform.sh 环境。
有关迁移数据库和文件的详细信息可在 Platform.sh 文件中查看。
部署一个新站点
您可以开始一个新的 Platform.sh 项目。选择发展计划并完成校验过程。
一旦您的项目准备就绪,为其命名并选择::Create a new site。选择 Symfonystack 和一个类似 Standard 的起始点。
就是这样!您的 Symfony 应用程序将自主运行并进行配置。您很快就能够在您的浏览器中看到它。
10
Doctrine
除了您自己上传文件,您或许考虑使用 VichUploaderBundle 社区 bundle。这个 bundle 提供了所有常见的操作(例如文件重命名、保存和删除),并且它紧密地与 Doctrine ORM、MongoDB ODM、PHPCR ODM 和 Propel 组成为一个整体。
用 Doctrine 实体上传文件与上传任何其他文件无区别。换句话说,您可以在提交表单之后自由移动您控件中的文件。为了举例如何做这个,参见文件类型引用页面。
如果您选择的话,您也可以整合上传文件到您的实体生命周期(例如,创建、更新和移除)。这种情况下,当您的实体被创建,更新或者是从 Doctrine 移除,上传文件和移除进程将会自动发生(不需要在您的控件中做任何事)。
要使这个奏效,您需要注意大量的细节,将会在这本教程条目中讲到。
基本设置
首先,创建一个简单的 Doctrine 实体类来使用:
// src/AppBundle/Entity/Document.php
namespace AppBundle\Entity;
use Doctrine\ORM\Mapping as ORM;
use Symfony\Component\Validator\Constraints as Assert;
/**
* @ORM\Entity
*/
class Document
{
/**
* @ORM\Id
* @ORM\Column(type="integer")
* @ORM\GeneratedValue(strategy="AUTO")
*/
public $id;
/**
* @ORM\Column(type="string", length=255)
* @Assert\NotBlank
*/
public $name;
/**
* @ORM\Column(type="string", length=255, nullable=true)
*/
public $path;
public function getAbsolutePath()
{
return null === $this->path
? null
: $this->getUploadRootDir().'/'.$this->path;
}
public function getWebPath()
{
return null === $this->path
? null
: $this->getUploadDir().'/'.$this->path;
}
protected function getUploadRootDir()
{
// the absolute directory path where uploaded
// documents should be saved
return __DIR__.'/../../../../web/'.$this->getUploadDir();
}
protected function getUploadDir()
{
// get rid of the __DIR__ so it doesn't screw up
// when displaying uploaded doc/image in the view.
return 'uploads/documents';
}
}
Document 实体有一个名称并且与一个文件相关联。path 属性储存相关的路径到文件,并且保存到数据库中。
getAbsolutePath() 是一个可以将绝对路径返回到文件的便捷方法,而 getWebPath() 是一个可以将网页路径返回,可用于模板链接上传文件的便捷方法。
如果您还未做完,您应该首先阅读文件类型文档来了解基本的上传进程是如何运行的。
如果您正在使用标注来指定您的验证规则(正如例子所示),确保您已经用标注启动了验证(参见验证配置)。
如果您使用方法 getUploadRootDir(),注意这会保存根文件的内部文件,可以被所有人读取。要考虑把它放在根文件之外,并当您需要保护这些文件的时候添加自定义查看逻辑。
要上传表单中的实际文件,使用一个“虚拟” file 域。例如,如果您正在一个控件里直接构建您的表单,它看起来会像这样:
public function uploadAction()
{
// ...
$form = $this->createFormBuilder($document)
->add('name')
->add('file')
->getForm();
// ...
}
接下来,在您的 Document 类里创建这个属性,并添加一些验证规则:
use Symfony\Component\HttpFoundation\File\UploadedFile;
// ...
class Document
{
/**
* @Assert\File(maxSize="6000000")
*/
private $file;
/**
* Sets file.
*
* @param UploadedFile $file
*/
public function setFile(UploadedFile $file = null)
{
$this->file = $file;
}
/**
* Get file.
*
* @return UploadedFile
*/
public function getFile()
{
return $this->file;
}
}
Annotations
// src/AppBundle/Entity/Document.php
namespace AppBundle\Entity;
// ...
use Symfony\Component\Validator\Constraints as Assert;
class Document
{
/**
* @Assert\File(maxSize="6000000")
*/
private $file;
// ...
}
YAML:
# src/AppBundle/Resources/config/validation.yml
AppBundle\Entity\Document:
properties:
file:
- File:
maxSize: 6000000
XML:
<!-- src/AppBundle/Resources/config/validation.xml -->
<class name="AppBundle\Entity\Document">
<property name="file">
<constraint name="File">
<option name="maxSize">6000000</option>
</constraint>
</property>
</class>
PHP:
// src/AppBundle/Entity/Document.php
namespace Acme\DemoBundle\Entity;
// ...
use Symfony\Component\Validator\Mapping\ClassMetadata;
use Symfony\Component\Validator\Constraints as Assert;
class Document
{
// ...
public static function loadValidatorMetadata(ClassMetadata $metadata)
{
$metadata->addPropertyConstraint('file', new Assert\File(array(
'maxSize' => 6000000,
)));
}
}
当您正在使用 File 约束,Symfony 会自动猜测表单域是文件上传输入。这就是您为什么在创建上面的表单时(->add('file'))不需要做显示设置的原因。
以下控件展示了如何处理整个进程:
// ...
use AppBundle\Entity\Document;
use Sensio\Bundle\FrameworkExtraBundle\Configuration\Template;
use Symfony\Component\HttpFoundation\Request;
// ...
/**
* @Template()
*/
public function uploadAction(Request $request)
{
$document = new Document();
$form = $this->createFormBuilder($document)
->add('name')
->add('file')
->getForm();
$form->handleRequest($request);
if ($form->isValid()) {
$em = $this->getDoctrine()->getManager();
$em->persist($document);
$em->flush();
return $this->redirectToRoute(...);
}
return array('form' => $form->createView());
}
之前的控件会用提交的名字自动保存 Document 实体,但是不会对文件做任何事情并且 path 属性为空白。
上传文件的一个简单的方法是在实体保存之前移动文件,然后相应地设置 path 属性。首先在 Document 类调用一个新的 upload() 方法,您就能立刻上传文件:
if ($form->isValid()) {
$em = $this->getDoctrine()->getManager();
$document->upload();
$em->persist($document);
$em->flush();
return $this->redirectToRoute(...);
}
upload() 方法会利用 UploadedFile 对象,在一个 file 域提交后会返回:
public function upload()
{
// the file property can be empty if the field is not required
if (null === $this->getFile()) {
return;
}
// use the original file name here but you should
// sanitize it at least to avoid any security issues
// move takes the target directory and then the
// target filename to move to
$this->getFile()->move(
$this->getUploadRootDir(),
$this->getFile()->getClientOriginalName()
);
// set the path property to the filename where you've saved the file
$this->path = $this->getFile()->getClientOriginalName();
// clean up the file property as you won't need it anymore
$this->file = null;
}
使用生命周期回呼
使用生命周期回呼是一个限制的技术,有一些缺陷。如果您想移除在 Document::getUploadRootDir() 方法内部的硬编码的 DIR 引用,最好的方法就是开始使用明确的 doctrine 监听器注入内核参数,比如 kernel.root_dir 来构建绝对路径。
尽管这个实现奏效,但是它有一个主要缺陷:如果实体保存的时候有问题怎么办?文件已经移动到了它的最终位置尽管实体的 path 属性未被正确保存。
为了避免这类问题,您应该改变实施从而使数据库操作和文件的移动具有原子性:如果在保存实体时有问题或者文件不能被移动,那么没有事情会发生。
要做到这一点,您需要正确移动文件因为 Doctrine 保存实体到数据库。这个可以通过挂钩一个实体生命周期回呼完成。
/**
* @ORM\Entity
* @ORM\HasLifecycleCallbacks
*/
class Document
{
}
接下来,重构 Document 类来利用这些回呼:
use Symfony\Component\HttpFoundation\File\UploadedFile;
/**
* @ORM\Entity
* @ORM\HasLifecycleCallbacks
*/
class Document
{
private $temp;
/**
* Sets file.
*
* @param UploadedFile $file
*/
public function setFile(UploadedFile $file = null)
{
$this->file = $file;
// check if we have an old image path
if (isset($this->path)) {
// store the old name to delete after the update
$this->temp = $this->path;
$this->path = null;
} else {
$this->path = 'initial';
}
}
/**
* @ORM\PrePersist()
* @ORM\PreUpdate()
*/
public function preUpload()
{
if (null !== $this->getFile()) {
// do whatever you want to generate a unique name
$filename = sha1(uniqid(mt_rand(), true));
$this->path = $filename.'.'.$this->getFile()->guessExtension();
}
}
/**
* @ORM\PostPersist()
* @ORM\PostUpdate()
*/
public function upload()
{
if (null === $this->getFile()) {
return;
}
// if there is an error when moving the file, an exception will
// be automatically thrown by move(). This will properly prevent
// the entity from being persisted to the database on error
$this->getFile()->move($this->getUploadRootDir(), $this->path);
// check if we have an old image
if (isset($this->temp)) {
// delete the old image
unlink($this->getUploadRootDir().'/'.$this->temp);
// clear the temp image path
$this->temp = null;
}
$this->file = null;
}
/**
* @ORM\PostRemove()
*/
public function removeUpload()
{
$file = $this->getAbsolutePath();
if ($file) {
unlink($file);
}
}
}
如果对你实体的改变被一个 Doctrine 事件监听器或者事件订阅者所处理,preUpdate() 回呼必须通知 Doctrine 所完成的变化。关于 preUpadate 事件限制的所有引用,在 Doctrine 事件文档中参见 preUpdate。
类现在做一切您需要的事情:它会在保存之前产生一个独特的文件名,在保存之后移动文件,并且如果实体被删除的话就移除文件。
现在文件的移动是由实体自动处理的,$document->upload() 的调用应从控件中移除:
if ($form->isValid()) {
$em = $this->getDoctrine()->getManager();
$em->persist($document);
$em->flush();
return $this->redirectToRoute(...);
}
@ORM\PrePersist() 和 @ORM\PostPersist() 事件回呼在实体保存到数据库前后被触发。在另一方面,当实体更新后,@ORM\PreUpdate() 和 @ORM\PostUpdate() 事件回呼被调用。
如果被保存的实体的字段其中之一有变化,PreUpdate 和 PostUpdate 回呼才会被激发。这意味着,默认情况下,如果您只调整 $file 属性,这些事件将不再被激发,因为属性本身不是直接通过 Doctrine 保存的。一个解决方案就是使用一个保存在 Doctrine 中的 updated 字段,然后当改变文件的时候手动调整。
使用 id 作为文件名称
如果您想使用 id 作为文件的名称,操作和您需要在 path 属性下保存的扩展有轻微的不同,并不是实际的文件名称:
``` use Symfony\Component\HttpFoundation\File\UploadedFile;
/** * @ORM\Entity * @ORM\HasLifecycleCallbacks */ class Document { private $temp;
/**
* Sets file.
*
* @param UploadedFile $file
*/
public function setFile(UploadedFile $file = null)
{
$this->file = $file;
// check if we have an old image path
if (is_file($this->getAbsolutePath())) {
// store the old name to delete after the update
$this->temp = $this->getAbsolutePath();
} else {
$this->path = 'initial';
}
}
/**
* @ORM\PrePersist()
* @ORM\PreUpdate()
*/
public function preUpload()
{
if (null !== $this->getFile()) {
$this->path = $this->getFile()->guessExtension();
}
}
/**
* @ORM\PostPersist()
* @ORM\PostUpdate()
*/
public function upload()
{
if (null === $this->getFile()) {
return;
}
// check if we have an old image
if (isset($this->temp)) {
// delete the old image
unlink($this->temp);
// clear the temp image path
$this->temp = null;
}
// you must throw an exception here if the file cannot be moved
// so that the entity is not persisted to the database
// which the UploadedFile move() method does
$this->getFile()->move(
$this->getUploadRootDir(),
$this->id.'.'.$this->getFile()->guessExtension()
);
$this->setFile(null);
}
/**
* @ORM\PreRemove()
*/
public function storeFilenameForRemove()
{
$this->temp = $this->getAbsolutePath();
}
/**
* @ORM\PostRemove()
*/
public function removeUpload()
{
if (isset($this->temp)) {
unlink($this->temp);
}
}
public function getAbsolutePath()
{
return null === $this->path
? null
: $this->getUploadRootDir().'/'.$this->id.'.'.$this->path;
}
}
您将会注意到在这种情况下,您需要再做一些工作来移除文件。在移除之前,您必须存储文件路径(因为它取决于 id)。然后,一旦对象已被完全从数据库移除,您可以安全地删除文件(在 **PostRemove** 中)。
## 如何使用 Doctrine 扩展:Timestampable, Sluggable, Translatable 等等
Doctrine2 非常灵活,并且社区已经创建了一系列有用的 Doctrine 扩展来帮助您做一些常见的实体相关的任务。
特别有一个库— [DoctrineExtensionshref="https://github.com/Atlantic18/DoctrineExtensions) 库—为 [Sluggable](https://github.com/Atlantic18/DoctrineExtensions/blob/master/doc/sluggable.md), [Translatable](https://github.com/Atlantic18/DoctrineExtensions/blob/master/doc/translatable.md), [Timestampable](https://github.com/Atlantic18/DoctrineExtensions/blob/master/doc/timestampable.md), [Loggable](https://github.com/Atlantic18/DoctrineExtensions/blob/master/doc/loggable.md), [Tree](https://github.com/Atlantic18/DoctrineExtensions/blob/master/doc/tree.md) 和 [Sortable](https://github.com/Atlantic18/DoctrineExtensions/blob/master/doc/sortable.md") 行为提供了整合功能。
这些扩展的每一个使用将在库中解释。
然而,为了安装/激发每一个扩展,您必须注册并激活一个 [Event Listener](http://symfony.com/doc/current/cookbook/doctrine/event_listeners_subscribers.html)。做这个您有两个选择:
1. 使用 [StofDoctrineExtensionsBundle](https://github.com/stof/StofDoctrineExtensionsBundle),整合以上的库。
2. 直接实施这项服务,通过此文档材料与 Symfony 的集成:[在 Symfony2 中安装 Gedmo Doctrine2 扩展href="https://github.com/Atlantic18/DoctrineExtensions/blob/master/doc/symfony2.md")。
## 如何注册事件监听器和订阅
Doctrine 包括一个丰富的事件系统可以在任何事情在系统内部发生的时候激发事件。对于您来说,这意味着您可以创建任意的[服务](http://symfony.com/doc/current/book/service_container.html)并且让 Doctrine 在任何时候,一个特定的动作(例如:**prePersist**)在 Doctrine 内部发生时,通知那些对象。这可以是有用的,例如,在任何时候您的数据库保存一个对象就创建一个独立的搜索表单。
Doctrine 定义了两种类型的对象,可以监听 Doctrine 事件:监听器和订阅。它们都很相似,但是监听器更为直接。更多的,可以参见 Doctrine 网站上的[事件系统](http://docs.doctrine-project.org/projects/doctrine-orm/en/latest/reference/events.html)。
Doctrine 网站也解释了所有可以被监听的现存事件。
### 配置监听器或订阅
注册一个服务充当一个事件监听器或者订阅,您只需要用过适当的名字[标记](http://symfony.com/doc/current/book/service_container.html#book-service-container-tags)它即可。取决于您的使用实例,您可以钩挂一个监听器到每一个 DBAL 连接和 ORM 实体管理器或者只是进入一个具体的 DBAL 连接和所有使用这个连接的实体管理器。
YAML:
doctrine: dbal: default_connection: default connections: default: driver: pdo_sqlite memory: true
services: my.listener: class: Acme\SearchBundle\EventListener\SearchIndexer tags: - { name: doctrine.event_listener, event: postPersist } my.listener2: class: Acme\SearchBundle\EventListener\SearchIndexer2 tags: - { name: doctrine.event_listener, event: postPersist, connection: default } my.subscriber: class: Acme\SearchBundle\EventListener\SearchIndexerSubscriber tags: - { name: doctrine.event_subscriber, connection: default }
XML:
<doctrine:config>
<doctrine:dbal default-connection="default">
<doctrine:connection driver="pdo_sqlite" memory="true" />
</doctrine:dbal>
</doctrine:config>
<services>
<service id="my.listener" class="Acme\SearchBundle\EventListener\SearchIndexer">
<tag name="doctrine.event_listener" event="postPersist" />
</service>
<service id="my.listener2" class="Acme\SearchBundle\EventListener\SearchIndexer2">
<tag name="doctrine.event_listener" event="postPersist" connection="default" />
</service>
<service id="my.subscriber" class="Acme\SearchBundle\EventListener\SearchIndexerSubscriber">
<tag name="doctrine.event_subscriber" connection="default" />
</service>
</services>
PHP:
use Symfony\Component\DependencyInjection\Definition;
$container->loadFromExtension('doctrine', array( 'dbal' => array( 'default_connection' => 'default', 'connections' => array( 'default' => array( 'driver' => 'pdo_sqlite', 'memory' => true, ), ), ), ));
$container ->setDefinition( 'my.listener', new Definition('Acme\SearchBundle\EventListener\SearchIndexer') ) ->addTag('doctrine.event_listener', array('event' => 'postPersist')) ; $container ->setDefinition( 'my.listener2', new Definition('Acme\SearchBundle\EventListener\SearchIndexer2') ) ->addTag('doctrine.event_listener', array('event' => 'postPersist', 'connection' => 'default')) ; $container ->setDefinition( 'my.subscriber', new Definition('Acme\SearchBundle\EventListener\SearchIndexerSubscriber') ) ->addTag('doctrine.event_subscriber', array('connection' => 'default')) ;
### 创建监听器类
在之前的例子中,服务 **my.listener** 被配置为 **postPersist** 事件中的 Doctrine 监听器。服务后的类必须有 **postPersist** 方法,当事件被发送时,此方法被调用。
// src/Acme/SearchBundle/EventListener/SearchIndexer.php namespace Acme\SearchBundle\EventListener;
use Doctrine\ORM\Event\LifecycleEventArgs; use Acme\StoreBundle\Entity\Product;
class SearchIndexer { public function postPersist(LifecycleEventArgs $args) { $entity = $args->getEntity(); $entityManager = $args->getEntityManager();
// perhaps you only want to act on some "Product" entity
if ($entity instanceof Product) {
// ... do something with the Product
}
}
}
在每一个事件中,您可以访问 **LifecycleEventArgs** 对象,可以让您既访问事件的实例对象也可以访问实例管理器本身。
一个需要注意的重要的事情是监听器将会监听到应用程序中*所有的*实例。所以,如果您只是对实例具体的一个类型感兴趣(例如:**Product** 实例而不是 **BlogPost** 实例),您应该在您的方法中检查实例类型(如上面所示)。
> 在 Doctrine2.4 中,将要介绍一个功能叫做实体监听器。这是用于实例的一个生命周期监听器类。您可以在 [Doctrine 文档](http://docs.doctrine-project.org/projects/doctrine-orm/en/latest/reference/events.html#entity-listeners)中阅读有关信息。
### 创建订阅类
Doctrine 事件订阅必须实现 **Doctrine\Common\EventSubscriber** 接口,并且对于每一个订阅的事件都得有一个事件方法:
// src/Acme/SearchBundle/EventListener/SearchIndexerSubscriber.php namespace Acme\SearchBundle\EventListener;
use Doctrine\Common\EventSubscriber; use Doctrine\ORM\Event\LifecycleEventArgs; // for Doctrine 2.4: Doctrine\Common\Persistence\Event\LifecycleEventArgs; use Acme\StoreBundle\Entity\Product;
class SearchIndexerSubscriber implements EventSubscriber { public function getSubscribedEvents() { return array( 'postPersist', 'postUpdate', ); }
public function postUpdate(LifecycleEventArgs $args)
{
$this->index($args);
}
public function postPersist(LifecycleEventArgs $args)
{
$this->index($args);
}
public function index(LifecycleEventArgs $args)
{
$entity = $args->getEntity();
$entityManager = $args->getEntityManager();
// perhaps you only want to act on some "Product" entity
if ($entity instanceof Product) {
// ... do something with the Product
}
}
}
> Doctrine 事件订阅不可以像 [Symfony 事件订阅](http://symfony.com/doc/current/components/event_dispatcher/introduction.html#event-dispatcher-using-event-subscribers)那样返回一系列灵活的方法来调用事件。Doctrine 事件订阅可以返回一系列简单的它们所订阅的事件的名称。Doctrine 期待当使用一个监听器的时,订阅上的方法同每一个订阅的事件有相同的名称。
想要完整的参考,参考 Doctrine 文档中的章节:[事件系统](http://docs.doctrine-project.org/projects/doctrine-orm/en/latest/reference/events.html)。
## 如何使用 Doctrine DBAL
> 这篇文章关于 Doctrine DBAL。一般来说,你将会使用更高级别的 Doctrine ORM 层次,它仅使用幕后的 DBAL 真正地与数据库交流。要阅读更多关于 Doctrine ORM,参见“[数据库与 Doctrine](http://symfony.com/doc/current/book/doctrine.html)”。
[Doctrine](http://www.doctrine-project.org/) 数据库抽象层(DBAL)是一个抽象层面,位于 [PDO](http://php.net/pdo) 的顶端,并且提供一个直观的和灵活的 API,用于与最流行的关系数据库进行通信。换句话说,DBAL 库使执行查询和执行其他数据库操作很容易。
> 阅读官方 Doctrine [DBAL 文档](http://docs.doctrine-project.org/projects/doctrine-dbal/en/latest/index.html)来学习更多关于 Doctrine DBAL 库的细节和功能。
一开始,配置数据库连接参数:
YAML:
# app/config/config.yml
doctrine: dbal: driver: pdo_mysql dbname: Symfony user: root password: null charset: UTF8 server_version: 5.6
XML:
PHP:
// app/config/config.php $container->loadFromExtension('doctrine', array( 'dbal' => array( 'driver' => 'pdo_mysql', 'dbname' => 'Symfony', 'user' => 'root', 'password' => null, 'charset' => 'UTF8', 'server_version' => '5.6', ), ));
想要完整的 DBAL 配置选项或者学习如何配置多种连接,参见 [Doctrine DBAL 配置](http://symfony.com/doc/current/reference/configuration/doctrine.html#reference-dbal-configuration)。
然后你可以通过访问 **database_connection** 服务来访问 Doctrine DBAL 连接:
class UserController extends Controller { public function indexAction() { $conn = $this->get('database_connection'); $users = $conn->fetchAll('SELECT * FROM users');
// ...
}
}
### 注册自定义映射类型
你可以通过 Symfony 配置来注册自定义映射类型。它们将会被添加到所有的配置连接中。想知道更多关于自定义映射类型的信息,阅读它们文档的 Doctrine [自定义映射类型](http://docs.doctrine-project.org/projects/doctrine-dbal/en/latest/reference/types.html#custom-mapping-types)部分。
YAML:
# app/config/config.yml
doctrine: dbal: types: custom_first: AppBundle\Type\CustomFirst custom_second: AppBundle\Type\CustomSecond
XML:
<doctrine:config>
<doctrine:dbal>
<doctrine:type name="custom_first" class="AppBundle\Type\CustomFirst" />
<doctrine:type name="custom_second" class="AppBundle\Type\CustomSecond" />
</doctrine:dbal>
</doctrine:config>
PHP:
// app/config/config.php $container->loadFromExtension('doctrine', array( 'dbal' => array( 'types' => array( 'custom_first' => 'AppBundle\Type\CustomFirst', 'custom_second' => 'AppBundle\Type\CustomSecond', ), ), ));
### 在 SchemaTool 中注册自定义映射类型
SchemaTool 被用于检测数据库来比较模式。为了完成这个任务,需要知道每一个数据库需要的映射类型是什么。注册新的可以通过配置来完成。
现在,将 ENUM 类型(默认情况下不由 DBAL 支持)映射到 **string** 映射类型:
YAML:
# app/config/config.yml
doctrine: dbal: mapping_types: enum: string
XML:
<doctrine:config>
<doctrine:dbal>
<doctrine:mapping-type name="enum">string</doctrine:mapping-type>
</doctrine:dbal>
</doctrine:config>
PHP:
// app/config/config.php $container->loadFromExtension('doctrine', array( 'dbal' => array( 'mapping_types' => array( 'enum' => 'string', ), ), ));
## 如何从已存在的数据库中生成实体
当开始使用一个工作于一个全新的项目的数据库,自然而然就有两个不同的结果。大部分情况下,数据库模型的设计和建立从零开始。然而有些时候,您将是从一个已存在且不变的模型上开始。幸运的是,Doctrine 有一大堆的工具来帮助从您已存在的数据中生成模型类。
> 正如 [Doctrine 工具文档](http://docs.doctrine-project.org/projects/doctrine-orm/en/latest/reference/tools.html#reverse-engineering)所说的,逆向工程是开始一个项目的一次性过程。Doctrine 能够转换 70 - 80% 基于领域、表单和外检约束的必要映射信息。Doctrine 不能够发现逆关联、继承类型、作为主键的外键实体或者语义操作关联例如级联或者生命周期事件。在生成实体之后还有一些必要的额外工作来设计每一个适合您的域模型特性。
本教程假设您正在使用一个有以下两个表格的简单的博客应用程序:**blog_post** 和 **blog_comment**。由于外键约束的原因,评论记录与后续记录相链接。
CREATE TABLE blog_post
( id
bigint(20) NOT NULL AUTO_INCREMENT, title
varchar(100) COLLATE utf8_unicode_ci NOT NULL, content
longtext COLLATE utf8_unicode_ci NOT NULL, created_at
datetime NOT NULL, PRIMARY KEY (id
) ) ENGINE=InnoDB AUTO_INCREMENT=1 DEFAULT CHARSET=utf8 COLLATE=utf8_unicode_ci;
CREATE TABLE blog_comment
( id
bigint(20) NOT NULL AUTO_INCREMENT, post_id
bigint(20) NOT NULL, author
varchar(20) COLLATE utf8_unicode_ci NOT NULL, content
longtext COLLATE utf8_unicode_ci NOT NULL, created_at
datetime NOT NULL, PRIMARY KEY (id
), KEY blog_comment_post_id_idx
(post_id
), CONSTRAINT blog_post_id
FOREIGN KEY (post_id
) REFERENCES blog_post
(id
) ON DELETE CASCADE ) ENGINE=InnoDB AUTO_INCREMENT=1 DEFAULT CHARSET=utf8 COLLATE=utf8_unicode_ci;
在投入到教程之前,确保您的数据库连接参数在 **app/config/parameters.yml** 文件中正确设置(或者不管您的数据库配置在哪里),并确保您已经初始化了一个将要群集您实体类的包。在本教程中假设存在并位于 **src/Acme/BlogBundle** 文件夹。
从已存在数据库创建实体类的第一步是让 Doctrine 内省数据库并生成相应的元数据文件。元数据文件描述了在表字段生成的实体类。
$ php app/console doctrine:mapping:import --force AcmeBlogBundle xml
这个命令行工具让 Doctrine 来内省数据库并在包的 **src/Acme/BlogBundle/Resources/config/doctrine** 文件夹中生成 XML 元数据文件。这生成两个文件:**BlogPost.orm.xml** 和 **BlogComment.orm.xml**。
> 通过把最后一个参数改为 **yml** 来生成 YAML 格式的元数据文件也是可能的。
生成的 **BlogPost.orm.xml** 元数据文件看起来如下:
一旦元数据文件生成,您可以通过执行以下两个命令让 Doctrine 创建相关的实体类。
$ php app/console doctrine:mapping:convert annotation ./src $ php app/console doctrine:generate:entities AcmeBlogBundle
第一个命令生成注释映射的实体类。但是如果您想使用 YAML 或者 XML 而不是注释,您应该只执行第二个命令。
> 如果您想使用注释,您可以安全地在运行了这两个命令后删除 XML(或 YAML)文件。
例如,新创建的 **BlogComment** 实体类看起来如下:
// src/Acme/BlogBundle/Entity/BlogComment.php namespace Acme\BlogBundle\Entity;
use Doctrine\ORM\Mapping as ORM;
/** * Acme\BlogBundle\Entity\BlogComment * * @ORM\Table(name="blog_comment") * @ORM\Entity */ class BlogComment { /** * @var integer $id * * @ORM\Column(name="id", type="bigint") * @ORM\Id * @ORM\GeneratedValue(strategy="IDENTITY") */ private $id;
/**
* @var string $author
*
* @ORM\Column(name="author", type="string", length=100, nullable=false)
*/
private $author;
/**
* @var text $content
*
* @ORM\Column(name="content", type="text", nullable=false)
*/
private $content;
/**
* @var datetime $createdAt
*
* @ORM\Column(name="created_at", type="datetime", nullable=false)
*/
private $createdAt;
/**
* @var BlogPost
*
* @ORM\ManyToOne(targetEntity="BlogPost")
* @ORM\JoinColumn(name="post_id", referencedColumnName="id")
*/
private $post;
}
正如您可以看到的,Doctrine 将所有的表字段转化成为纯私有和带注释的类属性。最令人印象深刻的是它同样发现了与基于外键约束的 **BlogPost** 实体类的关系。因此,您可以在 **$post** 实体类中找到用 **BlogPost** 实体映射的一个私有的 **$post** 属性。
> 如果您想有一对多的关系,您需要手动将其添加到实体或者生成的 XML 或 YAML 文件。在具体的实体上添加一个区段使一对多定义 **inversedBy** 和 **mappedBy** 块。
现在可以使用生成的实体了。玩得开心!
## 如何使用多个实体管理器和连接
您可以在一个 Symfony 应用程序中使用多个 Doctrine 实体管理器或者连接。这是必要的,如果您使用的是不同的数据库,甚至是完全不同的实体的供应商。换句话说,连接到一个数据库的一个实体管理器处理一些实体的时候,连接到另一个数据库的另一个实体管理器将会处理剩余的实体。
> 使用多个实体管理器相当简单,但是却是更为高级并且不是经常所需要的。在添加这复杂的层之前,确保您真正需要多个实体管理器。
以下的配置代码展示了如何配置两个实体管理器:
YAML:
doctrine: dbal: default_connection: default connections: default: driver: "%database_driver%" host: "%database_host%" port: "%database_port%" dbname: "%database_name%" user: "%database_user%" password: "%database_password%" charset: UTF8 customer: driver: "%database_driver2%" host: "%database_host2%" port: "%database_port2%" dbname: "%database_name2%" user: "%database_user2%" password: "%database_password2%" charset: UTF8
orm:
default_entity_manager: default
entity_managers:
default:
connection: default
mappings:
AppBundle: ~
AcmeStoreBundle: ~
customer:
connection: customer
mappings:
AcmeCustomerBundle: ~
XML:
<config>
<dbal default-connection="default">
<connection name="default"
driver="%database_driver%"
host="%database_host%"
port="%database_port%"
dbname="%database_name%"
user="%database_user%"
password="%database_password%"
charset="UTF8"
/>
<connection name="customer"
driver="%database_driver2%"
host="%database_host2%"
port="%database_port2%"
dbname="%database_name2%"
user="%database_user2%"
password="%database_password2%"
charset="UTF8"
/>
</dbal>
<orm default-entity-manager="default">
<entity-manager name="default" connection="default">
<mapping name="AppBundle" />
<mapping name="AcmeStoreBundle" />
</entity-manager>
<entity-manager name="customer" connection="customer">
<mapping name="AcmeCustomerBundle" />
</entity-manager>
</orm>
</config>
PHP:
$container->loadFromExtension('doctrine', array( 'dbal' => array( 'default_connection' => 'default', 'connections' => array( 'default' => array( 'driver' => '%database_driver%', 'host' => '%database_host%', 'port' => '%database_port%', 'dbname' => '%database_name%', 'user' => '%database_user%', 'password' => '%database_password%', 'charset' => 'UTF8', ), 'customer' => array( 'driver' => '%database_driver2%', 'host' => '%database_host2%', 'port' => '%database_port2%', 'dbname' => '%database_name2%', 'user' => '%database_user2%', 'password' => '%database_password2%', 'charset' => 'UTF8', ), ), ),
'orm' => array(
'default_entity_manager' => 'default',
'entity_managers' => array(
'default' => array(
'connection' => 'default',
'mappings' => array(
'AppBundle' => null,
'AcmeStoreBundle' => null,
),
),
'customer' => array(
'connection' => 'customer',
'mappings' => array(
'AcmeCustomerBundle' => null,
),
),
),
),
));
这种情况下,您已经定义了两个实体管理器,称之为 **default** 和 **customer**。**default** 实体管理器管理在 AppBundle 和 AcmeStoreBundle 中的实体,而 **customer** 实体管理器管理在 AcmeCustomerBundle 中的实体。您也定义了两个连接,用于每个实体管理器。
> 当使用多个连接和实体管理器的时候,您应该对您想要的配置很明确。如果您*的确*遗漏了连接或者实体管理器的名称,就使用默认情况(例如 **default**)。
当使用多个连接来创建您的数据库时:
# Play only with "default" connection
$ php app/console doctrine:database:create
# Play only with "customer" connection
$ php app/console doctrine:database:create --connection=customer
当使用多个实体管理器来更新您的模式:
# Play only with "default" mappings
$ php app/console doctrine:schema:update --force
# Play only with "customer" mappings
$ php app/console doctrine:schema:update --force --em=customer
如果您在请求的时候*的确*遗漏了实体管理器的名称,返回到默认实体管理器(例如 **default**)
class UserController extends Controller { public function indexAction() { // All three return the "default" entity manager $em = $this->get('doctrine')->getManager(); $em = $this->get('doctrine')->getManager('default'); $em = $this->get('doctrine.orm.default_entity_manager');
// Both of these return the "customer" entity manager
$customerEm = $this->get('doctrine')->getManager('customer');
$customerEm = $this->get('doctrine.orm.customer_entity_manager');
}
}
现在您可以像之前那样使用 Doctrine 了—使用 **default** 实体来保存和读取它所管理的实体,**customer** 实体管理器来保存和读取它的实体。
同样适用于存储库调用:
class UserController extends Controller { public function indexAction() { // Retrieves a repository managed by the "default" em $products = $this->get('doctrine') ->getRepository('AcmeStoreBundle:Product') ->findAll() ;
// Explicit way to deal with the "default" em
$products = $this->get('doctrine')
->getRepository('AcmeStoreBundle:Product', 'default')
->findAll()
;
// Retrieves a repository managed by the "customer" em
$customers = $this->get('doctrine')
->getRepository('AcmeCustomerBundle:Customer', 'customer')
->findAll()
;
}
}
## 如何注册自定义 DQL 函数
Doctrine 允许您指定自定义 DQL 函数。要想知道关于这个话题的更多信息,阅读 Doctrine 的教程文章“[DQL 用户定义函数](http://docs.doctrine-project.org/projects/doctrine-orm/en/latest/cookbook/dql-user-defined-functions.html)”。
在 Symfony 中,您可以按照如下注册自定义 DQL 函数:
YAML:
# app/config/config.yml
doctrine: orm: # ... dql: string_functions: test_string: AppBundle\DQL\StringFunction second_string: AppBundle\DQL\SecondStringFunction numeric_functions: test_numeric: AppBundle\DQL\NumericFunction datetime_functions: test_datetime: AppBundle\DQL\DatetimeFunction
XML:
<doctrine:config>
<doctrine:orm>
<!-- ... -->
<doctrine:dql>
<doctrine:string-function name="test_string">AppBundle\DQL\StringFunction</doctrine:string-function>
<doctrine:string-function name="second_string">AppBundle\DQL\SecondStringFunction</doctrine:string-function>
<doctrine:numeric-function name="test_numeric">AppBundle\DQL\NumericFunction</doctrine:numeric-function>
<doctrine:datetime-function name="test_datetime">AppBundle\DQL\DatetimeFunction</doctrine:datetime-function>
</doctrine:dql>
</doctrine:orm>
</doctrine:config>
PHP:
// app/config/config.php $container->loadFromExtension('doctrine', array( 'orm' => array( // ... 'dql' => array( 'string_functions' => array( 'test_string' => 'AppBundle\DQL\StringFunction', 'second_string' => 'AppBundle\DQL\SecondStringFunction', ), 'numeric_functions' => array( 'test_numeric' => 'AppBundle\DQL\NumericFunction', ), 'datetime_functions' => array( 'test_datetime' => 'AppBundle\DQL\DatetimeFunction', ), ), ), ));
## 如何定义虚拟类和接口之间的关系
Bundles 的目标之一是创建一个不具有多个(如果有的话)依赖关系的谨慎的功能 bundles,允许您在其他应用程序中使用该功能,而不包括不必要的项目。
Doctrine2.2 包括一个新的实用工具,称为 **ResolveTargetEntityListener**,通过截取 Doctrine 内部一定的调用并且在运行时重写您元数据映射的 **targetEntity** 参数作用。这意思是在您的 bundle 里,您可以在您的映射中使用一个接口或者虚拟类,并期望在运行时正确映射到一个具体的实体。
这个功能允许您在定义不同实体间的关系,而不让它们很难依赖。
### 背景
假设您有一个 invoiceBundle 提供进销存功能并且 CustomerBundle 包含客户管理工具。您想保持它们分开的状态,因为它们可以在分开的状态下用于其他系统,但对于您的应用程序,您想将其放在一起使用。
在这种情况下,您有一个与一个不存在对象相关的 **Invoice** 实体 **InvoiceSubjectInterface**。目标是让 **ResolveTargetEntityListener** 来取代任何提及与实体对象实现该接口的接口。
### 设置
本文章使用以下两种基本实体(简洁但不完整)来解释如何设置并使用 **ResolveTargetEntityListener**。
Customer 实体:
// src/Acme/AppBundle/Entity/Customer.php
namespace Acme\AppBundle\Entity;
use Doctrine\ORM\Mapping as ORM; use Acme\CustomerBundle\Entity\Customer as BaseCustomer; use Acme\InvoiceBundle\Model\InvoiceSubjectInterface;
/** * @ORM\Entity * @ORM\Table(name="customer") */ class Customer extends BaseCustomer implements InvoiceSubjectInterface { // In this example, any methods defined in the InvoiceSubjectInterface // are already implemented in the BaseCustomer }
Invoice 实体:
// src/Acme/InvoiceBundle/Entity/Invoice.php
namespace Acme\InvoiceBundle\Entity;
use Doctrine\ORM\Mapping AS ORM; use Acme\InvoiceBundle\Model\InvoiceSubjectInterface;
/** * Represents an Invoice. * * @ORM\Entity * @ORM\Table(name="invoice") */ class Invoice { /** * @ORM\ManyToOne(targetEntity="Acme\InvoiceBundle\Model\InvoiceSubjectInterface") * @var InvoiceSubjectInterface */ protected $subject; }
InvoiceSubjectInterface:
// src/Acme/InvoiceBundle/Model/InvoiceSubjectInterface.php
namespace Acme\InvoiceBundle\Model;
/** * An interface that the invoice Subject object should implement. * In most circumstances, only a single object should implement * this interface as the ResolveTargetEntityListener can only * change the target to a single object. */ interface InvoiceSubjectInterface { // List any additional methods that your InvoiceBundle // will need to access on the subject so that you can // be sure that you have access to those methods.
/**
* @return string
*/
public function getName();
}
接下来,您需要配置监听器,告知 DoctrineBundle 关于替代的事情:
YAML:
# app/config/config.yml
doctrine: # ... orm: # ... resolve_target_entities: Acme\InvoiceBundle\Model\InvoiceSubjectInterface: Acme\AppBundle\Entity\Customer
XML:
<doctrine:config>
<doctrine:orm>
<!-- ... -->
<doctrine:resolve-target-entity interface="Acme\InvoiceBundle\Model\InvoiceSubjectInterface">Acme\AppBundle\Entity\Customer</doctrine:resolve-target-entity>
</doctrine:orm>
</doctrine:config>
PHP:
// app/config/config.php $container->loadFromExtension('doctrine', array( 'orm' => array( // ... 'resolve_target_entities' => array( 'Acme\InvoiceBundle\Model\InvoiceSubjectInterface' => 'Acme\AppBundle\Entity\Customer', ), ), ));
### 结语
有了 **ResolveTargetEntityListener**,您可以分离您的 bundles,让它们自己保持合用的状态,但是仍能够定义不同对象之间的关系。通过使用这种方法,您的 bundles 会更容易保持独立。
## 如何为多个 Doctrine 的实现提供模型类
当创建一个不仅可以用于 Doctrine ORM,也可以用于 CouchDB ODM,MongoDB ODM 或者 PHPCR ODM 的 bundle,您应该仍然只能写一种模型类。Doctrine bundles 提供了一个编译器为您的模型类注册映射。
> 对于不可再使用的 bundle,最简单的选择就是将您的模型类放在默认的位置:在 Doctrine ORM 中 **Entity** 或者 在 ODM 之一的 **Document**。对于可以再使用的 bundle,复制模型类不只是为了获取自动映射,而是使用扫描编译器。
> 2.3 基本映射扫描编译器在 Symfony2.3 中介绍。Doctrine bundles 在 DoctrineBundle >= 1.3.0, MongoDBBundle >= 3.0.0, PHPCRBundle >= 1.0.0 支持它,并且自从 [CouchDB Mapping Compiler Pass pull request](https://github.com/doctrine/DoctrineCouchDBBundle/pull/27) 合并后,(无版本)CouchDBBundle 支持扫描编译器。
> 2.6 Symfony2.6 中介绍了支持定义命名空间别名。用老版本的 Symfony 来定义别名是安全的,因为别名是 **createXmlMappingDriver** 的最后一个参数,并且如果参数不存在的话,就会被 PHP 忽略。
在您的 bundles 类中,编写以下代码来注册扫描编译器。这是为 CmfRoutingBundle 编写的,所以其中部分需要按照您的情况进行调整:
use Doctrine\Bundle\DoctrineBundle\DependencyInjection\Compiler\DoctrineOrmMappingsPass; use Doctrine\Bundle\MongoDBBundle\DependencyInjection\Compiler\DoctrineMongoDBMappingsPass; use Doctrine\Bundle\CouchDBBundle\DependencyInjection\Compiler\DoctrineCouchDBMappingsPass; use Doctrine\Bundle\PHPCRBundle\DependencyInjection\Compiler\DoctrinePhpcrMappingsPass;
class CmfRoutingBundle extends Bundle { public function build(ContainerBuilder $container) { parent::build($container); // ...
$modelDir = realpath(__DIR__.'/Resources/config/doctrine/model');
$mappings = array(
$modelDir => 'Symfony\Cmf\RoutingBundle\Model',
);
$ormCompilerClass = 'Doctrine\Bundle\DoctrineBundle\DependencyInjection\Compiler\DoctrineOrmMappingsPass';
if (class_exists($ormCompilerClass)) {
$container->addCompilerPass(
DoctrineOrmMappingsPass::createXmlMappingDriver(
$mappings,
array('cmf_routing.model_manager_name'),
'cmf_routing.backend_type_orm',
array('CmfRoutingBundle' => 'Symfony\Cmf\RoutingBundle\Model')
));
}
$mongoCompilerClass = 'Doctrine\Bundle\MongoDBBundle\DependencyInjection\Compiler\DoctrineMongoDBMappingsPass';
if (class_exists($mongoCompilerClass)) {
$container->addCompilerPass(
DoctrineMongoDBMappingsPass::createXmlMappingDriver(
$mappings,
array('cmf_routing.model_manager_name'),
'cmf_routing.backend_type_mongodb',
array('CmfRoutingBundle' => 'Symfony\Cmf\RoutingBundle\Model')
));
}
$couchCompilerClass = 'Doctrine\Bundle\CouchDBBundle\DependencyInjection\Compiler\DoctrineCouchDBMappingsPass';
if (class_exists($couchCompilerClass)) {
$container->addCompilerPass(
DoctrineCouchDBMappingsPass::createXmlMappingDriver(
$mappings,
array('cmf_routing.model_manager_name'),
'cmf_routing.backend_type_couchdb',
array('CmfRoutingBundle' => 'Symfony\Cmf\RoutingBundle\Model')
));
}
$phpcrCompilerClass = 'Doctrine\Bundle\PHPCRBundle\DependencyInjection\Compiler\DoctrinePhpcrMappingsPass';
if (class_exists($phpcrCompilerClass)) {
$container->addCompilerPass(
DoctrinePhpcrMappingsPass::createXmlMappingDriver(
$mappings,
array('cmf_routing.model_manager_name'),
'cmf_routing.backend_type_phpcr',
array('CmfRoutingBundle' => 'Symfony\Cmf\RoutingBundle\Model')
));
}
}
}
注意 [class_exists](http://php.net/manual/en/function.class-exists.php) 的核对。这是很关键的,因为您不想您的 bundle 在所有的 Doctrine bundles 中有一个很困难的依赖,而是让用户决定使用哪一个。
扫描编译器为 Doctrine 提供的所有驱动提供工厂方法:Annotations, XML, Yaml, PHP 和 StaticPHP。参数是:
• 一个到命名空间的绝对路径的映射/散列;
• 一组容器参数,您的 bundle 用以指定其使用的原则管理器的名称。在以上的例子中,CmfRoutingBundle 存储在 **cmf_routing.model_manager_name** 参数下使用的管理器名字。扫描编译器将会附加 Doctrine 使用的参数来指定默认管理器的名称。使用找到的第一个参数,并且管理器注册该映射;
• 一个由扫描编译器使用来决定此 Doctrine 类型是否被使用的可选择的容器参数名称。如果您的用户安装了不止一种 Doctrine bundle,那这就很相关了,但是您的 bundle 只能在一种 Doctrine 情况下使用。
• 一个命名控件的映射/散列别名。这应该是 Doctrine 自动映射使用的同一惯例。在以上的例子中,这允许用户来调用 **$om->getRepository('CmfRoutingBundle:Route')**。
> 工厂方法使用 Doctrine 的 **SymfonyFileLocator**,意味着如果它们不包含像文件名称那样的完整的命名空间,它将只能看到 XML 和 YML 映射文件。这是由设计 **SymfonyFileLocator** 简化了事情,假定文件只是作为文件名的“简短”版本(例如 **BlogPost.orm.xml**)。
> 如果您也需要映射一个基本类,您可以注册一个像这个的 **DefaultFileLocator** 扫描编译器。代码从 **DoctrineOrmMappingsPass** 中获取,并且适用于 **DefaultFileLocator** 而不是 **SymfonyFileLocator**:
private function buildMappingCompilerPass() { $arguments = array(array(realpath(DIR . '/Resources/config/doctrine-base')), '.orm.xml'); $locator = new Definition('Doctrine\Common\Persistence\Mapping\Driver\DefaultFileLocator', $arguments); $driver = new Definition('Doctrine\ORM\Mapping\Driver\XmlDriver', array($locator));
return new DoctrineOrmMappingsPass(
$driver,
array('Full\Namespace'),
array('your_bundle.manager_name'),
'your_bundle.orm_enabled'
);
}
> 记住您不需要提供一个命名空间别名除非您的用户希望访问 Doctrine 的基本类。
> 现在将您的映射文件以有效的类名称放入 **/Resources/config/doctrine-base** 中,由 **.** 而不是 **/** 分开,例如 **Other.Namespace.Model.Name.orm.xml**。您不可以混淆两者,要不然 **SymfonyFileLocator** 就会搞糊涂了。
> 对其他 Doctrine 实现做相应的调整。
## 如何实现一个简单的注册表单
一些表单有额外的字段,其值不需要存储在数据库中。例如,您可能想创建一个带有额外字段的注册表单(像“条款接受”复选框字段)以及嵌入表单,实际上是存储账户信息。
### 简单的用户模型
您有一个简单的 **User** 实体映射到数据库中:
// src/Acme/AccountBundle/Entity/User.php namespace Acme\AccountBundle\Entity;
use Doctrine\ORM\Mapping as ORM; use Symfony\Component\Validator\Constraints as Assert; use Symfony\Bridge\Doctrine\Validator\Constraints\UniqueEntity;
/** * @ORM\Entity * @UniqueEntity(fields="email", message="Email already taken") */ class User { /** * @ORM\Id * @ORM\Column(type="integer") * @ORM\GeneratedValue(strategy="AUTO") */ protected $id;
/**
* @ORM\Column(type="string", length=255)
* @Assert\NotBlank()
* @Assert\Email()
*/
protected $email;
/**
* @ORM\Column(type="string", length=255)
* @Assert\NotBlank()
* @Assert\Length(max = 4096)
*/
protected $plainPassword;
public function getId()
{
return $this->id;
}
public function getEmail()
{
return $this->email;
}
public function setEmail($email)
{
$this->email = $email;
}
public function getPlainPassword()
{
return $this->plainPassword;
}
public function setPlainPassword($password)
{
$this->plainPassword = $password;
}
}
此 **User** 实体包含三个字段,其中两个(**email** 和 **plainPassword**)应该在表单中显示。电子邮件属性在数据库中必须是独立的,这是通过在类的顶部添加此验证执行的。
> 如果您想在安全系统中整合此用户,您需要实现安全组件的 [UserInterface](http://symfony.com/doc/current/book/security.html#book-security-user-entity)。
### 为什么有 4096 密码限制?
注意 **plainPassword** 字段最长长度为 4096 个字符。出于安全目的([CVE-2013-5750](https://symfony.com/blog/cve-2013-5750-security-issue-in-fosuserbundle-login-form)),Symfony 在编码的时候限制了明文密码的长度为 4096 个字符。添加这个限制确保了您的表单将在任何人尝试一个非常长的密码时给出一个验证错误。
您将需要在您的应用程序的任何用户提交一段明文密码的位置添加这个限制(比如,改变密码表单)。唯一您不需要担心的地方是你的登录表单,因为 Symfony 的安全组件为你解决这些。
### 为模型创建一个表单
接下来,为 **User** 模型创建表单:
// src/Acme/AccountBundle/Form/Type/UserType.php namespace Acme\AccountBundle\Form\Type;
use Symfony\Component\Form\AbstractType; use Symfony\Component\Form\FormBuilderInterface; use Symfony\Component\OptionsResolver\OptionsResolver;
class UserType extends AbstractType { public function buildForm(FormBuilderInterface $builder, array $options) { $builder->add('email', 'email'); $builder->add('plainPassword', 'repeated', array( 'first_name' => 'password', 'second_name' => 'confirm', 'type' => 'password', )); }
public function configureOptions(OptionsResolver $resolver)
{
$resolver->setDefaults(array(
'data_class' => 'Acme\AccountBundle\Entity\User'
));
}
public function getName()
{
return 'user';
}
}
只有两种字段:**email** 和 **plainPassword**(重复以确认输入的密码)。**data_class** 选择告知表单基础数据类的名称(例如,您的 **User** 实体)。
> 想探索更多关于表单组件的事情,阅读 [Forms](http://symfony.com/doc/current/book/forms.html)。
### 在注册表单中嵌入用户表单
您将为注册页面使用的表单与用于简单修饰 **User**(例如 **UserType**)的表单不一样。注册表单包含进一步的字段像“接受条款”,其值不会被存储在数据库中。
开始先创建一个简单类代表“注册”:
// src/Acme/AccountBundle/Form/Model/Registration.php namespace Acme\AccountBundle\Form\Model;
use Symfony\Component\Validator\Constraints as Assert;
use Acme\AccountBundle\Entity\User;
class Registration { /** * @Assert\Type(type="Acme\AccountBundle\Entity\User") * @Assert\Valid() */ protected $user;
/**
* @Assert\NotBlank()
* @Assert\True()
*/
protected $termsAccepted;
public function setUser(User $user)
{
$this->user = $user;
}
public function getUser()
{
return $this->user;
}
public function getTermsAccepted()
{
return $this->termsAccepted;
}
public function setTermsAccepted($termsAccepted)
{
$this->termsAccepted = (bool) $termsAccepted;
}
}
接下来,为 **Registration** 模型创建表单:
// src/Acme/AccountBundle/Form/Type/RegistrationType.php namespace Acme\AccountBundle\Form\Type;
use Symfony\Component\Form\AbstractType; use Symfony\Component\Form\FormBuilderInterface;
class RegistrationType extends AbstractType { public function buildForm(FormBuilderInterface $builder, array $options) { $builder->add('user', new UserType()); $builder->add( 'terms', 'checkbox', array('property_path' => 'termsAccepted') ); $builder->add('Register', 'submit'); }
public function getName()
{
return 'registration';
}
}
您不需要为嵌入 **UserType** 表单而使用一种特别的方法。一个表单也是一个字段—所以您可以像其他字段一样添加此字段,预计 **Registration.user** 属性会保存 **User** 类的一个实例。
### 提交表单
下面,您需要一个控制器来处理表单。开始先创建一个简单的控制器来展示注册表单:
// src/Acme/AccountBundle/Controller/AccountController.php namespace Acme\AccountBundle\Controller;
use Symfony\Bundle\FrameworkBundle\Controller\Controller;
use Acme\AccountBundle\Form\Type\RegistrationType; use Acme\AccountBundle\Form\Model\Registration;
class AccountController extends Controller { public function registerAction() { $registration = new Registration(); $form = $this->createForm(new RegistrationType(), $registration, array( 'action' => $this->generateUrl('account_create'), ));
return $this->render(
'AcmeAccountBundle:Account:register.html.twig',
array('form' => $form->createView())
);
}
}
还有它的模板:
{# src/Acme/AccountBundle/Resources/views/Account/register.html.twig #} {{ form(form) }}
接下来,创建控制器处理表单提交。进行验证,并将数据保存到数据库中:
use Symfony\Component\HttpFoundation\Request; // ...
public function createAction(Request $request) { $em = $this->getDoctrine()->getManager();
$form = $this->createForm(new RegistrationType(), new Registration());
$form->handleRequest($request);
if ($form->isValid()) {
$registration = $form->getData();
$em->persist($registration->getUser());
$em->flush();
return $this->redirectToRoute(...);
}
return $this->render(
'AcmeAccountBundle:Account:register.html.twig',
array('form' => $form->createView())
);
}
### 添加新路由
接下来,更新您的路由。如果您将路由放置于您包的内部(如下所示),不要忘记确保路由文件正在被[导入](http://symfony.com/doc/current/book/routing.html#routing-include-external-resources)。
YAML:
# src/Acme/AccountBundle/Resources/config/routing.yml
account_register: path: /register defaults: { _controller: AcmeAccountBundle:Account:register }
account_create: path: /register/create defaults: { _controller: AcmeAccountBundle:Account:create }
XML:
<route id="account_register" path="/register">
<default key="_controller">AcmeAccountBundle:Account:register</default>
</route>
<route id="account_create" path="/register/create">
<default key="_controller">AcmeAccountBundle:Account:create</default>
</route>
PHP:
// src/Acme/AccountBundle/Resources/config/routing.php use Symfony\Component\Routing\RouteCollection; use Symfony\Component\Routing\Route;
$collection = new RouteCollection(); $collection->add('account_register', new Route('/register', array( '_controller' => 'AcmeAccountBundle:Account:register', ))); $collection->add('account_create', new Route('/register/create', array( '_controller' => 'AcmeAccountBundle:Account:create', )));
return $collection;
### 更新您的数据库模式
当然,因为您在此教程中已经添加了一个 **User** 实体,确保您的数据库模型已经正确更新:
$ php app/console doctrine:schema:update --force
就是这样!您的表单现在已经验证了,并且允许您保存 **User** 对象到数据库中。在 **Registration** 模型类上额外的 **terms** 复选框在验证过程中使用,但在保存 User 到数据库之后就不是真正地使用了。
## 控制台命令
Doctrine2 ORM 集成在 **doctrine** 命名空间下提供了几个控制台命令。为了查看命令列表您可以使用 **list** 命令:
$ php app/console list doctrine
一列可用的命令将打印出。您可以通过运行 **help** 命令发现更多关于任何这些命令的消息(或任何 Symfony 命令)。例如,要获取关于 **doctrine:database:create** 任务的细节,就运行:
$ php app/console help doctrine:database:create
一些值得注意并有趣的任务包括:
- **doctrine:ensure-production-settings** — 检查看当前环境是否为生产有效地配置了。这应该总是在 **prod** 环境中运行的:
$ php app/console doctrine:ensure-production-settings --env=prod
- **doctrine:mapping:import** — 允许 Doctrine 来内省一个已存在的数据库并创建映射信息。想知道更多信息,参见[如何在一个已有的数据库生成实体](http://symfony.com/doc/current/cookbook/doctrine/reverse_engineering.html)。
- **doctrine:mapping:info** — 告诉您 Doctrine 所了解到的所有实体,以及映射中是否有基础错误。
- **doctrine:query:dql** 和 **doctrine:query:sql**—允许您在命令行中直接执行 DQL 或者 SQL 问询。
## (configuration)如何在数据库中使用 PdoSessionHandler 存储 Sessions
> 在 Symfony 2.6 中有一个后向兼容:数据库模式稍作改变。更多细节请见 [Symfony 2.6 的改变](http://symfony.com/doc/current/cookbook/configuration/pdo_session_storage.html#pdo-session-handle-26-changes)。
默认的 Symfony 的 session 存储将 session 信息写进文件。大多数的中到大型的网页使用一个数据库储存 session 的值而不是文件,因为数据库很好用并且适应多线程网页服务器环境。
Symfony 有一个内建的数据库 session 的存储解决方案名为 [PdoSessionHandler](http://api.symfony.com/2.7/Symfony/Component/HttpFoundation/Session/Storage/Handler/PdoSessionHandler.html)。使用这个,你只需要在主配置文件中改变一些参数:
YAML:
```YAML
# app/config/config.yml
framework:
session:
# ...
handler_id: session.handler.pdo
services:
session.handler.pdo:
class: Symfony\Component\HttpFoundation\Session\Storage\Handler\PdoSessionHandler
public: false
arguments:
- "mysql:dbname=mydatabase"
- { db_username: myuser, db_password: mypassword }
XML:
<!-- app/config/config.xml -->
<framework:config
>
<framework:session
handler-id
=
"session.handler.pdo"
cookie-lifetime
=
"3600"
auto-start
=
"true"
/>
</framework:config
>
<services
>
<service
id
=
"session.handler.pdo"
class
=
"Symfony\Component\HttpFoundation\Session\Storage\Handler\PdoSessionHandler"
public
=
"false"
>
<argument
>
mysql:dbname=mydatabase
</agruement
>
<argument
type
=
"collection"
>
<argument
key
=
"db_username"
>
myuser
</argument
>
<argument
key
=
"db_password"
>
mypassword
</argument
>
</argument
>
</service
>
</services
>
PHP:
// app/config/config.php
use
Symfony\Component\DependencyInjection\Definition
;
use
Symfony\Component\DependencyInjection\Reference
;
$container
->
loadFromExtension
(
'framework'
,
array
(
...,
'session'
=>
array
(
// ...,
'handler_id'
=>
'session.handler.pdo'
,
)
,
)
)
;
$storageDefinition
=
new
Definition
(
'Symfony\Component\HttpFoundation\Session\Storage\Handler\PdoSessionHandler'
,
array
(
'mysql:dbname=mydatabase'
,
array
(
'db_username'
=>
'myuser'
,
'db_password'
=>
'mypassword'
)
)
)
;
$container
->
setDefinition
(
'session.handler.pdo'
,
$storageDefinition
)
;
设置表和列名称
这将会产生一个有着很多不同列的 sessions 表。表的名称以及所有的列名称,可以通过向 PdoSessionHandler 传递一个第二数组参数的方式设置:
YAML:
# app/config/config.yml
services
:
# ...
session.handler.pdo
:
class
:
Symfony\Component\HttpFoundation\Session\Storage\Handler\PdoSessionHandler
public
:
false
arguments
:
-
"mysql:dbname=mydatabase"
- { db_table
:
sessions, db_username
:
myuser, db_password
:
mypassword
}
XML:
<!-- app/config/config.xml -->
<services
>
<service
id
=
"session.handler.pdo"
class
=
"Symfony\Component\HttpFoundation\Session\Storage\Handler\PdoSessionHandler"
public
=
"false"
>
<argument
>
mysql:dbname=mydatabase
</agruement
>
<argument
type
=
"collection"
>
<argument
key
=
"db_table"
>
sessions
</argument
>
<argument
key
=
"db_username"
>
myuser
</argument
>
<argument
key
=
"db_password"
>
mypassword
</argument
>
</argument
>
</service
>
</services
>
PHP:
// app/config/config.php
use
Symfony\Component\DependencyInjection\Definition
;
// ...
$storageDefinition
=
new
Definition
(
'Symfony\Component\HttpFoundation\Session\Storage\Handler\PdoSessionHandler'
,
array
(
'mysql:dbname=mydatabase'
,
array
(
'db_table'
=>
'sessions'
,
'db_username'
=>
'myuser'
,
'db_password'
=>
'mypassword'
)
)
)
;
$container
->
setDefinition
(
'session.handler.pdo'
,
$storageDefinition
)
;
db_lifetime_col 是在 Symfony 2.6 中被引进的。2.6 之前的版本并不存在。
下列这些参数你必须设置:
db_table (默认为 sessions):
你的数据库中的 session 表的名称;
db_id_col (默认为 sess_id):
你的 session 表的 id 列的名称(文本类型(128));
db_data_col (默认为 sess_data):
你的 session 表的 value 列的名称 (二进制大对象);
db_time_col (默认为 sess_time): 你的 session 表的 time 列的名称(整型);
db_lifetime_col (默认为 sess_lifetime): T你的 session 表的 lifetime 列的名称(整型).
共享你的数据库连接信息
根据给定的设置,数据库的连接只是为了 session 存储连接而设置的。当你为 session 数据使用分离的数据库时这个是可以的。
但是如果你想要将 session 数据像你的工程的其它的数据一样储存在同一个数据库中,你可以使用通过引用数据库的 parameters.yml 文件的连接设置——相关的参数在如下定义:
YAML:
services
:
session.handler.pdo
:
class
:
Symfony\Component\HttpFoundation\Session\Storage\Handler\PdoSessionHandler
public
:
false
arguments
:
-
"mysql:host=%database_host%;port=%database_port%;dbname=%database_name%"
- { db_username
:
%database_user%, db_password: %database_password% }
XML:
<service
id
=
"session.handler.pdo"
class
=
"Symfony\Component\HttpFoundation\Session\Storage\Handler\PdoSessionHandler"
public
=
"false"
>
<argument
>
mysql:host=%database_host%;port=%database_port%;dbname=%database_name%
</agruement
>
<argument
type
=
"collection"
>
<argument
key
=
"db_username"
>
%database_user%
</argument
>
<argument
key
=
"db_password"
>
%database_password%
</argument
>
</argument
>
</service
>
PHP:
$storageDefinition
=
new
Definition
(
'Symfony\Component\HttpFoundation\Session\Storage\Handler\PdoSessionHandler'
,
array
(
'mysql:host=%database_host%;port=%database_port%;dbname=%database_name%'
,
array
(
'db_username'
=>
'%database_user%'
,
'db_password'
=>
'%database_password%'
)
)
)
;
SQL 语句案例
当升级到 Symfony 2.6 时模式就需要改变了
如果你使用 PdoSessionHandler 是 Symfony 2.6 之前的版本然后进行了升级,你的 session 表需要做出一些改变:
- 需要添加新的 session lifetime (sess_lifetime 默认)整型列; - data 列(sess_data 默认)需要改成二进制大对象型。
更多细节详见下面的 SQL 语句。
为了保存以前(2.5 以及更早的)版本的功能,将你的类的名称由 PdoSessionHandler 改成 LegacyPdoSessionHandler(Symfony 2.6.2 中添加的旧的类)。
MySQL
创建新的数据库的表的 SQL 语句如下所示(MySQL):
CREATE TABLE `sessions` (
`sess_id` VARBINARY(128) NOT NULL PRIMARY KEY,
`sess_data` BLOB NOT NULL,
`sess_time` INTEGER UNSIGNED NOT NULL,
`sess_lifetime` MEDIUMINT NOT NULL
) COLLATE utf8_bin, ENGINE = InnoDB;
二进制大对象类型的栏目只能储存到 64 kb。如果存储的用户的 session 数据超过这个值,可能就会出现异常或者它们的 session 会被重置。如果你需要更多的存储空间可以考虑使用 MEDIUMBLOB。
PostgreSQL
对于 PostgreSQL,代码如下所示:
CREATE TABLE sessions (
sess_id VARCHAR(128) NOT NULL PRIMARY KEY,
sess_data BYTEA NOT NULL,
sess_time INTEGER NOT NULL,
sess_lifetime INTEGER NOT NULL
);
微软的 SQL Server
对于微软的 SQL Server,代码如下所示:
CREATE TABLE [dbo].[sessions](
[sess_id] [nvarchar](255) NOT NULL,
[sess_data] [ntext] NOT NULL,
[sess_time] [int] NOT NULL,
[sess_lifetime] [int] NOT NULL,
PRIMARY KEY CLUSTERED(
[sess_id] ASC
) WITH (
PAD_INDEX = OFF,
STATISTICS_NORECOMPUTE = OFF,
IGNORE_DUP_KEY = OFF,
ALLOW_ROW_LOCKS = ON,
ALLOW_PAGE_LOCKS = ON
) ON [PRIMARY]
) ON [PRIMARY] TEXTIMAGE_ON [PRIMARY]
11
电子邮件
发送电子邮件对于任何 web 应用程序来说,都是一个经典任务,并且具有特殊的复杂性和潜在的缺陷。不是重新创建轮,发送电子邮件的解决方案之一就是使用 SwiftmailerBundle,利用 Swift Mailer 库的能力。这个 bundle 来自于 Symfony 标准版本。
配置
使用 Swift Mailer 的话,您需要对您的邮件服务器配置。
如果不设置/使用您自己的邮件服务器,您可能想使用一个主邮件服务器,例如 Mandrill,Sendgrid,Amazon SES 或者其他的。这些给您一个 SMTP 服务器、用户名和密码(有的时候叫做秘钥),可以在 Swift Mailer 配置中使用。
在一个标准的 Symfony 安装中,一些 swfitmailer 配置已经包含在内了:
YAML:
# app/config/config.yml
swiftmailer:
transport: "%mailer_transport%"
host: "%mailer_host%"
username: "%mailer_user%"
password: "%mailer_password%"
XML:
<!-- app/config/config.xml -->
<!--
xmlns:swiftmailer="http://symfony.com/schema/dic/swiftmailer"
http://symfony.com/schema/dic/swiftmailer http://symfony.com/schema/dic/swiftmailer/swiftmailer-1.0.xsd
-->
<swiftmailer:config
transport="%mailer_transport%"
host="%mailer_host%"
username="%mailer_user%"
password="%mailer_password%" />
PHP:
// app/config/config.php
$container->loadFromExtension('swiftmailer', array(
'transport' => "%mailer_transport%",
'host' => "%mailer_host%",
'username' => "%mailer_user%",
'password' => "%mailer_password%",
));
这些值(例如 %mailer_transport%)可从设置在 parameters.yml 文件中的参数中读出。您可以在该文件中修饰这些值或者直接在这里设置值。
以下配置属性可用:
- transport (smtp, mail, sendmail, 或者 gmail)
- username
- password
- host
- port
- encryption (tls,或者 ssl)
- auth_mode (plain, login,或者 cram-md5)
- spool
- type (如何排列消息,支持 file 或者 memory,参见如何缓存电子邮件)
- path(存储消息的地方)
- delivery_address(一个可以发送所有电子邮件的地址)
- disable_delivery(设置为 true 来完全禁用转发)
发送电子邮件
Swift Mailer 库通过创建、配置然后发送 Swift_Message 对象来工作。“mailer” 负责实际的转发消息并且通过 mailer 服务来访问。综上,发送一封电子邮件是相当简单的。
public function indexAction($name)
{
$message = \Swift_Message::newInstance()
->setSubject('Hello Email')
->setFrom('send@example.com')
->setTo('recipient@example.com')
->setBody(
$this->renderView(
// app/Resources/views/Emails/registration.html.twig
'Emails/registration.html.twig',
array('name' => $name)
),
'text/html'
)
/*
* If you also want to include a plaintext version of the message
->addPart(
$this->renderView(
'Emails/registration.txt.twig',
array('name' => $name)
),
'text/plain'
)
*/
;
$this->get('mailer')->send($message);
return $this->render(...);
}
把事情分解,电子邮件主体存储在一个模板中,并由 renderView() 方法显示。registration.html.twig 模板可能看起来像这样:
{# app/Resources/views/Emails/registration.html.twig #}
<h3>You did it! You registered!</h3>
{# example, assuming you have a route named "login" #}
To login, go to: <a href="{{ url('login') }}">...</a>.
Thanks!
{# Makes an absolute URL to the /images/logo.png file #}
<img src="{{ absolute_url(asset('images/logo.png')) }}"
$message 对象支持更多的选择,如包括附件,添加 HTML 内容,以及更多。幸运地是,Swift Mailer 在本文档中详细得讲了关于创建信息的主题。
其他可用的有关 Symfony 发送电子邮件的教程文章:
在发展过程中,如果不使用一个常规得 SMTP 服务器来发送邮件,您可能发现使用 Gmail 更简单且更实用。SwiftmailerBundle 使它变得相当简单。
如果不使用您常规的 Gmail 账户,理所当然推荐的是您创建一个特别的账户。
在开发配置文件中,改变 transport 设置到 gmail 并设置 username 和 password 到 Google 证书上:
YAML:
# app/config/config_dev.yml
swiftmailer:
transport: gmail
username: your_gmail_username
password: your_gmail_password
XML:
<!-- app/config/config_dev.xml -->
<?xml version="1.0" encoding="UTF-8" ?>
<container xmlns="http://symfony.com/schema/dic/services"
xmlns:xsi="http://www.w3.org/2001/XMLSchema-instance"
xmlns:swiftmailer="http://symfony.com/schema/dic/swiftmailer"
xsi:schemaLocation="http://symfony.com/schema/dic/services
http://symfony.com/schema/dic/services/services-1.0.xsd
http://symfony.com/schema/dic/swiftmailer
http://symfony.com/schema/dic/swiftmailer/swiftmailer-1.0.xsd">
<!-- ... -->
<swiftmailer:config
transport="gmail"
username="your_gmail_username"
password="your_gmail_password"
/>
</container>
PHP:
// app/config/config_dev.php
$container->loadFromExtension('swiftmailer', array(
'transport' => 'gmail',
'username' => 'your_gmail_username',
'password' => 'your_gmail_password',
));
您完成了!
如果您正使用 Symfony 标准版本,在 parameters.yml 中配置参数:
# app/config/parameters.yml
parameters:
# ...
mailer_transport: gmail
mailer_host: ~
mailer_user: your_gmail_username
mailer_password: your_gmail_password
gmail 传送只是一个使用 smtp 传送的快捷方式,并设置 encryption, auth_mode 和 host 同 Gmail 一起工作。
取决于您的 Gmail 账户设置,您可能收到应用程序验证错误。如果您的 Gmail 账户使用 2 步验证,您应该生成一个应用程序密码来供 mailer_password 参数使用。您也应该确保您允许安全性较低的应用程序可以访问您的 Gmail 账户。
从一个生产系统发送电子邮件的要求不同于你的发展设置,因为你不想被电子邮件的数量、发送速率或者发送者地址所限制。因此,[使用 Gmail] 或者相似的服务不是一个选择。如果设置或者保持您自己可信的邮件服务器让您很头疼,这里有一个简单的解决方案:利用云服务来发送您的邮件。
本教程展示给您整合 Amazon 的简单电子邮件服务(SES) 到 Symfony 是多么简单。
您可以将相同的技术用于其他邮件服务。因为大多时候只不过是为 Swift Mailer 配置一个 SMTP 终结点。
在 Symfony 配置中,根据 SES 控制台提供的消息改变 Swift Mailer 的设置 transport, host, port 和 encryption。在 SES 控制台中创建您个人的 SMTP 证书并借助所提供的 username 和 password 完成任务。
YAML:
# app/config/config.yml
swiftmailer:
transport: smtp
host: email-smtp.us-east-1.amazonaws.com
port: 465 # different ports are available, see SES console
encryption: tls # TLS encryption is required
username: AWS_ACCESS_KEY # to be created in the SES console
password: AWS_SECRET_KEY # to be created in the SES console
XML:
<!-- app/config/config.xml -->
<?xml version="1.0" encoding="UTF-8" ?>
<container xmlns="http://symfony.com/schema/dic/services"
xmlns:xsi="http://www.w3.org/2001/XMLSchema-instance"
xmlns:swiftmailer="http://symfony.com/schema/dic/swiftmailer"
xsi:schemaLocation="http://symfony.com/schema/dic/services
http://symfony.com/schema/dic/services/services-1.0.xsd
http://symfony.com/schema/dic/swiftmailer
http://symfony.com/schema/dic/swiftmailer/swiftmailer-1.0.xsd">
<!-- ... -->
<swiftmailer:config
transport="smtp"
host="email-smtp.us-east-1.amazonaws.com"
port="465"
encryption="tls"
username="AWS_ACCESS_KEY"
password="AWS_SECRET_KEY"
/>
</container>
PHP:
// app/config/config.php
$container->loadFromExtension('swiftmailer', array(
'transport' => 'smtp',
'host' => 'email-smtp.us-east-1.amazonaws.com',
'port' => 465,
'encryption' => 'tls',
'username' => 'AWS_ACCESS_KEY',
'password' => 'AWS_SECRET_KEY',
));
port 和 encryption 密钥在 Symfony 标准版本配置中默认情况下是不显示的,但是您可以简单地按照需要添加。
就是这样,您已经准备好通过云来发送邮件了。
如果您使用 Symfony 标准版本,在 parameters.yml 中配置参数,并在您的配置文件中使用。这允许每个应用程序的安装有不同的 Swift Mailer。例如,在开发中使用 Gmail,在生产中使用云服务。
# app/config/parameters.yml
parameters:
# ...
mailer_transport: smtp
mailer_host: email-smtp.us-east-1.amazonaws.com
mailer_port: 465 # different ports are available, see SES console
mailer_encryption: tls # TLS encryption is required
mailer_user: AWS_ACCESS_KEY # to be created in the SES console
mailer_password: AWS_SECRET_KEY # to be created in the SES console
如果您更倾向于使用 Amazon SES,请注意以下几点:
- 您需要注册 Amazon 网页服务(AWS);
- 每一个在 From 或 Return-Path(返回地址)使用的发送者地址需要由主控者验证。您也可以验证整个域;
- 最初你是在一个受限制的模式。在被允许发送给任意收件人之前,您需要请求访问许可;
- SES 可能受到指控。
当开发应用程序发送电子邮件时,您通常不希望在开发过程中发送电子邮件到指定的收件人。如果您使用的是 SwiftmailerBundle 的 Symfony,您可以轻松地通过配置设置完成,不用对您的应用程序编码做任何改变。当遇到在开发时使用电子邮件的情况,主要有两个选择:(a)完全禁用发送电子邮件或者(b)所有电子邮件发送到一个特定的地址(可选的例外)。
禁用发送
您可以禁用发送电子邮件通过设置 disable_delivery 选项为 true。这是标准分配中 test 环境中的默认值。如果您在 test 具体配置中做这个,那么当您运行测试的时候邮件不会被发送,但是在 prod 和 dev 环境下就会继续被发送。
YAML:
# app/config/config_test.yml
swiftmailer:
disable_delivery: true
XML:
<!-- app/config/config_test.xml -->
<!--
xmlns:swiftmailer="http://symfony.com/schema/dic/swiftmailer"
http://symfony.com/schema/dic/swiftmailer http://symfony.com/schema/dic/swiftmailer/swiftmailer-1.0.xsd
-->
<swiftmailer:config
disable-delivery="true" />
PHP:
// app/config/config_test.php
$container->loadFromExtension('swiftmailer', array(
'disable_delivery' => "true",
));
如果您也想在 dev 环境中禁用转发,仅在 config_dev.yml 文件中添加一个相同的配置。
发送到一个指定位置
您也可以选择将所有的电子邮件发送到一个具体地址,而不是当发送消息时实际指定的地址。这可以通过选项 delivery_address 完成:
YAML:
# app/config/config_dev.yml
swiftmailer:
delivery_address: dev@example.com
XML:
<!-- app/config/config_dev.xml -->
<!--
xmlns:swiftmailer="http://symfony.com/schema/dic/swiftmailer"
http://symfony.com/schema/dic/swiftmailer http://symfony.com/schema/dic/swiftmailer/swiftmailer-1.0.xsd
-->
<swiftmailer:config delivery-address="dev@example.com" />
PHP:
// app/config/config_dev.php
$container->loadFromExtension('swiftmailer', array(
'delivery_address' => "dev@example.com",
));
现在,假设您正在发送电子邮件到 recipient@example.com。
public function indexAction($name)
{
$message = \Swift_Message::newInstance()
->setSubject('Hello Email')
->setFrom('send@example.com')
->setTo('recipient@example.com')
->setBody(
$this->renderView(
'HelloBundle:Hello:email.txt.twig',
array('name' => $name)
)
)
;
$this->get('mailer')->send($message);
return $this->render(...);
}
在 dev 环境中,电子邮件将被发送到 dev@example.com。Swfit Mailor 会为电子邮件添加一个额外的标题,X-Swift-To,包含替代的地址,所以您仍可以看到谁会收到电子邮件。
除了 to 地址之外,这也会阻止电子邮件发送到任何设置为 CC 或者 BCC 的地址。Swift Mailer 会为覆盖它们的地址的电子邮件添加额外的标题。CC 和 BCC 地址的标题分别是 X-Swift-Cc 和 X-Swift-Bcc。
发送到指定地址但有例外
假设您想将所有的电子邮件重新发送到一个指定的地址,(像上面的到 dev@example.com)。但是您毕竟可能想查阅一些发送到指定地址的电子邮件,并且没有被重新发送(即使它在 dev 环境中)。这可以通过添加选项 delivery_whitelist 完成:
YAML:
# app/config/config_dev.yml
swiftmailer:
delivery_address: dev@example.com
delivery_whitelist:
# all email addresses matching this regex will *not* be
# redirected to dev@example.com
- "/@specialdomain.com$/"
# all emails sent to admin@mydomain.com won't
# be redirected to dev@example.com too
- "/^admin@mydomain.com$/"
XML:
<!-- app/config/config_dev.xml -->
<?xml version="1.0" charset="UTF-8" ?>
<container xmlns="http://symfony.com/schema/dic/services"
xmlns:swiftmailer="http://symfony.com/schema/dic/swiftmailer">
<swiftmailer:config delivery-address="dev@example.com">
<!-- all email addresses matching this regex will *not* be redirected to dev@example.com -->
<swiftmailer:delivery-whitelist-pattern>/@specialdomain.com$/</swiftmailer:delivery-whitelist-pattern>
<!-- all emails sent to admin@mydomain.com won't be redirected to dev@example.com too -->
<swiftmailer:delivery-whitelist-pattern>/^admin@mydomain.com$/</swiftmailer:delivery-whitelist-pattern>
</swiftmailer:config>
PHP:
// app/config/config_dev.php
$container->loadFromExtension('swiftmailer', array(
'delivery_address' => "dev@example.com",
'delivery_whitelist' => array(
// all email addresses matching this regex will *not* be
// redirected to dev@example.com
'/@specialdomain.com$/',
// all emails sent to admin@mydomain.com won't be
// redirected to dev@example.com too
'/^admin@mydomain.com$/',
),
));
在以上例子中,所有的电子邮件消息会重新发送到 dev@example.com,除了发送到 admin@mydomain.com 地址的消息或者其他属于 specialdomain.com 域的电子邮件地址的消息,将会正常发送。
从 Web 调试工具栏查看
当您在 dev 环境中使用 web 调试工具栏时,您可以在一个单一的响应中查看任何邮件。工具栏上的电子邮件图标会显示发送了多少电子邮件。如果您点击它,一个报告显示发送电子邮件的细节。
如果您发送一封电子邮件,然后立即重定向到另一个网页,网页调试工具栏将不显示电子邮件图标或在下一页面不显示报告。
反而,您可以在 config_dev.yml 文件中设置选项 intercept_redirects 为 true,将会导致重新转到停止并允许您打开发送电子邮件的细节的报告。
YAML:
# app/config/config_dev.yml
web_profiler:
intercept_redirects: true
XML:
<!-- app/config/config_dev.xml -->
<!--
xmlns:webprofiler="http://symfony.com/schema/dic/webprofiler"
xsi:schemaLocation="http://symfony.com/schema/dic/webprofiler
http://symfony.com/schema/dic/webprofiler/webprofiler-1.0.xsd">
-->
<webprofiler:config
intercept-redirects="true"
/>
PHP:
// app/config/config_dev.php
$container->loadFromExtension('web_profiler', array(
'intercept_redirects' => 'true',
));
另外,您可以在重新定向和由之前请求的提交 URL 搜索(例如 /contact/handle)之后,打开分析器。分析器的搜索功能允许您为任何过去的请求加载分析器信息。
当您正在从 Symfony 应用程序中使用 SwiftmailerBundle 发送一封电子邮件,默认情况下会立刻发送该邮件。然而您可能想避免 Swift Mailer 与电子邮件传送之间的性能影响,可能导致用户在邮件发送的过程中等待下一页面加载。这可以通过选择“缓存”电子邮件而不是直接发送来避免、这意味着 Swift Mailer 并不试图发送一封电子邮件,而是将邮件保存在某处,如一个文件。另一个进程可以在缓存中读取并且在缓存中处理发送电子邮件。现在 Swift Mailer 只支持缓存到文件或者内存中。
使用内存缓存
当您使用缓存来存储电子邮件到内存时,它们会在内核终止前立即发送。这意味着如果整个请求在没有任何异常情况或错误下执行的话,电子邮件才会被发送。要用内存选项配置 swiftmailer,使用以下配置:
YAML:
# app/config/config.yml
swiftmailer:
# ...
spool: { type: memory }
XML:
<!-- app/config/config.xml -->
<!--
xmlns:swiftmailer="http://symfony.com/schema/dic/swiftmailer"
http://symfony.com/schema/dic/swiftmailer
http://symfony.com/schema/dic/swiftmailer/swiftmailer-1.0.xsd
-->
<swiftmailer:config>
<swiftmailer:spool type="memory" />
</swiftmailer:config>
PHP:
// app/config/config.php
$container->loadFromExtension('swiftmailer', array(
// ...
'spool' => array('type' => 'memory')
));
使用文件缓存
YAML:
# app/config/config.yml
swiftmailer:
# ...
spool:
type: file
path: /path/to/spool
XML:
<!-- app/config/config.xml -->
<!--
xmlns:swiftmailer="http://symfony.com/schema/dic/swiftmailer"
http://symfony.com/schema/dic/swiftmailer
http://symfony.com/schema/dic/swiftmailer/swiftmailer-1.0.xsd
-->
<swiftmailer:config>
<swiftmailer:spool
type="file"
path="/path/to/spool" />
</swiftmailer:config>
PHP:
// app/config/config.php
$container->loadFromExtension('swiftmailer', array(
// ...
'spool' => array(
'type' => 'file',
'path' => '/path/to/spool',
),
));
如果您想用项目目录缓存到某个地方,记住您可以使用 %kernel.root_dir% 参数来引用项目的根:
path: "%kernel.root_dir%/spool"
现在,当您的应用程序发送一封电子邮件的时候,它不会实际被发送,而是添加到缓存。从缓存中发送消息是分开完成的。在缓存中有一个控制台命令来发送消息:
$ php app/console swiftmailer:spool:send --env=prod
有一个选项来限制发送的消息数:
$ php app/console swiftmailer:spool:send --message-limit=10 --env=prod
您也可以设置时间,限制到秒:
$ php app/console swiftmailer:spool:send --time-limit=10 --env=prod
当然您在现实中不想手动运行这个。相反,控制台命令应该由一个 cron 作业或计划任务激发并且在固定的间隔运行。
由于 SwiftmailerBundle 的缘故,用 Symfony 发送电子邮件是相当简单的,是利用 Swift Mailer 库的能力。
要功能测试电子邮件是否发送,甚至判断电子邮件主题,内容或者其他标题,您可以使用 Symfony 分析器。
开始先用一个简单的控制器动作发送一封电子邮件:
public function sendEmailAction($name)
{
$message = \Swift_Message::newInstance()
->setSubject('Hello Email')
->setFrom('send@example.com')
->setTo('recipient@example.com')
->setBody('You should see me from the profiler!')
;
$this->get('mailer')->send($message);
return $this->render(...);
}
不要忘记按照在如何在功能测试中使用编译器解释的那样启动分析器。
在您的功能测试中,在分析器中使用 swiftmailer 收集器来获取关于发送在之前请求上的消息的信息:
// src/AppBundle/Tests/Controller/MailControllerTest.php
use Symfony\Bundle\FrameworkBundle\Test\WebTestCase;
class MailControllerTest extends WebTestCase
{
public function testMailIsSentAndContentIsOk()
{
$client = static::createClient();
// Enable the profiler for the next request (it does nothing if the profiler is not available)
$client->enableProfiler();
$crawler = $client->request('POST', '/path/to/above/action');
$mailCollector = $client->getProfile()->getCollector('swiftmailer');
// Check that an email was sent
$this->assertEquals(1, $mailCollector->getMessageCount());
$collectedMessages = $mailCollector->getMessages();
$message = $collectedMessages[0];
// Asserting email data
$this->assertInstanceOf('Swift_Message', $message);
$this->assertEquals('Hello Email', $message->getSubject());
$this->assertEquals('send@example.com', key($message->getFrom()));
$this->assertEquals('recipient@example.com', key($message->getTo()));
$this->assertEquals(
'You should see me from the profiler!',
$message->getBody()
);
}
}
12
事件分发器
在 web 开发中很常见,在您的控制器动作之前或之后,需要执行一些逻辑作为过滤器或挂钩。
在 symfony1 中,由 preExecute 和 postExecute 方法达到。大部分主要的框架有相似的方法,但是在 Symfony 缺没有这样的事。好消息是有一个更好的方法来妨碍在 Request -> Response 进程中使用 EventDispatcher 组件。
标识验证示例
想象您需要开发一个 API,其中一些控制器是公开的但是其他的一些别限制在一个或一些客户上。对于这些私人的功能,您可以为客户提供一个标识来进行自我验证。
所以,在执行您的控制器动作之前,您需要检查动作是否限制。如果是限制的话,您需要验证所提供的标识。
请记住本教程为了简洁,标识将被在配置中定义,并且不管是数据库设置还是认证,没有通过安全组件的都不会被使用。
kernel.controller 事件隔离器之前
首先,使用 config.yml 存储一些基本的标识配置,还有参数密钥:
YAML:
# app/config/config.yml
parameters:
tokens:
client1: pass1
client2: pass2
XML:
<!-- app/config/config.xml -->
<parameters>
<parameter key="tokens" type="collection">
<parameter key="client1">pass1</parameter>
<parameter key="client2">pass2</parameter>
</parameter>
</parameters>
PHP:
// app/config/config.php
$container->setParameter('tokens', array(
'client1' => 'pass1',
'client2' => 'pass2',
));
标记要检查的控制器
kernel.controller 监听器会收到每个请求的通知,恰好在控制器执行之前。所以首先,您需要一些办法来验证匹配请求的控制器是否需要标识验证。
一个简洁容易的方法是创建一个空的接口,使控制器实现它:
namespace AppBundle\Controller;
interface TokenAuthenticatedController
{
// ...
}
实现此接口的控制器看起来像这样:
namespace AppBundle\Controller;
use AppBundle\Controller\TokenAuthenticatedController;
use Symfony\Bundle\FrameworkBundle\Controller\Controller;
class FooController extends Controller implements TokenAuthenticatedController
{
// An action that needs authentication
public function barAction()
{
// ...
}
}
创建一个事件监听器
接下来,您需要创建一个事件监听器,保存在您控制器之前执行的逻辑。如果您对事件监听器不熟悉的话,您可以在如何创建一个事件监听器学到更多。
// src/AppBundle/EventListener/TokenListener.php
namespace AppBundle\EventListener;
use AppBundle\Controller\TokenAuthenticatedController;
use Symfony\Component\HttpKernel\Exception\AccessDeniedHttpException;
use Symfony\Component\HttpKernel\Event\FilterControllerEvent;
class TokenListener
{
private $tokens;
public function __construct($tokens)
{
$this->tokens = $tokens;
}
public function onKernelController(FilterControllerEvent $event)
{
$controller = $event->getController();
/*
* $controller passed can be either a class or a Closure.
* This is not usual in Symfony but it may happen.
* If it is a class, it comes in array format
*/
if (!is_array($controller)) {
return;
}
if ($controller[0] instanceof TokenAuthenticatedController) {
$token = $event->getRequest()->query->get('token');
if (!in_array($token, $this->tokens)) {
throw new AccessDeniedHttpException('This action needs a valid token!');
}
}
}
}
注册监听器
最后,作为服务器注册您的监听器,并且标记为事件监听器。通过在 kernel.controller 上监听,您就可以告知 Symfony 您想要在任何控制器执行前调用监听器。
YAML:
# app/config/services.yml
services:
app.tokens.action_listener:
class: AppBundle\EventListener\TokenListener
arguments: ["%tokens%"]
tags:
- { name: kernel.event_listener, event: kernel.controller, method: onKernelController }
XML:
<!-- app/config/services.xml -->
<service id="app.tokens.action_listener" class="AppBundle\EventListener\TokenListener">
<argument>%tokens%</argument>
<tag name="kernel.event_listener" event="kernel.controller" method="onKernelController" />
</service>
PHP:
// app/config/services.php
use Symfony\Component\DependencyInjection\Definition;
$listener = new Definition('AppBundle\EventListener\TokenListener', array('%tokens%'));
$listener->addTag('kernel.event_listener', array(
'event' => 'kernel.controller',
'method' => 'onKernelController'
));
$container->setDefinition('app.tokens.action_listener', $listener);
有了这个配置,您的 TokenListener onKernelController 方法将会在每一个请求都执行。如果将要执行的控制器实现了 TokenAuthenticatedController,应用过标识验证。这让您在想要的任何控制器上有一个“前”过滤器。
kernel.response 事件隔离器之后
除了在您的控制器之前有一个执行的“挂钩”,您也可以添加一个挂钩在您的控制器之后执行。这个例子,想象您想添加一个 sha1 散列(使用那个标识的盐值)到所有已通此标识验证的响应。
另一个核心 Symfony 事件 — 叫做 kernel.response — 在每一项请求都提醒,但是实在控制器返回到响应对象之后。创建一个“后”监听器如同创建一个监听器类一样简单,并且在此事件上注册。
例如,从之前的例子中拿出 TokenListener,首先在请求属性中记录验证标识。这将作为一个基本标志,即此请求进行了标识验证。
public function onKernelController(FilterControllerEvent $event)
{
// ...
if ($controller[0] instanceof TokenAuthenticatedController) {
$token = $event->getRequest()->query->get('token');
if (!in_array($token, $this->tokens)) {
throw new AccessDeniedHttpException('This action needs a valid token!');
}
// mark the request as having passed token authentication
$event->getRequest()->attributes->set('auth_token', $token);
}
}
现在,在此类添加另一个方法 — onKernelResponse — 寻找在此请求对象上的标志而且如果找到的话,就在响应上设置一个自定义标题:
// add the new use statement at the top of your file
use Symfony\Component\HttpKernel\Event\FilterResponseEvent;
public function onKernelResponse(FilterResponseEvent $event)
{
// check to see if onKernelController marked this as a token "auth'ed" request
if (!$token = $event->getRequest()->attributes->get('auth_token')) {
return;
}
$response = $event->getResponse();
// create a hash and set it as a response header
$hash = sha1($response->getContent().$token);
$response->headers->set('X-CONTENT-HASH', $hash);
}
最终,第二个“标签”也需要在服务定义中来通知 Symfony onKernelResponse 事件应该为 kernel.response 通知:
YAML:
# app/config/services.yml
services:
app.tokens.action_listener:
class: AppBundle\EventListener\TokenListener
arguments: ["%tokens%"]
tags:
- { name: kernel.event_listener, event: kernel.controller, method: onKernelController }
- { name: kernel.event_listener, event: kernel.response, method: onKernelResponse }
XML:
<!-- app/config/services.xml -->
<service id="app.tokens.action_listener" class="AppBundle\EventListener\TokenListener">
<argument>%tokens%</argument>
<tag name="kernel.event_listener" event="kernel.controller" method="onKernelController" />
<tag name="kernel.event_listener" event="kernel.response" method="onKernelResponse" />
</service>
PHP:
// app/config/services.php
use Symfony\Component\DependencyInjection\Definition;
$listener = new Definition('AppBundle\EventListener\TokenListener', array('%tokens%'));
$listener->addTag('kernel.event_listener', array(
'event' => 'kernel.controller',
'method' => 'onKernelController'
));
$listener->addTag('kernel.event_listener', array(
'event' => 'kernel.response',
'method' => 'onKernelResponse'
));
$container->setDefinition('app.tokens.action_listener', $listener);
就这样!TokenListener 现在在每一个控件执行前都被通知(onKernelController)并且在每个控件之后返回一个响应(onKernelResponse)。通过让具体的控件实现 TokenAuthenticatedController 接口,您的监听器知道哪个控件是该采取行动的。并且通过在请求“属性”包里存储一个值,onKernelResponse 方法知道添加额外的标题。玩得开心!
允许多个类向另一个类添加方法,您可以在您想要扩展的类中定义神奇的 __call() 方法,像这样:
class Foo
{
// ...
public function __call($method, $arguments)
{
// create an event named 'foo.method_is_not_found'
$event = new HandleUndefinedMethodEvent($this, $method, $arguments);
$this->dispatcher->dispatch('foo.method_is_not_found', $event);
// no listener was able to process the event? The method does not exist
if (!$event->isProcessed()) {
throw new \Exception(sprintf('Call to undefined method %s::%s.', get_class($this), $method));
}
// return the listener returned value
return $event->getReturnValue();
}
}
这使用了特别的,应该也可被创建的 HandleUndefinedMethodEvent。这是一个通用类,每次您需要使用这种模式的类扩展可以重复使用:
use Symfony\Component\EventDispatcher\Event;
class HandleUndefinedMethodEvent extends Event
{
protected $subject;
protected $method;
protected $arguments;
protected $returnValue;
protected $isProcessed = false;
public function __construct($subject, $method, $arguments)
{
$this->subject = $subject;
$this->method = $method;
$this->arguments = $arguments;
}
public function getSubject()
{
return $this->subject;
}
public function getMethod()
{
return $this->method;
}
public function getArguments()
{
return $this->arguments;
}
/**
* Sets the value to return and stops other listeners from being notified
*/
public function setReturnValue($val)
{
$this->returnValue = $val;
$this->isProcessed = true;
$this->stopPropagation();
}
public function getReturnValue()
{
return $this->returnValue;
}
public function isProcessed()
{
return $this->isProcessed;
}
}
接下来,创建一个类,将会监听 foo.method_is_not_found 事件并且添加方法 bar():
class Bar
{
public function onFooMethodIsNotFound(HandleUndefinedMethodEvent $event)
{
// only respond to the calls to the 'bar' method
if ('bar' != $event->getMethod()) {
// allow another listener to take care of this unknown method
return;
}
// the subject object (the foo instance)
$foo = $event->getSubject();
// the bar method arguments
$arguments = $event->getArguments();
// ... do something
// set the return value
$event->setReturnValue($someValue);
}
}
最后,通过注册一个 Bar 的实例和事件 foo.method_is_not_found 添加新的 bar 方法到 Foo 类。
$bar = new Bar();
$dispatcher->addListener('foo.method_is_not_found', array($bar, 'onFooMethodIsNotFound'));
在方法调用前后做一些事情
如果您想在调用一个方法之前后之后做一些事情,您可以在方法开始或结尾分别调度一个事件:
class Foo
{
// ...
public function send($foo, $bar)
{
// do something before the method
$event = new FilterBeforeSendEvent($foo, $bar);
$this->dispatcher->dispatch('foo.pre_send', $event);
// get $foo and $bar from the event, they may have been modified
$foo = $event->getFoo();
$bar = $event->getBar();
// the real method implementation is here
$ret = ...;
// do something after the method
$event = new FilterSendReturnValue($ret);
$this->dispatcher->dispatch('foo.post_send', $event);
return $event->getReturnValue();
}
}
在这个例子中,两个事件被扔出:foo.pre_send 在方法前执行,foo.post_send 在方法后执行。每一个使用自定义事件类来与两个事件的监听器交流。这些事件类需要由您创建并且按照这个例子中,允许变量 $foo, $bar 和 $ret 被检索并由监听器设置。
例如,假设 FilterSendReturnValue 有一个 setReturnValue 方法,一个监听器可能看起来像这样:
public function onFooPostSend(FilterSendReturnValue $event)
{
$ret = $event->getReturnValue();
// modify the original ``$ret`` value
$event->setReturnValue($ret);
}
Symfony 具有很多能触发您应用中的自定义行为的事件和钩子(hooks)。这些事件可以在 KernelEvents 类中查看并且是由 HttpKernel 组件引发。
如果您想要挂钩到事件并添加您自己的自定义逻辑,您必须创建一种在这个事件中作为事件监听者的服务。在此条目中,您将创建一个作为异常监听器的服务,允许您修改您的应用程序异常的显示方式。KernelEvents::EXCEPTION 事件是核心内核事件之一:
// src/AppBundle/EventListener/AcmeExceptionListener.php
namespace AppBundle\EventListener;
use Symfony\Component\HttpKernel\Event\GetResponseForExceptionEvent;
use Symfony\Component\HttpFoundation\Response;
use Symfony\Component\HttpKernel\Exception\HttpExceptionInterface;
class AcmeExceptionListener
{
public function onKernelException(GetResponseForExceptionEvent $event)
{
// You get the exception object from the received event
$exception = $event->getException();
$message = sprintf(
'My Error says: %s with code: %s',
$exception->getMessage(),
$exception->getCode()
);
// Customize your response object to display the exception details
$response = new Response();
$response->setContent($message);
// HttpExceptionInterface is a special type of exception that
// holds status code and header details
if ($exception instanceof HttpExceptionInterface) {
$response->setStatusCode($exception->getStatusCode());
$response->headers->replace($exception->getHeaders());
} else {
$response->setStatusCode(Response::HTTP_INTERNAL_SERVER_ERROR);
}
// Send the modified response object to the event
$event->setResponse($response);
}
}
每个事件接受的 $event 对象略有不同。对 kernel.exception 事件来说,它是GetResponseForExceptionEvent 。如果想了解每个事件监听接受的对象是什么类型的,请参阅:KernelEvents 。
当给 kernel.request, kernel.view 或者 kernel.exception 事件设置响应的时候。事件的传播是停止的,所以优先级较低的监听器并没有被调用。
现在您已经创建了一个类,您现在只需要把它注册为一个服务,并且使用一个特殊的标签告诉 Symfony 这个类是一个 kernel.exception event 事件上的监听器:
YAML:
# app/config/services.yml
services:
kernel.listener.your_listener_name:
class: AppBundle\EventListener\AcmeExceptionListener
tags:
- { name: kernel.event_listener, event: kernel.exception, method: onKernelException }
XML:
<!-- app/config/services.xml -->
<service id="kernel.listener.your_listener_name" class="AppBundle\EventListener\AcmeExceptionListener">
<tag name="kernel.event_listener" event="kernel.exception" method="onKernelException" />
</service>
PHP:
// app/config/services.php
$container
->register('kernel.listener.your_listener_name', 'AppBundle\EventListener\AcmeExceptionListener')
->addTag('kernel.event_listener', array('event' => 'kernel.exception', 'method' => 'onKernelException'))
;
这里有一个默认值为 0 并且具有可选性的附加优先标签选项。所有监听器都会按照它们的优先级顺序进行执行(从高到低)。当您需要确保您的监听器是按照顺序执行的时候,使用这个标签会非常有用。
请求事件,检查类型
一个单页面可以发送很多请求(一个主请求和很多子请求),这也是为什么使用 KernelEvents::REQUEST 事件时,您可能需要检查请求的类型。这可以按照如下步骤完成:
// src/AppBundle/EventListener/AcmeRequestListener.php
namespace AppBundle\EventListener;
use Symfony\Component\HttpKernel\Event\GetResponseEvent;
use Symfony\Component\HttpKernel\HttpKernel;
class AcmeRequestListener
{
public function onKernelRequest(GetResponseEvent $event)
{
if (!$event->isMasterRequest()) {
// don't do anything if it's not the master request
return;
}
// ...
}
}
两种可用的 HttpKernelInterface 接口里的请求分别是:HttpKernelInterface::MASTER_REQUEST 和 HttpKernelInterface::SUB_REQUEST。
调试事件监听器
2.在 Symfony 2.6 节 中我们讲过 debug:event-dispatcher 命令。
您可以得知哪些监听器通过使用控制台注册到了事件中。如果想要显示所有事件和它们的监听器,您可以通过运行下面的代码来实现:
$ php app/console debug:event-dispatcher
您可以通过制定某个监听器的名称来获得某个已注册到特定事件的监听器:
$ php app/console debug:event-dispatcher kernel.exception
13
表达式
在 Symfony2.4 中,一个强有力的 ExpressionLanguage 组件添加到 Symfony 中。这允许我们在配置中添加高度自定义的逻辑。
Symfony 框架有以下几种方式利用原装的表达式:
• 配置服务;
• 路由匹配条件;
• 检查安全(解释如下)并且获取 allow_if 的控件;
• 验证。
想要知道更多关于如何创建和使用表达式,参见表达式句法。
安全:复杂的访问控件表达式
除了像 ROLE_ADMIN 一样的角色,isGranted 方法也接受 Expression 对象:
use Symfony\Component\ExpressionLanguage\Expression;
// ...
public function indexAction()
{
$this->denyAccessUnlessGranted(new Expression(
'"ROLE_ADMIN" in roles or (user and user.isSuperAdmin())'
));
// ...
}
在这个例子中,如果当前用户有 ROLE_ADMIN,或者如果当前用户对象是 isSuperAdmin(),返回到 true,将被授予访问(注意:您的用户对象可能没有 isSuperAdmin 方法,该方法专为此例而发明的)。
这使用一个表达式,您可以学习更多的表达式语言句法,参见表达式句法。
在表达式中,您可能访问到大部分变量:
user
用户对象(或者您未验证的时候字符串 anon)
roles
用户所有的一组角色,包括来自角色等级但不包括 IS_AUTHENTICATED_*/ 属性(见以下的功能)。
object
对象(若任何)作为第二个参数传递给 isGranted。
token
标识对象。
trust_resolver
AuthenticationTrustResolverInterface 对象:您可能使用会使用 **is_*** 的功能。
另外,您可以访问表达式里很多的功能:
is_authenticated
返回 true 如果用户通过“记住我”或者“完全”验证—例如,返回 true 如果用户“注册”。
is_anonymous
等同于使用 IS_AUTHENTICATED_ANONYMOUSLY 的 isGranted 功能。
is_remember_me
相似但不等同于 IS_AUTHENTICATED_REMEMBERED,见下。
is_fully_authenticated
相似但不等同于 IS_AUTHENTICATED_FULLY,见下。
has_role
检查看是否用户有了所给的角色—等同于表达式 'ROLE_ADMIN' in roles。
比起检查 IS_AUTHENTICATED_REMEMBERED,is_remember_me 是不同的。
is_remember_me 和 is_authenticated_fully 功能对于使用 IS_AUTHENTICATED_REMEMBERED 和 IS_AUTHENTICATED_FULLY 的 isGranted 功能是相似的—但是它们不一样。以下体现了区别:
use Symfony\Component\ExpressionLanguage\Expression;
// ...
$ac = $this->get('security.authorization_checker');
$access1 = $ac->isGranted('IS_AUTHENTICATED_REMEMBERED');
$access2 = $ac->isGranted(new Expression(
'is_remember_me() or is_fully_authenticated()'
));
这里,$access1 和 $access2 将会有相同的值。不像 IS_AUTHENTICATED_REMEMBERED 和 IS_AUTHENTICATED_FULLY 的行为,如果用户通过 cookie 验证,is_remember_me 的功能只是返回 true 并且如果用户在这个部分确实注册了(例如,完备的),is_fully_authenticated 只是返回 true。
14
表单
Symfony 提供了很多种来渲染表单的方法。在本指导中,你将学习如何自定义你的表单的每一个可能的部分使用尽可能少的步骤,不论你在你的模板引擎中使用的是 Twig 还是 PHP。
表单渲染基础
召回表单区域的标签,错误以及 HTML 插件可以很容易地通过使用 Twig 的 form_row 功能或者 PHP 的帮助方法来进行渲染:
Twig:
{
{
form_row
(
form
.age
)
}
}
PHP:
<?php
echo
$view
[
'form'
]
->
row
(
$form
[
'age'
]
)
;
?>
你也可以分别渲染这三个部分:
Twig:
<div>
{
{
form_label
(
form
.age
)
}
}
{
{
form_errors
(
form
.age
)
}
}
{
{
form_widget
(
form
.age
)
}
}
</div>
PHP:
<div>
<?php
echo
$view
[
'form'
]
->
label
(
$form
[
'age'
]
)
;
?>
<?php
echo
$view
[
'form'
]
->
errors
(
$form
[
'age'
]
)
;
?>
<?php
echo
$view
[
'form'
]
->
widget
(
$form
[
'age'
]
)
;
?>
</div>
在这两种情况下,表单的标签,错误以及 HTML 插件通过使用一系列的 Symfony 包含的标记进行了渲染。举例来说,上述两个模板都会被渲染:
<div>
<label for="form_age">Age</label>
<ul>
<li>This field is required</li>
</ul>
<input type="number" id="form_age" name="form[age]" />
</div>
为了快速使用原型并且测试表单,你可以只使用一行来渲染整个表单:
Twig:
{# renders all fields #}
{
{
form_widget
(
form
)
}
}
{# renders all fields *and* the form start and end tags #}
{
{
form
(
form
)
}
}
PHP:
<!-- renders all fields -->
<?php
echo
$view
[
'form'
]
->
widget
(
$form
)
?>
<!-- renders all fields *and* the form start and end tags -->
<?php
echo
$view
[
'form'
]
->
form
(
$form
)
?>
本指导接下来的部分将解释表单的每一部分的标记如何在几个不同的程度来调整。获取更多关于表单渲染的一般信息详见在模板中渲染表单。
什么是表单的主题?
Symfony 使用表单碎片——一小块模板用来渲染一小块表单——来渲染表单的每一部分——区域标签,错误,输入文本框,选择标签等等。
这个碎片在 Twig 中被定义为区域,同时在 PHP 中被定义为模板文件。
主题只不过是一些碎片的集合,这些碎片就是你在渲染表单时想要使用的。换句话说,如果你想要个性化一部分表单是如何被渲染的,你需要输入一个主题,这个主题包含了适合的个性化的表单碎片。
Symfony 中包含四个内建的表单主题这些主题定义了需要渲染的表单的每一个部分的每一个碎片:
- form_div_layout.html.twig,将每一个表单的字段包含在 \<div> 元素中。
- form_table_layout.html.twig,将整个表单包含在 \<table> 元素中以及将每一个表单字段包含在 \<tr> 元素中。
- bootstrap_3_layout.html.twig,使用合适的 CSS 类将整个表单包含在 \<div> 元素中并且应用默认的 Bootstrap 3 CSS framework 风格。
- bootstrap_3_horizontal_layout.html.twig,这个和前面的主题很相似,但是 CSS 类应用的是那些用于水平展示表单的(例如标签以及在同一行的控件)。
当你使用 Bootstrap 表单主题并且手动渲染表单时,对字段调用 form_label() 并不会意味着什么。这是因为 Bootstrap 内部,标签已经在 form_widget() 中显示。
在下一节中,你将学习到通过重写或者部分重写它的碎片如何个性化主题。
举例来说,当整型字段的控件被渲染时,input number 字段就会产生:
Twig:
{
{
form_widget
(
form
.age
)
}
}
PHP:
<?php
echo
$view
[
'form'
]
->
widget
(
$form
[
'age'
]
)
?>
渲染:
<input type="number" id="form_age" name="form[age]" required="required" value="33" />
内部的,Symfony 使用 integer_widget 碎片来渲染字段。这是因为字段类型是整型并且你正在渲染它的控件(这个和它的标签或者错误截然相反)。
在 Twig 中这个将会从 form_div_layout.html.twig 模板中默认到 integer_widget 区域。
在 PHP 中将会是位于 FrameworkBundle/Resources/views/Form 文件夹的 integer_widget.html.php 文件。
默认的 integer_widget 的安装启用如下所示:
Twig:
{# form_div_layout.html.twig #}
{
%
block
integer_widget
%
}
{
%
set
type
=
type
|
default
(
'number'
)
%
}
{
{
block
(
'form_widget_simple'
)
}
}
{
%
endblock
integer_widget
%
}
PHP:
<!-- integer_widget.html.php -->
<?php
echo
$view
[
'form'
]
->
block
(
$form
,
'form_widget_simple'
,
array
(
'type'
=>
isset
(
$type
)
?
$type
:
"number"
)
)
?>
正如你所见,这个碎片自己渲染另一个碎片——form_widget_simple:
Twig:
{# form_div_layout.html.twig #}
{
%
block
form_widget_simple
%
}
{
%
set
type
=
type
|
default
(
'text'
)
%
}
<input type="
{
{
type
}
}
"
{
{
block
(
'widget_attributes'
)
}
}
{
%
if
value
is
not
empty
%
}
value="
{
{
value
}
}
"
{
%
endif
%
}
/>
{
%
endblock
form_widget_simple
%
}
PHP:
<!-- FrameworkBundle/Resources/views/Form/form_widget_simple.html.php -->
<input
type="
<?php
echo
isset
(
$type
)
?
$view
->
escape
(
$type
)
:
'text'
?>
"
<?php
if
(
!
empty
(
$value
)
)
:
?>
value="
<?php
echo
$view
->
escape
(
$value
)
?>
"
<?php
endif
?>
<?php
echo
$view
[
'form'
]
->
block
(
$form
,
'widget_attributes'
)
?>
/>
重点是,碎片指示了表单的每一个部分的 HTML 输出。为了个性化表单输出,你只需要识别并且重写正确的碎片。一系列的表单碎片的结合就是大家所熟知的表单“主题”。当渲染表单的时候,你可以选择应用哪个或者哪些主题。
在 Twig 中主题是简单的模板文件并且碎片是定义在这些文件中的区域。
在 PHP 中主题是一个文件夹并且碎片是这个文件夹中的独立的模板文件。
识别哪个区域来个性化
在本例中,个性化的碎片名为 integer_widget,因为你想要为所有的整型字段类型重写 HTML 控件,如果你需要个性化 textarea 字段,你就要个性化 textarea_widget。
正如你所见,碎片的名称是由字段类型以及字段的哪一个部分(例如 widget, label, errors, row)被渲染组合而成的。同样的,为了个性化错误如何仅使用输入文本字段渲染,你需要个性化 text_errors 碎片。
然而,更常见的是你想要个性化所有的字段的错误显示方式。你可以通过个性化 form_errors 碎片来达到这个目的。利用字段类型继承的优点。特别的,由于文本类型是由表单类型扩展而来的,在回到它的父碎片名称之前如果它不存在(例如 form_errors),表单的组件将会首先寻找特定类型的碎片(例如 text_errors)。
获取有关这个话题的更多信息,参见表单碎片命名。
表单主题化
为了看看表单主题化的威力,假设你想要将每一个输入数字字段捆绑一个 div 标签。做这个的关键就是将 integer_widget 碎片个性化。
在 Twig 中进行表单主题化
当在 Twig 中个性化表单字段区域时,在个性化的表单区域可能存在的地方你有两种选择:
方法 | 优点 | 缺点 |
将相同的模板作为表单插入 | 快速简单 | 不能在其它的模板中应用 |
插入单独分开的模板 | 可以在很多模板中重复使用 | 需要创建额外的模板 |
这两种方法都会产生相同的结果但是在不同的情况下各有各的优点。
方法 1:将相同的模板作为表单插入
最简单的个性化 integer_widget 区域的方法是直接在实际渲染表单的模板中进行。
{% extends '::base.html.twig' %}
{% form_theme form _self %}
{% block integer_widget %}
<div class="integer_widget">
{% set type = type|default('number') %}
{{ block('form_widget_simple') }}
</div>
{% endblock %}
{% block content %}
{# ... render the form #}
{{ form_row(form.age) }}
{% endblock %}
通过使用特殊的 {% form_theme form _self %} 标签,Twig 在相同的模板中寻找任何重写的表单区域。假设 form.age 区域是整型类型的字段,当它的控件被渲染时,个性化的 integer_widget 区域将会被使用。
这个方法的缺点就是个性化的表单区域当在其它的模板中渲染其它表单时不能重复利用。换句话说,这个方法在当对你的应用程序中的单一的表单进行表单个性化时最有用。如果你想在你的应用程序的多个(或者所有)表单中重复利用表单个性化,那么请阅读下一节。
方法 2:插入分开的模板
你也可以选择将个性化的 integer_widget 模板区域放置于完全分开的模板中。代码以及最终结果是一样的,但是你现在可以重复在多个模板中使用表单个性化:
{# app/Resources/views/Form/fields.html.twig #}
{% block integer_widget %}
<div class="integer_widget">
{% set type = type|default('number') %}
{{ block('form_widget_simple') }}
</div>
{% endblock %}
既然你已经创建了个性化的表单区域,那么你就需要告诉 Symfony 来使用它。在你实际渲染表单的地方插入模板,通过 form_theme 标签告诉 Symfony 来使用它:
{% form_theme form 'AppBundle:Form:fields.html.twig' %}
{{ form_widget(form.age) }}
当 form.age 标签被渲染的时候,Symfony 将会从新的模板中使用 integer_widget 区域同时 input 标签将会被捆绑在个性化区域的特定的 div 元素上。
多重模板
一个表单可以通过应用多个模板来进行个性化。为了完成这个,需要使用 with 关键字将所有模板的名称作为一个数组传递:
{% form_theme form with ['::common.html.twig', ':Form:fields.html.twig',
'AppBundle:Form:fields.html.twig'] %}
{# ... #}
模板可以位于不同的 bundle 同时它们甚至可以储存在全局目录 app/Resources/views/ 中。
子表单
你也可以应用表单主题来区分你的子表单:
{% form_theme form.child 'AppBundle:Form:fields.html.twig' %}
当你想要为不同于你的主表单的嵌套的表单定制主题时这个就会很有用。只要区分你的主题就好:
{% form_theme form 'AppBundle:Form:fields.html.twig' %}
{% form_theme form.child 'AppBundle:Form:fields_child.html.twig' %}
PHP 环境下的表单主题化
当你使用 PHP 作为模板引擎的时候,个性化碎片的唯一方法就是创建一个新的模板文件——这个和使用 Twig 的第二种方法很相似。
模板文件必须在碎片之后命名。你必须创建一个 integer_widget.html.php 文件从而能个性化 integer_widget 碎片。
<!-- app/Resources/views/Form/integer_widget.html.php -->
<div class="integer_widget">
<?php echo $view['form']->block($form, 'form_widget_simple', array('type' => isset($type) ? $type : "number")) ?>
</div>
既然你已经创建了个性化的表单模板,那么你就需要告诉 Symfony 来使用它。在你实际渲染表单的地方插入模板,通过 setTheme 帮助方法告诉 Symfony 来使用它:
<?php $view['form']->setTheme($form, array('AppBundle:Form')); ?>
<?php $view['form']->widget($form['age']) ?>
当 form.age 标签被渲染的时候,Symfony 将会使用个性化的 integer_widget.html.php 模板,同时 input 标签将会被捆绑在 div 元素上。
如果你想要将主题应用到特定的子表单上,将它传递给 setTheme 方法:
<?php $view['form']->setTheme($form['child'], 'AppBundle:Form/Child'); ?>
引用基本表单区域(只对 Twig 有效)
目前为止,重写特定的表单区域最好的方法就是从 form_div_layout.html.twig 复制默认的区域,然后将它粘贴到不同的模板中,然后将它个性化。在很多情况下,你可以通过在个性化时引用基本表单区域来避免这一步。
这个很容易做,但是如果你的表单区域作为表单位于同一个模板或者分开的模板中就会有轻微的不一样。
从作为表单的相同模板的内部引用区域
通过添加 use 标签的方式来在你渲染表单的地方输入:
{% use 'form_div_layout.html.twig' with integer_widget as base_integer_widget %}
现在,当从 form_div_layout.html.twig 中来的区域被输入后,integer_widget 区域被叫做 base_integer_widget。这就意味着当你重新定义 integer_widget 区域你可以通过 base_integer_widget 引用默认的标记:
{% block integer_widget %}
<div class="integer_widget">
{{ block('base_integer_widget') }}
</div>
{% endblock %}
从外部模板引用基本区域
如果你的表单个性化位于外部模板,你可以通过使用 Twig 的 parent() 功能来引用基本区域:
{# app/Resources/views/Form/fields.html.twig #}
{% extends 'form_div_layout.html.twig' %}
{% block integer_widget %}
<div class="integer_widget">
{{ parent() }}
</div>
{% endblock %}
当使用 PHP 作为模板引擎的时候将不可能引用基本区域。你必须手动复制基本区域的内容到你的新模板文件中。
应用程序范围内的自定义
如果你想要将特定的个性化全局应用到你的应用程序之中,你可以通过将表单的个性化放到外部模板然后将它输入到你的应用程序配置之中。
Twig
通过使用下列的配置,任何在 AppBundle:Form:fields.html.twig 模板中的自定义表单区域当表单被渲染时都会被全局使用。
YAML:
# app/config/config.yml
twig
:
form_themes
:
- 'AppBundle:Form:fields.html.twig'
# ...
XML:
<!-- app/config/config.xml -->
<twig:config
>
<twig:form-theme
>
AppBundle:Form:fields.html.twig
</twig:form-theme
>
<!-- ... -->
</twig:config
>
PHP:
// app/config/config.php
$container
->
loadFromExtension
(
'twig'
,
array
(
'form_themes'
=>
array
(
'AppBundle:Form:fields.html.twig'
,
)
,
// ...
)
)
;
默认情况下,当渲染表单时 Twig 使用 div 布局。然而,有些人可能更喜欢使用 table 渲染表单。使用 form_table_layout.html.twig 资源来调用这样的布局:
YAML:
# app/config/config.yml
twig
:
form_themes
:
- 'form_table_layout.html.twig'
# ...
XML:
<!-- app/config/config.xml -->
<twig:config
>
<twig:form-theme
>
form_table_layout.html.twig
</twig:form-theme
>
<!-- ... -->
</twig:config
>
PHP:
// app/config/config.php
$container
->
loadFromExtension
(
'twig'
,
array
(
'form_themes'
=>
array
(
'form_table_layout.html.twig'
,
)
,
// ...
)
)
;
如果你只是想用在一个模板中有更改,在你的模板中添加下列这一行代码而不是将模板添加成资源:
{% form_theme form 'form_table_layout.html.twig' %}
注意 form 变量在上述的代码中是你传递到你的模板表单视图变量。
PHP
通过使用下列配置,任何在 app/Resources/views/Form 文件夹下的表单的自定义的碎片在渲染表单时将会被全局应用。
YAML:
# app/config/config.yml
framework
:
templating
:
form
:
resources
:
- 'AppBundle:Form'
# ...
XML:
<!-- app/config/config.xml -->
<framework:config
>
<framework:templating
>
<framework:form
>
<resource
>
AppBundle:Form
</resource
>
</framework:form
>
</framework:templating
>
<!-- ... -->
</framework:config
>
PHP:
// app/config/config.php
// PHP
$container
->
loadFromExtension
(
'framework'
,
array
(
'templating'
=>
array
(
'form'
=>
array
(
'resources'
=>
array
(
'AppBundle:Form'
,
)
,
)
,
)
,
// ...
)
)
;
默认情况下,当渲染表单时 PHP 使用 div 布局。然而,有些人可能更喜欢使用 table 渲染表单。使用 FrameworkBundle:FormTable 资源来调用这样的布局:
YAML:
# app/config/config.yml
framework
:
templating
:
form
:
resources
:
- 'FrameworkBundle:FormTable'
XML:
<!-- app/config/config.xml -->
<framework:config
>
<framework:templating
>
<framework:form
>
<resource
>
FrameworkBundle:FormTable
</resource
>
</framework:form
>
</framework:templating
>
<!-- ... -->
</framework:config
>
PHP:
// app/config/config.php
$container
->
loadFromExtension
(
'framework'
,
array
(
'templating'
=>
array
(
'form'
=>
array
(
'resources'
=>
array
(
'FrameworkBundle:FormTable'
,
)
,
)
,
)
,
// ...
)
)
;
如果你只是想要在一个模板中有更改,在你的模板中添加下列这一行代码而不是将模板添加成资源:
<?php $view['form']->setTheme($form, array('FrameworkBundle:FormTable')); ?>
注意 $form 变量在上述的代码中是你传递到你的模板表单视图变量。
如何在独立的字段中进行自定义
目前为止,你已经看到了不同的方式来自定义所有的文本字段类型的控件输出。你也可以自定义独立的字段。举例来说,假设你在 product 表单中有两个文本字段——name 和 description——但是你只想自定义其中的一个。这个可以通过自定义名为区域的代码属性以及需要自定义的部分名称的组合碎片来完成。举例来说,只自定义 name 字段:
{% form_theme form _self %}
{% block _product_name_widget %}
<div class="text_widget">
{{ block('form_widget_simple') }}
</div>
{% endblock %}
{{ form_widget(form.name) }}
<!-- Main template -->
<?php echo $view['form']->setTheme($form, array('AppBundle:Form')); ?>
<?php echo $view['form']->widget($form['name']); ?>
<!-- app/Resources/views/Form/_product_name_widget.html.php -->
<div class="text_widget">
echo $view['form']->block('form_widget_simple') ?>
</div>
在这里,_product_name_widget 碎片定义了模板使用编号为 product_name 的字段(名称是 product[name])。
字段的 product 属性是表单的名称,这个可能是手动设置的或者是基于你的表单类型名称自动产生的(例如 ProductType 等同于 product)。如果你不确定你的表单的名称,就需要你的表单名称产生的源。
如果你想要改变 _product_name_widget 区域的 product 或者 name 属性你可以在你的表单中设置 block_name 选项:
``` use Symfony\Component\Form\FormBuilderInterface;
public function buildForm(FormBuilderInterface $builder, array $options) { // ...
$builder->add('name', 'text', array(
'block_name' => 'custom_name',
));
}
```
然后区域的名称就会变成 _product_custom_name_widget。
你也可以使用相同的方法来重写整个字段行:
Twig:
{
%
form_theme
form
_self
%
}
{
%
block
_product_name_row
%
}
<div class="name_row">
{
{
form_label
(
form
)
}
}
{
{
form_errors
(
form
)
}
}
{
{
form_widget
(
form
)
}
}
</div>
{
%
endblock
%
}
{
{
form_row
(
form
.name
)
}
}
PHP:
<!-- Main template -->
<?php
echo
$view
[
'form'
]
->
setTheme
(
$form
,
array
(
'AppBundle:Form'
)
)
;
?>
<?php
echo
$view
[
'form'
]
->
row
(
$form
[
'name'
]
)
;
?>
<!-- app/Resources/views/Form/_product_name_row.html.php -->
<div class="name_row">
<?php
echo
$view
[
'form'
]
->
label
(
$form
)
?>
<?php
echo
$view
[
'form'
]
->
errors
(
$form
)
?>
<?php
echo
$view
[
'form'
]
->
widget
(
$form
)
?>
</div>
其它一些自定义
目前为止,本指导已经介绍过一些如何渲染表单的不同的个性化方法。关键就是要个性化特定的碎片,这个碎片和你想要控制的表单的属性相关。(详见命名表单区域)
在下一节中,你将学习如何使几个普通的表单个性化。为了这些个性化,需要使用表单主题化一节中介绍的方法。
个性化错误输出
表单的组件只是会处理校验错误如何被渲染而不是实际的校验信息。这些错误信息由你应用到你的对象的校验限制自己决定。获取更多信息详见校验章节。
当表单提交错误的时候有很多很多不同的方式来决定错误如何被渲染。当你使用 form_errors 的时候字段的错误信息就会被渲染:
Twig:
{
{
form_errors
(
form
.age
)
}
}
PHP:
<?php
echo
$view
[
'form'
]
->
errors
(
$form
[
'age'
]
)
;
?>
默认情况下,错误在一个没有排序的列表中被渲染:
<ul>
<li>This field is required</li>
</ul>
为了重写所有文件的错误如何被渲染,简单的复制粘贴并且个性化 form_errors 碎片就好。
Twig:
{# form_errors.html.twig #}
{
%
block
form_errors
%
}
{
%
spaceless
%
}
{
%
if
errors
|
length
>
0
%
}
<ul>
{
%
for
error
in
errors
%
}
<li>
{
{
error
.message
}
}
</li>
{
%
endfor
%
}
</ul>
{
%
endif
%
}
{
%
endspaceless
%
}
{
%
endblock
form_errors
%
}
PHP:
<!-- form_errors.html.php -->
<?php
if
(
$errors
)
:
?>
<ul>
<?php
foreach
(
$errors
as
$error
)
:
?>
<li>
<?php
echo
$error
->
getMessage
(
)
?>
</li>
<?php
endforeach
?>
</ul>
<?php
endif
?>
如何应用这些个性化参见表单主题化。
你也可以自定义这些错误输出成为一种特定的字段类型。为了只是个性化这些错误使用的标志,遵循和上面相同的步骤但是把内容放到相关的 _errors 区域(或者文件以防是 PHP 模板)。举例来说,text_errors (或者 text_errors.html.php)。
找出哪个是你必须个性化的区域或者文件详见表单碎片命名。
对于你的表单来说是全局的特定的错误(例如不仅仅是一个字段)被分开来渲染。通常在你的表单的顶部:
Twig:
{
{
form_errors
(
form
)
}
}
PHP:
<?php
echo
$view
[
'form'
]
->
render
(
$form
)
;
?>
为了仅仅个性化这些错误所使用的标记,遵循上述所说的步骤,但是检查 compound 的值是否设置为真。如果为真的话,这就意味着现在正在被渲染的就是字段的集合(例如整个表单),并且不仅仅是一个独立的字段。
Twig:
{# form_errors.html.twig #}
{
%
block
form_errors
%
}
{
%
spaceless
%
}
{
%
if
errors
|
length
>
0
%
}
{
%
if
compound
%
}
<ul>
{
%
for
error
in
errors
%
}
<li>
{
{
error
.message
}
}
</li>
{
%
endfor
%
}
</ul>
{
%
else
%
}
{# ... display the errors for a single field #}
{
%
endif
%
}
{
%
endif
%
}
{
%
endspaceless
%
}
{
%
endblock
form_errors
%
}
PHP:
<!-- form_errors.html.php -->
<?php
if
(
$errors
)
:
?>
<?php
if
(
$compound
)
:
?>
<ul>
<?php
foreach
(
$errors
as
$error
)
:
?>
<li>
<?php
echo
$error
->
getMessage
(
)
?>
</li>
<?php
endforeach
?>
</ul>
<?php
else
:
?>
<!-- ... render the errors for a single field -->
<?php
endif
?>
<?php
endif
?>
个性化“表单行”
当你可以管理的时候,最简单的渲染表单的字段的方法就是通过 form_row 功能,这个功能渲染标签,错误以及字段的 HTML 插件。为了个性化渲染所有表单字段行所使用的标志,重写 form_row 碎片。举例来说,你想要在每一个行的周围的 div 元素中添加一个类:
Twig:
{# form_row.html.twig #}
{
%
block
form_row
%
}
<div class="form_row">
{
{
form_label
(
form
)
}
}
{
{
form_errors
(
form
)
}
}
{
{
form_widget
(
form
)
}
}
</div>
{
%
endblock
form_row
%
}
PHP:
<!-- form_row.html.php -->
<div class="form_row">
<?php
echo
$view
[
'form'
]
->
label
(
$form
)
?>
<?php
echo
$view
[
'form'
]
->
errors
(
$form
)
?>
<?php
echo
$view
[
'form'
]
->
widget
(
$form
)
?>
</div>
如何应用这些个性化详见表单主题化。
为字段标签添加必填星号标注
如果你想要将你的所有的必填字段加上必填星号标注(*),你可以通过个性化 form_label 碎片来完成。
在 Twig 中,如果你正在你的表单的相同的模板中个性化表单,修正 use 标签并且添加下列代码:
{% use 'form_div_layout.html.twig' with form_label as base_form_label %}
{% block form_label %}
{{ block('base_form_label') }}
{% if required %}
<span class="required" title="This field is required">*</span>
{% endif %}
{% endblock %}
在 Twig 中,如果你正在你的表单的不同的模板中个性化表单,使用下列代码:
{% extends 'form_div_layout.html.twig' %}
{% block form_label %}
{{ parent() }}
{% if required %}
<span class="required" title="This field is required">*</span>
{% endif %}
{% endblock %}
当使用 PHP 作为模板引擎时你必须从原始模板中复制内容:
<!-- form_label.html.php -->
<!-- original content -->
<?php if ($required) { $label_attr['class'] = trim((isset($label_attr['class']) ? $label_attr['class'] : '').' required'); } ?>
<?php if (!$compound) { $label_attr['for'] = $id; } ?>
<?php if (!$label) { $label = $view['form']->humanize($name); } ?>
<label <?php foreach ($label_attr as $k => $v) { printf('%s="%s" ', $view->escape($k), $view->escape($v)); } ?>><?php echo $view->escape($view['translator']->trans($label, array(), $translation_domain)) ?></label>
<!-- customization -->
<?php if ($required) : ?>
<span class="required" title="This field is required">*</span>
<?php endif ?>
如何应用这些个性化详见表单主题化。
仅使用 CSS
默认情况下,请求字段的 label 标签被一个叫做 required CSS 类渲染。因此,你也可以只使用 CSS 来添加星号标注:
label.required:before {
content: "* ";
}
添加“帮助”消息
你也可以自定义你的表单控件从而拥有“帮助”信息选项。
在 Twig 中,如果你正在你的表单的相同的模板中个性化表单,修正 use 标签并且添加下列代码:
{% use 'form_div_layout.html.twig' with form_widget_simple as base_form_widget_simple %}
{% block form_widget_simple %}
{{ block('base_form_widget_simple') }}
{% if help is defined %}
<span class="help">{{ help }}</span>
{% endif %}
{% endblock %}
在 Twig 中,如果你正在你的表单的不同的模板中个性化表单,使用下列代码:
{% extends 'form_div_layout.html.twig' %}
{% block form_widget_simple %}
{{ parent() }}
{% if help is defined %}
<span class="help">{{ help }}</span>
{% endif %}
{% endblock %}
当使用 PHP 作为模板引擎时你必须从原始模板中复制内容:
<!-- form_widget_simple.html.php -->
<!-- Original content -->
<input
type="<?php echo isset($type) ? $view->escape($type) : 'text' ?>"
<?php if (!empty($value)): ?>value="<?php echo $view->escape($value) ?>"<?php endif ?>
<?php echo $view['form']->block($form, 'widget_attributes') ?>
/>
<!-- Customization -->
<?php if (isset($help)) : ?>
<span class="help"><?php echo $view->escape($help) ?></span>
<?php endif ?>
为了渲染字段下的帮助信息,传递一个 help 变量:
Twig:
{
{
form_widget
(
form
.
title
,
{
'help'
:
'foobar'
}
)
}
}
PHP:
<?php
echo
$view
[
'form'
]
->
widget
(
$form
[
'title'
]
,
array
(
'help'
=>
'foobar'
)
)
?>
如何应用这些个性化详见表单主题化。
使用表单变量
渲染表单的不同部分的大多数功能(例如表单控件,表单标签,表单错误等等)都可以允许你直接做特定的自定义。看下面这个例子:
Twig:
{# render a widget, but add a "foo" class to it #}
{
{
form_widget
(
form
.name
,
{
'attr'
:
{
'class'
:
'foo'
}
}
)
}
}
PHP:
<!-- render a widget, but add a "foo" class to it -->
<?php
echo
$view
[
'form'
]
->
widget
(
$form
[
'name'
]
,
array
(
'attr'
=>
array
(
'class'
=>
'foo'
,
)
,
)
)
?>
这个包含表单“变量”的数组作为第二个参数传递。更多关于这方面的细节,详见更多关于表单变量。
数据转换是用于将字段数据转换成可以在表单中展示的格式(并且可以重新提交)。它们已经内部使用了很多字段类型。举例来说,数据字段类型可以被渲染成 yyyy-MM-dd 格式的文本框。内部的,数据转换将 DateTime 开始的字段的值转换成 yyyy-MM-dd 字符串来渲染表格,并且返回到 DateTime 对象提交。
当表单字段拥有 inherit_data 选项设置,数的转换将不会被应用到那个字段。
简单的例子:在用户输入上消除 HTML
假设你拥有一个 textarea 类型描述标签的 Task 表单:
// src/AppBundle/Form/TaskType.php
namespace AppBundle\Form\Type;
use Symfony\Component\Form\FormBuilderInterface;
use Symfony\Component\OptionsResolver\OptionsResolver;
// ...
class TaskType extends AbstractType
{
public function buildForm(FormBuilderInterface $builder, array $options)
{
$builder->add('description', 'textarea');
}
public function configureOptions(OptionsResolver $resolver)
{
$resolver->setDefaults(array(
'data_class' => 'AppBundle\Entity\Task',
));
}
// ...
}
但是这里有两个复杂点:
- 你的用户允许使用一些 HTML 标签,但是不是其它的:在表单提交之后你需要一种调用 striptags 的方法;
- 为了友好性,在渲染表单之前你想要将 \<br/> 标签转换成换行符(\n),这样文本就更容易编辑了。
这是一个将定制的数据转换附到 description 字段的最好时机。最简单的方法就是使用 CallbackTransformer 类:
// src/AppBundle/Form/TaskType.php
namespace AppBundle\Form\Type;
use Symfony\Component\Form\CallbackTransformer;
use Symfony\Component\Form\FormBuilderInterface;
// ...
class TaskType extends AbstractType
{
public function buildForm(FormBuilderInterface $builder, array $options)
{
$builder->add('description', 'textarea');
$builder->get('description')
->addModelTransformer(new CallbackTransformer(
// transform <br/> to \n so the textarea reads easier
function ($originalDescription) {
return preg_replace('#<br\s*/?>#i', "\n", $originalDescription);
},
function ($submittedDescription) {
// remove most HTML tags (but not br,p)
$cleaned = strip_tags($submittedDescription, '<br><br/><p>');
// transform any \n to real <br/>
return str_replace("\n", '<br/>', $cleaned);
}
))
;
}
// ...
}
CallbackTransformer 类使用了两个回调函数作为参数。第一个将原始值转换成为能够在渲染字段时使用的格式。第二个做了相反的事情:它将提交的值转换回你在代码中将要用的格式。
addModelTransformer() 方法接受任何实施 DataTransformerInterface 的对象,这样你就可以创建你自己的类,而不是将所有的逻辑都放入表单(详见下一节)。
你也可以添加转换器,你可以通过稍微改变格式的方法添加文件:
$builder->add(
$builder->create('description', 'textarea')
->addModelTransformer(...)
);
更难的例子:将问题数字转化为问题实体
比如说你的 Task 实体到 Issue 实体有多对一的关系(例如每一个 Task 都有一个可选的外部关键字对应与之相关的 Issue)。添加包含所有问题的列表框可能最终会变得很长并且需要很长时间加载出来。作为替代,你可以在用户能够简单地输入问题数字的地方决定你想要添加一个列表框。
由像往常一样设置文本字段开始:
// src/AppBundle/Form/TaskType.php
namespace AppBundle\Form\Type;
// ...
class TaskType extends AbstractType
{
public function buildForm(FormBuilderInterface $builder, array $options)
{
$builder
->add('description', 'textarea')
->add('issue', 'text')
;
}
public function configureOptions(OptionsResolver $resolver)
{
$resolver->setDefaults(array(
'data_class' => 'AppBundle\Entity\Task'
));
}
// ...
}
好的开始!但是如果你在这里停止并且提交表单,Task 的 issue 属性就会是一个字符串(例如 “55”)。你如何提交时将这个转换成为 Issue 实体?
创建转换器
你可以像之前那样使用 CallbackTransformer。但是由于这个有一点点复杂,创建一个新的转换类将会使得 TaskType 表单类更简单。
创建一个 IssueToNumberTransformer 类:它将会负责转化问题数字和 Issue 实体:
// src/AppBundle/Form/DataTransformer/IssueToNumberTransformer.php
namespace AppBundle\Form\DataTransformer;
use AppBundle\Entity\Issue;
use Doctrine\Common\Persistence\EntityManager;
use Symfony\Component\Form\DataTransformerInterface;
use Symfony\Component\Form\Exception\TransformationFailedException;
class IssueToNumberTransformer implements DataTransformerInterface
{
private $entityManager;
public function __construct(EntityManager $entityManager)
{
$this->entityManager = $entityManager;
}
/**
* Transforms an object (issue) to a string (number).
*
* @param Issue|null $issue
* @return string
*/
public function transform($issue)
{
if (null === $issue) {
return '';
}
return $issue->getId();
}
/**
* Transforms a string (number) to an object (issue).
*
* @param string $issueNumber
* @return Issue|null
* @throws TransformationFailedException if object (issue) is not found.
*/
public function reverseTransform($issueNumber)
{
// no issue number? It's optional, so that's ok
if (!$issueNumber) {
return;
}
$issue = $this->entityManager
->getRepository('AppBundle:Issue')
// query for the issue with this id
->find($issueNumber)
;
if (null === $issue) {
// causes a validation error
// this message is not shown to the user
// see the invalid_message option
throw new TransformationFailedException(sprintf(
'An issue with number "%s" does not exist!',
$issueNumber
));
}
return $issue;
}
}
就好像第一个例子,转换器有两个方法。transform() 方法负责将你代码中的数据转换成可以在你的表单中渲染的格式(例如 Issue 对象到它的 id 一个字符串)。reverseTransform() 方法负责相反的工作:它将提交的值转换回你想要的格式(例如将 id 转换成为 Issue 对象)。
为了引起校验错误,使用 TransformationFailedException。但是你向这个例外传递的信息不会向用户展示。你可以使用 invalid_message 选项来设置消息(详见下面)。
当 null 被传递到 transform() 方法时。你的转换器将会返回和它正在转化的类型相等的值(例如一个空的字符串,整型的 0 或者浮点型的 0.0)。
使用转换器
接下来,你需要从 TaskType 内部将 IssueToNumberTransformer 类实例化并且将其添加到 issue 字段。但是为了完成这个,你将会需要实体管理的实例(由于 IssueToNumberTransformer 需要这个)。
没问题!仅仅添加 __construct() 功能到 TaskType 中并且使得这个被传入。然后,你就能轻而易举地创建以及添加转换器了:
// src/AppBundle/Form/TaskType.php
namespace AppBundle\Form\Type;
use AppBundle\Form\DataTransformer\IssueToNumberTransformer;
use Doctrine\Common\Persistence\EntityManager;
// ...
class TaskType extends AbstractType
{
private $entityManager;
public function __construct(EntityManager $entityManager)
{
$this->entityManager = $entityManager;
}
public function buildForm(FormBuilderInterface $builder, array $options)
{
$builder
->add('description', 'textarea')
->add('issue', 'text', array(
// validation message if the data transformer fails
'invalid_message' => 'That is not a valid issue number',
));
// ...
$builder->get('issue')
->addModelTransformer(new IssueToNumberTransformer($this->entityManager));
}
// ...
}
现在,当你创建你的 TaskType 时,你需要在实体管理器中传递:
// e.g. in a controller somewhere
$entityManager = $this->getDoctrine()->getManager();
$form = $this->createForm(new TaskType($entityManager), $task);
// ...
为了使得这一步更加简单(尤其如果 TaskType 嵌入在其它的表单类型类中),你可以选择将你的表单类型注册成为服务。
棒棒的,你已经完成了!你的用户将可以很容易地在文本字段中输入问题数字并且这将会转化成问题对象。这就意味着,在成功的提交之后,表单组件将会向 Task::setIssue() 传递一个真正的 Issue 对象而不是问题数字。
如果问题没有被发现的话,那个字段的表单错误将会产生,同时这个错误消息可以被 invalid_message 字段选项控制。
在添加你的转换器的时候需要注意。举例来说,下列代码就是错误的,由于转换器将会被用于整个表单而不是仅仅这个字段:
// THIS IS WRONG - TRANSFORMER WILL BE APPLIED TO THE ENTIRE FORM
// see above example for correct code
$builder->add('issue', 'text')
->addModelTransformer($transformer);
创建一个可以重复使用的 issue_selector 字段
在上面的例子中,你对正常的 text 字段应用了转换器。但是如果做很多这样的转换,最好创建一个定制的字段类型那样就可以自动完成这些了。
首先,创建定制字段类型类:
// src/AppBundle/Form/IssueSelectorType.php
namespace AppBundle\Form;
use AppBundle\Form\DataTransformer\IssueToNumberTransformer;
use Doctrine\ORM\EntityManager;
use Symfony\Component\Form\AbstractType;
use Symfony\Component\Form\FormBuilderInterface;
use Symfony\Component\OptionsResolver\OptionsResolver;
class IssueSelectorType extends AbstractType
{
private $entityManager;
public function __construct(EntityManager $entityManager)
{
$this->entityManager = $entityManager;
}
public function buildForm(FormBuilderInterface $builder, array $options)
{
$transformer = new IssueToNumberTransformer($this->entityManager);
$builder->addModelTransformer($transformer);
}
public function configureOptions(OptionsResolver $resolver)
{
$resolver->setDefaults(array(
'invalid_message' => 'The selected issue does not exist',
));
}
public function getParent()
{
return 'text';
}
public function getName()
{
return 'issue_selector';
}
}
很好!这个像文本字段(getParent())一样的运行和渲染,但是将会自动具有数据转换并且 invalid_message 选项将会有一个很好的默认值。
接下来,将你的类型注册为服务并且给它加上 form.type 的标签,这样它就可以被认为是定制的字段类型了:
YAML:
# app/config/services.yml
services
:
app.type.issue_selector
:
class
:
AppBundle\Form\IssueSelectorType
arguments
:
[
"@doctrine.orm.entity_manager"
]
tags
:
- { name
:
form.type, alias
:
issue_selector
}
XML:
<!-- app/config/services.xml -->
<?xml
version
=
"1.0"
encoding
=
"UTF-8"
?>
<container
xmlns
=
"http://symfony.com/schema/dic/services"
xmlns:xsi
=
"http://www.w3.org/2001/XMLSchema-instance"
xsi:schemaLocation
=
"http://symfony.com/schema/dic/services
http://symfony.com/schema/dic/services/services-1.0.xsd"
>
<services
>
<service
id
=
"app.type.issue_selector"
class
=
"AppBundle\Form\IssueSelectorType"
>
<argument
type
=
"service"
id
=
"doctrine.orm.entity_manager"
/>
<tag
name
=
"form.type"
alias
=
"issue_selector"
/>
</service
>
</services
>
</container
>
PHP:
// app/config/services.php
use
Symfony\Component\DependencyInjection\Definition
;
use
Symfony\Component\DependencyInjection\Reference
;
// ...
$container
->
setDefinition
(
'app.type.issue_selector'
,
new
Definition
(
'AppBundle\Form\IssueSelectorType'
)
,
array
(
new
Reference
(
'doctrine.orm.entity_manager'
)
,
)
)
->
addTag
(
'form.type'
,
array
(
'alias'
=>
'issue_selector'
,
)
)
;
现在,不论何时你想要使用你的特殊的 issue_selector 字段类型都是十分容易的:
// src/AppBundle/Form/TaskType.php
namespace AppBundle\Form\Type;
use AppBundle\Form\DataTransformer\IssueToNumberTransformer;
// ...
class TaskType extends AbstractType
{
public function buildForm(FormBuilderInterface $builder, array $options)
{
$builder
->add('description', 'textarea')
->add('issue', 'issue_selector')
;
}
// ...
}
关于模型和视图转换
在上面的例子中,转换器曾经作为一种“模型”转换器。实际上,有两种类型的转化器同时又有三种不同类型的基础数据。
在任何表单中,这三种不同的类型数据是:
- 模型数据——这是你的应用程序中使用的数据格式(例如一个 Issue 对象)。如果你调用 Form::getData() 或者 Form::setData(),你就会处理模型数据。
- 普通数据——这是你的数据的普通版本并且这个和你的“模型”数据一样常见(尽管不是在我们的例子中)。它经常不会被直接应用。
- 视图数据——这是表单字段自动填充的数据格式。用户也很有可能提交这种格式的数据。当你调用 Form::submit($data) 时,$data 就是“视图”格式的数据。
这两种不同类型的转换器帮助相互转换这些类型的数据:
模型转换器:
- 转换:“模型数据”=>“普通数据” - 反转换:“普通数据”=>“模型数据”
视图转换器: - 转换:“普通数据”=>“视图数据” - 反转换:“视图数据”=>“普通数据”
你需要哪种转换器取决于你的实际情况。
为了使用视图转换器,你需要调用 addViewTransformer。
那么为什么使用模型转换器?
在这个例子中,字段类型是 文本 字段,同时文本字段一直被认为是一种简单,纯量的格式在“普通”和“视图”格式中。由于这个原因最合适的转换器就是“模型”转换器(这个转换器转换普通格式)——字符串的 issue 数字——到模型格式——Issue 对象)。
转换器的不同之处在于副标题以及你需要一直想着字段的“普通”数据会是什么样子。举例来说,文本字段的普通数据就是一个字符串,但是对于日期字段就是 DateTime 对象。
一条最普通的原则,正常化的数据应当包含尽可能多的信息。
时常地,表单不能静态地被创建。在这一节,你将学习基于三种常见的用例如何自定义你的表单:
- 基于基础数据自定义你的表单
例子:你有一个“产品”表单并且你需要修正、添加、移除一个字段基于基础的被编辑的产品数据。 - 如何基于用户数据动态生成表单
例子:你创建了一个 “Friend Message” 的表单并且需要建立一个包含和现有的授权的用户友好的唯一用户的下拉菜单。 - 动态生成提交的表单
例子:在一个注册表单中,你有一个“镇”字段并且还有一个“州”字段,这个字段应该是动态的取决于“镇”字段的值。
如果你想要学习更多表单事件之后的基本知识,你可以看看表单事件的文档。
基于基础数据自定义你的表单
在跳到动态表格产生之前,想象一下空的表单类什么样:
// src/AppBundle/Form/Type/ProductType.php
namespace AppBundle\Form\Type;
use Symfony\Component\Form\AbstractType;
use Symfony\Component\Form\FormBuilderInterface;
use Symfony\Component\OptionsResolver\OptionsResolver;
class ProductType extends AbstractType
{
public function buildForm(FormBuilderInterface $builder, array $options)
{
$builder->add('name');
$builder->add('price');
}
public function configureOptions(OptionsResolver $resolver)
{
$resolver->setDefaults(array(
'data_class' => 'AppBundle\Entity\Product'
));
}
public function getName()
{
return 'product';
}
}
如果这段特定的代码你已经不熟悉了,你可能需要在进行下一步之前复习一下表单章节。
假设这样一种情况:这个表单使用了一个虚构的“产品”类这个类只有两个属性(“名称”和“价格”)。由这个类产生的表单将会看起来都一样不管是否有一个新的产品被创建或者已经存在的产品被编辑(例如从数据库中取出产品)。
现在假设,一旦对象被创建的话你就不希望用户改变名称的值了。为了完成这个,你可以使用 Symfony 的 EventDispatcher component 系统来分析数据并且基于产品的对象信息修正表单。在这一节,你将要学习如何在这个层次向你的表单添加灵活性。
向表单类添加事件监听器
那么,代替直接添加名称控件,创建那个特定的字段的任务就委托给事件监听器了:
// src/AppBundle/Form/Type/ProductType.php
namespace AppBundle\Form\Type;
// ...
use Symfony\Component\Form\FormEvent;
use Symfony\Component\Form\FormEvents;
class ProductType extends AbstractType
{
public function buildForm(FormBuilderInterface $builder, array $options)
{
$builder->add('price');
$builder->addEventListener(FormEvents::PRE_SET_DATA, function (FormEvent $event) {
// ... adding the name field if needed
});
}
// ...
}
目标就是只创建名称字段如果基础的产品对象是新的(例如没有被放到数据库中)。基于这一点,事件监听器可能如下所示:
// ...
public function buildForm(FormBuilderInterface $builder, array $options)
{
// ...
$builder->addEventListener(FormEvents::PRE_SET_DATA, function (FormEvent $event) {
$product = $event->getData();
$form = $event->getForm();
// check if the Product object is "new"
// If no data is passed to the form, the data is "null".
// This should be considered a new "Product"
if (!$product || null === $product->getId()) {
$form->add('name', 'text');
}
});
}
FormEvents::PRE_SET_DATA 行其实是分解了 form.pre_set_data 字符串。FormEvents 是具有组织功能的。它是一个中心地带,在这里你可以找到所有的不同的表单事件。你可以通过 FormEvents 类来看完整的表单事件列表。
向表单类添加事件预订管理
为了更好的重复利用或者如果你的事件监听器里有复杂的逻辑,你也可以通过向事件预定管理中添加名称字段来转移逻辑:
// src/AppBundle/Form/Type/ProductType.php
namespace AppBundle\Form\Type;
// ...
use AppBundle\Form\EventListener\AddNameFieldSubscriber;
class ProductType extends AbstractType
{
public function buildForm(FormBuilderInterface $builder, array $options)
{
$builder->add('price');
$builder->addEventSubscriber(new AddNameFieldSubscriber());
}
// ...
}
现在创建名称的逻辑存在于它自己的预定类之中了:
// src/AppBundle/Form/EventListener/AddNameFieldSubscriber.php
namespace AppBundle\Form\EventListener;
use Symfony\Component\Form\FormEvent;
use Symfony\Component\Form\FormEvents;
use Symfony\Component\EventDispatcher\EventSubscriberInterface;
class AddNameFieldSubscriber implements EventSubscriberInterface
{
public static function getSubscribedEvents()
{
// Tells the dispatcher that you want to listen on the form.pre_set_data
// event and that the preSetData method should be called.
return array(FormEvents::PRE_SET_DATA => 'preSetData');
}
public function preSetData(FormEvent $event)
{
$product = $event->getData();
$form = $event->getForm();
if (!$product || null === $product->getId()) {
$form->add('name', 'text');
}
}
}
如何基于用户数据动态创建表单
有些时候你希望你的表单不只是基于其它表单数据动态创建而是基于其它的数据——例如当前的用户的一些数据。假设你有一个社交网站,网站中的人们只能和被标记成朋友的人进行聊天。在这种情况下,和谁聊天的“选择列表”应当只包括目前用户的朋友的用户名。
创建表单样式类型
使用了事件监听器,你的表单可能如下所示:
// src/AppBundle/Form/Type/FriendMessageFormType.php
namespace AppBundle\Form\Type;
use Symfony\Component\Form\AbstractType;
use Symfony\Component\Form\FormBuilderInterface;
use Symfony\Component\Form\FormEvents;
use Symfony\Component\Form\FormEvent;
use Symfony\Component\Security\Core\Authentication\Token\Storage\TokenStorageInterface;
class FriendMessageFormType extends AbstractType
{
public function buildForm(FormBuilderInterface $builder, array $options)
{
$builder
->add('subject', 'text')
->add('body', 'textarea')
;
$builder->addEventListener(FormEvents::PRE_SET_DATA, function (FormEvent $event) {
// ... add a choice list of friends of the current application user
});
}
public function getName()
{
return 'friend_message';
}
}
现在的问题就是获取当前用户的用户名,同时创建一个只包含用户朋友的选择字段。
幸运的是向表单中注入服务这个十分简单。这个可以在构造器中完成:
private $tokenStorage;
public function __construct(TokenStorageInterface $tokenStorage)
{
$this->tokenStorage = $tokenStorage;
}
你可能会奇怪,既然你已经可以访问用户(通过存储),为什么不直接在 buildForm 使用并且忽略事件监听器呢?这是因为在 buildForm 方法中这样做的话就会导致整个表单类型被修正而仅仅是一个表单实例。这个可能不是一个常见问题,但是技术层面来讲的话一个单一的表单类型可以使用单一的请求来创建很多表单或者字段。
自定义表单类型
既然你已经有了基础你就可以利用 TokenStorageInterface 并且向监听器添加逻辑了:
// src/AppBundle/FormType/FriendMessageFormType.php
use Symfony\Component\Security\Core\Authentication\Token\Storage\TokenStorageInterface;
use Doctrine\ORM\EntityRepository;
// ...
class FriendMessageFormType extends AbstractType
{
private $tokenStorage;
public function __construct(TokenStorageInterface $tokenStorage)
{
$this->tokenStorage = $tokenStorage;
}
public function buildForm(FormBuilderInterface $builder, array $options)
{
$builder
->add('subject', 'text')
->add('body', 'textarea')
;
// grab the user, do a quick sanity check that one exists
$user = $this->tokenStorage->getToken()->getUser();
if (!$user) {
throw new \LogicException(
'The FriendMessageFormType cannot be used without an authenticated user!'
);
}
$builder->addEventListener(
FormEvents::PRE_SET_DATA,
function (FormEvent $event) use ($user) {
$form = $event->getForm();
$formOptions = array(
'class' => 'AppBundle\Entity\User',
'property' => 'fullName',
'query_builder' => function (EntityRepository $er) use ($user) {
// build a custom query
// return $er->createQueryBuilder('u')->addOrderBy('fullName', 'DESC');
// or call a method on your repository that returns the query builder
// the $er is an instance of your UserRepository
// return $er->createOrderByFullNameQueryBuilder();
},
);
// create the field, this is similar the $builder->add()
// field name, field type, data, options
$form->add('friend', 'entity', $formOptions);
}
);
}
// ...
}
TokenStorageInterface 是在 Symfony 2.6 中被引入的。以前的版本,你需要使用 SecurityContextInterface 的 getToken() 方法。
multiple 和 expanded 表单选项都是默认设置成 false 这是因为邻近字段是实体。
使用表单
现在我们的表单准备使用了,这里还有两种可能的方式在控制器中使用它:
- 手动创建并且记住将 token storage 传递给它;
或者
- 将它定义为服务。
a) 手动创建表单
这个非常简单,并且这可能是更好的方法,除非你正在很多地方使用你的新的表单类型或者将其放置在其它表单中:
class FriendMessageController extends Controller
{
public function newAction(Request $request)
{
$tokenStorage = $this->container->get('security.token_storage');
$form = $this->createForm(
new FriendMessageFormType($tokenStorage)
);
// ...
}
}
b)将表单定义为服务
将你的表单定义为服务,仅仅创建一个正常的服务然后添加 form.type 标签。
YAML:
# app/config/config.yml
services
:
app.form.friend_message
:
class
:
AppBundle\Form\Type\FriendMessageFormType
arguments
:
[
"@security.token_storage"
]
tags
:
- { name
:
form.type, alias
:
friend_message
}
XML:
<!-- app/config/config.xml -->
<services
>
<service
id
=
"app.form.friend_message"
class
=
"AppBundle\Form\Type\FriendMessageFormType"
>
<argument
type
=
"service"
id
=
"security.context"
/>
<tag
name
=
"form.type"
alias
=
"friend_message"
/>
</service
>
</services
>
PHP:
// app/config/config.php
$definition
=
new
Definition
(
'AppBundle\Form\Type\FriendMessageFormType'
)
;
$definition
->
addTag
(
'form.type'
,
array
(
'alias'
=>
'friend_message'
)
)
;
$container
->
setDefinition
(
'app.form.friend_message'
,
$definition
,
array
(
'security.token_storage'
)
)
;
如果你想要从控制器中或者其它的有权访问表单工厂的服务创建表单,那么你可以使用:
use Symfony\Component\DependencyInjection\ContainerAware;
class FriendMessageController extends ContainerAware
{
public function newAction(Request $request)
{
$form = $this->get('form.factory')->create('friend_message');
// ...
}
}
如果你扩展 Symfony\Bundle\FrameworkBundle\Controller\Controller 类,你可以简单地调用:
$form = $this->createForm('friend_message');
你也可以简单的将表单类型嵌入到其它表单:
// inside some other "form type" class
public function buildForm(FormBuilderInterface $builder, array $options)
{
$builder->add('message', 'friend_message');
}
动态创建提交表单
另外一种可能出现的情况就是你想要根据用户提交的数据特定的自定义表单。举例来说,假设你有一个收集运动的注册表单。一些时间将会允许你指定你的字段的喜欢的位置。这将会是一个选择字段的例子。然而可能的选择将会依赖于运动。足球就会有前锋,后卫,守门员等等……棒球就会有投手但是不会有守门员。你需要正确的选项来保证验证通过。
这个将作为一个实体字段传递到表单。所以我们可以向下面这样访问每一项运动:
// src/AppBundle/Form/Type/SportMeetupType.php
namespace AppBundle\Form\Type;
use Symfony\Component\Form\AbstractType;
use Symfony\Component\Form\FormBuilderInterface;
use Symfony\Component\Form\FormEvent;
use Symfony\Component\Form\FormEvents;
// ...
class SportMeetupType extends AbstractType
{
public function buildForm(FormBuilderInterface $builder, array $options)
{
$builder
->add('sport', 'entity', array(
'class' => 'AppBundle:Sport',
'placeholder' => '',
))
;
$builder->addEventListener(
FormEvents::PRE_SET_DATA,
function (FormEvent $event) {
$form = $event->getForm();
// this would be your entity, i.e. SportMeetup
$data = $event->getData();
$sport = $data->getSport();
$positions = null === $sport ? array() : $sport->getAvailablePositions();
$form->add('position', 'entity', array(
'class' => 'AppBundle:Position',
'placeholder' => '',
'choices' => $positions,
));
}
);
}
// ...
}
为了支持 empty_value,placeholder 选项是在 Symfony 2.6 中引进的,这个在 2.6 之前版本也可以用。
当你第一次创建表单来展示用户时,那么这个例子会很好的帮助你。
然而,当你处理表单提交的时候事情就变得复杂了。这是因为 PRE_SET_DATA 事件告诉我们你开始的数据(例如一个空的 SportMeetup 对象)而不是提交的数据。
在表单上,我们经常会听到下列事件:
- PRE_SET_DATA
- POST_SET_DATA
- PRE_SUBMIT
- SUBMIT
- POST_SUBMIT
PRE_SUBMIT, SUBMIT 和 POST_SUBMIT 事件是在 Symfony 2.3 中引进的。在之前,它们叫做 PRE_BIND, BIND 和 POST_BIND。
关键就是将 POST_SUBMIT 监听器添加到你依赖的字段中。如果你将一个 POST_SUBMIT 监听器添加到子表单中(例如运动),并且向父表单添加一个新的子表单,表单组件就会自动侦测出新的字段并且将它映射到提交的客户的数据。
表单的形式将会如下所示:
// src/AppBundle/Form/Type/SportMeetupType.php
namespace AppBundle\Form\Type;
// ...
use Symfony\Component\Form\FormInterface;
use AppBundle\Entity\Sport;
class SportMeetupType extends AbstractType
{
public function buildForm(FormBuilderInterface $builder, array $options)
{
$builder
->add('sport', 'entity', array(
'class' => 'AppBundle:Sport',
'placeholder' => '',
));
;
$formModifier = function (FormInterface $form, Sport $sport = null) {
$positions = null === $sport ? array() : $sport->getAvailablePositions();
$form->add('position', 'entity', array(
'class' => 'AppBundle:Position',
'placeholder' => '',
'choices' => $positions,
));
};
$builder->addEventListener(
FormEvents::PRE_SET_DATA,
function (FormEvent $event) use ($formModifier) {
// this would be your entity, i.e. SportMeetup
$data = $event->getData();
$formModifier($event->getForm(), $data->getSport());
}
);
$builder->get('sport')->addEventListener(
FormEvents::POST_SUBMIT,
function (FormEvent $event) use ($formModifier) {
// It's important here to fetch $event->getForm()->getData(), as
// $event->getData() will get you the client data (that is, the ID)
$sport = $event->getForm()->getData();
// since we've added the listener to the child, we'll have to pass on
// the parent to the callback functions!
$formModifier($event->getForm()->getParent(), $sport);
}
);
}
// ...
}
你可以看到你需要监听这两个事件并且需要有不同的回调,只是因为在两个不同的情形,你可以应用的数据在不同的事件中。如果不是那样,监听器将会一直在给定的表单执行相同的任务。
还差一件事就是在选定运动后的客户端升级。这将会通过向你的应用程序进行 AJAX 回调完成。假设你拥有运动集合创建控制器:
// src/AppBundle/Controller/MeetupController.php
namespace AppBundle\Controller;
use Symfony\Bundle\FrameworkBundle\Controller\Controller;
use Symfony\Component\HttpFoundation\Request;
use AppBundle\Entity\SportMeetup;
use AppBundle\Form\Type\SportMeetupType;
// ...
class MeetupController extends Controller
{
public function createAction(Request $request)
{
$meetup = new SportMeetup();
$form = $this->createForm(new SportMeetupType(), $meetup);
$form->handleRequest($request);
if ($form->isValid()) {
// ... save the meetup, redirect etc.
}
return $this->render(
'AppBundle:Meetup:create.html.twig',
array('form' => $form->createView())
);
}
// ...
}
根据当前在运动字段的选择,关联的模板使用了一些 JavaScript 更新位置表单字段:
Twig:
{# app/Resources/views/Meetup/create.html.twig #}
{
{
form_start
(
form
)
}
}
{
{
form_row
(
form
.sport
)
}
}
{# <select id="meetup_sport" ... #}
{
{
form_row
(
form
.position
)
}
}
{# <select id="meetup_position" ... #}
{# ... #}
{
{
form_end
(
form
)
}
}
<script>
var $sport = $('#meetup_sport');
// When sport gets selected ...
$sport.change(function() {
// ... retrieve the corresponding form.
var $form = $(this).closest('form');
// Simulate form data, but only include the selected sport value.
var data = {};
data[$sport.attr('name')] = $sport.val();
// Submit data via AJAX to the form's action path.
$.ajax({
url : $form.attr('action'),
type: $form.attr('method'),
data : data,
success: function(html) {
// Replace current position field ...
$('#meetup_position').replaceWith(
// ... with the returned one from the AJAX response.
$(html).find('#meetup_position')
);
// Position field now displays the appropriate positions.
}
});
});
</script>
PHP:
<!-- app/Resources/views/Meetup/create.html.php -->
<?php
echo
$view
[
'form'
]
->
start
(
$form
)
?>
<?php
echo
$view
[
'form'
]
->
row
(
$form
[
'sport'
]
)
?>
<!-- <select id="meetup_sport" ... -->
<?php
echo
$view
[
'form'
]
->
row
(
$form
[
'position'
]
)
?>
<!-- <select id="meetup_position" ... -->
<!-- ... -->
<?php
echo
$view
[
'form'
]
->
end
(
$form
)
?>
<script>
var $sport = $('#meetup_sport');
// When sport gets selected ...
$sport.change(function() {
// ... retrieve the corresponding form.
var $form = $(this).closest('form');
// Simulate form data, but only include the selected sport value.
var data = {};
data[$sport.attr('name')] = $sport.val();
// Submit data via AJAX to the form's action path.
$.ajax({
url : $form.attr('action'),
type: $form.attr('method'),
data : data,
success: function(html) {
// Replace current position field ...
$('#meetup_position').replaceWith(
// ... with the returned one from the AJAX response.
$(html).find('#meetup_position')
);
// Position field now displays the appropriate positions.
}
});
});
</script>
向确切的更新过的位置字段提交整个表单的主要的好处就是不需要附加的服务端代码;所有的上述代码产生的提交的表单都能再利用。
禁止表单验证
使用 POST_SUBMIT 事件来禁止表单验证并且阻止 ValidationListener 被调用。
需要做这个的原因就是即使你设置 validation_groups 为 false 也会依然有完整性的检查执行。举例来说,一个上传的文件将会被检查是否太大,表单将会检查是否有不存在的字段被提交。使用监听器禁用所有这些:
use Symfony\Component\Form\FormBuilderInterface;
use Symfony\Component\Form\FormEvents;
use Symfony\Component\Form\FormEvent;
public function buildForm(FormBuilderInterface $builder, array $options)
{
$builder->addEventListener(FormEvents::POST_SUBMIT, function (FormEvent $event) {
$event->stopPropagation();
}, 900); // Always set a higher priority than ValidationListener
// ...
}
通过这样做。你可以故意的禁用一些东西不仅仅是表单验证,因为 POST_SUBMIT 事件可能还有其它的监听器。
在这一节中你将学习到如何创建一个嵌入了很多表单集合的表单。这个可能会很有用,举例来说,如果你有一个 Task 类并且你想编辑、创建、删除很多与 Task 相关的 Tag 对象,就在同一个表单之中。
在这一节中,将会假设你使用 Doctrine 作为你的数据库存储。但是如果你没有使用 Doctrine 的话(例如使用的是 Propel 或者只是数据库连接),这都很相似。本指导只有很少一部分真正关注“持续性”。
如果你正在使用 Doctrine 的话,你需要添加 Doctrine 元数据,包括定义在 Task 的 tags 上的多对多的映射。
首先假设每一个 Task 属于多重的 Tag 对象。我们由建立简单的 Task 类开始:
// src/Acme/TaskBundle/Entity/Task.php
namespace Acme\TaskBundle\Entity;
use Doctrine\Common\Collections\ArrayCollection;
class Task
{
protected $description;
protected $tags;
public function __construct()
{
$this->tags = new ArrayCollection();
}
public function getDescription()
{
return $this->description;
}
public function setDescription($description)
{
$this->description = $description;
}
public function getTags()
{
return $this->tags;
}
}
ArrayCollection 是 Doctrine 特有的并且基本上和使用 array 一样(但是如果你使用 Doctrine 必须是 ArrayCollection)。
现在,创建一个 Tag 类。就像你上面看到的一样,Task 可以有很多 Tag 对象:
// src/Acme/TaskBundle/Entity/Tag.php
namespace Acme\TaskBundle\Entity;
class Tag
{
public $name;
}
名称属性在这里是公共的所以 Tag 对象才可以被用户修正:
// src/Acme/TaskBundle/Form/Type/TagType.php
namespace Acme\TaskBundle\Form\Type;
use Symfony\Component\Form\AbstractType;
use Symfony\Component\Form\FormBuilderInterface;
use Symfony\Component\OptionsResolver\OptionsResolver;
class TagType extends AbstractType
{
public function buildForm(FormBuilderInterface $builder, array $options)
{
$builder->add('name');
}
public function configureOptions(OptionsResolver $resolver)
{
$resolver->setDefaults(array(
'data_class' => 'Acme\TaskBundle\Entity\Tag',
));
}
public function getName()
{
return 'tag';
}
}
有了这个,你有足够的能力让它自己渲染 tag 表单。但是由于最终目标是允许 Task 的 tag 可以在 task 表单中自己修正,为 Task 类创建一个表单。
注意你使用集合字段类型来嵌入 TagType 表单的集合:
// src/Acme/TaskBundle/Form/Type/TaskType.php
namespace Acme\TaskBundle\Form\Type;
use Symfony\Component\Form\AbstractType;
use Symfony\Component\Form\FormBuilderInterface;
use Symfony\Component\OptionsResolver\OptionsResolver;
class TaskType extends AbstractType
{
public function buildForm(FormBuilderInterface $builder, array $options)
{
$builder->add('description');
$builder->add('tags', 'collection', array('type' => new TagType()));
}
public function configureOptions(OptionsResolver $resolver)
{
$resolver->setDefaults(array(
'data_class' => 'Acme\TaskBundle\Entity\Task',
));
}
public function getName()
{
return 'task';
}
}
在你的控制器中,你现在将要初始化一个新的 TaskType 实例:
// src/Acme/TaskBundle/Controller/TaskController.php
namespace Acme\TaskBundle\Controller;
use Acme\TaskBundle\Entity\Task;
use Acme\TaskBundle\Entity\Tag;
use Acme\TaskBundle\Form\Type\TaskType;
use Symfony\Component\HttpFoundation\Request;
use Symfony\Bundle\FrameworkBundle\Controller\Controller;
class TaskController extends Controller
{
public function newAction(Request $request)
{
$task = new Task();
// dummy code - this is here just so that the Task has some tags
// otherwise, this isn't an interesting example
$tag1 = new Tag();
$tag1->name = 'tag1';
$task->getTags()->add($tag1);
$tag2 = new Tag();
$tag2->name = 'tag2';
$task->getTags()->add($tag2);
// end dummy code
$form = $this->createForm(new TaskType(), $task);
$form->handleRequest($request);
if ($form->isValid()) {
// ... maybe do some form processing, like saving the Task and Tag objects
}
return $this->render('AcmeTaskBundle:Task:new.html.twig', array(
'form' => $form->createView(),
));
}
}
现在相应的模板也能够渲染 task 的两个描述字段,也能够渲染已经和 Task 有关联的 TagType 的任何标签。在上面的控制器中。我们添加了一些虚拟的代码这样你就可以看的清楚了(因为 Task 在最初创建时并没有 tag)。
Twig:
{# src/Acme/TaskBundle/Resources/views/Task/new.html.twig #}
{# ... #}
{
{
form_start
(
form
)
}
}
{# render the task's only field: description #}
{
{
form_row
(
form
.description
)
}
}
<h3>Tags</h3>
<ul class="tags">
{# iterate over each existing tag and render its only field: name #}
{
%
for
tag
in
form
.tags
%
}
<li>
{
{
form_row
(
tag
.name
)
}
}
</li>
{
%
endfor
%
}
</ul>
{
{
form_end
(
form
)
}
}
{# ... #}
PHP:
<!-- src/Acme/TaskBundle/Resources/views/Task/new.html.php -->
<!-- ... -->
<?php
echo
$view
[
'form'
]
->
start
(
$form
)
?>
<!-- render the task's only field: description -->
<?php
echo
$view
[
'form'
]
->
row
(
$form
[
'description'
]
)
?>
<h3>Tags</h3>
<ul class="tags">
<?php
foreach
(
$form
[
'tags'
]
as
$tag
)
:
?>
<li>
<?php
echo
$view
[
'form'
]
->
row
(
$tag
[
'name'
]
)
?>
</li>
<?php
endforeach
?>
</ul>
<?php
echo
$view
[
'form'
]
->
end
(
$form
)
?>
<!-- ... -->
当用户提交表单的时候,tags 字段的提交的数据将会用于构造 Tag 对象的 ArrayCollection,这个将会在之后设置 Task 实例的 tag 字段。
tags 的集合可以通过 $task->getTags() 正常访问并且可以保存到数据库或者在你想用的时候就可以用。
目前为止,这个都是很好用的,但是这不允许你动态添加新的 tag 或者删除已经存在的 tag。所以,当编辑已经存在的 tag 是非常好用,然而你的用户不能实际添加新的 tag。
在这一节,你只嵌入了一个集合,但是不会仅限于此。你也可以随意嵌入你想要的集合。但是如果在你的开发设置中使用 Xdebug 的话,你就会可能收到 Maximum function nesting level of '100' reached, aborting! 的错误提示。这是由于 xdebug.max_nesting_level 的 PHP 设置,这个值默认是 100。
这个直接将循环时限制到 100,可能会在模板中渲染表单时不够,如果你一次渲染整个表单(例如 form_widget(form))。为了避免这个你可以将这个直接设置成一个较高的值(或者通过 php.ini 文件或者通过 ini_set,例如在 app/autoload.php 中)或者手动使用 form_row 渲染每一个表单。
允许有“原型”的“新” Tags
允许用户动态添加新的 tag,这就意味着你需要使用一些 JavaScript。之前在你的表单中添加了两个 tag。现在让用户直接在浏览器中添加他们需要的 tag 表单。这将会通过一些 JavaScript 来完成。
你需要做的第一件事就是让表单集合知道它将会受到不明数量的 tag。目前为止你已经添加了两个并且表单类型希望就是收到两个,否则将会出现错误提示:This form should not contain extra fields。为了使这个变得灵活,向你的集合表单中添加 allow_add 选项:
// src/Acme/TaskBundle/Form/Type/TaskType.php
// ...
use Symfony\Component\Form\FormBuilderInterface;
public function buildForm(FormBuilderInterface $builder, array $options)
{
$builder->add('description');
$builder->add('tags', 'collection', array(
'type' => new TagType(),
'allow_add' => true,
));
}
除了告诉字段接收任何数量的提交的对象之外,allow_add 也为你制造了一个“原型”变量。这个“原型”是一个小的“模板”包含了所有的 HTML 能够渲染任意的新的 “tag” 表单。为了渲染它,在你的模板中进行如下改变:
Twig:
<ul class="tags" data-prototype="
{
{
form_widget
(
form
.tags
.vars
.prototype
)
|
e
}
}
">
...
</ul>
PHP:
<ul class="tags" data-prototype="
<?php
echo
$view
->
escape
(
$view
[
'form'
]
->
row
(
$form
[
'tags'
]
->
vars
[
'prototype'
]
)
)
?>
">
...
</ul>
如果你一次性渲染你的整个 “tags” 子表单(例如 form_row(form.tags)),那么原型将会在外部的 div 作为 data-prototype 属性可用,和你上面看到的相似。
form.tags.vars.prototype 是表单元素,这个看起来感觉就是队列里的 form_widget(tag) 元素在你的 for 循环中。这就意味着你可以调用 form_widget, form_row 或者 form_label。你甚至可以选择只渲染它的一个字段(例如名称字段):
{{ form_widget(form.tags.vars.prototype.name)|e }}
在渲染页,结果将会像下面这样:
<ul class="tags" data-prototype="<div><label class=" required">__name__</label><div id="task_tags___name__"><div><label for="task_tags___name___name" class=" required">Name</label><input type="text" id="task_tags___name___name" name="task[tags][__name__][name]" required="required" maxlength="255" /></div></div></div>">
这一节的目标就是使用 JavaScript 读取这个属性并且动态添加新的 tag 表单,当用户点击“添加一个 tag”链接的时候。为了使事情变得简单,这个例子使用了 jQuery 并且假设在你的包的某个位置包括它。
在你的包的某个位置添加一个脚本标签这样你就可以开始写一些 JavaScript 了。
首先,在“tags”列表的底部通过 JavaScript 添加一个链接。然后,将“单击”事件捆绑在链接上这样你就可以添加一个新的 tag 表单(addTagForm 将会在接下来展示):
var $collectionHolder;
// setup an "add a tag" link
var $addTagLink = $('<a href="#" class="add_tag_link">Add a tag</a>');
var $newLinkLi = $('<li></li>').append($addTagLink);
jQuery(document).ready(function() {
// Get the ul that holds the collection of tags
$collectionHolder = $('ul.tags');
// add the "add a tag" anchor and li to the tags ul
$collectionHolder.append($newLinkLi);
// count the current form inputs we have (e.g. 2), use that as the new
// index when inserting a new item (e.g. 2)
$collectionHolder.data('index', $collectionHolder.find(':input').length);
$addTagLink.on('click', function(e) {
// prevent the link from creating a "#" on the URL
e.preventDefault();
// add a new tag form (see next code block)
addTagForm($collectionHolder, $newLinkLi);
});
});
addTagForm 功能的工作就是当链接被点击的时候使用 data-prototype 属性动态添加一个新的表单。data-prototype HTML 包含了名为 task[tags][name][name] 的 tag 文本输入元素和 task_tags___name___name 的 id。name ** 是一个小的“占位符”,这个你可以使用一个独特的,增量的数字代替(例如 **task[tags][3][name])。
使这些起作用的实际的代码可能很不同,但是下面有一个例子:
function addTagForm($collectionHolder, $newLinkLi) {
// Get the data-prototype explained earlier
var prototype = $collectionHolder.data('prototype');
// get the new index
var index = $collectionHolder.data('index');
// Replace '__name__' in the prototype's HTML to
// instead be a number based on how many items we have
var newForm = prototype.replace(/__name__/g, index);
// increase the index with one for the next item
$collectionHolder.data('index', index + 1);
// Display the form in the page in an li, before the "Add a tag" link li
var $newFormLi = $('<li></li>').append(newForm);
$newLinkLi.before($newFormLi);
}
将你的 JavaScript 文件分开到几个真正的 JavaScript 文件中比在这里用 HTML 写要好。
现在,每当用户点击添加 tag 的链接时,一个新的子表单都会出现在页面中。当表单被提交的时候,任何新的 tag 表单都会被转换成新的 Tag 对象并且添加到 Task 对象的 tags 属性中。
你可以在 JSFiddle 中找到实例。
为了使得处理这些新的 tag 更容易,为 Task 类中的 tags 添加一个“添加”和一个“移除”方法:
// src/Acme/TaskBundle/Entity/Task.php
namespace Acme\TaskBundle\Entity;
// ...
class Task
{
// ...
public function addTag(Tag $tag)
{
$this->tags->add($tag);
}
public function removeTag(Tag $tag)
{
// ...
}
}
接下来,添加一个 by_reference 选项到 tags 字段并且将其设置为 false:
// src/Acme/TaskBundle/Form/Type/TaskType.php
// ...
public function buildForm(FormBuilderInterface $builder, array $options)
{
// ...
$builder->add('tags', 'collection', array(
// ...
'by_reference' => false,
));
}
由于这两个更改,当表单被提交时,每一个新的 Tag 都是通过调用 addTag 方法添加到 Task 类的。在做这个改变之前,它们是通过调用 $task->getTags()->add($tag) 方法由表单内部添加的。这样也很好,但是使用 “adder” 方法使得处理这些新的 Tag 对象更容易了(尤其是如果你是用的是你接下来将会学习的 Doctrine!)。
你已经建立了 addTag 和 removeTag 两个方法,否则表单将会继续使用 setTag 即使 by_reference 是 false。你将会在本文的后面详细学习 removeTag 方法。
Doctrine:串联关系并且保留“颠倒”的一边
为了使用 Doctrine 来保存新的 tags,你需要考虑多一点事情。首先除非迭代绑定所有的新的 Tag 对象并且在每一个上调用 $em->persist($tag),你将会从 Doctrine 收到一个错误提示:
一个新的实例已经通过关系发现了 Acme\TaskBundle\Entity\Task#tags 那是未配置的叠加持续实例操作...
为了解决这个问题,你可能需要自动选择“叠加”持续的操作从 Task 对象到任何相关的 tags。为了完成这个,需要向你的多对多元数据中添加 cascade 选项:
Annotations
// src/Acme/TaskBundle/Entity/Task.php
// ...
/**
* @ORM\ManyToMany(targetEntity="Tag", cascade={"persist"})
*/
protected $tags;
```YAML
src/Acme/TaskBundle/Resources/config/doctrine/Task.orm.yml
Acme\TaskBundle\Entity\Task: type: entity # ... oneToMany: tags: targetEntity: Tag cascade: [persist] ```
XML
<doctrine-mapping xmlns="http://doctrine-project.org/schemas/orm/doctrine-mapping"
xmlns:xsi="http://www.w3.org/2001/XMLSchema-instance"
xsi:schemaLocation="http://doctrine-project.org/schemas/orm/doctrine-mapping
http://doctrine-project.org/schemas/orm/doctrine-mapping.xsd">
<entity name="Acme\TaskBundle\Entity\Task">
<!-- ... -->
<one-to-many field="tags" target-entity="Tag">
<cascade>
<cascade-persist />
</cascade>
</one-to-many>
</entity>
</doctrine-mapping>
第二个潜在的问题就是处理 Doctrine 的所有方与反向方。在本例子中,如果“所有”方的关系是 “Task”,那么持续性就会很好的工作,由于 tags 已经正确添加到 Task。然而,如果所有方在 “Tag” 上,那么你就需要多做一点工作来确保关系的正确方得到修正。
这个窍门就是为了确保单一的 “Task” 设置在每一个 “Tag” 上。一个简单的方法是添加一些额外的逻辑到 addTag(),这个被表单的类型调用由于 by_reference 设置成了 false:
// src/Acme/TaskBundle/Entity/Task.php
// ...
public function addTag(Tag $tag)
{
$tag->addTask($this);
$this->tags->add($tag);
}
在 Tag 中,只需要确定你有 addTask 方法:
// src/Acme/TaskBundle/Entity/Tag.php
// ...
public function addTask(Task $task)
{
if (!$this->tasks->contains($task)) {
$this->tasks->add($task);
}
}
如果你拥有一对多的关系,那么工作区就很相似,除非你能仅仅从 addTag 中调用 setTask。
允许 Tags 被移除
接下来的一步就是允许删除集合中的特定条目。这个方法和允许 Tags 被添加差不多。
从在表单类型中添加 allow_delete 选项开始:
// src/Acme/TaskBundle/Form/Type/TaskType.php
// ...
public function buildForm(FormBuilderInterface $builder, array $options)
{
// ...
$builder->add('tags', 'collection', array(
// ...
'allow_delete' => true,
));
}
现在,你需要在 Task 的 removeTag 方法中加入一些代码:
// src/Acme/TaskBundle/Entity/Task.php
// ...
class Task
{
// ...
public function removeTag(Tag $tag)
{
$this->tags->removeElement($tag);
}
}
模板修正
allow_delete 选项有一个后果:如果一个结合的条目没有在提交时发送,相关的数据就会从服务器的集合中移除。因此解决办法就是从表单组件中移除 DOM。
首先,给每一个 tag 表单添加“删除这个 tag” 的链接:
jQuery(document).ready(function() {
// Get the ul that holds the collection of tags
$collectionHolder = $('ul.tags');
// add a delete link to all of the existing tag form li elements
$collectionHolder.find('li').each(function() {
addTagFormDeleteLink($(this));
});
// ... the rest of the block from above
});
function addTagForm() {
// ...
// add a delete link to the new form
addTagFormDeleteLink($newFormLi);
}
addTagFormDeleteLink 功能将会如下所示:
function addTagFormDeleteLink($tagFormLi) {
var $removeFormA = $('<a href="#">delete this tag</a>');
$tagFormLi.append($removeFormA);
$removeFormA.on('click', function(e) {
// prevent the link from creating a "#" on the URL
e.preventDefault();
// remove the li for the tag form
$tagFormLi.remove();
});
}
当 tag 表单从 DOM 移除并且提交,移除的 Tag 对象将不会包含在传递到 setTags 的集合中。基于你的持续层,这可能或者可能不足以实际移除被移除的 Tag 和 Task 对象间的关系。
Doctrine:保证数据库的持续性
当这样移除对象之后,你可能需要多做一些工作来保证 Task 以及被移除的 Tag 之间的关系被适当移除。
在 Doctrine 之中,你有两种关系:所有方以及反方。正常情况下你将会有多对多的关系并且删除的 tags 将会消失并且一直正确(添加新的 tags 也会有效果)。
但是如果你有一对多的关系或者在 Task 实体上有多对多的 mappedBy关系(意味着 Task 是“反”向的),你就需要移除 tags 来保持正确的一致性。
在这种情况下,你可以通过修正控制器来移除已经移除的 tag 的关系。这个假设你有一些 editAction 这个处理你的 Task 的“更新”:
// src/Acme/TaskBundle/Controller/TaskController.php
use Doctrine\Common\Collections\ArrayCollection;
// ...
public function editAction($id, Request $request)
{
$em = $this->getDoctrine()->getManager();
$task = $em->getRepository('AcmeTaskBundle:Task')->find($id);
if (!$task) {
throw $this->createNotFoundException('No task found for id '.$id);
}
$originalTags = new ArrayCollection();
// Create an ArrayCollection of the current Tag objects in the database
foreach ($task->getTags() as $tag) {
$originalTags->add($tag);
}
$editForm = $this->createForm(new TaskType(), $task);
$editForm->handleRequest($request);
if ($editForm->isValid()) {
// remove the relationship between the tag and the Task
foreach ($originalTags as $tag) {
if (false === $task->getTags()->contains($tag)) {
// remove the Task from the Tag
$tag->getTasks()->removeElement($task);
// if it was a many-to-one relationship, remove the relationship like this
// $tag->setTask(null);
$em->persist($tag);
// if you wanted to delete the Tag entirely, you can also do that
// $em->remove($tag);
}
}
$em->persist($task);
$em->flush();
// redirect back to some edit page
return $this->redirectToRoute('task_edit', array('id' => $id));
}
// render some form template
}
正如你所见,正确地添加或者移除元素是很微妙的。除非你有多对多的关系,在那里 Task 在 “拥有”方,你将需要做额外的工作来确保每一个 Tag 对象自己的关系正确地更新(不论你是添加还是删除已经存在的 tags)。
Symfony 具有很多核心的字段类型来建立表单。然而有些情况下为了特定的目的你可能想要创建一个自定义的表单字段类型。本指导假设你需要定义人的性别的字段,基于存在的选择字段。这一节介绍这个字段是如何定义的,你将如何自定义它的输出以及最后你将如何将它注册到你的应用程序中来使用。
定义字段类型
为了创建自定义的字段类型,首先你需要建立和字段相关的类。在这种情况下字段类型的类将会调用 GenderType 以及文件将会默认被储存在表单字段的默认位置中,也就是 \Form\Type。确保字段扩展了 AbstractType:
// src/AppBundle/Form/Type/GenderType.php
namespace AppBundle\Form\Type;
use Symfony\Component\Form\AbstractType;
use Symfony\Component\OptionsResolver\OptionsResolver;
class GenderType extends AbstractType
{
public function configureOptions(OptionsResolver $resolver)
{
$resolver->setDefaults(array(
'choices' => array(
'm' => 'Male',
'f' => 'Female',
)
));
}
public function getParent()
{
return 'choice';
}
public function getName()
{
return 'gender';
}
}
文件的位置并不是很重要——Form\Type 目录只是一个惯例。
在这里,getParent 功能返回的值表示你正在扩展选择字段类型。这也就意味着在默认情况下你继承了所有的逻辑,同时渲染了所有字段类型。你可以到 ChoiceType 类去看看这些逻辑。这里有三种十分重要的方法:
buildForm()
每一个字段类型都有 buildForm() 方法,你可以在这个方法中配置建立任何字段。注意这是和你建立你的表单相同的方法,同时它也可以在这里起作用。
buildView()
这个方法是用来建立在你的模板中渲染字段时你所需要的任意变量。举例来说,在 ChoiceType 中,multiple 变量在模板中配置和使用来设置(或者不设置)select 字段的 multiple 属性。更多细节详见为字段建立模板。
configureOptions() 方法是在 Symfony 2.7 中引进的。在之前的版本中这个方法叫做 setDefaultOptions()。
configureOptions()
这个方法为你的表单类型定义了选项,这是可以用在 buildForm() 和 buildView() 中的选项。对于所有的字段有很多普通的选项(详见表单字段类型),但是在这里你可以创建你所需要的。
如果你创建了一个包含了很多字段的字段,那么记得将你的“父”类型设置成表单或者扩展表单的那些。此外,如果你想要修改你的父类型中产生的子类型的任何“视图”,就使用 finishView() 方法。
getName() 方法返回一个标识符,这个标识符在你的应用程序中是独特的。这个可以在很多地方应用,比如当你自定义你的表单类型如何渲染时。
这个字段的目标就是扩展选择类型来启用性别的选择。这个可以通过将选择设置成一个可能性别的列表来完成。
为字段创建一个模板
每一个字段类型都是由模板碎片渲染的,这个是由你的 getName() 方法的值在某种程度上决定的。获取更多信息详见什么是表单主题?。
在这种情况下,由于父字段是选择,你并不需要做任何工作由于定制的字段会自动被当做选择类型来渲染。但是为了这个例子考虑,假设当你的字段是“扩大的”(例如 radio button 或者复选框而不是选择字段),你想要一直在 ul 元素中渲染它。在你的表单主题模板中(详见上面的链接),创建一个 gender_widget 来处理它:
Twig:
{# app/Resources/views/Form/fields.html.twig #}
{
%
block
gender_widget
%
}
{
%
spaceless
%
}
{
%
if
expanded
%
}
<ul
{
{
block
(
'widget_container_attributes'
)
}
}
>
{
%
for
child
in
form
%
}
<li>
{
{
form_widget
(
child
)
}
}
{
{
form_label
(
child
)
}
}
</li>
{
%
endfor
%
}
</ul>
{
%
else
%
}
{# just let the choice widget render the select tag #}
{
{
block
(
'choice_widget'
)
}
}
{
%
endif
%
}
{
%
endspaceless
%
}
{
%
endblock
%
}
PHP:
<!-- app/Resources/views/Form/gender_widget.html.php -->
<?php
if
(
$expanded
)
:
?>
<ul
<?php
$view
[
'form'
]
->
block
(
$form
,
'widget_container_attributes'
)
?>
>
<?php
foreach
(
$form
as
$child
)
:
?>
<li>
<?php
echo
$view
[
'form'
]
->
widget
(
$child
)
?>
<?php
echo
$view
[
'form'
]
->
label
(
$child
)
?>
</li>
<?php
endforeach
?>
</ul>
<?php
else
:
?>
<!-- just let the choice widget render the select tag -->
<?php
echo
$view
[
'form'
]
->
renderBlock
(
'choice_widget'
)
?>
<?php
endif
?>
确保正确的控件前缀被使用。在这个例子中的名称应该是 gender_widget,根据 getName 返回来的值。进一步来说,主配置文件应当指向定制的表单模板这样就能够在渲染所有表单时使用。
当使用 Twig 如下所示:
```YAML
twig: form_themes: - 'AppBundle:Form:fields.html.twig' ```
XML
<twig:config>
<twig:form-theme>AppBundle:Form:fields.html.twig</twig:form-theme>
</twig:config>
PHP
// app/config/config.php
$container->loadFromExtension('twig', array(
'form_themes' => array(
'AppBundle:Form:fields.html.twig',
),
));
对于 PHP 模板引擎,你的配置应当如下所示:
```YAML
framework: templating: form: resources: - 'AppBundle:Form' ```
XML
<container xmlns="http://symfony.com/schema/dic/services"
xmlns:xsi="http://www.w3.org/2001/XMLSchema-instance"
xmlns:framework="http://symfony.com/schema/dic/symfony"
xsi:schemaLocation="http://symfony.com/schema/dic/services http://symfony.com/schema/dic/services/services-1.0.xsd
http://symfony.com/schema/dic/symfony http://symfony.com/schema/dic/symfony/symfony-1.0.xsd">
<framework:config>
<framework:templating>
<framework:form>
<framework:resource>AppBundle:Form</twig:resource>
</framework:form>
</framework:templating>
</framework:config>
</container>
PHP
// app/config/config.php
$container->loadFromExtension('framework', array(
'templating' => array(
'form' => array(
'resources' => array(
'AppBundle:Form',
),
),
),
));
使用字段类型
你可以马上使用你的自定义的字段类型,只需要在你的一个表单中创建一个新的类型实例:
// src/AppBundle/Form/Type/AuthorType.php
namespace AppBundle\Form\Type;
use Symfony\Component\Form\AbstractType;
use Symfony\Component\Form\FormBuilderInterface;
class AuthorType extends AbstractType
{
public function buildForm(FormBuilderInterface $builder, array $options)
{
$builder->add('gender_code', new GenderType(), array(
'placeholder' => 'Choose a gender',
));
}
}
但是仅仅是由于 GenderType() 很简单所以这个可以起作用。如果性别代码存储在配置或者在数据库中该怎么办?下一节将为你介绍如何使用复杂的字段类型来解决这个问题。
placeholder 是在 Symfony 2.6 中引入的,支持 empty_value,这个在 2.6 之前的版本也可用。
将字段类型作为服务
目前为止,本节已经假设你已经拥有一个简单的定制的字段类型。但是如果你需要访问配置,数据库连接,或者一些其它服务,那么你就需要将你的字段类型注册为服务,举例来说,你将性别参数存储在配置中:
YAML:
# app/config/config.yml
parameters
:
genders
:
m
:
Male
f
:
Female
XML:
<!-- app/config/config.xml -->
<parameters
>
<parameter
key
=
"genders"
type
=
"collection"
>
<parameter
key
=
"m"
>
Male
</parameter
>
<parameter
key
=
"f"
>
Female
</parameter
>
</parameter
>
</parameters
>
PHP:
// app/config/config.php
$container
->
setParameter
(
'genders.m'
,
'Male'
)
;
$container
->
setParameter
(
'genders.f'
,
'Female'
)
;
为了使用参数,定义你的自定义字段类型为服务,将性别参数值作为第一参数注入到它的将要创建的 __construct 函数:
YAML:
# src/AppBundle/Resources/config/services.yml
services
:
app.form.type.gender
:
class
:
AppBundle\Form\Type\GenderType
arguments
:
-
"%genders%"
tags
:
- { name
:
form.type, alias
:
gender
}
XML:
<!-- src/AppBundle/Resources/config/services.xml -->
<service
id
=
"app.form.type.gender"
class
=
"AppBundle\Form\Type\GenderType"
>
<argument
>
%genders%
</argument
>
<tag
name
=
"form.type"
alias
=
"gender"
/>
</service
>
PHP:
// src/AppBundle/Resources/config/services.php
use
Symfony\Component\DependencyInjection\Definition
;
$container
->
setDefinition
(
'app.form.type.gender'
,
new
Definition
(
'AppBundle\Form\Type\GenderType'
,
array
(
'%genders%'
)
)
)
->
addTag
(
'form.type'
,
array
(
'alias'
=>
'gender'
,
)
)
;
确保服务文件被输入。详见使用入口输入配置。
确保 tag 的 alias 属性和由 方法定义的返回值要相一致。当你使用定制的字段的时候你就体会到这个的重要性。但是首先,向 GenderType 添加 __construct 方法,这个接收性别的配置:
// src/AppBundle/Form/Type/GenderType.php
namespace AppBundle\Form\Type;
use Symfony\Component\OptionsResolver\OptionsResolver;
// ...
// ...
class GenderType extends AbstractType
{
private $genderChoices;
public function __construct(array $genderChoices)
{
$this->genderChoices = $genderChoices;
}
public function configureOptions(OptionsResolver $resolver)
{
$resolver->setDefaults(array(
'choices' => $this->genderChoices,
));
}
// ...
}
非常好!GenderType 现在已经拥有配置参数并且注册成为了服务。除此之外,因为你在它的配置中使用 form.type 别名,现在使用这个字段更容易了:
// src/AppBundle/Form/Type/AuthorType.php
namespace AppBundle\Form\Type;
use Symfony\Component\Form\FormBuilderInterface;
// ...
class AuthorType extends AbstractType
{
public function buildForm(FormBuilderInterface $builder, array $options)
{
$builder->add('gender_code', 'gender', array(
'placeholder' => 'Choose a gender',
));
}
}
注意替代实例化一个新的实例,你可以仅仅通过你的服务配置中使用的别名来引用它,性别。玩的开心!
当你需要特定目的的表单类型时自定义表单字段类型就很好,例如性别选择或者增值税发票号码输入。
但是有时候,你不需要添加新的字段类型——你只是想要在已经存在的上面添加一些特征。这时候表单类型扩展就出现了。
表单类型扩展主要有两种用途:
- 你想要向几种类型中添加一般特征(例如向每一个字段类型添加“帮助”文本);
- 你想要向一种类型中添加特定特征(例如向“文件”字段添加“下载”特征)。
在这两种情况下,通过定制的表单渲染或者定制的表单字段类型可能会实现你的目标。但是使用表单类型扩展可以更加清楚(通过限制模板中的业务逻辑)并且更灵活(你可以向一个表单类型中添加几个类型扩展)。
表单类型扩展能够完成大多是定制的字段类型能做的事情,但是代替自己成为字段类型,它们插入到已经存在的类型中。
假设你管理一个媒体实体,并且每一个媒体都和一个文件相关联。你的媒体表单使用了文件类型,但是当编辑这个实体的时候,你就会看到它的临近文件输入的图像自动渲染。
你当然可以通过在模板中配置字段如何被渲染。但是字段类型扩展允许你以一种更加流行的方式。
定义表单类型扩展
你的第一个任务就是创建一个表单类型扩展类(在本文中叫做 ImageTypeExtension)。标准情况下表单类型扩展通常位于你的某一个 bundle 的 Form\Extension 目录之下。
当创建表单类型扩展的时候,你可以启用 FormTypeExtensionInterface 界面或者扩展 AbstractTypeExtension 类。大多数情况下扩展 abstract 类更容易一些:
// src/Acme/DemoBundle/Form/Extension/ImageTypeExtension.php
namespace Acme\DemoBundle\Form\Extension;
use Symfony\Component\Form\AbstractTypeExtension;
class ImageTypeExtension extends AbstractTypeExtension
{
/**
* Returns the name of the type being extended.
*
* @return string The name of the type being extended
*/
public function getExtendedType()
{
return 'file';
}
}
你必须使用的一个方法就是 getExtendedType 功能。它是用来被你的扩展所扩展的表单类型的名称的。
getExtendedType 方法返回的值和你希望扩展的表单类型类的 getName 方法所返回的值相一致。
处理 getExtendedType 方法,你可能还想重写下列的一个方法:
- buildForm()
- buildView()
- configureOptions()
- finishView()
有关于这些方法的用途的更多信息,你可以参考创建自定义表单类型这篇指导文章。
将你的表单类型扩展注册为服务
接下来这一步就是使得 Symfony 知道你的扩展。你所需要做的就是使用 form.type_extension 标签将它声明为一个服务:
YAML:
services
:
acme_demo_bundle.image_type_extension
:
class
:
Acme\DemoBundle\Form\Extension\ImageTypeExtension
tags
:
- { name
:
form.type_extension, alias
:
file
}
XML:
<service
id
=
"acme_demo_bundle.image_type_extension"
class
=
"Acme\DemoBundle\Form\Extension\ImageTypeExtension"
>
<tag
name
=
"form.type_extension"
alias
=
"file"
/>
</service
>
PHP:
$container
->
register
(
'acme_demo_bundle.image_type_extension'
,
'Acme\DemoBundle\Form\Extension\ImageTypeExtension'
)
->
addTag
(
'form.type_extension'
,
array
(
'alias'
=>
'file'
)
)
;
标签的别名值就是扩展将要应用到的字段的类型。在你应用的时候,如果你想要扩展文件字段类型,你就可以用文件作为别名。
给扩展添加业务逻辑
你的扩展的目标就是展示完美的图片在文件输入旁边(当基本类型包括图片的时候)。为了达到这个目的,假设你是用的方法和如何使用 Doctrine 处理文件上传中所描述的一样:你有一个具有文件属性的媒体模型(和表单中的文件字段相对应)以及一个路径属性(和数据库中的图片路径相对应):
// src/Acme/DemoBundle/Entity/Media.php
namespace Acme\DemoBundle\Entity;
use Symfony\Component\Validator\Constraints as Assert;
class Media
{
// ...
/**
* @var string The path - typically stored in the database
*/
private $path;
/**
* @var \Symfony\Component\HttpFoundation\File\UploadedFile
* @Assert\File(maxSize="2M")
*/
public $file;
// ...
/**
* Get the image URL
*
* @return null|string
*/
public function getWebPath()
{
// ... $webPath being the full image URL, to be used in templates
return $webPath;
}
}
你的表单类型扩展类将需要做两件事来扩展文件表单类型:
- 重写 configureOptions 方法来添加 image_path 选项;
- 重写 buildForm 和 buildView 方法来将图片的地址传递到视图。
逻辑如下:当添加文件类型的表单字段,你就能制定一个新的选项:image_path。这个选项将会告诉文件字段如何获得实际的图片地址并且在视图中展示它:
// src/Acme/DemoBundle/Form/Extension/ImageTypeExtension.php
namespace Acme\DemoBundle\Form\Extension;
use Symfony\Component\Form\AbstractTypeExtension;
use Symfony\Component\Form\FormView;
use Symfony\Component\Form\FormInterface;
use Symfony\Component\PropertyAccess\PropertyAccess;
use Symfony\Component\OptionsResolver\OptionsResolver;
class ImageTypeExtension extends AbstractTypeExtension
{
/**
* Returns the name of the type being extended.
*
* @return string The name of the type being extended
*/
public function getExtendedType()
{
return 'file';
}
/**
* Add the image_path option
*
* @param OptionsResolver $resolver
*/
public function configureOptions(OptionsResolver $resolver)
{
$resolver->setDefined(array('image_path'));
}
/**
* Pass the image URL to the view
*
* @param FormView $view
* @param FormInterface $form
* @param array $options
*/
public function buildView(FormView $view, FormInterface $form, array $options)
{
if (array_key_exists('image_path', $options)) {
$parentData = $form->getParent()->getData();
if (null !== $parentData) {
$accessor = PropertyAccess::createPropertyAccessor();
$imageUrl = $accessor->getValue($parentData, $options['image_path']);
} else {
$imageUrl = null;
}
// set an "image_url" variable that will be available when rendering this field
$view->vars['image_url'] = $imageUrl;
}
}
}
重写文件控件模板碎片
每一个字段类型都是由模板碎片所渲染的。那些模板碎片可以被重写从而来自定义表单渲染。获取更多信息,你可以阅读什么是表单主题?这篇文章。
在你的扩展类之中,你已经添加了一个新的变量(image_url),但是你依旧需要使用你的模板中的新的变量。特别的,你需要重写 file_widget 区域:
Twig:
{# src/Acme/DemoBundle/Resources/views/Form/fields.html.twig #}
{
%
extends
'form_div_layout.html.twig'
%
}
{
%
block
file_widget
%
}
{
%
spaceless
%
}
{
{
block
(
'form_widget'
)
}
}
{
%
if
image_url
is
not
null
%
}
<img src="
{
{
asset
(
image_url
)
}
}
"/>
{
%
endif
%
}
{
%
endspaceless
%
}
{
%
endblock
%
}
PHP:
<!-- src/Acme/DemoBundle/Resources/views/Form/file_widget.html.php -->
<?php
echo
$view
[
'form'
]
->
widget
(
$form
)
?>
<?php
if
(
null
!==
$image_url
)
:
?>
<img src="
<?php
echo
$view
[
'assets'
]
->
getUrl
(
$image_url
)
?>
"/>
<?php
endif
?>
你需要改变你的配置文件或者明确指定你想要如何给你的表单加主题为了使 Symfony 使用你所重写的区域。更多信息详见什么是表单主题?这篇文章。
使用表单类型扩展
从现在起,当在你的表单中添加文件类型的字段时,你就可以指定 image_path 选项,这个选项将用来展示文件字段旁的图片。举例来说:
// src/Acme/DemoBundle/Form/Type/MediaType.php
namespace Acme\DemoBundle\Form\Type;
use Symfony\Component\Form\AbstractType;
use Symfony\Component\Form\FormBuilderInterface;
class MediaType extends AbstractType
{
public function buildForm(FormBuilderInterface $builder, array $options)
{
$builder
->add('name', 'text')
->add('file', 'file', array('image_path' => 'webPath'));
}
public function getName()
{
return 'media';
}
}
当展示表单的时候,如果基本的模型已经和图片关联,你就会看到它在文件输入旁边显示。
inherit_data 选项是在 Symfony 2.3 中引入的。在之前的版本中,它叫做 virtual。
在你有些从不同的实体中有重复的字段时 inherit_data 表单字段选项可以很有用的。举例来说,假设你有两个实体,一个是公司另一个是顾客:
// src/AppBundle/Entity/Company.php
namespace AppBundle\Entity;
class Company
{
private $name;
private $website;
private $address;
private $zipcode;
private $city;
private $country;
}
// src/AppBundle/Entity/Customer.php
namespace AppBundle\Entity;
class Customer
{
private $firstName;
private $lastName;
private $address;
private $zipcode;
private $city;
private $country;
}
正如你所看到的,每个实体共享了一些字段:地址,邮编,城市,乡村。
从给这些实体建立表单开始,CompanyType 和 CustomerType:
// src/AppBundle/Form/Type/CompanyType.php
namespace AppBundle\Form\Type;
use Symfony\Component\Form\AbstractType;
use Symfony\Component\Form\FormBuilderInterface;
class CompanyType extends AbstractType
{
public function buildForm(FormBuilderInterface $builder, array $options)
{
$builder
->add('name', 'text')
->add('website', 'text');
}
}
// src/AppBundle/Form/Type/CustomerType.php
namespace AppBundle\Form\Type;
use Symfony\Component\Form\FormBuilderInterface;
use Symfony\Component\Form\AbstractType;
class CustomerType extends AbstractType
{
public function buildForm(FormBuilderInterface $builder, array $options)
{
$builder
->add('firstName', 'text')
->add('lastName', 'text');
}
}
代替在两个表单中包含这些地址,邮编,城市,乡村的重复字段,你可以创建一个名为位置类型的第三个表单:
// src/AppBundle/Form/Type/LocationType.php
namespace AppBundle\Form\Type;
use Symfony\Component\Form\AbstractType;
use Symfony\Component\Form\FormBuilderInterface;
use Symfony\Component\OptionsResolver\OptionsResolver;
class LocationType extends AbstractType
{
public function buildForm(FormBuilderInterface $builder, array $options)
{
$builder
->add('address', 'textarea')
->add('zipcode', 'text')
->add('city', 'text')
->add('country', 'text');
}
public function configureOptions(OptionsResolver $resolver)
{
$resolver->setDefaults(array(
'inherit_data' => true
));
}
public function getName()
{
return 'location';
}
}
位置表单有一个很有趣的选项设置,也就是 inherit_data。这个选项使得表单可以从它的父表单那里继承数据。如果嵌入到公司表单中,位置表单的字段将会访问公司实体的属性。如果嵌入到顾客表单中,位置表单的字段将会访问顾客实体的属性。很简单,有木有?
代替在位置类型中设置 inherit_data 选项,你也可以(就像其它选项一样)将它传递到 $builder->add() 的第三参数中。
最后,通过将位置表单添加到你的原始表单中来完成这个工作:
// src/AppBundle/Form/Type/CompanyType.php
public function buildForm(FormBuilderInterface $builder, array $options)
{
// ...
$builder->add('foo', new LocationType(), array(
'data_class' => 'AppBundle\Entity\Company'
));
}
// src/AppBundle/Form/Type/CustomerType.php
public function buildForm(FormBuilderInterface $builder, array $options)
{
// ...
$builder->add('bar', new LocationType(), array(
'data_class' => 'AppBundle\Entity\Customer'
));
}
就是这样!你已经提取重复的字段并且将它定义到一个分离位置的,当你需要用的时候就能重复利用的表单中了。
具有 inherit_data 选项设置的表单不能有 *_SET_DATA 事件监听器。
表单组件包含三个核心的对象:一个是表单类型(实现 FormTypeInterface),Form 以及 the FormView。
经常被程序员操作的唯一的类是表单类型类,这个类作为表单的基类。它被用来生成 Form 以及 FormView。你可以通过模拟它和工厂的交互作用来直接测试它,但是这个会很复杂。最好的办法就是将它传递到 FormFactory 这样就会像真正在应用程序中使用一样。这对于 bootstrap 很简单并且你可以信任 Symfony 组件测试这个足够用了。
这里有一个类你可以直接用它来进行简单的 FormTypes 测试:TypeTestCase。它是用来测试核心类型的,同时你也可以用它测试你的类型。
在 2.3 中 TypeTestCase 已经转移到 Symfony\Component\Form\Test 命名空间中了。在之前的版本中,这个类位于 Symfony\Component\Form\Tests\Extension\Core\Type。
取决于你安装你的 Symfony 的方法或者 Symfony 表单测试组件可能没有被下载。这种情况下可以使用 Composer 的 --prefer-source 选项。
基础
最简单的 TypeTestCase 启用如下所示:
// src/Acme/TestBundle/Tests/Form/Type/TestedTypeTest.php
namespace Acme\TestBundle\Tests\Form\Type;
use Acme\TestBundle\Form\Type\TestedType;
use Acme\TestBundle\Model\TestObject;
use Symfony\Component\Form\Test\TypeTestCase;
class TestedTypeTest extends TypeTestCase
{
public function testSubmitValidData()
{
$formData = array(
'test' => 'test',
'test2' => 'test2',
);
$type = new TestedType();
$form = $this->factory->create($type);
$object = TestObject::fromArray($formData);
// submit the data to the form directly
$form->submit($formData);
$this->assertTrue($form->isSynchronized());
$this->assertEquals($object, $form->getData());
$view = $form->createView();
$children = $view->children;
foreach (array_keys($formData) as $key) {
$this->assertArrayHasKey($key, $children);
}
}
}
那么,它怎么测试呢?下面就来详细讲解。
首先你需要区分 FormType 是否编制。这包括基本的类的继承,buildForm 功能以及选项解决方案。这应该是你写的第一个测试:
$type = new TestedType();
$form = $this->factory->create($type);
这个测试检查了你的表单使用的数据翻译器没有失败的。isSynchronized() 方法只是设置成 false 如果数据转换器出现例外:
$form->submit($formData);
$this->assertTrue($form->isSynchronized());
不要测试验证:这个被监听器实现,这个在测试环境不活跃并且它依赖于验证配置。作为替代直接对你的定制的限制进行单元测试。
接下来,核实表单的提交和映射。下列的测试检查了所有的字段是否正确被指定:
$this->assertEquals($object, $form->getData());
最后,检查 FormView 的创建。你应当检查是否你想要展示的所有的控件在子属性上有用:
$view = $form->createView();
$children = $view->children;
foreach (array_keys($formData) as $key) {
$this->assertArrayHasKey($key, $children);
}
添加你的表单依靠的类型
你的表单可能依赖于其它被定义为服务的类型。可能像下面这样:
// src/Acme/TestBundle/Form/Type/TestedType.php
// ... the buildForm method
$builder->add('acme_test_child_type');
为了正确的建立你的表单,你需要在你的测试中使得类型对于你的表单工厂可用。最简单的方法就是在创建父表单时使用 PreloadedExtension 类手动注册:
// src/Acme/TestBundle/Tests/Form/Type/TestedTypeTests.php
namespace Acme\TestBundle\Tests\Form\Type;
use Acme\TestBundle\Form\Type\TestedType;
use Acme\TestBundle\Model\TestObject;
use Symfony\Component\Form\Test\TypeTestCase;
use Symfony\Component\Form\PreloadedExtension;
class TestedTypeTest extends TypeTestCase
{
protected function getExtensions()
{
$childType = new TestChildType();
return array(new PreloadedExtension(array(
$childType->getName() => $childType,
), array()));
}
public function testSubmitValidData()
{
$type = new TestedType();
$form = $this->factory->create($type);
// ... your test
}
}
确保你添加的子类型被很好地测试。否则你正在测试的表单的子表单将会出现错误。
添加自定义扩展
你使用由表单扩展添加的一些选项使得这种情况检查出现。其中的一种情况就是 ValidatorExtension 的 invalid_message 选项。TypeTestCase 只加载核心表单扩展,所以一个“不可用的选项”例外将会被释放如果你想要使用它测试基于其它扩展的类。你需要将这些扩展添加到工厂对象:
// src/Acme/TestBundle/Tests/Form/Type/TestedTypeTests.php
namespace Acme\TestBundle\Tests\Form\Type;
use Acme\TestBundle\Form\Type\TestedType;
use Acme\TestBundle\Model\TestObject;
use Symfony\Component\Form\Test\TypeTestCase;
use Symfony\Component\Form\Forms;
use Symfony\Component\Form\FormBuilder;
use Symfony\Component\Form\Extension\Validator\Type\FormTypeValidatorExtension;
use Symfony\Component\Validator\ConstraintViolationList;
class TestedTypeTest extends TypeTestCase
{
protected function setUp()
{
parent::setUp();
$validator = $this->getMock('\Symfony\Component\Validator\Validator\ValidatorInterface');
$validator->method('validate')->will($this->returnValue(new ConstraintViolationList()));
$this->factory = Forms::createFormFactoryBuilder()
->addExtensions($this->getExtensions())
->addTypeExtension(
new FormTypeValidatorExtension(
$validator
)
)
->addTypeGuesser(
$this->getMockBuilder(
'Symfony\Component\Form\Extension\Validator\ValidatorTypeGuesser'
)
->disableOriginalConstructor()
->getMock()
)
->getFormFactory();
$this->dispatcher = $this->getMock('Symfony\Component\EventDispatcher\EventDispatcherInterface');
$this->builder = new FormBuilder(null, null, $this->dispatcher, $this->factory);
}
// ... your tests
}
测试不同集合的数据
如果你不熟悉 PHPUnit 的 数据提供,这可能是使用它们的好机会:
// src/Acme/TestBundle/Tests/Form/Type/TestedTypeTests.php
namespace Acme\TestBundle\Tests\Form\Type;
use Acme\TestBundle\Form\Type\TestedType;
use Acme\TestBundle\Model\TestObject;
use Symfony\Component\Form\Test\TypeTestCase;
class TestedTypeTest extends TypeTestCase
{
/**
* @dataProvider getValidTestData
*/
public function testForm($data)
{
// ... your test
}
public function getValidTestData()
{
return array(
array(
'data' => array(
'test' => 'test',
'test2' => 'test2',
),
),
array(
'data' => array(),
),
array(
'data' => array(
'test' => null,
'test2' => null,
),
),
);
}
}
上述代码将以三种不同的数据集合三次运行你的测试。这就允许固定的测试去耦合并且很容易测试多重数据集合。
你也可以传递另外一个参数,例如 boolean,如果表单必须给定的数据集合同步或者不同步表单等等。
empty_data 允许你为你的表单类指定一个空的数据集合。如果你提交表单就会用到空的数据集合,但是没有在你的表单中调用 setData() 或者当你建立表单的时候传入数据。举例来说:
public function indexAction()
{
$blog = ...;
// $blog is passed in as the data, so the empty_data
// option is not needed
$form = $this->createForm(new BlogType(), $blog);
// no data is passed in, so empty_data is
// used to get the "starting data"
$form = $this->createForm(new BlogType());
}
默认情况下,empty_data 设置为 null。或者,如果你为你的表单类指定了 data_class 选项,它将会默认一个新的实例的类。这个实例将会通过调用构造函数创建并且没有参数。
如果你想要重写这个默认的行为,有两种方法可以用。
选择 1:实例化一个新的类
你可能使用这个方法的原因就是如果你想要使用具有参数的构造函数的话。记住,默认的 data_class 选项调用构造函数没有参数:
// src/AppBundle/Form/Type/BlogType.php
// ...
use Symfony\Component\Form\AbstractType;
use AppBundle\Entity\Blog;
use Symfony\Component\OptionsResolver\OptionsResolver;
class BlogType extends AbstractType
{
private $someDependency;
public function __construct($someDependency)
{
$this->someDependency = $someDependency;
}
// ...
public function configureOptions(OptionsResolver $resolver)
{
$resolver->setDefaults(array(
'empty_data' => new Blog($this->someDependency),
));
}
}
你可以使用你想使用的任何方法来实例化你的类。在这个例子中,当我们实例化 BlogType 的时候,我们向它传递一些依赖性,然后使用它将 Blog 类实例化。要点就是,你能够将 empty_data 设置到你想使用的全“新的”对象中。
选择 2:提供一个闭包
使用闭包是一个更好的选择,因为它只有在对象需要的时候才会被创建。
闭包必须接受 FormInterface 实例为第一变元:
use Symfony\Component\OptionsResolver\OptionsResolver;
use Symfony\Component\Form\FormInterface;
// ...
public function configureOptions(OptionsResolver $resolver)
{
$resolver->setDefaults(array(
'empty_data' => function (FormInterface $form) {
return new Blog($form->get('title')->getData());
},
));
}
handleRequest() 方法是在 Symfony 2.3 中引进的。
有了 handleRequest() 方法,处理表单提交就简单多了:
use Symfony\Component\HttpFoundation\Request;
// ...
public function newAction(Request $request)
{
$form = $this->createFormBuilder()
// ...
->getForm();
$form->handleRequest($request);
if ($form->isValid()) {
// perform some action...
return $this->redirectToRoute('task_success');
}
return $this->render('AcmeTaskBundle:Default:new.html.twig', array(
'form' => $form->createView(),
));
}
有关这个方法的更多细节详见处理表单提交。
手动调用 Form::submit()
在 Symfony 2.3 之前,submit() 方法叫做 bind()。
在某些情况下,你可能想要对何时你的表单被提交以及什么数据传递到它有更好的控制。代替使用 handleRequest() 方法,直接将提交的数据传递到 submit():
use Symfony\Component\HttpFoundation\Request;
// ...
public function newAction(Request $request)
{
$form = $this->createFormBuilder()
// ...
->getForm();
if ($request->isMethod('POST')) {
$form->submit($request->request->get($form->getName()));
if ($form->isValid()) {
// perform some action...
return $this->redirectToRoute('task_success');
}
}
return $this->render('AcmeTaskBundle:Default:new.html.twig', array(
'form' => $form->createView(),
));
}
包含嵌套字段的表单期望在 submit() 中的一个数组。你也可以同直接在字段上调用 submit() 提交独立的字段:
$form->get('firstName')->submit('Fabien');
向 Form::submit() 传递一个请求(不赞成)
在 Symfony 2.3 之前,submit 方法叫做 bind。
在 Symfony 2.3 之前,submit() 方法接受请求对象作为方便的捷径到前一个例子:
use Symfony\Component\HttpFoundation\Request;
// ...
public function newAction(Request $request)
{
$form = $this->createFormBuilder()
// ...
->getForm();
if ($request->isMethod('POST')) {
$form->submit($request);
if ($form->isValid()) {
// perform some action...
return $this->redirectToRoute('task_success');
}
}
return $this->render('AcmeTaskBundle:Default:new.html.twig', array(
'form' => $form->createView(),
));
}
将请求直接传递到 submit() 依然有效,但是我们不推荐并且这将会在 Symfony 3.0 中移除。作为替代你应当看看 handleRequest() 方法。
您可以通过继承一个限制基类 Constraint 来创建一个自定义的验证限制,比如,您可以创建一个简单的验证器来检查一个字符串是否只包含字母和数字。
创建限制类
首先,您可以通过继承 Constraint 来创建一个验证:
// src/AppBundle/Validator/Constraints/ ContainsAlphanumeric.php
namespace AppBundle\Validator\Constraints;
use Symfony\Component\Validator\Constraint;
/**
* @Annotation
*/
class ContainsAlphanumeric extends Constraint
{
public $message = 'The string "%string%" contains an illegal character: it can only contain letters or numbers.';
}
当创建一个新类时,很有必要为新创建的限制类添加上 @Annotation 文档注释,通过注释可以增加新建类代码的可读性,使其更好的被使用。您可以在新创建的类中选择公有属性进行注释与说明。
创建验证器
正如您看到一样,一个验证限制类是十分简洁的,并不是通过该限制验证类直接执行验证,而是通过另一个限制验证类 "constraint validator" 中指定的 validatedBy() 方法进行验证,在该方法中存在一些默认的简单算法逻辑:
// in the base Symfony\Component\Validator\Constraint class
public function validatedBy()
{
return get_class($this).'Validator';
}
换句话说,当您创建一个自定义的限制验证类的时候,(例如:MyConstraint)当实际执行验证的时候 Symfony 会自动调用另一个类 MyConstraintValidator 进行验证。
这个验证类也很简洁,只包括一个 validate() 方法:
// src/AppBundle/Validator/Constraints/ContainsAlphanumericValidator.php
namespace AppBundle\Validator\Constraints;
use Symfony\Component\Validator\Constraint;
use Symfony\Component\Validator\ConstraintValidator;
class ContainsAlphanumericValidator extends ConstraintValidator
{
public function validate($value, Constraint $constraint)
{
if (!preg_match('/^[a-zA-Z0-9]+$/', $value, $matches)) {
// If you're using the new 2.5 validation API (you probably are!)
$this->context->buildViolation($constraint->message)
->setParameter('%string%', $value)
->addViolation();
// If you're using the old 2.4 validation API
/*
$this->context->addViolation(
$constraint->message,
array('%string%' => $value)
);
*/
}
}
}
在这个验证类中,您并不需要设定一个返回值。相反的是,如果您需要验证的内容是合法的,那么该内容将会通过验证,如果该内容不能被检验通过,那么 buildViolation
方法会把错误信息作为参数传递给 ConstraintViolationBuilderInterface 作为一个实例进行调用,然后 addViolation
方法会把不合法的部分标注到您需要检测的内容中。
使用新创建的限制验证
就和使用 Symfony 本身提供的接口一样,使用一个自定义的验证限制类也同样很简单:
Annotations:
// src/AppBundle/Entity/AcmeEntity.php
use Symfony\Component\Validator\Constraints as Assert;
use AppBundle\Validator\Constraints as AcmeAssert;
class AcmeEntity
{
// ...
/**
* @Assert\NotBlank
* @AcmeAssert\ContainsAlphanumeric
*/
protected $name;
// ...
}
YAML:
# src/AppBundle/Resources/config/validation.yml
AppBundle\Entity\AcmeEntity:
properties:
name:
- NotBlank: ~
- AppBundle\Validator\Constraints\ContainsAlphanumeric: ~
XML:
<!-- src/AppBundle/Resources/config/validation.xml -->
<?xml version="1.0" encoding="UTF-8" ?>
<constraint-mapping xmlns="http://symfony.com/schema/dic/constraint-mapping"
xmlns:xsi="http://www.w3.org/2001/XMLSchema-instance"
xsi:schemaLocation="http://symfony.com/schema/dic/constraint-mapping http://symfony.com/schema/dic/constraint-mapping/constraint-mapping-1.0.xsd">
<class name="AppBundle\Entity\AcmeEntity">
<property name="name">
<constraint name="NotBlank" />
<constraint name="AppBundle\Validator\Constraints\ContainsAlphanumeric" />
</property>
</class>
</constraint-mapping>
PHP:
```: // src/AppBundle/Entity/AcmeEntity.php use Symfony\Component\Validator\Mapping\ClassMetadata; use Symfony\Component\Validator\Constraints\NotBlank; use AppBundle\Validator\Constraints\ContainsAlphanumeric;
class AcmeEntity { public $name;
public static function loadValidatorMetadata(ClassMetadata $metadata)
{
$metadata->addPropertyConstraint('name', new NotBlank());
$metadata->addPropertyConstraint('name', new ContainsAlphanumeric());
}
}
如果在您定义的类中含有可选择的属性时,您应该在创建自定义类的时候就以公有的方式声明这些属性,那么这些可选择的属性就可以像使用 核心 Symfony 约束类中的属性一样使用它们。
### 带有依赖关系的限制验证
如果您的限制验证具有依赖关系,就如同一个数据库的连接操作,那么它将被视为依赖注入与服务定位器中的一个服务项,那么这个服务项必须包含 **validator.constraint_validator** 标签和 **alias** 属性。
YAML:
# app/config/services.yml
services: validator.unique.your_validator_name: class: Fully\Qualified\Validator\Class\Name tags: - { name: validator.constraint_validator, alias: alias_name }
XML:
public function validatedBy() { return 'alias_name'; }
PHP:
// app/config/services.php $container ->register('validator.unique.your_validator_name', 'Fully\Qualified\Validator\Class\Name') ->addTag('validator.constraint_validator', array('alias' => 'alias_name'));
这时候您新建的类就可以用此别名去引用相应的限制类了:
public function validatedBy() { return 'alias_name'; }
就如同上文提到的,Symfony 会自动查找以 constraint 命名并且添加了验证的类。如果您的约束验证程序被定义为一种服务项,那么您应该覆写 **validatedBy()** 方法来返回您定义该服务项时使用的别名,否则 Symfony 不会使用这个限制验证类的服务项,使得该限制验证类被实例化的时候不会有任何依赖项被注入。
### 限制验证类
一个验证类可以返回一个类作用域的对象属性:
public function getTargets() { return self::CLASS_CONSTRAINT; }
验证类中的 **validate()** 方法把这个对象作为它的第一个参数:
class ProtocolClassValidator extends ConstraintValidator { public function validate($protocol, Constraint $constraint) { if ($protocol->getFoo() != $protocol->getBar()) { // If you're using the new 2.5 validation API (you probably are!) $this->context->buildViolation($constraint->message) ->atPath('foo') ->addViolation();
// If you're using the old 2.4 validation API
/*
$this->context->addViolationAt(
'foo',
$constraint->message,
array(),
null
);
*/
}
}
}
注意,一个限制验证类是作用于其本身,而不是一个属性:
Annotations:
/** * @AcmeAssert\ContainsAlphanumeric */ class AcmeEntity { // ... }
YAML:
# src/AppBundle/Resources/config/validation.yml
AppBundle\Entity\AcmeEntity: constraints: - AppBundle\Validator\Constraints\ContainsAlphanumeric: ~
XML:
## 如何用 Doctrine 上传文件
> 除了您自己上传文件,您或许考虑使用 [VichUploaderBundle](https://github.com/dustin10/VichUploaderBundle) 社区 bundle。这个 bundle 提供了所有常见的操作(例如文件重命名、保存和删除),并且它紧密地与 Doctrine ORM、MongoDB ODM、PHPCR ODM 和 Propel 组成为一个整体。
用 Doctrine 实体上传文件与上传任何其他文件无区别。换句话说,您可以在提交表单之后自由移动您控件中的文件。为了举例如何做这个,参见[文件类型引用](http://symfony.com/doc/current/reference/forms/types/file.html)页面。
如果您选择的话,您也可以整合上传文件到您的实体生命周期(例如,创建、更新和移除)。这种情况下,当您的实体被创建,更新或者是从 Doctrine 移除,上传文件和移除进程将会自动发生(不需要在您的控件中做任何事)。
要使这个奏效,您需要注意大量的细节,将会在这本教程条目中讲到。
### 基本设置
首先,创建一个简单的 Doctrine 实体类来使用:
// src/AppBundle/Entity/Document.php namespace AppBundle\Entity;
use Doctrine\ORM\Mapping as ORM; use Symfony\Component\Validator\Constraints as Assert;
/** * @ORM\Entity */ class Document { /** * @ORM\Id * @ORM\Column(type="integer") * @ORM\GeneratedValue(strategy="AUTO") */ public $id;
/**
* @ORM\Column(type="string", length=255)
* @Assert\NotBlank
*/
public $name;
/**
* @ORM\Column(type="string", length=255, nullable=true)
*/
public $path;
public function getAbsolutePath()
{
return null === $this->path
? null
: $this->getUploadRootDir().'/'.$this->path;
}
public function getWebPath()
{
return null === $this->path
? null
: $this->getUploadDir().'/'.$this->path;
}
protected function getUploadRootDir()
{
// the absolute directory path where uploaded
// documents should be saved
return __DIR__.'/../../../../web/'.$this->getUploadDir();
}
protected function getUploadDir()
{
// get rid of the __DIR__ so it doesn't screw up
// when displaying uploaded doc/image in the view.
return 'uploads/documents';
}
}
**Document** 实体有一个名称并且与一个文件相关联。**path** 属性储存相关的路径到文件,并且保存到数据库中。
**getAbsolutePath()** 是一个可以将绝对路径返回到文件的便捷方法,而 **getWebPath()** 是一个可以将网页路径返回,可用于模板链接上传文件的便捷方法。
> 如果您还未做完,您应该首先阅读[文件](http://symfony.com/doc/current/reference/forms/types/file.html)类型文档来了解基本的上传进程是如何运行的。
> 如果您正在使用标注来指定您的验证规则(正如例子所示),确保您已经用标注启动了验证(参见[验证配置](http://symfony.com/doc/current/book/validation.html#book-validation-configuration))。
> 如果您使用方法 **getUploadRootDir()**,注意这会保存根文件的内部文件,可以被所有人读取。要考虑把它放在根文件之外,并当您需要保护这些文件的时候添加自定义查看逻辑。
要上传表单中的实际文件,使用一个“虚拟” **file** 域。例如,如果您正在一个控件里直接构建您的表单,它看起来会像这样:
public function uploadAction() { // ...
$form = $this->createFormBuilder($document)
->add('name')
->add('file')
->getForm();
// ...
}
接下来,在您的 **Document** 类里创建这个属性,并添加一些验证规则:
use Symfony\Component\HttpFoundation\File\UploadedFile;
// ... class Document { /** * @Assert\File(maxSize="6000000") */ private $file;
/**
* Sets file.
*
* @param UploadedFile $file
*/
public function setFile(UploadedFile $file = null)
{
$this->file = $file;
}
/**
* Get file.
*
* @return UploadedFile
*/
public function getFile()
{
return $this->file;
}
}
Annotations
// src/AppBundle/Entity/Document.php namespace AppBundle\Entity;
// ... use Symfony\Component\Validator\Constraints as Assert;
class Document { /** * @Assert\File(maxSize="6000000") */ private $file;
// ...
}
YAML:
# src/AppBundle/Resources/config/validation.yml
AppBundle\Entity\Document: properties: file: - File: maxSize: 6000000
XML:
PHP:
// src/AppBundle/Entity/Document.php namespace Acme\DemoBundle\Entity;
// ... use Symfony\Component\Validator\Mapping\ClassMetadata; use Symfony\Component\Validator\Constraints as Assert;
class Document { // ...
public static function loadValidatorMetadata(ClassMetadata $metadata)
{
$metadata->addPropertyConstraint('file', new Assert\File(array(
'maxSize' => 6000000,
)));
}
}
> 当您正在使用 **File** 约束,Symfony 会自动猜测表单域是文件上传输入。这就是您为什么在创建上面的表单时(**->add('file')**)不需要做显示设置的原因。
以下控件展示了如何处理整个进程:
// ... use AppBundle\Entity\Document; use Sensio\Bundle\FrameworkExtraBundle\Configuration\Template; use Symfony\Component\HttpFoundation\Request; // ...
/** * @Template() */ public function uploadAction(Request $request) { $document = new Document(); $form = $this->createFormBuilder($document) ->add('name') ->add('file') ->getForm();
$form->handleRequest($request);
if ($form->isValid()) {
$em = $this->getDoctrine()->getManager();
$em->persist($document);
$em->flush();
return $this->redirectToRoute(...);
}
return array('form' => $form->createView());
}
之前的控件会用提交的名字自动保存 **Document** 实体,但是不会对文件做任何事情并且 **path** 属性为空白。
上传文件的一个简单的方法是在实体保存之前移动文件,然后相应地设置 **path** 属性。首先在 **Document** 类调用一个新的 **upload()** 方法,您就能立刻上传文件:
if ($form->isValid()) { $em = $this->getDoctrine()->getManager();
$document->upload();
$em->persist($document);
$em->flush();
return $this->redirectToRoute(...);
}
**upload()** 方法会利用 [UploadedFile](http://api.symfony.com/2.7/Symfony/Component/HttpFoundation/File/UploadedFile.html) 对象,在一个 **file** 域提交后会返回:
public function upload() { // the file property can be empty if the field is not required if (null === $this->getFile()) { return; }
// use the original file name here but you should
// sanitize it at least to avoid any security issues
// move takes the target directory and then the
// target filename to move to
$this->getFile()->move(
$this->getUploadRootDir(),
$this->getFile()->getClientOriginalName()
);
// set the path property to the filename where you've saved the file
$this->path = $this->getFile()->getClientOriginalName();
// clean up the file property as you won't need it anymore
$this->file = null;
}
### 使用生命周期回呼
> 使用生命周期回呼是一个限制的技术,有一些缺陷。如果您想移除在 **Document::getUploadRootDir()** 方法内部的硬编码的 **__DIR__** 引用,最好的方法就是开始使用明确的 [doctrine 监听器](http://symfony.com/doc/current/cookbook/doctrine/event_listeners_subscribers.html)注入内核参数,比如 **kernel.root_dir** 来构建绝对路径。
尽管这个实现奏效,但是它有一个主要缺陷:如果实体保存的时候有问题怎么办?文件已经移动到了它的最终位置尽管实体的 **path** 属性未被正确保存。
为了避免这类问题,您应该改变实施从而使数据库操作和文件的移动具有原子性:如果在保存实体时有问题或者文件不能被移动,那么*没有事情*会发生。
要做到这一点,您需要正确移动文件因为 Doctrine 保存实体到数据库。这个可以通过挂钩一个实体生命周期回呼完成。
/** * @ORM\Entity * @ORM\HasLifecycleCallbacks */ class Document { }
接下来,重构 **Document** 类来利用这些回呼:
use Symfony\Component\HttpFoundation\File\UploadedFile;
/** * @ORM\Entity * @ORM\HasLifecycleCallbacks */ class Document { private $temp;
/**
* Sets file.
*
* @param UploadedFile $file
*/
public function setFile(UploadedFile $file = null)
{
$this->file = $file;
// check if we have an old image path
if (isset($this->path)) {
// store the old name to delete after the update
$this->temp = $this->path;
$this->path = null;
} else {
$this->path = 'initial';
}
}
/**
* @ORM\PrePersist()
* @ORM\PreUpdate()
*/
public function preUpload()
{
if (null !== $this->getFile()) {
// do whatever you want to generate a unique name
$filename = sha1(uniqid(mt_rand(), true));
$this->path = $filename.'.'.$this->getFile()->guessExtension();
}
}
/**
* @ORM\PostPersist()
* @ORM\PostUpdate()
*/
public function upload()
{
if (null === $this->getFile()) {
return;
}
// if there is an error when moving the file, an exception will
// be automatically thrown by move(). This will properly prevent
// the entity from being persisted to the database on error
$this->getFile()->move($this->getUploadRootDir(), $this->path);
// check if we have an old image
if (isset($this->temp)) {
// delete the old image
unlink($this->getUploadRootDir().'/'.$this->temp);
// clear the temp image path
$this->temp = null;
}
$this->file = null;
}
/**
* @ORM\PostRemove()
*/
public function removeUpload()
{
$file = $this->getAbsolutePath();
if ($file) {
unlink($file);
}
}
}
> 如果对你实体的改变被一个 Doctrine 事件监听器或者事件订阅者所处理,**preUpdate()** 回呼必须通知 Doctrine 所完成的变化。关于 preUpadate 事件限制的所有引用,在 Doctrine 事件文档中参见 [preUpdate](http://docs.doctrine-project.org/projects/doctrine-orm/en/latest/reference/events.html#preupdate)。
类现在做一切您需要的事情:它会在保存之前产生一个独特的文件名,在保存之后移动文件,并且如果实体被删除的话就移除文件。
现在文件的移动是由实体自动处理的,**$document->upload()** 的调用应从控件中移除:
if ($form->isValid()) { $em = $this->getDoctrine()->getManager();
$em->persist($document);
$em->flush();
return $this->redirectToRoute(...);
}
> **@ORM\PrePersist()** 和 **@ORM\PostPersist()** 事件回呼在实体保存到数据库前后被触发。在另一方面,当实体更新后,**@ORM\PreUpdate()** 和 **@ORM\PostUpdate()** 事件回呼被调用。
> 如果被保存的实体的字段其中之一有变化,**PreUpdate** 和 **PostUpdate** 回呼才会被激发。这意味着,默认情况下,如果您只调整 **$file** 属性,这些事件将不再被激发,因为属性本身不是直接通过 Doctrine 保存的。一个解决方案就是使用一个保存在 Doctrine 中的 **updated** 字段,然后当改变文件的时候手动调整。
### 使用 id 作为文件名称
如果您想使用 **id** 作为文件的名称,操作和您需要在 **path** 属性下保存的扩展有轻微的不同,并不是实际的文件名称:
```
use Symfony\Component\HttpFoundation\File\UploadedFile;
/**
* @ORM\Entity
* @ORM\HasLifecycleCallbacks
*/
class Document
{
private $temp;
/**
* Sets file.
*
* @param UploadedFile $file
*/
public function setFile(UploadedFile $file = null)
{
$this->file = $file;
// check if we have an old image path
if (is_file($this->getAbsolutePath())) {
// store the old name to delete after the update
$this->temp = $this->getAbsolutePath();
} else {
$this->path = 'initial';
}
}
/**
* @ORM\PrePersist()
* @ORM\PreUpdate()
*/
public function preUpload()
{
if (null !== $this->getFile()) {
$this->path = $this->getFile()->guessExtension();
}
}
/**
* @ORM\PostPersist()
* @ORM\PostUpdate()
*/
public function upload()
{
if (null === $this->getFile()) {
return;
}
// check if we have an old image
if (isset($this->temp)) {
// delete the old image
unlink($this->temp);
// clear the temp image path
$this->temp = null;
}
// you must throw an exception here if the file cannot be moved
// so that the entity is not persisted to the database
// which the UploadedFile move() method does
$this->getFile()->move(
$this->getUploadRootDir(),
$this->id.'.'.$this->getFile()->guessExtension()
);
$this->setFile(null);
}
/**
* @ORM\PreRemove()
*/
public function storeFilenameForRemove()
{
$this->temp = $this->getAbsolutePath();
}
/**
* @ORM\PostRemove()
*/
public function removeUpload()
{
if (isset($this->temp)) {
unlink($this->temp);
}
}
public function getAbsolutePath()
{
return null === $this->path
? null
: $this->getUploadRootDir().'/'.$this->id.'.'.$this->path;
}
}
您将会注意到在这种情况下,您需要再做一些工作来移除文件。在移除之前,您必须存储文件路径(因为它取决于 id)。然后,一旦对象已被完全从数据库移除,您可以安全地删除文件(在 PostRemove 中)。
15
前端
Symfony 以及它的所有的包都是由 Composer 所完美管理的。Bower 是前端依赖性管理的附属工具,就像 Bootstrap 或者 jQuery。由于 Symfony 是一个纯的后端框架,因此它不能使用 Bower 来帮助你。幸运的是,它很好用!
安装 Bower
Bower 位于 Node.js 的顶层。确保你安装了它然后运行下列代码:
$ npm install -g bower
在完成这个命令之后,在你终端运行 bower 来检查它是否正确安装了。
如果你的电脑上没有安装 NodeJS,你也可以使用 BowerPHP(一个非官方的 Bower 的 PHP 接口)。注意这个依然运行在阿尔法状态下。如果你使用 BowerPHP,那么就用 BowerPHP 代替例子中的 bower。
在你的工程中配置 Bower
正常情况下,Bower 将所有东西下载到 bower_components/ 命令中。在 Symfony 中,只有在 web/ 目录下的文件才是可以公开访问的,因此作为替代你需要在那配置 Bower 来下载东西。为了完成这个,你需要创建一个具有新的目的地(例如 web/assets/vendor)的 .bowerrc 文件:
{
"directory": "web/assets/vendor/"
}
如果你在使用基于前端的系统例如 Gulp 或者 Grunt,那么你就可以随意按照你想的来配置目录。典型地,你最终将使用这些工具来将你的所有资产移动到 web/ 目录。
一个例子:安装 Bootstrap
信不信由你,但是现在你已经准备好在你的 Symfony 应用程序中使用 Bower 了。作为一个例子,你将在你的工程中安装 Bootstrap 并且在你的布局中包含它。
安装依赖性
只要运行 bower init 就能创建 bower.json 文件。现在你已经准备开始向你的工程中添加东西了。举例来说,向你的 Bootstrap 中添加 bower.json 并且下载它,只要运行下列代码就好:
$ bower install --save bootstrap
这个将会在 web/assets/vendor/ 中(或者你在 .bowerrc 中设置的其他路径)安装 Bootstrap 以及它的依赖性。
获取更多如何使用 Bower 的信息,请查阅 Bower 文档。
在你的模板中包含依赖性
既然已经安装了依赖性,你可以像正常的 CSS/JS 一样在你的模板中包含 bootstrap:
Twig:
{# app/Resources/views/layout.html.twig #}
<!doctype html>
<html>
<head>
{# ... #}
<link rel="stylesheet"
href="{{ asset('assets/vendor/bootstrap/dist/css/bootstrap.min.css') }}">
</head>
{# ... #}
</html>
PHP:
<!-- app/Resources/views/layout.html.php -->
<!doctype html>
<html>
<head>
{# ... #}
<link rel="stylesheet" href="<?php echo $view['assets']->getUrl(
'assets/vendor/bootstrap/dist/css/bootstrap.min.css'
) ?>">
</head>
{# ... #}
</html>
好样的!你的站点现在正在使用 Bootstrap。你现在可以轻松地将 bootstrap 升级到最新版本并且也可以管理其他的前端依赖性。
我是应该 Git 忽略还是提交 Bower 资产?
目前,你应当提交由 Bower 下载的注册而不是向你的 .gitignore 文件添加目录(例如 web/assets/vendor):
$ git add web/assets/vendor
为什么呢?不像 Composer,Bower 目前没有“锁定”特征,这就意味着在不同的服务器上运行 bower install 将会给你额外的你在其它机器上的资产这没有保障。更多细节,详见检查前端的依赖性这篇文章。
但是,在将来 Bower 很可能添加锁定特征(例如 bower/bower#1748)。
16
日志
Monolog 是 Symfony 使用的 PHP 日志记录函数。它由 Python LogBook 函数产生。
使用
只需要在你控制器的容器中获得 logger 服务就可以记录消息了:
public function indexAction()
{
$logger = $this->get('logger');
$logger->info('I just got the logger');
$logger->error('An error occurred');
// ...
}
logger 服务在不同的日志水平上有不同的方法,哪种方法可用详见 LoggerInterface 获取更多细节信息。
Handlers 和 Channels:在不同位置记录日志
Monolog 中每一个日志都定义了日志信道,这个将你的日志信息组织成不同的“目录”。然后,每一个频道都有一堆 handlers 来写日志(handlers 可以共享)。
当在服务中注入日志编写器时你可以使用定制的频道控件这个定义了日志编写器的“频道”。
基本的 handler 是 StreamHandler,它在流中记录日志(默认情况下 prod 环境下的 app/logs/prod.log 以及 dev 环境下的 app/logs/dev.log)。
Monolog 也有一个强力的内建 handler 来在 prod 环境下记录日志:FingersCrossedHandler。它允许你在缓冲区储存消息并且只有当消息到达行为层次才记录它们(这个在 Symfony 的标准版本提供的配置中是错误的)通过将消息传递到另一个 handler 的方式。
使用几个 Handlers
日志记录器用了一堆 handlers,这些 handlers 相继被调用。这就允许你很容易的以多种不同的方式来记录信息。
YAML:
# app/config/config.yml
monolog:
handlers:
applog:
type: stream
path: /var/log/symfony.log
level: error
main:
type: fingers_crossed
action_level: warning
handler: file
file:
type: stream
level: debug
syslog:
type: syslog
level: error
XML:
<!-- app/config/config.xml -->
<?xml version="1.0" encoding="UTF-8" ?>
<container xmlns="http://symfony.com/schema/dic/services"
xmlns:xsi="http://www.w3.org/2001/XMLSchema-instance"
xmlns:monolog="http://symfony.com/schema/dic/monolog"
xsi:schemaLocation="http://symfony.com/schema/dic/services
http://symfony.com/schema/dic/services/services-1.0.xsd
http://symfony.com/schema/dic/monolog
http://symfony.com/schema/dic/monolog/monolog-1.0.xsd">
<monolog:config>
<monolog:handler
name="applog"
type="stream"
path="/var/log/symfony.log"
level="error"
/>
<monolog:handler
name="main"
type="fingers_crossed"
action-level="warning"
handler="file"
/>
<monolog:handler
name="file"
type="stream"
level="debug"
/>
<monolog:handler
name="syslog"
type="syslog"
level="error"
/>
</monolog:config>
</container>
PHP
PHP:
// app/config/config.php
$container->loadFromExtension('monolog', array(
'handlers' => array(
'applog' => array(
'type' => 'stream',
'path' => '/var/log/symfony.log',
'level' => 'error',
),
'main' => array(
'type' => 'fingers_crossed',
'action_level' => 'warning',
'handler' => 'file',
),
'file' => array(
'type' => 'stream',
'level' => 'debug',
),
'syslog' => array(
'type' => 'syslog',
'level' => 'error',
),
),
));
上述配置定义了一堆 handlers 这些 handlers 将会以它们被定义的顺序被调用。
handler 命名的“文件”不会包含在它自己中因为它被用作是 fingers_crossed handler 的嵌套的 handler。
如果你想要在另外的配置文件中改变 MonologBundle 的配置你需要重新定义整个堆栈,它不能被合并因为顺序很重要而且合并不能控制顺序。
改变格式
handler 使用 Formatter 来在记录日志之前格式化它。所有的 Monolog handlers 默认使用 Monolog\Formatter\LineFormatter 的实例但是你可以很容易的替换它,你的格式器必须实现 Monolog\Formatter\FormatterInterface。
YAML:
# app/config/config.yml
services:
my_formatter:
class: Monolog\Formatter\JsonFormatter
monolog:
handlers:
file:
type: stream
level: debug
formatter: my_formatter
XML:
<!-- app/config/config.xml -->
<?xml version="1.0" encoding="UTF-8" ?>
<container xmlns="http://symfony.com/schema/dic/services"
xmlns:xsi="http://www.w3.org/2001/XMLSchema-instance"
xmlns:monolog="http://symfony.com/schema/dic/monolog"
xsi:schemaLocation="http://symfony.com/schema/dic/services
http://symfony.com/schema/dic/services/services-1.0.xsd
http://symfony.com/schema/dic/monolog
http://symfony.com/schema/dic/monolog/monolog-1.0.xsd">
<services>
<service id="my_formatter" class="Monolog\Formatter\JsonFormatter" />
</services>
<monolog:config>
<monolog:handler
name="file"
type="stream"
level="debug"
formatter="my_formatter"
/>
</monolog:config>
</container>
PHP:
// app/config/config.php
$container
->register('my_formatter', 'Monolog\Formatter\JsonFormatter');
$container->loadFromExtension('monolog', array(
'handlers' => array(
'file' => array(
'type' => 'stream',
'level' => 'debug',
'formatter' => 'my_formatter',
),
),
));
如何循环你的日志文件
经过一段时间,日志文件就会变得很大,不管是在开发还是产品环境下。最好的解决方法就是在他们变得太大之前使用一个像 Linux 的 logrotate 命令一样的工具来循环日志文件。
另外一个选项就是通过使用 rotating_file handler 来使得 Monolog 来循环文件。这个 handler 每天创建一个新的日志文件并且可以自动移除旧的日志文件。使用它,仅仅需要配置你的 handler 的 type 选项到 rotating_file:
YAML:
# app/config/config_dev.yml
monolog:
handlers:
main:
type: rotating_file
path: %kernel.logs_dir%/%kernel.environment%.log
level: debug
# max number of log files to keep
# defaults to zero, which means infinite files
max_files: 10
XML:
<!-- app/config/config_dev.xml -->
<?xml version="1.0" charset="UTF-8" ?>
<container xmlns=''http://symfony.com/schema/dic/services"
xmlns:monolog="http://symfony.com/schema/dic/monolog">
<monolog:config>
<monolog:handler name="main"
type="rotating_file"
path="%kernel.logs_dir%/%kernel.environment%.log"
level="debug"
<!-- max number of log files to keep
defaults to zero, which means infinite files -->
max_files="10"
/>
</monolog:config>
</container>
PHP:
// app/config/config_dev.php
$container->loadFromExtension('monolog', array(
'handlers' => array(
'main' => array(
'type' => 'rotating_file',
'path' => '%kernel.logs_dir%/%kernel.environment%.log',
'level' => 'debug',
// max number of log files to keep
// defaults to zero, which means infinite files
'max_files' => 10,
),
),
));
在日志信息中添加一些额外数据
Monolog 允许你编辑记录在它被记录之前添加一些额外数据。processor 可以应用到整个 handler 堆栈也可以对一个特定的 handler 应用。
processor 就是一个可调用的接收记录为它的第一变元。Processors 使用 monolog.processor DIC tag 进行设置。详见关于它的指导。
添加一个节/请求标记
有时候很难说明日志中的哪一条是属于哪个节或者请求的。下面的例子就会为使用 processor 的每一个请求添加一个独特的标记。
namespace Acme\MyBundle;
use Symfony\Component\HttpFoundation\Session\Session;
class SessionRequestProcessor
{
private $session;
private $token;
public function __construct(Session $session)
{
$this->session = $session;
}
public function processRecord(array $record)
{
if (null === $this->token) {
try {
$this->token = substr($this->session->getId(), 0, 8);
} catch (\RuntimeException $e) {
$this->token = '????????';
}
$this->token .= '-' . substr(uniqid(), -8);
}
$record['extra']['token'] = $this->token;
return $record;
}
}
YAML:
# app/config/config.yml
services:
monolog.formatter.session_request:
class: Monolog\Formatter\LineFormatter
arguments:
- "[%%datetime%%] [%%extra.token%%] %%channel%%.%%level_name%%: %%message%%\n"
monolog.processor.session_request:
class: Acme\MyBundle\SessionRequestProcessor
arguments: ["@session"]
tags:
- { name: monolog.processor, method: processRecord }
monolog:
handlers:
main:
type: stream
path: "%kernel.logs_dir%/%kernel.environment%.log"
level: debug
formatter: monolog.formatter.session_request
XML:
<!-- app/config/config.xml -->
<?xml version="1.0" encoding="UTF-8" ?>
<container xmlns="http://symfony.com/schema/dic/services"
xmlns:xsi="http://www.w3.org/2001/XMLSchema-instance"
xmlns:monolog="http://symfony.com/schema/dic/monolog"
xsi:schemaLocation="http://symfony.com/schema/dic/services
http://symfony.com/schema/dic/services/services-1.0.xsd
http://symfony.com/schema/dic/monolog
http://symfony.com/schema/dic/monolog/monolog-1.0.xsd">
<services>
<service id="monolog.formatter.session_request"
class="Monolog\Formatter\LineFormatter">
<argument>[%%datetime%%] [%%extra.token%%] %%channel%%.%%level_name%%: %%message%%
</argument>
</service>
<service id="monolog.processor.session_request"
class="Acme\MyBundle\SessionRequestProcessor">
<argument type="service" id="session" />
<tag name="monolog.processor" method="processRecord" />
</service>
</services>
<monolog:config>
<monolog:handler
name="main"
type="stream"
path="%kernel.logs_dir%/%kernel.environment%.log"
level="debug"
formatter="monolog.formatter.session_request"
/>
</monolog:config>
</container>
PHP:
// app/config/config.php
$container
->register(
'monolog.formatter.session_request',
'Monolog\Formatter\LineFormatter'
)
->addArgument('[%%datetime%%] [%%extra.token%%] %%channel%%.%%level_name%%: %%message%%\n');
$container
->register(
'monolog.processor.session_request',
'Acme\MyBundle\SessionRequestProcessor'
)
->addArgument(new Reference('session'))
->addTag('monolog.processor', array('method' => 'processRecord'));
$container->loadFromExtension('monolog', array(
'handlers' => array(
'main' => array(
'type' => 'stream',
'path' => '%kernel.logs_dir%/%kernel.environment%.log',
'level' => 'debug',
'formatter' => 'monolog.formatter.session_request',
),
),
));
如果你使用几个 handler,你也可以在 handler 层注册一个 processor 或者在频道层而不是全局注册(详见下面一节)。
每个 Handler 注册 Processors
你可以使用 monolog.processor 标签的 handler 选项来为每一个 Handler 注册 Processor:
YAML:
# app/config/config.yml
services:
monolog.processor.session_request:
class: Acme\MyBundle\SessionRequestProcessor
arguments: ["@session"]
tags:
- { name: monolog.processor, method: processRecord, handler: main }
XML:
<!-- app/config/config.xml -->
<?xml version="1.0" encoding="UTF-8" ?>
<container xmlns="http://symfony.com/schema/dic/services"
xmlns:xsi="http://www.w3.org/2001/XMLSchema-instance"
xmlns:monolog="http://symfony.com/schema/dic/monolog"
xsi:schemaLocation="http://symfony.com/schema/dic/services
http://symfony.com/schema/dic/services/services-1.0.xsd
http://symfony.com/schema/dic/monolog
http://symfony.com/schema/dic/monolog/monolog-1.0.xsd">
<services>
<service id="monolog.processor.session_request"
class="Acme\MyBundle\SessionRequestProcessor">
<argument type="service" id="session" />
<tag name="monolog.processor" method="processRecord" handler="main" />
</service>
</services>
</container>
PHP:
// app/config/config.php
$container
->register(
'monolog.processor.session_request',
'Acme\MyBundle\SessionRequestProcessor'
)
->addArgument(new Reference('session'))
->addTag('monolog.processor', array('method' => 'processRecord', 'handler' => 'main'));
每个频道注册 Processors
你可以使用 monolog.processor 标签的 channel 选项来为每一个频道注册 Processor:
YAML:
# app/config/config.yml
services:
monolog.processor.session_request:
class: Acme\MyBundle\SessionRequestProcessor
arguments: ["@session"]
tags:
- { name: monolog.processor, method: processRecord, channel: main }
XML:
<!-- app/config/config.xml -->
<?xml version="1.0" encoding="UTF-8" ?>
<container xmlns="http://symfony.com/schema/dic/services"
xmlns:xsi="http://www.w3.org/2001/XMLSchema-instance"
xmlns:monolog="http://symfony.com/schema/dic/monolog"
xsi:schemaLocation="http://symfony.com/schema/dic/services
http://symfony.com/schema/dic/services/services-1.0.xsd
http://symfony.com/schema/dic/monolog
http://symfony.com/schema/dic/monolog/monolog-1.0.xsd">
<services>
<service id="monolog.processor.session_request"
class="Acme\MyBundle\SessionRequestProcessor">
<argument type="service" id="session" />
<tag name="monolog.processor" method="processRecord" channel="main" />
</service>
</services>
</container>
PHP:
// app/config/config.php
$container
->register(
'monolog.processor.session_request',
'Acme\MyBundle\SessionRequestProcessor'
)
->addArgument(new Reference('session'))
->addTag('monolog.processor', array('method' => 'processRecord', 'channel' => 'main'));
Monolog 可以当应用程序出现错误的时候被配置来发送电子邮件。这个配置需要一些嵌入的 handlers 来避免接收太多的电子邮件。这个配置起初看起来会很复杂但是每一个 handler 在出故障时都是很直接的。
YAML:
# app/config/config_prod.yml
monolog:
handlers:
mail:
type: fingers_crossed
# 500 errors are logged at the critical level
action_level: critical
# to also log 400 level errors (but not 404's):
# action_level: error
# excluded_404s:
# - ^/
handler: buffered
buffered:
type: buffer
handler: swift
swift:
type: swift_mailer
from_email: error@example.com
to_email: error@example.com
# or list of recipients
# to_email: [dev1@example.com, dev2@example.com, ...]
subject: An Error Occurred!
level: debug
XML:
<!-- app/config/config_prod.xml -->
<container xmlns="http://symfony.com/schema/dic/services"
xmlns:xsi="http://www.w3.org/2001/XMLSchema-instance"
xmlns:monolog="http://symfony.com/schema/dic/monolog"
xsi:schemaLocation="http://symfony.com/schema/dic/services http://symfony.com/schema/dic/services/services-1.0.xsd
http://symfony.com/schema/dic/monolog http://symfony.com/schema/dic/monolog/monolog-1.0.xsd">
<monolog:config>
<monolog:handler
name="mail"
type="fingers_crossed"
action-level="critical"
handler="buffered"
<!--
To also log 400 level errors (but not 404's):
action-level="error"
And add this child inside this monolog:handler
<monolog:excluded-404>^/</monolog:excluded-404>
-->
/>
<monolog:handler
name="buffered"
type="buffer"
handler="swift"
/>
<monolog:handler
name="swift"
type="swift_mailer"
from-email="error@example.com"
subject="An Error Occurred!"
level="debug">
<monolog:to-email>error@example.com</monolog:to-email>
<!-- or multiple to-email elements -->
<!--
<monolog:to-email>dev1@example.com</monolog:to-email>
<monolog:to-email>dev2@example.com</monolog:to-email>
...
-->
</monolog:handler>
</monolog:config>
</container>
PHP:
// app/config/config_prod.php
$container->loadFromExtension('monolog', array(
'handlers' => array(
'mail' => array(
'type' => 'fingers_crossed',
'action_level' => 'critical',
// to also log 400 level errors (but not 404's):
// 'action_level' => 'error',
// 'excluded_404s' => array(
// '^/',
// ),
'handler' => 'buffered',
),
'buffered' => array(
'type' => 'buffer',
'handler' => 'swift',
),
'swift' => array(
'type' => 'swift_mailer',
'from_email' => 'error@example.com',
'to_email' => 'error@example.com',
// or a list of recipients
// 'to_email' => array('dev1@example.com', 'dev2@example.com', ...),
'subject' => 'An Error Occurred!',
'level' => 'debug',
),
),
));
邮件 handler 是一个 fingers_crossed 的 handler,这就意味着这只有在行为层才会被触发,在这个例子中到达了临界。临界层只会触发 5xx HTTP 代码错误。如果一旦到达这一层 fingers_crossed 的 handler 将会记录所有的消息且不管它们是哪一层。handler 设置意味着输出之后传递到 缓冲 handler。
如果你想要 400 和 500 层次错误触发电子邮件,将 action_level 设置成 critical 而不是 error。可以参照上面例子的代码。
缓冲 handler 简单地保留着请求的所有信息然后一口气将他们传递到嵌入的 handler 中。如果不使用这个 handler 那么每条消息将会分别发送电子邮件。这就是后来传递到 swift handler 的。这是专门处理向你发送错误电子邮件的 handler。这个的设置很直接,对于来去的地址和主题来说。
你可以将这些 handler 与其他的合并这样错误就会在发出邮件的同时记录在服务器中:
YAML:
# app/config/config_prod.yml
monolog:
handlers:
main:
type: fingers_crossed
action_level: critical
handler: grouped
grouped:
type: group
members: [streamed, buffered]
streamed:
type: stream
path: "%kernel.logs_dir%/%kernel.environment%.log"
level: debug
buffered:
type: buffer
handler: swift
swift:
type: swift_mailer
from_email: error@example.com
to_email: error@example.com
subject: An Error Occurred!
level: debug
XML:
<!-- app/config/config_prod.xml -->
<container xmlns="http://symfony.com/schema/dic/services"
xmlns:xsi="http://www.w3.org/2001/XMLSchema-instance"
xmlns:monolog="http://symfony.com/schema/dic/monolog"
xsi:schemaLocation="http://symfony.com/schema/dic/services http://symfony.com/schema/dic/services/services-1.0.xsd
http://symfony.com/schema/dic/monolog http://symfony.com/schema/dic/monolog/monolog-1.0.xsd">
<monolog:config>
<monolog:handler
name="main"
type="fingers_crossed"
action_level="critical"
handler="grouped"
/>
<monolog:handler
name="grouped"
type="group"
>
<member type="stream"/>
<member type="buffered"/>
</monolog:handler>
<monolog:handler
name="stream"
path="%kernel.logs_dir%/%kernel.environment%.log"
level="debug"
/>
<monolog:handler
name="buffered"
type="buffer"
handler="swift"
/>
<monolog:handler
name="swift"
from-email="error@example.com"
to-email="error@example.com"
subject="An Error Occurred!"
level="debug"
/>
</monolog:config>
</container>
PHP:
// app/config/config_prod.php
$container->loadFromExtension('monolog', array(
'handlers' => array(
'main' => array(
'type' => 'fingers_crossed',
'action_level' => 'critical',
'handler' => 'grouped',
),
'grouped' => array(
'type' => 'group',
'members' => array('streamed', 'buffered'),
),
'streamed' => array(
'type' => 'stream',
'path' => '%kernel.logs_dir%/%kernel.environment%.log',
'level' => 'debug',
),
'buffered' => array(
'type' => 'buffer',
'handler' => 'swift',
),
'swift' => array(
'type' => 'swift_mailer',
'from_email' => 'error@example.com',
'to_email' => 'error@example.com',
'subject' => 'An Error Occurred!',
'level' => 'debug',
),
),
));
这个使用了 group handler 来向两个组员发送消息,buffered 和 stream handlers。现在这些消息既被记录在日志中又被电子邮件发送出去了。
使用当命令得到执行的时候传递的 OutputInterface 实例的特定信息显示层面消息,可以使用控制台来打印。
作为替代,你也可以使用控制台组件提供的独立的 PSR-3 日志记录器。
当很多的日志需要记录时,依靠信息显示设置(-v, -vv, -vvv)来打印信息就很麻烦,因为调用需要有条件覆盖。代码很快就会变得冗长。举例来说:
use Symfony\Component\Console\Input\InputInterface;
use Symfony\Component\Console\Output\OutputInterface;
protected function execute(InputInterface $input, OutputInterface $output)
{
if ($output->getVerbosity() >= OutputInterface::VERBOSITY_DEBUG) {
$output->writeln('Some info');
}
if ($output->getVerbosity() >= OutputInterface::VERBOSITY_VERBOSE) {
$output->writeln('Some more info');
}
}
没有使用这些语法方法来检验每一个信息显示层,MonologBridge 提供了一个 ConsoleHandler,它可以监听控制台事件并且能够基于目前的日志水平以及控制台信息显示来将日志消息记录到控制台输出中。
上述例子就可以被写成下面这样:
use Symfony\Component\Console\Input\InputInterface;
use Symfony\Component\Console\Output\OutputInterface;
protected function execute(InputInterface $input, OutputInterface $output)
{
// assuming the Command extends ContainerAwareCommand...
$logger = $this->getContainer()->get('logger');
$logger->debug('Some info');
$logger->notice('Some more info');
}
依赖于命令运行的信息显示层以及用户的配置(看下面),这些消息可能会也可能不会向控制台展示。如果他们被展示,他们将会被加上时间标记并且被适当上色。除此之外,错误日志将会被写到错误输出中(php://stderr)。这里没有必要再有条件地处理信息显示设置。
Monolog 控制台 handler 在 Monolog 配置中可用。这在 Symfony Standard Edition 2.4 中也是默认的。
YAML:
# app/config/config.yml
monolog:
handlers:
console:
type: console
XML:
<!-- app/config/config.xml -->
<?xml version="1.0" encoding="UTF-8" ?>
<container xmlns="http://symfony.com/schema/dic/services"
xmlns:monolog="http://symfony.com/schema/dic/monolog">
<monolog:config>
<monolog:handler name="console" type="console" />
</monolog:config>
</container>
PHP:
// app/config/config.php
$container->loadFromExtension('monolog', array(
'handlers' => array(
'console' => array(
'type' => 'console',
),
),
));
使用 verbosity_levels 选项你可以适应信息显示以及日志层面的映射。在上述的例子中也将会展示一些正常信息显示模式下的通知(而不仅是警告)。除此之外,它将会只使用由定制的 my_channel 频道记录的消息并且通过定制的格式器来改变现实风格(更多详细信息参见 MonologBundle 指南)
YAML:
# app/config/config.yml
monolog:
handlers:
console:
type: console
verbosity_levels:
VERBOSITY_NORMAL: NOTICE
channels: my_channel
formatter: my_formatter
XML:
<!-- app/config/config.xml -->
<?xml version="1.0" encoding="UTF-8" ?>
<container xmlns="http://symfony.com/schema/dic/services"
xmlns:monolog="http://symfony.com/schema/dic/monolog">
<monolog:config>
<monolog:handler name="console" type="console" formatter="my_formatter">
<monolog:verbosity-level verbosity-normal="NOTICE" />
<monolog:channel>my_channel</monolog:channel>
</monolog:handler>
</monolog:config>
</container>
PHP:
// app/config/config.php
$container->loadFromExtension('monolog', array(
'handlers' => array(
'console' => array(
'type' => 'console',
'verbosity_levels' => array(
'VERBOSITY_NORMAL' => 'NOTICE',
),
'channels' => 'my_channel',
'formatter' => 'my_formatter',
),
),
));
YAML:
# app/config/services.yml
services:
my_formatter:
class: Symfony\Bridge\Monolog\Formatter\ConsoleFormatter
arguments:
- "[%%datetime%%] %%start_tag%%%%message%%%%end_tag%% (%%level_name%%) %%context%% %%extra%%\n"
XML:
<!-- app/config/services.xml -->
<?xml version="1.0" encoding="UTF-8" ?>
<container xmlns="http://symfony.com/schema/dic/services"
xmlns:xsi="http://www.w3.org/2001/XMLSchema-instance"
xsi:schemaLocation="http://symfony.com/schema/dic/services http://symfony.com/schema/dic/services/services-1.0.xsd">
<services>
<service id="my_formatter" class="Symfony\Bridge\Monolog\Formatter\ConsoleFormatter">
<argument>[%%datetime%%] %%start_tag%%%%message%%%%end_tag%% (%%level_name%%) %%context%% %%extra%%\n</argument>
</service>
</services>
</container>
PHP:
// app/config/services.php
$container
->register('my_formatter', 'Symfony\Bridge\Monolog\Formatter\ConsoleFormatter')
->addArgument('[%%datetime%%] %%start_tag%%%%message%%%%end_tag%% (%%level_name%%) %%context%% %%extra%%\n')
;
有时候你的日志充满了不想看到的 404 HTTP 错误,举例来说,当攻击者扫描你的应用的一些知名的应用程序路径时(例如 /phpmyadmin)。当使用 fingers_crossed handler 时,你可以基于一个在 MonologBundle 配置中正常的解释来拒绝记录这些日志:
YAML:
# app/config/config.yml
monolog:
handlers:
main:
# ...
type: fingers_crossed
handler: ...
excluded_404s:
- ^/phpmyadmin
XML:
<!-- app/config/config.xml -->
<container xmlns="http://symfony.com/schema/dic/services"
xmlns:xsi="http://www.w3.org/2001/XMLSchema-instance"
xmlns:monolog="http://symfony.com/schema/dic/monolog"
xsi:schemaLocation="http://symfony.com/schema/dic/services
http://symfony.com/schema/dic/services/services-1.0.xsd
http://symfony.com/schema/dic/monolog
http://symfony.com/schema/dic/monolog/monolog-1.0.xsd"
>
<monolog:config>
<monolog:handler type="fingers_crossed" name="main" handler="...">
<!-- ... -->
<monolog:excluded-404>^/phpmyadmin</monolog:excluded-404>
</monolog:handler>
</monolog:config>
</container>
PHP:
// app/config/config.php
$container->loadFromExtension('monolog', array(
'handlers' => array(
'main' => array(
// ...
'type' => 'fingers_crossed',
'handler' => ...,
'excluded_404s' => array(
'^/phpmyadmin',
),
),
),
));
Symfony 框架将日志消息组织到频道当中。默认情况下,这里有几个频道,包括 doctrine, event, security, request 和其他的一些。频道被印在了日志消息之中并且也能够被用来指导不同的频道到不同的地方、文件。
默认情况下,Symfony 记录每一条进入单一文件的消息(不管频道是什么)。
每一个频道和容器(使用 container:debug 命令来查看整个列表)中的日志服务(monolog.logger.XXX)相对应并且这些被注入到不同的服务中。
切换频道到不同的 Handler 中
现在,假设你想要记录 security 频道的日志到一个不同的文件中。为了完成这个,创建一个新的 handler 并且将它配置成只记录来自于 security 频道的日志。你可以在在所有环境下的 config.yml 中添加这个来记录日志,或者只是在 prod 中发生 config_prod.yml:
YAML:
# app/config/config.yml
monolog:
handlers:
security:
# log all messages (since debug is the lowest level)
level: debug
type: stream
path: "%kernel.logs_dir%/security.log"
channels: [security]
# an example of *not* logging security channel messages for this handler
main:
# ...
# channels: ["!security"]
XML:
<!-- app/config/config.xml -->
<container xmlns="http://symfony.com/schema/dic/services"
xmlns:xsi="http://www.w3.org/2001/XMLSchema-instance"
xmlns:monolog="http://symfony.com/schema/dic/monolog"
xsi:schemaLocation="http://symfony.com/schema/dic/services
http://symfony.com/schema/dic/services/services-1.0.xsd
http://symfony.com/schema/dic/monolog
http://symfony.com/schema/dic/monolog/monolog-1.0.xsd"
>
<monolog:config>
<monolog:handler name="security" type="stream" path="%kernel.logs_dir%/security.log">
<monolog:channels>
<monolog:channel>security</monolog:channel>
</monolog:channels>
</monolog:handler>
<monolog:handler name="main" type="stream" path="%kernel.logs_dir%/main.log">
<!-- ... -->
<monolog:channels>
<monolog:channel>!security</monolog:channel>
</monolog:channels>
</monolog:handler>
</monolog:config>
</container>
PHP:
// app/config/config.php
$container->loadFromExtension('monolog', array(
'handlers' => array(
'security' => array(
'type' => 'stream',
'path' => '%kernel.logs_dir%/security.log',
'channels' => array(
'security',
),
),
'main' => array(
// ...
'channels' => array(
'!security',
),
),
),
));
YAML 说明书
你可以通过多种形式指定配置:
channels: ~ # Include all the channels
channels: foo # Include only channel "foo"
channels: "!foo" # Include all channels, except "foo"
channels: [foo, bar] # Include only channels "foo" and "bar"
channels: ["!foo", "!bar"] # Include all channels, except "foo" and "bar"
创建你自己的信道
你可以一次将信道日志改变到一个服务。这既不是通过下面的配置也不是通过给你的服务添加 monolog.logger 标签并指定这个服务应该记录哪个信道的日志来完成的。有了这个标签,注入到服务中的日志记录器早就设置好使用你所指定的信道了。
不使用被标签的服务来设置附加信道
使用 MonologBundle 2.4 你可以配置附加信道而不需要给你的服务加标签:
YAML:
# app/config/config.yml
monolog:
channels: ["foo", "bar"]
XML:
<!-- app/config/config.xml -->
<container xmlns="http://symfony.com/schema/dic/services"
xmlns:xsi="http://www.w3.org/2001/XMLSchema-instance"
xmlns:monolog="http://symfony.com/schema/dic/monolog"
xsi:schemaLocation="http://symfony.com/schema/dic/services
http://symfony.com/schema/dic/services/services-1.0.xsd
http://symfony.com/schema/dic/monolog
http://symfony.com/schema/dic/monolog/monolog-1.0.xsd"
>
<monolog:config>
<monolog:channel>foo</monolog:channel>
<monolog:channel>bar</monolog:channel>
</monolog:config>
</container>
PHP:
// app/config/config.php
$container->loadFromExtension('monolog', array(
'channels' => array(
'foo',
'bar',
),
));
有了这个,你现在就可以使用自动注册的日志服务 monolog.logger.foo 将日志信息发送到 foo 频道了。
从指导书中学习更多
17
分析器
Symfony 的分析器将数据采集功能委托给数据收集器。Symfony 在默认上捆绑了一些数据收集器,但是你可以很容易地按照自己的需求创建自定义的收集器。
创建一个自定义的数据收集器
创建一个自定义的数据收集器,所需要做的实质工作就是实现数据收集器接口类 DataCollectorInterface:
interface DataCollectorInterface
{
/**
* Collects data for the given Request and Response.
*
* @param Request $request A Request instance
* @param Response $response A Response instance
* @param \Exception $exception An Exception instance
*/
function collect(Request $request, Response $response, \Exception $exception = null);
/**
* Returns the name of the collector.
*
* @return string The collector name
*/
function getName();
}
上述的 getName() 方法返回值必须是一个独一无二的名字。这是被用来之后进行信息访问的依据(可以在功能测试章节查看如何使用分析器文档来获得使用实例)。
而 collect() 方法负责存储想要被提供给局部属性的数据。
未探查序列化数据采集器的情况下,你不应该存储不可序列化的对象(如 PDO 对象),或者你需要提供自己的 serialize() 方法。
大部分的时间,扩展数据采集器和填充 $this->数据属性(它需要序列化 $this->数据属性)是非常方便的:
class MemoryDataCollector extends DataCollector
{
public function collect(Request $request, Response $response, \Exception $exception = null)
{
$this->data = array(
'memory' => memory_get_peak_usage(true),
);
}
public function getMemory()
{
return $this->data['memory'];
}
public function getName()
{
return 'memory';
}
}
使自定义数据收集器生效
为使一个数据收集器生效,将它添加进你的一个配置表中的常规服务,并把它附属在 data_collector 之后:
YAML:
services
:
data_collector.your_collector_name
:
class
:
Fully\Qualified\Collector\Class\Name
tags
:
- { name
:
data_collector
}
XML:
<service
id
=
"data_collector.your_collector_name"
class
=
"Fully\Qualified\Collector\Class\Name"
>
<tag
name
=
"data_collector"
/>
</service
>
PHP:
$container
->
register
(
'data_collector.your_collector_name'
,
'Fully\Qualified\Collector\Class\Name'
)
->
addTag
(
'data_collector'
)
;
添加网络分析器模板
当你想在网络调试工具条或网络分析器上显示你的数据收集器收集的数据,您将需要创建一个 Twig 模板。下面的例子可以帮助你开始:
{% extends 'WebProfilerBundle:Profiler:layout.html.twig' %}
{% block toolbar %}
{# This toolbar item may appear along the top or bottom of the screen.#}
{% set icon %}
<span class="icon"><img src="data:image/png;base64,iVBORw0KGgoAAAANSUhEUgAAABoAAAAcCAQAAADVGmdYAAAAAmJLR0QA/4ePzL8AAAAJcEhZcwAACxMAAAsTAQCanBgAAAAHdElNRQffAxkBCDStonIVAAAAGXRFWHRDb21tZW50AENyZWF0ZWQgd2l0aCBHSU1QV4EOFwAAAHpJREFUOMtj3PWfgXRAuqZd/5nIsIdhVBPFmgqIjCuYOrJsYtz1fxuUOYER2TQID8afwIiQ8YIkI4TzCv5D2AgaWSuExJKMIDbA7EEVhQEWXJ6FKUY4D48m7HYU/EcWZ8JlE6qfMELPDcUJuEMPxvYazYTDWRMjOcUyAEswO+VjeQQaAAAAAElFTkSuQmCC" alt=""/></span>
<span class="sf-toolbar-status">Example</span>
{% endset %}
{% set text %}
<div class="sf-toolbar-info-piece">
<b>Quick piece of data</b>
<span>100 units</span>
</div>
<div class="sf-toolbar-info-piece">
<b>Another quick thing</b>
<span>300 units</span>
</div>
{% endset %}
{# Set the "link" value to false if you do not have a big "panel"
section that you want to direct the user to. #}
{% include '@WebProfiler/Profiler/toolbar_item.html.twig' with { 'link': true } %}
{% endblock %}
{% block head %}
{# Optional, if you need your own JS or CSS files. #}
{{ parent() }} {# Use parent() to keep the default styles #}
{% endblock %}
{% block menu %}
{# This left-hand menu appears when using the full-screen profiler. #}
<span class="label">
<span class="icon"><img src="data:image/png;base64,iVBORw0KGgoAAAANSUhEUgAAABoAAAAcCAQAAADVGmdYAAAAAmJLR0QA/4ePzL8AAAAJcEhZcwAACxMAAAsTAQCanBgAAAAHdElNRQffAxkBCDStonIVAAAAGXRFWHRDb21tZW50AENyZWF0ZWQgd2l0aCBHSU1QV4EOFwAAAHpJREFUOMtj3PWfgXRAuqZd/5nIsIdhVBPFmgqIjCuYOrJsYtz1fxuUOYER2TQID8afwIiQ8YIkI4TzCv5D2AgaWSuExJKMIDbA7EEVhQEWXJ6FKUY4D48m7HYU/EcWZ8JlE6qfMELPDcUJuEMPxvYazYTDWRMjOcUyAEswO+VjeQQaAAAAAElFTkSuQmCC" alt=""/></span>
<strong>Example Collector</strong>
</span>
{% endblock %}
{% block panel %}
{# Optional, for showing the most details. #}
<h2>Example</h2>
<p>
<em>Major information goes here</em>
</p>
{% endblock %}
每个块都是可选的。工具栏块用于网页调试工具,菜单和面板用于将一个面板添加到网络分析器中。
所有块都有访问收集器对象的权限。
内置的模板使用 Base64 编码的图像工具栏:
<img src="data:image/png;base64,..." />
你可以很容易利用这个小脚本计算出图像的 base64 值:
#!/usr/bin/env php
<?php
echo base64_encode(file_get_contents($_SERVER['argv'][1]));
为了使模板生效,在您配置的 data_collector 标签中添加模板属性。例如,假设你的模板是在一些 AcmeDebugBundle 中,那么:
YAML:
services
:
data_collector.your_collector_name
:
class
:
Acme\DebugBundle\Collector\Class\Name
tags
:
- { name
:
data_collector, template
:
"AcmeDebugBundle:Collector:templatename"
,
XML:
<service
id
=
"data_collector.your_collector_name"
class
=
"Acme\DebugBundle\Collector\Class\Name"
>
<tag
name
=
"data_collector"
template
=
"AcmeDebugBundle:Collector:templatename"
id
=
"your_collector_name"
/>
</service
>
PHP:
$container
->
register
(
'data_collector.your_collector_name'
,
'Acme\DebugBundle\Collector\Class\Name'
)
->
addTag
(
'data_collector'
,
array
(
'template'
=>
'AcmeDebugBundle:Collector:templatename'
,
'id'
=>
'your_collector_name'
,
)
)
;
记得确保你的 ID 属性与用于 getname() 方法的字符串相同。
默认情况下,分析器只在开发环境中被启用。但可以想象的是作为一个开发商想要看到分析器即使是在产品中。另一种情况可能是,仅当一个管理员登录时,你想要启用分析器。你可以通过使用匹配器在这些情况下实现分析器的启用。
使用内置的匹配
Symfony 提供了一个内置的匹配器用来匹配路径和 IPS 。例如,如果你需要仅当 168.0.0.1 IP 访问网页时显示分析器,那么你可以使用这个配置:
YAML:
# app/config/config.yml
framework
:
# ...
profiler
:
matcher
:
ip
:
168.0.0.1
XML:
<!-- app/config/config.xml -->
<framework:config
>
<framework:profiler
ip
=
"168.0.0.1"
/>
</framework:config
>
PHP:
// app/config/config.php
$container
->
loadFromExtension
(
'framework'
,
array
(
'profiler'
=>
array
(
'ip'
=>
'168.0.0.1'
,
)
,
)
)
;
还可以设置路径选项来定义应启用分析器的路径。 例如,设置它为 ^/admin/
将使仅为 ^/admin/
网址来启用分析器。
创建一个自定义匹配器
你也可以创建一个自定义的匹配器。这是一个检查是否启用或不启用分析器的服务。创建这个服务,创建一个类实现 requestmatcherinterface 接口。这个接口需要一个方法:matches()。 此方法返回假以禁用事件分析器和返回真来启用分析器。
// src/AppBundle/Profiler/SuperAdminMatcher.php
namespace AppBundle\Profiler;
use Symfony\Component\Security\Core\Authorization\AuthorizationCheckerInterface;
use Symfony\Component\HttpFoundation\Request;
use Symfony\Component\HttpFoundation\RequestMatcherInterface;
class SuperAdminMatcher implements RequestMatcherInterface
{
protected $authorizationChecker;
public function __construct(AuthorizationCheckerInterface $authorizationChecker)
{
$this->authorizationChecker = $authorizationChecker;
}
public function matches(Request $request)
{
return $this->authorizationChecker->isGranted('ROLE_SUPER_ADMIN');
}
}
在 Symfony 2.6 中介绍了 AuthorizationCheckerInterface 。之前,你必须使用 SecurityContextInterface 中的 isGranted 方法。
然后,您需要配置服务:
YAML:
# app/config/services.yml
services
:
app.profiler.matcher.super_admin
:
class
:
AppBundle\Profiler\SuperAdminMatcher
arguments
:
[
"@security.authorization_checker"
]
XML:
<!-- app/config/services.xml -->
<services
>
<service
id
=
"app.profiler.matcher.super_admin"
class
=
"AppBundle\Profiler\SuperAdminMatcher"
>
<argument
type
=
"service"
id
=
"security.authorization_checker"
/>
</services
>
PHP:
// app/config/services.php
use
Symfony\Component\DependencyInjection\Definition
;
use
Symfony\Component\DependencyInjection\Reference
;
$container
->
setDefinition
(
'app.profiler.matcher.super_admin'
,
new
Definition
(
'AppBundle\Profiler\SuperAdminMatcher'
,
array
(
new
Reference
(
'security.authorization_checker'
)
)
)
;
Symfony 2.6 中介绍了安全认证检查服务(security.authorization_checker service) ,你必须使用 security.context 服务中的 isGranted() 方法。
现在服务已经被注册,唯一剩下要做的就是配置分析器使用该服务作为匹配器:
YAML:
# app/config/config.yml
framework
:
# ...
profiler
:
matcher
:
service
:
app.profiler.matcher.super_admin
XML:
<!-- app/config/config.xml -->
<framework:config
>
<!-- ... -->
<framework:profiler
service
=
"app.profiler.matcher.super_admin"
/>
</framework:config
>
PHP:
// app/config/config.php
$container
->
loadFromExtension
(
'framework'
,
array
(
// ...
'profiler'
=>
array
(
'service'
=>
'app.profiler.matcher.super_admin'
,
)
,
)
)
;
默认情况下,配置文件将收集的数据存储在缓存目录的文件中。你可以通过 dsn ,用户名,密码和有效时间的选项来控制存储。例如,下面的配置使用 MySQL 作为分析器的生命周期为一小时的存储方式:
YAML:
# app/config/config.yml
framework
:
profiler
:
dsn
:
"mysql:host=localhost;dbname=%database_name%"
username
:
"%database_user%"
password
:
"%database_password%"
lifetime
:
3600
XML:
<!-- app/config/config.xml -->
<?xml
version
=
"1.0"
encoding
=
"UTF-8"
?>
<container
xmlns
=
"http://symfony.com/schema/dic/services"
xmlns:xsi
=
"http://www.w3.org/2001/XMLSchema-instance"
xmlns:framework
=
"http://symfony.com/schema/dic/symfony"
xsi:schemaLocation
=
"http://symfony.com/schema/dic/services
http://symfony.com/schema/dic/services/services-1.0.xsd
http://symfony.com/schema/dic/symfony
http://symfony.com/schema/dic/symfony/symfony-1.0.xsd"
>
<framework:config
>
<framework:profiler
dsn
=
"mysql:host=localhost;dbname=%database_name%"
username
=
"%database_user%"
password
=
"%database_password%"
lifetime
=
"3600"
/>
</framework:config
>
</container
>
PHP:
// app/config/config.php
// ...
$container
->
loadFromExtension
(
'framework'
,
array
(
'profiler'
=>
array
(
'dsn'
=>
'mysql:host=localhost;dbname=%database_name%'
,
'username'
=>
'%database_user'
,
'password'
=>
'%database_password%'
,
'lifetime'
=>
3600
,
)
,
)
)
;
HttpKernel 组件目前支持以下几种分析器存储驱动程序:
- 文件
- sqlite
- mysql
- mongodb
- memcache
- memcached
- redis
大多数时候,分析器信息的访问和分析是基于 Web 的可视化的。当然,你也可以利用分析器服务提供的方法以编程方式检索分析信息。
当响应对象是可用的,使用 loadProfileFromResponse() 方法获得其相关分析器权限:
// ... $profiler is the 'profiler' service
$profile = $profiler->loadProfileFromResponse($response);
当分析器存储了关于请求的数据时,它还将为之绑定一个令牌;这个令牌在响应的 X-Debug-Token HTTP 头中是可用的。使用此令牌,你可以利用 loadProfile() 方法访问任何过去的响应:
$token = $response->headers->get('X-Debug-Token');
$profile = $container->get('profiler')->loadProfile($token);
当分析器启用而 Web 调试工具栏没有启用的话,使用你的浏览器的开发者工具获得的 X-Debug-Token HTTP 头部的值来检查页面。
分析器服务也提供了 find() 方法来查看一些基于标准的令牌:
// get the latest 10 tokens
$tokens = $container->get('profiler')->find('', '', 10, '', '');
// get the latest 10 tokens for all URL containing /admin/
$tokens = $container->get('profiler')->find('', '/admin/', 10, '', '');
// get the latest 10 tokens for local requests
$tokens = $container->get('profiler')->find('127.0.0.1', '', 10, '', '');
// get the latest 10 tokens for requests that happened between 2 and 4 days ago
$tokens = $container->get('profiler')
->find('', '', 10, '4 days ago', '2 days ago');
最后,如果你想在一个与生成信息的机器不同的机器上操纵分析数据的话,使用 profiler:export 和 profiler:import 命令:
# on the production machine
$ php app/console profiler:export > profile.data
# on the development machine
$ php app/console profiler:import /path/to/profile.data
# you can also pipe from the STDIN
$ cat /path/to/profile.data | php app/console profiler:import
18
请求
当你部署应用程序时,你可能将其部署在一个负载平衡器(如 AWS 弹性负载平衡器)或反向代理(如 Varnish 缓存)之后。
在大多数情况下,这不会在 Symfony 中造成任何问题。但是,当一个请求通过一个代理时,必须保证要求发送的信息使用标准 Forwarded 头或非标准的特殊 X-Forwarded-* 头。 例如,并不读 REMOTE_ADDR 报头(这将是你现在的反向代理的IP地址),用户的真实 IP 将被存储在一个标准的 Forwarded 像 for:="..." 头或非标准 X-Forwarded-For 报文头。
2.7 在 Symfony 2.7 中介绍了 Forwarded 头的相关内容。
如果你不配置 Symfony 去查看这些头文件,你会得到不正确的客户端的 IP 地址,无论客户端是否是通过 HTTPS 连接,客户端的端口和主机名是否被请求。
解决方案:可信代理(trusted_proxies)
这是没有问题的,但是你需要告诉 Symfony 发生了这样的事情,然后反向代理 IP 地址做这件事:
YAML:
# app/config/config.yml
# ...
framework
:
trusted_proxies
:
[
192.0.0.1, 10.0.0.0/
8
]
XML:
<!-- app/config/config.xml -->
<?xml
version
=
"1.0"
encoding
=
"UTF-8"
?>
<container
xmlns
=
"http://symfony.com/schema/dic/services"
xmlns:xsi
=
"http://www.w3.org/2001/XMLSchema-instance"
xmlns:framework
=
"http://symfony.com/schema/dic/symfony"
xsi:schemaLocation
=
"http://symfony.com/schema/dic/services http://symfony.com/schema/dic/services/services-1.0.xsd
http://symfony.com/schema/dic/symfony http://symfony.com/schema/dic/symfony/symfony-1.0.xsd"
>
<framework:config
trusted-proxies
=
"192.0.0.1, 10.0.0.0/8"
>
<!-- ... -->
</framework
>
</container
>
PHP:
// app/config/config.php
$container
->
loadFromExtension
(
'framework'
,
array
(
'trusted_proxies'
=>
array
(
'192.0.0.1'
,
'10.0.0.0/8'
)
,
)
)
;
在这个例子中,你说你的反向代理(或代理们)的IP地址为 192.0.0.1 或匹配使用 CIDR 符号的 IP 地址范围是 10.0.0.0/8 。更多的细节请看 framework.trusted_proxies 选项。
就是这样!Symfony 会现在查看正确的报文头并去获得客户端的 IP 地址,主机,端口和请求是否使用 HTTPS 等信息。
但是如果我的反向代理的 IP 地址是不断变化的怎么办!
一些反向代理(如亚马逊的弹性负载平衡器)没有一个静态 IP 地址或地址范围以便你可以用 CIDR 标记目标。在这种情况下,你需要-非常小心-相信所有的代理。
- 配置您的 Web 服务器(们)不回应除你的流量负载均衡以外的其它任何客户的任何传输信息。对于 AWS,这可以通过安全组来实现。
- 一旦你保证流量只会来自你信任的反向代理服务器,配置 Symfony 使之始终信任传入的请求。这是在您的前端控制器实现的:
// web/app.php
// ...
Request::setTrustedProxies(array($request->server->get('REMOTE_ADDR')));
$response = $kernel->handle($request);
// ...
- 确保在你的 app/config/config.yml 设置中的 trusted_proxies 没有被改变设置否则将改写上面的 setTrustedProxies 的调用。
就是这样!这一步是至关重要的,您可以防止流量从所有不受信任的来源进入。如果你允许外部访问,它们可以“欺骗”自己的真实IP地址等信息。
我的反向代理使用非标准(非 X-Forwarded)头
虽然 RFC 7239 近期定义了标准的转发头来涵盖所有的代理信息,但大多数反向代理仍将信息存储在非标 X-Forwarded-* 头中。
但是如果你的反向代理使用其它非标准的头文件,你可以配置这些(见"Trusting Proxies")。
这样的代码需要在你的前端控制器激活(如 Web 应用,PHP)。
每个请求都有一个“格式”(如 HTML,JSON),这是用来确定在响应中返回什么类型的内容。事实上,请求格式,可以通过 getRequestFormat() 来看到的,是用于设置在响应对象中内容类型头的 MIME 类型的。在内部,Symfony 包含了最常见的格式(例如 HTML,JSON)及其相关的 MIME 类型(例如 text/html, application/json)的映射。当然,其它格式的 MIME 类型的条目可以很容易地被添加。本文档将介绍如何添加 jsonp 格式和相应的 MIME 类型。
配置你的新格式
FrameworkBundle 注册一个用户,来添加传入的请求的格式。
你需要做的所有事情就是配置 jsonp 格式:
YAML:
# app/config/config.yml
framework
:
request
:
formats
:
jsonp
:
'application/javascript'
XML:
<!-- app/config/config.xml -->
<?xml
version
=
"1.0"
encoding
=
"UTF-8"
?>
<container
xmlns
=
"http://symfony.com/schema/dic/services"
xmlns:xsi
=
"http://www.w3.org/2001/XMLSchema-instance"
xmlns:framework
=
"http://symfony.com/schema/dic/symfony"
xsi:schemaLocation
=
"http://symfony.com/schema/dic/services
http://symfony.com/schema/dic/services/services-1.0.xsd
http://symfony.com/schema/dic/symfony
http://symfony.com/schema/dic/symfony/symfony-1.0.xsd"
>
<framework:config
>
<framework:request
>
<framework:format
name
=
"jsonp"
>
<framework:mime-type
>
application/javascript
</framework:mime-type
>
</framework:format
>
</framework:request
>
</framework:config
>
</container
>
PHP:
// app/config/config.php
$container
->
loadFromExtension
(
'framework'
,
array
(
'request'
=>
array
(
'formats'
=>
array
(
'jsonp'
=>
'application/javascript'
,
)
,
)
,
)
)
;
你也可以将多个 MIME 类型与一个格式关联,但是请注意,首选项必须是它将作为内容类型的:
YAML:
# app/config/config.yml
framework
:
request
:
formats
:
csv
:
[
'text/csv', 'text/plain'
]
XML:
<!-- app/config/config.xml -->
<?xml
version
=
"1.0"
encoding
=
"UTF-8"
?>
<container
xmlns
=
"http://symfony.com/schema/dic/services"
xmlns:xsi
=
"http://www.w3.org/2001/XMLSchema-instance"
xmlns:framework
=
"http://symfony.com/schema/dic/symfony"
xsi:schemaLocation
=
"http://symfony.com/schema/dic/services
http://symfony.com/schema/dic/services/services-1.0.xsd
http://symfony.com/schema/dic/symfony
http://symfony.com/schema/dic/symfony/symfony-1.0.xsd"
>
<framework:config
>
<framework:request
>
<framework:format
name
=
"csv"
>
<framework:mime-type
>
text/csv
</framework:mime-type
>
<framework:mime-type
>
text/plain
</framework:mime-type
>
</framework:format
>
</framework:request
>
</framework:config
>
</container
>
PHP:
// app/config/config.php
$container
->
loadFromExtension
(
'framework'
,
array
(
'request'
=>
array
(
'formats'
=>
array
(
'jsonp'
=>
array
(
'text/csv'
,
'text/plain'
,
)
,
)
,
)
,
)
)
;
在 Symfony 2.1 之前,本地设置被存储在被称为 _locale 的会话的属性中。从 2.1 版本开始,它储存在 Request 里,这意味着在一次用户请求中它不是“粘性的(sticky)”,在本文中,您将学习如何让用户的本地设置“粘性(sticky)”,一旦设定,相同的本地设置将被用于所有后续请求。
创建一个 LocaleListener
为了模拟储存在一个会话中的本地设置,您需要创建并注册一个新的事件监听器。为了模拟储存在一个会话中的本地设置,您需要创建并注册一个新的事件监听器。监听器是像这样的东西。通常情况下,_locale 被用作一个路由参数来表示本地设置,虽然它并不影响你如何确定一个请求所需的设置。
PHP:
// src/AppBundle/EventListener/LocaleListener.php
namespace
AppBundle\EventListener
;
use
Symfony\Component\HttpKernel\Event\GetResponseEvent
;
use
Symfony\Component\HttpKernel\KernelEvents
;
use
Symfony\Component\EventDispatcher\EventSubscriberInterface
;
class
LocaleListener implements EventSubscriberInterface
{
private
$defaultLocale
;
public
function
__construct
(
$defaultLocale
=
'en'
)
{
$this
->
defaultLocale
=
$defaultLocale
;
}
public
function
onKernelRequest
(
GetResponseEvent
$event
)
{
$request
=
$event
->
getRequest
(
)
;
if
(
!
$request
->
hasPreviousSession
(
)
)
{
return
;
}
// try to see if the locale has been set as a _locale routing parameter
if
(
$locale
=
$request
->
attributes
->
get
(
'_locale'
)
)
{
$request
->
getSession
(
)
->
set
(
'_locale'
,
$locale
)
;
}
else
{
// if no explicit locale has been set on this request, use one from the session
$request
->
setLocale
(
$request
->
getSession
(
)
->
get
(
'_locale'
,
$this
->
defaultLocale
)
)
;
}
}
public
static
function
getSubscribedEvents
(
)
{
return
array
(
// must be registered before the default Locale listener
KernelEvents
::
REQUEST
=>
array
(
array
(
'onKernelRequest'
,
17
)
)
,
)
;
}
}
然后注册监听器。
YAML:
services
:
app.locale_listener
:
class
:
AppBundle\EventListener\LocaleListener
arguments
:
[
"%kernel.default_locale%"
]
tags
:
- { name
:
kernel.event_subscriber
}
XML:
<service
id
=
"app.locale_listener"
class
=
"AppBundle\EventListener\LocaleListener"
>
<argument
>
%kernel.default_locale%
</argument
>
<tag
name
=
"kernel.event_subscriber"
/>
</service
>
PHP
use
Symfony\Component\DependencyInjection\Definition
;
$container
->
setDefinition
(
'app.locale_listener'
,
new
Definition
(
'AppBundle\EventListener\LocaleListener'
,
array
(
'%kernel.default_locale%'
)
)
)
->
addTag
(
'kernel.event_subscriber'
)
;
好了!现在通过改变用户设置并查看它在所有请求中都是粘性的(sticky)。记住,想要得到用户设置,使用 Request::getLocale 这个方法。
PHP:
// from a controller...
use
Symfony\Component\HttpFoundation\Request
;
public
function
indexAction
(
Request
$request
)
{
$locale
=
$request
->
getLocale
(
)
;
}
根据用户的喜好设置本地设置
您可能希望进一步提高该技术,并且以已登录用户的用户实体为依据定义本地设置。然而,由于 LocaleListener 比负责处理身份验证和设置具有 TokenStorage 的用户的 FirewallListener 早调用,您无法访问已登录用户。
假设您已经在 User 实体上定义了 locale 属性并且您想用此作为特定用户的本地设置。要做到这一点,您可以在登录过程和更新用户会话被重定向到它们的的第一个页面之前,用这个本地设置值将它们挂钩连接(hook into)。
要做到这一点,您需要对 security.interactive_login 事件添加一个事件监听器。
PHP:
// src/AppBundle/EventListener/UserLocaleListener.php
namespace
AppBundle\EventListener
;
use
Symfony\Component\HttpFoundation\Session\Session
;
use
Symfony\Component\Security\Http\Event\InteractiveLoginEvent
;
/**
* Stores the locale of the user in the session after the
* login. This can be used by the LocaleListener afterwards.
*/
class
UserLocaleListener
{
/**
* @var Session
*/
private
$session
;
public
function
__construct
(
Session
$session
)
{
$this
->
session
=
$session
;
}
/**
* @param InteractiveLoginEvent $event
*/
public
function
onInteractiveLogin
(
InteractiveLoginEvent
$event
)
{
$user
=
$event
->
getAuthenticationToken
(
)
->
getUser
(
)
;
if
(
null
!==
$user
->
getLocale
(
)
)
{
$this
->
session
->
set
(
'_locale'
,
$user
->
getLocale
(
)
)
;
}
}
}
然后注册监听器。
YAML:
# app/config/services.yml
services
:
app.user_locale_listener
:
class
:
AppBundle\EventListener\UserLocaleListener
arguments
:
[
@session
]
tags
:
- { name
:
kernel.event_listener, event
:
security.interactive_login, method
:
onInteractiveLogin
}
XML:
<!-- app/config/services.xml -->
<?xml
version
=
"1.0"
encoding
=
"UTF-8"
?>
<container
xmlns
=
"http://symfony.com/schema/dic/services"
xmlns:xsi
=
"http://www.w3.org/2001/XMLSchema-instance"
xsi:schemaLocation
=
"http://symfony.com/schema/dic/services
http://symfony.com/schema/dic/services/services-1.0.xsd"
>
<services
>
<service
id
=
"app.user_locale_listener"
class
=
"AppBundle\EventListener\UserLocaleListener"
>
<argument
type
=
"service"
id
=
"session"
/>
<tag
name
=
"kernel.event_listener"
event
=
"security.interactive_login"
method
=
"onInteractiveLogin"
/>
</service
>
</services
>
</container
>
PHP:
// app/config/services.php
$container
->
register
(
'app.user_locale_listener'
,
'AppBundle\EventListener\UserLocaleListener'
)
->
addArgument
(
'session'
)
->
addTag
(
'kernel.event_listener'
,
array
(
'event'
=>
'security.interactive_login'
,
'method'
=>
'onInteractiveLogin'
)
;
为了在用户更改语言偏好后立即更新语言,您需要在更新 User 实体后更新会话。
19
路由
有时,你想保护一些路径,确保它们总是通过 HTTPS 协议访问。路由组件允许你有计划的执行 URI 模式:
YAML:
secure
:
path
:
/secure
defaults
:
{
_controller
:
AppBundle:Main:secure
}
schemes
:
[
https
]
XML:
<?xml
version
=
"1.0"
encoding
=
"UTF-8"
?>
<routes
xmlns
=
"http://symfony.com/schema/routing"
xmlns:xsi
=
"http://www.w3.org/2001/XMLSchema-instance"
xsi:schemaLocation
=
"http://symfony.com/schema/routing http://symfony.com/schema/routing/routing-1.0.xsd"
>
<route
id
=
"secure"
path
=
"/secure"
schemes
=
"https"
>
<default
key
=
"_controller"
>
AppBundle:Main:secure
</default
>
</route
>
</routes
>
PHP:
use
Symfony\Component\Routing\RouteCollection
;
use
Symfony\Component\Routing\Route
;
$collection
=
new
RouteCollection
(
)
;
$collection
->
add
(
'secure'
,
new
Route
(
'/secure'
,
array
(
'_controller'
=>
'AppBundle:Main:secure'
,
)
,
array
(
)
,
array
(
)
,
''
,
array
(
'https'
)
)
)
;
return
$collection
;
上述的配置使得安全路由总是使用 HTTPS 访问。
当生成安全网址时,如果目前的方案是 HTTP ,Symfony 会自动生成一个使用 HTTPS 的绝对 URL 的格式:
{# If the current scheme is HTTPS #}
{{ path('secure') }}
{# generates /secure #}
{# If the current scheme is HTTP #}
{{ path('secure') }}
{# generates https://example.com/secure #}
我们对输入的请求也执行同样的要求。当使用 HTTPS 方案的时候,如果你试图用 HTTP 访问 /secure 的路径,你会被自动重定向到同一个 URL。
上面的例子是强制使用 HTTPS 的方案,但你也可以强制 URL 总是使用 HTTP。
安全组件提供了另一种方式设置通过 requires_channel 设置项来执行 HTTP 或 HTTPS 。这种替代方法是更适合用于你的网站的某一区域( 所有在 /admin 目录下的 URL )或当你想保护定义在第三方包中的 URL 时(请在如何强制对不同 URL 执行 HTTPS 或 HTTP 中查看更多的细节)。
有时,您需要包含一个 / 参数来组成 URL 。例如,采取经典的 /hello/{username}
路径。默认情况下,/hello/Fabien
将匹配该条路径而不是 /hello/Fabien/Kris
。这是因为 Symfony 使用这个字符作为路径各部分之间的分隔符。
本指南包括如何修改路径使 /hello/Fabien/Kris
匹配 /hello/{username}
,且此时 {username} 等于 Fabien/Kris。
配置路径
默认情况下,Symfony 的路由组件要求的参数匹配下面的正则表达式的路径:[ / ] + ^。这意味着除了 / 外所有的字符都是被允许的。
你必须通过指定一个更宽松的正则路径明确地允许/ 成为你参数的一部分。
Annotations:
use Sensio\Bundle\FrameworkExtraBundle\Configuration\Route;
class DemoController
{
/**
* @Route("/hello/{username}", name="_hello", requirements={"username"=".+"})
*/
public function helloAction($username)
{
// ...
}
}
YAML:
_hello
:
path
:
/hello/
{
username
}
defaults
:
{
_controller
:
AppBundle:Demo:hello
}
requirements
:
username
:
.+
XML:
<?xml
version
=
"1.0"
encoding
=
"UTF-8"
?>
<routes
xmlns
=
"http://symfony.com/schema/routing"
xmlns:xsi
=
"http://www.w3.org/2001/XMLSchema-instance"
xsi:schemaLocation
=
"http://symfony.com/schema/routing http://symfony.com/schema/routing/routing-1.0.xsd"
>
<route
id
=
"_hello"
path
=
"/hello/{username}"
>
<default
key
=
"_controller"
>
AppBundle:Demo:hello
</default
>
<requirement
key
=
"username"
>
.+
</requirement
>
</route
>
</routes
>
PHP:
use
Symfony\Component\Routing\RouteCollection
;
use
Symfony\Component\Routing\Route
;
$collection
=
new
RouteCollection
(
)
;
$collection
->
add
(
'_hello'
,
new
Route
(
'/hello/{username}'
,
array
(
'_controller'
=>
'AppBundle:Demo:hello'
,
)
,
array
(
'username'
=>
'.+'
,
)
)
)
;
return
$collection
;
就是这样!现在,{username} 参数就可以包含 / 字符了。
有时,一个 URL 网址需要重定向到另一个 URL 网址。你可以通过创建一个新的唯一任务是重定向的控制器动作来实现它,但使用的 FrameworkBundle 的 RedirectController 会更容易。
你可以使用网页名称(如 homepage )来重定向到一个特定的路径(例如 /about )或一个特定的路由。
使用路径重定向
假定您的应用程序的 / 路径没有默认控制器,并且您希望将这些请求重定向到 /app 。您将需要使用 urlRedirect() 方法来重定向到这个新的 URL:
YAML:
# app/config/routing.yml
# load some routes - one should ultimately have the path "/app"
AppBundle
:
resource
:
"@AppBundle/Controller/"
type
:
annotation
prefix
:
/app
# redirecting the root
root
:
path
:
/
defaults
:
_controller
:
FrameworkBundle:Redirect:urlRedirect
path
:
/app
permanent
:
true
XML:
<!-- app/config/routing.xml -->
<?xml
version
=
"1.0"
encoding
=
"UTF-8"
?>
<routes
xmlns
=
"http://symfony.com/schema/routing"
xmlns:xsi
=
"http://www.w3.org/2001/XMLSchema-instance"
xsi:schemaLocation
=
"http://symfony.com/schema/routing
http://symfony.com/schema/routing/routing-1.0.xsd"
>
<!-- load some routes - one should ultimately have the path "/app" -->
<import
resource
=
"@AppBundle/Controller/"
type
=
"annotation"
prefix
=
"/app"
/>
<!-- redirecting the root -->
<route
id
=
"root"
path
=
"/"
>
<default
key
=
"_controller"
>
FrameworkBundle:Redirect:urlRedirect
</default
>
<default
key
=
"path"
>
/app
</default
>
<default
key
=
"permanent"
>
true
</default
>
</route
>
</routes
>
PHP:
// app/config/routing.php
use
Symfony\Component\Routing\RouteCollection
;
use
Symfony\Component\Routing\Route
;
$collection
=
new
RouteCollection
(
)
;
// load some routes - one should ultimately have the path "/app"
$appRoutes
=
$loader
->
import
(
"@AppBundle/Controller/"
,
"annotation"
)
;
$appRoutes
->
setPrefix
(
'/app'
)
;
$collection
->
addCollection
(
$appRoutes
)
;
// redirecting the root
$collection
->
add
(
'root'
,
new
Route
(
'/'
,
array
(
'_controller'
=>
'FrameworkBundle:Redirect:urlRedirect'
,
'path'
=>
'/app'
,
'permanent'
=>
true
,
)
)
)
;
return
$collection
;
在这个例子中,你为 / 路径设置一个路由,让 RedirectController 将它重定向到 /app 。那么永久性的开关告诉动作发出 301 HTTP 状态代码代替默认的 302 HTTP 状态代码。
使用路由重定向
假设你正将你的网站从 WordPress 迁徙到 Symfony,你想重定向 /wp-admin 的路径到 sonata_admin_dashboard 的路由,但是你不知道路径,只知道路由名称。那么此时可以使用 redirect() 方法来实现:
YAML:
# app/config/routing.yml
# ...
# redirecting the admin home
root
:
path
:
/wp-admin
defaults
:
_controller
:
FrameworkBundle:Redirect:redirect
route
:
sonata_admin_dashboard
permanent
:
true
XML:
<!-- app/config/routing.xml -->
<?xml
version
=
"1.0"
encoding
=
"UTF-8"
?>
<routes
xmlns
=
"http://symfony.com/schema/routing"
xmlns:xsi
=
"http://www.w3.org/2001/XMLSchema-instance"
xsi:schemaLocation
=
"http://symfony.com/schema/routing
http://symfony.com/schema/routing/routing-1.0.xsd"
>
<!-- ... -->
<!-- redirecting the admin home -->
<route
id
=
"root"
path
=
"/wp-admin"
>
<default
key
=
"_controller"
>
FrameworkBundle:Redirect:redirect
</default
>
<default
key
=
"route"
>
sonata_admin_dashboard
</default
>
<default
key
=
"permanent"
>
true
</default
>
</route
>
</routes
>
PHP:
// app/config/routing.php
use
Symfony\Component\Routing\RouteCollection
;
use
Symfony\Component\Routing\Route
;
$collection
=
new
RouteCollection
(
)
;
// ...
// redirecting the root
$collection
->
add
(
'root'
,
new
Route
(
'/wp-admin'
,
array
(
'_controller'
=>
'FrameworkBundle:Redirect:redirect'
,
'route'
=>
'sonata_admin_dashboard'
,
'permanent'
=>
true
,
)
)
)
;
return
$collection
;
因为你需要重定向到一个路由而不是一个路径,所需的选项被称为重定向的行为路径,而不是在 url 重定向中的行为路径。
如何在路由中使用除了 GET 和 POST 的 HTTP 方法
一个请求的 HTTP 方法是可以查看是否匹配路由的请求中的一种。这种方法使在 “Routing” 这本书中路由那一章节的使用了 GET 和 POST 示例来介绍的。你也可以像这样使用其它 HTTP 动作。例如,如果你有一个博客文章条目,那么你可以使用相同的网址路径通过匹配 GET, PUT 和 DELETE 来显示它,改变它和删除它。
YAML:
blog_show
:
path
:
/blog/
{
slug
}
defaults
:
{
_controller
:
AppBundle:Blog:show
}
methods
:
[
GET
]
blog_update
:
path
:
/blog/
{
slug
}
defaults
:
{
_controller
:
AppBundle:Blog:update
}
methods
:
[
PUT
]
blog_delete
:
path
:
/blog/
{
slug
}
defaults
:
{
_controller
:
AppBundle:Blog:delete
}
methods
:
[
DELETE
]
XML:
<?xml
version
=
"1.0"
encoding
=
"UTF-8"
?>
<routes
xmlns
=
"http://symfony.com/schema/routing"
xmlns:xsi
=
"http://www.w3.org/2001/XMLSchema-instance"
xsi:schemaLocation
=
"http://symfony.com/schema/routing http://symfony.com/schema/routing/routing-1.0.xsd"
>
<route
id
=
"blog_show"
path
=
"/blog/{slug}"
methods
=
"GET"
>
<default
key
=
"_controller"
>
AppBundle:Blog:show
</default
>
</route
>
<route
id
=
"blog_update"
path
=
"/blog/{slug}"
methods
=
"PUT"
>
<default
key
=
"_controller"
>
AppBundle:Blog:update
</default
>
</route
>
<route
id
=
"blog_delete"
path
=
"/blog/{slug}"
methods
=
"DELETE"
>
<default
key
=
"_controller"
>
AppBundle:Blog:delete
</default
>
</route
>
</routes
>
PHP:
use
Symfony\Component\Routing\RouteCollection
;
use
Symfony\Component\Routing\Route
;
$collection
=
new
RouteCollection
(
)
;
$collection
->
add
(
'blog_show'
,
new
Route
(
'/blog/{slug}'
,
array
(
'_controller'
=>
'AppBundle:Blog:show'
,
)
,
array
(
)
,
array
(
)
,
''
,
array
(
)
,
array
(
'GET'
)
)
)
;
$collection
->
add
(
'blog_update'
,
new
Route
(
'/blog/{slug}'
,
array
(
'_controller'
=>
'AppBundle:Blog:update'
,
)
,
array
(
)
,
array
(
)
,
''
,
array
(
)
,
array
(
'PUT'
)
)
)
;
$collection
->
add
(
'blog_delete'
,
new
Route
(
'/blog/{slug}'
,
array
(
'_controller'
=>
'AppBundle:Blog:delete'
,
)
,
array
(
)
,
array
(
)
,
''
,
array
(
'DELETE'
)
)
)
;
return
$collection
;
使用 _method 伪造方法
这里显示的 _method 功能在 Symfony 2.2 中默认是禁用的,在 Symfony 2.3 中默认启用。要在 Symfony 2.2 中控制它,你必须在你处理请求之前)请求调用 Request::enableHttpMethodParameterOverride(例如,在你前端控制器中) 。在 Symfony2.3 中,使用 http_method_override 选项即可。
不幸的是,实际并非如此简单,因为大多数浏览器不支持通过 HTML 格式中的方法发送 PUT 和 DELETE 请求。但幸运的是,Symfony 提供了一个简单的方法来绕过这一限制,通过在查询字符串或 HTTP 请求参数中添加一个 _method 方法参数,Symfony 会利用这个方法来匹配路径。如果它们提交的不是 GET 或 POST, 那么表单会自动包含此参数的一个隐藏字段。更多信息请查看 the related chapter in the forms documentation 。
有时你会发现将你的路由的一部分变成全局可配置的是非常有用的。例如,如果你建立一个国际化的网站,你可能会开始在一个或两个地方。你肯定会想你的路由添加一个要求来防止用户匹配到其它地区而不是你支持的区域。
你可以要求你的 _locale 硬编码在你所有的路径中,但是一个更好的解决方案在你的路由配置中使用一个可配置的服务容器参数:
YAML:
# app/config/routing.yml
contact
:
path
:
/
{
_locale
}
/contact
defaults
:
{
_controller
:
AppBundle:Main:contact
}
requirements
:
_locale
:
"%app.locales%"
XML:
<!-- app/config/routing.xml -->
<?xml
version
=
"1.0"
encoding
=
"UTF-8"
?>
<routes
xmlns
=
"http://symfony.com/schema/routing"
xmlns:xsi
=
"http://www.w3.org/2001/XMLSchema-instance"
xsi:schemaLocation
=
"http://symfony.com/schema/routing http://symfony.com/schema/routing/routing-1.0.xsd"
>
<route
id
=
"contact"
path
=
"/{_locale}/contact"
>
<default
key
=
"_controller"
>
AppBundle:Main:contact
</default
>
<requirement
key
=
"_locale"
>
%app.locales%
</requirement
>
</route
>
</routes
>
PHP:
// app/config/routing.php
use
Symfony\Component\Routing\RouteCollection
;
use
Symfony\Component\Routing\Route
;
$collection
=
new
RouteCollection
(
)
;
$collection
->
add
(
'contact'
,
new
Route
(
'/{_locale}/contact'
,
array
(
'_controller'
=>
'AppBundle:Main:contact'
,
)
,
array
(
'_locale'
=>
'%app.locales%'
,
)
)
)
;
return
$collection
;
你现在就可以在你的容器的某个地方控制和设置 app.locales 参数了:
YAML:
# app/config/config.yml
parameters
:
app.locales
:
en|es
XML:
<!-- app/config/config.xml -->
<parameters
>
<parameter
key
=
"app.locales"
>
en|es
</parameter
>
</parameters
>
PHP:
// app/config/config.php
$container
->
setParameter
(
'app.locales'
,
'en|es'
)
;
你还可以使用一个参数来定义你的路由路径(或者你的路径的一部分):
YAML:
# app/config/routing.yml
some_route
:
path
:
/
%app.route_prefix%/contact
defaults
:
{
_controller
:
AppBundle:Main:contact
}
XML:
<!-- app/config/routing.xml -->
<?xml
version
=
"1.0"
encoding
=
"UTF-8"
?>
<routes
xmlns
=
"http://symfony.com/schema/routing"
xmlns:xsi
=
"http://www.w3.org/2001/XMLSchema-instance"
xsi:schemaLocation
=
"http://symfony.com/schema/routing http://symfony.com/schema/routing/routing-1.0.xsd"
>
<route
id
=
"some_route"
path
=
"/%app.route_prefix%/contact"
>
<default
key
=
"_controller"
>
AppBundle:Main:contact
</default
>
</route
>
</routes
>
PHP:
// app/config/routing.php
use
Symfony\Component\Routing\RouteCollection
;
use
Symfony\Component\Routing\Route
;
$collection
=
new
RouteCollection
(
)
;
$collection
->
add
(
'some_route'
,
new
Route
(
'/%app.route_prefix%/contact'
,
array
(
'_controller'
=>
'AppBundle:Main:contact'
,
)
)
)
;
return
$collection
;
就像在正常服务容器配置文件中那样,如果在你的路径中真的需要 % ,你可以通过双打来避免百分比的意义,例如 /score-50%%,它会被重处理为 /score-50%。
然而,包括任何在 URL 的 % 字符会自动生成的 URL 编码,这个例子生成的 URL 会是 /score-50%25( %25 是编码 % 字符的结果)。
关于在 Dependency Injection Class 下的参数处理请查看 Using Parameters within a Dependency Injection Class。
什么是一个自定义路由加载器
自定义路由装载程序使你能够根据某些约定或模式生成路由。在这种情况下,一个很好的例子是在 FOSRestBundle 的使用中路由是基于控制器中的动作方法的名称产生的。
一个自定义路由加载器不会使你的软件不需要手动修改路由配置(例如 app/config/routing.yml)就注入路径。如果你的包提供的路线,无论是通过一个配置文件,如 WebProfilerBundle 那样,或通过自定义路由程序,像 FOSRestBundle 那样,在路由配置项中有一个入口都是必须的。
现在有许多软件使用自己的路由加载器完成以上描述的功能,例如 instance FOSRestBundle, JMSI18nRoutingBundle, KnpRadBundle 和 SonataAdminBundle。
加载路由
在 Symfony 应用中的路径是由 DelegatingLoader 加载的。这种加载器采用了一些其它加载器(代表)来加载不同类型的资源,例如 YAML 文件或控制器文件中的 @Route 和 @Method 注释。特定加载器实现了 LoaderInterface 接口,因此有两个重要的方法:supports() 和 load()。
在 Symfony 的标准版中从 routing.yml 中取出以下几行:
# app/config/routing.yml
app:
resource: @AppBundle/Controller/
type: annotation
当主加载器解析时,它会尝试所有注册代表加载器并以给定的资源 (@AppBundle/Controller/) 和类型(注释)作为参数调用它们各自的 support() 方法。只要有一个加载器返回真,其 load()方法就会被调用,且它会返回一个包含路径对象的 RouteCollection 值。
创建一个自定义的加载器
为了从一些自定义源加载一些路由(即从注释,YAML 或 XML 文件以外的资源),你需要创建一个自定义路由加载器。这个加载器必须实现 LoaderInterface 接口。
在大多数情况下,最好不要去实现自己 LoaderInterface 接口而是从 Loader 中扩展出来。
下面的示例加载器支持一种额外的加载路由资源类型。额外的类型是不重要的-你可以创造你想要的任何资源类型。该示例中的资源名称本身并不是会实际使用:
// src/AppBundle/Routing/ExtraLoader.php
namespace AppBundle\Routing;
use Symfony\Component\Config\Loader\Loader;
use Symfony\Component\Routing\Route;
use Symfony\Component\Routing\RouteCollection;
class ExtraLoader extends Loader
{
private $loaded = false;
public function load($resource, $type = null)
{
if (true === $this->loaded) {
throw new \RuntimeException('Do not add the "extra" loader twice');
}
$routes = new RouteCollection();
// prepare a new route
$path = '/extra/{parameter}';
$defaults = array(
'_controller' => 'AppBundle:Extra:extra',
);
$requirements = array(
'parameter' => '\d+',
);
$route = new Route($path, $defaults, $requirements);
// add the new route to the route collection
$routeName = 'extraRoute';
$routes->add($routeName, $route);
$this->loaded = true;
return $routes;
}
public function supports($resource, $type = null)
{
return 'extra' === $type;
}
}
确保您指定的控制器确实存在。在这种情况下,你要在 AppBundle 的 ExtraController 中创建一个 extraAction 方法:
// src/AppBundle/Controller/ExtraController.php
namespace AppBundle\Controller;
use Symfony\Component\HttpFoundation\Response;
use Symfony\Bundle\FrameworkBundle\Controller\Controller;
class ExtraController extends Controller
{
public function extraAction($parameter)
{
return new Response($parameter);
}
}
现在我们为 ExtraLoader 定义一个服务:
YAML:
# app/config/services.yml
services
:
app.routing_loader
:
class
:
AppBundle\Routing\ExtraLoader
tags
:
- { name
:
routing.loader
}
XML:
<?xml
version
=
"1.0"
?>
<container
xmlns
=
"http://symfony.com/schema/dic/services"
xmlns:xsi
=
"http://www.w3.org/2001/XMLSchema-instance"
xsi:schemaLocation
=
"http://symfony.com/schema/dic/services http://symfony.com/schema/dic/services/services-1.0.xsd"
>
<services
>
<service
id
=
"app.routing_loader"
class
=
"AppBundle\Routing\ExtraLoader"
>
<tag
name
=
"routing.loader"
/>
</service
>
</services
>
</container
>
PHP:
use
Symfony\Component\DependencyInjection\Definition
;
$container
->
setDefinition
(
'app.routing_loader'
,
new
Definition
(
'AppBundle\Routing\ExtraLoader'
)
)
->
addTag
(
'routing.loader'
)
;
注意 routing.loader 标签。 包含这个标签的所有的服务会被标记为潜在路由加载器并会被作为专业路由加载器被添加到 routing.loader 服务中,这就是一个 DelegatingLoader 实例。
使用自定义加载器
如果你没有做其它的话,你的自定义路由程序将不会被调用。为使用自定义加载器,你只需要添加一些额外的路由配置:
YAML:
# app/config/routing.yml
app_extra
:
resource
:
.
type
:
extra
XML:
<?xml
version
=
"1.0"
encoding
=
"UTF-8"
?>
<routes
xmlns
=
"http://symfony.com/schema/routing"
xmlns:xsi
=
"http://www.w3.org/2001/XMLSchema-instance"
xsi:schemaLocation
=
"http://symfony.com/schema/routing http://symfony.com/schema/routing/routing-1.0.xsd"
>
<import
resource
=
"."
type
=
"extra"
/>
</routes
>
PHP:
// app/config/routing.php
use
Symfony\Component\Routing\RouteCollection
;
$collection
=
new
RouteCollection
(
)
;
$collection
->
addCollection
(
$loader
->
import
(
'.'
,
'extra'
)
)
;
return
$collection
;
这里的重要部分是类型关键字。由于这种类型是 ExtraLoader 所支持的并且需要保证它的 load() 方法被调用所以它的值应该是 “extra” 类型的。对于 ExtraLoader 来说资源关键字相对来讲是微不足道,所以它被设置为“.”。
使用自定义路由加载器定义的路由将自动缓存到该框架中。所以每当你在加载器类中改变某些东西时,不要忘记清除缓存。
更多先进的加载器
如果你的自定义路由加载器是如上述所示从 Loader 中扩展起来的,那么你还可以利用所提供的解析器,LoaderResolver 实例来加载第二种路由资源。
当然你还需要实现 supports() 和 load()。每当你想加载另一个资源时,例如一个 YAML 的路由配置文件,你可以调用 import() 方法如下:
// src/AppBundle/Routing/AdvancedLoader.php
namespace AppBundle\Routing;
use Symfony\Component\Config\Loader\Loader;
use Symfony\Component\Routing\RouteCollection;
class AdvancedLoader extends Loader
{
public function load($resource, $type = null)
{
$collection = new RouteCollection();
$resource = '@AppBundle/Resources/config/import_routing.yml';
$type = 'yaml';
$importedRoutes = $this->import($resource, $type);
$collection->addCollection($importedRoutes);
return $collection;
}
public function supports($resource, $type = null)
{
return 'advanced_extra' === $type;
}
}
资源名称和进口路由配置类型可以是任意设置,通常由路由配置加载器支持(YAML,XML,PHP,注释等)。
这个指导书的目的是演示如何将有尾部反斜线的 URL 重定向为相同的不包含尾部反斜线的 URL。
首先创建一个控制器,将匹配任意包含尾部反斜线的 URL,删除尾随的反斜线(如果有查询参数的话请保持),并重定向到一个 301 恢复状态码的新的网址:
// src/AppBundle/Controller/RedirectingController.php
namespace AppBundle\Controller;
use Symfony\Bundle\FrameworkBundle\Controller\Controller;
use Symfony\Component\HttpFoundation\Request;
class RedirectingController extends Controller
{
public function removeTrailingSlashAction(Request $request)
{
$pathInfo = $request->getPathInfo();
$requestUri = $request->getRequestUri();
$url = str_replace($pathInfo, rtrim($pathInfo, ' /'), $requestUri);
return $this->redirect($url, 301);
}
}
在此之后,创建一个路由到该控制器使任意一个有尾部反斜线的 URL 访问时匹配该路由;一定要把这条路线放在你的系统中,解释如下:
YAML:
remove_trailing_slash
:
path
:
/
{
url
}
defaults
:
{
_controller
:
AppBundle:Redirecting:removeTrailingSlash
}
requirements
:
url
:
.*/$
methods
:
[
GET
]
XML:
<routes
xmlns
=
"http://symfony.com/schema/routing"
>
<route
id
=
"remove_trailing_slash"
path
=
"/{url}"
methods
=
"GET"
>
<default
key
=
"_controller"
>
AppBundle:Redirecting:removeTrailingSlash
</default
>
<requirement
key
=
"url"
>
.*/$
</requirement
>
</route
>
</routes
>
PHP:
use
Symfony\Component\Routing\RouteCollection
;
use
Symfony\Component\Routing\Route
;
$collection
=
new
RouteCollection
(
)
;
$collection
->
add
(
'remove_trailing_slash'
,
new
Route
(
'/{url}'
,
array
(
'_controller'
=>
'AppBundle:Redirecting:removeTrailingSlash'
,
)
,
array
(
'url'
=>
'.*/$'
,
)
,
array
(
)
,
''
,
array
(
)
,
array
(
'GET'
)
)
)
;
在旧版浏览器中重定向一个 POST 请求是不能很好的实现的。在重定向后由于一些原因一个 POST 请求的 302 会发送一个 GET 请求,因为这个原因,这里的路径只能匹配 GET 请求。
请确保在你的路由配置中路由列表的最末端包含此路由。否则,重定向一个包含有反斜线的路由是危险的(包括 Symfony 的核心路由)。
默认的采集参数不一定要匹配路由路径中的占位符。事实上,你可以使用默认数组来指定额外的参数,这些变量可以作为参数传递给控制器:
YAML:
# app/config/routing.yml
blog
:
path
:
/blog/
{
page
}
defaults
:
_controller
:
AppBundle:Blog:index
page
:
1
title
:
"Hello world!"
XML:
<!-- app/config/routing.xml -->
<?xml
version
=
"1.0"
encoding
=
"UTF-8"
?>
<routes
xmlns
=
"http://symfony.com/schema/routing"
xmlns:xsi
=
"http://www.w3.org/2001/XMLSchema-instance"
xsi:schemaLocation
=
"http://symfony.com/schema/routing
http://symfony.com/schema/routing/routing-1.0.xsd"
>
<route
id
=
"blog"
path
=
"/blog/{page}"
>
<default
key
=
"_controller"
>
AppBundle:Blog:index
</default
>
<default
key
=
"page"
>
1
</default
>
<default
key
=
"title"
>
Hello world!
</default
>
</route
>
</routes
>
PHP:
// app/config/routing.php
use
Symfony\Component\Routing\RouteCollection
;
use
Symfony\Component\Routing\Route
;
$collection
=
new
RouteCollection
(
)
;
$collection
->
add
(
'blog'
,
new
Route
(
'/blog/{page}'
,
array
(
'_controller'
=>
'AppBundle:Blog:index'
,
'page'
=>
1
,
'title'
=>
'Hello world!'
,
)
)
)
;
return
$collection
;
现在,你就可以在你的控制中访问这个额外的参数了:
public function indexAction($page, $title)
{
// ...
}
正如你所看到的,这个 $title
变量从未在路由路径中定义,但是你仍然可以从你的控制器中获取它的值。
20
安全
如果您是某种数据库的用户并需要一个登录表单,那么您应该考虑使用 FOSUserBundle,它可以帮助您建立您的 User 对象并提供了多路由和控制器用于常见任务,如登录,注册,忘记密码。
本节中,您将构建一个传统的登录表单。当然,当用户登录时,您可以像数据库一样在任何地方加载用户信息。详见 B) Configuring how Users are Loaded。
本章假定您已经遵循了 security chapter 的开始,并使用 http_basic 身份验证正常工作。
首先,在您的防火墙下启用表单登录:
# app/config/security.yml
security
:
# ...
firewalls
:
default
:
anonymous
:
~
http_basic
:
~
form_login
:
login_path
:
/login
check_path
:
/login_check
<!-- app/config/security.xml -->
<?xml
version
=
"1.0"
encoding
=
"UTF-8"
?>
<srv:container
xmlns
=
"http://symfony.com/schema/dic/security"
xmlns:srv
=
"http://symfony.com/schema/dic/services"
xmlns:xsi
=
"http://www.w3.org/2001/XMLSchema-instance"
xsi:schemaLocation
=
"http://symfony.com/schema/dic/services
http://symfony.com/schema/dic/services/services-1.0.xsd"
>
<config
>
<firewall
name
=
"main"
>
<anonymous
/>
<form-login
login-path
=
"/login"
check-path
=
"/login_check"
/>
</firewall
>
</config
>
</srv:container
>
// app/config/security.php
$container
->
loadFromExtension
(
'security'
,
array
(
'firewalls'
=>
array
(
'main'
=>
array
(
'anonymous'
=>
array
(
)
,
'form_login'
=>
array
(
'login_path'
=>
'/login'
,
'check_path'
=>
'/login_check'
,
)
,
)
,
)
,
)
)
;
login_path 和 check_path 也可以是路径名称(但不能有强制性的通配符,例如 /login/{foo} 在 foo 没有默认值)。
现在,在安全系统启动身份验证过程时,它将用户重定向到登录表单 /login。直观上说,执行此登录表单是您的工作。首先,在包中创建一个 SecurityController:
// src/AppBundle/Controller/SecurityController.php
namespace
AppBundle\Controller
;
use
Symfony\Bundle\FrameworkBundle\Controller\Controller
;
class
SecurityController
extends
Controller
{
}
接下来,创建两个路径:一个路径是为了每个在您 form_login 配置下的路径创建(/login 和 /login_check):
// src/AppBundle/Controller/SecurityController.php
// ...
use Symfony\Component\HttpFoundation\Request;
use Sensio\Bundle\FrameworkExtraBundle\Configuration\Route;
class SecurityController extends Controller
{
/**
* @Route("/login", name="login_route")
*/
public function loginAction(Request $request)
{
}
/**
* @Route("/login_check", name="login_check")
*/
public function loginCheckAction()
{
// this controller will not be executed,
// as the route is handled by the Security system
}
}
# app/config/routing.yml
login_route
:
path
:
/login
defaults
:
{
_controller
:
AppBundle:Security:login
}
login_check
:
path
:
/login_check
# no controller is bound to this route
# as it's handled by the Security system
<!-- app/config/routing.xml -->
<?xml
version
=
"1.0"
encoding
=
"UTF-8"
?>
<routes
xmlns
=
"http://symfony.com/schema/routing"
xmlns:xsi
=
"http://www.w3.org/2001/XMLSchema-instance"
xsi:schemaLocation
=
"http://symfony.com/schema/routing
http://symfony.com/schema/routing/routing-1.0.xsd"
>
<route
id
=
"login_route"
path
=
"/login"
>
<default
key
=
"_controller"
>
AppBundle:Security:login
</default
>
</route
>
<route
id
=
"login_check"
path
=
"/login_check"
/>
<!-- no controller is bound to this route
as it's handled by the Security system -->
</routes
>
// app/config/routing.php
use
Symfony\Component\Routing\RouteCollection
;
use
Symfony\Component\Routing\Route
;
$collection
=
new
RouteCollection
(
)
;
$collection
->
add
(
'login_route'
,
new
Route
(
'/login'
,
array
(
'_controller'
=>
'AppBundle:Security:login'
,
)
)
)
;
$collection
->
add
(
'login_check'
,
new
Route
(
'/login_check'
,
array
(
)
)
)
;
// no controller is bound to this route
// as it's handled by the Security system
return
$collection
;
很好!接下来,向 loginAction 添加逻辑,它将展示登录表单:
// src/AppBundle/Controller/SecurityController.php
public
function
loginAction
(
Request
$request
)
{
$authenticationUtils
=
$this
->
get
(
'security.authentication_utils'
)
;
// get the login error if there is one
$error
=
$authenticationUtils
->
getLastAuthenticationError
(
)
;
// last username entered by the user
$lastUsername
=
$authenticationUtils
->
getLastUsername
(
)
;
return
$this
->
render
(
'security/login.html.twig'
,
array
(
// last username entered by the user
'last_username'
=>
$lastUsername
,
'error'
=>
$error
,
)
)
;
}
2.6 security.authentication_utils 服务和 AuthenticationUtils 类在 Symfony 2.6 中做了介绍。
不要被这种控制器所迷惑。正如您将看到,当用户提交表单时,安全系统会自动为您处理表单提交。如果用户提交了一个无效用户名或密码,此控制器会从安全系统中读取表单提交的错误,以便它可以显示给用户。
换句话说,您的工作是显示登录表单和可能发生的任何登录错误,但安全系统本身负责检查提交的用户名和密码并对用户进行身份验证。
最后,创建模板:
{# app/Resources/views/security/login.html.twig #}
{# ... you will probably extends your base template, like base.html.twig #}
{
%
if
error
%
}
<div>
{
{
error
.messageKey
|
trans
(
error
.messageData
,
'security'
)
}
}
</div>
{
%
endif
%
}
<form action="
{
{
path
(
'login_check'
)
}
}
" method="post">
<label for="username">Username:</label>
<input type="text" id="username" name="_username" value="
{
{
last_username
}
}
" />
<label for="password">Password:</label>
<input type="password" id="password" name="_password" />
{#
If you want to control the URL the user
is redirected to on success (more details below)
<input type="hidden" name="_target_path" value="/account" />
#}
<button type="submit">login</button>
</form>
<!-- src/Acme/SecurityBundle/Resources/views/Security/login.html.php -->
<?php
if
(
$error
)
:
?>
<div>
<?php
echo
$error
->
getMessage
(
)
?>
</div>
<?php
endif
?>
<form action="
<?php
echo
$view
[
'router'
]
->
generate
(
'login_check'
)
?>
" method="post">
<label for="username">Username:</label>
<input type="text" id="username" name="_username" value="
<?php
echo
$last_username
?>
" />
<label for="password">Password:</label>
<input type="password" id="password" name="_password" />
<!--
If you want to control the URL the user
is redirected to on success (more details below)
<input type="hidden" name="_target_path" value="/account" />
-->
<button type="submit">login</button>
</form>
传递到模板的错误变量是一个 AuthenticationException 的实例。它可能包含更多的信息,甚至有关身份验证失败的敏感信息,所以要明智地使用它!
表单的样式不限,但要符合以下的一些要求:
- 表单必须 POST 到 /login_check,因为这是您在 security.yml 中 form_login 键下的配置。
- 用户名必须有 _username 名称,密码必须有 _password 名称。
实际上,这一切都可以在 form_login 键下配置。详见 Form Login Configuration
当前的登录表单不能抵御 CSRF 攻击。阅读 Using CSRF Protection in the Login Form 了解如何保护您的登录表单。
就是这样!当您提交表单时,安全系统会自动检查用户凭据,然后验证该用户或将用户发送回显示错误信息的登录表单页面。
下面来回顾一下整个过程:
- 用户试图访问受保护的资源;
- 防火墙通过将用户重定向到登录表单 (/login) 来启动身份检验过程;
- /login 页面通过本例中创建的路径和控制器来展现登录表单;
- 用户将登录表单提交到 /login_check;
- 安全系统将拦截该请求,检查用户提交的凭据,如果他们是正确的,用户进行身份验证,如果他们不正确,将用户重定向回登录表单。
在成功后重定向
如果提交凭据正确,用户将被重定向到请求的原始页面(例如 /admin/foo)。如果最初用户直接登录页面,他们就会被重定向到主页。这都是自定义的,例如,允许您将用户重定向到特定的 URL。
有关这方面的更多细节以及一般如何自定义表单登录过程,详见 How to Customize your Form Login
避免常见的陷阱
在设置您的登录表单时,注意一些常见的陷阱。
1. 创建正确的路径
首先,请确保您已经正确地定义了 /login 和 /login_check 的路径,并且它们正确地对应于 login_path 和 check_path 的配置值。这里配置错误可能意味着您被重定向至 404 页,而不是登录页面,或提交登录表单时不执行任何操作(只是一遍又一遍地看到登录表单)。
2. 确保登录页面不安全(重定向至循环)
此外,确保登录页面可由匿名用户访问。例如,下面的配置-它请求 ROLE_ADMIN 角色的所有 URL(包括 /login URL),将导致循环重定向。
# app/config/security.yml
# ...
access_control
:
- { path
:
^/, roles
:
ROLE_ADMIN
}
<!-- app/config/security.xml -->
<!-- ... -->
<access-control
>
<rule
path
=
"^/"
role
=
"ROLE_ADMIN"
/>
</access-control
>
// app/config/security.php
// ...
'access_control'
=>
array
(
array
(
'path'
=>
'^/'
,
'role'
=>
'ROLE_ADMIN'
)
,
)
,
通过添加匹配 /login/* 的访问控制,不请求身份验证来修复此问题:
# app/config/security.yml
# ...
access_control
:
- { path
:
^/login, roles
:
IS_AUTHENTICATED_ANONYMOUSLY
}
- { path
:
^/, roles
:
ROLE_ADMIN
}
<!-- app/config/security.xml -->
<!-- ... -->
<access-control
>
<rule
path
=
"^/login"
role
=
"IS_AUTHENTICATED_ANONYMOUSLY"
/>
<rule
path
=
"^/"
role
=
"ROLE_ADMIN"
/>
</access-control
>
// app/config/security.php
// ...
'access_control'
=>
array
(
array
(
'path'
=>
'^/login'
,
'role'
=>
'IS_AUTHENTICATED_ANONYMOUSLY'
)
,
array
(
'path'
=>
'^/'
,
'role'
=>
'ROLE_ADMIN'
)
,
)
,
此外,如果您的防火墙不允许匿名用户(没有 anonymous 键),您需要为登录页创建一个特殊的防火墙来允许匿名用户:
# app/config/security.yml
# ...
firewalls
:
# order matters! This must be before the ^/ firewall
login_firewall
:
pattern
:
^/login$
anonymous
:
~
secured_area
:
pattern
:
^/
form_login
:
~
<!-- app/config/security.xml -->
<!-- ... -->
<firewall
name
=
"login_firewall"
pattern
=
"^/login$"
>
<anonymous
/>
</firewall
>
<firewall
name
=
"secured_area"
pattern
=
"^/"
>
<form-login
/>
</firewall
>
// app/config/security.php
// ...
'firewalls'
=>
array
(
'login_firewall'
=>
array
(
'pattern'
=>
'^/login$'
,
'anonymous'
=>
array
(
)
,
)
,
'secured_area'
=>
array
(
'pattern'
=>
'^/'
,
'form_login'
=>
array
(
)
,
)
,
)
,
3. 确保 /login_check
在防火墙后面
接下来,确保您的 check_path URL (例如 /login_check)是在您正在使用的表单登录的防火墙后面(在本例中,单个防火墙匹配所有 URL,包括 /login_check)。如果 /login_check 不匹配任何防火墙,您会收到一个 Unable to find the controller for path "/login_check" 的异常。
4. 多个防火墙不共享相同的安全环境
如果您正在使用多个防火墙并且您对一个防火墙进行身份验证,您将不会自动对任何其它防火墙进行身份验证。不同的防火墙就像不同的安全系统。为此,您必须为不同的防火墙显式指定相同的 Firewall Context。但是通常对于大多数应用程序来说,有一个主要的防火墙就足够了。
5. 路径错误页是不被防火墙覆盖的
由于路径是在安全性之前被确定,404 错误页面不受任何防火墙控制。这意味着您不能做安全检查甚至访问这些页面上的用户对象。有关详细信息,请参阅 How to Customize Error Pages。
Symfony 的安全系统可以通过活动目录或开放授权服务器像数据库一样从任何地方加载安全用户。这篇文章将告诉你如何通过一个 Doctrine entity 从数据库加载用户信息。
前言
在开始之前,您应该检查 FOSUserBundle。这个外部包允许您从数据库加载用户信息(就像你会在这里学到的)并为您提供内置路径和控制器用于一些事务,比如登录、注册和忘记密码。但是,如果您需要大量自定义用户系统或者如果你想了解工作原理,本教程是更好的。
通过 Doctrine entity 加载用户信息有两个基本步骤:
之后,您可以了解更多关于禁止非活动用户,使用自定义查询和序列化会话用户的相关信息。
1) 创建您的用户实体
此项,假设您在一个应用程序包内已经有一个用户对象包含下列字段:id,username,password,email 和 isActive。
// src/AppBundle/Entity/User.php
namespace
AppBundle\Entity
;
use
Doctrine\ORM\Mapping
as
ORM
;
use
Symfony\Component\Security\Core\User\UserInterface
;
/**
* @ORM\Table(name="app_users")
* @ORM\Entity(repositoryClass="AppBundle\Entity\UserRepository")
*/
class
User implements UserInterface
,
\Serializable
{
/**
* @ORM\Column(type="integer")
* @ORM\Id
* @ORM\GeneratedValue(strategy="AUTO")
*/
private
$id
;
/**
* @ORM\Column(type="string", length=25, unique=true)
*/
private
$username
;
/**
* @ORM\Column(type="string", length=64)
*/
private
$password
;
/**
* @ORM\Column(type="string", length=60, unique=true)
*/
private
$email
;
/**
* @ORM\Column(name="is_active", type="boolean")
*/
private
$isActive
;
public
function
__construct
(
)
{
$this
->
isActive
=
true
;
// may not be needed, see section on salt below
// $this->salt = md5(uniqid(null, true));
}
public
function
getUsername
(
)
{
return
$this
->
username
;
}
public
function
getSalt
(
)
{
// you *may* need a real salt depending on your encoder
// see section on salt below
return
null
;
}
public
function
getPassword
(
)
{
return
$this
->
password
;
}
public
function
getRoles
(
)
{
return
array
(
'ROLE_USER'
)
;
}
public
function
eraseCredentials
(
)
{
}
/** @see \Serializable::serialize() */
public
function
serialize
(
)
{
return
serialize
(
array
(
$this
->
id
,
$this
->
username
,
$this
->
password
,
// see section on salt below
// $this->salt,
)
)
;
}
/** @see \Serializable::unserialize() */
public
function
unserialize
(
$serialized
)
{
list
(
$this
->
id
,
$this
->
username
,
$this
->
password
,
// see section on salt below
// $this->salt
)
=
unserialize
(
$serialized
)
;
}
}
为了让代码简短,一些 getter 和 setter 方法没有显示。但你可以通过运行生成这些:
$ php app/console doctrine:generate:entities AppBundle/Entity/User
接下来,确保创建数据库表:
$ php app/console doctrine:schema:update --force
什么是用户接口?
目前为止,这只是一个普通的对象。 但是为了在安全系统中使用此类,它必须实现用户接口。这要求该类有以下五种方法:
要了解这五个方法的更多信息,请参见用户接口。
序列化和反序列化方法做什么?
在每个请求末,用户对象是序列化会话的。对下一个请求,它是非序列化的。要帮助 PHP 正确做到这一点,您需要实现可序列化。但你不必序列化任何东西:你只需要几个字段(上面所示的那些加上一些额外的字段,如果你决定实现 AdvancedUserInterface 的话)。对于每个请求,id 用于从数据库中查询一个新的用户对象。
想要了解更多吗?详见理解序列化和用户如何在会话中进行保存。
2) 从对象加载配置安全性
现在,您已经有了一个实现了用户接口的用户对象,你只需要在 security.yml 中把这些告诉 Symfony 的安全系统。
在这个例子中,用户将通过 HTTP 基本身份验证输入用户名和密码。Symfony 会查询一个和用户名匹配的用户对象,然后检查密码(通常检查密码的用时较短):
YAML:
# app/config/security.yml
security:
encoders:
AppBundle\Entity\User:
algorithm: bcrypt
# ...
providers:
our_db_provider:
entity:
class: AppBundle:User
property: username
# if you're using multiple entity managers
# manager_name: customer
firewalls:
default:
pattern: ^/
http_basic: ~
provider: our_db_provider
# ...
XML:
<!-- app/config/security.xml -->
<config>
<encoder class="AppBundle\Entity\User"
algorithm="bcrypt"
/>
<!-- ... -->
<provider name="our_db_provider">
<entity class="AppBundle:User" property="username" />
</provider>
<firewall name="default" pattern="^/" provider="our_db_provider">
<http-basic />
</firewall>
<!-- ... -->
</config>
PHP:
// app/config/security.php
$container->loadFromExtension('security', array(
'encoders' => array(
'AppBundle\Entity\User' => array(
'algorithm' => 'bcrypt',
),
),
// ...
'providers' => array(
'our_db_provider' => array(
'entity' => array(
'class' => 'AppBundle:User',
'property' => 'username',
),
),
),
'firewalls' => array(
'default' => array(
'pattern' => '^/',
'http_basic' => null,
'provider' => 'our_db_provider',
),
),
// ...
));
首先,encoder 部分告诉 Symfony 期望使用 bcrypt 对数据库中的密码进行编码。第二,providers 部分创建一个叫 our_db_provider 的 "user provider",它知道通过 username 属性在您的 AppBundle:User 对象中查询。其中,our_db_provider 这个名字并不重要:它只需要在你的防火墙下匹配 provider 的密钥的值。或者,如果您没有在防火墙下设置 provider 密钥,第一个 “user provider” 会被自动使用。
If you're using PHP 5.4 or lower, you'll need to install the ircmaxell/password-compat library via Composer in order to be able to use the bcrypt encoder:如果您使用的是PHP 5.4 或更低版本,为了能够使用 bcrypt 编码器,您需要通过 Composer 安装 ircmaxell/password-compat 库:
{
"require": {
...
"ircmaxell/password-compat": "~1.0.3"
}
}
创建您的第一个用户
要添加用户,您可以实现一个注册表单或添加一些 fixtures。这只是一个普通的对象,所以没什么棘手,除了您需要对每个用户的密码进行加密。但别担心,Symfony 会给您一个用来实现此事的服务。有关详细信息,请参见动态编码密码。
下面是从 MySQL 中导出的 app_users 表,包含了用户 admin 和密码 admin (密码是加密过的)。
$ mysql> SELECT * FROM app_users;
+----+----------+--------------------------------------------------------------+--------------------+-----------+
| id | username | password | email | is_active |
+----+----------+--------------------------------------------------------------+--------------------+-----------+
| 1 | admin | $2a$08$jHZj/wJfcVKlIwr5AvR78euJxYK7Ku5kURNhNx.7.CSIJ3Pq6LEPC | admin@example.com | 1 |
+----+----------+--------------------------------------------------------------+--------------------+-----------+
您需要一个 salt 属性吗? 如果您使用 bcrypt,不需要。否则,是的。所有的密码必须用一个 salt 进行哈希处理,但是 bcrypt 内部做了这件事。由于本教程使用 bcrypt ,User 中的 getSalt() 方法只能返回空值(它没有被使用)。如果你使用了一个不同的算法,您需要在用户对象中取消对 salt 行的注释,并且添加一个持久的 salt 属性。
禁止非活动用户(AdvancedUserInterface)
如果用户 isActive 属性设置为 false (例如,is_active 在数据库中是 0),用户仍然可以正常登录到网站。这是很容易修正的。
排除非活动用户,更改您的用户类来实现 AdvancedUserInterface。这扩展了互动演示界面,所以你只需要新的界面:
// src/AppBundle/Entity/User.php
use Symfony\Component\Security\Core\User\AdvancedUserInterface;
// ...
class User implements AdvancedUserInterface, \Serializable
{
// ...
public function isAccountNonExpired()
{
return true;
}
public function isAccountNonLocked()
{
return true;
}
public function isCredentialsNonExpired()
{
return true;
}
public function isEnabled()
{
return $this->isActive;
}
// serialize and unserialize must be updated - see below
public function serialize()
{
return serialize(array(
// ...
$this->isActive
));
}
public function unserialize($serialized)
{
list (
// ...
$this->isActive
) = unserialize($serialized);
}
}
该 AdvancedUserInterface 接口添加四个额外的方法来验证帐户状态:
- isAccountNonExpired() 检查用户帐户是否已过期;
- isAccountNonLocked() 检查用户是否已被锁定;
- isCredentialsNonExpired() 检查用户凭据是否(密码)已过期;
- isEnabled() 检查用户是否已启用.
如果任何这些返回 false,则用户不会被允许登录。你可以选择坚持所有这些的属性,或任何你需要的(在这个例子中,isActive 是从数据库中选出的唯一属性)。
那么方法之间的区别是什么?每个方法返回一个略有不同的错误消息(当你在登录模板提交它们到自定义模式时,这些可以被转换)。
如果您使用 AdvancedUserInterface,您还需要添加任何由这些方法使用的属性(如 isActive)到 serialize() 和 unserialize() 方法。如果你不这样做,您的用户可能无法从每个请求上的会话中正确反序列化。
恭喜您!您的数据库加载安全系统已完成所有设置!接下来,添加一个真正的登录表单代替 HTTP 基本身份验证或继续阅读其他主题。
使用自定义查询加载用户
如果用户可以用他们的用户名或电子邮件登录,这将是很好的,这在数据库中都是独特的。不幸的是,本机实体提供者只能通过单个用户的属性处理查询。
要做到这一点,使您的用户资料库执行一个特殊的 UserProviderInterface。此接口需要三个方法:loadUserByUsername($username),refreshUser(UserInterface $user) 和 supportsClass($class):
// src/AppBundle/Entity/UserRepository.php
namespace AppBundle\Entity;
use Symfony\Component\Security\Core\User\UserInterface;
use Symfony\Component\Security\Core\User\UserProviderInterface;
use Symfony\Component\Security\Core\Exception\UsernameNotFoundException;
use Symfony\Component\Security\Core\Exception\UnsupportedUserException;
use Doctrine\ORM\EntityRepository;
class UserRepository extends EntityRepository implements UserProviderInterface
{
public function loadUserByUsername($username)
{
$user = $this->createQueryBuilder('u')
->where('u.username = :username OR u.email = :email')
->setParameter('username', $username)
->setParameter('email', $username)
->getQuery()
->getOneOrNullResult();
if (null === $user) {
$message = sprintf(
'Unable to find an active admin AppBundle:User object identified by "%s".',
$username
);
throw new UsernameNotFoundException($message);
}
return $user;
}
public function refreshUser(UserInterface $user)
{
$class = get_class($user);
if (!$this->supportsClass($class)) {
throw new UnsupportedUserException(
sprintf(
'Instances of "%s" are not supported.',
$class
)
);
}
return $this->find($user->getId());
}
public function supportsClass($class)
{
return $this->getEntityName() === $class
|| is_subclass_of($class, $this->getEntityName());
}
}
有关这些方法的详细信息,请参阅 UserProviderInterface。
别忘了将 repository 类添加到该实体的映射定义。
为了完成这一点,只需在 security.yml 中移除用户提供者的 property 键值。
YAML:
# app/config/security.yml
security:
# ...
providers:
our_db_provider:
entity:
class: AppBundle:User
# ...
XML:
<!-- app/config/security.xml -->
<config>
<!-- ... -->
<provider name="our_db_provider">
<entity class="AppBundle:User" />
</provider>
<!-- ... -->
</config>
PHP:
// app/config/security.php
$container->loadFromExtension('security', array(
...,
'providers' => array(
'our_db_provider' => array(
'entity' => array(
'class' => 'AppBundle:User',
),
),
),
...,
));
这告诉 Symfony 不要为用户自动查询。相反,当有人登录,用户资料库上的 loadUserByUsername() 方法将被调用。
了解序列化以及用户如何在会话中保存
如果你关心在用户类中 serialize() 方法的重要性或如何将用户对象序列化或反序列化,那么这一节适合于你。如果不是,可以跳过此节。
一旦用户登录,整个用户对象序列化到会话。对下一个请求,用户对象反序列化。然后,id 属性的值是用来从数据库中查询一个新的用户对象。最后,新的用户对象与反序列化的用户对象进行比较,以确保它们表示相同的用户。例如,如果由于某种原因,两个用户对象上的用户名不匹配,则出于安全原因,该用户将被注销。
尽管这一切会自动发生,但有一些重要的副作用。
首先,Serializable 接口和其序列化和反序列化方法被添加到允许用户类序列化的会话。这可能是也可能不是根据您的设置完成的,但它可能是个好主意。从理论上讲,只有 id 需要被序列化,因为 refreshUser() 方法在每个使用该 id 的请求上刷新用户(如上所述)。这给我们一个 "fresh" 用户对象。
但 Symfony 也使用用户名、salt 和密码来验证用户请求之间没有改变(如果你执行它,它也会调用你的 AdvancedUserInterface 方法)。未能序列化这些会导致你在每个请求上被注销。如果您的用户实现 EquatableInterface,而不是检查这些属性,你的 isEqualTo 方法只是调用,那么您可以检查所需的任何属性。除非你理解这一点,您可能不需要实现该接口或担心这些。
一旦用户经过身份验证,他们的凭证通常存储在会话中。这意味着会话结束时它们将被记录,并必须提供它们的登录细节及下次它们要访问的应用程序。你可以允许用户选择登录停留的时间比使用 cookie 会话持续的时间长,这可以通过使用 remember_me 防火墙选项来实现:
YAML:
# app/config/security.yml
firewalls:
default:
# ...
remember_me:
key: "%secret%"
lifetime: 604800 # 1 week in seconds
path: /
# by default, the feature is enabled by checking a
# checkbox in the login form (see below), uncomment the
# below lines to always enable it.
#always_remember_me: true
XML:
<!-- app/config/security.xml -->
<?xml version="1.0" encoding="utf-8" ?>
<srv:container xmlns="http://symfony.com/schema/dic/security"
xmlns:srv="http://symfony.com/schema/dic/services"
xmlns:xsi="http://www.w3.org/2001/XMLSchema-instance"
xsi:schemaLocation="http://symfony.com/schema/dic/services
http://symfony.com/schema/dic/services/services-1.0.xsd">
<config>
<firewall name="default">
<!-- ... -->
<!-- by default, the feature is enabled by checking a checkbox
in the login form (see below), add always-remember-me="true"
to always enable it. -->
<remember-me
key = "%secret%"
lifetime = "604800" <!-- 1 week in seconds -->
path = "/"
/>
</firewall>
</config>
</srv:container>
PHP:
// app/config/security.php
$container->loadFromExtension('security', array(
'firewalls' => array(
'default' => array(
// ...
'remember_me' => array(
'key' => '%secret%',
'lifetime' => 604800, // 1 week in seconds
'path' => '/',
// by default, the feature is enabled by checking a
// checkbox in the login form (see below), uncomment
// the below lines to always enable it.
//'always_remember_me' => true,
),
),
),
));
remember_me (下次自动登录)防火墙定义以下配置选项:
key (必需)
用于加密 cookie 值的内容。通常使用的秘密值定义在app/config/parameters.yml 文件中。
name (默认值:REMEMBERME)
cookie 的名称用来保持用户登录。如果你在同一应用程序的多个防火墙启用 remember_me 功能,确保为每个防火墙的 cookie 选择一个不同的名称。否则,你将面临很多安全相关问题。
Lifetime (默认值:31536000)
用户将持续登录状态的秒数。默认用户登录一年。
path (默认值:/)
与这种特性相关联的 cookie 的路径将被使用。默认情况下 cookie 将适用于整个网站,但你也可以将它限制到一个特定的部分(例如 /forum,/admin)。
domain (默认值:null)
使用与此特性相关的 cookie 的域。默认情况下 cookies 使用的当前域是从 $ _SERVER 获得。
secure (默认值:false)
如果该值为真,与此功能相关的 cookie 将被通过 HTTPS 安全连接发送给用户。
hhttponly (默认值:true)
如果该值为真,这个特性相关的 cookie 只能通过 HTTP 协议。这意味着 cookie 不会访问脚本语言,比如 JavaScript。
remember_me_parameter (默认值:_remember_me)
表单字段的名称检查决定是否应该启用“记住我”功能。继续阅读这篇文章,你将知道如何附有条件地启用这个特性。
always_remember_me(默认值:false)
如果该值为真,remember_me_parameter 的值将被忽略,“记住我”功能总是启用,不管最终用户的需求。
token_provider (默认值:null)
定义一个 token provider 的服务的 id 以供使用。默认情况下,令牌存储在一个 cookie 中。例如,您可能想要令牌存储在一个数据库中,但在 cookie 中没有一个(散列的)版本的密码。
DoctrineBridge 附带一个 Symfony\Bridge\Doctrine\Security\RememberMe\DoctrineTokenProvider,您可以使用。
强制用户退出下次自动登录的特性
为用户提供选择使用或不使用记住我的功能是个好主意,因为使用或不使用记住我并不总是合适的。通常这样做的方法是添加一个复选框登录表单。通过将复选框命名为 _remember_me(或您使用 remember_me_parameter 配置的名称),当复选框被选中并且用户成功登录时,cookie 会被自动设置。因此,特定的登录表单最终可能看起来像这样:
Twig:
{# app/Resources/views/security/login.html.twig #}
{% if error %}
<div>{{ error.message }}</div>
{% endif %}
<form action="{{ path('login_check') }}" method="post">
<label for="username">Username:</label>
<input type="text" id="username" name="_username" value="{{ last_username }}" />
<label for="password">Password:</label>
<input type="password" id="password" name="_password" />
<input type="checkbox" id="remember_me" name="_remember_me" checked />
<label for="remember_me">Keep me logged in</label>
<input type="submit" name="login" />
</form>
PHP:
<!-- app/Resources/views/security/login.html.php -->
<?php if ($error): ?>
<div><?php echo $error->getMessage() ?></div>
<?php endif ?>
<form action="<?php echo $view['router']->generate('login_check') ?>" method="post">
<label for="username">Username:</label>
<input type="text" id="username"
name="_username" value="<?php echo $last_username ?>" />
<label for="password">Password:</label>
<input type="password" id="password" name="_password" />
<input type="checkbox" id="remember_me" name="_remember_me" checked />
<label for="remember_me">Keep me logged in</label>
<input type="submit" name="login" />
</form>
在之后的访问中,用户将自动登录,同时 cookie 仍然是有效的。
强制用户在访问某些资源之前再次认证
当用户返回到您的站点时,他们自动验证存储在 cookie remember me 的信息。这允许用户访问受保护的资源,只要用户实际上通过了该网站的身份验证。
然而,在某些情况下,您可能想要强制用户实际认证之前访问某些资源。例如,您可能允许“记住我”用户看到基本账户信息,然后要求他们实际上认证之前修改这些信息。
安全组件提供了一种简单的方法来做到这一点。增加了明确分配给他们的角色,用户会根据他们的验证方式自动地被分配为以下角色之一:
IS_AUTHENTICATED_ANONYMOUSLY
自动分配给在防火墙下受部分站点保护但实际上没有登录的用户。这是匿名访问的唯一方式。
IS_AUTHENTICATED_REMEMBERED
自动分配给通过 remember me cookie 验证的用户。
IS_AUTHENTICATED_FULLY
自动分配给在当前会话中提供了他们的登录细节的用户。
除了显式分配角色,您可以使用这些来进行访问控制。
如果你有 IS_AUTHENTICATED_REMEMBERED 角色,那么你也有 IS_AUTHENTICATED_ANONYMOUSLY 角色。如果你有 IS_AUTHENTICATED_FULLY 角色,那么你还有另外两个角色。换句> 话说,这些角色代表三个级别的增加“强度”的认证。
您可以使用这些额外的角色更细粒度地控制访问一个网站的部分内容。例如,当通过 cookie 验证的时候,您可能想让你的用户能够在 /account 查看自己的账户,但必须提供他们的登录细节才能编辑账户细节。为此,您可以使用这些角色获得特定的控制器操作。编辑操作的控制器可以通过使用服务环境来获得。
在接下来的例子中,活动只在用户有 IS_AUTHENTICATED_FULLY 角色时允许。
// ...
use Symfony\Component\Security\Core\Exception\AccessDeniedException
// ...
public function editAction()
{
$this->denyAccessUnlessGranted('IS_AUTHENTICATED_FULLY');
// ...
}
如果您的应用程序是基于 Symfony 标准版,你也可以通过使用注释获得你的控制器:
use Sensio\Bundle\FrameworkExtraBundle\Configuration\Security;
/**
* @Security("has_role('IS_AUTHENTICATED_FULLY')")
*/
public function editAction($name)
{
// ...
}
如果你也有一个访问控制安全配置,需要用户有一个 ROLE_USER 角色以便访问任何帐户,那么就会有以下情况:
- 如果一个没有进行身份验证或匿名身份验证的用户试图访问帐户,用户将被要求进行身份验证。
- 一旦用户已经输入了他们的用户名和密码,假定对于你的每个配置,用户获得 ROLE_USER 角色,用户将会拥有 IS_AUTHENTICATED_FULLY 角色并能够访问帐户中的任何页面部分,包括 editAction 控制器。
- 如果用户的会话结束,当用户返回到网站,他们将能够访问每个账户页面 — 除了编辑页面 — 但要求是没有要求强制认证的。然而,当他们试图访问 editAction 控制器时,他们将被迫进行认证,因为他们都尚未充分认证。
如果您想了解更多以这种方式获得服务或方法的信息,请看如何获得任何服务或您的应用程序中的方法。
有时,无需登出和登入就能切换账户是很有用的(例如,当你调试或尝试理解别的用户的一个你无法复制的错误时)。这可以通过激活 switch_user 防火墙监听器来很容易地做到:
YAML:
# app/config/security.yml
security:
firewalls:
main:
# ...
switch_user: true
XML:
<!-- app/config/security.xml -->
<?xml version="1.0" encoding="UTF-8"?>
<srv:container xmlns="http://symfony.com/schema/dic/security"
xmlns:xsi="http://www.w3.org/2001/XMLSchema-instance"
xmlns:srv="http://symfony.com/schema/dic/services"
xsi:schemaLocation="http://symfony.com/schema/dic/services
http://symfony.com/schema/dic/services/services-1.0.xsd">
<config>
<firewall>
<!-- ... -->
<switch-user />
</firewall>
</config>
</srv:container>
PHP:
// app/config/security.php
$container->loadFromExtension('security', array(
'firewalls' => array(
'main'=> array(
// ...
'switch_user' => true
),
),
));
切换到另一个用户,只需添加一个带有 the_switch_user 参数和用户名为当前 URL 的查询字符串的值:
http://example.com/somewhere?_switch_user=thomas
切换回原来的用户,使用特殊的 _exit 用户名:
http://example.com/somewhere?_switch_user=_exit
在仿冒中,为用户提供一个特殊的角色,被称为 ROLE_PREVIOUS_ADMIN。在一个模板中,例如,这个角色可以用来显示退出仿冒的链接:
TWIG:
{% if is_granted('ROLE_PREVIOUS_ADMIN') %}
<a href="{{ path('homepage', {'_switch_user': '_exit'}) }}">Exit impersonation</a>
{% endif %}
PHP:
<?php if ($view['security']->isGranted('ROLE_PREVIOUS_ADMIN')): ?>
<a
href="<?php echo $view['router']->generate('homepage', array(
'_switch_user' => '_exit',
) ?>"
>
Exit impersonation
</a>
<?php endif ?>
在某些情况下,你可能需要得到代表仿冒者而不是被仿冒用户的对象。使用以下代码来遍历用户的角色,直到你找到一个 SwitchUserRole 对象:
use Symfony\Component\Security\Core\Role\SwitchUserRole;
$authChecker = $this->get('security.authorization_checker');
$tokenStorage = $this->get('security.token_storage');
if ($authChecker->isGranted('ROLE_PREVIOUS_ADMIN')) {
foreach ($tokenStorage->getToken()->getRoles() as $role) {
if ($role instanceof SwitchUserRole) {
$impersonatingUser = $role->getSource()->getUser();
break;
}
}
}
当然,这个功能需要向一个小的用户群提供。默认情况下,有 ROLE_ALLOWED_TO_SWITCH 角色的用户的访问是被限制的。这个角色的名字可以通过角色设置进行修改。对于额外的安全性,您还可以通过参数设置更改查询参数名称:
YAML:
# app/config/security.yml
security:
firewalls:
main:
# ...
switch_user: { role: ROLE_ADMIN, parameter: _want_to_be_this_user }
XML:
<!-- app/config/security.xml -->
<?xml version="1.0" encoding="UTF-8"?>
<srv:container xmlns="http://symfony.com/schema/dic/security"
xmlns:xsi="http://www.w3.org/2001/XMLSchema-instance"
xmlns:srv="http://symfony.com/schema/dic/services"
xsi:schemaLocation="http://symfony.com/schema/dic/services
http://symfony.com/schema/dic/services/services-1.0.xsd">
<config>
<firewall>
<!-- ... -->
<switch-user role="ROLE_ADMIN" parameter="_want_to_be_this_user" />
</firewall>
</config>
</srv:container>
PHP:
// app/config/security.php
$container->loadFromExtension('security', array(
'firewalls' => array(
'main'=> array(
// ...
'switch_user' => array(
'role' => 'ROLE_ADMIN',
'parameter' => '_want_to_be_this_user',
),
),
),
));
事件
防火墙的 security.switch_user 事件在仿冒完成后处理。 SwitchUserEvent 被传递给监听器,并且你可以用它来获得你仿冒的用户。
当你仿冒用户时关于 Making the Locale "Sticky" during a User's Session 的清单文本在本地不进行修正。下面的代码示例将显示如何更改粘滞区域设置:
YAML:
# app/config/services.yml
services:
app.switch_user_listener:
class: AppBundle\EventListener\SwitchUserListener
tags:
- { name: kernel.event_listener, event: security.switch_user, method: onSwitchUser }
XML:
<!-- app/config/services.xml -->
<service id="app.switch_user_listener" class="AppBundle\EventListener\SwitchUserListener">
<tag name="kernel.event_listener" event="security.switch_user" method="onSwitchUser" />
</service>
PHP:
// app/config/services.php
$container
->register('app.switch_user_listener', 'AppBundle\EventListener\SwitchUserListener')
->addTag('kernel.event_listener', array('event' => 'security.switch_user', 'method' => 'onSwitchUser'))
;
监听器实现假设你的 User 实体有 getLocale() 的方法。
// src/AppBundle/EventListener/SwitchUserListener.pnp
namespace AppBundle\EventListener;
use Symfony\Component\Security\Http\Event\SwitchUserEvent;
class SwitchUserListener
{
public function onSwitchUser(SwitchUserEvent $event)
{
$event->getRequest()->getSession()->set(
'_locale',
$event->getTargetUser()->getLocale()
);
}
}
在 Symfony 里,你可以用 ACL模块 来检测用户的数据使用权限,即使这个模块显得有些过于强势。一个更简单的解决方法就是与顾客接触,利用他们的 Voter 来作为判定条件。
Voters 也能用其他方式被用到,比如,用户 IP 黑名单就来自整个应用程序:How to Use Voters to Check User Permissions。
看看 authorization 这一章可以对 voter 有更深刻的理解。
Symfony 怎么使用 voter
为了合理使用 voter,我们必须了解 Symfony 与 voter 的互动机制。所有的 voter 都被 isGranted() 函数申请调用,同时检查他们的权限(比如security.authorization_checker 服务)。Voter 的每一次的决定,都会接触到相应的资源。
从根本上,Symfony 从所有的 voter 里收集响应,通过在应用程序里制定的相对一致可行且合理的策略,同时结合它们做出最后的判决(允许或者拒绝访问申请)。
如果要获得更充分的信息,可以参考访问决策管理器相关章节。
Voter 接口
一个自定义 voter 需要使用 VoterInterface 接口,或者其子接口AbstractVoter ,这个接口可以让创建一个 voter 对象更简单便捷一点。
abstract class AbstractVoter implements VoterInterface
{
abstract protected function getSupportedClasses();
abstract protected function getSupportedAttributes();
abstract protected function isGranted($attribute, $object, $user = null);
}
在这个例子里,voter 会检查它们自己是否可以得到一个特定的针对他们自定义条件的对象(比如他们必须是一个是这个对象的所有者)。如果条件检测失败,那么就会返回 VoterInterface::ACCESS_DENIED,否则就会返回 VoterInterface::ACCESS_GRANTED 。如果投票者完全没有处理权限的话,就会返回 VoterInterface::ACCESS_ABSTAIN。
创建自定义 Voter
我们的目标是创建一个 voter,来检测用户能否读入或者编辑一个特定的对象,下面是一个实现特例:
// src/AppBundle/Security/Authorization/Voter/PostVoter.php
namespace AppBundle\Security\Authorization\Voter;
use Symfony\Component\Security\Core\Authorization\Voter\AbstractVoter;
use Symfony\Component\Security\Core\User\UserInterface;
class PostVoter extends AbstractVoter
{
const VIEW = 'view';
const EDIT = 'edit';
protected function getSupportedAttributes()
{
return array(self::VIEW, self::EDIT);
}
protected function getSupportedClasses()
{
return array('AppBundle\Entity\Post');
}
protected function isGranted($attribute, $post, $user = null)
{
// make sure there is a user object (i.e. that the user is logged in)
if (!$user instanceof UserInterface) {
return false;
}
switch($attribute) {
case self::VIEW:
// the data object could have for example a method isPrivate()
// which checks the Boolean attribute $private
if (!$post->isPrivate()) {
return true;
}
break;
case self::EDIT:
// we assume that our data object has a method getOwner() to
// get the current owner user entity for this data object
if ($user->getId() === $post->getOwner()->getId()) {
return true;
}
break;
}
return false;
}
}
就是这样!voter 已经创建完成了,下一步是把 voter 移动到安全层里。
简明扼要地说,这里我们用三个抽象方法来实现我们的目标:
它告知 Symfony,每当一个被给定类的对象传递给 isGranted() 方法时,你的 voter 就应该被调用。比如说,如果你返回了 array('AppBundle\Model\Product'), 当一个 Product 对象传递给 isGranted() 方法时,Symfony 就可以调用 voter。
它告知 Symfony,每当一些给定字符串作为第一个参数传递给 isGranted() 方法时,应当调用 voter。比如,如果你返回了 array('CREATE','READ'),当它们中的一个被发送到 isGranted() 时,Symfony 就会调用 voter。
这个方法采用了商业逻辑,来核实是否允许未被给定的用户访问给定对象的给定属性(例如,create 或 read),这个方法必须返回 boolean 类型的值。
目前,使用 AbstractVoter 基类,您必须创建一个总是传递给 isGranted() 的 voter 的对象。
声明 voter 是一项服务
将 voter 归入安全层,你就必须把它声明为一项服务,然后贴上 security.voter: 的标签:
YAML:
# src/AppBundle/Resources/config/services.yml
services:
security.access.post_voter:
class: AppBundle\Security\Authorization\Voter\PostVoter
public: false
tags:
- { name: security.voter }
XML:
<!-- src/AppBundle/Resources/config/services.xml -->
<?xml version="1.0" encoding="UTF-8" ?>
<container xmlns="http://symfony.com/schema/dic/services"
xsi:schemaLocation="http://symfony.com/schema/dic/services
http://symfony.com/schema/dic/services/services-1.0.xsd">
<services>
<service id="security.access.post_voter"
class="AppBundle\Security\Authorization\Voter\PostVoter"
public="false">
<tag name="security.voter" />
</service>
</services>
</container>
PHP:
// src/AppBundle/Resources/config/services.php
$container
->register(
'security.access.post_voter',
'AppBundle\Security\Authorization\Voter\PostVoter'
)
->setPublic(false)
->addTag('security.voter')
;
如何在一个控制器里使用 voter
一个已注册的 voter 会在 isGranted() 函数从授权检查中被调用的时候调用。
// src/AppBundle/Controller/PostController.php
namespace AppBundle\Controller;
use Symfony\Bundle\FrameworkBundle\Controller\Controller;
use Symfony\Component\HttpFoundation\Response;
class PostController extends Controller
{
public function showAction($id)
{
// get a Post instance
$post = ...;
$authChecker = $this->get('security.authorization_checker');
if (false === $authChecker->isGranted('view', $post)) {
throw $this->createAccessDeniedException('Unauthorized access!');
}
return new Response('<h1>'.$post->getName().'</h1>');
}
}
2.6 security.authorization_checker 服务在 Symfony2.6 里被介绍,在 Symfony2.6 之前的版本里,你不得不用 security.context 服务里面的 isGranted() 方法。
就是这么简单!
改变访问决策策略
想象一下你对于每一个对象的每一种行为有多种多样的 voter。比如说,你有一个 voter 用来检测一个站点的使用成员是否已经超过了 18 岁。
为了应对这些情况,访问决策管理者用一种决策管理策略。你可以根据你的需求安装一组。这里有三种可使用的策略:
affirmative(default)
给予授权当一个 voter 允许授权的时候;
consensus
当有很多 voter 允许授权而不是被拒绝的时候给予授权;
unanimous
只有所有 voters 都允许授权的时候给予授权。
在上述情形下,所有的 voters 都应该允许访问以便授予用户读取 post 的访问权限。在这种情况下,默认策略可能会不再有效,而且 unanimous 应当被取代。你可以在安全配置里设置这些参数。
YAML:
# app/config/security.yml
security:
access_decision_manager:
strategy: unanimous
XML:
<!-- app/config/security.xml -->
<?xml version="1.0" encoding="UTF-8" ?>
<srv:container xmlns="http://symfony.com/schema/dic/security"
xmlns:srv="http://symfony.com/schema/dic/services"
xmlns:xsi="http://www.w3.org/2001/XMLSchema-instance"
xsi:schemaLocation="http://symfony.com/schema/dic/services
http://symfony.com/schema/dic/services/services-1.0.xsd
http://symfony.com/schema/dic/security
http://symfony.com/schema/dic/security/security-1.0.xsd"
>
<config>
<access-decision-manager strategy="unanimous">
</config>
</srv:container>
PHP:
// app/config/security.php
$container->loadFromExtension('security', array(
'access_decision_manager' => array(
'strategy' => 'unanimous',
),
));
在复杂的申请中,你可能经常面临访问权限决策不仅仅取决于请求者本人(Token)还牵涉到了被申请的对象的问题。这也是 ACLs 系统被制作出来的原因所在。
ACLs的替代选择
使用 ACL 并不是细微之事,它的的确确对使用有简化功能。当然,它可能会滥杀无辜。如果你的判定逻辑只是被简单的代码来描述(比如检查这个博客是否被一个现在的使用者所拥有> ),那么就考虑使用 voters。一个 voter 可以通过表决来传递对象,通过这些,你就可以做出复杂的决定和更高效地执行你的 ACL。此外,强制批准(比如 isGranted 部分)就会看起来和你所看到的这个条目极其相似,但是你的 voter 类就会在幕后控制判定逻辑了,而不是 ACL 系统。
想象你在设计一个博客系统,而你的使用者可以评论你的工作。现在,如果你希望一个使用者能够修改编辑他们自己的评论,但并不是所有的用户;此时,你可以修改所有的评论。在这种情况下,comment 就会处理域名对象,同时你会获得权限。你可以采用多种方式来完成这个 Symfony,两个基本的方式如下:
- Enforce security in your business methods:基本上讲,这个方法意味着在每一个 Comment 之间制作一个参照,比较这些使用者提供的令牌,就可以做出决策。
- Enforce security with roles:在这种方法中,你可以为每一个 Comment 对象添加一些角色。比如 ROLE_COMMENT_1, ROLE_COMMENT_2 等等。
每种方法都非常有效。然而,它们结合了你的授权逻辑来负责你的商业代码,会限制你的代码的可通用型,因此这就增加了单元调试难度。此外,你可能会撞上一些问题,如果用户只有一个简单的域名对象的话。
幸运的是,这里有一种更好的方式,你在下面就可以看到。
引导指令
现在,在你能够采取行动之前,你需要做一些引导指令。首先,你需要安装你要实用的 ACL 系统的连接。
YAML:
# app/config/security.yml
security:
acl:
connection: default
XML:
<!-- app/config/security.xml -->
<acl>
<connection>default</connection>
</acl>
PHP:
// app/config/security.php
$container->loadFromExtension('security', 'acl', array(
'connection' => 'default',
));
ACL 体系要求一种连接关系,这种连接关系可以由 DBAL 来提供,也可以由 MongoDB(使用 MongoDBAclBundle)来提供。然而,那并不意味着你必须用 DoctrineORM 或者 ODM 来组织你的域对象。你可以用任意组织对象的方法和手段,比如 DoctrineORM,MongoDB ODM,Propel,rawSQL 等等。选择权在你手里。
在连接方式确定好之后,你就需要来输入基础的数据结构了。幸运的是,有一项任务专门处理这种情况,只需要运行一下面的指令就可以了:
$ php app/console init:acl
开始工作
回到最开始的小例子上去,现在你可以对它运用 ACL 技术了。
一旦 ACL 被建立起来,你就可以通过建立一个 Access Control Entry,来向你的用户提供信息获取通道。当然同时就可以稳固你的使用者和你的工作实体之间的联系了。
建立一个 ACL,添加一个 ACE
// src/AppBundle/Controller/BlogController.php
namespace AppBundle\Controller;
use Symfony\Bundle\FrameworkBundle\Controller\Controller;
use Symfony\Component\Security\Core\Exception\AccessDeniedException;
use Symfony\Component\Security\Acl\Domain\ObjectIdentity;
use Symfony\Component\Security\Acl\Domain\UserSecurityIdentity;
use Symfony\Component\Security\Acl\Permission\MaskBuilder;
class BlogController extends Controller
{
// ...
public function addCommentAction(Post $post)
{
$comment = new Comment();
// ... setup $form, and submit data
if ($form->isValid()) {
$entityManager = $this->getDoctrine()->getManager();
$entityManager->persist($comment);
$entityManager->flush();
// creating the ACL
$aclProvider = $this->get('security.acl.provider');
$objectIdentity = ObjectIdentity::fromDomainObject($comment);
$acl = $aclProvider->createAcl($objectIdentity);
// retrieving the security identity of the currently logged-in user
$tokenStorage = $this->get('security.token_storage');
$user = $tokenStorage->getToken()->getUser();
$securityIdentity = UserSecurityIdentity::fromAccount($user);
// grant owner access
$acl->insertObjectAce($securityIdentity, MaskBuilder::MASK_OWNER);
$aclProvider->updateAcl($acl);
}
}
}
在上面的代码段中有一些重要的实施策略。现在,我仅仅希望能强调两点:
首先,你可能注意到 ->createAcl() 不直接接受域对象,而只接受 ObjectIdentityInterface 的启用。当你手里没有实际的区域对象实例的时候,这个附加步骤间接地允许你能够和 ACLs 交互。这在你想要检查一大批对象的权限的时候,将会起到很大的作用。
另一个有趣的部分在于 ->insertObjectAce() 的调用。在例子里,我们可以授予直接联机的用户以修改评论的权限。而 MaskBuilder::MASK_OWNER 是一个提前定义的整型位掩码;不必担心掩码生成器会抽象大部分细节,但是这种技术会帮助你从数据库里得到一系列不同的权限数据,从而让你的表现能够显得更漂亮一些。
ACEs 的检查顺序是很有意义的,作为一项通用的准则,你应该在最开始设立更多的入口。
检测通道
// src/AppBundle/Controller/BlogController.php
// ...
class BlogController
{
// ...
public function editCommentAction(Comment $comment)
{
$authorizationChecker = $this->get('security.authorization_checker');
// check for edit access
if (false === $authorizationChecker->isGranted('EDIT', $comment)) {
throw new AccessDeniedException();
}
// ... retrieve actual comment object, and do your editing here
}
}
在这个例子里,你可以检测用户是否有编辑权限。在 Symfony 内部,Symfony 会分配权限给几个整型的位掩码,然后检测用户是否拥有这些码。
你可以建立起 32 位的权限码(取决于你的 OS,PHP 的码位可以从 30 到 32 不等)。此外,你也可以定义累加权限。
累加权限
在上面的第一个例子中,你只能保证用户得到 owner 的基本权限。尽管这样可以有效地管理用户的基础操作权限,比如可视,编辑等等。但是有时候我们希望用户得到的权限更加明确清晰。
通过结合几个基本权限,MaskBuilder 能够被用于建立位掩码。
$builder = new MaskBuilder();
$builder
->add('view')
->add('edit')
->add('delete')
->add('undelete')
;
$mask = $builder->get(); // int(29)
这个整型位掩码能够被用于保证用户权限添加的成功。
$identity = new UserSecurityIdentity('johannes', 'Acme\UserBundle\Entity\User');
$acl->insertObjectAce($identity, $mask);
现在用户可以使用可视,编辑,删除以及取消删除对象了。
本章的目的是给出一个更深入的 ACL 系统的观点,并解释其背后的一些设计决策。
设计概念
Symfony 的对象实例的安全功能是基于一个访问控制列表的概念。每一个域对象实例都有自己的 ACL。ACL 实例有一个详细的列表,访问控制项(ACEs),用于访问决策。Symfony 的 ACL 系统集中在两个主要目标:
- 为您的域对象提供一种方式来有效地检索大量的 ACLs / ACEs,并修改它们;
- 提供一种方式来容易地决定一个人是否被允许在域对象上执行操作。
正如第一点中所暗示的,Symfony 的 ACL 系统的主要功能之一是以高性能的方式检索 ACLs / ACEs。这是非常重要的,因为每个 ACL 可能有一些 ACEs,并以树形方式继承另一个 ACL。因此,ORM 是没有作用的,代替使用 Doctrine 的 DBAL 直接连接的默认实现。
对象身份
ACL 系统是完全脱离您的域对象。他们甚至不需要存储在同一个数据库中,或在同一台服务器上。为了实现这种分离,ACL 系统对象通过对象标识对象表示。每次你想为一个域对象检索 ACL,ACL 系统将首先从你的域对象创建一个对象的身份,然后通过这个对象身份 ACL 提供者进行进一步处理。
安全身份
这是模拟对象身份标识,但在您的应用程序中代表一个用户或角色。每个角色或用户有自己的安全标识。
数据库表结构
默认实现使用五个数据库表如下所示。这些表按行数递增的顺序排在一个典型的应用程序中:
- acl_security_identities:此表记录所有持有 ACEs 的安全身份。默认实现附带两个安全身份:RoleSecurityIdentity 和 UserSecurityIdentity。
- acl_classes:这个表类名映射到一个唯一的 ID,可以引用其他表。
- acl_object_identities:该表中每一行代表一个单独的域对象实例。
- acl_object_identity_ancestors:这个表允许所有的祖先 ACL 在一个非常有效的方法下决定。
- acl_entries:这个表包含所有 ACEs。这通常是行数最多的表。它可以包含数千万没有显著影响性能的 ACEs。
访问控制条目的范围
访问控制条目在他们的应用中可以有不同的适用范围。在 Symfony 中,基本上有两个不同的范围:
- 类范围:这些条目适用于所有从属于相同类的对象。
- 对象范围:这个使用范围只用在前一章,它只适用于一个特定的对象。
有时,你会发现只需要为对象的一个特定字段申请一个 ACE。假设您想要一个只对管理员而不是您的客户服务可见的 ID。为了解决这个普遍的问题,增加了两个 sub-scopes:
- Class-Field-Scope:这些条目适用于所有从属于相同类的对象,但只有特定字段的对象。
- Object-Field-Scope:这些条目适用于一个特定的对象,并且只适用于那个对象的特定字段。
预先授权决策
预先授权决策,即做出决定之前任何安全方法被调用(或安全措施),已证实 AccessDecisionManager 服务是被使用的。AccessDecisionManager 也被用于实现基于角色的授权决策。就像角色,ACL 系统添加了一些新的属性,可以用来检查不同的权限。
内置权限映射
属性 | 含义 | 整数位掩码 |
VIEW | 是否有人可以查看域对象。 | VIEW, EDIT, OPERATOR, MASTER, or OWNER |
EDIT | 一个人是否可以更改域对象。 | EDIT, OPERATOR, MASTER, or OWNER |
CREATE | 一个人是否被允许创建域对象。 | CREATE, OPERATOR, MASTER, or OWNER |
DELETE | 一个人是否被允许删除域对象。 | DELETE, OPERATOR, MASTER, or OWNER |
UNDELETE | 删除的人是否可以恢复以前删除的域对象。 | UNDELETE, OPERATOR, MASTER, or OWNER |
OPERATOR | 是否有人允许执行所有上述操作。 | OPERATOR, MASTER, or OWNER |
MASTER | 是否有人允许执行所有上述操作,并且允许任何上述权限授予其他人。 | MASTER, or OWNER |
OWNER | 是否有人拥有域对象。OWNER 可以执行上述任何操作并授予 MASTER 和 OWNER 权限。 | OWNER |
权限属性 vs. 权限位掩码
AccessDecisionManager 属性的使用就像角色一样。通常,这些属性事实上代表一个聚合的整数位掩码。使用整数位掩码另一方面,ACL 系统内部在数据库中有效存储用户的权限,并使用极快的位掩码操作执行访问检查。
可扩展性
上述许可映射绝不是静态的,并且理论上可以完全被取代。然而,它应该囊括大多数您遇到的问题,以及与其他包的互操作性。鼓励您坚持它们原本被设想的意义。
后授权决策
后授权决策在一个安全的方法被调用后做出,并且通常涉及被这样的方法返回的域对象。在调用完成后,提供者也允许修改,或在返回之前过滤域对象之前返回。
由于当前的 PHP 语言的局限性,没有 post-authorization 功能构建为核心的安全组件。然而,有一个实验 JMSSecurityExtraBundle 增加这些功能。如果您想了解更多关于这是如何完成的的信息,请看它的相关文档。
达到授权决策的过程
ACL 类提供了两个方法来确定是否一个安全标识需要位掩码,isGranted 和 isFieldGranted。当 ACL 通过这些方法之一收到授权请求,它代表这个请求 PermissionGrantingStrategy 的实现。这允许您替换访问决策的方式而不修改 ACL 类本身。
PermissionGrantingStrategy 首先检查你所有的 object-scope ACEs。如果没有适用的,class-scope ACEs 将被检查。如果没有适用的,那么这个过程会重复地对父 ACL 的 ACEs 进行。如果没有父亲 ACL 存在,将会抛出一个异常。
您能在您的网站领域安全配置强制使用 HTTPS 协议。您可以强迫您的站点在安全配置中使用 HTTPS 协议。这是通过 access_control 规则使用 requires_channel 选项来完成的。例如,如果您想强制所有的 URL 以 /secure 开始来使用 HTTPS,那么你可以使用以下配置:
YAML:
access_control:
- { path: ^/secure, roles: ROLE_ADMIN, requires_channel: https }
XML:
<access-control>
<rule path="^/secure" role="ROLE_ADMIN" requires_channel="https" />
</access-control>
PHP:
'access_control' => array(
array(
'path' => '^/secure',
'role' => 'ROLE_ADMIN',
'requires_channel' => 'https',
),
),
登录表单本身就需要允许匿名访问,否则用户将无法进行身份验证。强制它使用 HTTPS,你仍然可以通过使用 is_authenticated_anonymously 选项使用 access_control 规则:
YAML:
access_control:
- { path: ^/login, roles: IS_AUTHENTICATED_ANONYMOUSLY, requires_channel: https }
XML:
<access-control>
<rule path="^/login"
role="IS_AUTHENTICATED_ANONYMOUSLY"
requires_channel="https" />
</access-control>
PHP:
'access_control' => array(
array(
'path' => '^/login',
'role' => 'IS_AUTHENTICATED_ANONYMOUSLY',
'requires_channel' => 'https',
),
),
它也可以指定在路径配置中使用 HTTPS,浏览如何强制路径始终使用 HTTPS 或 HTTP 了解更多细节。
通过安全组件,你可以配置一个能通过某些请求选项的防火墙。大多数情况下,仅通过 URL 匹配就可实现要求了,但某些特殊情况下,可通过进一步限定防火墙,使其禁止不满足要求的请求通过,达到同样的目的。
你可以使用任何这些限制,单独或混合在一起以得到您想要的防火墙配置。
通过模式限定
这也是默认的限定方式,并且仅当请求 URL 与限定配置模式串相匹配时,才初始化有限定的防火墙。
YAML:
# app/config/security.yml
# ...
security:
firewalls:
secured_area:
pattern: ^/admin
# ...
XML:
<!-- app/config/security.xml -->
<?xml version="1.0" encoding="UTF-8"?>
<srv:container xmlns="http://symfony.com/schema/dic/security"
xmlns:xsi="http://www.w3.org/2001/XMLSchema-instance"
xmlns:srv="http://symfony.com/schema/dic/services"
xsi:schemaLocation="http://symfony.com/schema/dic/services
http://symfony.com/schema/dic/services/services-1.0.xsd">
<config>
<!-- ... -->
<firewall name="secured_area" pattern="^/admin">
<!-- ... -->
</firewall>
</config>
</srv:container>
PHP:
// app/config/security.php
// ...
$container->loadFromExtension('security', array(
'firewalls' => array(
'secured_area' => array(
'pattern' => '^/admin',
// ...
),
),
));
模式是正则表达式。在本例中,仅当 URL 以 /admin 作为开始(以 ^ 作为正则开始符)时,防火墙会被激活。如果 URL 与该模式 不匹配,防火墙不会被激活,因此,防火墙就有可能成功接收请求。
通过主机限定
如果仅通过模式匹配限定不可满足要求,也可使用请求与主机匹配的方法。当配置选项主机确立后,可以限定防火墙,使它在仅当来自某请求的主机能匹配上配置时,才开始初始化。
YAML:
# app/config/security.yml
# ...
security:
firewalls:
secured_area:
host: ^admin\.example\.com$
# ...
XML:
<!-- app/config/security.xml -->
<?xml version="1.0" encoding="UTF-8"?>
<srv:container xmlns="http://symfony.com/schema/dic/security"
xmlns:xsi="http://www.w3.org/2001/XMLSchema-instance"
xmlns:srv="http://symfony.com/schema/dic/services"
xsi:schemaLocation="http://symfony.com/schema/dic/services
http://symfony.com/schema/dic/services/services-1.0.xsd">
<config>
<!-- ... -->
<firewall name="secured_area" host="^admin\.example\.com$">
<!-- ... -->
</firewall>
</config>
</srv:container>
PHP:
// app/config/security.php
// ...
$container->loadFromExtension('security', array(
'firewalls' => array(
'secured_area' => array(
'host' => '^admin\.example\.com$',
// ...
),
),
));
主机(如上述的模式一般)是一正则表达式。在本例中,仅当主机完全与 hostname 相等(以 ^ 和 $ 决定开头结尾)时,防火墙被激活。而如果名字与该模式不匹配,防火墙不会被激活,因此,防火墙就有可能把成功接收请求。
通过 HTTP 方法限定
该配置选项策略会把防火墙允许通过的 HTTP 方法限定在指令的方法里。
YAML:
# app/config/security.yml
# ...
security:
firewalls:
secured_area:
methods: [GET, POST]
# ...
XML:
<!-- app/config/security.xml -->
<?xml version="1.0" encoding="UTF-8"?>
<srv:container xmlns="http://symfony.com/schema/dic/security"
xmlns:xsi="http://www.w3.org/2001/XMLSchema-instance"
xmlns:srv="http://symfony.com/schema/dic/services"
xsi:schemaLocation="http://symfony.com/schema/dic/services
http://symfony.com/schema/dic/services/services-1.0.xsd">
<config>
<!-- ... -->
<firewall name="secured_area" methods="GET,POST">
<!-- ... -->
</firewall>
</config>
</srv:container>
PHP:
// app/config/security.php
// ...
$container->loadFromExtension('security', array(
'firewalls' => array(
'secured_area' => array(
'methods' => array('GET', 'POST'),
// ...
),
),
));
在本例中,仅当请求 HTTP 方法为 GET 或 POST 时,防火墙被激活。如果请求的方法不属于指定方法列表中,则防火墙不会被激活,有可能成功接收请求。
在 Symfony 2.5 中, 添加了限定防火墙的多种可能的方法,你可以在“如何限定防火墙使其只允许通过指定请求”章节中查阅。
使用表单登录来处理 Symfony 的验证是一件非常常见并且灵活的方法。几乎表单登录的每个方面都可以进行自定义,所有的默认配置都将在下一节中进行介绍。
表单登录参考配置
如果想要查看完整表单登录参考配置,请参考 SecurityBundle 配置 ("安全")。如下列举了一些更有趣的解释选项。
成功登录后的重定向
当使用不同的配置选项登录成功以后,您就可以改变重定向的登录表单。在默认的情况下,表单会重定向到用户请求的 URL(即触发显示登录窗体的 URL)。比如,如果用户请求 http://www.example.com/admin/post/18/edit,当用户成功的登录以后,页面最终会重定向到 http://www.example.com/admin/post/18。这是通过把用户请求的页面存储到 session 实现的。如果 session 中没有存储一个 URL(比如用户直接访问的登录页),那么当用户成功登录以后,系统就会给用户展示默认页。你可以通过很多种方式来改变这种模式。
就像前面提到的,在默认情况下,显示的页面将会被重定向到用户最初请求的页面。有时候,也会出现一些问题,就像后台的 Ajax 请求“看起来”像是最后访问的 URL,导致用户访问的页面被重定向到这里,有关控制此行为的信息,请参阅如何更改默认目标路径。
更改默认页面
首先,默认页是可以设置的(即如果没有在 session 中存储以前的页面路径,就会将页面重定向到默认的页面)。请使用以下配置来设置 default_security_target(默认安全目标) 路径:
YAML:
# app/config/security.yml
security:
firewalls:
main:
form_login:
# ...
default_target_path: default_security_target
XML:
<!-- app/config/security.xml -->
<config>
<firewall>
<form-login
default_target_path="default_security_target"
/>
</firewall>
</config>
PHP:
// app/config/security.php
$container->loadFromExtension('security', array(
'firewalls' => array(
'main' => array(
// ...
'form_login' => array(
// ...
'default_target_path' => 'default_security_target',
),
),
),
));
现在,当 session 中没有存储 URL,用户所浏览的页面将会转到 default_security_target 中的路径。
总是重定向到默认页
您可以通过设置 always_use_default_target_path 选项的值设定为真,这样的话,不管用户请求了什么 URL ,其访问的页面最终都会被重定向到默认页。
YAML:
# app/config/security.yml
security:
firewalls:
main:
form_login:
# ...
always_use_default_target_path: true
XML:
<!-- app/config/security.xml -->
<config>
<firewall>
<form-login
always_use_default_target_path="true"
/>
</firewall>
</config>
PHP:
// app/config/security.php
$container->loadFromExtension('security', array(
'firewalls' => array(
'main' => array(
// ...
'form_login' => array(
// ...
'always_use_default_target_path' => true,
),
),
),
));
使用引用的 URL
为了防止以前的 URL 没有被存储在 session 中,您不妨试试改用 HTTP_REFERER 属性,因为这往往会达到相同的效果。您可以通过把 setting use_referer 属性的值改为 true(默认是false):
YAML:
# app/config/security.yml
security:
firewalls:
main:
form_login:
# ...
use_referer: true
XML:
<!-- app/config/security.xml -->
<config>
<firewall>
<form-login
use_referer="true"
/>
</firewall>
</config>
PHP:
// app/config/security.php
$container->loadFromExtension('security', array(
'firewalls' => array(
'main' => array(
// ...
'form_login' => array(
// ...
'use_referer' => true,
),
),
),
));
控制重定向表单内的 URL
您还可以通过包含一个名叫 _target_path 的隐藏字段来重写用户通过表单本身重定向的 URL。例如,可以通过以下的程序来重定向到一些账户路由定义的 URL:
Twig:
{# src/Acme/SecurityBundle/Resources/views/Security/login.html.twig #}
{% if error %}
<div>{{ error.message }}</div>
{% endif %}
<form action="{{ path('login_check') }}" method="post">
<label for="username">Username:</label>
<input type="text" id="username" name="_username" value="{{ last_username }}" />
<label for="password">Password:</label>
<input type="password" id="password" name="_password" />
<input type="hidden" name="_target_path" value="account" />
<input type="submit" name="login" />
</form>
PHP:
<!-- src/Acme/SecurityBundle/Resources/views/Security/login.html.php -->
<?php if ($error): ?>
<div><?php echo $error->getMessage() ?></div>
<?php endif ?>
<form action="<?php echo $view['router']->generate('login_check') ?>" method="post">
<label for="username">Username:</label>
<input type="text" id="username" name="_username" value="<?php echo $last_username ?>" />
<label for="password">Password:</label>
<input type="password" id="password" name="_password" />
<input type="hidden" name="_target_path" value="account" />
<input type="submit" name="login" />
</form>
现在,用户访问页面将会被重定向到隐藏表单字段的值。这个值的属性可以是相对路径,也可以是绝对的 URL 路径,也可以是路由的名称。您甚至可以通过把 target_path_parameter 选项的值改为另一个值来更改隐藏表单字段的名称。
YAML:
# app/config/security.yml
security:
firewalls:
main:
form_login:
target_path_parameter: redirect_url
XML:
<!-- app/config/security.xml -->
<config>
<firewall>
<form-login
target_path_parameter="redirect_url"
/>
</firewall>
</config>
PHP:
// app/config/security.php
$container->loadFromExtension('security', array(
'firewalls' => array(
'main' => array(
'form_login' => array(
'target_path_parameter' => redirect_url,
),
),
),
));
登录失败后的重定向
除了可以将用户成功登录后的页面进行重定向,您也可以设置当用户登录失败后的重定向页面(例如用户提交了无效的用户名或密码) 。在默认情况下,用户访问的页面会重定向到登录表单页面,您也可以通过修改下面的属性来进行改变路径:
YAML:
# app/config/security.yml
security:
firewalls:
main:
form_login:
# ...
failure_path: login_failure
XML:
<!-- app/config/security.xml -->
<config>
<firewall>
<form-login
failure_path="login_failure"
/>
</firewall>
</config>
PHP:
// app/config/security.php
$container->loadFromExtension('security', array(
'firewalls' => array(
'main' => array(
// ...
'form_login' => array(
// ...
'failure_path' => 'login_failure',
),
),
),
));
在安全性一章中,您可以看到如何通过从服务容器请求 security.authorization_checker 并检查当前用户的角色来保护一个控制器:
// ...http://symfony.com/doc/current/book/security.html#book-security-securing-controller
use Symfony\Component\Security\Core\Exception\AccessDeniedException;
public function helloAction($name)
{
$this->denyAccessUnlessGranted('ROLE_ADMIN');
// ...
}
您也可以通过向服务注入 security.authorization_checker 服务来保护。关于如何向服务注入依赖项的内容介绍请参阅本书的服务容器的章节。假如您现在有一个可以发送电子邮件的 NewsletterManager 类 ,但是您想把它的使用权限制为具有 ROLE_NEWSLETTER_ADMIN 角色的用户,在您添加安全性之前,这个类应该是下述代码描述的这样:
// src/AppBundle/Newsletter/NewsletterManager.php
namespace AppBundle\Newsletter;
class NewsletterManager
{
public function sendNewsletter()
{
// ... where you actually do the work
}
// ...
}
您的目标是要通过调用 sendNewsletter() 方法来检查用户的角色。这第一步是向对象注入 security.authorization_checker 服务。因为如果不进行安全性检查将会失去意义,同时这也是进行构造函数注入的一个不错的方法,构造函数注入保证了授权检查对象在 NewsletterManager 类中可用:
// src/AppBundle/Newsletter/NewsletterManager.php
// ...
use Symfony\Component\Security\Core\Authorization\AuthorizationCheckerInterface;
class NewsletterManager
{
protected $authorizationChecker;
public function __construct(AuthorizationCheckerInterface $authorizationChecker)
{
$this->authorizationChecker = $authorizationChecker;
}
// ...
}
然后在您的服务配置中,您可以注入服务:
YAML:
# app/config/services.yml
services:
newsletter_manager:
class: "AppBundle\Newsletter\NewsletterManager"
arguments: ["@security.authorization_checker"]
XML:
<!-- app/config/services.xml -->
<services>
<service id="newsletter_manager" class="AppBundle\Newsletter\NewsletterManager">
<argument type="service" id="security.authorization_checker"/>
</service>
</services>
PHP:
// app/config/services.php
use Symfony\Component\DependencyInjection\Definition;
use Symfony\Component\DependencyInjection\Reference;
$container->setDefinition('newsletter_manager', new Definition(
'AppBundle\Newsletter\NewsletterManager',
array(new Reference('security.authorization_checker'))
));
随后可以调用 sendNewsletter() 方法来对注入服务进行安全性检查:
namespace AppBundle\Newsletter;
use Symfony\Component\Security\Core\Authorization\AuthorizationCheckerInterface;
use Symfony\Component\Security\Core\Exception\AccessDeniedException;
// ...
class NewsletterManager
{
protected $authorizationChecker;
public function __construct(AuthorizationCheckerInterface $authorizationChecker)
{
$this->authorizationChecker = $authorizationChecker;
}
public function sendNewsletter()
{
if (false === $this->authorizationChecker->isGranted('ROLE_NEWSLETTER_ADMIN')) {
throw new AccessDeniedException();
}
// ...
}
// ...
}
使用注释保护方法
您也可以通过使用可选的 JMSSecurityExtraBundle 包来保护带有注释的保护方法的调用。虽然在 Symfony 标准版本中不包括此包,但您可以去安装它。
如果想要启用注释功能,可以使用 security.secure_service 标记来标记您想保护的服务(您还可以为所有服务自动启用此功能请参阅下面的文本框):
YAML:
# app/services.yml
# ...
services:
newsletter_manager:
# ...
tags:
- { name: security.secure_service }
XML:
<!-- app/services.xml -->
<!-- ... -->
<services>
<service id="newsletter_manager" class="AppBundle\Newsletter\NewsletterManager">
<!-- ... -->
<tag name="security.secure_service" />
</service>
</services>
PHP:
// app/services.php
use Symfony\Component\DependencyInjection\Definition;
use Symfony\Component\DependencyInjection\Reference;
$definition = new Definition(
'AppBundle\Newsletter\NewsletterManager',
// ...
));
$definition->addTag('security.secure_service');
$container->setDefinition('newsletter_manager', $definition);
您可以通过使用注释来取得和上述程序一样的效果:
namespace AppBundle\Newsletter;
use JMS\SecurityExtraBundle\Annotation\Secure;
// ...
class NewsletterManager
{
/**
* @Secure(roles="ROLE_NEWSLETTER_ADMIN")
*/
public function sendNewsletter()
{
// ...
}
// ...
}
注释之所以可以有相同的效果是因为在程序中有一个代理类来帮您的类执行安全性检查。这也就是说,您只可以在公有和受保护的方法中使用注释,而不能在私有或者在带有 final 标记的方法中使用它们。
JMSSecurityExtraBundle 还允许您保护方法的参数和返回的值。更多的信息,请参阅 JMSSecurityExtraBundle 文档。
为所有服务激活注释功能
当您在保护一个服务的方法时(如上面所述),您可以单独的标记每个服务,也可以一次性激活所有的服务的功能。如果想要这样做,可以把 secure_all_services 配置将选项设置为 true:
YAML:
# app/config/config.yml
jms_security_extra:
# ...
secure_all_services: true
XML:
<!-- app/config/config.xml -->
<?xml version="1.0" ?>
<container xmlns="http://symfony.com/schema/dic/services"
xmlns:xsi="http://www.w3.org/2001/XMLSchema-instance"
xmlns:jms-security-extra="http://example.org/schema/dic/jms_security_extra"
xsi:schemaLocation="http://www.example.com/symfony/schema/ http://www.example.com/symfony/schema/hello-1.0.xsd">
<!-- ... -->
<jms-security-extra:config secure-controllers="true" secure-all-services="true" />
</srv:container>
PHP:
// app/config/config.php
$container->loadFromExtension('jms_security_extra', array(
// ...
'secure_all_services' => true,
));
这种方法也有一些缺点,当您激活了服务,初始页面加载可能会很慢并且会取决您已经定义了多少服务。
Symfony 的标准身份验证过程的一部分取决于"用户服务提供者"。当用户提交一个用户名和密码时,身份验证层便请求配置用户信息的程序返回一个用户对象来提供用户名。随后 Symfony 会检查此用户的密码是否正确,如果是正确的就会生成一个安全令牌,使用户在当前会话期间保持已经验证过的身份。当然不确定的是,Symfony 有一个 "in_memory" 和一个 "entity" 用户提供程序。在本节中,您可以了解到如何创建您自己的用户提供程序,如果您的用户通过一个自定义的数据库,一个文件,或者是这个例子中的 - 网络服务来访问该程序,那么该提供程序会非常有用。
创建一个用户类
首先,无论您从哪里获得用户数据,您都需要创建一个表示该数据的用户类。用户可以看到任何您想要和包含的数据。唯一的要求是该类实现用户接口。因此如下接口中的方法应该定义在自定义用户类中: getRoles()、 getPassword()、 getSalt()、 getUsername()、 eraseCredentials()。它也可能有助于实现 EquatableInterface 接口,在这个接口中定义了一个方法来检查用户是否等于当前用户。此接口需要包含 isEqualTo() 方法。
您的 WebserviceUser 如下所示:
// src/Acme/WebserviceUserBundle/Security/User/WebserviceUser.php
namespace Acme\WebserviceUserBundle\Security\User;
use Symfony\Component\Security\Core\User\UserInterface;
use Symfony\Component\Security\Core\User\EquatableInterface;
class WebserviceUser implements UserInterface, EquatableInterface
{
private $username;
private $password;
private $salt;
private $roles;
public function __construct($username, $password, $salt, array $roles)
{
$this->username = $username;
$this->password = $password;
$this->salt = $salt;
$this->roles = $roles;
}
public function getRoles()
{
return $this->roles;
}
public function getPassword()
{
return $this->password;
}
public function getSalt()
{
return $this->salt;
}
public function getUsername()
{
return $this->username;
}
public function eraseCredentials()
{
}
public function isEqualTo(UserInterface $user)
{
if (!$user instanceof WebserviceUser) {
return false;
}
if ($this->password !== $user->getPassword()) {
return false;
}
if ($this->salt !== $user->getSalt()) {
return false;
}
if ($this->username !== $user->getUsername()) {
return false;
}
return true;
}
}
如果您想让您的用户有更多或者更详细的信息,比如像用户的“姓”,那么您可以添加一个“姓”的字段来存放该数据。
创建一个用户提供程序
现在,您有一个用户类,您将创建用户提供程序,该程序可以从一些网络服务中抓取用户的信息,创建一个 WebserviceUser 对象,并且给它填充上数据。
用户提供程序只是一个需要实现 UserProviderInterface 接口的普通 PHP 类,在该接口中需要定义的三种方法: loadUserByUsername($username),refreshUser (UserInterface $user) 和 supportsClass($class)。有关更多详细信息,请参阅 UserProviderInterface。
该接口可以如同下面的代码描述一样:
// src/Acme/WebserviceUserBundle/Security/User/WebserviceUserProvider.php
namespace Acme\WebserviceUserBundle\Security\User;
use Symfony\Component\Security\Core\User\UserProviderInterface;
use Symfony\Component\Security\Core\User\UserInterface;
use Symfony\Component\Security\Core\Exception\UsernameNotFoundException;
use Symfony\Component\Security\Core\Exception\UnsupportedUserException;
class WebserviceUserProvider implements UserProviderInterface
{
public function loadUserByUsername($username)
{
// make a call to your webservice here
$userData = ...
// pretend it returns an array on success, false if there is no user
if ($userData) {
$password = '...';
// ...
return new WebserviceUser($username, $password, $salt, $roles);
}
throw new UsernameNotFoundException(
sprintf('Username "%s" does not exist.', $username)
);
}
public function refreshUser(UserInterface $user)
{
if (!$user instanceof WebserviceUser) {
throw new UnsupportedUserException(
sprintf('Instances of "%s" are not supported.', get_class($user))
);
}
return $this->loadUserByUsername($user->getUsername());
}
public function supportsClass($class)
{
return $class === 'Acme\WebserviceUserBundle\Security\User\WebserviceUser';
}
}
为用户提供程序创建一个服务
现在您可以把用户提供程序作为一种服务:
YAML:
# src/Acme/WebserviceUserBundle/Resources/config/services.yml
services:
webservice_user_provider:
class: Acme\WebserviceUserBundle\Security\User\WebserviceUserProvider
XML:
<!-- src/Acme/WebserviceUserBundle/Resources/config/services.xml -->
<services>
<service id="webservice_user_provider" class="Acme\WebserviceUserBundle\Security\User\WebserviceUserProvider" />
</services>
PHP:
// src/Acme/WebserviceUserBundle/Resources/config/services.php
use Symfony\Component\DependencyInjection\Definition;
$container->setDefinition(
'webservice_user_provider',
new Definition('Acme\WebserviceUserBundle\Security\User\WebserviceUserProvider')
);
真正的实现用户提供程序可能会需要有一些依赖关系或配置选项或是其它服务并且把它们在服务定义中设定为参数。
如何确保该服务文件被导入,详情请参阅带有输入的导入配置。
修改 security.yml
在您的安全配置中包含了所有的属性。我们把用户提供程序添加到"安全"一节中的提供程序的列表中并且为用户提供程序 (例如"web 服务") 选择一个名称,然后记录下您刚刚定义的服务的 id。
YAML:
# app/config/security.yml
security:
providers:
webservice:
id: webservice_user_provider
XML:
<!-- app/config/security.xml -->
<config>
<provider name="webservice" id="webservice_user_provider" />
</config>
PHP:
// app/config/security.php
$container->loadFromExtension('security', array(
'providers' => array(
'webservice' => array(
'id' => 'webservice_user_provider',
),
),
));
Symfony 也需要知道如何对网络上的用户输入的密码进行编码,例如用户通过填写一个登录表单提交的密码。您可以通过在您的安全配置文件中添加一行有关“编码器”一节中提到的代码来实现上述功能:
YAML:
# app/config/security.yml
security:
encoders:
Acme\WebserviceUserBundle\Security\User\WebserviceUser: sha512
XML:
<!-- app/config/security.xml -->
<config>
<encoder class="Acme\WebserviceUserBundle\Security\User\WebserviceUser">sha512</encoder>
</config>
PHP:
// app/config/security.php
$container->loadFromExtension('security', array(
'encoders' => array(
'Acme\WebserviceUserBundle\Security\User\WebserviceUser' => 'sha512',
),
));
当创建您的用户的时候(不管这些用户是怎样创建的)不管您的密码最初是怎样被编码的,它的值都必须符合密码编码规则。当一个用户提交他的密码的时候,混淆值将被追加到密码上,然后用相应的算法对它进行编码,然后再和 getPassword() 方法返回的哈希值进行比较。此外,根据您的选项,密码可能有编码多次并且被编成 base64 进制码。
关于密码如何进行编码的细节信息
Symfony 使用特定的方法来合并混淆值并且在和已经编码好的密码比较之前就完成对密码的编码。如果 getSalt() 没有返回任何值,那么仅仅使用了您在 security.yml 中指定的算法对您提交的密码进行编码。如果明确指定了一种混淆值,那么下面列举的值已经被创建了,并且通过该算法对其进行散列处理:
$password.'{'.$salt.'}';
如果外部用户通过不同的方法来对他们的密码进行混淆加密,那么你就需要做更多的工作,以保证 Symfony 能正确的对密码进行编码。这超出了本章的介绍范围,但可以通过包含 MessageDigestPasswordEncoder 子类并且重载 mergePasswordAndSalt 方法。
此外,在默认情况下,哈希值将会被多次编码然后被转化为 64 进制编码。了解详情请参阅 MessageDigestPasswordEncoder 一章。为了防止出现这种情况,请在您的配置文件中这样配置:
YAML:
# app/config/security.yml
security:
encoders:
Acme\WebserviceUserBundle\Security\User\WebserviceUser:
algorithm: sha512
encode_as_base64: false
iterations: 1
XML:
<!-- app/config/security.xml -->
<config>
<encoder class="Acme\WebserviceUserBundle\Security\User\WebserviceUser"
algorithm="sha512"
encode-as-base64="false"
iterations="1"
/>
</config>
PHP:
// app/config/security.php
$container->loadFromExtension('security', array(
'encoders' => array(
'Acme\WebserviceUserBundle\Security\User\WebserviceUser' => array(
'algorithm' => 'sha512',
'encode_as_base64' => false,
'iterations' => 1,
),
),
));
想象一下,如果您想要使您的网站只能在下午两点到四点之间才能被访问。在 Symfony 2.4 之前必须创建一个自定义的令牌、 工厂、 监听器和提供者才能实现。在本节中,您将学习如何在一个登录表单(即您的用户提交他们的用户名和密码的页面)中实现上述功能 。在 Symfony 2.6 之前,您必须使用密码编码器来验证用户的密码。
密码身份验证器
2.6 在 Symfony 2.6 介绍了 UserPasswordEncoderInterface 接口。
首先,创建新的类来实现 SimpleFormAuthenticatorInterface 接口。最终,这将允许您创建自定义逻辑来对用户进行身份验证:
// src/Acme/HelloBundle/Security/TimeAuthenticator.php
namespace Acme\HelloBundle\Security;
use Symfony\Component\HttpFoundation\Request;
use Symfony\Component\Security\Core\Authentication\SimpleFormAuthenticatorInterface;
use Symfony\Component\Security\Core\Authentication\Token\TokenInterface;
use Symfony\Component\Security\Core\Authentication\Token\UsernamePasswordToken;
use Symfony\Component\Security\Core\Encoder\UserPasswordEncoderInterface;
use Symfony\Component\Security\Core\Exception\AuthenticationException;
use Symfony\Component\Security\Core\Exception\UsernameNotFoundException;
use Symfony\Component\Security\Core\User\UserProviderInterface;
class TimeAuthenticator implements SimpleFormAuthenticatorInterface
{
private $encoder;
public function __construct(UserPasswordEncoderInterface $encoder)
{
$this->encoder = $encoder;
}
public function authenticateToken(TokenInterface $token, UserProviderInterface $userProvider, $providerKey)
{
try {
$user = $userProvider->loadUserByUsername($token->getUsername());
} catch (UsernameNotFoundException $e) {
throw new AuthenticationException('Invalid username or password');
}
$passwordValid = $this->encoder->isPasswordValid($user, $token->getCredentials());
if ($passwordValid) {
$currentHour = date('G');
if ($currentHour < 14 || $currentHour > 16) {
throw new AuthenticationException(
'You can only log in between 2 and 4!',
100
);
}
return new UsernamePasswordToken(
$user,
$user->getPassword(),
$providerKey,
$user->getRoles()
);
}
throw new AuthenticationException('Invalid username or password');
}
public function supportsToken(TokenInterface $token, $providerKey)
{
return $token instanceof UsernamePasswordToken
&& $token->getProviderKey() === $providerKey;
}
public function createToken(Request $request, $username, $password, $providerKey)
{
return new UsernamePasswordToken($username, $password, $providerKey);
}
}
它是怎样工作的
很好!现在你只需要设置一些配置。但首先,你可以了解更多有关此类中的每个方法的作用。
1)createToken 方法
当 Symfony 开始处理请求,createToken() 方法会被调用,在这个方法中会创建一个 TokenInterface 对象,并且该对象包含的所有您需要的信息都会在 authenticateToken() 中进行用户身份验证 (例如用户名和密码) 。
您在这里创建的所有令牌对象随后都将通过 authenticateToken() 方法传递给您。
2)supportsToken 方法
当 Symfony 调用 createToken() 方法后,它将会调用您创建的类中的 supportsToken() 方法(和任何其它身份验证监听器) 来弄清谁应该处理令牌。这仅仅是一种允许同一个防火墙使用几种身份验证机制的方法。 (通过这种方式,例如您可以首先通过证书或者 API 密钥来对用户进行身份验证然后再回退到登录表单)。
大多数情况下,你只需要确保在这个方法中,给 createToken() 方法中建立的令牌返回一个真值。您的程序逻辑应该如同这个例子一样。
3)authenticateToken 方法
如果 supportsToken 方法返回 true,Symfony 将会调用 authenticateToken() 方法。您现在应该做的是检查令牌是否允许首先通过的用户提供程序来获得用户对象,然后通过检查密码和当前时间来登录。
关于如何获取用户对象以及确定令牌是否有效 (例如检查密码)的"流",可能会随着您的需求而改变。
最终,您的任务是返回一个新的并且已经"身份验证"过的令牌对象(即:至少给它设定了一个角色),并且这个令牌对象中含有用户对象。
在这个方法中,需要使用密码编码器被来检查密码的有效性:
$passwordValid = $this->encoder->isPasswordValid($user, $token->getCredentials());
这已经是 Symfony 中可用的服务,并且它使用的是编码密钥下的安全配置 (例如 security.yml) 中的密码算法。下面,您将会看到如何把它注入 到 TimeAuthenticator 中。
配置
现在,把您的 TimeAuthenticator 作为一种服务来配置:
YAML:
# app/config/config.yml
services:
# ...
time_authenticator:
class: Acme\HelloBundle\Security\TimeAuthenticator
arguments: ["@security.password_encoder"]
XML:
<!-- app/config/config.xml -->
<?xml version="1.0" ?>
<container xmlns="http://symfony.com/schema/dic/services"
xmlns:xsi="http://www.w3.org/2001/XMLSchema-instance"
xsi:schemaLocation="http://symfony.com/schema/dic/services
http://symfony.com/schema/dic/services/services-1.0.xsd">
<services>
<!-- ... -->
<service id="time_authenticator"
class="Acme\HelloBundle\Security\TimeAuthenticator"
>
<argument type="service" id="security.password_encoder" />
</service>
</services>
</container>
PHP:
// app/config/config.php
use Symfony\Component\DependencyInjection\Definition;
use Symfony\Component\DependencyInjection\Reference;
// ...
$container->setDefinition('time_authenticator', new Definition(
'Acme\HelloBundle\Security\TimeAuthenticator',
array(new Reference('security.password_encoder'))
));
接着,使用 simple_form 密钥在安全配置中的防火墙中激活它:
YAML:
# app/config/security.yml
security:
# ...
firewalls:
secured_area:
pattern: ^/admin
# ...
simple_form:
authenticator: time_authenticator
check_path: login_check
login_path: login
XML:
<!-- app/config/security.xml -->
<?xml version="1.0" encoding="UTF-8"?>
<srv:container xmlns="http://symfony.com/schema/dic/security"
xmlns:xsi="http://www.w3.org/2001/XMLSchema-instance"
xmlns:srv="http://symfony.com/schema/dic/services"
xsi:schemaLocation="http://symfony.com/schema/dic/services
http://symfony.com/schema/dic/services/services-1.0.xsd">
<config>
<!-- ... -->
<firewall name="secured_area"
pattern="^/admin"
>
<simple-form authenticator="time_authenticator"
check-path="login_check"
login-path="login"
/>
</firewall>
</config>
</srv:container>
PHP:
// app/config/security.php
// ..
$container->loadFromExtension('security', array(
'firewalls' => array(
'secured_area' => array(
'pattern' => '^/admin',
'simple_form' => array(
'provider' => ...,
'authenticator' => 'time_authenticator',
'check_path' => 'login_check',
'login_path' => 'login',
),
),
),
));
Simple_form 密钥具有和正常的 form_login 相同的选项,但在 simple_form 密钥中具有指向新服务的附加的身份验证器密钥。有关详细信息,请参阅表单登录配置。
一般情况下,如果您对如何创建一个新的登录表单不熟悉或者是不明白 check_path 和 login_path 选项,请参阅如何自定义您的表单登录。
如今,我们常使用 API 去验证一个用户的身份 (例如开发一个 web 服务的时候)。该 API 密钥可以为每个请求提供服务,并且以查询字符串参数的形式或通过 HTTP 头部信息进行传递。
API 密钥身份验证器
我们应该通过预身份验证机制请求信息来对用户身份进行验证。SimplePreAuthenticatorInterface 接口能让您很容易的达到这个目的。
您的实际情况可能会有所不同,但在此示例中,从 apikey 查询参数中读取令牌、 从该值中加载正确的用户名,然后创建一个用户对象:
// src/AppBundle/Security/ApiKeyAuthenticator.php
namespace AppBundle\Security;
use Symfony\Component\Security\Core\Authentication\SimplePreAuthenticatorInterface;
use Symfony\Component\Security\Core\Authentication\Token\TokenInterface;
use Symfony\Component\Security\Core\Exception\AuthenticationException;
use Symfony\Component\Security\Core\Authentication\Token\PreAuthenticatedToken;
use Symfony\Component\HttpFoundation\Request;
use Symfony\Component\Security\Core\User\UserProviderInterface;
use Symfony\Component\Security\Core\Exception\BadCredentialsException;
class ApiKeyAuthenticator implements SimplePreAuthenticatorInterface
{
public function createToken(Request $request, $providerKey)
{
// look for an apikey query parameter
$apiKey = $request->query->get('apikey');
// or if you want to use an "apikey" header, then do something like this:
// $apiKey = $request->headers->get('apikey');
if (!$apiKey) {
throw new BadCredentialsException('No API key found');
// or to just skip api key authentication
// return null;
}
return new PreAuthenticatedToken(
'anon.',
$apiKey,
$providerKey
);
}
public function authenticateToken(TokenInterface $token, UserProviderInterface $userProvider, $providerKey)
{
if (!$userProvider instanceof ApiKeyUserProvider) {
throw new \InvalidArgumentException(
sprintf(
'The user provider must be an instance of ApiKeyUserProvider (%s was given).',
get_class($userProvider)
)
);
}
$apiKey = $token->getCredentials();
$username = $userProvider->getUsernameForApiKey($apiKey);
if (!$username) {
throw new AuthenticationException(
sprintf('API Key "%s" does not exist.', $apiKey)
);
}
$user = $userProvider->loadUserByUsername($username);
return new PreAuthenticatedToken(
$user,
$apiKey,
$providerKey,
$user->getRoles()
);
}
public function supportsToken(TokenInterface $token, $providerKey)
{
return $token instanceof PreAuthenticatedToken && $token->getProviderKey() === $providerKey;
}
}
当您已经配置了所以东西,你可以通过将 apikey 参数添加到查询字符串来进行身份验证,如同** http://example.com/admin/foo?apikey=37b51d194a7513e45b56f6524f2d51f2** 。
身份验证过程有几个步骤,不过实现的过程可能会有所不同:
1. createToken方法
在请求周期的早期 Symfony 调用 createToken() 方法。在这里您需要做的就是去创建一个包含所有消息的令牌对象,这些消息是来自于您的某个请求,在这个请求中您需要对用户进行身份验证 (例如 apikey 查询参数) 。如果缺少这些信息,则会抛出 BadCredentialsException 异常从而导致身份验证失败。相反,您可能想要跳过身份验证并且不返回信息,所以 Symfony 可以回退到另一种身份验证方法,如果存在这种方法。
2. supportsToken方法
当 Symfony 调用 createToken() 之后,它将调用您的类中的 supportsToken() 方法 (和任何其它身份验证监听器) 来弄清到底应该谁来处理令牌,这只是一种允许同一种防火墙使用几种身份验证机制的方法(用这种方式,例如您可以首先尝试使用证书或 API 密钥来对用户进行身份验证然后回退到表单登录)。
3. authenticateToken方法
如果 supportsToken() 返回 true,Symfony 将会调用 authenticateToken() 方法。一个关键部分是 $userProvider,这是外部的类,并且可以帮助您加载有关用户的信息。接下来您会了解更多关于 supportsToken() 的内容。
在此特定示例中,下面所述的事情将会出现在 authenticateToken() 中:
1. 首先,您可以使用 $userProvider 来以某种方式查找 $apiKey 对应的 $username。
2. 其次,再次使用 $userProvider 为 $username 加载或创建用户对象;
3. 最后,您将创建具有适当的角色并且已经通过身份验证的令牌(即标记具有至少一个角色),然后在令牌上还附加上用户对象。
最终目标是使用 $apiKey 来查找或创建用户对象。您如何去完成它 (例如查询数据库) 以及您的用户对象的确切的类可能会不同。这些差异在您的用户提供程序中最明显。
用户提供程序
$userProvider 可以是任何用户提供程序 (请参阅如何创建一个自定义的用户提供程序)。在此示例中,以某种方式用 $apiKey 为用户寻找用户名。这项工作是在 getUsernameForApiKey() 方法中完成的,这个方法在这个用例中完全是自定义的 (即这不是 Symfony 核心用户提供程序系统中的一种方法) 。
如下所示便是一个 $userProvider :
// src/AppBundle/Security/ApiKeyUserProvider.php
namespace AppBundle\Security;
use Symfony\Component\Security\Core\User\UserProviderInterface;
use Symfony\Component\Security\Core\User\User;
use Symfony\Component\Security\Core\User\UserInterface;
use Symfony\Component\Security\Core\Exception\UnsupportedUserException;
class ApiKeyUserProvider implements UserProviderInterface
{
public function getUsernameForApiKey($apiKey)
{
// Look up the username based on the token in the database, via
// an API call, or do something entirely different
$username = ...;
return $username;
}
public function loadUserByUsername($username)
{
return new User(
$username,
null,
// the roles for the user - you may choose to determine
// these dynamically somehow based on the user
array('ROLE_USER')
);
}
public function refreshUser(UserInterface $user)
{
// this is used for storing authentication in the session
// but in this example, the token is sent in each request,
// so authentication can be stateless. Throwing this exception
// is proper to make things stateless
throw new UnsupportedUserException();
}
public function supportsClass($class)
{
return 'Symfony\Component\Security\Core\User\User' === $class;
}
}
这时,把您的用户提供程序注册成为一种服务:
YAML:
# app/config/services.yml
services:
api_key_user_provider:
class: AppBundle\Security\ApiKeyUserProvider
XML:
<!-- app/config/services.xml -->
<?xml version="1.0" ?>
<container xmlns="http://symfony.com/schema/dic/services"
xmlns:xsi="http://www.w3.org/2001/XMLSchema-instance"
xsi:schemaLocation="http://symfony.com/schema/dic/services
http://symfony.com/schema/dic/services/services-1.0.xsd">
<services>
<!-- ... -->
<service id="api_key_user_provider"
class="AppBundle\Security\ApiKeyUserProvider" />
</services>
</container>
PHP:
// app/config/services.php
// ...
$container
->register('api_key_user_provider', 'AppBundle\Security\ApiKeyUserProvider');
请阅读特定的文章来了解如何去创建一个用户自定义提供程序。
getUsernameForApiKey() 方法中的代码逻辑是由您决定的。您可能用某种方式通过在“令牌”数据表中查找一些信息来把 API 秘钥(如 37b51d)转换成一个用户名(例如 jondoe)。
上述过程同样适用于 loadUserByUsername() 方法。在此示例中,只需创建 Symfony 的核心用户类。如果你不需要在您的用户对象中存储额外的信息 (如用户的姓),这样将会更加合理。不过如果您需要去存储更多的信息,那么您可以创建一个您自己的用户类并且通过查询数据库来填充它,这样将允许您在用户对象中添加自定义数据。
最后,就像任何通过 loadUserByUsername() 方法返回的用户类一样,我们只需要确保 supportsClass() 方法为用户对象返回正确的内容。 就如同这个例子中描述的那样,如果您的身份验证是无状态的 (即您期望用户发送的 API 密钥包含了所有的请求,那么您就不用把登录保存到 session 中了 ),那么您只用通过 refreshUser() 方法抛出 UnsupportedUserException 异常。
如果你想要在 session 中存储身份验证数据,那么并不需要在每个请求中发送秘钥,请参阅在 session 中存储身份验证。
身份验证处理失败
当凭据验证失败或者身份验证失败时,为了能让您的 ApiKeyAuthenticator 正确的显示 403 http 状态,您应该在您的身份验证器中实现 AuthenticationFailureHandlerInterface 接口。您可以使用该接口中的 onAuthenticationFailure 方法去创建一个错误响应。
// src/AppBundle/Security/ApiKeyAuthenticator.php
namespace AppBundle\Security;
use Symfony\Component\Security\Core\Authentication\SimplePreAuthenticatorInterface;
use Symfony\Component\Security\Core\Exception\AuthenticationException;
use Symfony\Component\Security\Http\Authentication\AuthenticationFailureHandlerInterface;
use Symfony\Component\HttpFoundation\Response;
use Symfony\Component\HttpFoundation\Request;
class ApiKeyAuthenticator implements SimplePreAuthenticatorInterface, AuthenticationFailureHandlerInterface
{
// ...
public function onAuthenticationFailure(Request $request, AuthenticationException $exception)
{
return new Response("Authentication Failed.", 403);
}
}
配置
当您完成了对 ApiKeyAuthenticator 的所有安装,您需要把它注册为一个服务并且在您的安全配置中使用它(例如 security.yml)。第一步,先把它注册为一个服务.
YAML:
# app/config/config.yml
services:
# ...
apikey_authenticator:
class: AppBundle\Security\ApiKeyAuthenticator
public: false
XML:
<!-- app/config/config.xml -->
<?xml version="1.0" ?>
<container xmlns="http://symfony.com/schema/dic/services"
xmlns:xsi="http://www.w3.org/2001/XMLSchema-instance"
xsi:schemaLocation="http://symfony.com/schema/dic/services
http://symfony.com/schema/dic/services/services-1.0.xsd">
<services>
<!-- ... -->
<service id="apikey_authenticator"
class="AppBundle\Security\ApiKeyAuthenticator"
public="false" />
</services>
</container>
PHP:
// app/config/config.php
use Symfony\Component\DependencyInjection\Definition;
use Symfony\Component\DependencyInjection\Reference;
// ...
$definition = new Definition('AppBundle\Security\ApiKeyAuthenticator');
$definition->setPublic(false);
$container->setDefinition('apikey_authenticator', $definition);
第二步,分别使用 simple_preauth 和提供程序秘钥在您的安全配置中的防火墙部分中激活它和自定义用户提供程序 (请参阅如何创建一个自定义的用户提供程序):
YAML:
# app/config/security.yml
security:
# ...
firewalls:
secured_area:
pattern: ^/admin
stateless: true
simple_preauth:
authenticator: apikey_authenticator
provider: api_key_user_provider
providers:
api_key_user_provider:
id: api_key_user_provider
XML:
<!-- app/config/security.xml -->
<?xml version="1.0" encoding="UTF-8"?>
<srv:container xmlns="http://symfony.com/schema/dic/security"
xmlns:xsi="http://www.w3.org/2001/XMLSchema-instance"
xmlns:srv="http://symfony.com/schema/dic/services"
xsi:schemaLocation="http://symfony.com/schema/dic/services
http://symfony.com/schema/dic/services/services-1.0.xsd">
<config>
<!-- ... -->
<firewall name="secured_area"
pattern="^/admin"
stateless="true"
provider="api_key_user_provider"
>
<simple-preauth authenticator="apikey_authenticator" />
</firewall>
<provider name="api_key_user_provider" id="api_key_user_provider" />
</config>
</srv:container>
PHP:
// app/config/security.php
// ..
$container->loadFromExtension('security', array(
'firewalls' => array(
'secured_area' => array(
'pattern' => '^/admin',
'stateless' => true,
'simple_preauth' => array(
'authenticator' => 'apikey_authenticator',
),
'provider' => 'api_key_user_provider',
),
),
'providers' => array(
'api_key_user_provider' => array(
'id' => 'api_key_user_provider',
),
),
));
完成了上述步骤!现在,在每个请求开始的时候,您的 ApiKeyAuthenticator 方法都会被调用,然后将进行身份验证过程。
无状态配置参数防止 Symfony 尝试在 session 中存储身份验证信息,但是并不必要,因为对于每个请求客户端都会发送 apikey。对每个请求中存储身份验证信息。如果你确实需要在 session 中存储身份验证,请继续阅读下去!
在 Session 中存储身份验证
到目前为止,本文已经介绍了有一些身份验证令牌在每个请求中都会被传送。但在某些情况下 (如 OAuth 流程),令牌可能只被传递给一个请求。在这种情况下,您一定想要对用户进行身份验证并在 session 中存储身份验证,以便用户在每个后续请求中自动登录。
想要实现上述功能,首先您应该在您的防火墙设置中将无状态秘钥删除或者把它们设置为 false:
YAML:
# app/config/security.yml
security:
# ...
firewalls:
secured_area:
pattern: ^/admin
stateless: false
simple_preauth:
authenticator: apikey_authenticator
provider: api_key_user_provider
providers:
api_key_user_provider:
id: api_key_user_provider
XML:
<!-- app/config/security.xml -->
<?xml version="1.0" encoding="UTF-8"?>
<srv:container xmlns="http://symfony.com/schema/dic/security"
xmlns:xsi="http://www.w3.org/2001/XMLSchema-instance"
xmlns:srv="http://symfony.com/schema/dic/services"
xsi:schemaLocation="http://symfony.com/schema/dic/services
http://symfony.com/schema/dic/services/services-1.0.xsd">
<config>
<!-- ... -->
<firewall name="secured_area"
pattern="^/admin"
stateless="false"
provider="api_key_user_provider"
>
<simple-preauth authenticator="apikey_authenticator" />
</firewall>
<provider name="api_key_user_provider" id="api_key_user_provider" />
</config>
</srv:container>
PHP:
// app/config/security.php
// ..
$container->loadFromExtension('security', array(
'firewalls' => array(
'secured_area' => array(
'pattern' => '^/admin',
'stateless' => false,
'simple_preauth' => array(
'authenticator' => 'apikey_authenticator',
),
'provider' => 'api_key_user_provider',
),
),
'providers' => array(
'api_key_user_provider' => array(
'id' => 'api_key_user_provider',
),
),
));
即使令牌被存储在 session 中,在这种情况下由于某些安全性原因,凭据和 API 密钥 (即 $token->getCredentials()) 不会被存储在 session 中。如果想要利用 session,请更新 ApiKeyAuthenticator 来查看被存储的令牌是否有一个可以使用的有效用户对象:
// src/AppBundle/Security/ApiKeyAuthenticator.php
// ...
class ApiKeyAuthenticator implements SimplePreAuthenticatorInterface
{
// ...
public function authenticateToken(TokenInterface $token, UserProviderInterface $userProvider, $providerKey)
{
if (!$userProvider instanceof ApiKeyUserProvider) {
throw new \InvalidArgumentException(
sprintf(
'The user provider must be an instance of ApiKeyUserProvider (%s was given).',
get_class($userProvider)
)
);
}
$apiKey = $token->getCredentials();
$username = $userProvider->getUsernameForApiKey($apiKey);
// User is the Entity which represents your user
$user = $token->getUser();
if ($user instanceof User) {
return new PreAuthenticatedToken(
$user,
$apiKey,
$providerKey,
$user->getRoles()
);
}
if (!$username) {
throw new AuthenticationException(
sprintf('API Key "%s" does not exist.', $apiKey)
);
}
$user = $userProvider->loadUserByUsername($username);
return new PreAuthenticatedToken(
$user,
$apiKey,
$providerKey,
$user->getRoles()
);
}
// ...
}
在 session 中存储身份验证信息工作原理是这样的:
1. 在每个请求结束后,Symfony 将会序列化令牌对象 (由 authenticateToken() 返回),同时也会序列化用户对象 (因为在令牌中设置了它的属性);
2. 在下一个请求中令牌将被反序列化并且被反序列化的用户对象将被传送给用户提供程序中的 refreshUser() 函数。
第二步是最重要的: Symfony 将会调用 refreshUser() 方法并把在 session 周期中序列化的用户对象传递给您。如果您的用户信息存储在数据库中,然后你可能想要重新查询一个新版本的用户信息来确保还没过期。但是,如果不理会您的要求,refreshUser() 现在应该返回用户对象:
// src/AppBundle/Security/ApiKeyUserProvider.php
// ...
class ApiKeyUserProvider implements UserProviderInterface
{
// ...
public function refreshUser(UserInterface $user)
{
// $user is the User that you set in the token inside authenticateToken()
// after it has been deserialized from the session
// you might use $user to query the database for a fresh user
// $id = $user->getId();
// use $id to make a query
// if you are *not* reading from a database and are just creating
// a User object (like in this example), you can just return it
return $user;
}
}
您一定也会想要确保您的用户对象被正确的序列化。如果您的用户对象具有私有属性,PHP 将无法序列化它们。在这种情况下,你可能得到一个所有属性都是空的用户对象。有关示例,请参见如何从数据库中加载安全用户 (实体提供程序)。
仅仅为特定的 URL 进行验证
在本小节中假定您想要获取每次请求的 apikey 身份验证。但在某些情况下 (如 OAuth 流程),你只需要在用户已经访问到了确定的 URL 的时候获取一次身份验证信息 (例如在 OAuth 中的 URL 重定向 )。
幸运的是,处理这个问题还比较容易: 只用检查使用 createToken() 方法创建令牌之前的 URL 是什么即可:
// src/AppBundle/Security/ApiKeyAuthenticator.php
// ...
use Symfony\Component\Security\Http\HttpUtils;
use Symfony\Component\HttpFoundation\Request;
class ApiKeyAuthenticator implements SimplePreAuthenticatorInterface
{
protected $httpUtils;
public function __construct(HttpUtils $httpUtils)
{
$this->httpUtils = $httpUtils;
}
public function createToken(Request $request, $providerKey)
{
// set the only URL where we should look for auth information
// and only return the token if we're at that URL
$targetUrl = '/login/check';
if (!$this->httpUtils->checkRequestPath($request, $targetUrl)) {
return;
}
// ...
}
}
在这里使用较为便利的 HttpUtils 类来检查当前的 URL 是否与您想要获取的 URL 相匹配。在这种情况下,URL (/登录/检查) 已经在类中被硬编码,但是您仍然可以把它作为构造函数的第二个参数。
接下来,只用更新您的服务配置来注入 security.http_utils 服务:
YAML:
# app/config/config.yml
services:
# ...
apikey_authenticator:
class: AppBundle\Security\ApiKeyAuthenticator
arguments: ["@security.http_utils"]
public: false
XML:
<!-- app/config/config.xml -->
<?xml version="1.0" ?>
<container xmlns="http://symfony.com/schema/dic/services"
xmlns:xsi="http://www.w3.org/2001/XMLSchema-instance"
xsi:schemaLocation="http://symfony.com/schema/dic/services
http://symfony.com/schema/dic/services/services-1.0.xsd">
<services>
<!-- ... -->
<service id="apikey_authenticator"
class="AppBundle\Security\ApiKeyAuthenticator"
public="false"
>
<argument type="service" id="security.http_utils" />
</service>
</services>
</container>
PHP:
// app/config/config.php
use Symfony\Component\DependencyInjection\Definition;
use Symfony\Component\DependencyInjection\Reference;
// ...
$definition = new Definition(
'AppBundle\Security\ApiKeyAuthenticator',
array(
new Reference('security.http_utils')
)
);
$definition->setPublic(false);
$container->setDefinition('apikey_authenticator', $definition);
到这里,本章就讲完了,祝您愉快!
创建一个人自定义的身份验证系统很难,本章将引导您完成这一进程。但根据您的需求,您可能可以通过一种更简单的, 或者通过集群包来解决这个问题:
- 如何创建一个自定义表单的密码验证器
- 如何使用 API 来进行用户身份验证
- 如果要通过 OAuth 来使用第三方平台的服务,如谷歌、 Facebook 或者 Twitter 进行身份验证,那么请尝试使用 HWIOAuthBundle 集群包。
如果您读过关于安全的那一章,那么您已经了解了在实现安全性的过程中 Symfony 对身份处理和授权的不同处理方式。本章将讨论在身份验证过程中所涉及的核心类以及如何实现一个自定义的身份验证提供程序。因为身份验证和授权是单独的概念,此扩展将会成为未知的用户提供程序,并将与您的应用程序中的用户提供程序一同运行,并且它们可能建立在内存,数据库,或任何其它您选择来存储它们的地方的基础上。
满足 WSSE
接下来的一章将演示如何为 WSSE 身份验证创建一个自定义的身份验证提供程序。WSSE 的安全协议提供了几个安全性利益:
1. 用户名 / 密码加密
2. 安全的防范再次攻击
3. 不需要 web 服务器配置
用 WSSE 来保护 SOAP 或 REST 架构的 web 服务非常有效 。
目前有很多关于 WSSE 的文档,本文不会重点讲解安全协议,而是讲解如何把一个自定义的协议添加到您的 Symfony 应用程序中。WSSE 的基础是:使用请求标头来检查加密凭据,使用时间戳和随机数来进行验证,使用密码摘要来为发出请求的用户进行身份验证。
WSSE 还支持应用程序密钥验证,这对 web 服务非常有用,但是该内容超出了本章的介绍范围。
令牌
令牌在 Symfony 安全环境中扮演了一个重要的角色。令牌表示当前请求中的用户身份验证数据。一旦请求通过了身份验证,令牌保留用户数据,并且通过安全环境传送该数据。首先,创建您的令牌类。这将允许您给您的身份验证提供程序传递所有的相关信息。
// src/AppBundle/Security/Authentication/Token/WsseUserToken.php
namespace AppBundle\Security\Authentication\Token;
use Symfony\Component\Security\Core\Authentication\Token\AbstractToken;
class WsseUserToken extends AbstractToken
{
public $created;
public $digest;
public $nonce;
public function __construct(array $roles = array())
{
parent::__construct($roles);
// If the user has roles, consider it authenticated
$this->setAuthenticated(count($roles) > 0);
}
public function getCredentials()
{
return '';
}
}
WsseUserToken 类是通过继承安全组件中的 AbstractToken 类来实现在每一个类中把 TokenInterface 当成令牌来使用,其中 AbstractToken 类提供了基本的令牌功能。
监听器
接下来,您需要一个监听器来监听防火墙。监听器的作用是向防火墙发送请求,并且调用身份验证提供程序。监听器必须是 ListenerInterface 的一个实例。如果成功完成上述过程,那么一个安全的监听器应该具有处理 GetResponseEvent 事件的能力,并在令牌存储中设置一个已通过身份验证的令牌,同时在令牌存储器中设置一个身份验证令牌。
// src/AppBundle/Security/Firewall/WsseListener.php
namespace AppBundle\Security\Firewall;
use Symfony\Component\HttpFoundation\Response;
use Symfony\Component\HttpKernel\Event\GetResponseEvent;
use Symfony\Component\Security\Core\Authentication\AuthenticationManagerInterface;
use Symfony\Component\Security\Core\Authentication\Token\Storage\TokenStorageInterface;
use Symfony\Component\Security\Core\Exception\AuthenticationException;
use Symfony\Component\Security\Http\Firewall\ListenerInterface;
use AppBundle\Security\Authentication\Token\WsseUserToken;
class WsseListener implements ListenerInterface
{
protected $tokenStorage;
protected $authenticationManager;
public function __construct(TokenStorageInterface $tokenStorage, AuthenticationManagerInterface $authenticationManager)
{
$this->tokenStorage = $tokenStorage;
$this->authenticationManager = $authenticationManager;
}
public function handle(GetResponseEvent $event)
{
$request = $event->getRequest();
$wsseRegex = '/UsernameToken Username="([^"]+)", PasswordDigest="([^"]+)", Nonce="([^"]+)", Created="([^"]+)"/';
if (!$request->headers->has('x-wsse') || 1 !== preg_match($wsseRegex, $request->headers->get('x-wsse'), $matches)) {
return;
}
$token = new WsseUserToken();
$token->setUser($matches[1]);
$token->digest = $matches[2];
$token->nonce = $matches[3];
$token->created = $matches[4];
try {
$authToken = $this->authenticationManager->authenticate($token);
$this->tokenStorage->setToken($authToken);
return;
} catch (AuthenticationException $failed) {
// ... you might log something here
// To deny the authentication clear the token. This will redirect to the login page.
// Make sure to only clear your token, not those of other authentication listeners.
// $token = $this->tokenStorage->getToken();
// if ($token instanceof WsseUserToken && $this->providerKey === $token->getProviderKey()) {
// $this->tokenStorage->setToken(null);
// }
// return;
}
// By default deny authorization
$response = new Response();
$response->setStatusCode(Response::HTTP_FORBIDDEN);
$event->setResponse($response);
}
}
这个监听器的作用是为预期的 X-WSSE 头部进行检查,为预期的 WSSE 信息匹配返回值,然后使用这个信息来创建一个令牌,接着在身份验证管理器中传递这个令牌。如果没有提供正确的信息,或身份验证管理器抛出 AuthenticationException 异常,那么将会返回 403 页面。
在上面的过程中没有使用到 AbstractAuthenticationListener 类,它是一个非常有用并且为安全性扩展插件提供了常用功能的基类。其中包括在 session 中维持令牌功能,提供成功 / 失败的处理程序、 登录表单的 URL,以及更多的功能。因为 WSSE 不需要在 session 中 保持身份验证或登录表单,所以在本实例中没有用到它。
只有当您想把身份验证程序串接起来的时候,提前的从监听器返回一个值才是有价值的,如果您想要禁止匿名用户访问,并且能够较好地展示 403 错误,则应在返回结果之前设置响应的状态码。
身份验证提供程序
身份验证提供程序将会为 WsseUserToken 进行验证。即,提供程序将会在 5 分钟之内验证已经创建好的标头值是否有效。Nonce 是唯一一个能在 5 分钟之内检查出结果的标头值,并且 PasswordDigest 标头值与该用户的密码相匹配。
// src/AppBundle/Security/Authentication/Provider/WsseProvider.php
namespace AppBundle\Security\Authentication\Provider;
use Symfony\Component\Security\Core\Authentication\Provider\AuthenticationProviderInterface;
use Symfony\Component\Security\Core\User\UserProviderInterface;
use Symfony\Component\Security\Core\Exception\AuthenticationException;
use Symfony\Component\Security\Core\Exception\NonceExpiredException;
use Symfony\Component\Security\Core\Authentication\Token\TokenInterface;
use AppBundle\Security\Authentication\Token\WsseUserToken;
use Symfony\Component\Security\Core\Util\StringUtils;
class WsseProvider implements AuthenticationProviderInterface
{
private $userProvider;
private $cacheDir;
public function __construct(UserProviderInterface $userProvider, $cacheDir)
{
$this->userProvider = $userProvider;
$this->cacheDir = $cacheDir;
}
public function authenticate(TokenInterface $token)
{
$user = $this->userProvider->loadUserByUsername($token->getUsername());
if ($user && $this->validateDigest($token->digest, $token->nonce, $token->created, $user->getPassword())) {
$authenticatedToken = new WsseUserToken($user->getRoles());
$authenticatedToken->setUser($user);
return $authenticatedToken;
}
throw new AuthenticationException('The WSSE authentication failed.');
}
/**
* This function is specific to Wsse authentication and is only used to help this example
*
* For more information specific to the logic here, see
* https://github.com/symfony/symfony-docs/pull/3134#issuecomment-27699129
*/
protected function validateDigest($digest, $nonce, $created, $secret)
{
// Check created time is not in the future
if (strtotime($created) > time()) {
return false;
}
// Expire timestamp after 5 minutes
if (time() - strtotime($created) > 300) {
return false;
}
// Validate that the nonce is *not* used in the last 5 minutes
// if it has, this could be a replay attack
if (file_exists($this->cacheDir.'/'.$nonce) && file_get_contents($this->cacheDir.'/'.$nonce) + 300 > time()) {
throw new NonceExpiredException('Previously used nonce detected');
}
// If cache directory does not exist we create it
if (!is_dir($this->cacheDir)) {
mkdir($this->cacheDir, 0777, true);
}
file_put_contents($this->cacheDir.'/'.$nonce, time());
// Validate Secret
$expected = base64_encode(sha1(base64_decode($nonce).$created.$secret, true));
return StringUtils::equals($expected, $digest);
}
public function supports(TokenInterface $token)
{
return $token instanceof WsseUserToken;
}
}
AuthenticationProviderInterface 需要用户令牌中的一种身份验证方法,和一种能够告诉身份验证管理器是否为给定的令牌使用提供程序的支持方法。在众多提供程序中,身份验证管理器会根据列表依次移动到每个提供程序。
预期的比较和提供的摘要会使用 StringUtils 类的 equals () 方法提供的恒定的时间比较。它的作用是用来减少可能的定时攻击。
工厂模式
您已经创建了一个自定义的令牌,自定义监听器和自定义提供程序。现在您需要把它们联系到一起。问题是您怎么为每个防火墙设定一个独特的提供程序?答案是通过使用一个工厂。工厂是您钩入安全组件的地方,您需要告诉它您的提供程序的名称和任何可用于它的配置选项。首先,您必须创建一个实现 SecurityFactoryInterface 的类。
// src/AppBundle/DependencyInjection/Security/Factory/WsseFactory.php
namespace AppBundle\DependencyInjection\Security\Factory;
use Symfony\Component\DependencyInjection\ContainerBuilder;
use Symfony\Component\DependencyInjection\Reference;
use Symfony\Component\DependencyInjection\DefinitionDecorator;
use Symfony\Component\Config\Definition\Builder\NodeDefinition;
use Symfony\Bundle\SecurityBundle\DependencyInjection\Security\Factory\SecurityFactoryInterface;
class WsseFactory implements SecurityFactoryInterface
{
public function create(ContainerBuilder $container, $id, $config, $userProvider, $defaultEntryPoint)
{
$providerId = 'security.authentication.provider.wsse.'.$id;
$container
->setDefinition($providerId, new DefinitionDecorator('wsse.security.authentication.provider'))
->replaceArgument(0, new Reference($userProvider))
;
$listenerId = 'security.authentication.listener.wsse.'.$id;
$listener = $container->setDefinition($listenerId, new DefinitionDecorator('wsse.security.authentication.listener'));
return array($providerId, $listenerId, $defaultEntryPoint);
}
public function getPosition()
{
return 'pre_auth';
}
public function getKey()
{
return 'wsse';
}
public function addConfiguration(NodeDefinition $node)
{
}
}
SecurityFactoryInterface 需要下列方法:
create 方法
这个方法为适当的安全环境把监听器和身份验证提供程序添加到 DI 容器中。
getPosition 方法
这必须是 pre_auth、表单、http,remember_me 类型和定义在已经被调用的提供程序中的方法。
getKey 方法
该方法定义了用来引用防火墙配置中的提供程序的配置密钥。
addConfiguration 方法
该方法用于定义您安全配置中的配置密钥下的配置选项。在后面将要介绍设置配置选项。
在这个示例中,我们没有用到 AbstractFactory 类,它是一个非常有用的基类,并且它为安全工厂提供了常用的功能。当定义不同类型的身份验证提供程序的时候,它可能会比较有用。
既然您已经创建了一个工厂类,在您的安全配置中 wsse 密钥可以当成防火墙来使用。
您可能会想知道,"您为什么需要特殊的工厂类,将监听器和提供程序添加到依赖注入容器?"这是一个非常好的问题。原因是,您可以多次使用您的防火墙,来保护您的应用程序的各个部分。正因为如此,每次使用您的防火墙时,在 DI 容器中便会创建一项新的服务 。工厂的作用就是创造这些新的服务。
配置
现在可以在过程中来查看身份验证提供程序。为了让它们运行起来,您现在需要做一些事情。第一件事是将上面描述的服务添加到 DI 容器。上边提到的您的工厂类可以参考还不存在的服务 id : wsse.security.authentication.provider 和 wsse.security.authentication.listener。现在让我们来定义这些服务。
YAML:
# src/AppBundle/Resources/config/services.yml
services:
wsse.security.authentication.provider:
class: AppBundle\Security\Authentication\Provider\WsseProvider
arguments: ["", "%kernel.cache_dir%/security/nonces"]
wsse.security.authentication.listener:
class: AppBundle\Security\Firewall\WsseListener
arguments: ["@security.token_storage", "@security.authentication.manager"]
XML:
<!-- src/AppBundle/Resources/config/services.xml -->
<container xmlns="http://symfony.com/schema/dic/services"
xmlns:xsi="http://www.w3.org/2001/XMLSchema-instance"
xsi:schemaLocation="http://symfony.com/schema/dic/services http://symfony.com/schema/dic/services/services-1.0.xsd">
<services>
<service id="wsse.security.authentication.provider"
class="AppBundle\Security\Authentication\Provider\WsseProvider" public="false">
<argument /> <!-- User Provider -->
<argument>%kernel.cache_dir%/security/nonces</argument>
</service>
<service id="wsse.security.authentication.listener"
class="AppBundle\Security\Firewall\WsseListener" public="false">
<argument type="service" id="security.token_storage"/>
<argument type="service" id="security.authentication.manager" />
</service>
</services>
</container>
PHP:
// src/AppBundle/Resources/config/services.php
use Symfony\Component\DependencyInjection\Definition;
use Symfony\Component\DependencyInjection\Reference;
$container->setDefinition('wsse.security.authentication.provider',
new Definition(
'AppBundle\Security\Authentication\Provider\WsseProvider', array(
'',
'%kernel.cache_dir%/security/nonces',
)
)
);
$container->setDefinition('wsse.security.authentication.listener',
new Definition(
'AppBundle\Security\Firewall\WsseListener', array(
new Reference('security.token_storage'),
new Reference('security.authentication.manager'),
)
)
);
到现在,您的服务已经定义好了,现在可以把您的包类中的工厂告诉您的安全环境:
// src/AppBundle/AppBundle.php
namespace AppBundle;
use AppBundle\DependencyInjection\Security\Factory\WsseFactory;
use Symfony\Component\HttpKernel\Bundle\Bundle;
use Symfony\Component\DependencyInjection\ContainerBuilder;
class AppBundle extends Bundle
{
public function build(ContainerBuilder $container)
{
parent::build($container);
$extension = $container->getExtension('security');
$extension->addSecurityListenerFactory(new WsseFactory());
}
}
这样我们就完成了配置!您现在可以在 WSSE 的保护下以定义您的应用程序了。
YAML:
security:
firewalls:
wsse_secured:
pattern: /api/.*
stateless: true
wsse: true
XML:
<config>
<firewall name="wsse_secured" pattern="/api/.*">
<stateless />
<wsse />
</firewall>
</config>
PHP:
$container->loadFromExtension('security', array(
'firewalls' => array(
'wsse_secured' => array(
'pattern' => '/api/.*',
'stateless' => true,
'wsse' => true,
),
),
));
祝贺您!您已经完成了您的定义安全身份验证提供程序的编写!
额外的补充
如何让您的 WSSE 身份验证提供程序更令人兴奋呢?这个答案可能是无解的。那么您为什么不给它添加一些闪烁的光芒?
配置
您可以在您的安全配置中的 wsse 密钥下添加自定义选项。例如,默认情况下,在终止已经创建的标题项之前有 5 分钟的时间。可以通过配置来实现让不同的防火墙有不同的超时限额。
首先,您需要编辑 WsseFactory 并且在 addConfiguration 方法中定义新的选项。
class WsseFactory implements SecurityFactoryInterface
{
// ...
public function addConfiguration(NodeDefinition $node)
{
$node
->children()
->scalarNode('lifetime')->defaultValue(300)
->end();
}
}
现在,在工厂的构造方法中,$config 参数将会包含一个生存期秘钥,并且设置为 5 分钟 (300 秒),除非在配置中设置了其他时间。然后向您的身份验证提供程序传递此参数来使用它。
class WsseFactory implements SecurityFactoryInterface
{
public function create(ContainerBuilder $container, $id, $config, $userProvider, $defaultEntryPoint)
{
$providerId = 'security.authentication.provider.wsse.'.$id;
$container
->setDefinition($providerId,
new DefinitionDecorator('wsse.security.authentication.provider'))
->replaceArgument(0, new Reference($userProvider))
->replaceArgument(2, $config['lifetime']);
// ...
}
// ...
}
您还需要为 wsse.security.authentication.provider 服务配置添加第三个参数,它可以是空白的,但必须在工厂的生存期内填充。WsseProvider 类现在还需要接受第三个构造函数参数 - 生存期 - 而它需要使用并不是硬编码的 300 秒。在这里没有展示这两个步骤。
每个 WSSE 请求的生存期现在都是是可配置的,并可以为每个防火墙设置任何可取的值。
YAML:
security:
firewalls:
wsse_secured:
pattern: /api/.*
stateless: true
wsse: { lifetime: 30 }
XML:
<config>
<firewall name="wsse_secured"
pattern="/api/.*"
>
<stateless />
<wsse lifetime="30" />
</firewall>
</config>
PHP:
$container->loadFromExtension('security', array(
'firewalls' => array(
'wsse_secured' => array(
'pattern' => '/api/.*',
'stateless' => true,
'wsse' => array(
'lifetime' => 30,
),
),
),
));
接下来就交给您自己配置了!在工厂中可以定义任何相关的配置项并且配置项可以传递到容器中的其他类或被消耗。
某些 web 服务器,包括 Apache 已经提供大量的身份验证模块。这些模块一般设置一些环境变量来确定哪个用户正在访问您的应用程序。不确定的是,Symfony 支持大多数的身份验证机制。这些请求被称为预身份验证请求,因为当该用户访问您的程序的时候他已经通过了身份验证。
X.509 客户端证书身份验证
当使用客户端证书时,您的网络服务器会进行所有的身份验证过程。举个例子,在 Apache 服务器下您可以使用 SSLVerifyClient 需求指令。
为安全配置中的特定防火墙的启用 x 509 身份验证:
YAML:
# app/config/security.yml
security:
firewalls:
secured_area:
pattern: ^/
x509:
provider: your_user_provider
XML:
<!-- app/config/security.xml -->
<?xml version="1.0" ?>
<srv:container xmlns="http://symfony.com/schema/dic/security"
xmlns:srv="http://symfony.com/schema/dic/services">
<config>
<firewall name="secured_area" pattern="^/">
<x509 provider="your_user_provider"/>
</firewall>
</config>
</srv:container>
PHP:
// app/config/security.php
$container->loadFromExtension('security', array(
'firewalls' => array(
'secured_area' => array(
'pattern' => '^/'
'x509' => array(
'provider' => 'your_user_provider',
),
),
),
));
默认情况下,防火墙向用户提供程序提供 SSL_CLIENT_S_DN_Email 变量,并将 SSL_CLIENT_S_DN 设置为 PreAuthenticatedToken 中的凭据。您可以通过分别在 x 509 防火墙配置中设置用户和凭据密钥来重载它们。
身份验证提供程序只会通知用户提供程序已经做出请求的用户名。您将需要创建 (或使用) 提供程序配置参数引用的 的"用户提供程序"(如配置示例中的 your_user_provider)。此提供程序将会把该用户名变成您选择的一个用户对象。有关创建或配置用户提供程序的详细信息,请参阅:
基于验证的 REMOTE_USER
2.6 在 Symfony 2.6 介绍了 REMOTE_USER 预身份验证防火墙。
许多身份验证模块,比如为 Apache 中的 auth_kerb 使用 REMOTE_USER 环境变量来提供用户名。如果身份验证发生在请求它之前,那么应用程序将会信任此变量。
使用 REMOTE_USER 环境变量来配置 Symfony ,只需在安全配置中启用相应的防火墙:
YAML:
# app/config/security.yml
security:
firewalls:
secured_area:
pattern: ^/
remote_user:
provider: your_user_provider
XML:
<!-- app/config/security.xml -->
<?xml version="1.0" ?>
<srv:container xmlns="http://symfony.com/schema/dic/security"
xmlns:srv="http://symfony.com/schema/dic/services">
<config>
<firewall name="secured_area" pattern="^/">
<remote-user provider="your_user_provider"/>
</firewall>
</config>
</srv:container>
PHP:
// app/config/security.php
$container->loadFromExtension('security', array(
'firewalls' => array(
'secured_area' => array(
'pattern' => '^/'
'remote_user' => array(
'provider' => 'your_user_provider',
),
),
),
));
防火墙将给您的您用户的提供程序提供 REMOTE_USER 环境变量。您可以通过设置 remote_user 防火墙配置中的用户密钥来改变变量名称。
就像 X509 身份验证,您需要配置"用户提供程序"。请参阅以前的注意栏目来获得更多的信息。
默认情况下,安全组件将保留在名为 _security.main.target_path 的 session 变量中最后访问的 URL 信息(主要是在 security.yml 中定义的防火墙的名称)。成功登录后,将用户重定向到此路径,并帮助他们继续停留在访问过的最后一个已知网页。
在某些情况下,这不是理想的。例如,当最后的请求 URL 返回的是非 HTML 或部分 HTML 响应的 XMLHttpRequest 对象,那么用户将被重定向回浏览器无法呈现的网页。
要解决此行为,您仅仅需要去继承 ExceptionListener 类,并且重载名为 setTargetPath() 的默认方法。
首先,重载您的配置文件中的 security.exception_listener.class 参数。这可以在您的主配置文件(在应用程序下的配置文件中)或导入包中配置文件中实现:
YAML:
# app/config/services.yml
parameters:
# ...
security.exception_listener.class: AppBundle\Security\Firewall\ExceptionListener
XML:
<!-- app/config/services.xml -->
<parameters>
<!-- ... -->
<parameter key="security.exception_listener.class">AppBundle\Security\Firewall\ExceptionListener</parameter>
</parameters>
PHP:
// app/config/services.php
// ...
$container->setParameter('security.exception_listener.class', 'AppBundle\Security\Firewall\ExceptionListener');
下一步,创建您自己的 ExceptionListener 监听器:
// src/AppBundle/Security/Firewall/ExceptionListener.php
namespace AppBundle\Security\Firewall;
use Symfony\Component\HttpFoundation\Request;
use Symfony\Component\Security\Http\Firewall\ExceptionListener as BaseExceptionListener;
class ExceptionListener extends BaseExceptionListener
{
protected function setTargetPath(Request $request)
{
// Do not save target path for XHR requests
// You can add any more logic here you want
// Note that non-GET requests are already ignored
if ($request->isXmlHttpRequest()) {
return;
}
parent::setTargetPath($request);
}
}
为您方案的需要在这里添加或多或少的逻辑。
当使用一个登录表单时,您应该确保可以抵御 CSRF (跨站点请求伪造)。安全组件已经对 CSRF 内置支持。在这篇文章中,您将学习如何在登录表单中使用它。
登录 CSRF 并不是特别知名。如果您想要知道更多详细信息,请参阅锻造登录请求。
配置 CSRF 保护
首先,配置安全组件来让它可以使用 CSRF 保护。安全组件需要 CSRF 令牌提供程序。您可以使用安全组件中默认的提供程序:
YMAL:
# app/config/security.yml
security:
firewalls:
secured_area:
# ...
form_login:
# ...
csrf_provider: security.csrf.token_manager
XML:
<!-- app/config/config.xml -->
<?xml version="1.0" encoding="UTF-8" ?>
<srv:container xmlns="http://symfony.com/schema/dic/security"
xmlns:xsi="http://www.w3.org/2001/XMLSchema-instance"
xmlns:srv="http://symfony.com/schema/dic/services"
xsi:schemaLocation="http://symfony.com/schema/dic/services http://symfony.com/schema/dic/services/services-1.0.xsd">
<config>
<firewall name="secured_area">
<!-- ... -->
<form-login csrf-provider="security.csrf.token_manager" />
</firewall>
</config>
</srv:container>
PHP:
// app/config/security.php
$container->loadFromExtension('security', array(
'firewalls' => array(
'secured_area' => array(
// ...
'form_login' => array(
// ...
'csrf_provider' => 'security.csrf.token_manager',
)
)
)
));
可以进一步配置安全组件,但这必须要能够在登录表单中使用 CSRF 攻击所需的所有信息。
渲染 CSRF 字段
既然该安全组件将检查 CSRF 令牌,您必须向包含 CSRF 令牌的登录表单中添加隐藏的字段。默认情况下,此字段被命名为 _csrf_token。该隐藏的字段必须包含 CSRF 令牌,该令牌可以使用 csrf_token 函数生成。该函数需要一个令牌的 ID,并且当使用登陆表单的时候该 ID 必须用来进行身份验证:
Twig:
{# src/Acme/SecurityBundle/Resources/views/Security/login.html.twig #}
{# ... #}
<form action="{{ path('login_check') }}" method="post">
{# ... the login fields #}
<input type="hidden" name="_csrf_token"
value="{{ csrf_token('authenticate') }}"
>
<button type="submit">login</button>
</form>
PHP:
<!-- src/Acme/SecurityBundle/Resources/views/Security/login.html.php -->
<!-- ... -->
<form action="<?php echo $view['router']->generate('login_check') ?>" method="post">
<!-- ... the login fields -->
<input type="hidden" name="_csrf_token"
value="<?php echo $view['form']->csrfToken('authenticate') ?>"
>
<button type="submit">login</button>
</form>
经过上述步骤,您已经可以防御 CSRF 攻击您登录表单了。
您可以通过设置 csrf_parameter 来更改字段的名称并通过在您的配置中设置意愿来更改令牌 ID :
YAML:
# app/config/security.yml
security:
firewalls:
secured_area:
# ...
form_login:
# ...
csrf_parameter: _csrf_security_token
intention: a_private_string
XML:
<!-- app/config/config.xml -->
<?xml version="1.0" encoding="UTF-8" ?>
<srv:container xmlns="http://symfony.com/schema/dic/security"
xmlns:xsi="http://www.w3.org/2001/XMLSchema-instance"
xmlns:srv="http://symfony.com/schema/dic/services"
xsi:schemaLocation="http://symfony.com/schema/dic/services http://symfony.com/schema/dic/services/services-1.0.xsd">
<config>
<firewall name="secured_area">
<!-- ... -->
<form-login csrf-parameter="_csrf_security_token"
intention="a_private_string" />
</firewall>
</config>
</srv:container>
PHP:
// app/config/security.php
$container->loadFromExtension('security', array(
'firewalls' => array(
'secured_area' => array(
// ...
'form_login' => array(
// ...
'csrf_parameter' => '_csrf_security_token',
'intention' => 'a_private_string',
)
)
)
));
通常情况下,我们通过配置一个密码编码器使它能够适用于特定的类的所有实例来实现它可以被所有用户使用:
YAML:
# app/config/security.yml
security:
# ...
encoders:
Symfony\Component\Security\Core\User\User: sha512
XML:
<!-- app/config/security.xml -->
<?xml version="1.0" encoding="UTF-8"?>
<srv:container xmlns="http://symfony.com/schema/dic/security"
xmlns:xsi="http://www.w3.org/2001/XMLSchema-instance"
xmlns:srv="http://symfony.com/schema/dic/services"
xsi:schemaLocation="http://symfony.com/schema/dic/services
http://symfony.com/schema/dic/services/services-1.0.xsd"
>
<config>
<!-- ... -->
<encoder class="Symfony\Component\Security\Core\User\User"
algorithm="sha512"
/>
</config>
</srv:container>
PHP:
// app/config/security.php
$container->loadFromExtension('security', array(
// ...
'encoders' => array(
'Symfony\Component\Security\Core\User\User' => array(
'algorithm' => 'sha512',
),
),
));
另一个选择是使用一个"指定的"编码器,然后选择您想要动态使用的编码器。
在前面的示例中,您已经为 Acme\UserBundle\Entity\User 设置了 sha512 算法。对于普通的用户这可能是足够安全的,但如果您想您的管理员拥有更强的算法,例如 bcrypt。那么可以通过制定的编码器来实现:
YAML:
# app/config/security.yml
security:
# ...
encoders:
harsh:
algorithm: bcrypt
cost: 15
XML:
<!-- app/config/security.xml -->
<?xml version="1.0" encoding="UTF-8" ?>
<srv:container xmlns="http://symfony.com/schema/dic/security"
xmlns:xsi="http://www.w3.org/2001/XMLSchema-instance"
xmlns:srv="http://symfony.com/schema/dic/services"
xsi:schemaLocation="http://symfony.com/schema/dic/services
http://symfony.com/schema/dic/services/services-1.0.xsd"
>
<config>
<!-- ... -->
<encoder class="harsh"
algorithm="bcrypt"
cost="15" />
</config>
</srv:container>
PHP:
// app/config/security.php
$container->loadFromExtension('security', array(
// ...
'encoders' => array(
'harsh' => array(
'algorithm' => 'bcrypt',
'cost' => '15'
),
),
));
在这里我们将创建名为 harsh 的编码器。为了使用户实例可以使用它,该类必须实现 EncoderAwareInterface 接口。该接口应该具有一个 - getEncoderName - 方法,该方法应返回编码器的名称:
// src/Acme/UserBundle/Entity/User.php
namespace Acme\UserBundle\Entity;
use Symfony\Component\Security\Core\User\UserInterface;
use Symfony\Component\Security\Core\Encoder\EncoderAwareInterface;
class User implements UserInterface, EncoderAwareInterface
{
public function getEncoderName()
{
if ($this->isAdmin()) {
return 'harsh';
}
return null; // use the default encoder
}
}
对于每个传入的请求,Symfony 都检查每个 access_control 条目来找到一个匹配当前项的请求的 access_control。当它找到一个匹配的 access_control 项它便停止,只有第一个匹配的 access_control 用于强制执行访问。
每个 access_control 拥有几个可以配置以下两个不同条件的选项:
1. 匹配选项
Symfony 中每个 access_control 条目创建了一个 RequestMatcher 用于确定是否应该对每个访问使用给定的访问控制。下面的 access_control 选项用于匹配:
- 路径
- ip 或 ips
- 主机
- 方法
以下面的 access_control 条目为例:
YAML:
# app/config/security.yml
security:
# ...
access_control:
- { path: ^/admin, roles: ROLE_USER_IP, ip: 127.0.0.1 }
- { path: ^/admin, roles: ROLE_USER_HOST, host: symfony\.com$ }
- { path: ^/admin, roles: ROLE_USER_METHOD, methods: [POST, PUT] }
- { path: ^/admin, roles: ROLE_USER }
XML:
<!-- app/config/security.xml -->
<?xml version="1.0" encoding="UTF-8"?>
<srv:container xmlns="http://symfony.com/schema/dic/security"
xmlns:xsi="http://www.w3.org/2001/XMLSchema-instance"
xmlns:srv="http://symfony.com/schema/dic/services"
xsi:schemaLocation="http://symfony.com/schema/dic/services
http://symfony.com/schema/dic/services/services-1.0.xsd">
<config>
<!-- ... -->
<access-control>
<rule path="^/admin" role="ROLE_USER_IP" ip="127.0.0.1" />
<rule path="^/admin" role="ROLE_USER_HOST" host="symfony\.com$" />
<rule path="^/admin" role="ROLE_USER_METHOD" method="POST, PUT" />
<rule path="^/admin" role="ROLE_USER" />
</access-control>
</config>
</srv:container>
PHP:
// app/config/security.php
$container->loadFromExtension('security', array(
// ...
'access_control' => array(
array(
'path' => '^/admin',
'role' => 'ROLE_USER_IP',
'ip' => '127.0.0.1',
),
array(
'path' => '^/admin',
'role' => 'ROLE_USER_HOST',
'host' => 'symfony\.com$',
),
array(
'path' => '^/admin',
'role' => 'ROLE_USER_METHOD',
'method' => 'POST, PUT',
),
array(
'path' => '^/admin',
'role' => 'ROLE_USER',
),
),
));
对于每个传入的请求,基于 URI、 客户端的 IP 地址、 传入的主机名和请求的方法 Symfony 会决定使用哪个 access_control 。请记住,第一个匹配规则已经被使用了,并且如果 ip、 主机或方法没有被指定为一个条目,该 access_control 将匹配任何的 ip、 主机或方法:
URI | IP | 主机 | 方法 | access_control | 为什么 |
/admin/user | 127.0.0.1 | example.com | GET | rule #1 (ROLE_USER_IP) | URI 匹配路径 IP 匹配 ip。 |
/admin/user | 127.0.0.1 | symfony.com | GET | rule #1 (ROLE_USER_IP) | 路径和 ip 仍然匹配。这也符合 ROLE_USER_HOST 条目,但只有第一个 access_control 匹配被使用了。. |
/admin/user | 168.0.0.1 | symfony.com | GET | rule #2 (ROLE_USER_HOST) | Ip 不符的第一个规则,因此使用第二个规则 (符合)。 |
/admin/user | 168.0.0.1 | symfony.com | POST | rule #2 (ROLE_USER_HOST) | 第二条规则仍然匹配。这也符合第三条规则 (ROLE_USER_METHOD),但只有第一个匹配的 access_control 被使用了。 |
/admin/user | 168.0.0.1 | example.com | POST | rule #3 (ROLE_USER_METHOD) | Ip 和主机与前两项不匹配,但和第三项 - ROLE_USER_METHOD - 匹配,并且它会被使用。 |
/admin/user | 168.0.0.1 | example.com | GET | rule #4 (ROLE_USER) | Ip、 主机和方法阻止的前三项进行匹配。但因为 URI 匹配 ROLE_USER 条目的路径模式,所以它会被使用。 |
/foo | 127.0.0.1 | symfony.com | POST | matches no entries | 它不匹配任何 access_control 规则,因为它的 URI 不匹配任何的路径值。 |
2.进入执行
一旦 Symfony 决定了哪些 access_control 条目能匹配 (如果有的话),那么它将执行基于角色的访问限制,allow_if 和 requires_channel 选项:
- role 如果用户没有所给定的角色,那么访问将会被拒绝 (在内部,将会抛出 AccessDeniedException 异常);
- allow_if 如果该表达式返回 false,那么访问将会被拒绝;
- requires_channel 如果传入请求通道 (例如 http) 和该值不匹配 (例如 https),那么用户将被重定向 (例如从 http 重定向到 https,反之亦然)。
如果访问被拒绝,如果一个用户还没有经过身份认证,那么系统将尝试对用户进行身份验证 (如:把用户重定向到登录页)。如果用户已经登录,则将显示 403 "拒绝访问"错误页。请参阅如何自定义错误页的详细信息。
使用 IP 来匹配 access_control
当您需要只和某些 IP 地址或范围请求所匹配的 access_control 项,那么会出现某些特定的情况。例如,可以使用它来拒绝访问除了那些从受信任的内部服务器之外的所有请求的 URL 模式。
你会看到在下面的例子解释,ips 选项并不限制到特定的 IP 地址。相反,使用 ips 密钥意味着 access_control 条目将仅匹配此 IP 地址,并且用户会根据 access_control 列表从不同的 IP 地址依次访问它。
这里是关于您如何配置一些示例 **/internal*** URL 模式的示例,所以它只能从本地服务器的请求来访问:
YAML:
# app/config/security.yml
security:
# ...
access_control:
#
- { path: ^/internal, roles: IS_AUTHENTICATED_ANONYMOUSLY, ips: [127.0.0.1, ::1] }
- { path: ^/internal, roles: ROLE_NO_ACCESS }
XML:
<!-- app/config/security.xml -->
<?xml version="1.0" encoding="UTF-8"?>
<srv:container xmlns="http://symfony.com/schema/dic/security"
xmlns:xsi="http://www.w3.org/2001/XMLSchema-instance"
xmlns:srv="http://symfony.com/schema/dic/services"
xsi:schemaLocation="http://symfony.com/schema/dic/services
http://symfony.com/schema/dic/services/services-1.0.xsd">
<config>
<!-- ... -->
<access-control>
<rule path="^/esi" role="IS_AUTHENTICATED_ANONYMOUSLY"
ips="127.0.0.1, ::1" />
<rule path="^/esi" role="ROLE_NO_ACCESS" />
</access-control>
</config>
</srv:container>
PHP:
// app/config/security.php
$container->loadFromExtension('security', array(
// ...
'access_control' => array(
array(
'path' => '^/esi',
'role' => 'IS_AUTHENTICATED_ANONYMOUSLY',
'ips' => '127.0.0.1, ::1'
),
array(
'path' => '^/esi',
'role' => 'ROLE_NO_ACCESS'
),
),
));
这里描述了当路径是 /internal/something 并且来自外部 IP 地址 10.0.0.1 的时候该如何去工作:
- 第一个访问控制规则将被忽略,因为虽然路径匹配但是 IP 地址不匹配,或者 IPs 列出的地址不匹配;
- 第二个访问控制规则是已经被启用的 (这里唯一的限制是路径),所以它匹配。如果你确保没有用户具有 ROLE_NO_ACCESS,那么访问就会被拒绝 (ROLE_NO_ACCESS 可以与任何现有的角色不匹配,它只是用来始终拒绝访问的访问)。
但如果同一请求来自 127.0.0.1 或:: 1 (IPv6 环回地址):
- 现在,作为路径和 ip 匹配启用的第一次的访问控制规则: 允许访问的用户总是有 IS_AUTHENTICATED_ANONYMOUSLY 的作用。
- 如果第一个规则成功匹配,那么第二访问规则则不会审查。
通过表达式来保护
一旦 access_control 条目相匹配,你可以通过角色秘钥或使用更复杂的逻辑与表达式中 allow_if 密钥拒绝访问:
YAML:
# app/config/security.yml
security:
# ...
access_control:
-
path: ^/_internal/secure
allow_if: "'127.0.0.1' == request.getClientIp() or has_role('ROLE_ADMIN')"
XML:
<access-control>
<rule path="^/_internal/secure"
allow-if="'127.0.0.1' == request.getClientIp() or has_role('ROLE_ADMIN')" />
</access-control>
PHP:
'access_control' => array(
array(
'path' => '^/_internal/secure',
'allow_if' => '"127.0.0.1" == request.getClientIp() or has_role("ROLE_ADMIN")',
),
),
在这种情况下,当用户试图从 /_internal/secure 开始访问任何 URL,如果 IP 地址是 127.0.0.1,或者如果用户拥有 ROLE_ADMIN 的角色,他们将只被授予访问权限。
在这个表达式中,您可以访问不同的变量和函数并且包括 Symfony 中的请求对象 (见请求)。
关于其他的函数和变量的列表,请参阅函数和变量。
迫使通道 (http,https)
您还可以要求用户通过 SSL 访问 URL;只需要使用任何 access_control 条目中的 requires_channel 参数。如果该 access_control 匹配成功并且请求使用的是 http 通道,用户将被重定向到 https:
YAML:
# app/config/security.yml
security:
# ...
access_control:
- { path: ^/cart/checkout, roles: IS_AUTHENTICATED_ANONYMOUSLY, requires_channel: https }
XML:
<!-- app/config/security.xml -->
<?xml version="1.0" encoding="UTF-8"?>
<srv:container xmlns="http://symfony.com/schema/dic/security"
xmlns:xsi="http://www.w3.org/2001/XMLSchema-instance"
xmlns:srv="http://symfony.com/schema/dic/services"
xsi:schemaLocation="http://symfony.com/schema/dic/services
http://symfony.com/schema/dic/services/services-1.0.xsd">
<access-control>
<rule path="^/cart/checkout"
role="IS_AUTHENTICATED_ANONYMOUSLY"
requires-channel="https" />
</access-control>
</srv:container>
PHP:
// app/config/security.php
$container->loadFromExtension('security', array(
'access_control' => array(
array(
'path' => '^/cart/checkout',
'role' => 'IS_AUTHENTICATED_ANONYMOUSLY',
'requires_channel' => 'https',
),
),
));
每一种身份验证机制 (例如 HTTP 身份验证,登录表单等) 恰好使用一个提供程序,默认情况下将使用第一个声明的用户提供程序 。但是如果您想要通过配置文件制定一些用户来验证,其他的用户信息存在数据库里该怎么办?我们可能可以通过创建一个新的供应程序并把它和以前的提供程序串联在一起:
YAML:
# app/config/security.yml
security:
providers:
chain_provider:
chain:
providers: [in_memory, user_db]
in_memory:
memory:
users:
foo: { password: test }
user_db:
entity: { class: Acme\UserBundle\Entity\User, property: username }
XML:
<!-- app/config/security.xml -->
<?xml version="1.0" encoding="UTF-8"?>
<srv:container xmlns="http://symfony.com/schema/dic/security"
xmlns:xsi="http://www.w3.org/2001/XMLSchema-instance"
xmlns:srv="http://symfony.com/schema/dic/services"
xsi:schemaLocation="http://symfony.com/schema/dic/services
http://symfony.com/schema/dic/services/services-1.0.xsd">
<config>
<provider name="chain_provider">
<chain>
<provider>in_memory</provider>
<provider>user_db</provider>
</chain>
</provider>
<provider name="in_memory">
<memory>
<user name="foo" password="test" />
</memory>
</provider>
<provider name="user_db">
<entity class="Acme\UserBundle\Entity\User" property="username" />
</provider>
</config>
</srv:container>
PHP:
// app/config/security.php
$container->loadFromExtension('security', array(
'providers' => array(
'chain_provider' => array(
'chain' => array(
'providers' => array('in_memory', 'user_db'),
),
),
'in_memory' => array(
'memory' => array(
'users' => array(
'foo' => array('password' => 'test'),
),
),
),
'user_db' => array(
'entity' => array(
'class' => 'Acme\UserBundle\Entity\User',
'property' => 'username',
),
),
),
));
现在,所有的身份验证机制都将使用 chain_provider(串联提供程序),因为它是第一次被指定的。Chain_provider 将依次尝试从 in_memory(内存)和 user_db(数据库用户表)提供程序中加载用户。
您还可以通过配置防火墙或个人的身份验证机制来使用一个特定的提供程序。再次申明,除非显式指定提供程序,则始终会使用第一个提供程序:
YAML:
# app/config/security.yml
security:
firewalls:
secured_area:
# ...
pattern: ^/
provider: user_db
http_basic:
realm: "Secured Demo Area"
provider: in_memory
form_login: ~
XML:
<!-- app/config/security.xml -->
<?xml version="1.0" encoding="UTF-8"?>
<srv:container xmlns="http://symfony.com/schema/dic/security"
xmlns:xsi="http://www.w3.org/2001/XMLSchema-instance"
xmlns:srv="http://symfony.com/schema/dic/services"
xsi:schemaLocation="http://symfony.com/schema/dic/services
http://symfony.com/schema/dic/services/services-1.0.xsd">
<config>
<firewall name="secured_area" pattern="^/" provider="user_db">
<!-- ... -->
<http-basic realm="Secured Demo Area" provider="in_memory" />
<form-login />
</firewall>
</config>
</srv:container>
PHP:
// app/config/security.php
$container->loadFromExtension('security', array(
'firewalls' => array(
'secured_area' => array(
// ...
'pattern' => '^/',
'provider' => 'user_db',
'http_basic' => array(
// ...
'provider' => 'in_memory',
),
'form_login' => array(),
),
),
));
在此示例中,如果用户试图通过 HTTP 身份验证登录,身份验证系统将使用 in_memory 用户提供程序。但如果用户尝试通过表单登录,将使用 user_db 提供程序(因为默认它是作为一个整体防火墙)。
有关用户提供程序和防火墙配置的详细信息,请参阅 SecurityBundle 配置 ("安全")。
21
序列化
把一个对象序列化和反序列化成不同的格式(例如:JSON 或者 XML)是一个非常复杂的话题。在 Symfony 中有一个序列化程序组件 Serializer Component 可以给您提供一些工具来帮您解决上述问题。
事实上,当您开始序列化和反序列化之前,您可以通过阅读序列化组件来了解并熟悉序列化,规范化子组件和编码器。
激活序列化程序
2.3 在 Symfony 之中一直都有序列化程序,不过在 Symfony 2.3 版本之前,您需要自己去构建序列化程序服务。
YAML:
# app/config/config.yml
framework:
# ...
serializer:
enabled: true
XML:
<!-- app/config/config.xml -->
<framework:config>
<!-- ... -->
<framework:serializer enabled="true" />
</framework:config>
PHP:
// app/config/config.php
$container->loadFromExtension('framework', array(
// ...
'serializer' => array(
'enabled' => true,
),
));
使用序列化程序服务
您一旦启动了序列化服务 serializer,您就可以在您需要的任何服务进程中使用它,它还可以被用在下述的控制器中:
// src/AppBundle/Controller/DefaultController.php
namespace AppBundle\Controller;
use Symfony\Bundle\FrameworkBundle\Controller\Controller;
class DefaultController extends Controller
{
public function indexAction()
{
$serializer = $this->get('serializer');
// ...
}
}
添加正规化子组件和编码器
2.7 ObjectNormalizer 是在 Symfony 2.7 中默认启用的。在以前的版本,您需要加载你自己的标准组件。
您一旦启动上述组件,在容器中便可以使用序列化程序服务 serializer,并且还配备了两个编码器 ( JsonEncoder 和 XmlEncoder) 以及 ObjectNormalizer 标准组件)。
您可以通过给规范化子组件和编码器添加上 serializer.normalizer 和 serializer.encoder 标记来加载它们,也可以通过设置标记的优先级顺序来决定匹配顺序。
这里有一个描述如何去加载 GetSetMethodNormalizer 的示例:
YAML:
# app/config/services.yml
services:
get_set_method_normalizer:
class: Symfony\Component\Serializer\Normalizer\GetSetMethodNormalizer
tags:
- { name: serializer.normalizer }
XML:
<!-- app/config/services.xml -->
<services>
<service id="get_set_method_normalizer" class="Symfony\Component\Serializer\Normalizer\GetSetMethodNormalizer">
<tag name="serializer.normalizer" />
</service>
</services>
PHP:
// app/config/services.php
use Symfony\Component\DependencyInjection\Definition;
$definition = new Definition(
'Symfony\Component\Serializer\Normalizer\GetSetMethodNormalizer'
));
$definition->addTag('serializer.normalizer');
$container->setDefinition('get_set_method_normalizer', $definition);
使用序列化组注释
2.7 在 Symfony 2.7 节中,我们讲解了 Symfony 支持序列化组的应用。
使用以下配置去启动序列化组注释:
YAML:
# app/config/config.yml
framework:
# ...
serializer:
enable_annotations: true
XML:
<!-- app/config/config.xml -->
<framework:config>
<!-- ... -->
<framework:serializer enable-annotations="true" />
</framework:config>
PHP:
// app/config/config.php
$container->loadFromExtension('framework', array(
// ...
'serializer' => array(
'enable_annotations' => true,
),
));
接下来,把 @Groups annotations 注释添加到您的类中,并且选择在序列化的时候将要使用哪个组:
$serializer = $this->get('serializer');
$json = $serializer->serialize(
$someObject,
'json', array('groups' => array('group1'))
);
启用元数据缓存
2.7 在 Symfony 2.7 节中,我们介绍了序列化程序。
就像序列化组可以提高应用程序的性能一样,我们可以使用序列化组件来使用元数据,任何在 Doctrine\Common\Cache\Cache 下被服务所实现的接口都能被使用。
在服务中使用的 APCu(PHP 中的 APC 单元 < 5.5 版本) 单元都是内置的。
YAML:
# app/config/config_prod.yml
framework:
# ...
serializer:
cache: serializer.mapping.cache.apc
XML:
<!-- app/config/config_prod.xml -->
<framework:config>
<!-- ... -->
<framework:serializer cache="serializer.mapping.cache.apc" />
</framework:config>
PHP:
// app/config/config_prod.php
$container->loadFromExtension('framework', array(
// ...
'serializer' => array(
'cache' => 'serializer.mapping.cache.apc',
),
));
进一步使用序列化组件
DunglasApiBundle 体系提供了一个支持 JSON-LD 和 Hydra Core Vocabulary 等超媒体格式的 API 系统。它是建立在 Symfony 框架和其序列化程序组件之上的。它提供了自定义规范化、自定义编码器、 自定义元数据和缓存系统。
如果您想完全的利用 Symfony 的序列化程序组件,那么请看看它是怎样捆绑工作的。
22
服务容器
Symfony 具有很多能触发您应用中的自定义行为的事件和钩子(hooks)。这些事件可以在 KernelEvents 类中查看并且是由 HttpKernel 组件引发。
如果您想要挂钩到事件并添加您自己的自定义逻辑,您必须创建一种在这个事件中作为事件监听者的服务。在此条目中,您将创建一个作为异常监听器的服务,允许您修改您的应用程序异常的显示方式。KernelEvents::EXCEPTION 事件是核心内核事件之一:
// src/AppBundle/EventListener/AcmeExceptionListener.php
namespace AppBundle\EventListener;
use Symfony\Component\HttpKernel\Event\GetResponseForExceptionEvent;
use Symfony\Component\HttpFoundation\Response;
use Symfony\Component\HttpKernel\Exception\HttpExceptionInterface;
class AcmeExceptionListener
{
public function onKernelException(GetResponseForExceptionEvent $event)
{
// You get the exception object from the received event
$exception = $event->getException();
$message = sprintf(
'My Error says: %s with code: %s',
$exception->getMessage(),
$exception->getCode()
);
// Customize your response object to display the exception details
$response = new Response();
$response->setContent($message);
// HttpExceptionInterface is a special type of exception that
// holds status code and header details
if ($exception instanceof HttpExceptionInterface) {
$response->setStatusCode($exception->getStatusCode());
$response->headers->replace($exception->getHeaders());
} else {
$response->setStatusCode(Response::HTTP_INTERNAL_SERVER_ERROR);
}
// Send the modified response object to the event
$event->setResponse($response);
}
}
每个事件接受的 $event 对象略有不同。对 kernel.exception 事件来说,它是GetResponseForExceptionEvent 。如果想了解每个事件监听接受的对象是什么类型的,请参阅:KernelEvents 。
当给 kernel.request, kernel.view 或者 kernel.exception 事件设置响应的时候。事件的传播是停止的,所以优先级较低的监听器并没有被调用。
现在您已经创建了一个类,您现在只需要把它注册为一个服务,并且使用一个特殊的标签告诉 Symfony 这个类是一个 kernel.exception event 事件上的监听器:
YAML:
# app/config/services.yml
services:
kernel.listener.your_listener_name:
class: AppBundle\EventListener\AcmeExceptionListener
tags:
- { name: kernel.event_listener, event: kernel.exception, method: onKernelException }
XML:
<!-- app/config/services.xml -->
<service id="kernel.listener.your_listener_name" class="AppBundle\EventListener\AcmeExceptionListener">
<tag name="kernel.event_listener" event="kernel.exception" method="onKernelException" />
</service>
PHP:
// app/config/services.php
$container
->register('kernel.listener.your_listener_name', 'AppBundle\EventListener\AcmeExceptionListener')
->addTag('kernel.event_listener', array('event' => 'kernel.exception', 'method' => 'onKernelException'))
;
这里有一个默认值为 0 并且具有可选性的附加优先标签选项。所有监听器都会按照它们的优先级顺序进行执行(从高到低)。当您需要确保您的监听器是按照顺序执行的时候,使用这个标签会非常有用。
请求事件,检查类型
一个单页面可以发送很多请求(一个主请求和很多子请求),这也是为什么使用 KernelEvents::REQUEST 事件时,您可能需要检查请求的类型。这可以按照如下步骤完成:
// src/AppBundle/EventListener/AcmeRequestListener.php
namespace AppBundle\EventListener;
use Symfony\Component\HttpKernel\Event\GetResponseEvent;
use Symfony\Component\HttpKernel\HttpKernel;
class AcmeRequestListener
{
public function onKernelRequest(GetResponseEvent $event)
{
if (!$event->isMasterRequest()) {
// don't do anything if it's not the master request
return;
}
// ...
}
}
两种可用的 HttpKernelInterface 接口里的请求分别是:HttpKernelInterface::MASTER_REQUEST 和 HttpKernelInterface::SUB_REQUEST。
调试事件监听器
2.在 Symfony 2.6 节 中我们讲过 debug:event-dispatcher 命令。
您可以得知哪些监听器通过使用控制台注册到了事件中。如果想要显示所有事件和它们的监听器,您可以通过运行下面的代码来实现:
$ php app/console debug:event-dispatcher
您可以通过制定某个监听器的名称来获得某个已注册到特定事件的监听器:
$ php app/console debug:event-dispatcher kernel.exception
这篇文章讲述的内容是关于作用域的,作用域是有关服务容器的一个比较高级的主题。如果您曾经在创建一个服务的时候被提示有关于“作用域”的错误,那么这篇文章很值得您去阅读。
如果您想要注入请求服务,一个简单的解决方案就是反向注入 request_stack 服务,并通过调用 getCurrentRequest() 方法 (请参阅注入请求) 来访问当前请求。剩下的这些篇幅从理论和更先进的方式来谈论作用域。如果您正在因为请求服务而处理作用域问题,那么您只需注入 request_stack。
理解作用域
一个服务的作用域决定着服务的实例在容器中的使用范围。DependencyInjection 组件提供了两个通用的作用域:
容器 (默认):
您每次请求相同的实例都会通过这个容器来调用它。
原型:
当您每次请求服务时都会创建新的实例。
ContainerAwareHttpKernel 还定义了第三种作用域:请求。这个作用域和请求捆绑在了一起,这意味着每个子请求都会创建一个新的实例,并且这个实例在请求之外就不能被使用了 (例如在 CLI 请求中) 。
示例:客户端作用域
与请求服务(请求服务具有一个简单的注释,请参照上面的介绍)不同的是,在默认的 Symfony 容器中不存在属于除了容器和原型以外的其它作用域。但是对于本文的意图来讲,我们想象着这里有另一个作用域客户端和一个属于它的 client_configuration(客户端布局) 服务。这并不是一个很常见的情况,不过在一个请求中,您可以使用这个方法多次进入或者退出客户端作用域,并且每个客户端都具有它自身的 client_configuration 服务。
作用域在一个服务的依赖项上添加了约束:一个服务不能依赖于作用域比较狭窄的服务组。比如,如果您创建一个通用的 my_foo 服务,但是您试图去注入 client_configuration 服务,当对这个容器进行编译的时候,您将会得到一个 ScopeWideningInjectionException 异常提示。请阅读下方文本框的内容以获得更多信息。
作用域和依赖项
想象一下你已经配置了 my_mailer 服务。但是您还没有配置服务的作用域,因此容器的作用域是默认的。换句话说,每次您请求容器的 my_mailer 服务,您将会得到相同的对象。这通常就是您想要您的服务的工作方式。
然而,想象一下,您想让您的 my_mailer 服务中具有 client_configuration 服务,或许是因为您想在该服务中了解一些细节,比如“发件人"地址,并且把它作为构造函数的参数,下面有几个为什么会出现这个问题的原因:
- 当请求 my_mailer 服务时,一个 my_mailer(在这里叫做 MailerA)的服务实例被创建了。同时 client_configuration(在这里叫做 ConfigurationA) 被传递给了它。
- 当您的一个应用程序需要使用另外的客户端来处理一些事情。您可以使用让您的应用程序进入一个新的 client_configuration 作用域,并且给容器设置一个新的 client_configuration 服务的方法。我们称这个服务为 ConfigurationB.
- 在您应用程序的某个位置,您再次请求 my_mailer 服务。 因为您的服务处于容器的范围内,所以只是相同的实例 (MailerA) 被重用了。但是这里有一个问题:MailerA 实例仍包含旧的 ConfigurationA 对象,但它现在不是具有(当前的 client_configuration 服务是 ConfigurationB)正确配置对象 。虽然这是一个微小且不易察觉的错误,但是,这个错误的组合可能会造成很大的错误,这就是为什么它不被允许的原因。
所以,这就是为什么会存在作用域的原因以及它们可能会导致的问题。请继续阅读本文去寻找通用的解决办法。
当然,一个服务如果依赖于具有很广泛的作用域的服务时完全没有问题的。
在一个比较狭窄的作用域内使用服务
对于作用域问题,下述有两个解决办法:
- A)把您的服务作为依赖项放在同一个作用域下(或者更窄的作用域)。如果您依赖于 client_configuration 服务,那么这就意味着把您新的服务放在客户端作用域中(请参阅 A)改变您服务的作用域)
- B)将整个容器传递给您的服务,当您每次想确定您是否得到了正确的实例,您就可以从容器中检索您的依赖项--您的服务时在默认的容器依赖项中的,(请参见 B)把容器作为您的服务的依赖项进行传递))
在 Symfony 2.7 以前,有另一种基于同步服务的选择。然而,在 从 Symfony 2.7 版本开始,这种服务就被取消了。
A)改变您的服务的范围
应该按照下面的定义来修改服务的作用域。在这个例子中假定在 Mailer 类中的构造函数的第一个参数是 ClientConfiguration 对象。
YMAL:
# app/config/services.yml
services:
my_mailer:
class: AppBundle\Mail\Mailer
scope: client
arguments: ["@client_configuration"]
XML:
<!-- app/config/services.xml -->
<services>
<service id="my_mailer"
class="AppBundle\Mail\Mailer"
scope="client">
<argument type="service" id="client_configuration" />
</service>
</services>
PHP:
// app/config/services.php
use Symfony\Component\DependencyInjection\Definition;
$definition = $container->setDefinition(
'my_mailer',
new Definition(
'AppBundle\Mail\Mailer',
array(new Reference('client_configuration'),
))
)->setScope('client');
B)把容器作为您服务的依赖项进行传递
并不是所有时候都可以把作用域设置得比较狭窄(比如:当树枝环境要把它作为一个依赖项的时候,一个树枝扩展必须在容器作用域内),在这些情况下,你可以向你的服务传递整个容器:
// src/AppBundle/Mail/Mailer.php
namespace AppBundle\Mail;
use Symfony\Component\DependencyInjection\ContainerInterface;
class Mailer
{
protected $container;
public function __construct(ContainerInterface $container)
{
$this->container = $container;
}
public function sendEmail()
{
$request = $this->container->get('client_configuration');
// ... do something using the client configuration here
}
}
请注意,不要把一个客户端的配置存储在一个对象的属性中,因为可能在将来调用这个对象的时候会出现在第一节中阐述的那种问题(除非 Symfony 没有检查到您出现了错误)。
该类的服务配置就如同下面的代码所示:
YAML:
# app/config/services.yml
services:
my_mailer:
class: AppBundle\Mail\Mailer
arguments: ["@service_container"]
# scope: container can be omitted as it is the default
XML:
<!-- app/config/services.xml -->
<services>
<service id="my_mailer" class="AppBundle\Mail\Mailer">
<argument type="service" id="service_container" />
</service>
</services>
PHP:
// app/config/services.php
use Symfony\Component\DependencyInjection\Definition;
use Symfony\Component\DependencyInjection\Reference;
$container->setDefinition('my_mailer', new Definition(
'AppBundle\Mail\Mailer',
array(new Reference('service_container'))
));
把整个容器注入服务通常不是一个很好的办法(您只用注入您需要的部分即可)。
如何在 Bundle 中使用 Compiler Passes
Compiler Passes 让您有机会去操作已经注册到其它服务容器中的服务定义。您可以阅读组件部分的文章“编制容器” 来了解怎么去创建它们。如果您想从一个 bundle 类中注册编译器,那么您需要把它添加到 bundle 类定义中的构造方法中:
// src/Acme/MailerBundle/AcmeMailerBundle.php
namespace Acme\MailerBundle;
use Symfony\Component\HttpKernel\Bundle\Bundle;
use Symfony\Component\DependencyInjection\ContainerBuilder;
use Acme\MailerBundle\DependencyInjection\Compiler\CustomCompilerPass;
class AcmeMailerBundle extends Bundle
{
public function build(ContainerBuilder $container)
{
parent::build($container);
$container->addCompilerPass(new CustomCompilerPass());
}
}
最常见的关于 Compiler Passes 的用例是标记服务 (想要了解更多关于标签的内容请参阅组件部分的内容"标记服务的运用") 。如果您要使用 bundle 类中的自定义标签名,随后使用标记名来包含 bundle 的名称(使用小写字母,下划线作为分隔符),然后加一个点,最后再跟着真正的名称。比如:如果您希望在您的 AcmeMailerBundle 类中引入某种形式的"传输"标记,可以称之为 acme_mailer.transport。
23
会话
会话代理机制有多种用途,这个例子展示了两个常见用法。不像通常的的那样加入会话处理程序,处理程序被添加到代理服务器,并在被会话储存驱动程序注册。
use
Symfony\Component\HttpFoundation\Session\Session
;
use
Symfony\Component\HttpFoundation\Session\Storage\NativeSessionStorage
;
use
Symfony\Component\HttpFoundation\Session\Storage\Handler\PdoSessionHandler
;
$proxy
=
new
YourProxy
(
new
PdoSessionHandler
(
)
)
;
$session
=
new
Session
(
new
NativeSessionStorage
(
array
(
)
,
$proxy
)
)
;
下面,您将会学习两个实例,可用于 YourProxy:会话数据的加密和只读的客人会话。
会话数据的加密
如果您想要加密会话数据,您可以使用代理服务器来加密和解密所需会话:
use
Symfony\Component\HttpFoundation\Session\Storage\Proxy\SessionHandlerProxy
;
class
EncryptedSessionProxy
extends
SessionHandlerProxy
{
private
$key
;
public
function
__construct
(
\SessionHandlerInterface
$handler
,
$key
)
{
$this
->
key
=
$key
;
parent
::
__construct
(
$handler
)
;
}
public
function
read
(
$id
)
{
$data
=
parent
::
read
(
$id
)
;
return
mcrypt_decrypt
(
\MCRYPT_3DES
,
$this
->
key
,
$data
)
;
}
public
function
write
(
$id
,
$data
)
{
$data
=
mcrypt_encrypt
(
\MCRYPT_3DES
,
$this
->
key
,
$data
)
;
return
parent
::
write
(
$id
,
$data
)
;
}
}
只读客人会话
有一些应用程序,其会话被客人(guest)用户需求,但没有特别的需要储存会话的需求。在这种情况下,您可以在会话被写入之前拦截它。
use
Foo\User
;
use
Symfony\Component\HttpFoundation\Session\Storage\Proxy\SessionHandlerProxy
;
class
ReadOnlyGuestSessionProxy
extends
SessionHandlerProxy
{
private
$user
;
public
function
__construct
(
\SessionHandlerInterface
$handler
,
User
$user
)
{
$this
->
user
=
$user
;
parent
::
__construct
(
$handler
)
;
}
public
function
write
(
$id
,
$data
)
{
if
(
$this
->
user
->
isGuest
(
)
)
{
return
;
}
return
parent
::
write
(
$id
,
$data
)
;
}
}
在 Symfony 2.1 之前,本地设置被存储在被称为 _locale 的会话的属性中。从 2.1 版本开始,它储存在 Request 里,这意味着在一次用户请求中它不是“粘性的(sticky)”,在本文中,您将学习如何让用户的本地设置“粘性(sticky)”,一旦设定,相同的本地设置将被用于所有后续请求。
创建一个 LocaleListener
为了模拟储存在一个会话中的本地设置,您需要创建并注册一个新的事件监听器。为了模拟储存在一个会话中的本地设置,您需要创建并注册一个新的事件监听器。监听器是像这样的东西。通常情况下,_locale 被用作一个路由参数来表示本地设置,虽然它并不影响你如何确定一个请求所需的设置。
PHP:
// src/AppBundle/EventListener/LocaleListener.php
namespace
AppBundle\EventListener
;
use
Symfony\Component\HttpKernel\Event\GetResponseEvent
;
use
Symfony\Component\HttpKernel\KernelEvents
;
use
Symfony\Component\EventDispatcher\EventSubscriberInterface
;
class
LocaleListener implements EventSubscriberInterface
{
private
$defaultLocale
;
public
function
__construct
(
$defaultLocale
=
'en'
)
{
$this
->
defaultLocale
=
$defaultLocale
;
}
public
function
onKernelRequest
(
GetResponseEvent
$event
)
{
$request
=
$event
->
getRequest
(
)
;
if
(
!
$request
->
hasPreviousSession
(
)
)
{
return
;
}
// try to see if the locale has been set as a _locale routing parameter
if
(
$locale
=
$request
->
attributes
->
get
(
'_locale'
)
)
{
$request
->
getSession
(
)
->
set
(
'_locale'
,
$locale
)
;
}
else
{
// if no explicit locale has been set on this request, use one from the session
$request
->
setLocale
(
$request
->
getSession
(
)
->
get
(
'_locale'
,
$this
->
defaultLocale
)
)
;
}
}
public
static
function
getSubscribedEvents
(
)
{
return
array
(
// must be registered before the default Locale listener
KernelEvents
::
REQUEST
=>
array
(
array
(
'onKernelRequest'
,
17
)
)
,
)
;
}
}
然后注册监听器。
YAML:
services
:
app.locale_listener
:
class
:
AppBundle\EventListener\LocaleListener
arguments
:
[
"%kernel.default_locale%"
]
tags
:
- { name
:
kernel.event_subscriber
}
XML:
<service
id
=
"app.locale_listener"
class
=
"AppBundle\EventListener\LocaleListener"
>
<argument
>
%kernel.default_locale%
</argument
>
<tag
name
=
"kernel.event_subscriber"
/>
</service
>
PHP
use
Symfony\Component\DependencyInjection\Definition
;
$container
->
setDefinition
(
'app.locale_listener'
,
new
Definition
(
'AppBundle\EventListener\LocaleListener'
,
array
(
'%kernel.default_locale%'
)
)
)
->
addTag
(
'kernel.event_subscriber'
)
;
好了!现在通过改变用户设置并查看它在所有请求中都是粘性的(sticky)。记住,想要得到用户设置,使用 Request::getLocale 这个方法。
PHP:
// from a controller...
use
Symfony\Component\HttpFoundation\Request
;
public
function
indexAction
(
Request
$request
)
{
$locale
=
$request
->
getLocale
(
)
;
}
根据用户的喜好设置本地设置
您可能希望进一步提高该技术,并且以已登录用户的用户实体为依据定义本地设置。然而,由于 LocaleListener 比负责处理身份验证和设置具有 TokenStorage 的用户的 FirewallListener 早调用,您无法访问已登录用户。
假设您已经在 User 实体上定义了 locale 属性并且您想用此作为特定用户的本地设置。要做到这一点,您可以在登录过程和更新用户会话被重定向到它们的的第一个页面之前,用这个本地设置值将它们挂钩连接(hook into)。
要做到这一点,您需要对 security.interactive_login 事件添加一个事件监听器。
PHP:
// src/AppBundle/EventListener/UserLocaleListener.php
namespace
AppBundle\EventListener
;
use
Symfony\Component\HttpFoundation\Session\Session
;
use
Symfony\Component\Security\Http\Event\InteractiveLoginEvent
;
/**
* Stores the locale of the user in the session after the
* login. This can be used by the LocaleListener afterwards.
*/
class
UserLocaleListener
{
/**
* @var Session
*/
private
$session
;
public
function
__construct
(
Session
$session
)
{
$this
->
session
=
$session
;
}
/**
* @param InteractiveLoginEvent $event
*/
public
function
onInteractiveLogin
(
InteractiveLoginEvent
$event
)
{
$user
=
$event
->
getAuthenticationToken
(
)
->
getUser
(
)
;
if
(
null
!==
$user
->
getLocale
(
)
)
{
$this
->
session
->
set
(
'_locale'
,
$user
->
getLocale
(
)
)
;
}
}
}
然后注册监听器。
YAML:
# app/config/services.yml
services
:
app.user_locale_listener
:
class
:
AppBundle\EventListener\UserLocaleListener
arguments
:
[
@session
]
tags
:
- { name
:
kernel.event_listener, event
:
security.interactive_login, method
:
onInteractiveLogin
}
XML:
<!-- app/config/services.xml -->
<?xml
version
=
"1.0"
encoding
=
"UTF-8"
?>
<container
xmlns
=
"http://symfony.com/schema/dic/services"
xmlns:xsi
=
"http://www.w3.org/2001/XMLSchema-instance"
xsi:schemaLocation
=
"http://symfony.com/schema/dic/services
http://symfony.com/schema/dic/services/services-1.0.xsd"
>
<services
>
<service
id
=
"app.user_locale_listener"
class
=
"AppBundle\EventListener\UserLocaleListener"
>
<argument
type
=
"service"
id
=
"session"
/>
<tag
name
=
"kernel.event_listener"
event
=
"security.interactive_login"
method
=
"onInteractiveLogin"
/>
</service
>
</services
>
</container
>
PHP:
// app/config/services.php
$container
->
register
(
'app.user_locale_listener'
,
'AppBundle\EventListener\UserLocaleListener'
)
->
addArgument
(
'session'
)
->
addTag
(
'kernel.event_listener'
,
array
(
'event'
=>
'security.interactive_login'
,
'method'
=>
'onInteractiveLogin'
)
;
为了在用户更改语言偏好后立即更新语言,您需要在更新 User 实体后更新会话。
在默认情况下, Symfony Standard Edition 应用了 php.ini 这个全局值来为 session.save_handler 和 session.save_path 决定选择哪里来存储会话数据。这都是由于以下的配置。
YAML:
# app/config/config.yml
framework
:
session
:
# handler_id set to null will use default session handler from php.ini
handler_id
:
~
XML:
<!-- app/config/config.xml -->
<?xml
version
=
"1.0"
encoding
=
"UTF-8"
?>
<container
xmlns
=
"http://symfony.com/schema/dic/services"
xmlns:xsi
=
"http://www.w3.org/2001/XMLSchema-instance"
xmlns:framework
=
"http://symfony.com/schema/dic/symfony"
xsi:schemaLocation
=
"http://symfony.com/schema/dic/services
http://symfony.com/schema/dic/services/services-1.0.xsd
http://symfony.com/schema/dic/symfony
http://symfony.com/schema/dic/symfony/symfony-1.0.xsd"
>
<framework:config
>
<!-- handler-id set to null will use default session handler from php.ini -->
<framework:session
handler-id
=
"null"
/>
</framework:config
>
</container
>
PHP:
// app/config/config.php
$container
->
loadFromExtension
(
'framework'
,
array
(
'session'
=>
array
(
// handler_id set to null will use default session handler from php.ini
'handler_id'
=>
null
,
)
,
)
)
;
由于有这个配置,想要改变您的会话元数据的储存位置的话就全部都要依靠 php.ini 配置来实现了。
然而,如果您有以下的配置的话,Symfony 将把会话数据存储在 %kernel.cache_dir%/sessions 这个缓存目录的文件夹里。这意味着如果您清空缓存的话,所有的最近会话也将被删除。
YAML:
# app/config/config.yml
framework
:
session
:
~
XML:
<!-- app/config/config.xml -->
<?xml
version
=
"1.0"
encoding
=
"UTF-8"
?>
<container
xmlns
=
"http://symfony.com/schema/dic/services"
xmlns:xsi
=
"http://www.w3.org/2001/XMLSchema-instance"
xmlns:framework
=
"http://symfony.com/schema/dic/symfony"
xsi:schemaLocation
=
"http://symfony.com/schema/dic/services
http://symfony.com/schema/dic/services/services-1.0.xsd
http://symfony.com/schema/dic/symfony
http://symfony.com/schema/dic/symfony/symfony-1.0.xsd"
>
<framework:config
>
<framework:session
/>
</framework:config
>
</container
>
PHP:
// app/config/config.php
$container
->
loadFromExtension
(
'framework'
,
array
(
'session'
=>
array
(
)
,
)
)
;
利用另一个目录来存储会话数据是一个当您清空缓存时确保最近的会话没有丢失的常用方法。
使用不同的会话保存操作是一个很好的(可能更复杂些)在 Symfony 中可提供的管理会话的方法。到 Configuring Sessions and Save Handlers 可以来看看会话保存处理程序的讨论。在 cookbook 中还有个还有个链接是关于在数据库中存储会话的。
如果您想要改变 Symfony 存储会话数据的目录的话,您只需要改变框架配置就可以了。在下面的例子中,会把会话目录改变到 app/sessions:
YAML:
# app/config/config.yml
framework
:
session
:
handler_id
:
session.handler.native_file
save_path
:
"%kernel.root_dir%/sessions"
XML:
<!-- app/config/config.xml -->
<?xml
version
=
"1.0"
encoding
=
"UTF-8"
?>
<container
xmlns
=
"http://symfony.com/schema/dic/services"
xmlns:xsi
=
"http://www.w3.org/2001/XMLSchema-instance"
xmlns:framework
=
"http://symfony.com/schema/dic/symfony"
xsi:schemaLocation
=
"http://symfony.com/schema/dic/services
http://symfony.com/schema/dic/services/services-1.0.xsd
http://symfony.com/schema/dic/symfony
http://symfony.com/schema/dic/symfony/symfony-1.0.xsd"
>
<framework:config
>
<framework:session
handler-id
=
"session.handler.native_file"
save-path
=
"%kernel.root_dir%/sessions"
/>
</framework:config
>
</container
>
PHP:
// app/config/config.php
$container
->
loadFromExtension
(
'framework'
,
array
(
'session'
=>
array
(
'handler_id'
=>
'session.handler.native_file'
,
'save_path'
=>
'%kernel.root_dir%/sessions'
,
)
,
)
)
;
** 2.3 **能够与传统 PHP 会话结合的能力在 Symfony 2.3 中介绍。
如果您整合 Symfony 的全栈框架和从 session_start() 开始会话的遗留应用程序的话,通过使用 PHP Bridge session,可以使您仍然能够使用 Symfony 会话管理。
如果应用程序已设置它自己的 PHP 保存处理程序,您可以使 handler_id 指定为空:
YAML:
framework
:
session
:
storage_id
:
session.storage.php_bridge
handler_id
:
~
XML:
<?xml
version
=
"1.0"
encoding
=
"UTF-8"
?>
<container
xmlns
=
"http://symfony.com/schema/dic/services"
xmlns:framework
=
"http://symfony.com/schema/dic/symfony"
>
<framework:config
>
<framework:session
storage-id
=
"session.storage.php_bridge"
handler-id
=
"null"
/>
</framework:config
>
</container
>
PHP:
$container
->
loadFromExtension
(
'framework'
,
array
(
'session'
=>
array
(
'storage_id'
=>
'session.storage.php_bridge'
,
'handler_id'
=>
null
,
)
)
;
否则,如果问题仅仅是您不能避免应用程序以 session_start() 启动会话,您仍可以通过指定保存处理程序来使用一个基于 Symfony 的会话保存处理程序,就像下面的例子那样:
YAML:
framework
:
session
:
storage_id
:
session.storage.php_bridge
handler_id
:
session.handler.native_file
XML:
<?xml
version
=
"1.0"
encoding
=
"UTF-8"
?>
<container
xmlns
=
"http://symfony.com/schema/dic/services"
xmlns:framework
=
"http://symfony.com/schema/dic/symfony"
>
<framework:config
>
<framework:session
storage-id
=
"session.storage.php_bridge"
handler-id
=
"session.storage.native_file"
/>
</framework:config
>
</container
>
PHP:
$container
->
loadFromExtension
(
'framework'
,
array
(
'session'
=>
array
(
'storage_id'
=>
'session.storage.php_bridge'
,
'handler_id'
=>
'session.storage.native_file'
,
)
)
;
如果遗留应用程序需要它自己的会话保存处理程序,请不要重写它。代替的是设置 handler_id: ~。请注意,在会话开始后,会话保存处理程序将不能更改。如果应用程序在 Symfony 初始化之前开始会话,会话保存程序会早已设置好。这种情况下,您需要 handler_id:。只有当您确认遗留应用程序可以无副作用的使用 Symfony 保存处理程序并且会话不在 Symfony 初始化之前启动的情况下重写保存程序。
从 Integrating with Legacy Sessions 获取更多细节。
PHP 会话的默认行为是不管会话有没有改变都保存会话。在 Symfony 中,每当会话被接入,可以用来确定会话的时效和空闲时间的元数据都会被记录(会话产生的/最后使用的)。
如果出于性能原因您想要限制会话保存的频率,这个功能在使元数据保持相对精确的情况下,调整元数据更新的间隔和减少会话保存的频率。如果其它会话数据被更改,会话始终保存。
您可以用设置 framework.session.metadata_update_threshold 一个大于 0 秒的值方法告诉 Symfony 不要更新元数据直到距“会话最后一次更新”时间过去了一段特定时间。
YAML:
framework
:
session
:
metadata_update_threshold
:
120
XML:
<?xml
version
=
"1.0"
encoding
=
"UTF-8"
?>
<container
xmlns
=
"http://symfony.com/schema/dic/services"
xmlns:framework
=
"http://symfony.com/schema/dic/symfony"
xmlns:xsi
=
"http://www.w3.org/2001/XMLSchema-instance"
xsi:schemaLocation
=
"http://symfony.com/schema/dic/services http://symfony.com/schema/dic/services/services-1.0.xsd
http://symfony.com/schema/dic/symfony http://symfony.com/schema/dic/symfony/symfony-1.0.xsd"
>
<framework:config
>
<framework:session
metadata-update-threshold
=
"120"
/>
</framework:config
>
</container
>
PHP:
$container
->
loadFromExtension
(
'framework'
,
array
(
'session'
=>
array
(
'metadata_update_threshold'
=>
120
,
)
,
)
)
;
PHP 默认行为是不管会话有没有改变都保存会话。当使用 framework.session.metadata_update_threshold 时,Symfony 会将会话处理程序裹入(wrap)(配置在 framework.session.handler_id 中) WriteCheckSessionHandler。这将阻止任何没有被修改的会话写入。
请注意,如果每个请求(request)都没有写入会话,它可能会比通常更早的回收(garbage collected)。这意味着您的用户可能会比预期提前注销。
(configuration)如何在数据库中使用 PdoSessionHandler 存储 Sessions
在 Symfony 2.6 中有一个后向兼容:数据库模式稍作改变。更多细节请见 Symfony 2.6 的改变。
默认的 Symfony 的 session 存储将 session 信息写进文件。大多数的中到大型的网页使用一个数据库储存 session 的值而不是文件,因为数据库很好用并且适应多线程网页服务器环境。
Symfony 有一个内建的数据库 session 的存储解决方案名为 PdoSessionHandler。使用这个,你只需要在主配置文件中改变一些参数:
YAML:
# app/config/config.yml
framework
:
session
:
# ...
handler_id
:
session.handler.pdo
services
:
session.handler.pdo
:
class
:
Symfony\Component\HttpFoundation\Session\Storage\Handler\PdoSessionHandler
public
:
false
arguments
:
-
"mysql:dbname=mydatabase"
- { db_username
:
myuser, db_password
:
mypassword
}
XML:
<!-- app/config/config.xml -->
<framework:config
>
<framework:session
handler-id
=
"session.handler.pdo"
cookie-lifetime
=
"3600"
auto-start
=
"true"
/>
</framework:config
>
<services
>
<service
id
=
"session.handler.pdo"
class
=
"Symfony\Component\HttpFoundation\Session\Storage\Handler\PdoSessionHandler"
public
=
"false"
>
<argument
>
mysql:dbname=mydatabase
</agruement
>
<argument
type
=
"collection"
>
<argument
key
=
"db_username"
>
myuser
</argument
>
<argument
key
=
"db_password"
>
mypassword
</argument
>
</argument
>
</service
>
</services
>
PHP:
// app/config/config.php
use
Symfony\Component\DependencyInjection\Definition
;
use
Symfony\Component\DependencyInjection\Reference
;
$container
->
loadFromExtension
(
'framework'
,
array
(
...,
'session'
=>
array
(
// ...,
'handler_id'
=>
'session.handler.pdo'
,
)
,
)
)
;
$storageDefinition
=
new
Definition
(
'Symfony\Component\HttpFoundation\Session\Storage\Handler\PdoSessionHandler'
,
array
(
'mysql:dbname=mydatabase'
,
array
(
'db_username'
=>
'myuser'
,
'db_password'
=>
'mypassword'
)
)
)
;
$container
->
setDefinition
(
'session.handler.pdo'
,
$storageDefinition
)
;
设置表和列名称
这将会产生一个有着很多不同列的 sessions 表。表的名称以及所有的列名称,可以通过向 PdoSessionHandler 传递一个第二数组参数的方式设置:
YAML:
# app/config/config.yml
services
:
# ...
session.handler.pdo
:
class
:
Symfony\Component\HttpFoundation\Session\Storage\Handler\PdoSessionHandler
public
:
false
arguments
:
-
"mysql:dbname=mydatabase"
- { db_table
:
sessions, db_username
:
myuser, db_password
:
mypassword
}
XML:
<!-- app/config/config.xml -->
<services
>
<service
id
=
"session.handler.pdo"
class
=
"Symfony\Component\HttpFoundation\Session\Storage\Handler\PdoSessionHandler"
public
=
"false"
>
<argument
>
mysql:dbname=mydatabase
</agruement
>
<argument
type
=
"collection"
>
<argument
key
=
"db_table"
>
sessions
</argument
>
<argument
key
=
"db_username"
>
myuser
</argument
>
<argument
key
=
"db_password"
>
mypassword
</argument
>
</argument
>
</service
>
</services
>
PHP:
// app/config/config.php
use
Symfony\Component\DependencyInjection\Definition
;
// ...
$storageDefinition
=
new
Definition
(
'Symfony\Component\HttpFoundation\Session\Storage\Handler\PdoSessionHandler'
,
array
(
'mysql:dbname=mydatabase'
,
array
(
'db_table'
=>
'sessions'
,
'db_username'
=>
'myuser'
,
'db_password'
=>
'mypassword'
)
)
)
;
$container
->
setDefinition
(
'session.handler.pdo'
,
$storageDefinition
)
;
db_lifetime_col 是在 Symfony 2.6 中被引进的。2.6 之前的版本并不存在。
下列这些参数你必须设置:
db_table (默认为 sessions):
你的数据库中的 session 表的名称;
db_id_col (默认为 sess_id):
你的 session 表的 id 列的名称(文本类型(128));
db_data_col (默认为 sess_data):
你的 session 表的 value 列的名称 (二进制大对象);
db_time_col (默认为 sess_time): 你的 session 表的 time 列的名称(整型);
db_lifetime_col (默认为 sess_lifetime): T你的 session 表的 lifetime 列的名称(整型).
共享你的数据库连接信息
根据给定的设置,数据库的连接只是为了 session 存储连接而设置的。当你为 session 数据使用分离的数据库时这个是可以的。
但是如果你想要将 session 数据像你的工程的其它的数据一样储存在同一个数据库中,你可以使用通过引用数据库的 parameters.yml 文件的连接设置——相关的参数在如下定义:
YAML:
services
:
session.handler.pdo
:
class
:
Symfony\Component\HttpFoundation\Session\Storage\Handler\PdoSessionHandler
public
:
false
arguments
:
-
"mysql:host=%database_host%;port=%database_port%;dbname=%database_name%"
- { db_username
:
%database_user%, db_password: %database_password% }
XML:
<service
id
=
"session.handler.pdo"
class
=
"Symfony\Component\HttpFoundation\Session\Storage\Handler\PdoSessionHandler"
public
=
"false"
>
<argument
>
mysql:host=%database_host%;port=%database_port%;dbname=%database_name%
</agruement
>
<argument
type
=
"collection"
>
<argument
key
=
"db_username"
>
%database_user%
</argument
>
<argument
key
=
"db_password"
>
%database_password%
</argument
>
</argument
>
</service
>
PHP:
$storageDefinition
=
new
Definition
(
'Symfony\Component\HttpFoundation\Session\Storage\Handler\PdoSessionHandler'
,
array
(
'mysql:host=%database_host%;port=%database_port%;dbname=%database_name%'
,
array
(
'db_username'
=>
'%database_user%'
,
'db_password'
=>
'%database_password%'
)
)
)
;
SQL 语句案例
当升级到 Symfony 2.6 时模式就需要改变了
如果你使用 PdoSessionHandler 是 Symfony 2.6 之前的版本然后进行了升级,你的 session 表需要做出一些改变:
- 需要添加新的 session lifetime (sess_lifetime 默认)整型列; - data 列(sess_data 默认)需要改成二进制大对象型。
更多细节详见下面的 SQL 语句。
为了保存以前(2.5 以及更早的)版本的功能,将你的类的名称由 PdoSessionHandler 改成 LegacyPdoSessionHandler(Symfony 2.6.2 中添加的旧的类)。
MySQL
创建新的数据库的表的 SQL 语句如下所示(MySQL):
CREATE TABLE `sessions` (
`sess_id` VARBINARY(128) NOT NULL PRIMARY KEY,
`sess_data` BLOB NOT NULL,
`sess_time` INTEGER UNSIGNED NOT NULL,
`sess_lifetime` MEDIUMINT NOT NULL
) COLLATE utf8_bin, ENGINE = InnoDB;
二进制大对象类型的栏目只能储存到 64 kb。如果存储的用户的 session 数据超过这个值,可能就会出现异常或者它们的 session 会被重置。如果你需要更多的存储空间可以考虑使用 MEDIUMBLOB。
PostgreSQL
对于 PostgreSQL,代码如下所示:
CREATE TABLE sessions (
sess_id VARCHAR(128) NOT NULL PRIMARY KEY,
sess_data BYTEA NOT NULL,
sess_time INTEGER NOT NULL,
sess_lifetime INTEGER NOT NULL
);
微软的 SQL Server
对于微软的 SQL Server,代码如下所示:
CREATE TABLE [dbo].[sessions](
[sess_id] [nvarchar](255) NOT NULL,
[sess_data] [ntext] NOT NULL,
[sess_time] [int] NOT NULL,
[sess_lifetime] [int] NOT NULL,
PRIMARY KEY CLUSTERED(
[sess_id] ASC
) WITH (
PAD_INDEX = OFF,
STATISTICS_NORECOMPUTE = OFF,
IGNORE_DUP_KEY = OFF,
ALLOW_ROW_LOCKS = ON,
ALLOW_PAGE_LOCKS = ON
) ON [PRIMARY]
) ON [PRIMARY] TEXTIMAGE_ON [PRIMARY]
会话(Sessions)会在当您读、写,甚至仅仅是检查会话中的数据是否存在的时候自动启动。这意味着如果您需要避免为某些用户创建会话 cookie 是很难的:您必须完全避免访问会话。
例如,在这种情况下的一个常见的问题是检查存储在会话中的 flash 消息。以下代码将保证会话始终是开始的(started)。
{% for flashMessage in app.session.flashbag.get('notice') %}
<div class="flash-notice">
{{ flashMessage }}
</div>
{% endfor %}
即使用户没有登录,即使您没有创建任何 flash 信息,只要调用 flashbag 的 get()(或是 has())方法就可以启动一个会话。这可能会损伤您的应用程序性能,因为所有的用户都会收到一个会话 cookie。为了避免这一行为,在尝试访问 flash 消息之前添加一个 check 。
{% if app.request.hasPreviousSession %}
{% for flashMessage in app.session.flashbag.get('notice') %}
<div class="flash-notice">
{{ flashMessage }}
</div>
{% endfor %}
{% endif %}
24
PSR-7
The PSR-7 bridge 将 HttpFoundation 对象转换到实现 HTTP message 接口的对象,定义在 PSR-7。
安装
您可以用 2 种不同的方式安装组件:
- 通过 Composer 安装(symfony/psr-http-message-bridge on Packagist)
- 使用官方 Git 库(https://github.com/symfony/psr-http-message-bridge)
Bridge 也需要一个 PSR-7 实现来允许将 HttpFoundation 对象转化为 PSR-7 对象。它为 Zend Diactoros 提供原生支持。使用 Composer(zendframework/zend-diactoros on Packagist)或者查阅项目文档来安装它。
使用
从 HttpFoundation 对象到 PSR-7 的转换
Bridge 提供一个名为 HttpMessageFactoryInterface 的一个 factory 的接口,它可以从 HttpFoundation 对象构造实现 PSR-7 的接口的对象。它也提供了一个内部使用 Zend Diactoros 的默认的实现。
下面的代码片段说明了如何将一个 Request 转换成一个 Zend Diactoros ServerRequest 实现 ServerRequestInterface 接口:
use Symfony\Bridge\PsrHttpMessage\Factory\DiactorosFactory;
use Symfony\Component\HttpFoundation\Request;
$symfonyRequest = new Request(array(), array(), array(), array(), array(), array('HTTP_HOST' => 'dunglas.fr'), 'Content');
// The HTTP_HOST server key must be set to avoid an unexpected error
$psr7Factory = new DiactorosFactory();
$psrRequest = $psr7Factory->createRequest($symfonyRequest);
现在从一个 Response 到一个实现 ResponseInterface 接口的 Zend Diactoros Response:
use Symfony\Bridge\PsrHttpMessage\Factory\DiactorosFactory;
use Symfony\Component\HttpFoundation\Response;
$symfonyResponse = new Response('Content');
$psr7Factory = new DiactorosFactory();
$psrResponse = $psr7Factory->createResponse($symfonyResponse);
转换对象实现 PSR-7 到 HttpFoundation 的接口
另一方面,bridge 提供一个名为 HttpFoundationFactoryInterface 的一个 factory 的接口,它可以从实现 PSR-7 的接口的对象构造 HttpFoundation 对象。
下一段代码解释如何将一个实现 ServerRequestInterface 接口的对象转变为一个 Request 实例。
use Symfony\Bridge\PsrHttpMessage\Factory\HttpFoundationFactory;
// $psrRequest is an instance of Psr\Http\Message\ServerRequestInterface
$httpFoundationFactory = new HttpFoundationFactory();
$symfonyRequest = $httpFoundationFactory->createRequest($psrRequest);
从一个实现 ResponseInterface 的对象到一个 Response 实例:
use Symfony\Bridge\PsrHttpMessage\Factory\HttpFoundationFactory;
// $psrResponse is an instance of Psr\Http\Message\ResponseInterface
$httpFoundationFactory = new HttpFoundationFactory();
$symfonyResponse = $httpFoundationFactory->createResponse($psrResponse);
25
Symfony 版本
Symfony2 框架和第一代框架相比,包含了一个重要的改变。幸运的是,由于核心的 MVC 架构,曾经精通一个 Symfony1 项目的技能与使用 Symfony2 的开发中用到的技能相关性很大。当然,app.ymi 没了,但是路由(routing)、控件(controllers)和模板(templates)还在。
本章大略地讲述 Symfony2 与 Symfony1 的区别。正如您所看到的,许多任务以稍稍不同的方式处理。您将会欣赏这些细微的差别,因为它们提升稳定性、可预测性和解耦(decoupled)您在 Symfony2 中应用程序的代码。
所以,靠坐在椅子上,放松,就像您从“过去”旅行到“现在”。
目录结构
当您看着一个 Symfony2 项目——例如 Symfony Standard Edition——您将会注意到一个与 Symfony1 非常不同的目录结构。然而,这些不同某种程度上讲仅仅是表面上的。
app/
目录
像 Symfony1 里面一样,您的工程有一个或多个应用程序,每一个都存在于 apps/ 目录之下(例如:apps/frontend)。在 Symfony2 默认情况下,您只有一个由 app/ 目录代表的应用程序。在 Symfony1 中,app/ 目录包含应用程序的特定配置。它还包含应用程序特定的缓存、日志、模板目录和一个 Kernel 类(AppKernel),是代表应用程序的基本对象。
和 Symfony1 不同的是,app/ 目录下几乎没有 PHP 代码。这个目录不是要像 Symfony1 一样存储模块(modules)或者库文件。相反,它只是储存配置和其他资源(模板,翻译文件(translation files))。
src/
目录
简单地说,您的所有实际代码都在这里。在Symfony2 中,所有的应用程序代码都在一个包(bundle,大致相当于一个 Symfony1 插件)里,并且默认情况下每个包(bundle)都在 src 目录之下。那么,src 目录有点像 Symfony1 中的 plugins 目录,但是更加灵活。此外,您的包(bundle)会存在于 src/ 目录之下,而第三方的包(bundle)会存在于 vendor/ 目录之下的某个地方。
为了得到一个更好的关于 src/ 目录的概念,首先想一想一个 Symfony1 应用程序的结构。首先,一部分代码可能存在于一个或多个程序中。最常见的那些包括模块,但也可能包括您写在程序中的其他 PHP 类。您可能也在您的项目的 config 目录下创建了一个 schema.yml 文件并建立了几个模型(model)文件。最后,为了帮助一些常见功能,您使用了一些存在 plugins/ 目录下的第三方插件。换句话说,驱动您的应用程序的代码储存在不同的地方。
在 Symfony2 中,生活简单得多,因为所有的 Symfony2 代码都必须存在于一个包(bundle)里。pretend symfony1 项目中,所有的都可以移入一个或多个插件中(事实上,这是一个非常好的尝试)。假设所有的模块、PHP 类、架构、路由配置等都转移到一个插件里,Symfony1 plugins/ 目录会和 Symfony2 src/ 目录非常相似。
再一次简而言之,src/ 目录就是您的代码、资产(assets)、模板和大多数特定于您的项目的东西存在的地方。
vendor/
目录
vendor/ 目录基本上相当于 Symfony1 里的 lib/vendor/目录,这是所有的 vendor 库和包(bundle)的传统目录。默认情况下,您会在这个目录里发现 Symfony2 的库文件以及一些其他的相关的库,例如 Doctrine2,Twig 和 Swift Mailer。第三方 Symfony2 包(bundle)存在于 vendor/ 目录下的某个地方。
web/
目录
web/ 目录没有太多改变。最明显的不同是没有 css/,js/ 和 images/ 目录。这是有意的。像您的 PHP 代码,所有的资产(assets)也都在一个包(bundle)里。在一个控制台命令的帮助下,每个包(bundle)的 Resources/public/ 目录被复制或者象征性的连接到 web/bundles/ 目录。这允许您保持包(bundle)内资源的组织,但是仍使它们能够被人们使用。要确保所有的包(bundle)都是可用的,运行以下命令:
$ php app/console assets:install web
这个命令是 Symfony2 的,等同于 Symfony1 的 plugin:publish-assets 命令。
自动加载
现代框架的优点之一是永远不需要担心需求文件。通过使用一个自动加载器,您可以指定项目中的任何类,并且相信它可用。在 Symfony2 中,自动加载变得更普遍,更快,并且独立地需求清除缓存。
在 Symfony1 中,自动加载是在整个项目中搜索需要的 PHP 类文件并将这些信息储存在一个巨大的数组(array)中。那数组(array)准确的告诉 Symfony1 哪个文件包含哪些类。在生产环境中,这就导致当类增加或者移走时需要清除缓存。
在 Symfony2 中,一个名为 Composer 的工具处理这一过程。自动加载器幕后的想法很简单:您的类的名称(包括命名空间)必须与包含这个类的文件的路径相匹配。以 Symfony2 Standard Edition 中的 FrameworkExtraBundle 作为例子:
namespace Sensio\Bundle\FrameworkExtraBundle;
use Symfony\Component\HttpKernel\Bundle\Bundle;
// ...
class SensioFrameworkExtraBundle extends Bundle
{
// ...
}
这个文件本身存在于 vendor/sensio/framework-extra-bundle/Sensio/Bundle/FrameworkExtraBundle/SensioFrameworkExtraBundle.php。正如您所见,路径的第二部分采用类的命名空间。第一部分等同于 SensioFrameworkExtraBundle 的包(package)的名称。
命名空间 Sensio\Bundle\FrameworkExtraBundle 和包(package)名称 sensio/framework-extra-bundle 清楚地说明了文件应该存在的目录是(vendor/sensio/framework-extra-bundle/Sensio/Bundle/FrameworkExtraBundle/)。然后 Composer 就可以在这个特定空间中寻找文件并快速地加载它。
如果文件不在这个准确的位置,您会收到这样一个错误提示 Class "Sensio\Bundle\FrameworkExtraBundle\SensioFrameworkExtraBundle" does not exist.。在 Symfony2 中,一个“class does not exist”错误意味着类的命名空间和物理位置没有匹配。基本上,Symfony2 是在确切位置找一个类,但这个位置不存在(或包含不同的类)。为了让类能够自动加载,您永远不需要清除 Symfony2 的缓存。
就像之前提到的那样,为了让自动加载器能够工作,它需要知道命名空间 Sensio 存在于 vendor/sensio/framework-extra-bundle 目录下,并且,举例来讲,命名空间 Doctrine 存在于 vendor/doctrine/orm/lib/ 目录下。这个映射完全由 Composer 控制。每一个通过 Composer 加载的第三方库都有它明确的设置,并且 Composer 为您处理一切事情。
为了让这能够工作,您的项目适用的所有的第三方库都必须定义在 composer.json 文件中。
如果您看一看 Symfony Standard Edition 中的 HelloController,您会发现它存在在 Acme\DemoBundle\Controller 命名空间下。然而 AcmeDemoBundle 并没有定义在您的 composer.json 文件中。尽管如此,但是这些文件还是自动加载了。这是因为您可以告诉 Composer 在没有定义一个依赖的情况下从特定的目录加载文件:
"autoload": {
"psr-0": { "": "src/" }
}
这意味着如果一个类没有在 vendor 目录中找到,Composer 会在抛出“class does not exist”错误之前,在 src 目录中搜索它。在 [the Composer documentationhref="https://getcomposer.org/doc/04-schema.md") 中阅读更多的关于 Composer 配置的知识。
使用控制台
在 Symfony1 中,控制台是在项目的根目录下被称为 symfony 的。
$ php symfony
在 Symfony2 中,控制台是在 app 子目录下被称为 console 的。
$ php app/console
应用程式
在 Symfony1 项目中,通常有几个应用程序:例如一个用于前端和一个用于后端。
在 Symfony2 项目中,您只需要创建一个应用程序(一个 blog 应用程序,一个 intranet 应用程序,...)。多数时候,如果您想要创建第二个应用程序,您可以创建另一个项目并且在它们之间共享一些包(bundles)。
然后如果您需要将一些包(bundles)的前端后端功能区分开,您可以给控件创建子命名空间,给模板创建子目录,区分语义结构,分离路由设置,等等。
当然,您的项目中有多个应用程序并没有错误,这完全取决于您。第二个应用程序意味着一个新的目录,例如 my_app/,具有相同的基本设置,比如 app/ 目录。
在词汇表中查看一个工程(Project)、一个应用程序(Application)和一个包(bundle)的定义。
包(bundles)和插件
在一个 Symfony1 项目中,一个插件可能包含配置,模块,PHP 库,资产(assets)和其他与项目相关的东西。在 Symfony2 中,插件的思想被“包(bundle)”代替了。一个包甚至比插件更加强大,因为核心 Symfony2 框架可以通过一系列包带入。在 Symfony2 中,包是一等公民,它非常灵活以至于核心代码本身就是一个包。
在 Symfony1 中,一个插件必须在 ProjectConfiguration 类中启用:
// config/ProjectConfiguration.class.php
public function setup()
{
// some plugins here
$this->enableAllPluginsExcept(array(...));
}
在 Symfony2 中,包在应用程序内核(application kernel)中激活:
// app/AppKernel.php
public function registerBundles()
{
$bundles = array(
new Symfony\Bundle\FrameworkBundle\FrameworkBundle(),
new Symfony\Bundle\TwigBundle\TwigBundle(),
...,
new Acme\DemoBundle\AcmeDemoBundle(),
);
return $bundles;
}
路由(routing.yml)和配置(config.yml)
在 Symfony1 中,routing.yml 和 app.yml 配置文件会自动加载在任何插件中。在 Symfony2 中,一个包中的路由和应用配置必须手动包含(include)。举个例子,要从一个名为 AcmeDemoBundle 的包里包括一个路由资源,您可以按照下面例子做:
YAML:
# app/config/routing.yml
_hello:
resource: "@AcmeDemoBundle/Resources/config/routing.yml"
XML:
<!-- app/config/routing.yml -->
<?xml version="1.0" encoding="UTF-8" ?>
<routes xmlns="http://symfony.com/schema/routing"
xmlns:xsi="http://www.w3.org/2001/XMLSchema-instance"
xsi:schemaLocation="http://symfony.com/schema/routing http://symfony.com/schema/routing/routing-1.0.xsd">
<import resource="@AcmeDemoBundle/Resources/config/routing.xml" />
</routes>
PHP:
// app/config/routing.php
use Symfony\Component\Routing\RouteCollection;
$collection = new RouteCollection();
$collection->addCollection($loader->import("@AcmeHelloBundle/Resources/config/routing.php"));
return $collection;
这将会加载从 AcmeDemoBundle 中的 Resources/config/routing.yml 文件中发现的路由。特殊的 @AcmeDemoBundle 是一个简写语法,它会在内部解决包的完整的路径。
您可以用同样的策略从一个包中带入设置:
YAML:
# app/config/config.yml
imports:
- { resource: "@AcmeDemoBundle/Resources/config/config.yml" }
XML:
<!-- app/config/config.xml -->
<imports>
<import resource="@AcmeDemoBundle/Resources/config/config.xml" />
</imports>
PHP:
// app/config/config.php
$this->import('@AcmeDemoBundle/Resources/config/config.php')
Symfony2 中的配置有点像在 Symfony1 中的 app.yml,除了更加系统化。您可以使用 app.yml 简单地创建您想要的任何键(key)。默认情况下,这些条目(entries)是没有意义的,完全取决于您在应用程序中如何使用它们:
# some app.yml file from symfony1
all:
email:
from_address: foo.bar@example.com
在 Symfony2 中,您也可以在 parameters 键(parameters key)下创建任意条目(entries):
YAML:
parameters:
email.from_address: foo.bar@example.com
XML:
<parameters>
<parameter key="email.from_address">foo.bar@example.com</parameter>
</parameters>
PHP:
$container->setParameter('email.from_address', 'foo.bar@example.com');
现在您可以用一个控件来获得它,例如:
public function helloAction($name)
{
$fromAddress = $this->container->getParameter('email.from_address');
}
现实中,Symfony2 的配置更为强大,主要用于配置您可以使用的对象。更多信息参见 "Service Container" 章节。
26
模板
有时您想要一个对您所用的所有模板都可用的变量。这在您的 app/config/config.yml 文件夹里是可行的。
YAML:
# app/config/config.yml
twig:
# ...
globals:
ga_tracking: UA-xxxxx-x
XML:
<!-- app/config/config.xml -->
<twig:config>
<!-- ... -->
<twig:global key="ga_tracking">UA-xxxxx-x</twig:global>
</twig:config>
PHP:
// app/config/config.php
$container->loadFromExtension('twig', array(
// ...
'globals' => array(
'ga_tracking' => 'UA-xxxxx-x',
),
));
现在,变量 ga_tracking 在所有的 Twig 模板里都是可用的了。
<p>The google tracking code is: {{ ga_tracking }}</p>
就是这么简单!
使用服务容器参数
您还可以利用内置的服务参数系统,它可以让您隔离或重用该值:
# app/config/parameters.yml
parameters:
ga_tracking: UA-xxxxx-x
YAML:
# app/config/config.yml
twig:
globals:
ga_tracking: "%ga_tracking%"
XML:
<!-- app/config/config.xml -->
<twig:config>
<twig:global key="ga_tracking">%ga_tracking%</twig:global>
</twig:config>
PHP:
// app/config/config.php
$container->loadFromExtension('twig', array(
'globals' => array(
'ga_tracking' => '%ga_tracking%',
),
));
同一个变量还是像以前那样能用。
引用服务
除了使用静态值,您还可以将该值设置为服务。当在模板中访问全局变量时,将从服务容器中请求服务,并访问该对象。
服务不会延迟加载。换句话说,当 Twig 被加载时,即使您从来没有使用全局变量,您的服务也会被实例化。
要将服务定义为全局 Twig 变量,以 @ 为前缀的字符串。这应该是熟悉的,因为它是在服务配置中使用相同语法。
YAML:
# app/config/config.yml
twig:
# ...
globals:
user_management: "@acme_user.user_management"
XML:
<!-- app/config/config.xml -->
<twig:config>
<!-- ... -->
<twig:global key="user_management">@acme_user.user_management</twig:global>
</twig:config>
PHP:
// app/config/config.php
$container->loadFromExtension('twig', array(
// ...
'globals' => array(
'user_management' => '@acme_user.user_management',
),
))
使用 Twig 扩充
如果全局变量要设置更为复杂的话 - 比如说一个对象 - 那么您就不能用上面的方法了。替代上面的方法,您需要创建一个 Twig 扩充并且在 getglobals 方法返回一个全局变量条目。
通常,当您引用模板的时候,您将使用 MyBundle:Subdir:filename.html.twig 格式 (请参见模板命名和位置)。
Twig 也以本机方式提供了一种称为“命名空间路径”的功能支持,然后为您的包进行了自动内置。
下面的路径便是一个例子:
{% extends "AppBundle::layout.html.twig" %}
{% include "AppBundle:Foo:bar.html.twig" %}
使用命名空间的路径,以下的程序将会很好的运行:
{% extends "@App/layout.html.twig" %}
{% include "@App/Foo/bar.html.twig" %}
在 Symfony 中,默认情况下,这两个路径都是有效的。
额外补充一点。使用经过命名空间声明的语法会运行得更快一些。
注册自己的命名空间
您也可以注册您自己的自定义命名空间。假设你正在使用一些第三方库,包括存放在 vendor/acme/foo-bar/templates 下的 Twig 模板。首先,为这个目录注册一个命名空间:
YAML:
# app/config/config.yml
twig:
# ...
paths:
"%kernel.root_dir%/../vendor/acme/foo-bar/templates": foo_bar
XML:
<!-- app/config/config.xml -->
<?xml version="1.0" ?>
<container xmlns="http://symfony.com/schema/dic/services"
xmlns:xsi="http://www.w3.org/2001/XMLSchema-instance"
xmlns:twig="http://symfony.com/schema/dic/twig"
>
<twig:config debug="%kernel.debug%" strict-variables="%kernel.debug%">
<twig:path namespace="foo_bar">%kernel.root_dir%/../vendor/acme/foo-bar/templates</twig:path>
</twig:config>
</container>
PHP:
// app/config/config.php
$container->loadFromExtension('twig', array(
'paths' => array(
'%kernel.root_dir%/../vendor/acme/foo-bar/templates' => 'foo_bar',
);
));
注册命名空间被称为 foo_bar,对应的是 vendor/acme/foo-bar/templates 目录。假设在该目录中的文件有一个叫做 sidebar.twig 的文件,那么您可以通过下面的代码来使用它:
{% include '@foo_bar/sidebar.twig' %}
每个命名空间对应多个路径
也可以将几个路径分配到相同的模板命名空间。但是在其中配置路径的顺序是非常重要的,因为如果配置的路径存在,Twig 总是从第一个配置的路径开始加载。当特定的模板不存在时,此功能可以作为一种回退机制来加载通用模板。
YAML:
# app/config/config.yml
twig:
# ...
paths:
"%kernel.root_dir%/../vendor/acme/themes/theme1": theme
"%kernel.root_dir%/../vendor/acme/themes/theme2": theme
"%kernel.root_dir%/../vendor/acme/themes/common": theme
XML:
<!-- app/config/config.xml -->
<?xml version="1.0" ?>
<container xmlns="http://symfony.com/schema/dic/services"
xmlns:twig="http://symfony.com/schema/dic/twig"
>
<twig:config debug="%kernel.debug%" strict-variables="%kernel.debug%">
<twig:path namespace="theme">%kernel.root_dir%/../vendor/acme/themes/theme1</twig:path>
<twig:path namespace="theme">%kernel.root_dir%/../vendor/acme/themes/theme2</twig:path>
<twig:path namespace="theme">%kernel.root_dir%/../vendor/acme/themes/common</twig:path>
</twig:config>
</container>
PHP:
// app/config/config.php
$container->loadFromExtension('twig', array(
'paths' => array(
'%kernel.root_dir%/../vendor/acme/themes/theme1' => 'theme',
'%kernel.root_dir%/../vendor/acme/themes/theme2' => 'theme',
'%kernel.root_dir%/../vendor/acme/themes/common' => 'theme',
),
));
现在,你可以使用相同的 @theme 命名空间来指位于前三个目录中的任何模板:
{% include '@theme/header.twig' %}
Symfony 默认 Twig 作为其模板引擎,但如果你想,你仍然可以使用纯 PHP 代码。在 Symfony 中,两种模板引擎都同样支持。Symfony 中在 PHP 上添加了一些不错的功能,使得使用 PHP 来编写模板更强大。
呈现 PHP 模板
如果你想使用 PHP 模板引擎,首先,请确保在应用程序配置文件中启用它:
YAML:
# app/config/config.yml
framework:
# ...
templating:
engines: ['twig', 'php']
XML:
<!-- app/config/config.xml -->
<framework:config>
<!-- ... -->
<framework:templating>
<framework:engine id="twig" />
<framework:engine id="php" />
</framework:templating>
</framework:config
PHP:
$container->loadFromExtension('framework', array(
// ...
'templating' => array(
'engines' => array('twig', 'php'),
),
));
现在,您可以仅仅通过在模板中使用 .php 扩展名代替 .twig 来提供一个 PHP 模板,而不是一个 Twig 模板。该控制器下呈现 index.html.php 模板:
// src/AppBundle/Controller/HelloController.php
// ...
public function indexAction($name)
{
return $this->render(
'AppBundle:Hello:index.html.php',
array('name' => $name)
);
}
您还可以使用 @Template 快捷方式提供默认的 AppBundle:Hello:index.html.php 模板:
// src/AppBundle/Controller/HelloController.php
use Sensio\Bundle\FrameworkExtraBundle\Configuration\Template;
// ...
/**
* @Template(engine="php")
*/
public function indexAction($name)
{
return array('name' => $name);
}
同时启用 php 和 twig 模板引擎是允许的,但它会对您的应用程序产生不良的副作用:Twig 命名空间的 @ 符号将不再支持 render() 方法:
``` public function indexAction() { // ...
// namespaced templates will no longer work in controllers
$this->render('@App/Default/index.html.twig');
// you must use the traditional template notation
$this->render('AppBundle:Default:index.html.twig');
} ```
``` {# inside a Twig template, namespaced templates work as expected #} {{ include('@App/Default/index.html.twig') }}
{# traditional template notation will also work #} {{ include('AppBundle:Default:index.html.twig') }} ```
修饰模板
通常情况下,模板项目中共享公用元素,像众所周知的页眉和页脚。在 Symfony 中,这个问题是以另一不同的方式被考虑的:一个模板可以由另一个修饰。
由于 extend() 的调用,index.html.php 模板是被 layout.html.php 修饰的。
<!-- app/Resources/views/Hello/index.html.php -->
<?php $view->extend('AppBundle::layout.html.php') ?>
Hello <?php echo $name ?>!
AppBundle::layout.html.php 符号听起来很熟悉,不是吗?它是用于引用模板的相同的符号。:: 部分只是意味着控制器的元素是空的,所以相应的文件直接存储在 views/ 下。
现在,我们来看一下 layout.html.php 文件:
<!-- app/Resources/views/layout.html.php -->
<?php $view->extend('::base.html.php') ?>
<h1>Hello Application</h1>
<?php $view['slots']->output('_content') ?>
布局本身就是被另一个修饰(::base.html.php)。 Symfony 支持多个修饰水平:一个布局本身可以被另一个装饰。在包的部分模板名字为空时,会在 app/Resources/views/ 目录下寻找视图。此目录为您的工程存储全局视图:
<!-- app/Resources/views/base.html.php -->
<!DOCTYPE html>
<html>
<head>
<meta http-equiv="Content-Type" content="text/html; charset=utf-8" />
<title><?php $view['slots']->output('title', 'Hello Application') ?></title>
</head>
<body>
<?php $view['slots']->output('_content') ?>
</body>
</html>
这两种布局中,$view['slots']->output('_content')
的表达方式被 index.html.php
和 layout.html.php
各自的子模版的内容所取代(在下一节中有更多关于 slot 的信息)。
如您所见,Symfony 提供了在一个神秘的 $view 对象上的方法。在模板中,$view 变量总是可得到的并且指向一个特殊的对象,该对象提供一堆方法对模板引擎进行标记。
使用 Slots
一个 slot 是代码的一个片段,定义在模板中,且可重用于任何布局来修饰模板。在 index.html.php 模板中,定义一个标题 slot:
<!-- app/Resources/views/Hello/index.html.php -->
<?php $view->extend('AppBundle::layout.html.php') ?>
<?php $view['slots']->set('title', 'Hello World Application') ?>
Hello <?php echo $name ?>!
基本布局已经有代码来输出页眉标题:
<!-- app/Resources/views/base.html.php -->
<head>
<meta http-equiv="Content-Type" content="text/html; charset=utf-8" />
<title><?php $view['slots']->output('title', 'Hello Application') ?></title>
</head>
在 output() 方法中插入一个 slot 的内容,并且如果 slot 未定义,则可以选择采用默认值。并且 _content 只是一个特殊的包含渲染后的子模版的 slot。
对于大型的 slots,还有一个扩展语法:
<?php $view['slots']->start('title') ?>
Some large amount of HTML
<?php $view['slots']->stop() ?>
包括其他模板
共享模板代码的一个片段的最好的方法是定义一个可以被纳入其他模板的模板。
创建一个 hello.html.php 模板:
<!-- app/Resources/views/Hello/hello.html.php -->
Hello <?php echo $name ?>!
然后修改 index.html.php 模板来包含上面的模板:
<!-- app/Resources/views/Hello/index.html.php -->
<?php $view->extend('AppBundle::layout.html.php') ?>
<?php echo $view->render('AppBundle:Hello:hello.html.php', array('name' => $name)) ?>
render() 方法计算并返回另一个模板的内容(这是作为在控制器中使用的完全相同的方法)。
嵌入其他控制器
如果要嵌入模板中的另一个控制器的结果要怎样做呢?当处理 Ajax 时,这是非常有用的,或在嵌入模板时,需要主模板中一些不可用的变量。
如果你创建了一个 fancy 活动,并且希望把它包含到 index.html.php template 模板中,只需要使用下面的代码:
<!-- app/Resources/views/Hello/index.html.php -->
<?php echo $view['actions']->render(
new \Symfony\Component\HttpKernel\Controller\ControllerReference('AppBundle:Hello:fancy', array(
'name' => $name,
'color' => 'green',
))
) ?>
这里,AppBundle:Hello:fancy 字符串指代 Hello 控制器中的 fancy 活动:
// src/AppBundle/Controller/HelloController.php
class HelloController extends Controller
{
public function fancyAction($name, $color)
{
// create some object, based on the $color variable
$object = ...;
return $this->render('AppBundle:Hello:fancy.html.php', array(
'name' => $name,
'object' => $object
));
}
// ...
}
但是 $view['actions’]
数组元素是在哪里定义的呢?像 $view['slots’]
一样,它被叫做模板助手,下一节会告诉您更多这方面的信息。
使用模板助手
Symfony 的模板系统可以很容易地通过助手(helpers)扩展。Helpers 是在模板中提供实用功能的 PHP 对象。Symfony 的 actions 和 slots 是内置的两个助手。
创建两个页面之间的链接
说到 web 应用程序,创建页面之间的联系是必须的。作为对模板中的 URLs 进行硬编码的替换,路由助手知道如何生成基于路由配置的 URL。这样,所有你可以很容易地更改配置更新的 URL:
<a href="<?php echo $view['router']->generate('hello', array('name' => 'Thomas')) ?>">
Greet Thomas!
</a>
generate() 方法需要路由名称和一个参数数组作为参数。路由名称是引用该主键下的被引用的路由并且参数是路由模式中定义的占位符的值:
# src/AppBundle/Resources/config/routing.yml
hello: # The route name
path: /hello/{name}
defaults: { _controller: AppBundle:Hello:index }
使用 Assets: Images, JavaScripts 和 Stylesheets
如果没有 images, JavaScripts, 和 stylesheets,互联网会是什么样的呢?Symfony 提供了 assets 标记来容易地处理它们:
<link href="<?php echo $view['assets']->getUrl('css/blog.css') ?>" rel="stylesheet" type="text/css" />
<img src="<?php echo $view['assets']->getUrl('images/logo.png') ?>" />
assets helper 的主要目的是使您的应用程序更便携。由于这个 helper 不更改任何模板中的代码,您可以把应用程序根目录移动到在您的 web 根目录之下的任何地方。
分析模板
通过使用 stopwatch 帮助器,您可以对您的模板部分计时并将其显示在 WebProfilerBundle 的 timeline 上:
<?php $view['stopwatch']->start('foo') ?>
... things that get timed
<?php $view['stopwatch']->stop('foo') ?>
如果您在您的模板上使用超过一次相同的名称,timeline 中的时间将按相同的 line 来进行分组。
输出转义
使用 PHP 模板时,每当变量向用户展示时对变量转义:
<?php echo $view->escape($var) ?>
默认情况下,escape() 方法假定变量是在 HTML 环境范围内输出。第二个参数允许您更改环境。例如,在一个 JavaScript 脚本中的输出,使用 js 环境:
<?php echo $view->escape($var, 'js') ?>
书写扩展的主要目的就是把经常使用的代码移动到一个可重用的类中,比如说添加国际化支持。扩展可以定义标签、 筛选、 测试、 操作符、 全局变量、 函数和节点访客。
创建扩展也使得在编译执行的时候和代码运行的时候使您的代码能更好地分离。这样的话,能使您的代码运行得更快。
在编写您自己的扩展之前, 请看一看 Twig 官方的扩展库。
创建扩展类
这本书介绍如何编写到 Twig 1.12 版本以后的自定义的 Twig 扩展。如果您使用的是旧版本,请阅读以前的 Twig 扩展文件。
如果想要使用您的自定义的功能,首先您必须创建一个 Twig 扩展类。如下面的例子,比如您需要创建一个价格筛选器来把一个给定的数字转换为价格的格式:
// src/AppBundle/Twig/AppExtension.php
namespace AppBundle\Twig;
class AppExtension extends \Twig_Extension
{
public function getFilters()
{
return array(
new \Twig_SimpleFilter('price', array($this, 'priceFilter')),
);
}
public function priceFilter($number, $decimals = 0, $decPoint = '.', $thousandsSep = ',')
{
$price = number_format($number, $decimals, $decPoint, $thousandsSep);
$price = '$'.$price;
return $price;
}
public function getName()
{
return 'app_extension';
}
}
除了自定义筛选器,你也可以添加自定义函数和注册全局变量。
把扩展注册为一种服务
现在,您必须让服务容器知道您新创建了新的 Twig 扩展:
YAML:
# app/config/services.yml
services:
app.twig_extension:
class: AppBundle\Twig\AppExtension
public: false
tags:
- { name: twig.extension }
XML:
<!-- app/config/services.xml -->
<services>
<service id="app.twig_extension"
class="AppBundle\Twig\AppExtension"
public="false">
<tag name="twig.extension" />
</service>
</services>
PHP:
// app/config/services.php
use Symfony\Component\DependencyInjection\Definition;
$container
->register('app.twig_extension', '\AppBundle\Twig\AppExtension')
->setPublic(false)
->addTag('twig.extension');
请记住 Twig 扩展并不是慢慢地加载。这意味有更高的可能性,您将会得到一个 ServiceCircularReferenceException(服务器循环引用异常)或 ScopeWideningInjectionException(超出作用域注入异常),如果任何服务 (或在这种情况下的 Twig 扩展) 是依赖于请求服务的话。想了解更多的信息去看看如何在作用域中工作。
使用自定义的扩展
使用您新创建的 Twig 扩展和使用其他扩展没有什么不同:
{# outputs $5,500.00 #}
{{ '5500'|price }}
将其他参数传递到您的筛选器:
{# outputs $5500,2516 #}
{{ '5500.25155'|price(4, ',', '') }}
进一步的学习
如果想要对 Twig 扩展有更深入的了解,请看看 Twig 扩展文件。
通常,当您需要创建一个页面,您需要创建一个控制器并且从该控制器中呈现模板。但如果您仅仅呈现一个简单的模板,并且不需要传递给它的任何数据,则完全没必要创建一个控制器,通过使用内置的 FrameworkBundle:Template:template 控制器就可以达到目的。
例如,假设您想要呈现 static/privacy.html.twig 模板,并且不需要给它传递任何变量。那么您可以这样做而无需创建一个控制器:
YAML:
acme_privacy:
path: /privacy
defaults:
_controller: FrameworkBundle:Template:template
template: static/privacy.html.twig
XML:
<?xml version="1.0" encoding="UTF-8" ?>
<routes xmlns="http://symfony.com/schema/routing"
xmlns:xsi="http://www.w3.org/2001/XMLSchema-instance"
xsi:schemaLocation="http://symfony.com/schema/routing http://symfony.com/schema/routing/routing-1.0.xsd">
<route id="acme_privacy" path="/privacy">
<default key="_controller">FrameworkBundle:Template:template</default>
<default key="template">static/privacy.html.twig</default>
</route>
</routes>
PHP:
use Symfony\Component\Routing\RouteCollection;
use Symfony\Component\Routing\Route;
$collection = new RouteCollection();
$collection->add('acme_privacy', new Route('/privacy', array(
'_controller' => 'FrameworkBundle:Template:template',
'template' => 'static/privacy.html.twig',
)));
return $collection;
FrameworkBundle:Template:template 控制器将简单地呈现给您把它当做默认模板传递的任何模板。
当然可以也使用这个技巧把控制器嵌入到模板中来展现这个模板。但由于把控制器嵌入到模板内的目的通常是在自定义的控制器中准备某些数据,这可能只是在您想要缓存这个页面的一部分的时候有用(请参见缓存静态模板)。
Twig:
{{ render(url('acme_privacy')) }}
PHP:
<?php echo $view['actions']->render(
$view['router']->generate('acme_privacy', array(), true)
) ?>
缓存的静态模板
因为通常使用这种方法可以实现模板静态化,所以对它们进行缓存会比较有意义。幸运的是,这相对来说比较容易,通过配置您的路径中的几个其他变量,您就可以控制您的页面如何缓存:
YAML:
acme_privacy:
path: /privacy
defaults:
_controller: FrameworkBundle:Template:template
template: 'static/privacy.html.twig'
maxAge: 86400
sharedAge: 86400
XML:
<?xml version="1.0" encoding="UTF-8" ?>
<routes xmlns="http://symfony.com/schema/routing"
xmlns:xsi="http://www.w3.org/2001/XMLSchema-instance"
xsi:schemaLocation="http://symfony.com/schema/routing http://symfony.com/schema/routing/routing-1.0.xsd">
<route id="acme_privacy" path="/privacy">
<default key="_controller">FrameworkBundle:Template:template</default>
<default key="template">static/privacy.html.twig</default>
<default key="maxAge">86400</default>
<default key="sharedAge">86400</default>
</route>
</routes>
PHP:
use Symfony\Component\Routing\RouteCollection;
use Symfony\Component\Routing\Route;
$collection = new RouteCollection();
$collection->add('acme_privacy', new Route('/privacy', array(
'_controller' => 'FrameworkBundle:Template:template',
'template' => 'static/privacy.html.twig',
'maxAge' => 86400,
'sharedAge' => 86400,
)));
return $collection;
MaxAge 和 sharedAge 的值用于修改在控制器中创建的响应对象。对缓存的详细信息,请参阅 HTTP 缓存。
这里也有一个私有变量 (此处未显示)。在默认情况下,响应将予以公开,只要它传递了 maxAge 或 sharedAge 。如果设置为 true,响应将被标记为私有。
27
测试
如果您的应用程序需要 HTTP 认证,跳过服务器变量的用户名和密码来生成客户端 createClient():
$client = static::createClient(array(), array(
'PHP_AUTH_USER' => 'username',
'PHP_AUTH_PW' => 'pa$$word',
));
您也可以在每一个请求的基础数据上重写它:
$client->request('DELETE', '/post/12', array(), array(), array(
'PHP_AUTH_USER' => 'username',
'PHP_AUTH_PW' => 'pa$$word',
));
当您的应用程序使用 form_login 时,您可以通过允许您的测试配置使用 HTTP 认证来简化您的测试。您可以使用以上的代码来在测试中进行认证,但是仍然使您的用户通过通常的 form_login 登陆。诀窍是在您的防火墙添加 http_basic 键(http_basic key),连同 form_login 键一起:
YAML:
# app/config/config_test.yml
security:
firewalls:
your_firewall_name:
http_basic: ~
XML:
<!-- app/config/config_test.xml -->
<security:config>
<security:firewall name="your_firewall_name">
<security:http-basic />
</security:firewall>
</security:config>
PHP:
// app/config/config_test.php
$container->loadFromExtension('security', array(
'firewalls' => array(
'your_firewall_name' => array(
'http_basic' => array(),
),
),
));
功能测试中的认证请求可能会延缓程序组。尤其当使用 form_login 的时候,它可能成为问题,因为它需要额外的填写和提交表单的需求。
解决办法之一是在测试环境中像如何在功能测试中模拟 HTTP 认证中解释的用法一样来设置防火墙使用 http_basic。另一个方法是您自己创建一个 token 并将它储存在一个会话中。当您这样做的时候,您必须确认一个适当的 cookie 随着一个请求发送。下面的例子演示了这一技术:
// src/AppBundle/Tests/Controller/DefaultControllerTest.php
namespace Appbundle\Tests\Controller;
use Symfony\Bundle\FrameworkBundle\Test\WebTestCase;
use Symfony\Component\BrowserKit\Cookie;
use Symfony\Component\Security\Core\Authentication\Token\UsernamePasswordToken;
class DefaultControllerTest extends WebTestCase
{
private $client = null;
public function setUp()
{
$this->client = static::createClient();
}
public function testSecuredHello()
{
$this->logIn();
$crawler = $this->client->request('GET', '/admin');
$this->assertTrue($this->client->getResponse()->isSuccessful());
$this->assertGreaterThan(0, $crawler->filter('html:contains("Admin Dashboard")')->count());
}
private function logIn()
{
$session = $this->client->getContainer()->get('session');
$firewall = 'secured_area';
$token = new UsernamePasswordToken('admin', null, $firewall, array('ROLE_ADMIN'));
$session->set('_security_'.$firewall, serialize($token));
$session->save();
$cookie = new Cookie($session->getName(), $session->getId());
$this->client->getCookieJar()->set($cookie);
}
}
这一技术在如何在功能测试中模拟 HTTP 认证中解释得更为整齐,是首选方式。
如果您需要模拟不同客户之间的互动(比如说一个聊天),先创建几个客户:
// ...
$harry = static::createClient();
$sally = static::createClient();
$harry->request('POST', '/say/sally/Hello');
$sally->request('GET', '/messages');
$this->assertEquals(Response::HTTP_CREATED, $harry->getResponse()->getStatusCode());
$this->assertRegExp('/Hello/', $sally->getResponse()->getContent());
当您的代码存在于一个全局状态(global state)或者它依赖的第三方库中存在全局状态,不存在这个工作。这种情况下,您可以隔离您的用户:
// ...
$harry = static::createClient();
$sally = static::createClient();
$harry->insulate();
$sally->insulate();
$harry->request('POST', '/say/sally/Hello');
$sally->request('GET', '/messages');
$this->assertEquals(Response::HTTP_CREATED, $harry->getResponse()->getStatusCode());
$this->assertRegExp('/Hello/', $sally->getResponse()->getContent());
隔离的用户在一个专用和整洁的 PHP 过程中透明地执行它们的需求,从而避免一切副作用。
由于隔离的用户更慢,您可以在主过程(main process)中留下一个用户,然后隔离其他用户。
重点推荐一个只测试 Response 的功能测试。但是如果您写了监视您的生产服务器的功能测试,您也许想要写一个分析器数据的测试,因为它给了您一个很好的方法来检查各种事情并执行一些度量。
Symfony 分析器为每一个请求采集大量数据。用这些数据来检查数据可调用的次数,框架中花费的时间,等等。但在断言之前,启动分析器并检查它,是确实很有效的(在在 test 环境中默认启动)。
class HelloControllerTest extends WebTestCase
{
public function testIndex()
{
$client = static::createClient();
// Enable the profiler for the next request
// (it does nothing if the profiler is not available)
$client->enableProfiler();
$crawler = $client->request('GET', '/hello/Fabien');
// ... write some assertions about the Response
// Check that the profiler is enabled
if ($profile = $client->getProfile()) {
// check the number of requests
$this->assertLessThan(
10,
$profile->getCollector('db')->getQueryCount()
);
// check the time spent in the framework
$this->assertLessThan(
500,
$profile->getCollector('time')->getDuration()
);
}
}
}
如果测试因为分析器数据(例如太多的数据库问题)而失败,您可能想要在测试结束后用 Web Profiler 来分析请求,如果您将 token 嵌入到错误信息中,这是很容易完成的:
$this->assertLessThan(
30,
$profile->getCollector('db')->getQueryCount(),
sprintf(
'Checks that query count is less than 30 (token %s)',
$profile->getToken()
)
);
分析器 store 可以由环境决定而不同(尤其如果您使用默认配置使用的 SQLite store 的话)。
即使您隔离了客户端或为您的测试使用了 HTTP 层,分析器信息都是可用的。
阅读内置的数据收集器的 API 来了解更多关于它们的接口。
加速测试不收集分析器数据
避免在每次测试中都收集数据,您可以将收集参数设置为 false:
YAML:
# app/config/config_test.yml
# ...
framework:
profiler:
enabled: true
collect: false
XML:
<!-- app/config/config.xml -->
<?xml version="1.0" encoding="UTF-8" ?>
<container xmlns="http://symfony.com/schema/dic/services"
xmlns:framework="http://symfony.com/schema/dic/symfony"
xmlns:xsi="http://www.w3.org/2001/XMLSchema-instance"
xsi:schemaLocation="http://symfony.com/schema/dic/services http://symfony.com/schema/dic/services/services-1.0.xsd
http://symfony.com/schema/dic/symfony http://symfony.com/schema/dic/symfony/symfony-1.0.xsd">
<!-- ... -->
<framework:config>
<framework:profiler enabled="true" collect="false" />
</framework:config>
</container>
PHP:
// app/config/config.php
// ...
$container->loadFromExtension('framework', array(
'profiler' => array(
'enabled' => true,
'collect' => false,
),
));
这样的话,只有调用 $client->enableProfiler()
的测试才会收集数据。
如果您的代码和数据库交互,例如从中读取数据或者写入数据,您需要把这个考虑进去来调整测试。有很多方法可以解决这个问题。您可以创建一个 Repository 的仿制品,然后用它来返回预期的对象。在功能测试中,您可能需要准备一个有预定值的测试数据库来确保您的测试始终有相同的数据来使用。
如果您想直接测试您的查询(queries),看如何测试 Doctrine 仓库。
在单元测试中模拟 Repository
如果您想测试一个独立的依赖于一个 Doctrine repository 的代码,您需要模拟 Repository。通常,您将 EntityManager 注入的您的类中然后使用它获得 repository。这使事情变得有一些困难,因为您需要同时模拟 EntityManager 和您的 repository 类。
通过将您的 repository 作为 factory service 注册来直接注入 repository 是可能的(也是一个好主意)。这使设置需要多一些工作,但使测试更加容易,因为您只需要模拟 repository。
假设您要测试的类看起来像这样:
namespace AppBundle\Salary;
use Doctrine\Common\Persistence\ObjectManager;
class SalaryCalculator
{
private $entityManager;
public function __construct(ObjectManager $entityManager)
{
$this->entityManager = $entityManager;
}
public function calculateTotalSalary($id)
{
$employeeRepository = $this->entityManager
->getRepository('AppBundle:Employee');
$employee = $employeeRepository->find($id);
return $employee->getSalary() + $employee->getBonus();
}
}
由于 ObjectManager 通过构造函数被注入类里面,在一个测试内很容易传递(pass)一个模拟类:
use AppBundle\Salary\SalaryCalculator;
class SalaryCalculatorTest extends \PHPUnit_Framework_TestCase
{
public function testCalculateTotalSalary()
{
// First, mock the object to be used in the test
$employee = $this->getMock('\AppBundle\Entity\Employee');
$employee->expects($this->once())
->method('getSalary')
->will($this->returnValue(1000));
$employee->expects($this->once())
->method('getBonus')
->will($this->returnValue(1100));
// Now, mock the repository so it returns the mock of the employee
$employeeRepository = $this
->getMockBuilder('\Doctrine\ORM\EntityRepository')
->disableOriginalConstructor()
->getMock();
$employeeRepository->expects($this->once())
->method('find')
->will($this->returnValue($employee));
// Last, mock the EntityManager to return the mock of the repository
$entityManager = $this
->getMockBuilder('\Doctrine\Common\Persistence\ObjectManager')
->disableOriginalConstructor()
->getMock();
$entityManager->expects($this->once())
->method('getRepository')
->will($this->returnValue($employeeRepository));
$salaryCalculator = new SalaryCalculator($entityManager);
$this->assertEquals(2100, $salaryCalculator->calculateTotalSalary(1));
}
}
在这个例子中,您由内而外的构造模拟,首先创建由 Repository 返回的 employee,它本身被 EntityManager 返回。这种方式中,没有真正的类参加到测试中。
为功能测试更改数据库设置
如果您有功能测试,您希望他们与一个真实的数据库进行交互。大多数时候您需要用专用的数据库连接来保证当您开发应用程序时不会重写您输入的数据,也可以在每个测试之前清空数据库。
要做到这一点,您可以指定一个数据库配置,覆盖默认的配置:
YAML:
# app/config/config_test.yml
doctrine:
# ...
dbal:
host: localhost
dbname: testdb
user: testdb
password: testdb
XML:
<!-- app/config/config_test.xml -->
<doctrine:config>
<doctrine:dbal
host="localhost"
dbname="testdb"
user="testdb"
password="testdb"
/>
</doctrine:config>
PHP:
// app/config/config_test.php
$configuration->loadFromExtension('doctrine', array(
'dbal' => array(
'host' => 'localhost',
'dbname' => 'testdb',
'user' => 'testdb',
'password' => 'testdb',
),
));
确保您的数据库在 localhost 上运行,并且有数据库和用户凭证设置(database and user credentials set up)的定义。
一个 Symfony 项目中的 Doctrine 仓库(repositories)测试是不被推荐的。当您处理一个仓库(repository)的时候,您真正在处理一些面对真正的数据库连接的东西。
幸运的是,您可以很容易地测试您对真实数据库的查询(queries),如下所述。
功能测试
如果您需要确实地执行一个查询,您需要启动(boot)内核(kernel)以获得一个有效的链接。在这种情况下您会继承(extend)KernelTestCase,这可以使一切变得简单:
// src/Acme/StoreBundle/Tests/Entity/ProductRepositoryFunctionalTest.php
namespace Acme\StoreBundle\Tests\Entity;
use Symfony\Bundle\FrameworkBundle\Test\KernelTestCase;
class ProductRepositoryFunctionalTest extends KernelTestCase
{
/**
* @var \Doctrine\ORM\EntityManager
*/
private $em;
/**
* {@inheritDoc}
*/
public function setUp()
{
self::bootKernel();
$this->em = static::$kernel->getContainer()
->get('doctrine')
->getManager()
;
}
public function testSearchByCategoryName()
{
$products = $this->em
->getRepository('AcmeStoreBundle:Product')
->searchByCategoryName('foo')
;
$this->assertCount(1, $products);
}
/**
* {@inheritDoc}
*/
protected function tearDown()
{
parent::tearDown();
$this->em->close();
}
}
有时运行测试,在运行测试之前,需要做额外的引导工作。例如,如果您正在运行一个功能测试并引入了一个新的翻译资源,那么您需要在运行这些测试之前清除缓存。这份指导书包括了如何做到这一点。
首先,添加以下文件:
// app/tests.bootstrap.php
if (isset($_ENV['BOOTSTRAP_CLEAR_CACHE_ENV'])) {
passthru(sprintf(
'php "%s/console" cache:clear --env=%s --no-warmup',
__DIR__,
$_ENV['BOOTSTRAP_CLEAR_CACHE_ENV']
));
}
require __DIR__.'/bootstrap.php.cache';
用 tests.bootstrap.php
替换 app/phpunit.xml.dist
里的测试引导文件 bootstrap.php.cache
:
<!-- app/phpunit.xml.dist -->
<!-- ... -->
<phpunit
...
bootstrap = "tests.bootstrap.php"
>
现在您可以在您的 phpunit.xml.dist
文件中定义您想要在哪种环境下清理缓存:
<!-- app/phpunit.xml.dist -->
<php>
<env name="BOOTSTRAP_CLEAR_CACHE_ENV" value="test"/>
</php>
现在,这已经变成了一个环境变量(即 $_ENV
),可以在自定义引导文件(tests.bootstrap.php
)中找到。
由于 SwiftmailerBundle 的缘故,用 Symfony 发送电子邮件是相当简单的,是利用 Swift Mailer 库的能力。
要功能测试电子邮件是否发送,甚至判断电子邮件主题,内容或者其他标题,您可以使用 Symfony 分析器。
开始先用一个简单的控制器动作发送一封电子邮件:
public function sendEmailAction($name)
{
$message = \Swift_Message::newInstance()
->setSubject('Hello Email')
->setFrom('send@example.com')
->setTo('recipient@example.com')
->setBody('You should see me from the profiler!')
;
$this->get('mailer')->send($message);
return $this->render(...);
}
不要忘记按照在如何在功能测试中使用编译器解释的那样启动分析器。
在您的功能测试中,在分析器中使用 swiftmailer 收集器来获取关于发送在之前请求上的消息的信息:
// src/AppBundle/Tests/Controller/MailControllerTest.php
use Symfony\Bundle\FrameworkBundle\Test\WebTestCase;
class MailControllerTest extends WebTestCase
{
public function testMailIsSentAndContentIsOk()
{
$client = static::createClient();
// Enable the profiler for the next request (it does nothing if the profiler is not available)
$client->enableProfiler();
$crawler = $client->request('POST', '/path/to/above/action');
$mailCollector = $client->getProfile()->getCollector('swiftmailer');
// Check that an email was sent
$this->assertEquals(1, $mailCollector->getMessageCount());
$collectedMessages = $mailCollector->getMessages();
$message = $collectedMessages[0];
// Asserting email data
$this->assertInstanceOf('Swift_Message', $message);
$this->assertEquals('Hello Email', $message->getSubject());
$this->assertEquals('send@example.com', key($message->getFrom()));
$this->assertEquals('recipient@example.com', key($message->getTo()));
$this->assertEquals(
'You should see me from the profiler!',
$message->getBody()
);
}
}
表单组件包含三个核心的对象:一个是表单类型(实现 FormTypeInterface),Form 以及 the FormView。
经常被程序员操作的唯一的类是表单类型类,这个类作为表单的基类。它被用来生成 Form 以及 FormView。你可以通过模拟它和工厂的交互作用来直接测试它,但是这个会很复杂。最好的办法就是将它传递到 FormFactory 这样就会像真正在应用程序中使用一样。这对于 bootstrap 很简单并且你可以信任 Symfony 组件测试这个足够用了。
这里有一个类你可以直接用它来进行简单的 FormTypes 测试:TypeTestCase。它是用来测试核心类型的,同时你也可以用它测试你的类型。
在 2.3 中 TypeTestCase 已经转移到 Symfony\Component\Form\Test 命名空间中了。在之前的版本中,这个类位于 Symfony\Component\Form\Tests\Extension\Core\Type。
取决于你安装你的 Symfony 的方法或者 Symfony 表单测试组件可能没有被下载。这种情况下可以使用 Composer 的 --prefer-source 选项。
基础
最简单的 TypeTestCase 启用如下所示:
// src/Acme/TestBundle/Tests/Form/Type/TestedTypeTest.php
namespace Acme\TestBundle\Tests\Form\Type;
use Acme\TestBundle\Form\Type\TestedType;
use Acme\TestBundle\Model\TestObject;
use Symfony\Component\Form\Test\TypeTestCase;
class TestedTypeTest extends TypeTestCase
{
public function testSubmitValidData()
{
$formData = array(
'test' => 'test',
'test2' => 'test2',
);
$type = new TestedType();
$form = $this->factory->create($type);
$object = TestObject::fromArray($formData);
// submit the data to the form directly
$form->submit($formData);
$this->assertTrue($form->isSynchronized());
$this->assertEquals($object, $form->getData());
$view = $form->createView();
$children = $view->children;
foreach (array_keys($formData) as $key) {
$this->assertArrayHasKey($key, $children);
}
}
}
那么,它怎么测试呢?下面就来详细讲解。
首先你需要区分 FormType 是否编制。这包括基本的类的继承,buildForm 功能以及选项解决方案。这应该是你写的第一个测试:
$type = new TestedType();
$form = $this->factory->create($type);
这个测试检查了你的表单使用的数据翻译器没有失败的。isSynchronized() 方法只是设置成 false 如果数据转换器出现例外:
$form->submit($formData);
$this->assertTrue($form->isSynchronized());
不要测试验证:这个被监听器实现,这个在测试环境不活跃并且它依赖于验证配置。作为替代直接对你的定制的限制进行单元测试。
接下来,核实表单的提交和映射。下列的测试检查了所有的字段是否正确被指定:
$this->assertEquals($object, $form->getData());
最后,检查 FormView 的创建。你应当检查是否你想要展示的所有的控件在子属性上有用:
$view = $form->createView();
$children = $view->children;
foreach (array_keys($formData) as $key) {
$this->assertArrayHasKey($key, $children);
}
添加你的表单依靠的类型
你的表单可能依赖于其它被定义为服务的类型。可能像下面这样:
// src/Acme/TestBundle/Form/Type/TestedType.php
// ... the buildForm method
$builder->add('acme_test_child_type');
为了正确的建立你的表单,你需要在你的测试中使得类型对于你的表单工厂可用。最简单的方法就是在创建父表单时使用 PreloadedExtension 类手动注册:
// src/Acme/TestBundle/Tests/Form/Type/TestedTypeTests.php
namespace Acme\TestBundle\Tests\Form\Type;
use Acme\TestBundle\Form\Type\TestedType;
use Acme\TestBundle\Model\TestObject;
use Symfony\Component\Form\Test\TypeTestCase;
use Symfony\Component\Form\PreloadedExtension;
class TestedTypeTest extends TypeTestCase
{
protected function getExtensions()
{
$childType = new TestChildType();
return array(new PreloadedExtension(array(
$childType->getName() => $childType,
), array()));
}
public function testSubmitValidData()
{
$type = new TestedType();
$form = $this->factory->create($type);
// ... your test
}
}
确保你添加的子类型被很好地测试。否则你正在测试的表单的子表单将会出现错误。
添加自定义扩展
你使用由表单扩展添加的一些选项使得这种情况检查出现。其中的一种情况就是 ValidatorExtension 的 invalid_message 选项。TypeTestCase 只加载核心表单扩展,所以一个“不可用的选项”例外将会被释放如果你想要使用它测试基于其它扩展的类。你需要将这些扩展添加到工厂对象:
// src/Acme/TestBundle/Tests/Form/Type/TestedTypeTests.php
namespace Acme\TestBundle\Tests\Form\Type;
use Acme\TestBundle\Form\Type\TestedType;
use Acme\TestBundle\Model\TestObject;
use Symfony\Component\Form\Test\TypeTestCase;
use Symfony\Component\Form\Forms;
use Symfony\Component\Form\FormBuilder;
use Symfony\Component\Form\Extension\Validator\Type\FormTypeValidatorExtension;
use Symfony\Component\Validator\ConstraintViolationList;
class TestedTypeTest extends TypeTestCase
{
protected function setUp()
{
parent::setUp();
$validator = $this->getMock('\Symfony\Component\Validator\Validator\ValidatorInterface');
$validator->method('validate')->will($this->returnValue(new ConstraintViolationList()));
$this->factory = Forms::createFormFactoryBuilder()
->addExtensions($this->getExtensions())
->addTypeExtension(
new FormTypeValidatorExtension(
$validator
)
)
->addTypeGuesser(
$this->getMockBuilder(
'Symfony\Component\Form\Extension\Validator\ValidatorTypeGuesser'
)
->disableOriginalConstructor()
->getMock()
)
->getFormFactory();
$this->dispatcher = $this->getMock('Symfony\Component\EventDispatcher\EventDispatcherInterface');
$this->builder = new FormBuilder(null, null, $this->dispatcher, $this->factory);
}
// ... your tests
}
测试不同集合的数据
如果你不熟悉 PHPUnit 的 数据提供,这可能是使用它们的好机会:
// src/Acme/TestBundle/Tests/Form/Type/TestedTypeTests.php
namespace Acme\TestBundle\Tests\Form\Type;
use Acme\TestBundle\Form\Type\TestedType;
use Acme\TestBundle\Model\TestObject;
use Symfony\Component\Form\Test\TypeTestCase;
class TestedTypeTest extends TypeTestCase
{
/**
* @dataProvider getValidTestData
*/
public function testForm($data)
{
// ... your test
}
public function getValidTestData()
{
return array(
array(
'data' => array(
'test' => 'test',
'test2' => 'test2',
),
),
array(
'data' => array(),
),
array(
'data' => array(
'test' => null,
'test2' => null,
),
),
);
}
}
上述代码将以三种不同的数据集合三次运行你的测试。这就允许固定的测试去耦合并且很容易测试多重数据集合。
你也可以传递另外一个参数,例如 boolean,如果表单必须给定的数据集合同步或者不同步表单等等。
28
升级
当一个新的补丁版本被发布时(只有最后一个数字改变了),被发布的内容只包含错误修正。这意味着升级一个补丁版本真的很简单。
$ composer update symfony/symfony
就是这个!您不应该遇到任何的后退 - 兼容性中断或是需要改变您的代码中的任何内容。这是因为当您开启您的工程的时候,您的 composer.json 包含应用了一个像 2.6.* 的限制的 Symfony,在那里当您升级时只有最后一个版本数字会改变。
推荐尽快升级补丁版本,这是因为重要的程式错误和安全泄露可能在这些更新中被修补。
升级其它的包(Packages)
您可能也想升级剩余的库。如果您在 composer.json 中对您的[版本限制(version constraints)href="https://getcomposer.org/doc/01-basic-usage.md")做的很好。您可以执行以下代码来安全地升级:
$ composer update
注意,如果在您的 composer.json (例如 dev-master)中含有非特定的[版本限制(version constraints)href="https://getcomposer.org/doc/01-basic-usage.md"),这可以使一些 non-Symfony 库升级到含有后向兼容中断改变的版本。
如果您正在升级一个副版本(中间的数字变化),那么您不应该会遇到重要的向后兼容性的改变。细节参见 Symfony backwards compatibility promise。
然而,一些向后兼容的中断是可能发生的,您会在一秒钟内学习如何准备他们。
这里有 2 个步骤来升级一个副版本:
1)通过 Composer 升级 Symfony 库
首先,您需要通过修改您的 composer.json 升级 Symfony 来使用新版本:
{
"...": "...",
"require": {
"symfony/symfony": "2.6.*",
},
"...": "...",
}
下一步,用 Composer 下载新版本的库:
$ composer update symfony/symfony
依赖错误
如果您得到了一个依赖的错误,它可能只是意味着您需要升级其他 Symfony 的依赖。在这种情况下,尝试以下命令:
$ composer update symfony/symfony --with-dependencies
这个命令升级 symfony/symfony 和它依赖的所有包(packages),其中包含一些其他的包。通过使用 composer.json 里的严格版本限制(tight version constraints),您可以控制每个库升级到哪个版本。
如果这仍不管用,你的 composer.json 文件可能指定了某个库的一个版本,这个库与新版本的 Symfony 不兼容。这种情况下,更新 composer.json 中的那个库到更新的版本可能能够解决这个问题。
或者,你可能会有更深层的问题,不同的库依赖于其他库冲突的版本。检查错误信息以调试。
升级其他包
您可能也想升级剩余的库。如果您在 composer.json 中对您的[版本限制(version constraints)href="https://getcomposer.org/doc/01-basic-usage.md")做的很好。您可以执行以下代码来安全地升级:
$ composer update
注意,如果在您的 composer.json (例如 dev-master)中含有非特定的[版本限制(version constraints)href="https://getcomposer.org/doc/01-basic-usage.md"),这可以使一些 non-Symfony 库升级到含有后向兼容中断改变的版本。
2)更新您的代码,使之在新的版本中工作
理论上,您本应做!然而,您可能需要对您的代码进行少许修改,使所有部分起作用。此外,一些功能在您使用的时候仍然可以工作,但现在可能已经是过时的了。这不是大问题,如果您知道过时的东西是什么,您就可以花时间来修复它们了。
Symfony 每个版本都附带升级文件(例如 [UPGRADE-2.7.mdhref="https://github.com/symfony/symfony/blob/2.7/UPGRADE-2.7.md")),储存在 Symfony 目录下,里面描述了这些改变。如果您按照文件中的说明更新相应代码,那么更新将会是安全的。
这些更新文件也可以在 Symfony Repository 找到。
每隔几年,Symfony 都会发布一个新的主版本(第一个数字改变)。这些版本是最棘手的升级,因为它们允许包含向后兼容的中断。然而,Symfony 试图使这个升级过程尽可能的平稳。
这意味着您可以在主版本发布之前更新您的代码。这被称为使您的代码未来兼容(future compatible)。
这里有三个步骤升级一个主版本:
1)使您的代码不是过时的
在一个主版本的生命周期中,新的特性被添加,方法签名和公共 API 的用法改变。但是,副版本不应该包含任何向后兼容的更改。要做到这一点,“老的”(例如,函数,类,等等)的代码仍然工作,但被标记为过时,表明它将在未来删除/改变,您应该停止使用它。
当主版本(例如 3.0.0)发布,所有的过时的特性和功能都会被去除。所以,只要您将代码中的主版本之前的最后一个版本(例如 2.8.*)中过时的特性都停用,您应该能没有问题地升级。
为了帮助您完成这个,最后一个发布的副版本将会触发过期提醒。例如,2.7 和 2.8 版本触发过期提醒。当在浏览器的开发环境上访问您的应用程序时,这些提醒会在 web 开发工具栏显示:
图片 28.1 1
PHPUnit 中的过时部分
默认情况下,PHPUnit 会像处理真正的错误一样处理过时提醒。这意味着所有的任务都被终止,因为它使用了向后兼容层(BC layer)。
为了确保这样的情况不会发生,您可以安装 PHPUnit bridge:
$ composer require symfony/phpunit-bridge
现在,您的任务像通常一样执行,一个漂亮的过期提醒总结显示在测试报告末尾。
$ phpunit
...
OK (10 tests, 20 assertions)
Remaining deprecation notices (6)
The "request" service is deprecated and will be removed in 3.0. Add a typehint for
Symfony\Component\HttpFoundation\Request to your controller parameters to retrieve the
request instead: 6x
3x in PageAdminTest::testPageShow from Symfony\Cmf\SimpleCmsBundle\Tests\WebTest\Admin
2x in PageAdminTest::testPageList from Symfony\Cmf\SimpleCmsBundle\Tests\WebTest\Admin
1x in PageAdminTest::testPageEdit from Symfony\Cmf\SimpleCmsBundle\Tests\WebTest\Admin
2)通过 Composer 更新新的主版本
如果您的代码不是过时的,您可以通过 Composer 使用修改 composer.json 的方法更新 Symfony 库:
{
"...": "...",
"require": {
"symfony/symfony": "3.0.*",
},
"...": "...",
}
下一步,用 Composer 下载新版本的库:
$ composer update symfony/symfony
依赖错误
如果您得到了一个依赖的错误,它可能只是意味着您需要升级其他 Symfony 的依赖。在这种情况下,尝试以下命令:
$ composer update symfony/symfony --with-dependencies
这个命令升级 symfony/symfony 和它依赖的所有包(packages),其中包含一些其他的包。通过使用 composer.json 里的严格版本限制(tight version constraints),您可以控制每个库升级到哪个版本。
如果这仍不管用,您的 composer.json 文件可能指定了某个库的一个版本,这个库与新版本的 Symfony 不兼容。这种情况下,更新 composer.json 中的那个库到更新的版本可能能够解决这个问题。
或者,您可能会有更深层的问题,不同的库依赖于其他库冲突的版本。检查错误信息以调试。
升级其他包
您可能也想升级剩余的库。如果您在 composer.json 中对您的[版本限制(version constraints)href="https://getcomposer.org/doc/01-basic-usage.md")做的很好。您可以执行以下代码来安全地升级:
$ composer update
注意,如果在您的 composer.json (例如 dev-master)中含有非特定的[版本限制(version constraints)href="https://getcomposer.org/doc/01-basic-usage.md"),这可以使一些 non-Symfony 库升级到含有后向兼容中断改变的版本。
3)更新您的代码,使之在新的版本中工作
现在您有一个很好的机会!然而,由于后向兼容层并不总是可能的,新的主版本可能包含新的向后兼容中断。确保您阅读 Symfony 中的 UPGRADE-X.0.md(其中 X 是新版本号),并查看您需要注意的向后兼容中断。
"XXX is deprecated" E-USER-DEPRECATED 的警告是什么意思?
从 Symfony 2.7 开始,如果您使用一个过时的类、功能或选项,Symfony 就会触发 E_USER_DEPRECATED 错误。在内部,它看起来是像这样的东西:
trigger_error(
'The fooABC method is deprecated since version 2.4 and will be removed in 3.0.',
E_USER_DEPRECATED
);
这很好,因为您能够通过检查您的日志知道在您升级程序之前需要改变什么。在 Symfony 框架中,过时的通知的数量会显示在 web 调试工具栏上。并且,如果您安装了 phpunit-bridge,您会在运行完您的任务之后得到一份过时通知的报告。
我如何才能沉默这种警告?
这些都是有用的,您不想让它们在开发中出现并且您也可能想让它们在生成的时候沉默,以避免它们填充错误日志。
在 Symfony 框架中
在 Symfony 框架中,~E_USER_DEPRECATED 被自动添加到 app/bootstrap.php.cache 中,但是您至少需要 2.3.14 版本或者 SensioDistributionBundle 的 3.0.21 版本。所以,您也许需要升级:
$ composer update sensio/distribution-bundle
一旦您升级了,文件 bootstrap.php.cache 会自动重建。您会看到顶部添加了一行 ~E_USER_DEPRECATED。
在 Symfony 框架之外
要做到这一点,添加 ~E_USER_DEPRECATED 到 php.ini 里的 error_reporting 中:
; before
error_reporting = E_ALL
; after
error_reporting = E_ALL & ~E_USER_DEPRECATED
或者,您可以在您项目的引导程序中直接设置它:
error_reporting(error_reporting() & ~E_USER_DEPRECATED);
我如何才能修复这个警告?
基本上,当然,您想要停止使用过时的功能。有时这很容易:警告可能准确的告诉您需要改变什么。
但其他情况下,警告可能会不清楚:某个地方的一个设置可能会使一个更深层的类触发这个警告。这种情况下,Symfony 尽力给出了一个明确的信息,但您可能需要进一步的研究这一警告。
有时,警告可能来源于您所使用的第三方库或者包(bundle)。如果是这样的话,有一个很好的机会,那些过时的东西都已更新。这种情况下,升级库来修复它们。
一旦所有的过时警告都消失了,您就有更多的信心来升级了。
29
验证
您可以通过继承一个限制基类 Constraint 来创建一个自定义的验证限制,比如,您可以创建一个简单的验证器来检查一个字符串是否只包含字母和数字。
创建限制类
首先,您可以通过继承 Constraint 来创建一个验证:
// src/AppBundle/Validator/Constraints/ ContainsAlphanumeric.php
namespace AppBundle\Validator\Constraints;
use Symfony\Component\Validator\Constraint;
/**
* @Annotation
*/
class ContainsAlphanumeric extends Constraint
{
public $message = 'The string "%string%" contains an illegal character: it can only contain letters or numbers.';
}
当创建一个新类时,很有必要为新创建的限制类添加上 @Annotation 文档注释,通过注释可以增加新建类代码的可读性,使其更好的被使用。您可以在新创建的类中选择公有属性进行注释与说明。
创建验证器
正如您看到一样,一个验证限制类是十分简洁的,并不是通过该限制验证类直接执行验证,而是通过另一个限制验证类 "constraint validator" 中指定的 validatedBy() 方法进行验证,在该方法中存在一些默认的简单算法逻辑:
// in the base Symfony\Component\Validator\Constraint class
public function validatedBy()
{
return get_class($this).'Validator';
}
换句话说,当您创建一个自定义的限制验证类的时候,(例如:MyConstraint)当实际执行验证的时候 Symfony 会自动调用另一个类 MyConstraintValidator 进行验证。
这个验证类也很简洁,只包括一个 validate() 方法:
// src/AppBundle/Validator/Constraints/ContainsAlphanumericValidator.php
namespace AppBundle\Validator\Constraints;
use Symfony\Component\Validator\Constraint;
use Symfony\Component\Validator\ConstraintValidator;
class ContainsAlphanumericValidator extends ConstraintValidator
{
public function validate($value, Constraint $constraint)
{
if (!preg_match('/^[a-zA-Z0-9]+$/', $value, $matches)) {
// If you're using the new 2.5 validation API (you probably are!)
$this->context->buildViolation($constraint->message)
->setParameter('%string%', $value)
->addViolation();
// If you're using the old 2.4 validation API
/*
$this->context->addViolation(
$constraint->message,
array('%string%' => $value)
);
*/
}
}
}
在这个验证类中,您并不需要设定一个返回值。相反的是,如果您需要验证的内容是合法的,那么该内容将会通过验证,如果该内容不能被检验通过,那么 buildViolation
方法会把错误信息作为参数传递给 ConstraintViolationBuilderInterface 作为一个实例进行调用,然后 addViolation
方法会把不合法的部分标注到您需要检测的内容中。
使用新创建的限制验证
就和使用 Symfony 本身提供的接口一样,使用一个自定义的验证限制类也同样很简单:
Annotations:
// src/AppBundle/Entity/AcmeEntity.php
use Symfony\Component\Validator\Constraints as Assert;
use AppBundle\Validator\Constraints as AcmeAssert;
class AcmeEntity
{
// ...
/**
* @Assert\NotBlank
* @AcmeAssert\ContainsAlphanumeric
*/
protected $name;
// ...
}
YAML:
# src/AppBundle/Resources/config/validation.yml
AppBundle\Entity\AcmeEntity:
properties:
name:
- NotBlank: ~
- AppBundle\Validator\Constraints\ContainsAlphanumeric: ~
XML:
<!-- src/AppBundle/Resources/config/validation.xml -->
<?xml version="1.0" encoding="UTF-8" ?>
<constraint-mapping xmlns="http://symfony.com/schema/dic/constraint-mapping"
xmlns:xsi="http://www.w3.org/2001/XMLSchema-instance"
xsi:schemaLocation="http://symfony.com/schema/dic/constraint-mapping http://symfony.com/schema/dic/constraint-mapping/constraint-mapping-1.0.xsd">
<class name="AppBundle\Entity\AcmeEntity">
<property name="name">
<constraint name="NotBlank" />
<constraint name="AppBundle\Validator\Constraints\ContainsAlphanumeric" />
</property>
</class>
</constraint-mapping>
PHP:
```: // src/AppBundle/Entity/AcmeEntity.php use Symfony\Component\Validator\Mapping\ClassMetadata; use Symfony\Component\Validator\Constraints\NotBlank; use AppBundle\Validator\Constraints\ContainsAlphanumeric;
class AcmeEntity { public $name;
public static function loadValidatorMetadata(ClassMetadata $metadata)
{
$metadata->addPropertyConstraint('name', new NotBlank());
$metadata->addPropertyConstraint('name', new ContainsAlphanumeric());
}
}
如果在您定义的类中含有可选择的属性时,您应该在创建自定义类的时候就以公有的方式声明这些属性,那么这些可选择的属性就可以像使用 核心 Symfony 约束类中的属性一样使用它们。
带有依赖关系的限制验证
如果您的限制验证具有依赖关系,就如同一个数据库的连接操作,那么它将被视为依赖注入与服务定位器中的一个服务项,那么这个服务项必须包含
validator.constraint_validator
标签和
alias
属性。
YAML:
# app/config/services.yml
services: validator.unique.your_validator_name: class: Fully\Qualified\Validator\Class\Name tags: - { name: validator.constraint_validator, alias: alias_name }
XML:
public function validatedBy() { return 'alias_name'; }
PHP:
// app/config/services.php $container ->register('validator.unique.your_validator_name', 'Fully\Qualified\Validator\Class\Name') ->addTag('validator.constraint_validator', array('alias' => 'alias_name'));
这时候您新建的类就可以用此别名去引用相应的限制类了:
public function validatedBy() { return 'alias_name'; }
就如同上文提到的,Symfony 会自动查找以 constraint 命名并且添加了验证的类。如果您的约束验证程序被定义为一种服务项,那么您应该覆写
validatedBy()
方法来返回您定义该服务项时使用的别名,否则 Symfony 不会使用这个限制验证类的服务项,使得该限制验证类被实例化的时候不会有任何依赖项被注入。
限制验证类
一个验证类可以返回一个类作用域的对象属性:
public function getTargets() { return self::CLASS_CONSTRAINT; }
验证类中的
validate()
方法把这个对象作为它的第一个参数:
class ProtocolClassValidator extends ConstraintValidator { public function validate($protocol, Constraint $constraint) { if ($protocol->getFoo() != $protocol->getBar()) { // If you're using the new 2.5 validation API (you probably are!) $this->context->buildViolation($constraint->message) ->atPath('foo') ->addViolation();
// If you're using the old 2.4 validation API
/*
$this->context->addViolationAt(
'foo',
$constraint->message,
array(),
null
);
*/
}
}
}
注意,一个限制验证类是作用于其本身,而不是一个属性:
Annotations:
/** * @AcmeAssert\ContainsAlphanumeric */ class AcmeEntity { // ... }
YAML:
# src/AppBundle/Resources/config/validation.yml
AppBundle\Entity\AcmeEntity: constraints: - AppBundle\Validator\Constraints\ContainsAlphanumeric: ~
XML:
有时候,您想通过某些规则和标准来定义并且展示不同的限制验证错误。比如,您建立了一个给用户进行注册的表单,用户需要输入身份信息和用户凭据来完成注册。当用户进行注册的时候,输入用户名和一个安全的密码是必不可少的,但是是否输入用户的银行账户信息并不是强制要求的,用户具有选择权。尽管如此,如果用户在该字段输入了信息,那么您还是需要检查用户在该字段的输入的信息是否是正确有效的,如果输入出现错误,您就得给出不同的错误描述。
实现该功能一共需要两个步骤:
1. 给限制验证类提供不同级别的错误描述。
2. 根据提供的错误级别来定义输入内容的错误级别。
1. 制定错误的级别
> 2.6 在 Symfony 2.6节中介绍了
payload
选项。
使用
payload
选项来配置每个约束的级别:
Annotations:
// src/AppBundle/Entity/User.php namespace AppBundle\Entity;
use Symfony\Component\Validator\Constraints as Assert;
class User { /** * @Assert\NotBlank(payload = {severity = "error"}) */ protected $username;
/**
* @Assert\NotBlank(payload = {severity = "error"})
*/
protected $password;
/**
* @Assert\Iban(payload = {severity = "warning"})
*/
protected $bankAccountNumber;
}
YAML:
# src/AppBundle/Resources/config/validation.yml
AppBundle\Entity\User: properties: username: - NotBlank: payload: severity: error password: - NotBlank: payload: severity: error bankAccountNumber: - Iban: payload: severity: warning
XML:
<class name="AppBundle\Entity\User">
<property name="username">
<constraint name="NotBlank">
<option name="payload">
<value key="severity">error</value>
</option>
</constraint>
</property>
<property name="password">
<constraint name="NotBlank">
<option name="payload">
<value key="severity">error</value>
</option>
</constraint>
</property>
<property name="bankAccountNumber">
<constraint name="Iban">
<option name="payload">
<value key="severity">warning</value>
</option>
</constraint>
</property>
</class>
PHP:
// src/AppBundle/Entity/User.php namespace AppBundle\Entity;
use Symfony\Component\Validator\Mapping\ClassMetadata; use Symfony\Component\Validator\Constraints as Assert;
class User { public static function loadValidatorMetadata(ClassMetadata $metadata) { $metadata->addPropertyConstraint('username', new Assert\NotBlank(array( 'payload' => array('severity' => 'error'), ))); $metadata->addPropertyConstraint('password', new Assert\NotBlank(array( 'payload' => array('severity' => 'error'), ))); $metadata->addPropertyConstraint('bankAccountNumber', new Assert\Iban(array( 'payload' => array('severity' => 'warning'), ))); } }
2. 根据错误级别模板定义用户错误级别
> 2.6 在 Symfony 2.6节中的
ConstraintViolation
类中介绍了
getConstraint()
方法。
当
用户
输入的对象在检验时失败,这时候就可以通过使用
getConstraint()
方法来检索造成失败的限制。每个限制都会把 payload 选项作为一个公开属性进行展示。
// a constraint validation failure, instance of // Symfony\Component\Validator\ConstraintViolation $constraintViolation = ...; $constraint = $constraintViolation->getConstraint(); $severity = isset($constraint->payload['severity']) ? $constraint->payload['severity'] : null;
例如,您可以利用这个功能把错误级别作为一个 HTML 类的一个附加项添加到表单的错误区域:
{%- block form_errors -%} {%- if errors|length > 0 -%}
{%- for error in errors -%} {% if error.cause.constraint.payload.severity is defined %} {% set severity = error.cause.constraint.payload.severity %} {% endif %} <li{% if severity is defined %} class="{{ severity }}"{% endif %}>{{ error.message }} {%- endfor -%}
{%- endif -%} {%- endblock form_errors -%} ```
30
Web 服务器
2.6 在 Symfony 2.6 节中介绍了把服务器作为后台进程运行的功能。
从 PHP 5.4 版本以来,CLI SAPI 就带有内置的 web 服务器 built-in web server ,当您在开发项目的时候,它可以在本地运行您的程序,并且进行测试和展示。通过这种方式,您就没有必要很麻烦的去配置如同 Apache 或者 Nginx 等功能完整的 web 服务器。
内置的 web 服务器只用于您可控制的网络中,而不是用于一个人人都可访问的公共网络中。
启动 web 服务器
在一个 PHP 的内置服务器中运行 Symfony 程序就像执行启动服务器命令 server:start 那样简单:
$ php app/console server:start
通过这个命令就可以在 localhost 下的 8000 端口 localhost:8000 启动您的 Symfony 程序运行环境。
在默认的情况下,服务器在环回设备上监听的是 8000 端口,您也可以通过命令行传输一个 IP 地址和端口号来更改套接字:
$ php app/console server:run 192.168.0.1:8080
您可以通过使用 server:status 命令来检查一个服务器是否正在监听一个确定的套接字:
$ php app/console server:status
$ php app/console server:status 192.168.0.1:8080
上述第一行代码表示您将要通过 localhost:8000 访问服务器来运行 Symfony 程序,第二行代码表示也可以通过访问 192.168.0.1:8080 达到同样的目的。
在 Symfony 2.6 版本以前,server:run 命令是用来启动内置服务器的,在 2.6 版本以后,这个命令仍然有效,但是略有不同。当使用这个命令时,它将会拦截当前的终端,除非您终止这个操作(通常是用按键 Ctrl + C 实现 ),而不是启动后台服务器。
在虚拟机内部使用内置 web 服务器
如果您想在内置的虚拟机上运行内置 web 服务器并且通过浏览器来加载您主机中的网站,那么您需要监听 0.0.0.0:8000 地址 (即分配给虚拟机的所有的 IP 地址):
$ php app/console server:start 0.0.0.0:8000
切记,永远不要使用一个可以直接通过 Internet 直接访问的计算机来监听所有的接口。不能在公用的网络中使用内置的 web 服务器。
命令选项
内置 web 服务器期望把一个“路由器”脚本(“路由器”脚本章节见 php.net) 作为参数。当命令还在产品或者是其它开发环境中执行时,已经有一个这样的“路由器”脚本参数传递给了 Symfony。可以在任何环境或者路由器脚本中使用路由器选项:
$ php app/console server:start --env=test --router=app/config/router_test.php
如果您的程序的根文档和标准的目录布局不同,那么您需要通过使用 --docroot 选项来传递正确的位置:
$ php app/console server:start --docroot=public_html
停止服务器
当您完成了工作,您可以通过 server:stop 命令来停止服务器:
$ php app/console server:stop
就像使用启动服务器命令一样,如果你省略了套接字信息, Symfony 会停止 localhost:8000 下的服务器。所以,当您的服务器监听的不是默认地址或者端口的时候,请在执行命令的时候加上套接字信息:
$ php app/console server:stop 192.168.0.1:8080
最好的开发你的 Symfony 应用程序的方法就是使用 PHP 的内部网页服务器。然而,当使用老版本的 PHP 时或者当在开发环境运行应用程序时,你就会需要一个全功能的网页服务器。这篇文章介绍了在 Symfony 中使用 Apache 或者 Nginx 的一些方法。
当使用 Apache 时。你可以将 PHP 设置成 Apache module 或者使用 PHP FPM FastCGI。FastCGI 也是用 Nginx 使用 PHP 的最好的方法。
网页目录
网页目录是你的所有应用程序的公共以及静态文件的根目录,包括图片,样式表和 JavaScript 文件。它也是前端控制器(app.php 和 app_dev.php)存在的地方。
当你配置你的网页目录时,网页目录作为文档的根。在下面的例子中,web/ 目录将会是文档的根。这个目录是 /var/www/project/web/。
如果你的虚拟主机请求你将 web/ 目录更改到另外的位置(例如 public_html/),确保你重写了 web/ 的位置。
使用 mod_php/PHP-CGI 的 Apache
使得你的应用程序在 Apache 下运行的最小配置是:
<VirtualHost *:80>
ServerName domain.tld
ServerAlias www.domain.tld
DocumentRoot /var/www/project/web
<Directory /var/www/project/web>
AllowOverride All
Order Allow,Deny
Allow from All
</Directory>
# uncomment the following lines if you install assets as symlinks
# or run into problems when compiling LESS/Sass/CoffeScript assets
# <Directory /var/www/project>
# Options FollowSymlinks
# </Directory>
ErrorLog /var/log/apache2/project_error.log
CustomLog /var/log/apache2/project_access.log combined
</VirtualHost>
如果你的系统支持 APACHE_LOG_DIR 变量,你就可能想要使用 ${APACHE_LOG_DIR}/ 来代替硬编码 /var/log/apache2/。
使用下面的可选配置来禁用 .htaccess 支持从而增加网页服务器的效率:
<VirtualHost *:80>
ServerName domain.tld
ServerAlias www.domain.tld
DocumentRoot /var/www/project/web
<Directory /var/www/project/web>
AllowOverride None
Order Allow,Deny
Allow from All
<IfModule mod_rewrite.c>
Options -MultiViews
RewriteEngine On
RewriteCond %{REQUEST_FILENAME} !-f
RewriteRule ^(.*)$ app.php [QSA,L]
</IfModule>
</Directory>
# uncomment the following lines if you install assets as symlinks
# or run into problems when compiling LESS/Sass/CoffeScript assets
# <Directory /var/www/project>
# Options FollowSymlinks
# </Directory>
ErrorLog /var/log/apache2/project_error.log
CustomLog /var/log/apache2/project_access.log combined
</VirtualHost>
如果你使用 php-cgi,Apache 将默认不会通过 HTTP 基本的 PHP 的用户名和密码。为了取消这个限制,你应当使用下面这一小段配置代码:
RewriteRule .* - [E=HTTP_AUTHORIZATION:%{HTTP:Authorization}]
在 Apache 2.4 下使用 mod_php/PHP-CGI
在 Apache 2.4 下,Order Allow,Deny 已经被 Require all granted 所取代。因此,你需要像下面这样修正你的目录权限设置:
<Directory /var/www/project/web>
Require all granted
# ...
</Directory>
获取更多的有关于 Apache 配置的选项,阅读官方的 Apache 文档。
Apache 的 PHP-FPM
为了使用 Apache 的 PHP5-FPM,首先你必须确定你有安装二进制的 php-fpm FastCGI 进程管理器以及 Apache 的 FastCGI 模块(例如,在基于 Debian 的系统中你已经安装 libapache2-mod-fastcgi 和 php5-fpm 包)。
PHP-FPM 使用一种叫做 pools 的东西处理输入的 FastCGI 请求。你可以在 FPM 中设置任意的 pools 的数量。在 pool 中你可以配置监听 TCP 套接字(IP 和 端口)或者 Unix 主机套接字。每一个 pool 也可以在不同的 UID 和 GID 下运行:
; a pool called www
[www]
user = www-data
group = www-data
; use a unix domain socket
listen = /var/run/php5-fpm.sock
; or listen on a TCP socket
listen = 127.0.0.1:9000
Apache 2.4 下使用 mod_proxy_fcgi
如果你使用的是 Apache 2.4,你可以轻松应用 mod_proxy_fcgi 来向 PHP-FPM 传递内部请求。配置 PHP-FPM 监听 TCP 套接字(mod_proxy 目前暂时不支持 Unix 套接字),在你的 Apache 配置中启用 mod_proxy 和 mod_proxy_fcgi 并且使用 SetHandler 直接将 PHP 文件的请求传递给 PHP FPM:
<VirtualHost *:80>
ServerName domain.tld
ServerAlias www.domain.tld
# Uncomment the following line to force Apache to pass the Authorization
# header to PHP: required for "basic_auth" under PHP-FPM and FastCGI
#
# SetEnvIfNoCase ^Authorization$ "(.+)" HTTP_AUTHORIZATION=$1
# For Apache 2.4.9 or higher
# Using SetHandler avoids issues with using ProxyPassMatch in combination
# with mod_rewrite or mod_autoindex
<FilesMatch \.php$>
SetHandler proxy:fcgi://127.0.0.1:9000
</FilesMatch>
# If you use Apache version below 2.4.9 you must consider update or use this instead
# ProxyPassMatch ^/(.*\.php(/.*)?)$ fcgi://127.0.0.1:9000/var/www/project/web/$1
# If you run your Symfony application on a subpath of your document root, the
# regular expression must be changed accordingly:
# ProxyPassMatch ^/path-to-app/(.*\.php(/.*)?)$ fcgi://127.0.0.1:9000/var/www/project/web/$1
DocumentRoot /var/www/project/web
<Directory /var/www/project/web>
# enable the .htaccess rewrites
AllowOverride All
Require all granted
</Directory>
# uncomment the following lines if you install assets as symlinks
# or run into problems when compiling LESS/Sass/CoffeScript assets
# <Directory /var/www/project>
# Options FollowSymlinks
# </Directory>
ErrorLog /var/log/apache2/project_error.log
CustomLog /var/log/apache2/project_access.log combined
</VirtualHost>
Apache 2.2 的 PHP-FPM
在 Apache 2.2 或者更低的版本中,你不能使用 mod_proxy_fcgi。你必须使用 FastCgiExternalServer 来代替这个。因此,你的 Apache 配置应当像下面所示:
<VirtualHost *:80>
ServerName domain.tld
ServerAlias www.domain.tld
AddHandler php5-fcgi .php
Action php5-fcgi /php5-fcgi
Alias /php5-fcgi /usr/lib/cgi-bin/php5-fcgi
FastCgiExternalServer /usr/lib/cgi-bin/php5-fcgi -host 127.0.0.1:9000 -pass-header Authorization
DocumentRoot /var/www/project/web
<Directory /var/www/project/web>
# enable the .htaccess rewrites
AllowOverride All
Order Allow,Deny
Allow from all
</Directory>
# uncomment the following lines if you install assets as symlinks
# or run into problems when compiling LESS/Sass/CoffeScript assets
# <Directory /var/www/project>
# Options FollowSymlinks
# </Directory>
ErrorLog /var/log/apache2/project_error.log
CustomLog /var/log/apache2/project_access.log combined
</VirtualHost>
如果你更喜欢使用 Unix 套接字,你必须使用 -socket 作为替代:
FastCgiExternalServer /usr/lib/cgi-bin/php5-fcgi -socket /var/run/php5-fpm.sock -pass-header Authorization
Nginx
使得你的应用程序可以在 Nginx 运行的最小配置如下所示:
server {
server_name domain.tld www.domain.tld;
root /var/www/project/web;
location / {
# try to serve file directly, fallback to app.php
try_files $uri /app.php$is_args$args;
}
# DEV
# This rule should only be placed on your development environment
# In production, don't include this and don't deploy app_dev.php or config.php
location ~ ^/(app_dev|config)\.php(/|$) {
fastcgi_pass unix:/var/run/php5-fpm.sock;
fastcgi_split_path_info ^(.+\.php)(/.*)$;
include fastcgi_params;
fastcgi_param SCRIPT_FILENAME $document_root$fastcgi_script_name;
fastcgi_param HTTPS off;
}
# PROD
location ~ ^/app\.php(/|$) {
fastcgi_pass unix:/var/run/php5-fpm.sock;
fastcgi_split_path_info ^(.+\.php)(/.*)$;
include fastcgi_params;
fastcgi_param SCRIPT_FILENAME $document_root$fastcgi_script_name;
fastcgi_param HTTPS off;
# Prevents URIs that include the front controller. This will 404:
# http://domain.tld/app.php/some-path
# Remove the internal directive to allow URIs like this
internal;
}
error_log /var/log/nginx/project_error.log;
access_log /var/log/nginx/project_access.log;
}
依赖于你的 PHP-FPM 配置,fastcgi_pass 也可以是 fastcgi_pass 127.0.0.1:9000。
这个只是在网页目录下执行 app.php, app_dev.php 和 config.php。所有其他的文件都会以文本形式存在。你必须确保如果你确实配置 app_dev.php 或者 config.php 使得这些文件安全且不能被任何外界使用者使用(每个文件顶部的 IP 地址检查码默认完成此项工作)。
如果在你的网页目录下你有其它的 PHP 文件需要被执行,确保它们包含在上述的 location 区域。
获取更多的 Nginx 配置选项,阅读官方的 Nginx 文档。
31
Web 服务
如何在一个 Symfony 控制器中创建一个 SOAP 的 Web 服务
我们可以使用几个简单的工具把控制器设置为一个 SOAP 服务器。当然,您必须安装 PHP SOAP 扩展。介于目前 PHP SOAP 扩展不能生成 WSDL,您必须从头开始创建一个 WSDL 或者使用第三方的生成器。
这里有几个通过 PHP 实现的 SOAP 服务器。比如 Zend SOAP 和 NuSOAP 。虽然在这些示例中只使用了 PHP SOAP 扩展,不过这个想法仍然应该适用于其它的实现。
SOAP 通过把 PHP 对象的方法公开给一个外部的实体(即使用 SOAP 服务的人 )。首先,创建一个名为 -HelloService- 的类去表示您将要在 SOAP 中公开的功能。在这种情况下,SOAP 服务将会允许客户端去调用一个名为 hello 的方法用来发送一封电子邮件:
// src/Acme/SoapBundle/Services/HelloService.php
namespace Acme\SoapBundle\Services;
class HelloService
{
private $mailer;
public function __construct(\Swift_Mailer $mailer)
{
$this->mailer = $mailer;
}
public function hello($name)
{
$message = \Swift_Message::newInstance()
->setTo('me@example.com')
->setSubject('Hello Service')
->setBody($name . ' says hi!');
$this->mailer->send($message);
return 'Hello, '.$name;
}
}
接下来,您可以试图让 Symfony 能够创建一个该类的实例。因为该类需要发送邮件,所以在设计该类的时候就应该让它接受一个 Swift_Mailer 实例。您可以使用服务控制器来配置 Symfony 来构造一个 HelloService 对象:
YAML:
# app/config/services.yml
services:
hello_service:
class: Acme\SoapBundle\Services\HelloService
arguments: ["@mailer"]
XML:
<!-- app/config/services.xml -->
<services>
<service id="hello_service" class="Acme\SoapBundle\Services\HelloService">
<argument type="service" id="mailer"/>
</service>
</services>
PHP:
// app/config/services.php
$container
->register('hello_service', 'Acme\SoapBundle\Services\HelloService')
->addArgument(new Reference('mailer'));
下面是一个能够处理 SOAP 请求的控制器的示例。如果 indexAction() 可以通过路由或者 soap 协议访问,那么 WDSL 文档就可以通过 soap 或 wsdl 协议检索。
namespace Acme\SoapBundle\Controller;
use Symfony\Bundle\FrameworkBundle\Controller\Controller;
use Symfony\Component\HttpFoundation\Response;
class HelloServiceController extends Controller
{
public function indexAction()
{
$server = new \SoapServer('/path/to/hello.wsdl');
$server->setObject($this->get('hello_service'));
$response = new Response();
$response->headers->set('Content-Type', 'text/xml; charset=ISO-8859-1');
ob_start();
$server->handle();
$response->setContent(ob_get_clean());
return $response;
}
}
请留意对 ob_start() 和 ob_get_clean() 方法的调用。这些方法控制着某些输出缓冲 output buffering ,这些缓冲允许您去接受 $server->handle() 的输出响应。这是非常有必要的,因为 Symfony 期望您的控制器返回一个带有把其输出当成它的内容的响应对象。并且,您必须把头部的 ”Content-Type“ 属性设置为 “text/xml”,这同样也是客户端所期望的。所以,您可以使用 ob_start() 来开始对 STDOUT 的缓冲,并且使用 ob_get_clean() 来把输出响应转存到响应的内容并且清理缓冲区。最后,就可以准备返回响应了。
下面是一个通过使用 NuSOAP 来调用服务的例子。假定在这个例子中,上述控制器中的 indexAction 是通过路由或者 soap 协议访问的:
$client = new \Soapclient('http://example.com/app.php/soap?wsdl', true);
$result = $client->call('hello', array('name' => 'Scott'));
下面是一个 WSDL 的例子:
<?xml version="1.0" encoding="ISO-8859-1"?>
<definitions xmlns:SOAP-ENV="http://schemas.xmlsoap.org/soap/envelope/"
xmlns:xsd="http://www.w3.org/2001/XMLSchema"
xmlns:xsi="http://www.w3.org/2001/XMLSchema-instance"
xmlns:SOAP-ENC="http://schemas.xmlsoap.org/soap/encoding/"
xmlns:tns="urn:arnleadservicewsdl"
xmlns:soap="http://schemas.xmlsoap.org/wsdl/soap/"
xmlns:wsdl="http://schemas.xmlsoap.org/wsdl/"
xmlns="http://schemas.xmlsoap.org/wsdl/"
targetNamespace="urn:helloservicewsdl">
<types>
<xsd:schema targetNamespace="urn:hellowsdl">
<xsd:import namespace="http://schemas.xmlsoap.org/soap/encoding/" />
<xsd:import namespace="http://schemas.xmlsoap.org/wsdl/" />
</xsd:schema>
</types>
<message name="helloRequest">
<part name="name" type="xsd:string" />
</message>
<message name="helloResponse">
<part name="return" type="xsd:string" />
</message>
<portType name="hellowsdlPortType">
<operation name="hello">
<documentation>Hello World</documentation>
<input message="tns:helloRequest"/>
<output message="tns:helloResponse"/>
</operation>
</portType>
<binding name="hellowsdlBinding" type="tns:hellowsdlPortType">
<soap:binding style="rpc" transport="http://schemas.xmlsoap.org/soap/http"/>
<operation name="hello">
<soap:operation soapAction="urn:arnleadservicewsdl#hello" style="rpc"/>
<input>
<soap:body use="encoded" namespace="urn:hellowsdl"
encodingStyle="http://schemas.xmlsoap.org/soap/encoding/"/>
</input>
<output>
<soap:body use="encoded" namespace="urn:hellowsdl"
encodingStyle="http://schemas.xmlsoap.org/soap/encoding/"/>
</output>
</operation>
</binding>
<service name="hellowsdl">
<port name="hellowsdlPort" binding="tns:hellowsdlBinding">
<soap:address location="http://example.com/app.php/soap" />
</port>
</service>
</definitions>
32
工作流
虽然本文是基于 Git 讲述的,但是如果您想把项目存储于 Subversion 中,本文所讲的泛型原则同样适用。
当您通读了用 Symfony 创建您的第一个页面这篇文章,您将会对 Symfony 越来越熟悉。所以,理所当然这时候您可以创建您自己的项目了。在本章中,您将会学到一个最好的办法即通过使用 Git 源码控制管理系统去创建一个新的 Symfony 项目。
初始化项目设置
第一步,您需要下载 Symfony 框架并且让它运行起来。请仔细阅读 安装并且配置 Symfony 这一章。
一旦您的程序运行起来,请遵循下面的这些简单的步骤:
- 初始化 Git 仓库:
$ git init
- 将所有的初始文件添加到 Git 中:
$ git add .
可能您已经注意到了,并不是所有的文件都在第一步中被 Composer 管理工具下载了,而是被 Git 暂时的提交了。就如同这个项目的依赖项(是由依赖管理工具 Composer 所管理),以及 parameters.yml (其中包含了敏感信息,比如数据库的凭据) 一样,某些文件和文件夹不应该被提交到 Git。为了帮助您避免意外的提交这些文件和文件夹,有一个相应的包含一个名叫 .gitignore 文件的标准分布规则,在这个文件中包含了一个列表,这个列表中指明了哪些文件和文件夹不应该被提交。
您可能想要创建一个被整个系统使用的 .gitignore 文件。这样的话,就允许您排除一些通过您的 IDE 或者操作系统 创建的项目中的文件和文件夹。有关详细信息,请阅读 GitHub .gitignore。
- 给您新建的项目创建一个初始提交。
$ git commit -m "Initial commit"
此时,你有一个功能齐全并且能够正确提交到 Git 的 Symfony 项目,那么此时您就可以开始您的扩展了,把您新的改动提交到您的 Git 仓库。
您可以继续阅读用 Symfony 创建您的第一个页面这一章来了解更多的关于怎么在您的应用程序中配置和开发。
Symfony 标准版配备了一些示例功能。若要删除示例代码,请按照"如何到删除 AcmeDemoBundle" 中的说明。
带有 composer.json 的管理供应商库
它是怎么工作的?
每个 Symfony 项目中都有一系列的第三方提供的 “vendor” 库。其目标就是用一种或多种方法把这些文件下载到您的 vendor/ 的目录,并且,在理想情况下,这些库会给您一些确切的方法去管理这些每个您需要的确切的版本。
默认情况下,这些库文件通过运行一个 composer 程序来安装二进制“下载程序”来下载文件。这些 composer 文件来自于一个叫做 Composer 依赖管理工具,您可以通过阅读 Installation 来了解更多关于安装它的内容。
所执行的 composer 命令都是在您的项目根目录下的 composer.json 文件中读取的。这是一个 JSON 格式的文件,在这个文件中包含了您所需要的外部包名称和一些需要下载的版本信息以及其它更多信息的列表。composer 也从文件 composer.lock 读取信息,这个文件允许您把一个确切的版本连接任何一个您需要的库。事实上,如果存在 composer.lock 文件,那么这个文件中的版本信息就会附带 composer.json 中的信息,通过这样来更新您的库文件的版本,来允许 composer 更新。
如果您想在您的程序中添加一个新的程序包,那么请运行下面的 composer require 命令:
$ composer require doctrine/doctrine-fixtures-bundle
如果想了解更多关于 Composer 管理工具的信息,请参阅 GetComposer.org:
我们必须明白的是,这些供应商库实际上并不是您的仓库的一部分,相反,它们仅仅是一些被下载到 vendor/ 目录下的一些未监视的文件。但是因为下载这些文件所需要的所有的信息都保存在 composer.json 和 composer.lock(被存储在仓库中) 文件中,任何开发人员都可以使用这个项目,运行 composer 进行安装,并且下载这些确切相同的供应商库。这意味着您在不需要将供应商库提交到您的仓库的情况下,就能准确的了解这个库的作用,并且运用它。
所以,一个开发人员无论在什么时候使用您的项目,他们都应该先运行您的 **composer install ** 程序脚本来确保每个所需要的供应商库已经被下载了。
由于 Symfony 是一系列的第三方库,并且这些第三方库可以通过 composer.json 和 composer.lock 文件来对 Symfony 库进行完全控制,升级 Symfony 就是指简单的升级这些文件,以使它们匹配最新的 Symfony 标准版本中的状态。
当然,如果您在 composer.json 中添加了新的条目,那么请确保只替换原来的那些部分(即不能同时删除任何您自定义的条目)。
在远程服务器上存储您的项目
你现在有一个存储在 Git 中的功能齐全的 Symfony 项目。然而,在大多数情况下,你会还想在远程服务器上存储您项目的备份以便其他开发人员可以在该项目进行协作。
在远程服务器上存储您的项目的最简单方法是通过基于 web 的托管服务,如 GitHub 或者 Bitbucke 。当然,这里还有更多的服务,你可以在 comparison of hosting services 进行研究和查找。
或者,您可以通过创建一个新的存储仓库系统把您的 Git 仓库存储到任何一个服务器中 ,然后将它送到服务器上。仓库能够帮助管理 Gitolite。
如何在 SubVersion 中创建并保存一个 Symfony 项目
本章是基于 Subversion 进行阐述的,并且所讲到的规则是建立在 如何在 Git 中创建并保存一个 Symfony 项目 一章中所讲内容的基础上。
一旦当您通读了用 Symfony 创建您的第一个页面这篇文章,您将会对 Symfony 越来越熟悉。所以,理所当然这时候您可以创建您自己的项目了。管理 Symfony 项目最常用的方法就是使用 Git,但是如果有些人喜欢使用 Subversion 也是完全没有问题的,就像在 Git 中管理您的项目一样,在本章中,您将会学习到如何使用 SVN 去管理您的项目。
这是一个在 Subversion 仓库中监视您的 Symfony 项目的众多方法中的一个简单有效的方法。
Subversion 仓库
在本章中,我们假定您的存储仓库布局遵循普遍的标准结构:
myproject/
branches/
tags/
trunk/
大多数 Subversion 托管都遵循这个标准的做法。这是在 Subversion 版本控制系统一文中推荐的布局,并且这个对于大多数免费托管平台来说,这个布局都是最常用的(请参见 Subversion 托管方案 )。
初始化项目设置
第一步,您需要下载 Symfony 框架并且让它运行起来。请仔细阅读 安装并且配置 Symfony 这一章。
一旦您的程序运行起来,请遵循下面的这些简单的步骤:
1. 检查将要托管这个项目的 Subversion 仓库,假定它名为 myproject 并且被托管在 Google code 平台:
$ svn checkout http://myproject.googlecode.com/svn/trunk myproject
2. 在 Subversion 文件夹中拷贝 Symfony 项目:
$ mv Symfony/* myproject/
3. 现在,设置某些文件的忽略规则。并不是所有文件都应该被存储在你的 Subversion 仓库中,比如某些生成的文件(如缓存)或者每台计算机中自定义的文件(如数据库的配置信息)。我们利用 svn:ignore 属性实现上述功能,这样的话,某些特定的文件就可以被忽略。
$ cd myproject/
$ svn add --depth=empty app app/cache app/logs app/config web
$ svn propset svn:ignore "vendor" .
$ svn propset svn:ignore "bootstrap*" app/
$ svn propset svn:ignore "parameters.yml" app/config/
$ svn propset svn:ignore "*" app/cache/
$ svn propset svn:ignore "*" app/logs/
$ svn propset svn:ignore "bundles" web
$ svn ci -m "commit basic Symfony ignore list (vendor, app/bootstrap*, app/config/parameters.yml, app/cache/*, app/logs/*, web/bundles)"
4. 现在,这些剩下的文件就可以被添加并且提交到项目中了:
$ svn add --force .
$ svn ci -m "add basic Symfony Standard 2.X.Y"
就像这样!因为 app/config/parameters.yml 文件将被忽略,所以您可以存储您计算机的特定设置比如您数据库密码,但是又可以不用提交它们。虽然文件 parameters.yml.dist 被提交了,但是并不是由 Symfony 进行读取的。新的开发人员可以通过使用您对您项目文件添加的秘钥来克隆您的项目,并且把该文件拷贝到 parameters.yml 文件中,进行自定义,然后就可以开始开发了。
此时,在你 Subversion 仓库中有一个功能齐全的 Symfony 项目,并且可以开始把您项目的扩展内容提交到 Subversion repository 仓库中了。
您可以继续阅读用 Symfony 创建您的第一个页面这一章来了解更多的关于怎么在您的应用程序中配置和开发。
Symfony 标准版配备了一些示例功能。若要删除示例代码,请按照如何到删除 AcmeDemoBundle 中的说明。
带有 composer.json 的管理供应商库
它是怎么工作的?
每个 Symfony 项目中都有一系列的第三方提供的 “vendor” 库。其目标就是用一种或多种方法把这些文件下载到您的 vendor/ 的目录,并且,在理想情况下,这些库会给您一些确切的方法去管理这些每个您需要的版本。
默认情况下,这些库文件通过运行一个 composer 程序来安装二进制“下载程序”来下载文件。这些 composer 文件来自于一个叫做 Composer 依赖管理工具,您可以通过阅读 Installation 来了解更多关于安装它的内容。
所执行的 composer 命令都是在您的项目根目录下的 composer.json 文件中读取的。这是一个 JSON 格式的文件,在这个文件中包含了您所需要的外部包名称和一些需要下载的版本信息以及其它更多信息的列表。composer 也从文件 composer.lock 读取信息,这个文件允许您把一个确切的版本连接任何一个您需要的库。事实上,如果存在 composer.lock 文件,那么这个文件中的版本信息就会附带 composer.json 中的信息,通过这样来更新您的库文件的版本,来允许 composer 更新。
如果您想在您的程序中添加一个新的程序包,那么请运行下面的 composer require 命令:
$ composer require doctrine/doctrine-fixtures-bundle
如果想了解更多关于 Composer 管理工具的信息,请参阅 GetComposer.org:
我们必须明白的是,这些供应商库实际上并不是您的仓库的一部分,相反,它们仅仅是一些被下载到 vendor/ 目录下的一些未监视的文件。但是因为下载这些文件所需要的所有的信息都保存在 composer.json 和 composer.lock(被存储在仓库中) 文件中,任何开发人员都可以使用这个项目,运行 composer 进行安装,并且下载这些确切相同的供应商库。这意味着您在不需要将供应商库提交到您的仓库的情况下,就能准确的了解这个库的作用,并且运用它。
所以,一个开发人员无论在什么时候使用您的项目,他们都应该先运行您的 **composer install ** 程序脚本来确保每个所需要的供应商库已经被下载了。
由于 Symfony 是一系列的第三方库,并且这些第三方库可以通过 composer.json 和 composer.lock 文件来对 Symfony 库进行完全控制,升级 Symfony 就是指简单的升级这些文件,以使它们匹配最新的 Symfony 标准版本中的状态。
当然,如果您在 composer.json 中添加了新的条目,那么请确保只替换原来的那些部分(即不能同时删除任何您自定义的条目)
Subversion 托管解决方案
Git 和 Git 的最大的区别就是 Subversion 需要在一个中央仓库上工作,您现在有以下几种解决方案:
- 自主托管:创建您自己的仓库,并且通过文件系统或者网络来访问它。如果您想获得更多资料来帮助您理解,请参阅 Subversion 托管方案
- 第三方托管:目前有很多很好但是免费可用的托管方案,就比如 GitHub,Google code ,SourceForgeSourceForge 和 Gna 等,它们之中的部分平台也提供 Git 托管服务。


更多信息请访问

