


打开首页先选择自己的系统版本 (我这里采用的 web 服务器是 nginx,系统是 centos7 )传输门
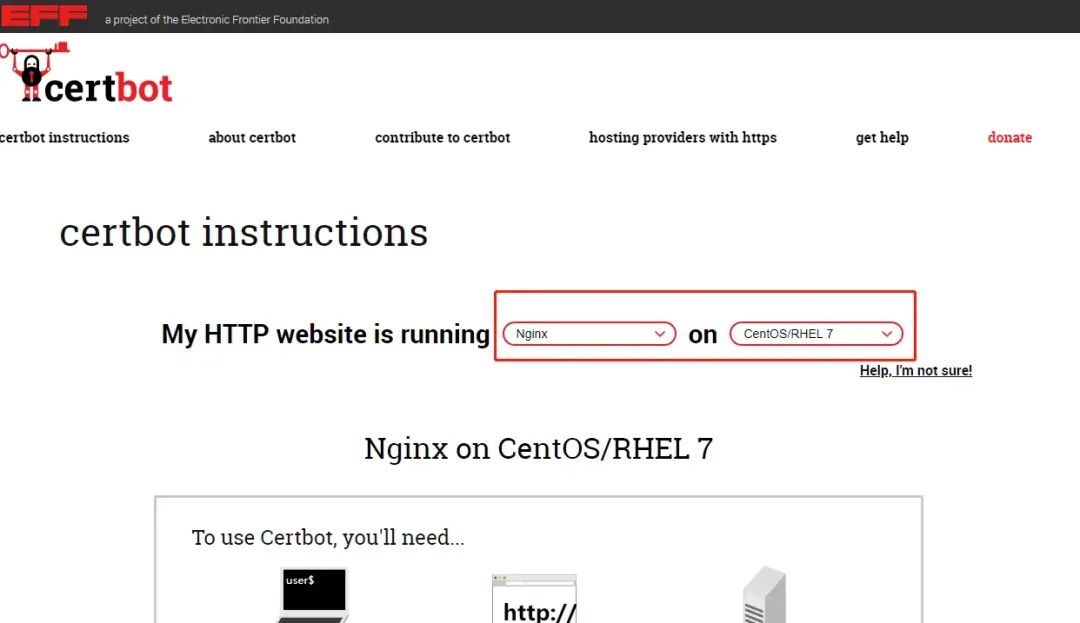
可以按照官网提供的操作文档执行命令
# 安装 certbot 客户端工具

sudo yum install certbot python2-certbot-nginx

# 自动检测 nginx 配置以及确定哪些网站需要配置 ssl (会列出全部的 nginx 配置信息)

sudo certbot --nginx

# 设置 crontab 计划任务,自动更新 ssl 证书

echo "0 0,12 * * * root python -c 'import random; import time; time.sleep(random.random() * 3600)' && certbot renew -q" | sudo tee -a /etc/crontab > /dev/null
以下记录本人安装 certbot 的整个过程
系统环境
服务器:阿里云服务器
系统:centos 7
web 服务器:nginx
安装过宝塔 (安装过宝塔后,nginx 的主配置文件位于/www/server/nginx/conf/
)
整体流程是按照官网的流程来操作的,但是其中会遇到各种问题,出现的问题如下:
安装 certbot 客户端工具 (此流程正常),安装过程中,该直接回车的就回车,该直接选 Yes 的输入 Y 然后回车
sudo yum install certbot python2-certbot-nginx
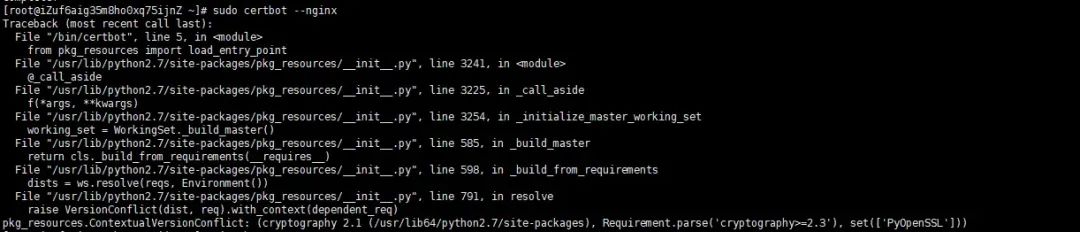
配置 ssl 时,一路出错,如下:
sudo certbot --nginx
重要错误信息如下:
pkg_resources.ContextualVersionConflict: (cryptography 2.1 (/usr/lib64/python2.7/site-packages), Requirement.parse('cryptography>=2.3'), set(['PyOpenSSL']))
查看 PyOpenSSL 版本信息,发现确实是版本过低的原因
pip show PyOpenSSL
解决方案:更新相应的 python 包
pip install -U PyOpenSSL

pip install -U cryptography
再次执行以下命令
sudo certbot --nginx
再次发现报错,错误信息如下:
ImportError: cannot import name UnrewindableBodyError
解决方案:安装相应的 python 包
# 更新 pip
pip install --upgrade pip

# 卸载 urllib3
pip uninstall urllib3

# 重新再次下载
pip install urllib3
再次执行以下命令
sudo certbot --nginx
再次发现报错,错误信息如下:
ImportError: No module named urllib3.exceptions
解决方案:直接暴力下载相应的 pyOpenSSL 包
yum -y install http://cbs.centos.org/kojifiles/packages/pyOpenSSL/16.2.0/3.el7/noarch/python2-pyOpenSSL-16.2.0-3.el7.noarch.rpm
再次执行以下命令
sudo certbot --nginx
继续报错,如下:
Error while running nginx -c /etc/nginx/nginx.conf -t.

nginx: [emerg] open() "/etc/nginx/nginx.conf" failed (2: No such file or directory)
nginx: configuration file /etc/nginx/nginx.conf test failed

The nginx plugin is not working; there may be problems with your existing configuration.
The error was: MisconfigurationError('Error while running nginx -c /etc/nginx/nginx.conf -t.\n\nnginx: [emerg] open() "/etc/nginx/nginx.conf" failed (2: No such file or directory)\nnginx: configuration file /etc/nginx/nginx.conf test failed\n',)

原因是:宝塔将 nginx 的主配置文件安装在 /www/server/nginx/conf/
目录下,然而 certbot
默认在扫描 /etc/nginx/nginx.conf
文件,故而找不到 nginx 的配置文件
解决方案:指定 nginx 的配置目录,执行以下命令
sudo certbot --nginx --nginx-server-root=/www/server/nginx/conf/
然而不幸的是,依然还是报错,报错信息如下:
An unexpected error occurred:
TypeError: from_buffer() cannot return the address of the raw string within a str or unicode or bytearray object
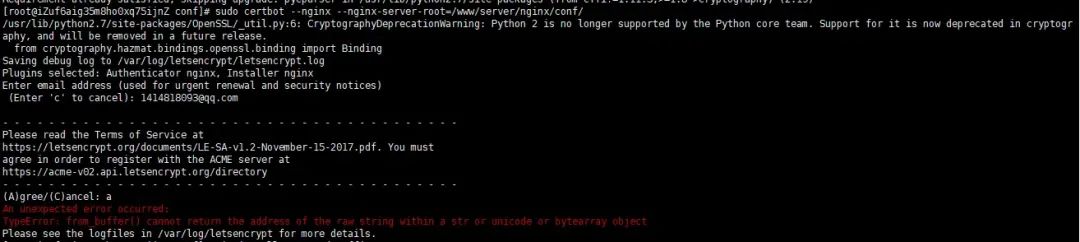
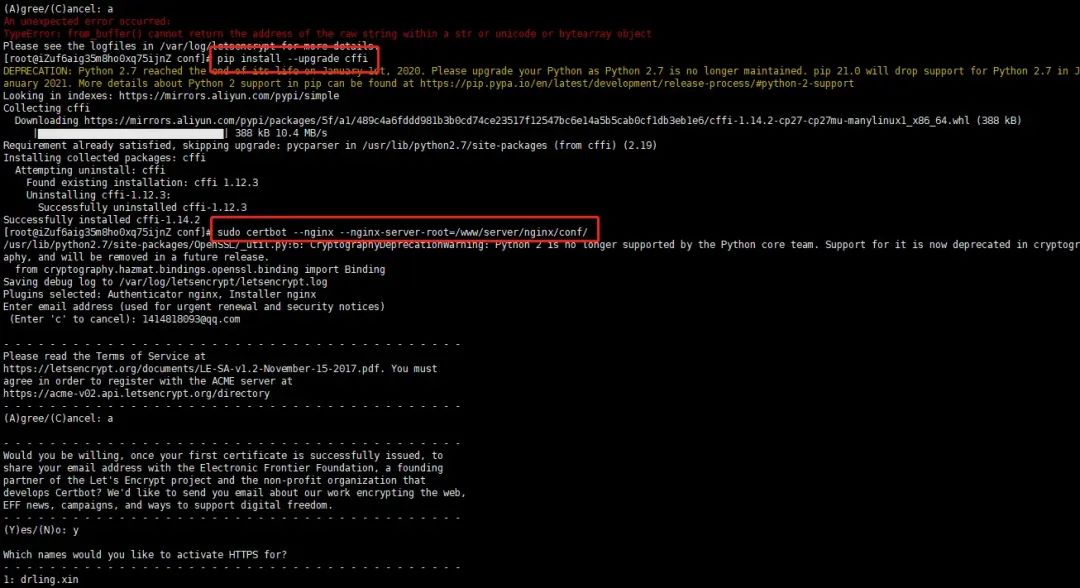
解决方案:更新 cffi 包,执行以下命令
pip install --upgrade cffi
安装完毕之后,再次执行以下命令
sudo certbot --nginx --nginx-server-root=/www/server/nginx/conf/
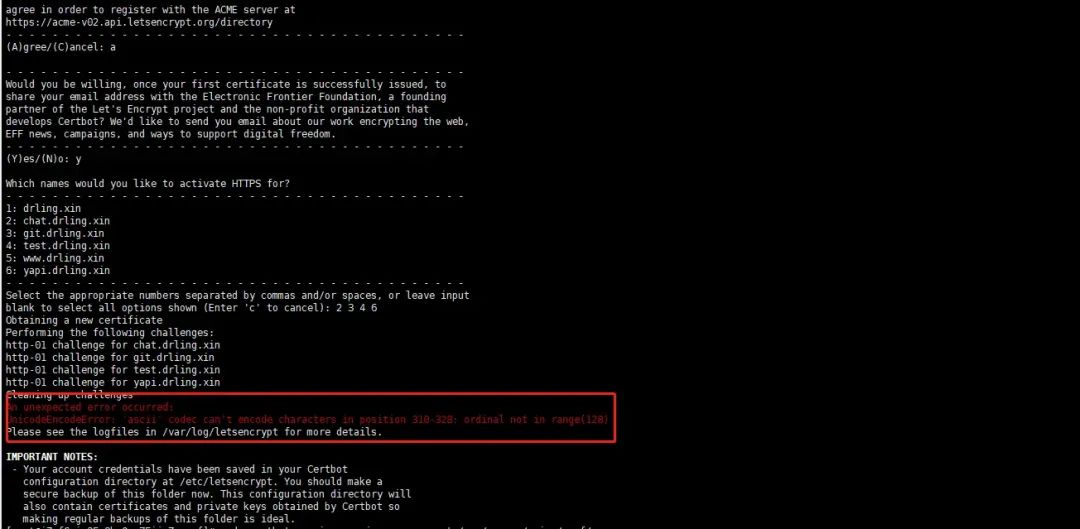
发现还是报错,报错信息如下:
An unexpected error occurred:
UnicodeEncodeError: 'ascii' codec can't encode characters in position 310-328: ordinal not in range(128)
关于 ascii 报错,这篇文章有详细的介绍 通过 Certbot 安装 Let's Encrypt 证书,来实现全站的 HTTPS 访问
解决方案是:检查你选择的需要配置的 nginx 配置文件中是否含有中文,将所有的中文去掉就好了
去掉之后,再次执行以下命令
sudo certbot --nginx --nginx-server-root=/www/server/nginx/conf/
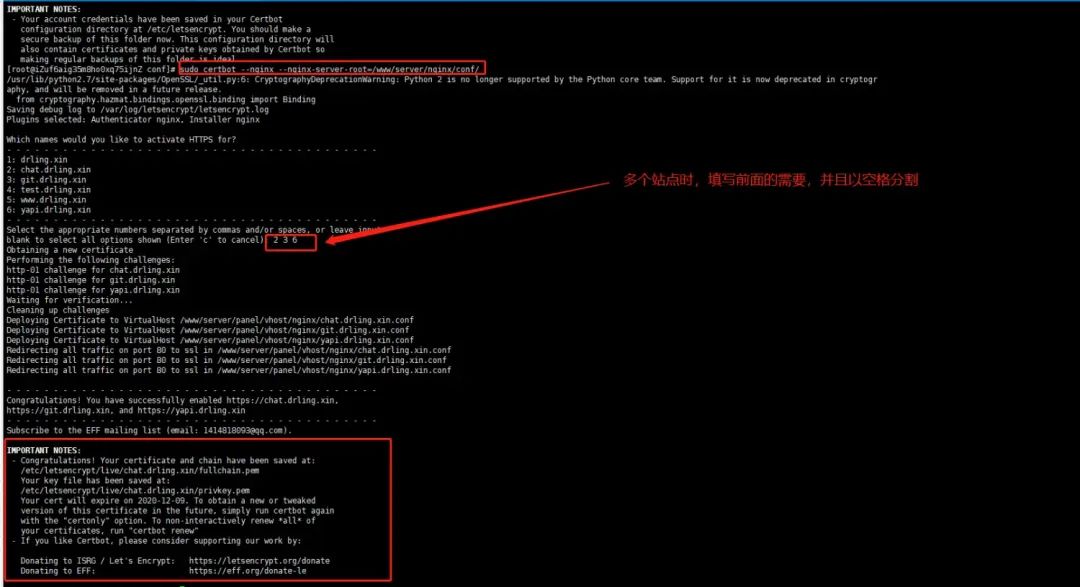
大功告成!
对比一下没有配置 ssl 之前的 nginx 配置
没有配置 ssl 之前的 nginx 信息
server
{
    server_name www.pudongping.com;
    index index.php index.html index.htm default.php default.htm default.html;
    root www/wwwroot/www.pudongping.com;

    location ~ ^/(\.user.ini|\.htaccess|\.git|\.svn|\.project|LICENSE|README.md)
    {
        return 404;
    }

}
配置 ssl 之后的配置信息 (现在配置文件中,默认强制性重定向了 https)
server
{
    server_name www.pudongping.com;
    index index.php index.html index.htm default.php default.htm default.html;
    root www/wwwroot/www.pudongping.com;

    location ~ ^/(\.user.ini|\.htaccess|\.git|\.svn|\.project|LICENSE|README.md)
    {
        return 404;
    }


    listen 443 ssl; # managed by Certbot
    ssl_certificate etc/letsencrypt/live/www.pudongping.com/fullchain.pem; # managed by Certbot
    ssl_certificate_key etc/letsencrypt/live/www.pudongping.com/privkey.pem; # managed by Certbot
    include etc/letsencrypt/options-ssl-nginx.conf; # managed by Certbot
    ssl_dhparam etc/letsencrypt/ssl-dhparams.pem; # managed by Certbot

}
server
{
    if ($host = www.pudongping.com) {
        return 301 https://$host$request_uri;
    } # managed by Certbot


    listen 80;
    server_name www.pudongping.com;
    return 404; # managed by Certbot


}
自动更新证书
由于 Let's Encrypt 默认的有效期是 90 天,所以如果你的应用需要在生产环境长期提供服务,还要在证书到期之后更新证书,我们可以通过 certbot renew
命令来更新证书,你可以通过如下命令来测试该命令是否生效:
sudo certbot renew --dry-run
如果在输出中看到如下字样,则表示生效:

当然,真实环境中通过手动维护是不现实的,我们可以借助 Crontab 来编写一个定时任务,每个月都强制更新一个这个证书,然后重启 Nginx:
0 0 1 * * certbot renew
5 0 1 * * service nginx restart
或者直接执行官方提供的命令
echo "0 0,12 * * * root python -c 'import random; import time; time.sleep(random.random() * 3600)' && certbot renew -q" | sudo tee -a /etc/crontab > /dev/null
关于目录
Certbot 的配置文件目录在 /etc/letsencryptCertbot 的 log 预设路径在 /var/log/letsencrypt网站对应的 .pem
文件路径在/etc/letsencrypt/live/网站名称/privkey.pem
certbot官网地址:https://certbot.eff.org/
最后说个事
公号算法变了,为防止看不到我的更新
大家帮忙加个星标
点击上方的公众号卡片
再点右上角三个点
就能看到设为星标
算我跪下来求你们
往期精选:
