


实验环境:安装了Oracle11GR2软件的 Centos.4
实验目的:熟悉创建Oracle数据库实例的DBCA方法
实验步骤:
DBCA创建Oracle数据库实例的方法有两种:1、图形化安装 2、字符界面安装
字符界面安装又可以分为两种方式:1、使用安装文件中的dbca.rsp,定制数据库;2、DBCA命令行方式
我们先对字符界面安装的两种方式做重点介绍,最后将图形化创建的步骤列示。
方法一、DBCA利用rsp方式构建数据库实例
创建rsp文件
cat <<EOF>>/data/mydbs.rsp [GENERAL] RESPONSEFILE_VERSION = "11.2.0" OPERATION_TYPE = "createDatabase" [CREATEDATABASE] GDBNAME = "hpprdzb" SID = "hpprdzb" TEMPLATENAME = "General_Purpose.dbc" SYSPASSWORD = "123456" SYSPASSWORD = "123456" SYSTEMPASSWORD = "123456" DATAFILEDESTINATION =/data/oracle/app/oracle/oradata AUTOMATICMEMORYMANAGEMENT = "TRUE" TOTALMEMORY = "480" STORAGETYPE="FS" CHARACTERSET="AL32UTF8" NATIONALCHARACTERSET="UTF8" |
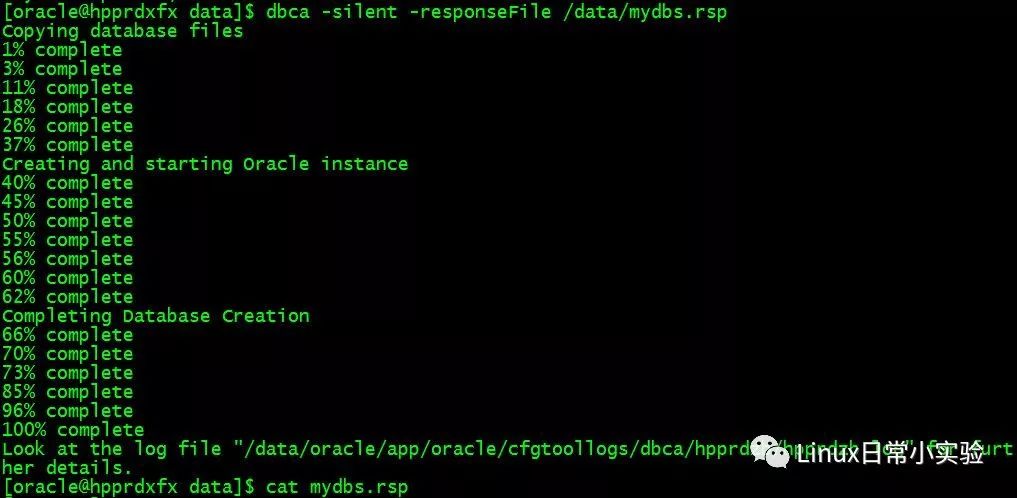
创建Oracle数据库实例
$ dbca -silent -responseFile /data/mydbs.rsp
方式二、DBCA命令行
先给出示例,读者可以使用$dbca -h查看
$dbca -silent -createDatabase -templateName General_Purpose.dbc -gdbname ora11g -sid ora11g -sysPassword lhr -systemPassword lhr -responseFile NO_VALUE -datafileDestination /data/oracle/app/oracle/oradata -redoLogFileSize 50 -recoveryAreaDestination /data/oracle/app/oracle/flash_recovery_area -storageType FS -characterSet AL32UTF8 -nationalCharacterSet UTF8 -sampleSchema true -memoryPercentage 30 -totalMemory 200 -emConfiguration NONE
实验到此基本完成,以下为此篇文章的论据。
遇到如下问题,可以采用如下机制解决。

# mount -o size=1G -o nr_inodes=1000000 -o noatime,nodiratime -o remount /dev/shm
在Oracle 11g中如果采用AMM内存管理,那么当MEMORY_TARGET的值大于/dev/shm的时候,就会报ORA-00845: MEMORY_TARGET not supported on this system错误,解决办法增加/dev/shm大小。
dbca [-silent | -progressOnly | -customCreate] {<command> <options> } | { [<command> [options] ] -responseFile <response file > } [-continueOnNonFatalErrors <true | false>] Please refer to the manual for details. You can enter one of the following command:
Create a database by specifying the following parameters: -createDatabase -templateName <name of an existing template> [-cloneTemplate] -gdbName <global database name> [-policyManaged | -adminManaged <Policy managed or Admin managed Database, default is Admin managed database>] [-createServerPool <To create ServerPool which will be used by the database to be created>] [-force <To create serverpool by force when adequate free servers are not available. This may affect already running database>] -serverPoolName <One serverPool Name in case of create server pool and comma separated list of serverPool name in case of use serverpool> -[cardinality <Specify cardinality for new serverPool to be created, default is the number of qualified nodes>] [-sid <database system identifier>] [-sysPassword <SYS user password>] [-systemPassword <SYSTEM user password>] [-emConfiguration <CENTRAL|LOCAL|ALL|NOBACKUP|NOEMAIL|NONE> -dbsnmpPassword <DBSNMP user password> -sysmanPassword <SYSMAN user password> [-hostUserName <Host user name for EM backup job> -hostUserPassword <Host user password for EM backup job> -backupSchedule <Daily backup schedule in the form of hh:mm>] [-smtpServer <Outgoing mail (SMTP) server for email notifications> -emailAddress <Email address for email notifications>] [-centralAgent <Enterprise Manager central agent home>]] [-disableSecurityConfiguration <ALL|AUDIT|PASSWORD_PROFILE|NONE> [-datafileDestination <destination directory for all database files> | -datafileNames <a text file containing database objects such as controlfiles, tablespaces, redo log files and spfile to their corresponding raw device file names mappings in name=value format.>] [-redoLogFileSize <size of each redo log file in megabytes>] [-recoveryAreaDestination <destination directory for all recovery files>] [-datafileJarLocation <location of the data file jar, used only for clone database creation>] [-storageType < FS | ASM > [-asmsnmpPassword <ASMSNMP password for ASM monitoring>] -diskGroupName <database area disk group name> -recoveryGroupName <recovery area disk group name> [-characterSet <character set for the database>] [-nationalCharacterSet <national character set for the database>] [-registerWithDirService <true | false> -dirServiceUserName <user name for directory service> -dirServicePassword <password for directory service > -walletPassword <password for database wallet >] [-listeners <list of listeners to configure the database with>] [-variablesFile <file name for the variable-value pair for variables in the template>]] [-variables <comma seperated list of name=value pairs>] [-initParams <comma seperated list of name=value pairs>] [-memoryPercentage <percentage of physical memory for Oracle>] [-automaticMemoryManagement ] [-totalMemory <memory allocated for Oracle in MB>] [-databaseType <MULTIPURPOSE|DATA_WAREHOUSING|OLTP>]]
Configure a database by specifying the following parameters: -configureDatabase -sourceDB <source database sid> [-sysDBAUserName <user name with SYSDBA privileges> -sysDBAPassword <password for sysDBAUserName user name>] [-registerWithDirService|-unregisterWithDirService|-regenerateDBPassword <true | false> -dirServiceUserName <user name for directory service> -dirServicePassword <password for directory service > -walletPassword <password for database wallet >] [-disableSecurityConfiguration <ALL|AUDIT|PASSWORD_PROFILE|NONE> [-enableSecurityConfiguration <true|false> [-emConfiguration <CENTRAL|LOCAL|ALL|NOBACKUP|NOEMAIL|NONE> -dbsnmpPassword <DBSNMP user password> -symanPassword <SYSMAN user password> [-hostUserName <Host user name for EM backup job> -hostUserPassword <Host user password for EM backup job> -backupSchedule <Daily backup schedule in the form of hh:mm>] [-smtpServer <Outgoing mail (SMTP) server for email notifications> -emailAddress <Email address for email notifications>] [-centralAgent <Enterprise Manager central agent home>]]
Create a template from an existing database by specifying the following parameters: -createTemplateFromDB -sourceDB <service in the form of <host>:<port>:<sid>> -templateName <new template name> -sysDBAUserName <user name with SYSDBA privileges> -sysDBAPassword <password for sysDBAUserName user name> [-maintainFileLocations <true | false>]
Create a clone template from an existing database by specifying the following parameters: -createCloneTemplate -sourceSID <source database sid> -templateName <new template name> [-sysDBAUserName <user name with SYSDBA privileges> -sysDBAPassword <password for sysDBAUserName user name>] [-maintainFileLocations <true | false>] [-datafileJarLocation <directory to place the datafiles in a compressed format>]
Generate scripts to create database by specifying the following parameters: -generateScripts -templateName <name of an existing template> -gdbName <global database name> [-scriptDest <destination for all the scriptfiles>]
Delete a database by specifying the following parameters: -deleteDatabase -sourceDB <source database sid> [-sysDBAUserName <user name with SYSDBA privileges> -sysDBAPassword <password for sysDBAUserName user name>] Query for help by specifying the following options: -h | -help |
方式三、图形化安装


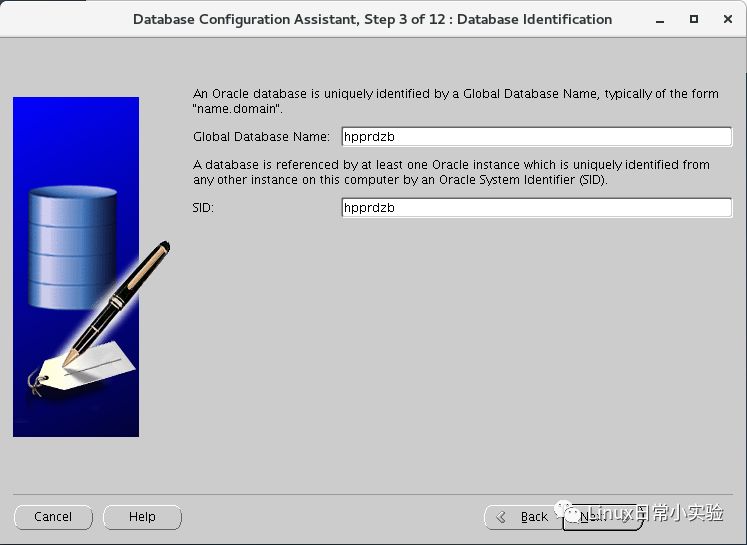
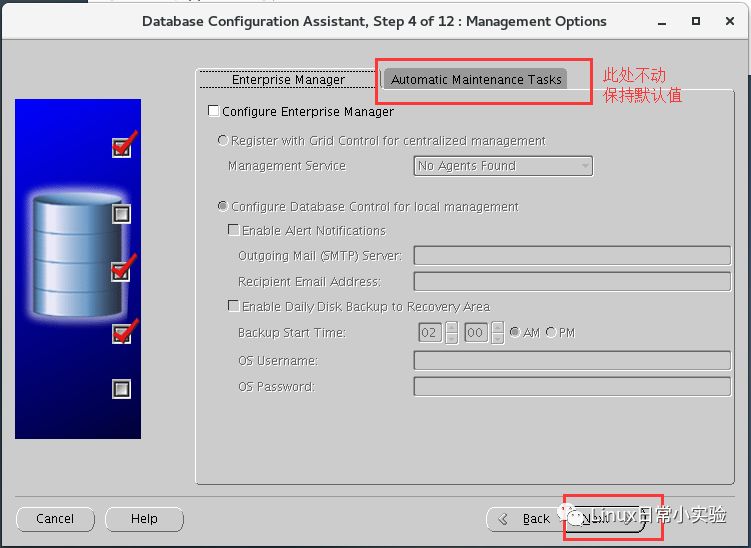
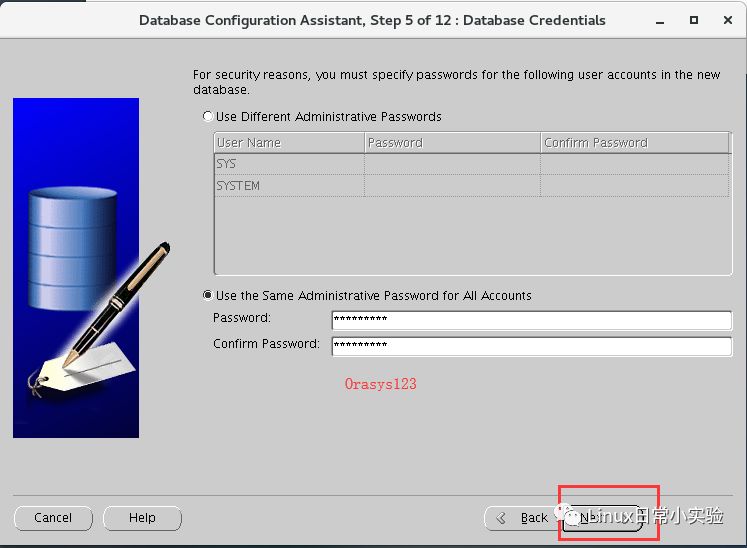

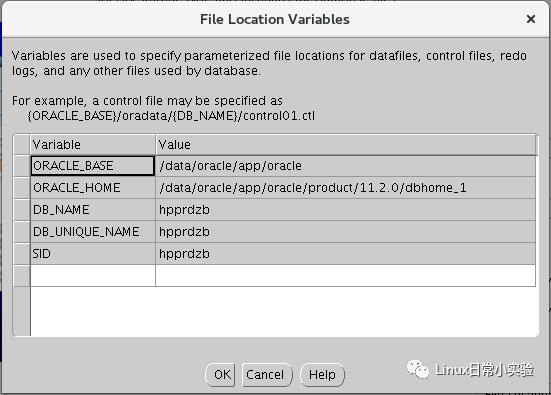
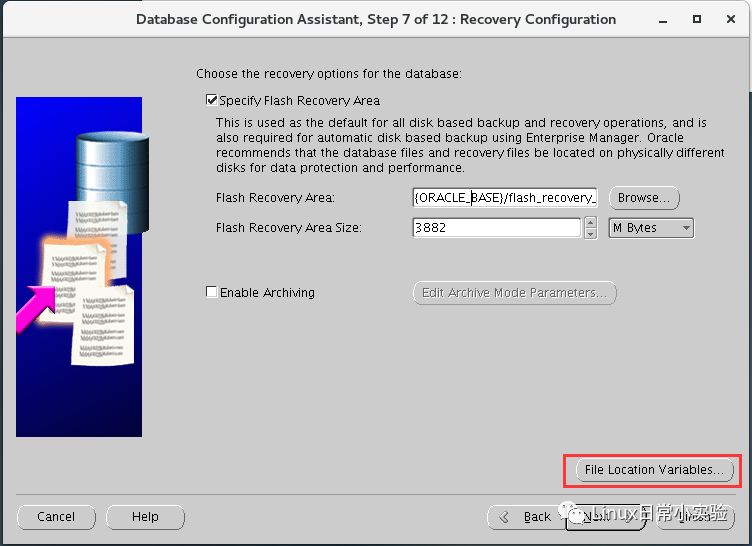
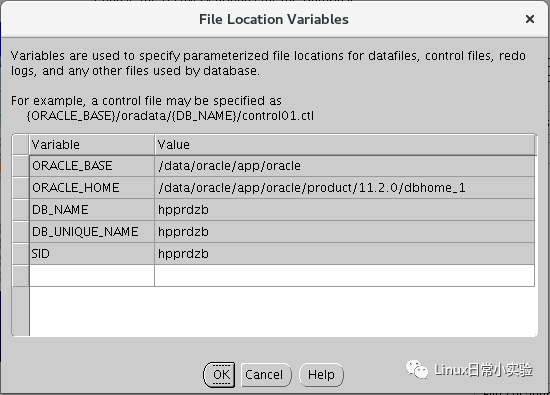
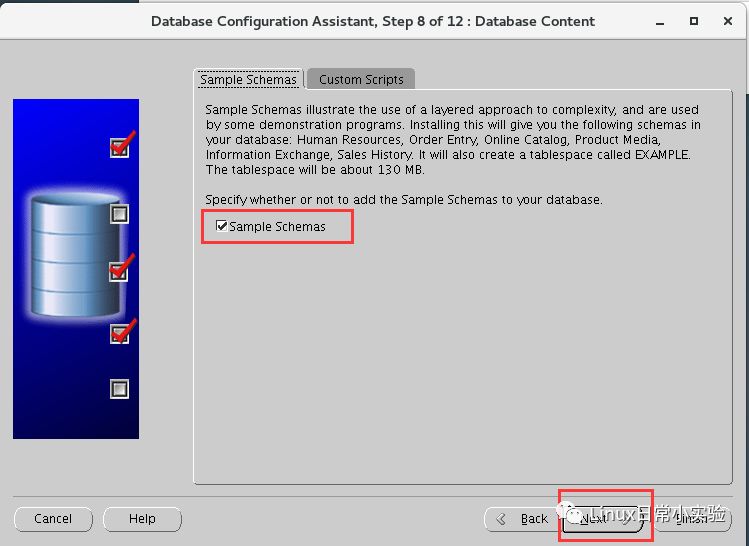


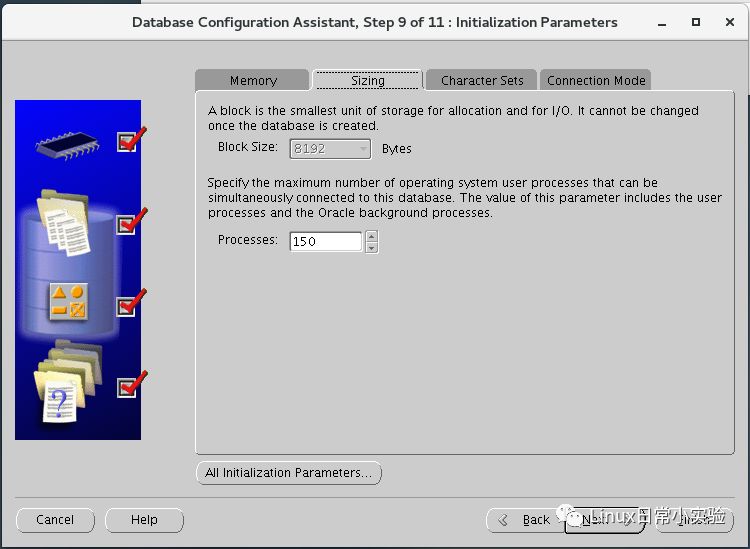
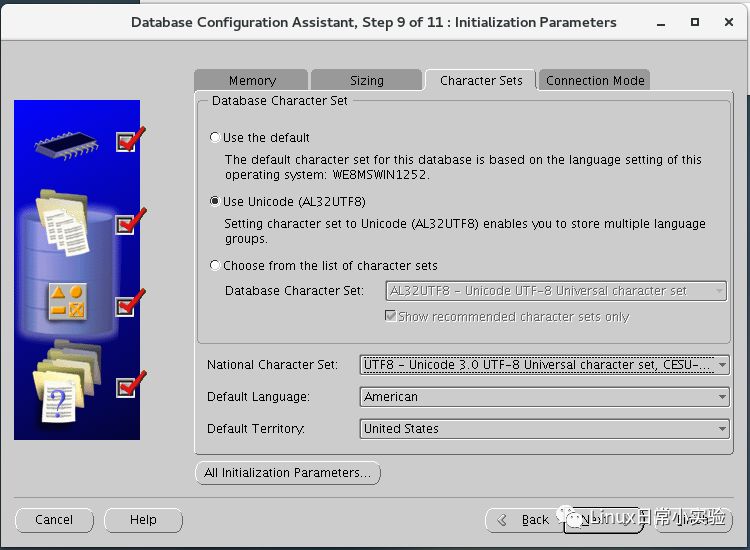
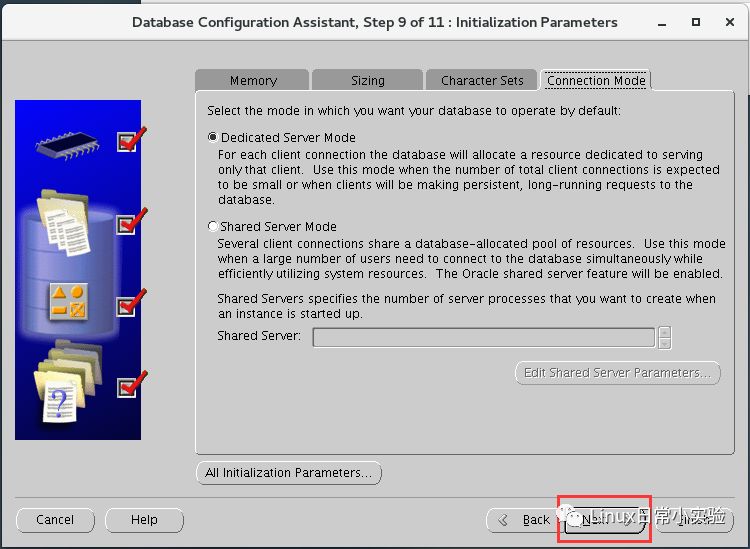
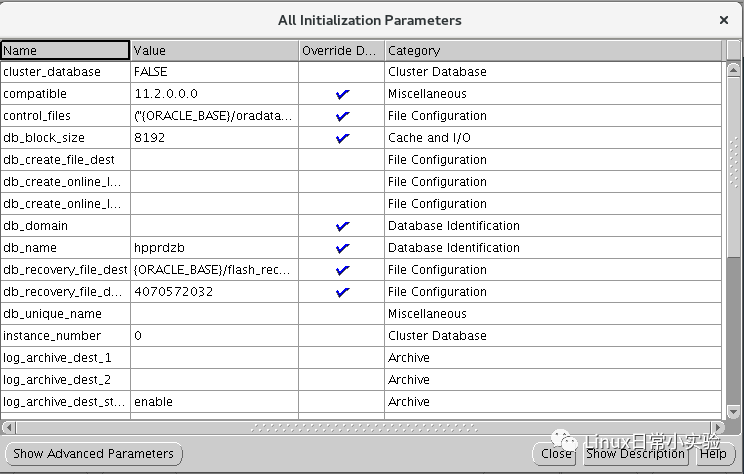
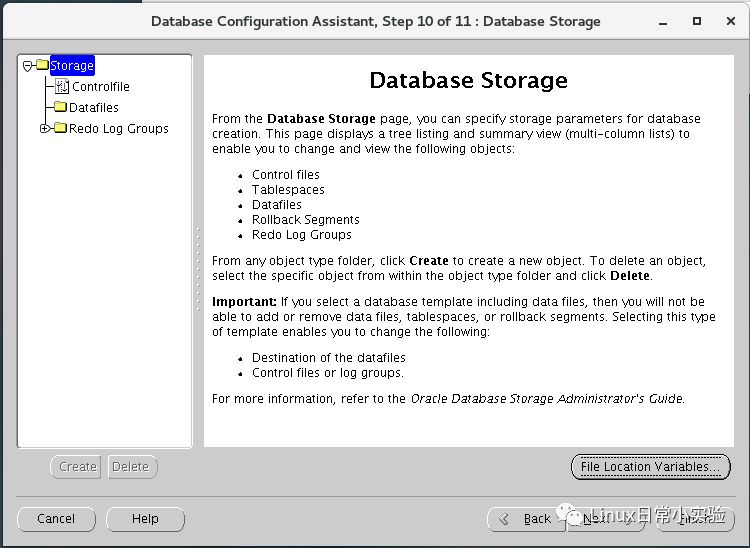

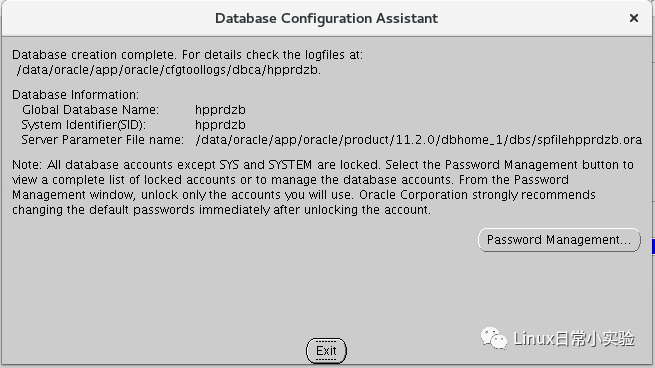
图形化安装完毕。
如果您喜欢我的文章,请长按标识符关注我的公众号,学习Linux的路上,期待与您同行。

