

本文作者:拨开乌云见阳光
来源:墨天轮
前言
在墨天轮国产数据库流行度排行榜上:https://www.modb.pro/dbRank
看到AntDB上升迅猛,马上就要进入榜单前十。于是激发了想要了解的兴趣。利用昨晚的业余时间,尝试进行了安装,整个过程非常顺利。在此记录并分享。

硬件环境要求
目前支持的操作系统:
操作系统 | 版本 | CPU架构 |
CentOS | 7.5以上 | x86_64 |
CentOS | 7.5以上 | aarch64 |
Kylin | V10 | x86_64 |
Kylin | V10 | aarch64 |
openEuler | 20.0以上 | x86_64 |
openEuler | 20.0以上 | aarch64 |
推荐的最小硬件资源:
配置项 | 规格 |
CPU内核数 | 4核及以上 |
内存 | 8G及以上 |
磁盘剩余容量 | 20G及以上 |
安装前的准备
1、在本机创建VMWare虚拟机
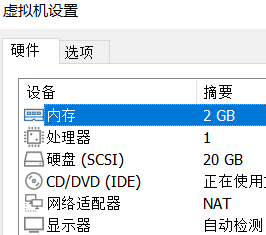
虽然官方推荐的最小硬件资源为:4CPU + 8GB ,但是实际上,用于测试,1CPU + 2GB 的配置也是可以的。
所以创建的VMWare虚拟机硬件资源分配为:1CPU + 2GB(内存) + 20GB(磁盘),如下:
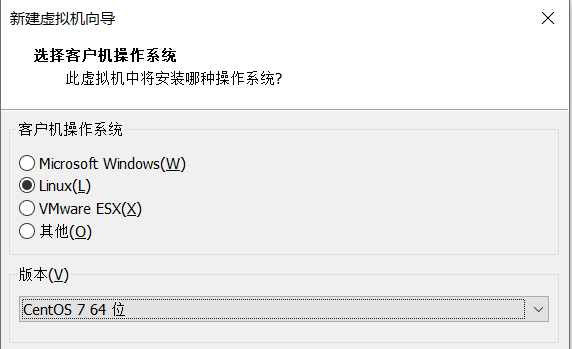
2、在创建的VMWare虚拟机上安装CentOS 7.5以上版本的操作系统
最小化安装即可。
3、关闭防火墙
以root用户登录 CentOS 虚拟机,执行如下命令:
systemctl stop firewalld
systemctl disable firewalld
4、创建安装目录和安装用户
以root用户登录 CentOS 虚拟机,执行如下命令:
mkdir -p data
useradd -d data/antdb -m antdb
echo password|passwd --stdin antdb
id antdb
5、下载并上传安装包(antdb-ce-7.2.0.centos7.x86_64.tar.gz)上传到/data/antdb目录下,并修改该安装包的权限
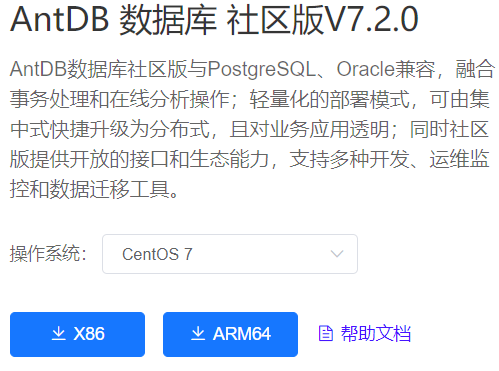
(1)下载安装包
下载地址:http://www.antdb.net/download
安装包文件名:antdb-ce-7.2.0.centos7.x86_64.tar.gz
(2)上传安装包文件,并设置属主:
cd data/antdb
chown -R antdb:antdb antdb-ce-7.2.0.centos7.x86_64.tar.gz
安装
su - antdb
tar -xzvf antdb-ce-7.2.0.centos7.x86_64.tar.gz
cd antdb-ce-7.2.0.centos7.x86_64
sh antdb_install.sh
以上安装脚本,执行过程如下:
[Info] AntDB install begins
get_os_info...
get_os_info...succeeded.
get_hardwareinfo...
get_hardwareinfo...succeeded.
check_hardwareinfo...
The current operating system hardware resources are less than the recommended hardware requirements for antdb operation.

Recommended hardware minimum requirements
CPU             :Quad Core processor or equivalent processor
Memory (RAM)    :8  GB minimum
Free disk space :20 GB minimum

Current operating system hardware
CPU             :1 Core processor
Memory (RAM)    :1.93 GB
Free disk space :17.16 GB

Are you sure to continue ?(Y/N):[Default:Y]
OK,continue...
check_hardwareinfo...succeeded.
check_SHA256...
check_SHA256...succeeded.
check_agreement...

Hunan AsiaInfo Anhui Technologies Co., Ltd.
Software End User License Agreement
......此处为用户许可协议的内容......
Do you agree? [yes/no, Default: yes]
OK, you agree with the agreement. continue...
check_agreement...succeeded.
[Note] Choose AntDB type "(c)entralized" or "(d)istributed" for installation [Default: centralized]
[Info] Use default deployment mode ... "centralized"
[Note] Choose an empty directory to install AntDB [Default: data/antdb/app/antdb]
[Info] Use default install path ... "/data/antdb/app/antdb"
[Info] Checking install path ... ok
[Info] Decompressing package ... ok
[Info] Copying files ... ok
[Note] Excute 'source data/antdb/.bashrc' to make the environment variables take effect.
[Info] set bash environment ... ok
[Note] The following files can be used as reference to set OS kernel config manually.
  data/antdb/app/antdb/setup/common/kernel_limits.conf
  data/antdb/app/antdb/setup/common/kernel_sysctl.conf
[Info] AntDB install succeeds!
[Info] AntDB init begins
[Note] Continue to do AntDB initialization? [yes/no, Default: yes]
[Note] Please enter a name for new database [Default: antdb]
[Note] Please enter a name for database user [Default: antdb]
[Note] Please enter a pasword for database user [Default: antdb]
[Note] Retype password:
[Info] Checking AntDB home ... data/antdb/app/antdb
[Info] Checking AntDB edition ... ok
[Info] Checking netstat ... failed
[Info] Checking port ... 6655
[Info] Initializing local database ... ok
[Info] Starting AntDB ... ok
[Info] Creating default database antdb ... ok
[Info] Creating default user antdb ... skip
[Info] Setting database password ... ok
[Info] Creating customized database(antdb) ... ok
[Info] Creating customized user(antdb) ... ok
[Info] Setting customized database password ... ok
[Info] AntDB info:
+----------+-----------+------+----------------------------+-------+----------+
| database |    ip     | port |            data            | user  | password |
+----------+-----------+------+----------------------------+-------+----------+
| antdb    | localhost | 6655 | data/antdb/app/antdb/data | antdb | 123456   |
+----------+-----------+------+----------------------------+-------+----------+

[Info] AntDB logon:
         adb -d "database" -U "user" -p "port"

[Info] AntDB init succeeds
显示以上信息,表示安装成功。此时可以查看相关的服务进程:
ps -ef|grep antdb
相关的服务进程如下:
antdb      1091      1  0 08:01 ?        00:00:00 data/antdb/app/antdb/bin/postgres -D data/antdb/app/antdb/data
antdb      1093   1091  0 08:01 ?        00:00:00 postgres: checkpointer
antdb      1094   1091  0 08:01 ?        00:00:00 postgres: background writer
antdb      1095   1091  0 08:01 ?        00:00:00 postgres: walwriter
antdb      1096   1091  0 08:01 ?        00:00:00 postgres: autovacuum launcher
antdb      1097   1091  0 08:01 ?        00:00:00 postgres: stats collector
antdb      1098   1091  0 08:01 ?        00:00:00 postgres: logical replication launcher
设置antdb用户环境
编辑antdb用户环境配置文件:
vi ~/.bash_profile
加入如下内容:
export ADBHOME=/data/antdb/app/antdb
export PATH=$ADBHOME/bin:$PATH
export LD_LIBRARY_PATH=$ADBHOME/lib:$LD_LIBRARY_PATH
export PGDATABASE=postgres

export adbdata=/data/antdb/app/antdb/data
alias adbmgr='psql -p 6655 -d postgres '
alias adb_stop='pg_ctl stop -D $adbdata -m fast'
alias adb_start='pg_ctl start -D $adbdata'
alias adb_status='pg_ctl status -D $adbdata'
执行如下命令,使以上环境变量生效:
source ~/.bash_profile
登录数据库
在antdb用户环境中,执行如下命令登录数据库:
adb -d antdb -U antdb -p 6655
登录后,可执行相关的数据库命令,比如查看数据库的相关信息,如下:
antdb=# \l
                              List of databases
   Name    | Owner | Encoding |   Collate   |    Ctype    | Access privileges
-----------+-------+----------+-------------+-------------+-------------------
 antdb     | antdb | UTF8     | en_US.UTF-8 | en_US.UTF-8 |
 postgres  | antdb | UTF8     | en_US.UTF-8 | en_US.UTF-8 |
 template0 | antdb | UTF8     | en_US.UTF-8 | en_US.UTF-8 | =c/antdb         +
           |       |          |             |             | antdb=CTc/antdb
 template1 | antdb | UTF8     | en_US.UTF-8 | en_US.UTF-8 | =c/antdb         +
           |       |          |             |             | antdb=CTc/antdb
(4 rows)

antdb=# select version();
                                   version
-----------------------------------------------------------------------------
 PostgreSQL 13.3 on x86_64-pc-linux-gnu, compiled by gcc (GCC) 9.5.0, 64-bit
(1 row)
由以上版本信息,可以看到 AntDB 数据库 社区版 V7.2.0,是基于PG 13.3打造的。
配置远程登录数据库
1、设置数据库相关参数
在antdb用户环境,执行如下命令:
adbmgr
postgres=# alter system set listen_addresses='*';
postgres=# \q
2、重启数据库服务,使以上配置生效:
adb_stop
adb_start
3、尝试远程登录数据库
psql -h 192.168.20.32 -U antdb -d antdb -p 6655
通过DBeaver访问数据库
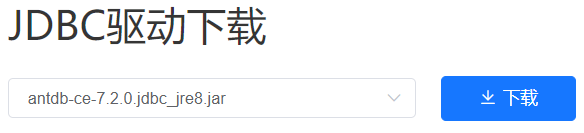
1、下载JDBC驱动
下载地址:http://www.antdb.net/download
JDBC驱动文件名:antdb-ce-7.2.0.jdbc_jre8.jar
2、打开DBeaver软件,进行数据库连接设置
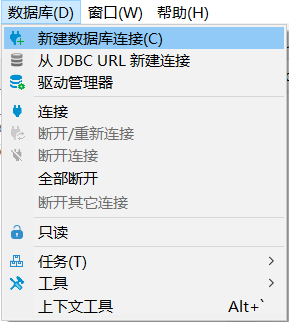
(1)新建数据库连接:
(2)选择PostgreSQL

(3)设置数据库的连接信息
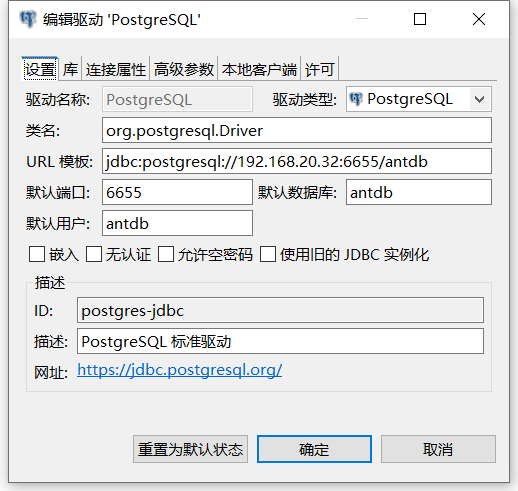
(4)添加JDBC驱动文件

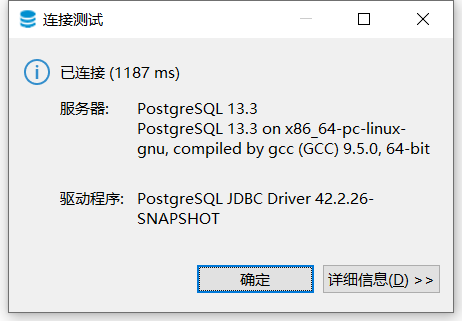
(5)测试连接,正常则显示如下:
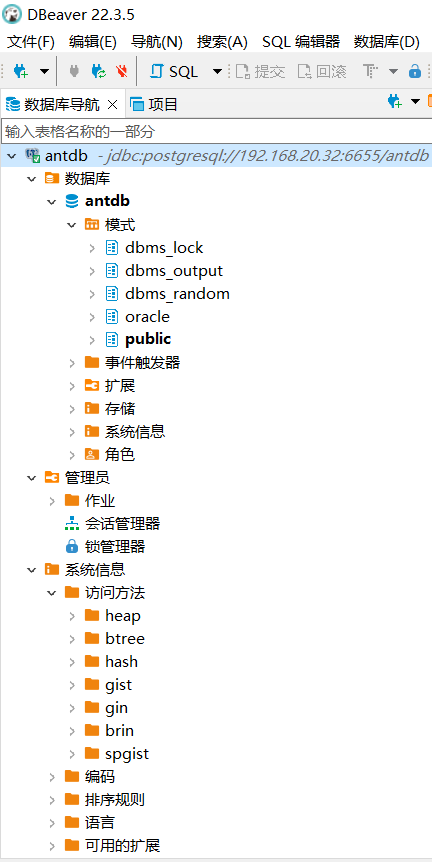
3、通过DBeaver访问数据库:
后记