


本文我们将讲解nginx的配置文件,以及反向代理
零、环境准备
这里提一嘴.如果你使用的是docker方式安装的nginx,你想要改默认端口80的话,单单修改了docker-compose.yml中的端口映射是不行的,虽然能够正常运行容器但是外部仍然无法访问。

这时候,还需要进入容器内部,修改容器内的默认端口80.
解决方案如下
1、进入docker 容器
docker exec -it 容器名 bin/bash
docker exec -it 容器id bin/bash
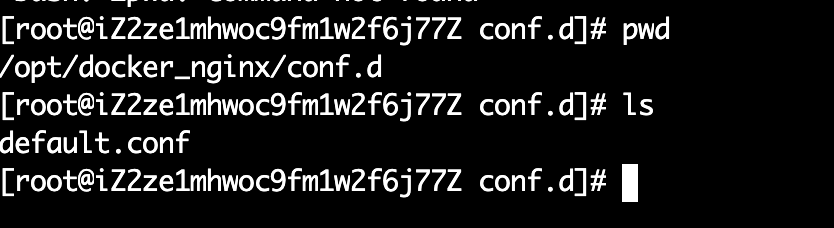
2、查看nginx 启动的配置文件,默认在容器的/etc/nginx/conf.d/default.conf
3、因为docker 容器内部没有vi编辑器,可以先下载vi编辑器,下载完成后可直接在容器内部编辑
apt-get update
apt-get install vim

修改nginx启动的端口号为8484
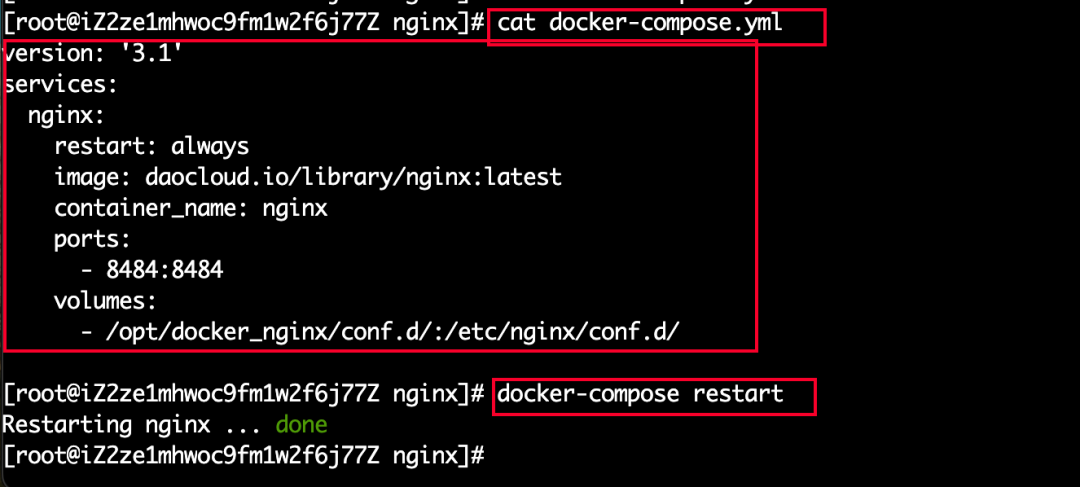
docker-compose restart

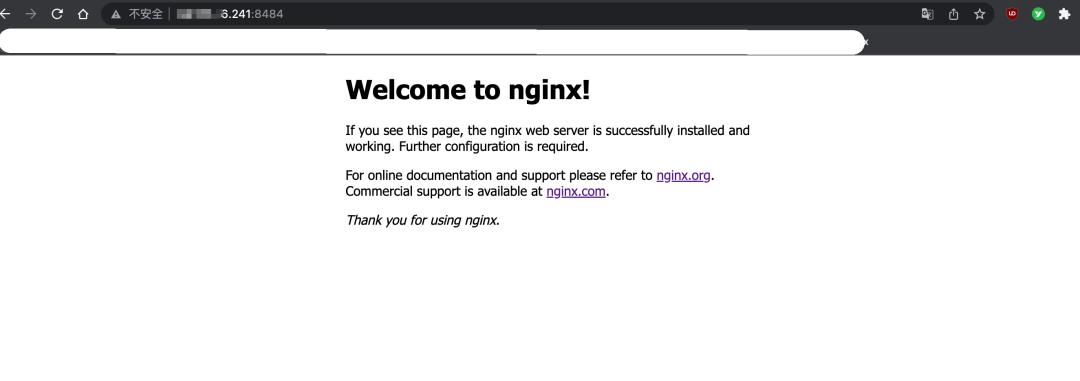
5、访问外网,ip:8484,解决问题.

#查看当前nginx的配置需要进入docker容器中
docker exec -it 容器id bash
#进入容器后
cd /etc/nginx/
cat nginx.conf
user nginx;
worker_processes 1;
error_log var/log/nginx/error.log warn;
pid var/run/nginx.pid;
# 以上同城为全局块
# worker_processes的数值越大,Nginx的并发能力就越强
# error_log代表Nginx错误日志存放的位置
# pid是Nginx运行的一个标识
events {
worker_connections 1024;
}
# events块
# worker_connections的数值越大,Nginx的并发能力就越强
http {
include etc/nginx/mime.types;
default_type application/octet-stream;
log_format main '$remote_addr - $remote_user [$time_local] "$request" '
'$status $body_bytes_sent "$http_referer" '
'"$http_user_agent" "$http_x_forwarded_for"';
access_log var/log/nginx/access.log main;
sendfile on;
#tcp_nopush on;
keepalive_timeout 65;
#gzip on;
include etc/nginx/conf.d/*.conf;
}敲重点!!!
# http块
# include代表引入一个外部文件
# include etc/nginx/mime.types; mime.types中存放着大量媒体类型
# include etc/nginx/conf.d/*.conf; 引入了conf.d下以.conf为结尾的配置文件
server {
    listen       80;
    listen  [::]:80;
    server_name  localhost;

    #charset koi8-r;
    #access_log  /var/log/nginx/host.access.log  main;

    location / {
        root   /usr/share/nginx/html;
        index  index.html index.htm;
    }
 # location块
 # root:将接受到的请求根据/usr/share/nginx/html去查找静态资源
 # index:默认去上述的路径中找到index.html或index.htm

    #error_page  404              /404.html;

    # redirect server error pages to the static page /50x.html
    #
    error_page   500 502 503 504  /50x.html;
    location = /50x.html {
        root   /usr/share/nginx/html;
    }


    # proxy the PHP scripts to Apache listening on 127.0.0.1:80
    #
    #location ~ \.php$ {
    #    proxy_pass   http://127.0.0.1;
    #}

    # pass the PHP scripts to FastCGI server listening on 127.0.0.1:9000
    #
    #location ~ \.php$ {
    #    root           html;
    #    fastcgi_pass   127.0.0.1:9000;
    #    fastcgi_index  index.php;
    #    fastcgi_param  SCRIPT_FILENAME  /scripts$fastcgi_script_name;
    #    include        fastcgi_params;
    #}

    # deny access to .htaccess files, if Apache's document root
    # concurs with nginx's one
    #
    #location ~ /\.ht {
    #    deny  all;
    #}
}

# server块
# listen代表Nginx监听的端口号
# server_name代表Nginx接受请求的IP
修改docker-compose文件
#退出容器
exit
#关闭容器
docker-compose down
version: '3.1'
services:
  nginx:
    restart: always
    image: daocloud.io/library/nginx:latest
    container_name: nginx
    ports:
      - 8484:8484
    volumes:
      - /opt/docker_nginx/conf.d/:/etc/nginx/conf.d
再次访问nginx主页,证明没出现问题.
二、Nginx反向代理
2.1、正向代理和反向代理介绍
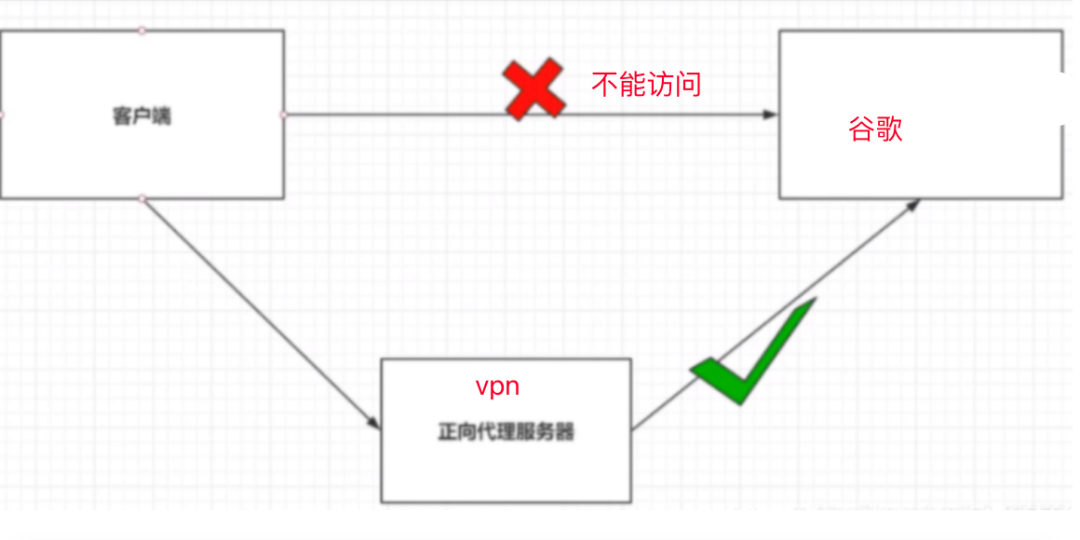
正向代理:
1.正向代理服务是由客户端设立的
2.客户端了解代理服务器和目标服务器都是谁
3.帮助咱们实现突破访问权限,提高访问的速度,对目标服务器隐藏客户端的ip地址
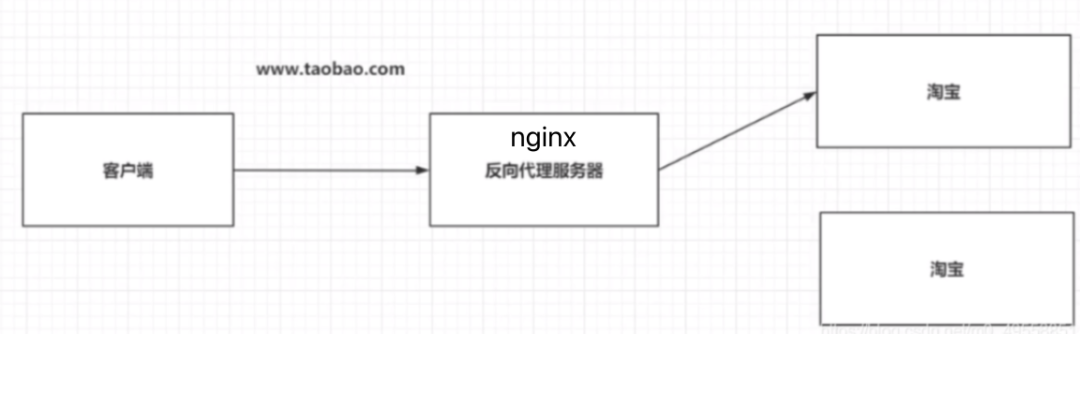
反向代理:
1.反向代理服务器是配置在服务端的
2.客户端不知道访问的到底是哪一台服务器(淘宝有很多服务器)
3.达到负载均衡,并且可以隐藏服务器真正的ip地址
2.2基于Nginx实现反向代理
准备一个目标服务器
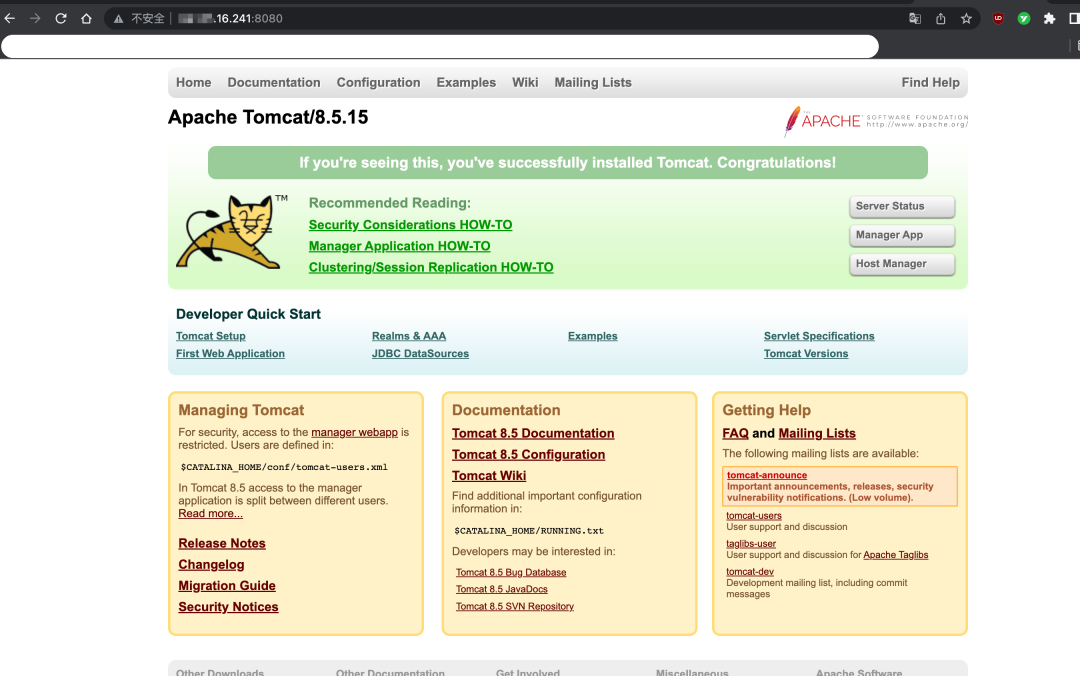
启动tomcat服务器
编写nginx的配置文件(/opt/docker_nginx/conf.d/default.conf),通过Nginx访问到tomcat服务器
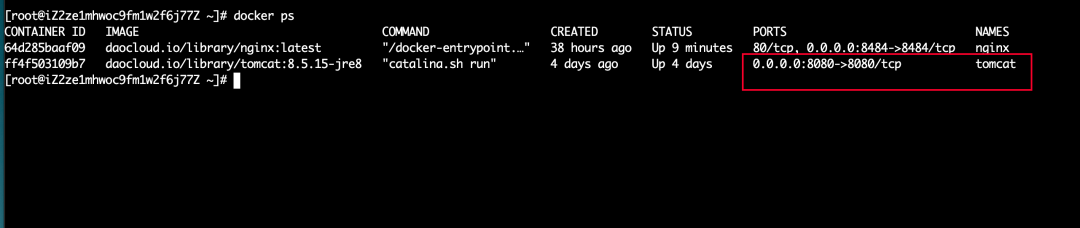
docker run -d -p 8080:8080 --name tomcat daocloud.io/library/tomcat:8.5.15-jre8
server {
    listen       8484;
    listen  [::]:8484;
    server_name  localhost;
    location / {
        #这里是上一步tomcat主页的地址
        proxy_pass http://12.333.4.241:8080/;
    }
}
#重启nginx
docker-compose restart

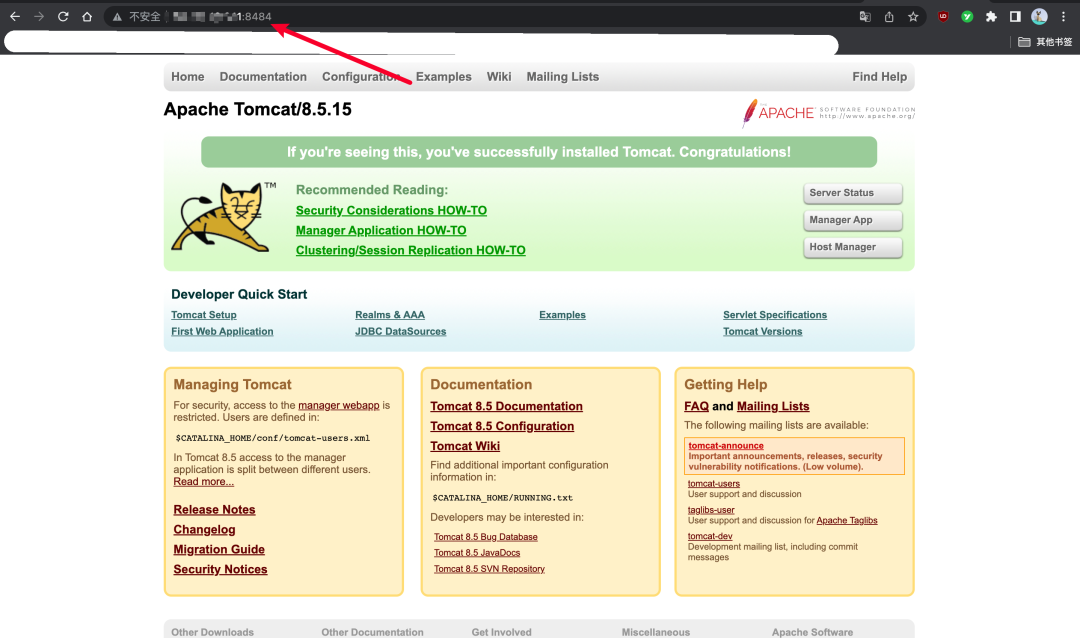
这时候再次访问nginx主页http://ip:8484/,(如果你前面location配置了location /index 就访问http://ip:8484/index,)他就转发到tomcat的8080服务上,因为隐藏了真实服务器的地址(8080),这个就叫做反代理,是不是很简单?

文章转载自程序员恰恰,如果涉嫌侵权,请发送邮件至:contact@modb.pro进行举报,并提供相关证据,一经查实,墨天轮将立刻删除相关内容。
