


关于SpringBoot自动装配:
往往在写Spring项目的时候,需要大量配置xml文件,但是当我们使用了SpringBoot时,往往什么都不需要配置就能启动一个项目,这就是SpringBoot自动装配的功劳。
SpringBoot自动装配
SpringBoot自动装配核心是SpringBoot启动类上的@SpringBootApplication注解,而SpringBootApplication注解由
@SprignBootConfiguration
、@EnabeAutoConfigutation
、ComponentScan
三个注解组成,而关于自动装配的是@EnableAutoConfigutation
注解
@Target(ElementType.TYPE)@Retention(RetentionPolicy.RUNTIME)@Documented@Inherited@AutoConfigurationPackage@Import(AutoConfigurationImportSelector.class)public @interface EnableAutoConfiguration {//xxxx}
很明显,这里import了一个AutoConfigurationImportSelector
类,关于这个类我们只关注selectImports
方法,因为这是个ImportSelector方式导入的类,
@Overridepublic String[] selectImports(AnnotationMetadata annotationMetadata) {if (!isEnabled(annotationMetadata)) {return NO_IMPORTS;}// 获取自动装配的类的信息AutoConfigurationEntry autoConfigurationEntry = getAutoConfigurationEntry(annotationMetadata);return StringUtils.toStringArray(autoConfigurationEntry.getConfigurations());}protected AutoConfigurationEntry getAutoConfigurationEntry(AnnotationMetadata annotationMetadata) {if (!isEnabled(annotationMetadata)) {return EMPTY_ENTRY;}AnnotationAttributes attributes = getAttributes(annotationMetadata);// 获取配置信息List<String> configurations = getCandidateConfigurations(annotationMetadata, attributes);//....return new AutoConfigurationEntry(configurations, exclusions);}protected List<String> getCandidateConfigurations(AnnotationMetadata metadata, AnnotationAttributes attributes) {//通过loadFactoryNames的方法获取配置信息List<String> configurations = SpringFactoriesLoader.loadFactoryNames(getSpringFactoriesLoaderFactoryClass(),getBeanClassLoader());//...return configurations;}//而loadFactoryNames则是加载过程private static Map<String, List<String>> loadSpringFactories(ClassLoader classLoader) {try {//加载FACTORIES_RESOURCE_LOCATION,而这个值是"META-INF/spring.factories"Enumeration<URL> urls = classLoader.getResources(FACTORIES_RESOURCE_LOCATION);}catch (IOException ex) {}return result;}
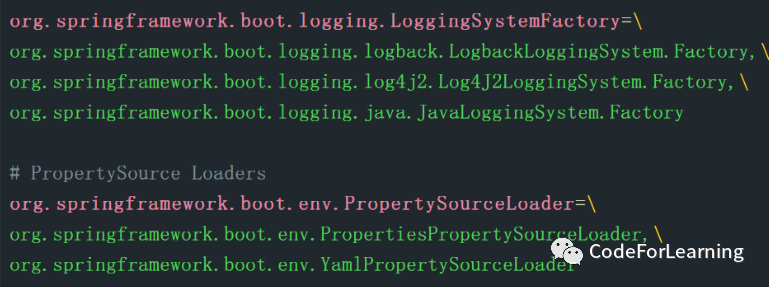
通过部分的源码分析,很明显,这是去找所有引入的包的"META-INF/spring.factories"信息,然后导入这些配置信息,那么这个文件里的信息是:
随便找一个,下面是org.springframewrk.bootsprring-boot2.4.1/spring-boot-2.4.1.jar/META-INF/spring.factories
点进去其中一个看看,每一个都是一个类,准确来说是个配置类,填好了默认属性的配置类(也就是约定大于配置),已经填好了约定信息的配置,最后就是加载这些默认配置信息
由此可见,springboot自动配置信息是由@SpringBootApplication注解,再到@EnabeAutoConfigutation,再到其引入的类,最后导入resource/META-INF/spring.factories 中的配置信息类,最后解析并注入Ioc中,最后就完成了自动装配
Eureka自动装配
使用Eureka时,通常只引入一个starter和启动类上加一个@EnableEurekaServer
注解
先看看注解部分
@Target(ElementType.TYPE)
@Retention(RetentionPolicy.RUNTIME)
@Documented
@Import(EurekaServerMarkerConfiguration.class)
public @interface EnableEurekaServer {

}
注解也只是引入了一个Configuration配置类,但是这个配置类里面是空的,只是一个标记(Marker)
@Configuration(proxyBeanMethods = false)
public class EurekaServerMarkerConfiguration {
        @Bean
        public Marker eurekaServerMarkerBean() {
                return new Marker();
    }
        class Marker {
    }
}
那么Eureka又是怎么起作用的呢?
根据SpringBoot自动装配原理,在Eureka源码包下,同样发现了META-INF\spring.factories
org.springframework.boot.autoconfigure.EnableAutoConfiguration=\
  org.springframework.cloud.netflix.eureka.server.EurekaServerAutoConfiguration
显然是自动装配,将EurekaServerAutoCofigurtion装配起来了,在该类中,做了很多操作
@Configuration(proxyBeanMethods = false)
@Import(EurekaServerInitializerConfiguration.class)
@ConditionalOnBean(EurekaServerMarkerConfiguration.Marker.class)
@EnableConfigurationProperties({ EurekaDashboardProperties.class,
        InstanceRegistryProperties.class })
@PropertySource("classpath:/eureka/server.properties")
public class EurekaServerAutoConfiguration implements WebMvcConfigurer {
}
先来关注一下注解部分:
@Configuration(proxyBeanMethods = false)
:@Bean不使用代理,每次均生成新的对象,这样少一层代理性能好@import@ConditionalOnBean(xxx.class)
:这个相当好,就是判断xxx.class是否存在而来加载当前类,存在则加载,这里Eureka判断的是Marker.class,就是@EnableEurekaServer引入的那个class,只有当加了@EnableEurekaServer注解时,该类才会生效@EnableConfigurationProperties@PropertySource("classpath/xxx")
:加载额外的配置文件
着重分析@import
和@EnableConfigurationProperties
,@import
是将相关的类直接导入IoC容器中,而这里导入的是Eureka的启动类
@EnableConfigurationProperties
引入的两个类,它们都有一个共同的注解:@ConfigurationProperties("xxx")
这个注解是一个配置注解,是一种声明Bean式的注解,即将当前类当做一个配置文件,通常我们在写yml文件时,server.port 等等配置项,都是通过加了该注解的类中声明的,该注解有个前缀选项,通过制定的前缀绑定配置文件中的属性,例如:
server:
  port: 8080
此时该配置类应该这么写
@ConfigurationProperties(prefix = "server")
public class ServerConfig{
    int port;
    //getter setter
}
通过以上分析很容易了解到Eureka的启动原理,简单总结一下:
引入Eureka
启动类上加入
@EnableEurekaServer引入EurekaServerStarter
SpringBoot启动,
判断是否容器中是否存在Marker的Bean
存在则先导入配置文件
再通过import导入Eureka生命周期类,和Spring容器一起启动
加载
@EnableEurekaServer
所import的一个Maker标记类加载Eureka包下的META-INF/spring.factories 下的自动配置类
Eureka启动
自定义Starter
(简单版)
编写自定义注解xxx.annotation
@Target({ElementType.FIELD,ElementType.TYPE})
@Retention(RetentionPolicy.RUNTIME)
@Documented
@Component
@Import(Marker.class)
public @interface ABC {
}
编写Marker.class
@Componet
public class Marker {

}
编写配置类
@Configuration
@EnableConfigurationProperties({ProcessorPropertoes.class})
public class Configuration {
}
@Configuration
@ConfigurationProperties(prefix = "test")
public class ProcessorPropertoes {
private String ipAddress ;
private int port;
private String name;
//getter、setter
}编写META-INF/spring.factories
#-------starter自动装配---------
org.springframework.boot.autoconfigure.EnableAutoConfiguration=xxx.xxx.xxx.Configuration
最后开一个新的SpringBoot项目,然后引入该打包过的starer,配置好配置文件,启动即可(这里看不出任何效果)可以写一个Controller,获取ProcessorPropertoes这个Bean然后获取ipAddress也可以
当然这只是一个较为简单的Starter,只有一个框子,具体要干什么需要自己填充,例如实现lifeCycle接口和spring容器一起启动,实现BeanPostProcessor、BeanFactoryPostProcessor、InstantiationAwareBeanPostProcessor等接口等实现自己的项目的关键逻辑
(复杂版后期再补 鸽子)
