


随着国产数据库技术的发展进步,我发现身边越来越多DBA同学开始华丽转型。近期我很幸运地参与到多款数据库技术支持工作,包括:达梦、人大金仓、TDSQL、TBase、TiDB、HotDB等。我每次入门学习一款新产品,都会尝试在自己的笔记本搭建测试环境。本期,我将为大家分享下“TiDB 7.5 实验测试环境搭建及小插曲处理”。
TiDB 是平凯星辰 PingCAP 公司自主设计、研发的开源分布式关系型数据库,是一款同时支持在线事务处理与在线分析处理 (Hybrid Transactional and Analytical Processing, HTAP) 的融合型分布式数据库产品,具备水平扩容或者缩容、金融级高可用、实时 HTAP、云原生的分布式数据库、兼容 MySQL 协议和 MySQL 生态等重要特性。目标是为用户提供一站式 OLTP (Online Transactional Processing)、OLAP (Online Analytical Processing)、HTAP 解决方案。TiDB 适合高可用、强一致要求较高、数据规模较大等各种应用场景。
TiDB 7.5.0 为长期支持版本 (Long-Term Support Release, LTS)。
3、TiDB学习资料
TiDB课程 https://cn.pingcap.com/courses-catalog/
TiDB社区 https://tidb.net/
TiDB文档 https://docs.pingcap.com/zh/
【TiDB 社区智慧合集】史上最全的 158篇 TiDB 用户实践合集来啦!千万不要错过!
https://tidb.net/blog/87fb0073
4、单机模拟部署生产集群
适用场景:希望用单台 Linux 服务器,体验 TiDB 最小的完整拓扑的集群,并模拟生产环境下的部署步骤。只要你的主机可以联网,便可通过单台 Linux 服务器,体验 TiDB 最小的完整拓扑的集群,并模拟生产环境下的部署步骤,可以快速搭建出一套基础测试集群。
本节介绍如何参照 TiUP 最小拓扑的一个 YAML 文件部署 TiDB 集群。TiDB 是一个分布式系统。最基础的 TiDB 测试集群通常由 2 个 TiDB 实例、3 个 TiKV 实例、3 个 PD 实例和可选的 TiFlash 实例构成。部署步骤如下:
准备环境
开始部署 TiDB 集群前,准备一台部署主机,确保其软件满足需求:
(1)推荐安装 CentOS 7.3 及以上版本
(2)部署需要使用部署主机的 root 用户及密码
(3)部署主机关闭防火墙或者开放 TiDB 集群的节点间所需端口
(4)运行环境可以支持互联网访问,用于下载 TiDB 及相关软件安装包
最小规模的 TiDB 集群拓扑包含以下实例:
| 实例 | 个数 | IP | 配置 |
| TiKV | 3 | 192.168.198.132 192.168.198.132 192.168.198.132 | 避免端口和目录冲突 |
| PD | 1 | 192.168.198.132 | 默认端口和全局目录配置 |
| TiFlash | 1 | 192.168.198.132 | 默认端口和全局目录配置 |
| Monitor | 1 | 192.168.198.132 | 默认端口和全局目录配置 |
下载并安装 TiUP:
curl --proto '=https' --tlsv1.2 -sSf https://tiup-mirrors.pingcap.com/install.sh | shSuccessfully set mirror to https://tiup-mirrors.pingcap.comDetected shell: bashShell profile: root/.bash_profile/root/.bash_profile has been modified to add tiup to PATHopen a new terminal or source root/.bash_profile to use itInstalled path: root/.tiup/bin/tiup===============================================Have a try: tiup playground===============================================
声明全局环境变量:
--source ${your_shell_profile}source root/.bash_profile
安装 TiUP 的 cluster 组件:
tiup cluster
如果机器已经安装 TiUP cluster,需要更新软件版本:
tiup update --self && tiup update cluster
由于模拟多机部署,需要通过 root 用户调大 sshd 服务的连接数限制。
修改 etc/ssh/sshd_config 将 MaxSessions 调至 20。
重启 sshd 服务。
service sshd restart
创建并启动集群
按下面的配置模板,编辑配置文件,命名为 topo.yaml,其中:
user: "tidb":表示通过 tidb 系统用户(部署会自动创建)来做集群的内部管理,默认使用 22 端口通过 ssh 登录目标机器
replication.enable-placement-rules:设置这个 PD 参数来确保 TiFlash 正常运行
host:设置为本部署主机的 IP
配置模板如下:
# # Global variables are applied to all deployments and used as the default value of# # the deployments if a specific deployment value is missing.global:user: "tidb"ssh_port: 22deploy_dir: "/tidb-deploy"data_dir: "/tidb-data"# # Monitored variables are applied to all the machines.monitored:node_exporter_port: 9100blackbox_exporter_port: 9115server_configs:tidb:instance.tidb_slow_log_threshold: 300tikv:readpool.storage.use-unified-pool: falsereadpool.coprocessor.use-unified-pool: truepd:replication.enable-placement-rules: truereplication.location-labels: ["host"]tiflash:logger.level: "info"pd_servers:- host: 192.168.198.132tidb_servers:- host: 192.168.198.132tikv_servers:- host: 192.168.198.132port: 20160status_port: 20180config:server.labels: { host: "logic-host-1" }- host: 192.168.198.132port: 20161status_port: 20181config:server.labels: { host: "logic-host-2" }- host: 192.168.198.132port: 20162status_port: 20182config:server.labels: { host: "logic-host-3" }tiflash_servers:- host: 192.168.198.132monitoring_servers:- host: 192.168.198.132grafana_servers:- host: 192.168.198.132
执行集群部署命令:
--tiup cluster deploy <cluster-name> <version> ./topo.yaml --user root -ptiup cluster deploy sjkywzd v7.5.1 ./topo.yaml --user root -p
参数 <cluster-name> 表示设置集群名称
参数 <version> 表示设置集群版本,例如 v7.5.1。可以通过 tiup list tidb 命令来查看当前支持部署的 TiDB 版本
参数 -p 表示在连接目标机器时使用密码登录
注意
如果主机通过密钥进行 SSH 认证,请使用 -i 参数指定密钥文件路径,-i 与 -p 不可同时使用。
按照引导,输入”y”及 root 密码,来完成部署:
Do you want to continue? [y/N]: y
Input SSH password:
[root@tidb ~]# tiup cluster deploy sjkywzd v7.5.1 ./topo.yaml --user root -pInput SSH password:+ Detect CPU Arch Name- Detecting node 192.168.198.132 Arch info ... Done+ Detect CPU OS Name- Detecting node 192.168.198.132 OS info ... DonePlease confirm your topology:Cluster type: tidbCluster name: sjkywzdCluster version: v7.5.1Role Host Ports OS/Arch Directories---- ---- ----- ------- -----------pd 192.168.198.132 2379/2380 linux/x86_64 tidb-deploy/pd-2379,/tidb-data/pd-2379tikv 192.168.198.132 20160/20180 linux/x86_64 tidb-deploy/tikv-20160,/tidb-data/tikv-20160tikv 192.168.198.132 20161/20181 linux/x86_64 tidb-deploy/tikv-20161,/tidb-data/tikv-20161tikv 192.168.198.132 20162/20182 linux/x86_64 tidb-deploy/tikv-20162,/tidb-data/tikv-20162tidb 192.168.198.132 4000/10080 linux/x86_64 /tidb-deploy/tidb-4000tiflash 192.168.198.132 9000/8123/3930/20170/20292/8234 linux/x86_64 /tidb-deploy/tiflash-9000,/tidb-data/tiflash-9000prometheus 192.168.198.132 9090/12020 linux/x86_64 /tidb-deploy/prometheus-9090,/tidb-data/prometheus-9090grafana 192.168.198.132 3000 linux/x86_64 /tidb-deploy/grafana-3000Attention:1. If the topology is not what you expected, check your yaml file.2. Please confirm there is no port/directory conflicts in same host.Do you want to continue? [y/N]: (default=N) y+ Generate SSH keys ... Done+ Download TiDB components- Download pd:v7.5.1 (linux/amd64) ... Done- Download tikv:v7.5.1 (linux/amd64) ... Done- Download tidb:v7.5.1 (linux/amd64) ... Done- Download tiflash:v7.5.1 (linux/amd64) ... Done- Download prometheus:v7.5.1 (linux/amd64) ... Done- Download grafana:v7.5.1 (linux/amd64) ... Done- Download node_exporter: (linux/amd64) ... Done- Download blackbox_exporter: (linux/amd64) ... Done+ Initialize target host environments- Prepare 192.168.198.132:22 ... Done+ Deploy TiDB instance- Copy pd -> 192.168.198.132 ... Done- Copy tikv -> 192.168.198.132 ... Done- Copy tikv -> 192.168.198.132 ... Done- Copy tikv -> 192.168.198.132 ... Done- Copy tidb -> 192.168.198.132 ... Done- Copy tiflash -> 192.168.198.132 ... Done- Copy prometheus -> 192.168.198.132 ... Done- Copy grafana -> 192.168.198.132 ... Done- Deploy node_exporter -> 192.168.198.132 ... Done- Deploy blackbox_exporter -> 192.168.198.132 ... Done+ Copy certificate to remote host+ Init instance configs- Generate config pd -> 192.168.198.132:2379 ... Done- Generate config tikv -> 192.168.198.132:20160 ... Done- Generate config tikv -> 192.168.198.132:20161 ... Done- Generate config tikv -> 192.168.198.132:20162 ... Done- Generate config tidb -> 192.168.198.132:4000 ... Done- Generate config tiflash -> 192.168.198.132:9000 ... Done- Generate config prometheus -> 192.168.198.132:9090 ... Done- Generate config grafana -> 192.168.198.132:3000 ... Done+ Init monitor configs- Generate config node_exporter -> 192.168.198.132 ... Done- Generate config blackbox_exporter -> 192.168.198.132 ... DoneEnabling component pdEnabling instance 192.168.198.132:2379Enable instance 192.168.198.132:2379 successEnabling component tikvEnabling instance 192.168.198.132:20162Enabling instance 192.168.198.132:20160Enabling instance 192.168.198.132:20161Enable instance 192.168.198.132:20161 successEnable instance 192.168.198.132:20160 successEnable instance 192.168.198.132:20162 successEnabling component tidbEnabling instance 192.168.198.132:4000Enable instance 192.168.198.132:4000 successEnabling component tiflashEnabling instance 192.168.198.132:9000Enable instance 192.168.198.132:9000 successEnabling component prometheusEnabling instance 192.168.198.132:9090Enable instance 192.168.198.132:9090 successEnabling component grafanaEnabling instance 192.168.198.132:3000Enable instance 192.168.198.132:3000 successEnabling component node_exporterEnabling instance 192.168.198.132Enable 192.168.198.132 successEnabling component blackbox_exporterEnabling instance 192.168.198.132Enable 192.168.198.132 successCluster `sjkywzd` deployed successfully, you can start it with command: `tiup cluster start sjkywzd --init`
首次启动集群:
tiup cluster start sjkywzd --init
访问集群:
安装 MySQL 客户端。如果已安装 MySQL 客户端则可跳过这一步骤。
yum -y install mysqlyum install numactl
访问 TiDB 数据库,密码为空:
mysql -h 192.168.198.132 -P 4000 -u root
访问 TiDB 的 Grafana 监控:
通过 http://{grafana-ip}:3000 访问集群 Grafana 监控页面,默认用户名和密码均为 admin。
http://192.168.198.132:3000/login
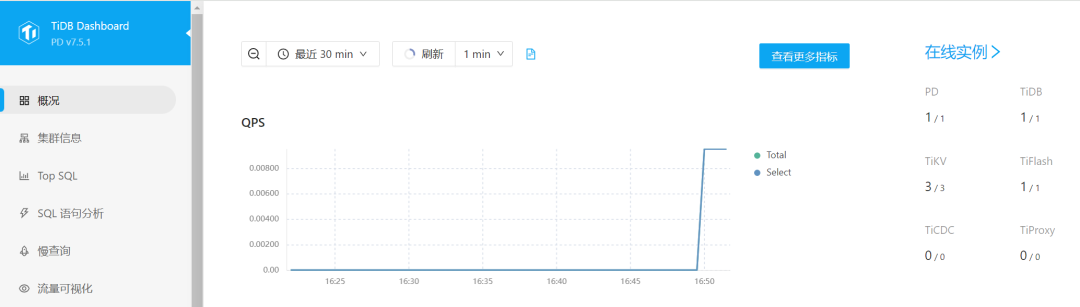
访问 TiDB 的 Dashboard:
通过 http://{pd-ip}:2379/dashboard 访问集群 TiDB Dashboard 监控页面,默认用户名为 root,密码为空。

执行以下命令确认当前已经部署的集群列表:
tiup cluster list[root@tidb log]# tiup cluster listName User Version Path PrivateKey---- ---- ------- ---- ----------sjkywzd tidb v7.5.1 /root/.tiup/storage/cluster/clusters/sjkywzd /root/.tiup/storage/cluster/clusters/sjkywzd/ssh/id_rsa
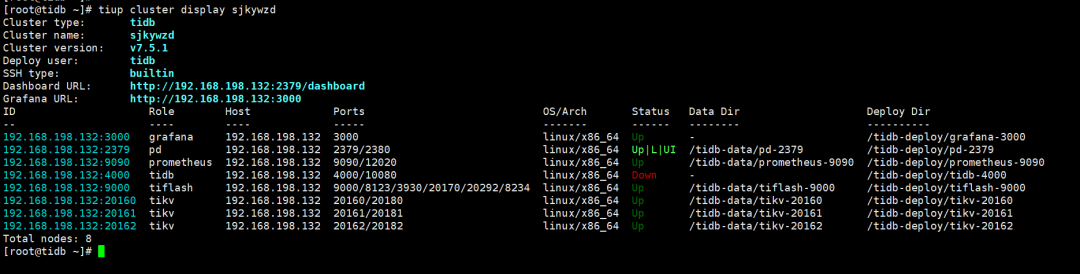
执行以下命令tiup cluster display sjkywzd查看集群的拓扑结构和状态:
--tiup cluster display <cluster-name>[root@tidb log]# tiup cluster display sjkywzdCluster type: tidbCluster name: sjkywzdCluster version: v7.5.1Deploy user: tidbSSH type: builtinDashboard URL: http://192.168.198.132:2379/dashboardGrafana URL: http://192.168.198.132:3000ID Role Host Ports OS/Arch Status Data Dir Deploy Dir-- ---- ---- ----- ------- ------ -------- ----------192.168.198.132:3000 grafana 192.168.198.132 3000 linux/x86_64 Up - /tidb-deploy/grafana-3000192.168.198.132:2379 pd 192.168.198.132 2379/2380 linux/x86_64 Up|L|UI /tidb-data/pd-2379 /tidb-deploy/pd-2379192.168.198.132:9090 prometheus 192.168.198.132 9090/12020 linux/x86_64 Up /tidb-data/prometheus-9090 /tidb-deploy/prometheus-9090192.168.198.132:4000 tidb 192.168.198.132 4000/10080 linux/x86_64 Up - /tidb-deploy/tidb-4000192.168.198.132:9000 tiflash 192.168.198.132 9000/8123/3930/20170/20292/8234 linux/x86_64 Up /tidb-data/tiflash-9000 /tidb-deploy/tiflash-9000192.168.198.132:20160 tikv 192.168.198.132 20160/20180 linux/x86_64 Up /tidb-data/tikv-20160 /tidb-deploy/tikv-20160192.168.198.132:20161 tikv 192.168.198.132 20161/20181 linux/x86_64 Up /tidb-data/tikv-20161 /tidb-deploy/tikv-20161192.168.198.132:20162 tikv 192.168.198.132 20162/20182 linux/x86_64 Up /tidb-data/tikv-20162 /tidb-deploy/tikv-20162Total nodes: 8
5、清除集群数据
此操作会关闭所有服务,并清空其数据目录或/和日志目录,并且无法恢复,需要谨慎操作。
清空集群所有服务的数据,但保留日志:
tiup cluster clean ${cluster-name} --data
清空集群所有服务的日志,但保留数据:
tiup cluster clean ${cluster-name} --log
清空集群所有服务的数据和日志:
tiup cluster clean ${cluster-name} --all
清空 Prometheus 以外的所有服务的日志和数据:
tiup cluster clean ${cluster-name} --all --ignore-role prometheus
清空节点 172.16.13.11:9000 以外的所有服务的日志和数据:
tiup cluster clean ${cluster-name} --all --ignore-node 172.16.13.11:9000
清空部署在 172.16.13.12 以外的所有服务的日志和数据:
tiup cluster clean ${cluster-name} --all --ignore-node 172.16.13.12
6、销毁集群
销毁集群操作会关闭服务,清空数据目录和部署目录,并且无法恢复,需要谨慎操作。
tiup cluster destroy ${cluster-name}
7、小插曲
由于之前使用tiup playgroup安装过tidb集群,没有把tidb socket清理干净,导致后面使用tidb用户启动tidb出现权限不足错误。即:集群安装过程执行tiup cluster start sjkywzd --init出现了以下报错,tidb节点状态为Down。
# tiup cluster start sjkywzd --init中间部分省略Started cluster `sjkywzd` successfullyFailed to set root password of TiDB database to 'd+Qi61vhT@2*8b^A09'Error: dial tcp 192.168.198.132:4000: connect: connection refusedVerbose debug logs has been written to /root/.tiup/logs/tiup-cluster-debug-2024-04-26-16-08-55.log.检查防火墙处于关闭状态查看tidb进程是否存在ps -ef|grep tidb-server检查 4000端口是否被占用ss -lnp|grep 4000检查tidb运行日志cd /tidb-deploy/tidb-4000/logtail -20 tidb.log看到/tmp/tidb-4000.sock文件没权限删除。[2024/04/26 16:34:31.146 +08:00] [FATAL] [main.go:887] ["failed to create the server"][error="failed to cleanup stale Unix socket file /tmp/tidb-4000.sock:dial unix /tmp/tidb-4000.sock: connect: permission denied"] [手动删除:rm -rf /tmp/tidb-4000.sock手动修改root密码mysql -h 192.168.198.132 -P 4000 -u rootuse mysql;select host,user from user;alter user 'root'@'%' identified by 'TidbAdmin51##';mysql -h 192.168.198.132 -P 4000 -u root -p
常用命令:
手动拉起tidb服务:tiup cluster start sjkywzd -R tidb
集群环境全面检查:tiup cluster check --cluster sjkywzd
[root@tidb ~]# tiup cluster check --cluster sjkywzd+ Download necessary tools- Downloading check tools for linux/amd64 ... Done+ Collect basic system information+ Collect basic system information- Getting system info of 192.168.198.132:22 ... Done+ Check time zone- Checking node 192.168.198.132 ... Done+ Check system requirements+ Check system requirements+ Check system requirements- Checking node 192.168.198.132 ... Done- Checking node 192.168.198.132 ... Done- Checking node 192.168.198.132 ... Done- Checking node 192.168.198.132 ... Done- Checking node 192.168.198.132 ... Done- Checking node 192.168.198.132 ... Done- Checking node 192.168.198.132 ... Done- Checking node 192.168.198.132 ... Done- Checking node 192.168.198.132 ... Done+ Cleanup check files- Cleanup check files on 192.168.198.132:22 ... DoneNode Check Result Message---- ----- ------ -------192.168.198.132 permission Pass /tidb-data/prometheus-9090 is writable192.168.198.132 permission Pass /tidb-data/tikv-20161 is writable192.168.198.132 permission Pass /tidb-data/tikv-20160 is writable192.168.198.132 permission Pass /tidb-deploy/tiflash-9000 is writable192.168.198.132 permission Pass /tidb-deploy/tikv-20161 is writable192.168.198.132 permission Pass /tidb-deploy/pd-2379 is writable192.168.198.132 permission Pass /tidb-deploy/prometheus-9090 is writable192.168.198.132 permission Pass /tidb-deploy/tikv-20160 is writable192.168.198.132 permission Pass /tidb-data/tikv-20162 is writable192.168.198.132 permission Pass /tidb-data/pd-2379 is writable192.168.198.132 permission Pass /tidb-deploy/grafana-3000 is writable192.168.198.132 permission Pass /tidb-data/tiflash-9000 is writable192.168.198.132 permission Pass /tidb-deploy/tikv-20162 is writable192.168.198.132 permission Pass /tidb-deploy/tidb-4000 is writable192.168.198.132 network Pass network speed of ens33 is 1000MB192.168.198.132 cpu-governor Warn Unable to determine current CPU frequency governor policy192.168.198.132 memory Pass memory size is 8192MB192.168.198.132 sysctl Fail fs.file-max = 787310, should be greater than 1000000192.168.198.132 sysctl Fail net.core.somaxconn = 128, should be greater than 32768192.168.198.132 sysctl Fail net.ipv4.tcp_syncookies = 1, should be 0192.168.198.132 sysctl Fail vm.swappiness = 30, should be 0192.168.198.132 selinux Pass SELinux is disabled192.168.198.132 command Fail numactl not usable, bash: numactl: command not found192.168.198.132 os-version Pass OS is CentOS Linux 7 (Core) 7.6.1810192.168.198.132 disk Warn mount point / does not have 'noatime' option set192.168.198.132 limits Fail soft limit of 'nofile' for user 'tidb' is not set or too low192.168.198.132 limits Fail hard limit of 'nofile' for user 'tidb' is not set or too low192.168.198.132 limits Fail soft limit of 'stack' for user 'tidb' is not set or too low192.168.198.132 thp Fail THP is enabled, please disable it for best performance192.168.198.132 cpu-cores Pass number of CPU cores / threads: 4192.168.198.132 swap Warn swap is enabled, please disable it for best performance192.168.198.132 disk Fail multiple components tikv:/tidb-data/tikv-20160,tikv:/tidb-data/tikv-20161,tikv:/tidb-data/tikv-20162,tiflash:/tidb-data/tiflash-9000 are using the same partition 192.168.198.132:/ as data dirChecking region status of the cluster sjkywzd...All regions are healthy.
查找并杀掉占用进程:isof -i:2380快速修复不合规项:tiup cluster check --apply --cluster sjkywzd
[root@tidb ~]# tiup cluster check --apply --cluster sjkywzd+ Download necessary tools- Downloading check tools for linux/amd64 ... Done+ Collect basic system information+ Collect basic system information- Getting system info of 192.168.198.132:22 ... Done+ Check time zone- Checking node 192.168.198.132 ... Done+ Check system requirements+ Check system requirements+ Check system requirements- Checking node 192.168.198.132 ... Done- Checking node 192.168.198.132 ... Done- Checking node 192.168.198.132 ... Done- Checking node 192.168.198.132 ... Done- Checking node 192.168.198.132 ... Done- Checking node 192.168.198.132 ... Done- Checking node 192.168.198.132 ... Done- Checking node 192.168.198.132 ... Done- Checking node 192.168.198.132 ... Done+ Cleanup check files- Cleanup check files on 192.168.198.132:22 ... DoneNode Check Result Message---- ----- ------ -------192.168.198.132 limits Fail will try to set 'tidb soft nofile 1000000'192.168.198.132 limits Fail will try to set 'tidb hard nofile 1000000'192.168.198.132 limits Fail will try to set 'tidb soft stack 10240'192.168.198.132 sysctl Fail will try to set 'fs.file-max = 1000000'192.168.198.132 sysctl Fail will try to set 'net.core.somaxconn = 32768'192.168.198.132 sysctl Fail will try to set 'net.ipv4.tcp_syncookies = 0'192.168.198.132 sysctl Fail will try to set 'vm.swappiness = 0'192.168.198.132 selinux Pass SELinux is disabled192.168.198.132 command Fail numactl not usable, bash: numactl: command not found, auto fixing not supported192.168.198.132 disk Warn mount point / does not have 'noatime' option set, auto fixing not supported192.168.198.132 disk Fail multiple components tikv:/tidb-data/tikv-20160,tikv:/tidb-data/tikv-20161,tikv:/tidb-data/tikv-20162,tiflash:/tidb-data/tiflash-9000 are using the same partition 192.168.198.132:/ as data dir, auto fixing not supported192.168.198.132 permission Pass /tidb-deploy/prometheus-9090 is writable192.168.198.132 permission Pass /tidb-data/tiflash-9000 is writable192.168.198.132 permission Pass /tidb-deploy/tikv-20160 is writable192.168.198.132 permission Pass /tidb-deploy/pd-2379 is writable192.168.198.132 permission Pass /tidb-deploy/grafana-3000 is writable192.168.198.132 permission Pass /tidb-data/tikv-20161 is writable192.168.198.132 permission Pass /tidb-deploy/tiflash-9000 is writable192.168.198.132 permission Pass /tidb-data/tikv-20162 is writable192.168.198.132 permission Pass /tidb-data/pd-2379 is writable192.168.198.132 permission Pass /tidb-deploy/tikv-20161 is writable192.168.198.132 permission Pass /tidb-data/tikv-20160 is writable192.168.198.132 permission Pass /tidb-data/prometheus-9090 is writable192.168.198.132 permission Pass /tidb-deploy/tikv-20162 is writable192.168.198.132 permission Pass /tidb-deploy/tidb-4000 is writable192.168.198.132 cpu-cores Pass number of CPU cores / threads: 4192.168.198.132 memory Pass memory size is 8192MB192.168.198.132 swap Warn will try to disable swap, please also check /etc/fstab manually192.168.198.132 network Pass network speed of ens33 is 1000MB192.168.198.132 thp Fail will try to disable THP, please check again after reboot192.168.198.132 os-version Pass OS is CentOS Linux 7 (Core) 7.6.1810192.168.198.132 cpu-governor Warn Unable to determine current CPU frequency governor policy, auto fixing not supported+ Try to apply changes to fix failed checks+ Try to apply changes to fix failed checks- Applying changes on 192.168.198.132 ... DoneChecking region status of the cluster sjkywzd...All regions are healthy.
8、参考链接
https://docs.pingcap.com/zh/tidb/v8.0/release-8.0.0https://tidb.net/blog/94c2b44chttps://docs.pingcap.com/zh/tidb/dev/quick-start-with-tidb
全文完,希望可以帮到正在阅读的你,如果觉得有帮助,可以分享给你身边的朋友,同事,你关心谁就分享给谁,一起学习共同进步~~~
