


点击上方:Linux技术宅,关注我!!!

PXE(Preboot Execution Environment)是一种网络引导协议,用于通过以太网从远程服务器加载操作系统镜像并启动计算机。它最初由Intel开发,现在已经成为许多现代计算机的基础组件之一,尤其是在无盘工作站和网络启动方面。
PXE工作原理:
计算机开机时,BIOS(基本输入输出系统)会检查计算机的启动顺序。
BIOS会从启动顺序中的第一个设备(通常是硬盘)加载引导程序。
引导程序负责加载位于启动设备上的操作系统内核和初始化硬件设备。
如果引导程序发现计算机通过网络连接到另一台计算机或服务器,它将尝试使用PXE协议从远程计算机加载操作系统镜像。
PXE协议使用TFTP(Trivial File Transfer Protocol)协议从远程服务器下载文件。这些文件包括用于启动操作系统的引导加载程序和操作系统内核。
引导加载程序将操作系统内核加载到内存中,然后控制系统将控制权交给操作系统内核,开始执行操作系统启动过程。
PXE的优点:
远程启动:通过PXE协议,计算机可以从远程服务器加载操作系统,从而实现远程启动。这对于无盘工作站和网络启动非常有用,可以减少硬件维护和管理成本。
灵活性:PXE使用TFTP协议下载文件,因此可以轻松地更改操作系统镜像和其他引导文件的位置和名称。这使得管理员可以灵活地管理和部署不同的操作系统版本和配置。
安全:PXE协议使用数字签名来验证从远程服务器加载的文件的完整性。这可以防止恶意软件或损坏的文件被加载到计算机上。
IP:192.168.10.10
系统:Centos7.5
硬件:vmware workstation虚拟机
关闭防火墙
[root@wyh21 ~]# systemctl disable firewalld --now[root@wyh21 ~]# iptables -F
关闭SELinux
将/etc/selinux/config中的SELINUX的值修改为“disabled”。重启生效。
[root@wyh21 ~]# cat etc/selinux/config# This file controls the state of SELinux on the system.# SELINUX= can take one of these three values:# enforcing - SELinux security policy is enforced.# permissive - SELinux prints warnings instead of enforcing.# disabled - No SELinux policy is loaded.SELINUX=disabled# SELINUXTYPE= can take one of three two values:# targeted - Targeted processes are protected,# minimum - Modification of targeted policy. Only selected processes are protected.# mls - Multi Level Security protection.SELINUXTYPE=targeted# 验证selinux是否关闭[root@wyh21 ~]# getenforceDisabled# 配置立即生效[root@wyh21 ~]# setenforce 0
[root@wyh21 ~]# mkdir -p var/www/html/centos7.5[root@wyh21 ~]# ls var/www/html/centos7.5[root@wyh21 ~]# mount dev/sr0 var/www/html/centos7.5/mount: dev/sr0 写保护,将以只读方式挂载[root@wyh21 ~]# df -h文件系统 容量 已用 可用 已用% 挂载点/dev/sr0 4.2G 4.2G 0 100% var/www/html/centos7.5# 配置yum源[root@wyh21 ~]# cat etc/yum.repos.d/centos7.repo[centos7]name=centos 7baseurl=file:///var/www/html/centos7.5enabled=1gpgcheck=0# 检查yum源是否成功[root@wyh21 ~]# yum repolist已加载插件:fastestmirror, langpacksRepodata is over 2 weeks old. Install yum-cron? Or run: yum makecache fastDetermining fastest mirrors源标识 源名称 状态!centos7 centos 7 3,971repolist: 3,971
[root@wyh21 ~]# yum install -y dhcp httpd xinetd tftp-server syslinux# 结果如下:已安装:dhcp.x86_64 12:4.2.5-68.el7.centoshttpd.x86_64 0:2.4.6-80.el7.centossyslinux.x86_64 0:4.05-13.el7tftp-server.x86_64 0:5.2-22.el7xinetd.x86_64 2:2.3.15-13.el7作为依赖被安装:apr.x86_64 0:1.4.8-3.el7_4.1apr-util.x86_64 0:1.5.2-6.el7httpd-tools.x86_64 0:2.4.6-80.el7.centosmailcap.noarch 0:2.1.41-2.el7完毕!
[root@wyh21 ~]# vi etc/dhcp/dhcpd.conf#该文件中没有参数,可使用:r usr/share/doc/dhcp*/dhcpd.conf.example#导入相关参数进行修改[root@wyh21 ~]# cat etc/dhcp/dhcpd.conf## dhcpd.confsubnet 192.168.10.0 netmask 255.255.255.224 {range 192.168.10.21 192.168.10.30;option domain-name-servers 192.168.10.10;option routers 192.168.10.1;option broadcast-address 192.168.10.255;default-lease-time 21600;max-lease-time 43200;next-server 192.168.10.10;filename "pxelinux.0";}[root@wyh21 ~]# systemctl enable dhcpd --nowCreated symlink from /etc/systemd/system/multi-user.target.wants/dhcpd.service to /usr/lib/systemd/system/dhcpd.service.
#编辑配置文件/etc/xinetd.d/tftp,disable参数yes改为no[root@wyh21 ~]# vi /etc/xinetd.d/tftpdisable = no[root@wyh21 ~]# systemctl enable tftp --nowCreated symlink from /etc/systemd/system/sockets.target.wants/tftp.socket to /usr/lib/systemd/system/tftp.socket.
[root@wyh21 ~]# systemctl enable httpd --nowCreated symlink from /etc/systemd/system/multi-user.target.wants/httpd.service to /usr/lib/systemd/system/httpd.service.[root@wyh21 ~]# cat /etc/yum.repos.d/centos7.repo[centos7]name=centos 7baseurl=http://192.168.10.10/centos7.5enabled=1gpgcheck=0#检查yum是否正常。[root@wyh21 ~]# yum repolist
拷贝所需文件到tftp服务默认的共享目录/var/lib/tftpboot/
[root@wyh21 ~]# cd /var/lib/tftpboot/[root@wyh21 tftpboot]# cp /usr/share/syslinux/pxelinux.0 .[root@wyh21 tftpboot]# cp /var/www/html/centos7.5/images/pxeboot/{initrd.img,vmlinuz} .[root@wyh21 tftpboot]# cp /var/www/html/centos7.5/isolinux/{splash.png,vesamenu.c32,boot.msg} .
创建目录pxelinux.cfg,并拷贝isolinux.cfg拷贝到pxelinux.cfg目录下命名为default。
[root@wyh21 tftpboot]# mkdir pxelinux.cfg[root@wyh21 tftpboot]# cp /var/www/html/centos7.5/isolinux/isolinux.cfg pxelinux.cfg/default[root@wyh21 tftpboot]# ll /var/lib/tftpboot/pxelinux.cfg/-rw-r--r-- 1 root root 3032 8月 21 23:28 default[root@wyh21 tftpboot]# ll总用量 57924-rw-r--r-- 1 root root 84 8月 21 23:25 boot.msg-rw-r--r-- 1 root root 52893200 8月 21 23:22 initrd.img-rw-r--r-- 1 root root 26764 8月 21 23:21 pxelinux.0drwxr-xr-x 2 root root 21 8月 21 23:28 pxelinux.cfg-rw-r--r-- 1 root root 186 8月 21 23:25 splash.png-rw-r--r-- 1 root root 152976 8月 21 23:25 vesamenu.c32-rwxr-xr-x 1 root root 6224704 8月 21 23:22 vmlinuz[root@wyh21 tftpboot]#
修改/var/lib/tftpboot/pxelinux.cfg/default文件。
1 default linux2 timeout 600361 label linux62 menu label ^Install CentOS 763 kernel vmlinuz64 append initrd=initrd.img inst.repo=http://192.168.10.10/centos7.5 inst.ks=http://192.168.10.10/ks.cfg quiet
延申:append参数
inst.stage2=hd:LABEL=CentOS\x207\x20x86_64inst.stage2=ftp://192.168.10.10ks=ftp://192.168.10.10/pub/ks.cfg
生成自动应答文件ks.cfg,并将其拷贝到/var/www/html/目录下
第一种:copy文件修改生成
[root@wyh21 tftpboot]# cp ~/anaconda-ks.cfg /var/www/html/ks.cfg[root@wyh21 tftpboot]# chmod +r /var/www/html/ks.cfg[root@wyh21 tftpboot]# vi /var/www/html/ks.cfg4 # Use CDROM installation media5 url --url=http://192.168.10.10/centos7.516 # Network information17 network --bootproto=dhcp --device=ens33 --onboot=off --ipv6=auto18 network --hostname=wangyanhui24 # System timezone25 timezone Asia/Shanghai --isUtc30 # Partition clearing information31 clearpart --all --initlabel
第二种:配置生成
安装system-config-kickstart软件包。
通过命令system-config-kickstart开始配置自动应答文件,这个过程是全图形操作。
[root@wyh21 ~]# yum install -y system-config-kickstart已安装:system-config-kickstart.noarch 0:2.9.7-1.el7完毕![root@wyh21 ~]# system-config-kickstart

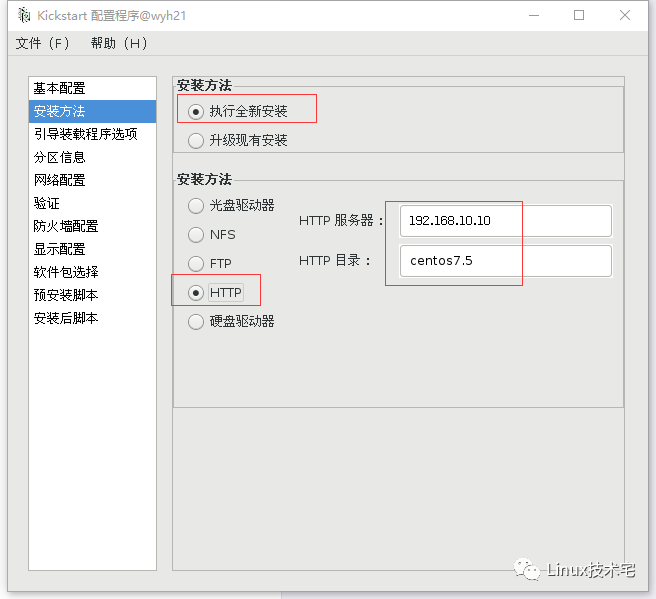
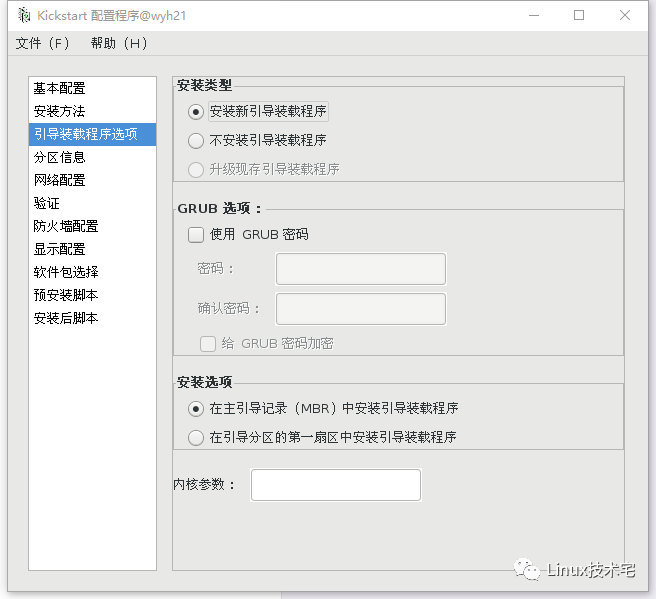
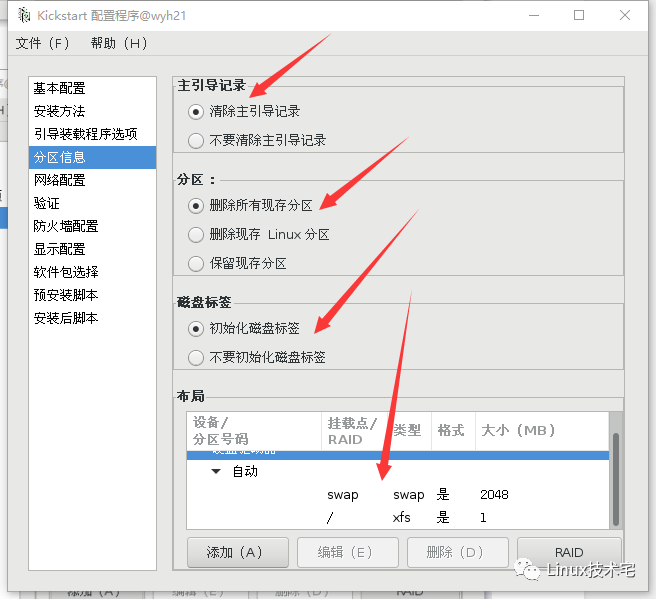
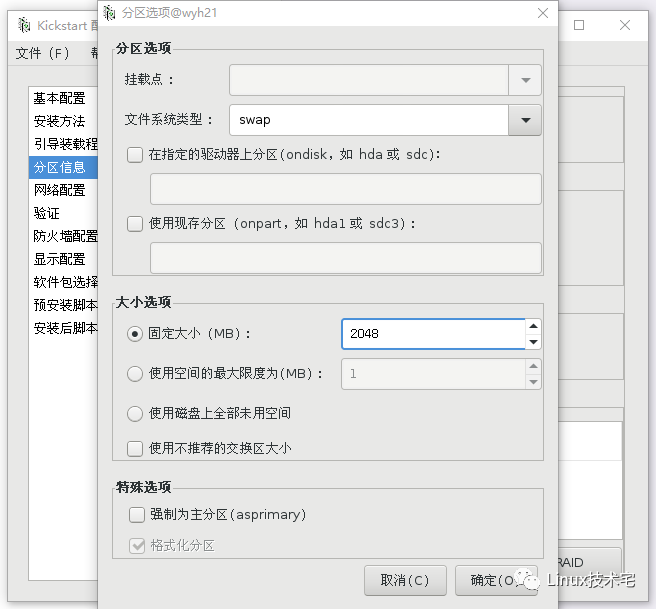
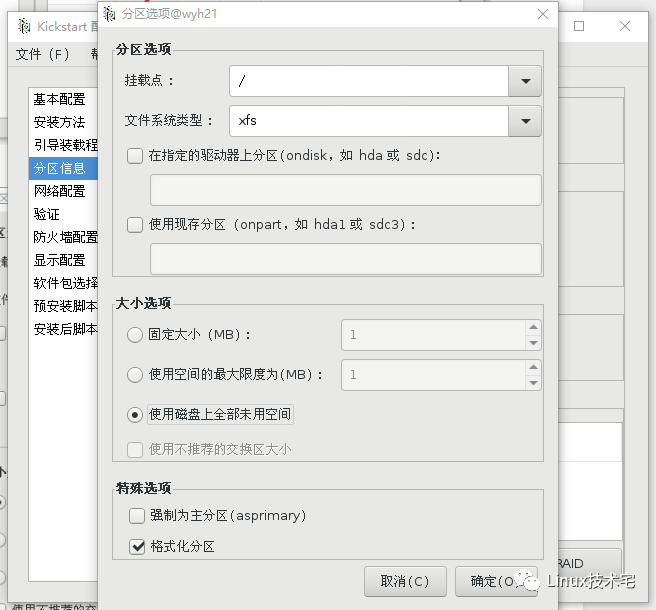
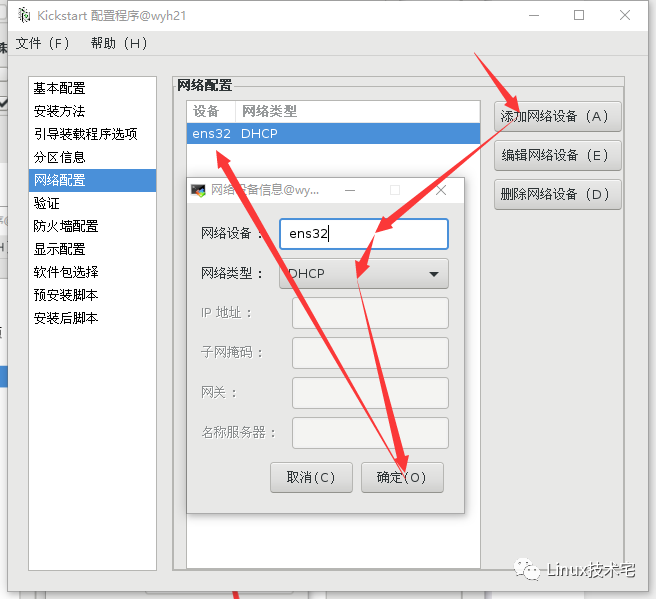
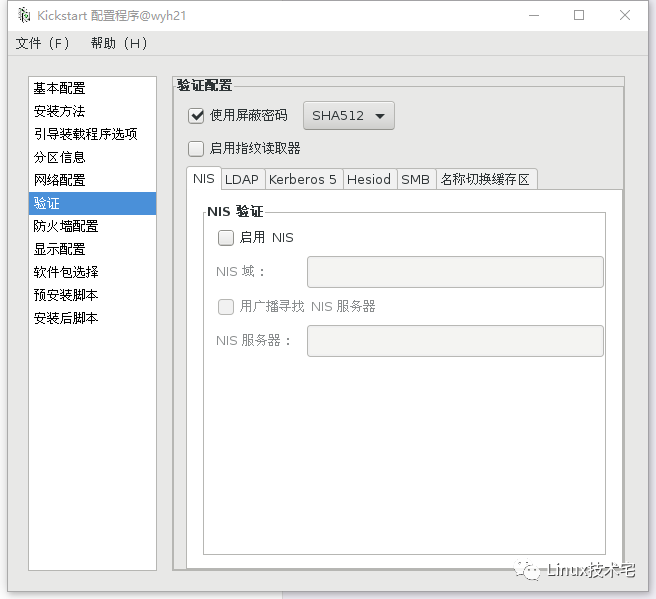
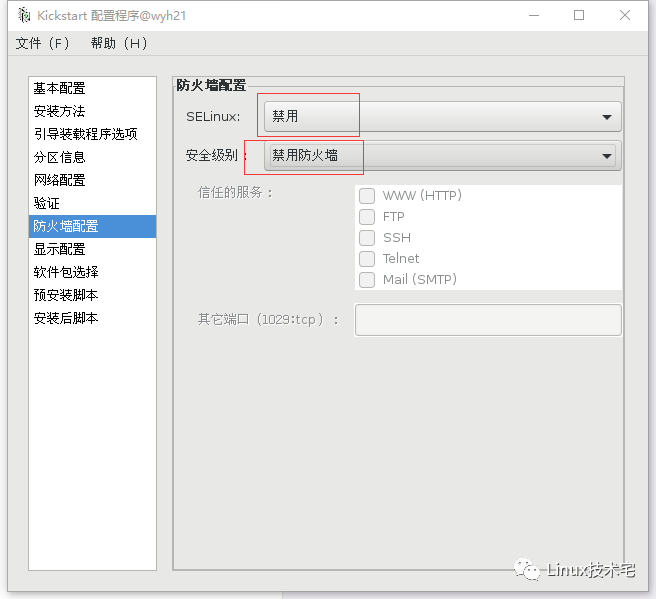
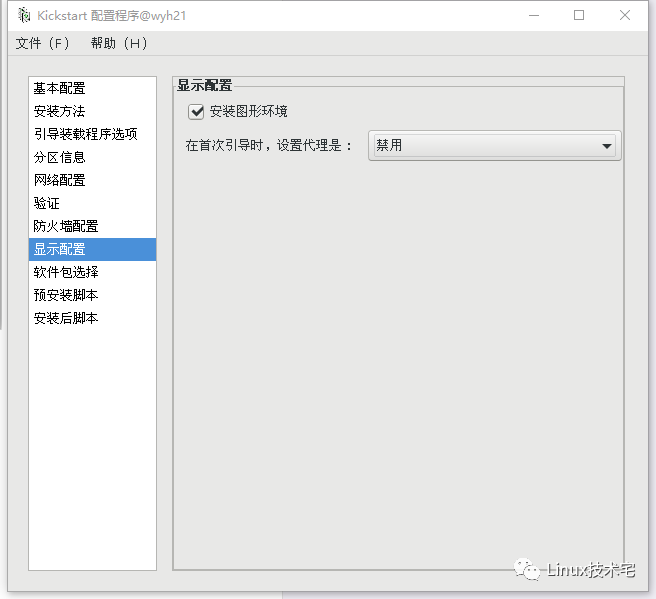
根据需求配置完成后,点击“文件”-“保存”到相应目录,然后关闭配置框即可。
https://blog.51cto.com/pjp5945/1266539

分享、在看与点赞
只要你点,我们就是胖友
