


1 环境说明
1.1 术语解释
- 中控机器
存储 OceanBase 数据库安装包和集群配置信息的机器。 - OBD
OceanBase Deployer,OceanBase 开源软件的安装部署工具,简称为 OBD。 - ODP
OceanBase Database Proxy,OceanBase 高性能反向代理服务器,简称为 ODP。 - OBserver
安装 OceanBase 数据库的机器。
1.2 机器列表
| 角色 | IP | 端口 |
|---|---|---|
| 中控机器 | 192.168.20.141 | |
| OBD | 192.168.20.141 | |
| ODP | 192.168.20.141 | [2883,2884] |
| OBserver | 192.168.20.142 | [2881,2882] |
| OBserver | 192.168.20.143 | [2881,2882] |
| OBserver | 192.168.20.144 | [2881,2882] |
2 实施步骤
2.1 资源准备
以下配置在所有节点执行,除非特殊标注。
2.1.1 配置hosts
cat >> /etc/hosts << EOF
192.168.20.141  obcontrol
192.168.20.142  ob01
192.168.20.143  ob02
192.168.20.144  ob03
EOF

[root@obcontrol ~]# cat /etc/hosts
127.0.0.1   localhost localhost.localdomain localhost4 localhost4.localdomain4
::1         localhost localhost.localdomain localhost6 localhost6.localdomain6
192.168.20.142  obcontrol
192.168.20.142  ob01
192.168.20.143  ob02
192.168.20.144  ob03
2.1.2 关闭透明大页
[root@obcontrol ~]# echo never > /sys/kernel/mm/transparent_hugepage/enabled
[root@obcontrol ~]# cat /sys/kernel/mm/transparent_hugepage/enabled
always madvise [never]
2.1.3 关闭SELinux
sed -i 's/SELINUX\=enforcing/SELINUX\=disabled/g' /etc/selinux/config
2.1.4 关闭防火墙
systemctl disable firewalld
systemctl stop firewalld
systemctl status firewalld

systemctl disable NetworkManager
systemctl stop NetworkManager
systemctl status NetworkManager
2.1.5 配置sysctl.conf
出于测试目的,仅设置必要参数。
cat >> /etc/sysctl.conf << EOF
# for oceanbase
## 修改内核异步 I/O 限制
fs.aio-max-nr=1048576
EOF
sysctl -p
2.1.6 配置 limits.conf
cat >> /etc/security/limits.conf << EOF
root soft nofile 655350
root hard nofile 655350
* soft nofile 655350
* hard nofile 655350
* soft stack 20480
* hard stack 20480
* soft nproc 655360
* hard nproc 655360
* soft core unlimited
* hard core unlimited
EOF
2.1.7 配置NTP
# 以obcontorl机器为ntp服务器,操作在obcontrol机器执行
[root@obcontrol ~]# yum install -y ntp
[root@obcontrol ~]# cat /etc/ntp.conf
....
restrict 127.0.0.1
restrict ::1
server 127.127.1.0
fudge 127.127.1.0 stratum 10

[root@obcontrol ~]# systemctl restart ntpd.service
[root@obcontrol ~]# systemctl status ntpd.service
● ntpd.service - Network Time Service
   Loaded: loaded (/usr/lib/systemd/system/ntpd.service; disabled; vendor preset: disabled)
   Active: active (running) since Wed 2021-09-15 16:49:06 CST; 18s ago
  Process: 27786 ExecStart=/usr/sbin/ntpd -u ntp:ntp $OPTIONS (code=exited, status=0/SUCCESS)
 Main PID: 27787 (ntpd)
    Tasks: 1
   CGroup: /system.slice/ntpd.service
           └─27787 /usr/sbin/ntpd -u ntp:ntp -g

Sep 15 16:49:06 obcontrol ntpd[27787]: Listen normally on 3 ens192 192.168.20.141 UDP 123
Sep 15 16:49:06 obcontrol ntpd[27787]: Listen normally on 4 virbr0 192.168.122.1 UDP 123
Sep 15 16:49:06 obcontrol ntpd[27787]: Listen normally on 5 lo ::1 UDP 123
Sep 15 16:49:06 obcontrol ntpd[27787]: Listen normally on 6 ens192 fe80::9750:8818:b39:c72b UDP 123
Sep 15 16:49:06 obcontrol ntpd[27787]: Listening on routing socket on fd #23 for interface updates
Sep 15 16:49:06 obcontrol ntpd[27787]: 0.0.0.0 c016 06 restart
Sep 15 16:49:06 obcontrol ntpd[27787]: 0.0.0.0 c012 02 freq_set kernel 0.000 PPM
Sep 15 16:49:06 obcontrol ntpd[27787]: 0.0.0.0 c011 01 freq_not_set
Sep 15 16:49:06 obcontrol systemd[1]: Started Network Time Service.
Sep 15 16:49:07 obcontrol ntpd[27787]: 0.0.0.0 c514 04 freq_mode
[root@obcontrol ~]# ntpq -p
     remote           refid      st t when poll reach   delay   offset  jitter
==============================================================================
*LOCAL(0)        .LOCL.          10 l   11   64  377    0.000    0.000   0.000
[root@obcontrol ~]# ntpstat
synchronised to local net (127.127.1.0) at stratum 11
   time correct to within 11 ms
   polling server every 64 s
# 以下操作在ob01,ob02,ob03机器执行
[root@ob01 ~]# yum install -y ntp
[root@ob01 ~]# cat /etc/ntp.conf
......
restrict 127.0.0.1
restrict ::1
server 192.168.20.141 prefer
[root@ob01 ~]# systemctl restart ntpd.service
[root@ob01 ~]# ntpq -p
     remote           refid      st t when poll reach   delay   offset  jitter
==============================================================================
*obcontrol       LOCAL(0)        11 u   64   64   17    0.339   22.058  15.610
[root@ob01 ~]# clockdiff obcontrol
.
host=obcontrol rtt=750(187)ms/0ms delta=29ms/29ms Wed Sep 15 17:25:59 2021
2.1.8 配置ssh
# 以下操作在obcontrol机器执行
[root@obcontrol ~]# ssh-keygen -t rsa
[root@obcontrol obtools]# vi scp.sh
#/usr/bin/bash
hosts=(
    "ob01"
    "ob02"
    "ob03"
    )
    for host in "${hosts[@]}"
    do

        echo "begin to scp " $@ " on " $host
        scp -r $1 $host:$2
    done
[root@obcontrol obtools]# chmod u+x scp.sh
[root@obcontrol obtools]# ./scp.sh ~/.ssh/id_rsa.pub ~/.ssh/
[root@obcontrol obtools]# cp scp.sh ssh.sh
[root@obcontrol obtools]# vi ssh.sh
#/usr/bin/bash
hosts=(
    "ob01"
    "ob02"
    "ob03"
    )
    for host in "${hosts[@]}"
    do

       echo "begin to run " $@ " on " $host
        ssh $host $@
    done

[root@obcontrol obtools]# ./ssh.sh "cat /root/.ssh/id_rsa.pub >> /root/.ssh/authorized_keys"
2.2 离线安装和在线安装OBD
离线安装:部署机器不能连接外网环境,将obdeploy,oceanbase的rpm上传至本地进行安装
在线安装:通过yum源,安装obdeploy,在通过obd进行oceanbase部署
2.2.1 离线安装
2.2.1.1 检查obd rpm包
下载地址https://open.oceanbase.com/softwareCenter/community
# 以下操作在obcontrol机器执行
[root@obcontrol obtools]# pwd
/root/obtools
[root@obcontrol obtools]# ll
total 107756
-rw-r--r--. 1 root root   658620 Sep 15 16:16 libobclient-2.0.0-2.el7.x86_64.rpm
-rw-r--r--. 1 root root 41916564 Sep 15 16:16 obclient-2.0.0-2.el7.x86_64.rpm
-rw-r--r--. 1 root root 12908572 Sep 13 17:44 ob-deploy-1.1.0-1.el7.x86_64.rpm
-rw-r--r--. 1 root root  8074612 Sep 14 09:36 obproxy-3.1.0-1.el7.x86_64.rpm
-rw-r--r--. 1 root root 46606940 Sep 14 09:36 oceanbase-ce-3.1.0-3.el7.x86_64.rpm
-rw-r--r--. 1 root root   158972 Sep 14 09:36 oceanbase-ce-libs-3.1.0-3.el7.x86_64.rpm
2.2.1.2 安装obd
# 以下操作在obcontrol机器执行
[root@obcontrol obtools]# rpm -ivh ob-deploy-1.1.0-1.el7.x86_64.rpm
Preparing...                          ################################# [100%]
Updating / installing...
   1:ob-deploy-1.1.0-1.el7            ################################# [100%]
Installation of obd finished successfully
Please source /etc/profile.d/obd.sh to enable it
[root@obcontrol obtools]# source /etc/profile.d/obd.sh
2.2.1.3 将OceanBase rpm离线软件包加入本地镜像
# 以下操作在obcontrol机器执行
[root@obcontrol obtools]# obd mirror clone obproxy-3.1.0-1.el7.x86_64.rpm oceanbase-ce-3.1.0-3.el7.x86_64.rpm oceanbase-ce-libs-3.1.0-3.el7.x86_64.rpm
name: obproxy
version: 3.1.0
release:1.el7
arch: x86_64
md5: 0b17cf0459a3b53c5a2febb6572894d183154c64
add obproxy-3.1.0-1.el7.x86_64.rpm to local mirror
name: oceanbase-ce
version: 3.1.0
release:3.el7
arch: x86_64
md5: b73bcd531bdf3f087391991b290ff2cbcdaa0dc9
add oceanbase-ce-3.1.0-3.el7.x86_64.rpm to local mirror
name: oceanbase-ce-libs
version: 3.1.0
release:3.el7
arch: x86_64
md5: 528144ec7ff0194a8b326491a396b8f5c87b1eaa
add oceanbase-ce-libs-3.1.0-3.el7.x86_64.rpm to local mirror

[root@obcontrol obtools]# obd mirror list local
+-------------------------------------------------------------------------------------------+
|                                     local Package List                                    |
+-------------------+---------+---------+--------+------------------------------------------+
| name              | version | release | arch   | md5                                      |
+-------------------+---------+---------+--------+------------------------------------------+
| obproxy           | 3.1.0   | 1.el7   | x86_64 | 0b17cf0459a3b53c5a2febb6572894d183154c64 |
| oceanbase-ce      | 3.1.0   | 3.el7   | x86_64 | b73bcd531bdf3f087391991b290ff2cbcdaa0dc9 |
| oceanbase-ce-libs | 3.1.0   | 3.el7   | x86_64 | 528144ec7ff0194a8b326491a396b8f5c87b1eaa |
+-------------------+---------+---------+--------+------------------------------------------+
2.2.1.4 删除远程仓库
# 以下操作在obcontrol机器执行
[root@obcontrol obtools]# mv /root/.obd/mirror/remote  /root/.obd/mirror/remotebak
2.2.2 在线安装
#在线安装方法
[root@obcontrol ~]# yum install -y yum-utils
[root@obcontrol ~]# yum-config-manager --add-repo https://mirrors.aliyun.com/oceanbase/OceanBase.repo
[root@obcontrol ~]# yum install -y ob-deploy
2.3 OBD部署集群
2.3.1 集群配置文件
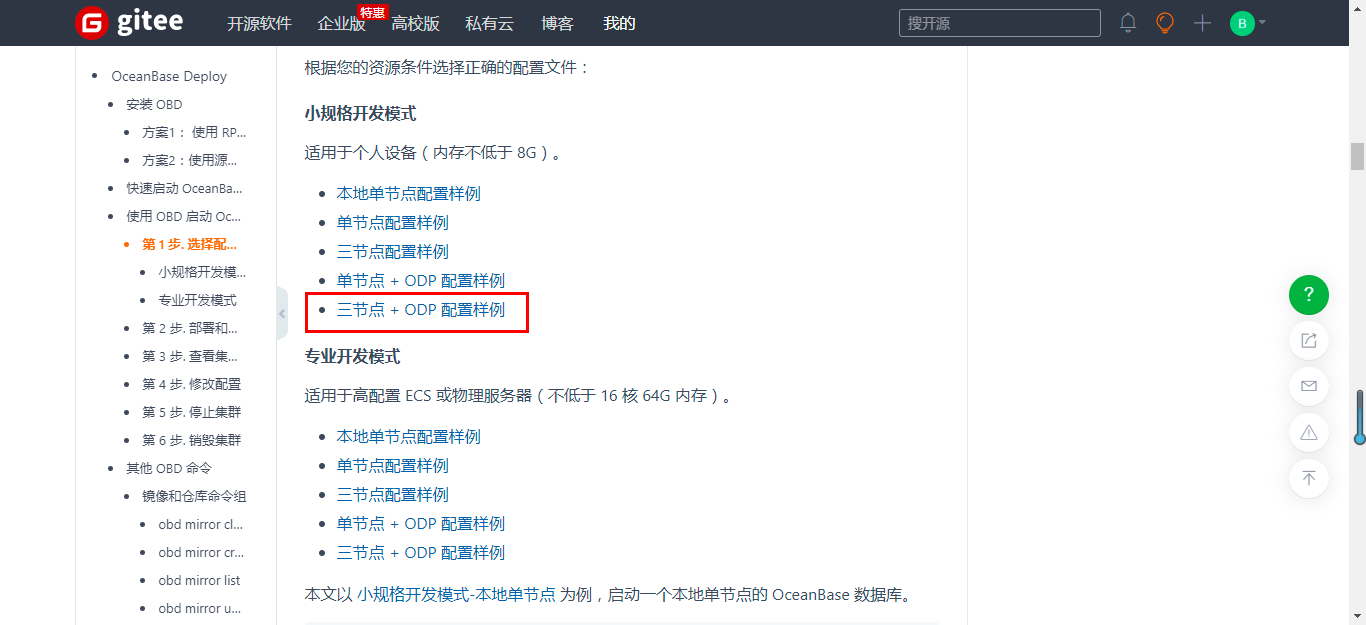
部署所需的配置文件,可以通过gitee和github下载,有不同规格的配置文件,本次选择《三节点 + ODP 配置样例》
https://gitee.com/oceanbase/obdeploy
https://github.com/oceanbase/obdeploy/blob/master/README-CN.md
[root@obcontrol obtools]# cat mini-distributed-with-obproxy-example.yaml
## Only need to configure when remote login is required
user:
   username: root    <===========
   password: root123 <===========
#   key_file: your ssh-key file path if need
#   port: your ssh port, default 22
#   timeout: ssh connection timeout (second), default 30
oceanbase-ce:
  servers:
    - name: z1
      # Please don't use hostname, only IP can be supported
      ip: 192.168.20.142 <===========
    - name: z2
      ip: 192.168.20.143 <===========
    - name: z3
      ip: 192.168.20.144 <===========
  global:
    # Please set devname as the network adaptor's name whose ip is  in the setting of severs.
    # if set severs as "127.0.0.1", please set devname as "lo"
    # if current ip is 192.168.1.10, and the ip's network adaptor's name is "eth0", please use "eth0"
    devname: ens192 <===========
    cluster_id: 1
    # please set memory limit to a suitable value which is matching resource.
    memory_limit: 8G
    system_memory: 4G
    stack_size: 512K
    cpu_count: 16
    cache_wash_threshold: 1G
    __min_full_resource_pool_memory: 268435456
    workers_per_cpu_quota: 10
    schema_history_expire_time: 1d
    # The value of net_thread_count had better be same as cpu's core number.
    net_thread_count: 4
    major_freeze_duty_time: Disable
    minor_freeze_times: 10
    enable_separate_sys_clog: 0
    enable_merge_by_turn: FALSE
    datafile_disk_percentage: 20
    syslog_level: INFO
    enable_syslog_recycle: true
    max_syslog_file_count: 4
    # observer cluster name, consistent with obproxy's cluster_name
    appname: ob_cluster
    root_password: 123456 <===========
    proxyro_password: 123456 <===========
  z1:
    mysql_port: 2881
    rpc_port: 2882
    home_path: /root/observer
    zone: zone1
  z2:
    mysql_port: 2881
    rpc_port: 2882
    home_path: /root/observer
    zone: zone2
  z3:
    mysql_port: 2881
    rpc_port: 2882
    home_path: /root/observer
    zone: zone3
obproxy:
  servers:
    - 192.168.20.141 <===========
  global:
    listen_port: 2883
    prometheus_listen_port: 2884
    home_path: /root/obproxy
    # oceanbase root server list
    # format: ip:mysql_port,ip:mysql_port
    rs_list: 192.168.20.142:2881;192.168.20.143:2881;192.168.20.144:2881 <===========
    enable_cluster_checkout: false
    # observer cluster name, consistent with oceanbase-ce's appname
    cluster_name: ob_cluster
    obproxy_sys_password: 123456 <===========
    observer_sys_password: 123456 <===========
2.3.2 安装集群
[root@obcontrol obtools]# obd cluster deploy ob-cluster -c ./mini-distributed-with-obproxy-example.yaml
oceanbase-ce-3.1.0 already installed.
obproxy-3.1.0 already installed.
+-----------------------------------------------------------------------------+
|                                   Packages                                  |
+--------------+---------+---------+------------------------------------------+
| Repository   | Version | Release | Md5                                      |
+--------------+---------+---------+------------------------------------------+
| oceanbase-ce | 3.1.0   | 3.el7   | b73bcd531bdf3f087391991b290ff2cbcdaa0dc9 |
| obproxy      | 3.1.0   | 1.el7   | 0b17cf0459a3b53c5a2febb6572894d183154c64 |
+--------------+---------+---------+------------------------------------------+
Repository integrity check ok
Parameter check ok
Open ssh connection ok
Remote oceanbase-ce-3.1.0-b73bcd531bdf3f087391991b290ff2cbcdaa0dc9 repository install ok
Remote oceanbase-ce-3.1.0-b73bcd531bdf3f087391991b290ff2cbcdaa0dc9 repository lib check !!
[WARN] z3(192.168.20.144) oceanbase-ce-3.1.0-b73bcd531bdf3f087391991b290ff2cbcdaa0dc9 require: libmariadb.so.3

Remote obproxy-3.1.0-0b17cf0459a3b53c5a2febb6572894d183154c64 repository install ok
Remote obproxy-3.1.0-0b17cf0459a3b53c5a2febb6572894d183154c64 repository lib check ok
Try to get lib-repository
oceanbase-ce-libs-3.1.0 already installed.
Use oceanbase-ce-libs-3.1.0-528144ec7ff0194a8b326491a396b8f5c87b1eaa for oceanbase-ce-3.1.0-b73bcd531bdf3f087391991b290ff2cbcdaa0dc9
Remote oceanbase-ce-libs-3.1.0-528144ec7ff0194a8b326491a396b8f5c87b1eaa repository install ok
Remote oceanbase-ce-3.1.0-b73bcd531bdf3f087391991b290ff2cbcdaa0dc9 repository lib check ok
Cluster status check ok
Initializes cluster work home ok
Initializes cluster work home ok
ob-cluster deployed
2.3.3 启动集群
[root@obcontrol obtools]# obd cluster start ob-cluster
Get local repositories and plugins ok
Open ssh connection ok
Cluster param config check ok
Check before start observer ok
[WARN] (192.168.20.142) clog and data use the same disk (/)
[WARN] (192.168.20.143) clog and data use the same disk (/)
[WARN] (192.168.20.144) clog and data use the same disk (/)

Check before start obproxy ok
Start observer ok
observer program health check ok
Connect to observer ok
Initialize cluster
Cluster bootstrap ok
Wait for observer init ok
+--------------------------------------------------+
|                     observer                     |
+----------------+---------+------+-------+--------+
| ip             | version | port | zone  | status |
+----------------+---------+------+-------+--------+
| 192.168.20.142 | 3.1.0   | 2881 | zone1 | active |
| 192.168.20.143 | 3.1.0   | 2881 | zone2 | active |
| 192.168.20.144 | 3.1.0   | 2881 | zone3 | active |
+----------------+---------+------+-------+--------+

Start obproxy ok
obproxy program health check ok
Connect to obproxy ok
Initialize cluster
+--------------------------------------------------+
|                     obproxy                      |
+----------------+------+-----------------+--------+
| ip             | port | prometheus_port | status |
+----------------+------+-----------------+--------+
| 192.168.20.141 | 2883 | 2884            | active |
+----------------+------+-----------------+--------+
ob-cluster running

[root@obcontrol obtools]# obd cluster list
+--------------------------------------------------------------+
|                         Cluster List                         |
+------------+-------------------------------+-----------------+
| Name       | Configuration Path            | Status (Cached) |
+------------+-------------------------------+-----------------+
| ob-cluster | /root/.obd/cluster/ob-cluster | running         |
+------------+-------------------------------+-----------------+
[root@obcontrol obtools]# obd cluster display ob-cluster
Get local repositories and plugins ok
Open ssh connection ok
Cluster status check ok
Connect to observer ok
Wait for observer init ok
+--------------------------------------------------+
|                     observer                     |
+----------------+---------+------+-------+--------+
| ip             | version | port | zone  | status |
+----------------+---------+------+-------+--------+
| 192.168.20.142 | 3.1.0   | 2881 | zone1 | active |
| 192.168.20.143 | 3.1.0   | 2881 | zone2 | active |
| 192.168.20.144 | 3.1.0   | 2881 | zone3 | active |
+----------------+---------+------+-------+--------+

Connect to obproxy ok
+--------------------------------------------------+
|                     obproxy                      |
+----------------+------+-----------------+--------+
| ip             | port | prometheus_port | status |
+----------------+------+-----------------+--------+
| 192.168.20.141 | 2883 | 2884            | active |
+----------------+------+-----------------+--------+
3 问题列表
3.1 部署集群,[ERROR] Parsing error
在部署集群时,报如下错误:

[root@ob01 obdeploy]# obd cluster deploy c2 -c ./example/mini-single-example.yaml
[ERROR] Parsing error:     <========
while parsing a block mapping
  in "/root/.obd/cluster/c2/config.yaml", line 2, column 1
expected <block end>, but found '<scalar>'
  in "/root/.obd/cluster/c2/config.yaml", line 6, column 4
[ERROR] Components not detected.
Please check the syntax of your configuration file
解决方案:
检查./example/mini-single-example.yaml配置文件,相应文件,空格和特殊字符
3.2 启动集群报[ERROR] IP no such net interface:
在启动集群时报如下错误:
[root@ob01 example]# obd cluster start c2
Get local repositories and plugins ok
Open ssh connection ok
Cluster param config check ok
Check before start observer x
[ERROR] 192.168.20.142 No such net interface: ens192   <========
[WARN] (192.168.20.142) clog and data use the same disk (/)
解决方案:
这是一个已知BUG导致的。
参考https://github.com/oceanbase/obdeploy/issues/37。
可以根据https://github.com/oceanbase/obdeploy/commit/b037c96b1a78397688f040a490dc495d805b65a7修改~/.obd/plugins/oceanbase/3.1.0/start_check.py

3.3 启动集群报open files number must not be less than 20000:
在启动集群时报如下错误:
[root@ob01 example]# obd cluster start c2
Get local repositories and plugins ok
Open ssh connection ok
Cluster param config check ok
Check before start observer x
[ERROR] (192.168.20.142) open files number must not be less than 20000 (Current value: 1024)   <======
[WARN] (192.168.20.142) clog and data use the same disk (/)
解决方案:
错误因为没有正确设置limit.conf,正常设置即可
[root@ob01 ~]# cat /etc/security/limits.conf
root soft nofile 655350
root hard nofile 655350

* soft nofile 655350
* hard nofile 655350
* soft stack 20480
* hard stack 20480
* soft nproc 655360
* hard nproc 655360
* soft core unlimited
* hard core unlimited
3.4 启动observer报libmariadb.so.3丢失
在单独启动一个observer时,报libmariadb.so.3丢失
[root@ob01 bin]# /root/observer/bin/observer -r '192.168.20.142:2882:2881;192.168.20.143:2882:2881;192.168.20.144:2882:2881' -o __min_full_resource_pool_memory=268435456,memory_limit='8G',system_memory='4G',stack_size='512K',cpu_count=16,cache_wash_threshold='1G',workers_per_cpu_quota=10,schema_history_expire_time='1d',net_thread_count=4,major_freeze_duty_time='Disable',minor_freeze_times=10,enable_separate_sys_clog=0,enable_merge_by_turn=False,datafile_disk_percentage=20,enable_syslog_recycle=True,max_syslog_file_count=4,root_password=123456 -z 'zone1' -p 2881 -P 2882 -n 'ob_cluster' -c 1 -d '/root/observer/store' -i 'ens192' -l 'INFO'

/root/observer/bin/observer: error while loading shared libraries: libmariadb.so.3: cannot open shared object file: No such file or directory
解决方案:
通过报错信息知,缺少libmariadb.so.3包,由于环境变量没有加载,设置LD_LIBRARY_PATH即可
[root@ob01 bin]# export LD_LIBRARY_PATH=/lib:/lib:/usr/lib:/root/observer/lib
[root@ob01 bin]# /root/observer/bin/observer -r '192.168.20.142:2882:2881;192.168.20.143:2882:2881;192.168.20.144:2882:2881' -o __min_full_resource_pool_memory=268435456,memory_limit='8G',system_memory='4G',stack_size='512K',cpu_count=16,cache_wash_threshold='1G',workers_per_cpu_quota=10,schema_history_expire_time='1d',net_thread_count=4,major_freeze_duty_time='Disable',minor_freeze_times=10,enable_separate_sys_clog=0,enable_merge_by_turn=False,datafile_disk_percentage=20,enable_syslog_recycle=True,max_syslog_file_count=4,root_password=123456 -z 'zone1' -p 2881 -P 2882 -n 'ob_cluster' -c 1 -d '/root/observer/store' -i 'ens192' -l 'INFO'
/root/observer/bin/observer -r 192.168.20.142:2882:2881;192.168.20.143:2882:2881;192.168.20.144:2882:2881 -o __min_full_resource_pool_memory=268435456,memory_limit=8G,system_memory=4G,stack_size=512K,cpu_count=16,cache_wash_threshold=1G,workers_per_cpu_quota=10,schema_history_expire_time=1d,net_thread_count=4,major_freeze_duty_time=Disable,minor_freeze_times=10,enable_separate_sys_clog=0,enable_merge_by_turn=False,datafile_disk_percentage=20,enable_syslog_recycle=True,max_syslog_file_count=4,root_password=123456 -z zone1 -p 2881 -P 2882 -n ob_cluster -c 1 -d /root/observer/store -i ens192 -l INFO
rs list: 192.168.20.142:2882:2881;192.168.20.143:2882:2881;192.168.20.144:2882:2881
optstr: __min_full_resource_pool_memory=268435456,memory_limit=8G,system_memory=4G,stack_size=512K,cpu_count=16,cache_wash_threshold=1G,workers_per_cpu_quota=10,schema_history_expire_time=1d,net_thread_count=4,major_freeze_duty_time=Disable,minor_freeze_times=10,enable_separate_sys_clog=0,enable_merge_by_turn=False,datafile_disk_percentage=20,enable_syslog_recycle=True,max_syslog_file_count=4,root_password=123456
zone: zone1
mysql port: 2881
rpc port: 2882
appname: ob_cluster
cluster id: 1
data_dir: /root/observer/store
devname: ens192
log level: INFO

[root@ob01 bin]# ps -ef|grep obs
root     15088     1 99 17:04 ?        00:00:44 /root/observer/bin/observer -r 192.168.20.142:2882:2881;192.168.20.143:2882:2881;192.168.20.144:2882:2881 -o __min_full_resource_pool_memory=268435456,memory_limit=8G,system_memory=4G,stack_size=512K,cpu_count=16,cache_wash_threshold=1G,workers_per_cpu_quota=10,schema_history_expire_time=1d,net_thread_count=4,major_freeze_duty_time=Disable,minor_freeze_times=10,enable_separate_sys_clog=0,enable_merge_by_turn=False,datafile_disk_percentage=20,enable_syslog_recycle=True,max_syslog_file_count=4,root_password=123456 -z zone1 -p 2881 -P 2882 -n ob_cluster -c 1 -d /root/observer/store -i ens192 -l INFO
「喜欢这篇文章,您的关注和赞赏是给作者最好的鼓励」
关注作者
【版权声明】本文为墨天轮用户原创内容,转载时必须标注文章的来源(墨天轮),文章链接,文章作者等基本信息,否则作者和墨天轮有权追究责任。如果您发现墨天轮中有涉嫌抄袭或者侵权的内容,欢迎发送邮件至:contact@modb.pro进行举报,并提供相关证据,一经查实,墨天轮将立刻删除相关内容。
