


❝MinIO 是一个高性能的对象存储服务,兼容 Amazon S3 云存储服务接口。它特别适合于需要大规模存储的应用场景,例如数据湖、机器学习存储、大数据分析等。本教程将指导你如何在 Spring Boot 项目中集成 MinIO,并展示一些基本的操作示例。
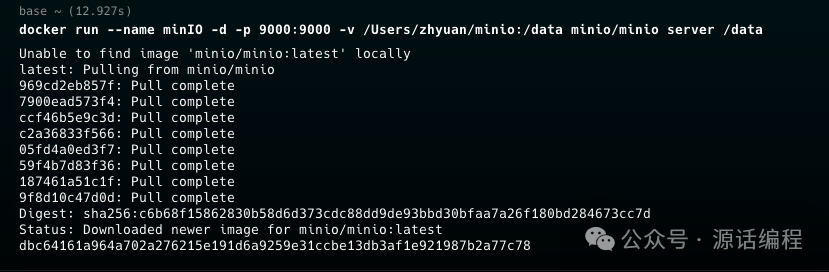
使用 Docker 安装 MinIO
docker run --name minIO -d -p 9000:9000 \
    -v /Users/zhyuan/minio:/data \
    minio/minio server /data
添加 Spring Boot 项目依赖
首先,我们需要创建一个新的 Spring Boot 项目并添加项目依赖:
<dependency>
    <groupId>io.minio</groupId>
    <artifactId>minio</artifactId>
    <version>8.3.1</version> <!-- 可以选择最新的版本号 -->
</dependency>
配置 MinIO
在 application.yml
文件中添加 MinIO 的配置信息:
minio:
  url: "http://127.0.0.1:9000" # MinIO服务的地址
  access-key: "minioadmin" # MinIO的访问密钥
  secret-key: "minioadmin" # MinIO的密钥
  bucket: "uyii-oss" # 默认的存储桶名称
接下来,创建一个配置类来初始化 MinIO 客户端:
import io.minio.MinioClient;
import org.springframework.beans.factory.annotation.Value;
import org.springframework.context.annotation.Bean;
import org.springframework.stereotype.Component;

@Component
public class MinioConfig {

    @Value("${minio.url}")
    private String minioUrl;

    @Value("${minio.access-key}")
    private String accessKey;

    @Value("${minio.secret-key}")
    private String secretKey;

    @Bean
    public MinioClient minioClient() {
        return MinioClient.builder()
                .endpoint(minioUrl)
                .credentials(accessKey, secretKey)
                .build();
    }
}
实现文件操作功能
创建一个服务类,用于处理文件的上传和下载功能。
import io.minio.*;
import io.minio.errors.MinioException;
import org.springframework.beans.factory.annotation.Autowired;
import org.springframework.beans.factory.annotation.Value;
import org.springframework.stereotype.Service;
import org.springframework.web.multipart.MultipartFile;

import java.io.InputStream;

@Service
public class MinioService {
    @Autowired
    private MinioClient minioClient;

    @Value("${minio.bucket}")
    private String bucketName;

    /**
     * 检查 bucket 是否存在,没有则创建
     * @throws Exception
     */
    public void checkAndCreateBucket() throws Exception {
        try {
            boolean isExist = minioClient.bucketExists(BucketExistsArgs.builder().bucket(bucketName).build());
            if (!isExist) {
                minioClient.makeBucket(MakeBucketArgs.builder().bucket(bucketName).build());
            }
        } catch (MinioException e) {
            throw new Exception("Error occurred: " + e.getMessage());
        }
    }

    /**
     * 上传文件
     *
     * @param file
     * @return
     * @throws Exception
     */
    public String uploadFile(MultipartFile file) throws Exception {
        try {
            checkAndCreateBucket();
            InputStream inputStream = file.getInputStream();
            long size = file.getSize();
            String contentType = file.getContentType();
            String fileName = file.getOriginalFilename();

            if (fileName == null || fileName.trim().isEmpty()) {
                throw new IllegalArgumentException("File name cannot be empty");
            }

            minioClient.putObject(
                    PutObjectArgs.builder()
                            .bucket(bucketName)
                            .object(fileName)
                            .stream(inputStream, size, -1)
                            .contentType(contentType)
                            .build()
            );
            return "File uploaded successfully.";
        } catch (MinioException e) {
            throw new Exception("Error occurred: " + e.getMessage());
        }
    }

    /**
     * 下载文件
     *
     * @param filename
     * @return
     * @throws Exception
     */
    public InputStream downloadFile(String filename) throws Exception {
        try {
            return minioClient.getObject(
                    GetObjectArgs.builder()
                            .bucket(bucketName)
                            .object(filename)
                            .build()
            );
        } catch (MinioException e) {
            throw new Exception("Error occurred: " + e.getMessage());
        }
    }

}
步骤 4:创建控制器
创建一个控制器类,用于处理文件上传和下载的 HTTP 请求。
import com.uyii.springbootminio.service.MinioService;
import org.springframework.beans.factory.annotation.Autowired;
import org.springframework.http.HttpHeaders;
import org.springframework.http.MediaType;
import org.springframework.http.ResponseEntity;
import org.springframework.web.bind.annotation.*;
import org.springframework.web.multipart.MultipartFile;
import org.springframework.web.servlet.mvc.method.annotation.StreamingResponseBody;

import java.io.InputStream;

@RestController
@RequestMapping("/minio")
public class MinioController {

    @Autowired
    private MinioService minioService;

    /**
     * 上传文件
     */
    @PostMapping("/upload")
    public ResponseEntity<String> uploadFile(@RequestParam("file") MultipartFile file) {
        try {
            String message = minioService.uploadFile(file);
            return ResponseEntity.ok(message);
        } catch (Exception e) {
            return ResponseEntity.status(500).body(e.getMessage());
        }
    }

    /**
     * 下载文件
     */
    @GetMapping("/download/{filename}")
    public ResponseEntity<StreamingResponseBody> downloadFile(@PathVariable String filename) {
        try {
            InputStream file = minioService.downloadFile(filename);
            StreamingResponseBody stream = outputStream -> {
                int numberOfBytesToWrite;
                byte[] data = new byte[1024];
                while ((numberOfBytesToWrite = file.read(data, 0, data.length)) != -1) {
                    outputStream.write(data, 0, numberOfBytesToWrite);
                }
                file.close();
            };
            return ResponseEntity.ok()
                    .header(HttpHeaders.CONTENT_DISPOSITION, "attachment; filename=\"" + filename + "\"")
                    .contentType(MediaType.APPLICATION_OCTET_STREAM)
                    .body(stream);
        } catch (Exception e) {
            return ResponseEntity.status(500).body(null);
        }
    }

}
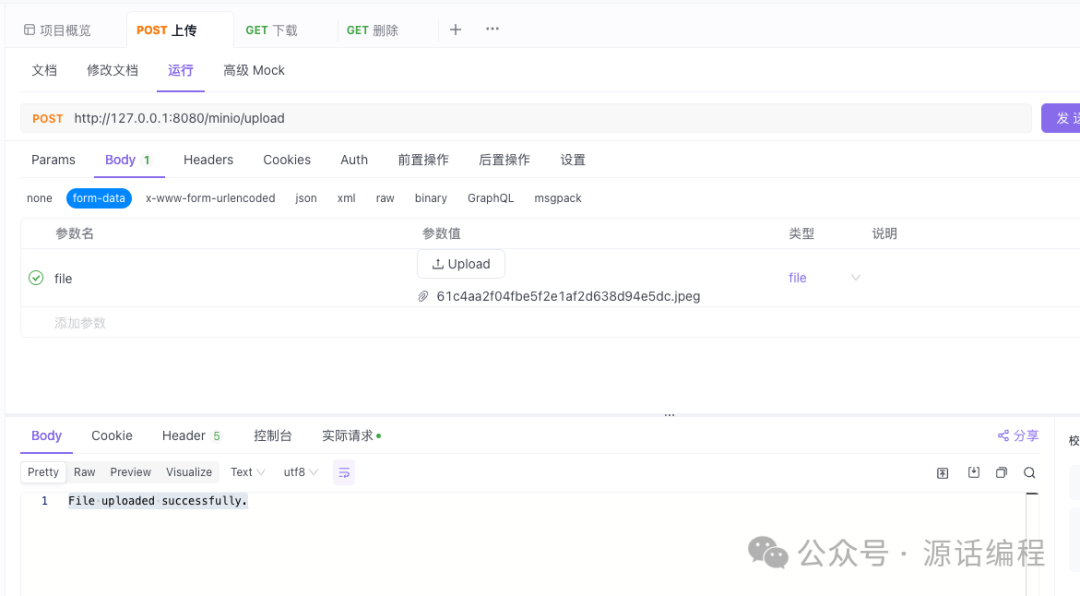
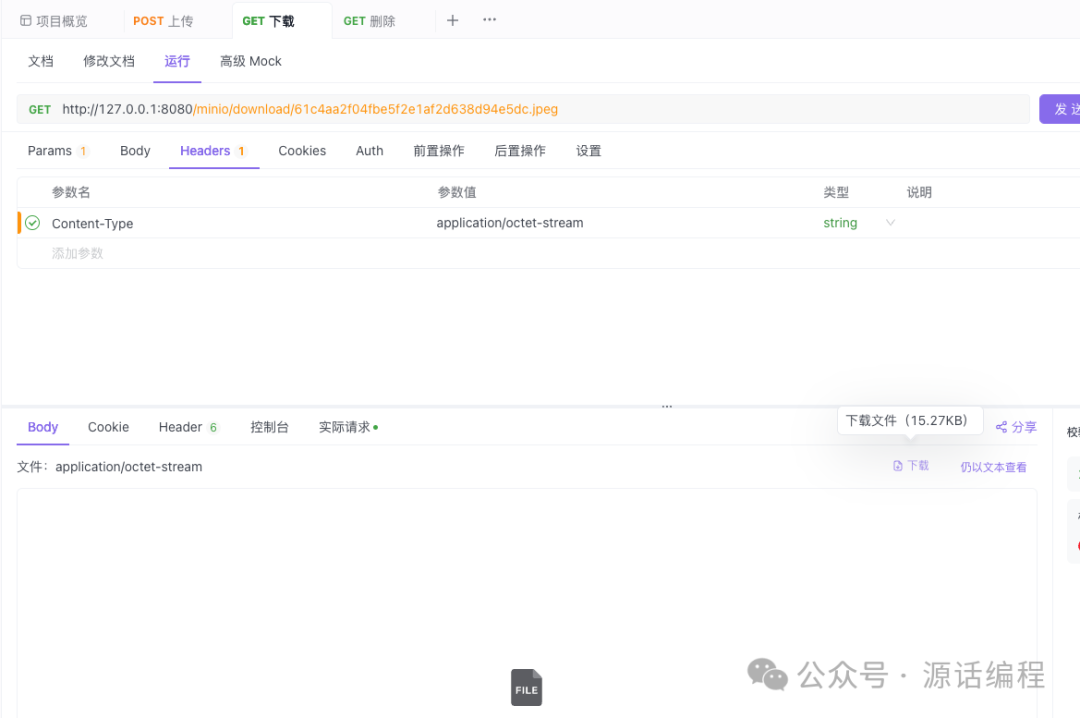
测试功能
上传
下载
结语
本文介绍了如何使用 Docker 安装 MinIO,然后在 Spring Boot 项目中集成 MinIO,并实现了文件的上传和下载功能。这只是 MinIO 功能的冰山一角,MinIO 还支持很多的高级特性,如对象版本控制、生命周期管理等。欲了解更多信息,请参考 MinIO 官方文档。希望本教程对你有所帮助,祝你编码愉快!
个人观点,仅供参考,如果问题,欢迎留言讨论。
文章转载自源话编程,如果涉嫌侵权,请发送邮件至:contact@modb.pro进行举报,并提供相关证据,一经查实,墨天轮将立刻删除相关内容。
