


热衷于分享各种干货知识,大家有想看或者想学的可以评论区留言,秉承着“开源知识来源于互联网,回归于互联网”的理念,分享一些日常工作中能用到或者频率比较的内容,希望大家能够喜欢,并提出宝贵地意见,我们一起提升,守住自己的饭碗。

一、环境准备
注意点:至少需要4g的内存,其他没有特殊的要求
(一)操作系统环境准备
1、关闭防火墙
[root@localhost ~]# systemctl stop firewalld
[root@localhost ~]# systemctl disable firewalld
2、打开生成core文件的开关
[root@localhost ~]# ulimit -c unlimited
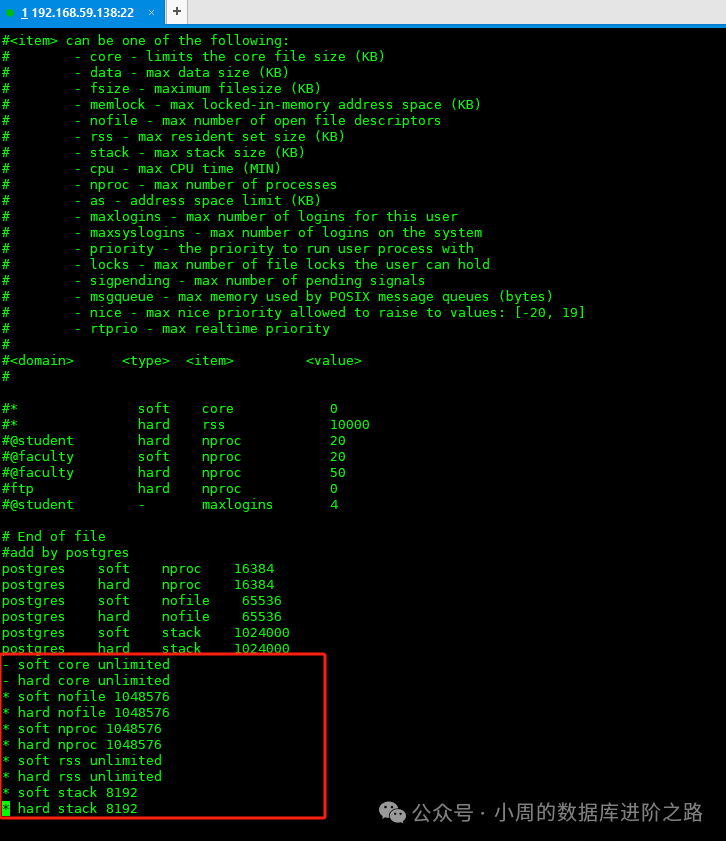
[root@localhost ~]# vi /etc/security/limits.conf
添加以下内容
- soft core unlimited
- hard core unlimited
3、调整资源限制值
 [root@localhost ~]#ulimit -n 1048576
#进程打开数
[root@localhost ~]#vi /etc/security/limits.conf
添加以下内容
* soft nofile 1048576
* hard nofile 1048576
#最大用户连接数
[root@localhost ~]#ulimit -u 1048576
[root@localhost ~]#vi /etc/security/limits.conf
添加以下内容
* soft nproc 1048576
* hard nproc 1048576
#进程占用最大内存
[root@localhost ~]#ulimit -m unlimited
[root@localhost ~]#vi /etc/security/limits.conf
添加以下内容
* soft rss unlimited
* hard rss unlimited
#进程最大栈空间
[root@localhost ~]#ulimit -s 8192
[root@localhost ~]#vi /etc/security/limits.conf
添加以下内容
* soft stack 8192
* hard stack 8192
4、关闭交换分区
[root@localhost ~]#sysctl -a | grep swappiness #查看关闭情况
[root@localhost ~]#sysctl -w vm.swappiness=0
[root@localhost ~]# echo "vm.swappiness=0">> /etc/sysctl.conf
5、调整自动分配本地端口范围
[root@localhost ~]#cat /proc/sys/net/ipv4/ip_local_port_range 查看连接可用的本地端口范围
[root@localhost ~]#sysctl -w net.ipv4.ip_local_port_range='32768 60999'
[root@localhost ~]# echo "net.ipv4.ip_local_port_range=32768 60999" >> /etc/sysctl.conf
6、调整进程的VMA上限
[root@localhost ~]#sysctl -a|grep vm.max_map_count #查看当前上限值
[root@localhost ~]#sysctl -w vm.max_map_count=2000000
[root@localhost ~]# echo "vm.max_map_count=2000000" >> /etc/sysctl.conf
7、关闭透明大页
[root@localhost ~]# cat /sys/kernel/mm/transparent_hugepage/enabled #查看是否关闭,一般默认关闭
(二)用户环境准备
1、设置主机名
[root@localhost ~]#hostnamectl set-hostname instance
2、创建安装用户
[root@localhost ~]# useradd -d /home/yashan -m yashan
[root@localhost ~]# passwd yashan
[root@localhost ~]# groupadd YASDBA
[root@localhost ~]# usermod -a -G YASDBA yashan
3、创建安装所需目录
[root@localhost ~]# mkdir -p /data/yanshan
[root@localhost ~]# chmod -R 770 /data/yanshan
[root@localhost ~]# su - yashan
[yashan@instance ~]$ mkdir install
[yashan@instance ~]$ cd /home/yashan/install
二、安装数据库
1、上传安装包
上传至/home/yashan/install目录下
[root@instance install]# chown -R yashan.YASDBA /home/yashan/install/yashandb-personal-23.2.3.100-linux-x86_64.tar.gz
[root@instance install]# tar -xvf yashandb-personal-23.2.3.100-linux-x86_64.tar.gz
[root@instance install]# chown -R yashan.YASDBA /data/yanshan/
[root@instance install]# chmod -R 755 /data/yanshan/
2、生成部署文件
[yashan@instance install]$ cd /home/yashan/install
[yashan@instance install]$ ./bin/yasboot package se gen --cluster yashandb -u yashan -p 123123 --ip 192.168.59.138 --port 22 --install-path /data/yashan/yasdb_home  --data-path /data/yashan/yasdb_data --begin-port 1688

3、执行安装
[yashan@instance install]$ ./bin/yasboot package install -t hosts.toml -i yashandb-personal-23.2.3.100-linux-x86_64.tar.gz

[yashan@instance install]$ ./bin/yasboot cluster deploy -t yashandb.toml

# 部署命令成功执行后将会在$YASDB_HOME目录下的conf文件夹中生成<<集群名称>>.bashrc环境变量文件
[yashan@instance install]$ cd /data/yashan/yasdb_home/yashandb/23.2.3.100/conf/
# 如~/.bashrc中已存在YashanDB相关的环境变量,将其清除
[yashan@mysql ~]$cat yashandb.bashrc >> ~/.bashrc
[yashan@mysql ~]$ source ~/.bashrc

6、检查安装结果
[yashan@instance install]$ ./bin/yasboot cluster password set -n A@12345678 -c yashandb

[yashan@instance install]$ yasboot cluster status -c yashandb -d

[yashan@instance install]$ yasql / as sysdba

1、提示安装实例重复
[yashan@mysql install]$./bin/yasboot cluster clean -c yashandb
[yashan@mysql install]$ ./bin/yasboot cluster deploy -t yashandb.toml
[yashan@mysql install]$ rm -rf /data/yashan/yasdb_data/db-1-1/instance/yasdb.pwd
[yashan@mysql install]$ ./bin/yasboot cluster clean -c yashandb
[yashan@mysql install]$ ./bin/yasboot cluster deploy -t yashandb.toml
2、提示需升级OPENSSL

如果安装最新版 依赖1.1.1版本的OpenSSL,环境中版本低于该版本时需要做升级操作
1、下载和解压软件包
下载地址:https://www.openssl.org/source/old/1.1.1/index.html,选择1.1.1L版本
2、下载完成后上传至服务器后台的/opt路径,解压openssl:
[root@instance ~]# tar zxvf openssl-1.1.1l.tar.gz
3、使用whereis openssl查看openssl的路径
[root@instance ~]# whereis openssl
4、备份老版本openssl文件
[root@instance ~]# sudo mv /usr/bin/openssl /usr/bin/openssl_old
[root@instance ~]# sudo mv /usr/lib64/openssl /usr/lib64/openssl_old
查看/usr/local/openssl下是否有,如果有一样备份
5、配置openssl安装目录
[root@instance openssl-1.1.1l]#./config --prefix=/usr/local/openssl
这步会报错缺少PERL依赖:
[root@instance ~]# wget https://www.cpan.org/src/5.0/perl-5.40.0.tar.gz
[root@instance ~]# tar -xzf perl-5.40.0.tar.gz
[root@instance perl-5.40.0]# cd perl-5.40.0
[root@instance perl-5.40.0]#yum -y install gcc gcc-c++ autoconf libjpeg libjpeg-devel libpng libpng-develfreetype freetype-devel libxml2 libxml2-devel zlib zlib-devel glibc glibc-develglib2 glib2-devel bzip2 bzip2-devel ncurses ncurses-devel curl curl-devele2fsprogs e2fsprogs-devel krb5 krb5-devel libidn libidn-devel opensslopenssl-devel openldap openldap-devel nss_ldap openldap-clientsopenldap-servers
[root@instance perl-5.40.0]#./Configure-des -Dprefix=$HOME/localperl
[root@instance perl-5.40.0]# make
[root@instance perl-5.40.0]# make test
[root@instance perl-5.40.0]# make install
6、编译&&安装
返回openssl,继续编译安装
[root@instance openssl-1.1.1l]#./config --prefix=/usr/local/openssl
[root@instance openssl-1.1.1l]# make && make install
等待安装完成即可。
7、创建软链接
说明:创建的软链接和之前没升级通过whereis openssl保持一致即可。
[root@instance yashan]# ln -s /usr/local/openssl/bin/openssl /usr/bin/openssl
[root@instanceyashan]# ln -s /usr/local/openssl/include/openssl /usr/include/openssl
8、添加动态链接库数据
[root@instance yashan]# echo "/usr/local/openssl/lib/">>/etc/ld.so.conf
检查一下,在/etc/ld.so.conf中是否已存在。
9、更新动态链接库
[root@instanceyashan]# ldconfig -v
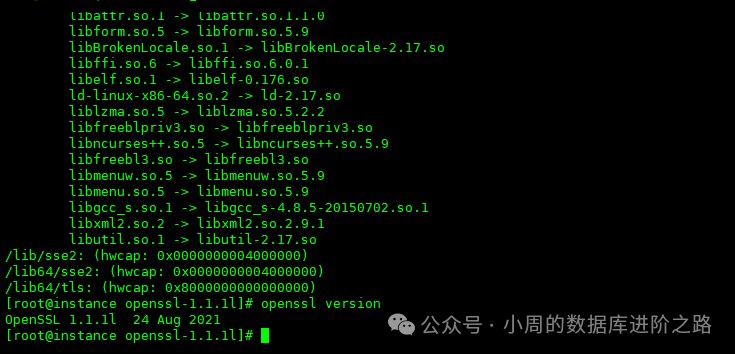
10、验证openssl
[root@instance yashan]# openssl version
11、执行部署数据库的步骤即可
[yashan@instance ~]$./bin/yasboot cluster deploy -t yashandb.toml
四、启动数据库
## 手动启动yasom和yasagent进程
[yashan@instance install]$yasboot process yasom start -c yashandb
[yashan@instance install]$ yasboot process yasagent start -c yashandb
## 待yasom和yasagent进程启动后,才能启动数据库
[yashan@instance install]$yasboot cluster start -c yashandb
五、总结
相比于其他国产数据库,崖山的安装要求更高,比如默认至少需要4g内存,最新版本安装必须升级OPENSSL。
,
文中的概念来源于互联网,如有侵权,请联系我删除。
欢迎关注公众号:小周的数据库进阶之路,一起交流数据库、中间件和云计算等技术。如果觉得读完本文有收获,可以转发给其他朋友,大家一起学习进步!感兴趣的朋友可以加我微信,拉您进群与业界的大佬们一起交流学习。
文章转载自小周的数据库进阶之路,如果涉嫌侵权,请发送邮件至:contact@modb.pro进行举报,并提供相关证据,一经查实,墨天轮将立刻删除相关内容。
