


Tips:一些记录,一些笔记

2024/04/14
SUNDAY
Sweat is the lunbricant of success.
汗水是成功的润滑剂。
01
Pillow
Pillow,英文直译「枕头」
在Python中,它是一个老牌的图像处理库。
Pillow 是 PIL 的替代版本,PIL 软件包提供了基本的图像处理功能,如:改变图像大小,旋转图像,图像格式转换,色场空间转换,图像增强,直方图处理,插值和滤波等等。
Pillow 为了解决 PIL 的两个问题:
1. 不兼容 setuptools
2. 报告的问题太多,而更新太慢
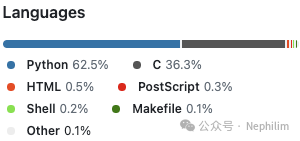
Pillow的大部分代码是由Python实现的,也有一部分使用到了C语言:
官方的Github地址:
https://github.com/python-pillow/Pillow
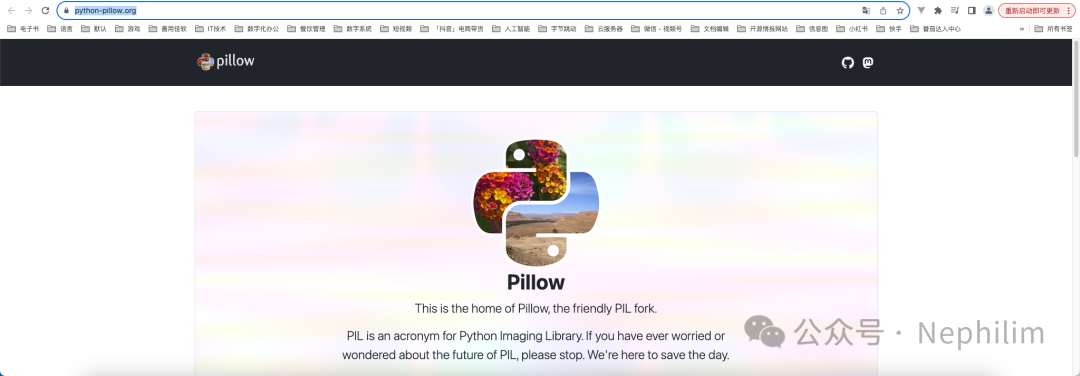
官方网站:
https://python-pillow.org/
官方文档:
https://pillow.readthedocs.io/en/latest/handbook/overview.html
本文只会涉及到部分内容,更多的详情请参考阅读「官方文档」。
02
安装
可以通过Python的PIP命令进行安装:
(daily_info_management) (base) adamhuan@Leviathan daily_info_management % pip3 install pillowLooking in indexes: https://mirrors.aliyun.com/pypi/simple/Collecting pillowDownloading https://mirrors.aliyun.com/pypi/packages/d4/0e/e344d6532f30b3b8de3d7a36fd05d5a43e4164afd1b41882529e766ef959/pillow-10.3.0-cp310-cp310-macosx_11_0_arm64.whl (3.4 MB)━━━━━━━━━━━━━━━━━━━━━━━━━━━━━━━━━━━━━━━━ 3.4/3.4 MB 9.6 MB/s eta 0:00:00Installing collected packages: pillowSuccessfully installed pillow-10.3.0(daily_info_management) (base) adamhuan@Leviathan daily_info_management %
03
基本使用
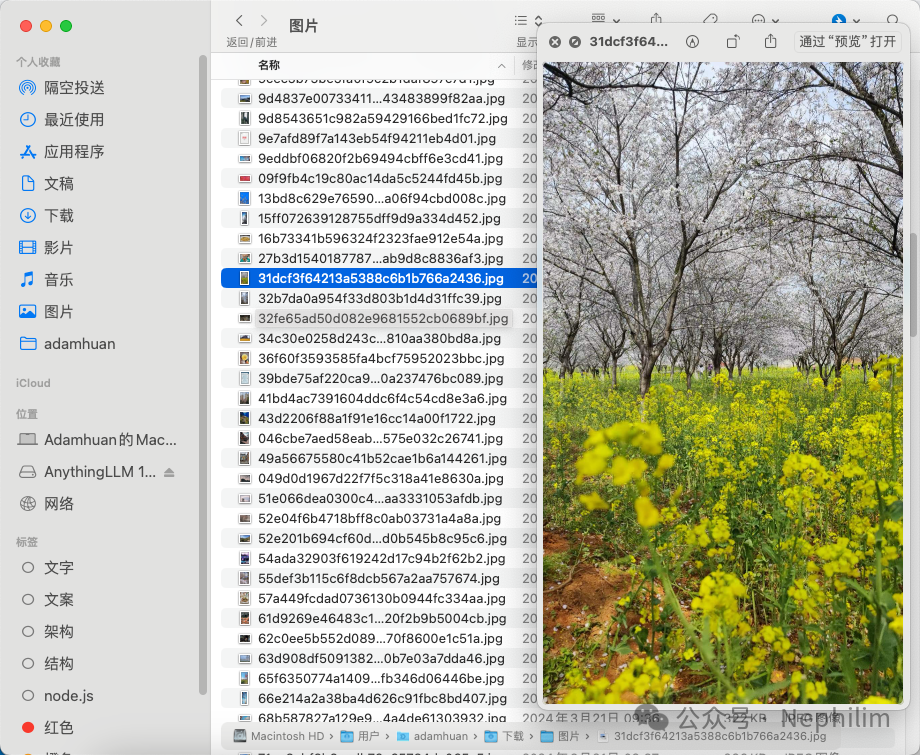
一、打开图片
在我本地有个图片:
代码:
(base) adamhuan@Leviathan ~ % cd Downloads(base) adamhuan@Leviathan Downloads % cd 图片(base) adamhuan@Leviathan 图片 %(base) adamhuan@Leviathan 图片 % ls -ltr | grep 31dcf3f64-rw-r-----@ 1 adamhuan staff 524648 3 23 22:07 31dcf3f64213a5388c6b1b766a2436.jpg(base) adamhuan@Leviathan 图片 %(base) adamhuan@Leviathan 图片 % pip3 list | grep PillowPillow 9.4.0(base) adamhuan@Leviathan 图片 %(base) adamhuan@Leviathan 图片 % python -VPython 3.11.5(base) adamhuan@Leviathan 图片 % pythonPython 3.11.5 (main, Sep 11 2023, 08:31:25) [Clang 14.0.6 ] on darwinType "help", "copyright", "credits" or "license" for more information.>>> from PIL import Image>>> image = Image.open('31dcf3f64213a5388c6b1b766a2436.jpg')>>> image.show()>>>
效果:

可以看到,成功打开了图片。
二、创建图片
语法:
image = Image.new(mode, size, color)
参数:
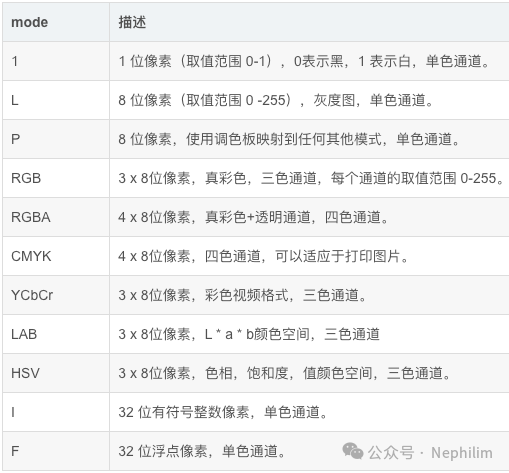
mode:图形模式(字符串类型):RGB(真彩图像)、L(灰度图像)、CMYK(色彩图打印模式)等
size:图像大小(元组类型:(width,height)):图像的像素大小
color:图片颜色,默认为黑色(0):参数支持(RGB)三元组数字、颜色十六进制码、颜色英文单词
代码:
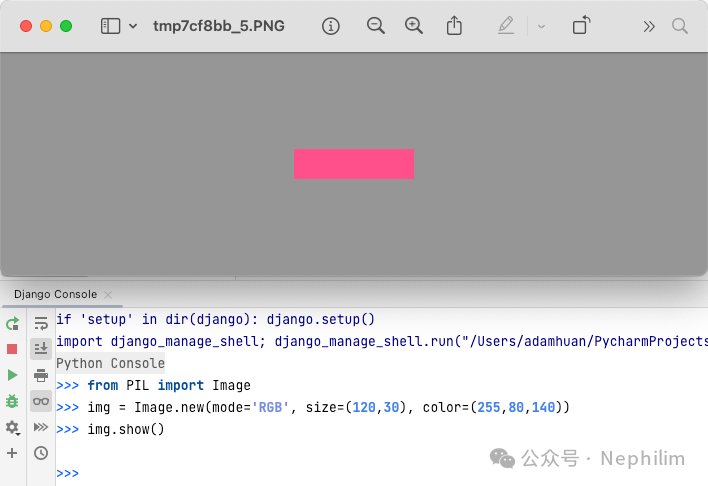
from PIL import Imageimg = Image.new(mode='RGB', size=(120,30), color=(255,255,140))img.show()
效果:
三、Image对象属性:
尺寸相关:
image.size
image.width
image.height
图片格式相关:
image.format
图片权限相关:
image.readonly:图片是否只读(0 - 是;1 - 否)
图片相关信息:
image.info
image.mode:图像模式
04
图片格式转换
Pillow库支持多种图片格式,可以直接通过「open()」方法读取图片,无须考虑图片是何种类型。
并且,Pillow能够很轻松的实现图片格式之间的转换。
图片格式之间的转换主要有两种方法:
save()
convert() + save()
一、save()
用于保存图像,当不指定文件格式的时候,它会以默认的图片格式来存储;
如果指定图片格式,则会以指定的格式存储图片;
Image.save(fp, format=None)
参数:
fp:图片的存储路径,包含图片的名称(字符串格式)
format:可选参数,用于指定图片的格式
二、convert() + save()
并非所有的图片格式都可以用 save() 完成转换,例如:PNG格式的图片直接保存为JPG格式的图片就会遇到错误:
OSError: cannot write mode RGBA as JPEG
这个错误的原因是:
PNG是四通道:RGBA模式(红绿蓝;Alpha透明)
JPG是三通道:RGB模式
因此,要实现这种图片格式的转换,就需要先将PNG转变为三通道模式。
Image类的方法「convert()」
Image.convert(mode, params**)
参数:
mode:要转换成的图像模式
params:其他可选参数
示例代码:
from PIL import Imageimage = Image.open("xxx.png")image_convert = image.convert('RGB')image_convert.save("xxx.jpg")
05
图像缩放(Image.resize())
语法:
Image.resize(size, resample=image.BICUBIC, box=None, reducing_gap=None)
参数:
size:元组类型((width,height)),图片缩放后的尺寸
resample:可选参数,图像重采样滤波器,默认为:Image.BICUBIC
box:对指定图片区域进行缩放,默认对整个原图进行缩放
reducing_gap:可选参数,浮点参数值,用于优化图片的缩放效果
06
创建缩略图(Image.thumbnail())
语法:
Image.thumbnail(size, resample)
参数:
size:元组参数,指的是缩小后的图像大小
resample:可选参数,指的是图像重采样滤波器
有四种过滤方式:
Image.BICUBIC(双立方插值法)(默认)
PIL.Image.NEAREST(最近邻插值法)
PIL.Image.BILINEAR(双线性插值法)
PIL.Image.LANCZOS(下采样过滤插值法)
07
Pillow:生成图片验证码
Pillow的语法还有很多的内容,更多的可以参阅官方文档。
通过上面的简单介绍,可以看到Pillow在处理图片方面,做的非常细致。
那么,它们组合到一起,到底可以做一件什么样的有意义的事情呢?
Pillow的实际的有意义的应用很多,比如下面的这个,可以做一个「随机生成图片验证码」的程序。
代码如下:
#!/usr/bin/env python# -*- coding: UTF-8 -*-# ——————————————————# 脚本说明:# xxxxxxxxx# ——————————————————# ========================================# 开始# ))))))))) 模块包导入import randomfrom PIL import Image, ImageDraw, ImageFont, ImageFilter# ))))))))) 类 方法def randomChar():"""生成随机字母(单个字母):return:"""return chr(random.randint(65,90))def randomColor():"""生成随机颜色:return:"""return (random.randint(0, 255),random.randint(10, 255),random.randint(64, 255))def gen_validate_code(width=120,height=30,validate_code_length=5,font_file='static/fonts/Monaco.ttf',font_size=20):# 最终生成的验证码的字符串列表validate_code = []# 图片对象image_object = Image.new(mode='RGB',size=(width,height),color=(255,255,255))# 画笔对象draw_object = ImageDraw.Draw(image_object,mode='RGB')# 字体对象font_object = ImageFont.truetype(font_file,font_size,)# 写文字:循环结束的时候,已经通过画笔对象将需要的文字写到了目标图片上for i in range(validate_code_length):char = randomChar()validate_code.append(char)h = random.randint(0, 4)draw_object.text([i * width validate_code_length, h],char,font=font_object,fill=randomColor(),)# 写噪点:干扰点for i in range(50):draw_object.point([random.randint(0, width), random.randint(0, height)],fill=randomColor())# 写噪点:干扰圆圈for i in range(50):draw_object.point([random.randint(0, width), random.randint(0, height)],fill=randomColor())x = random.randint(0, width)y = random.randint(0, height)draw_object.arc((x, y, x + 4, y + 4),0,90,fill=randomColor())# 写噪点:干扰线条for i in range(5):x1 = random.randint(0, width)y1 = random.randint(0, height)x2 = random.randint(0, width)y2 = random.randint(0, height)draw_object.line((x1, y1, x2, y2),fill=randomColor())# 图像降噪# 深度边缘增强滤波:EDGE_ENHANCE_MOREimage_object = image_object.filter(ImageFilter.EDGE_ENHANCE_MORE)return image_object, ''.join(validate_code)# ))))))))) 执行阶段if __name__ == '__main__':# ####################### 0. 执行生成# ######################img, code = gen_validate_code()print("%%%%%%%%%%%%%%%%%%%%")print("生成的随机「图片验证码」是【" + code + "】")print("%%%%%%%%%%%%%%%%%%%%")# ####################### 1. 直接打开# ######################img.show()# ####################### 2. 写入文件# ####################### with open('图片验证码.png', 'wb') as f:# img.save(f, format='png')# ####################### 3. 写入内存(Python 3.x)# ####################### from io import BytesIO# stream = BytesIO()# img.save(stream, format='png')# stream.getvalue()# ####################### 4. 写入内存(Python 2.x)# ####################### import StringIO# stream = StringIO.StringIO()# img.save(stream, 'png')# stream.getvalue()# ))))))))) 结束# ========================================# 结束
运行:
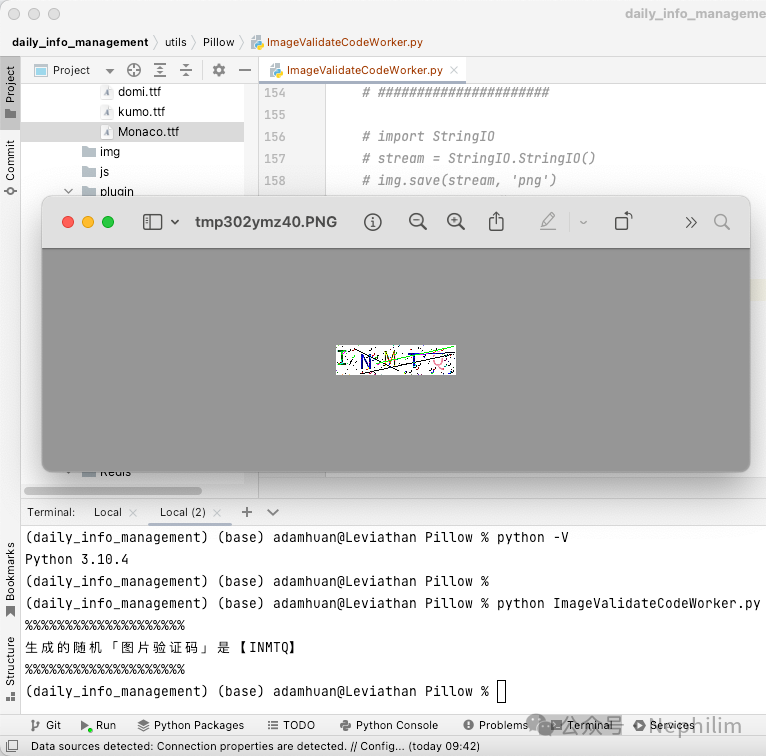
(daily_info_management) (base) adamhuan@Leviathan Pillow % pwd/Users/adamhuan/PycharmProjects/visible-abyss/daily_info_management/utils/Pillow(daily_info_management) (base) adamhuan@Leviathan Pillow %(daily_info_management) (base) adamhuan@Leviathan Pillow % ls -ltrtotal 8-rw-r--r-- 1 adamhuan staff 3826 Apr 14 21:07 ImageValidateCodeWorker.py(daily_info_management) (base) adamhuan@Leviathan Pillow %(daily_info_management) (base) adamhuan@Leviathan Pillow % python -VPython 3.10.4(daily_info_management) (base) adamhuan@Leviathan Pillow %(daily_info_management) (base) adamhuan@Leviathan Pillow % python ImageValidateCodeWorker.py%%%%%%%%%%%%%%%%%%%%生成的随机「图片验证码」是【INMTQ】%%%%%%%%%%%%%%%%%%%%(daily_info_management) (base) adamhuan@Leviathan Pillow %
效果:
END
温馨提示
如果你喜欢本文,请分享到朋友圈,想要获得更多信息,请关注我。
