


Tips:既然要讲Vue的组件全局自动注册,那么顺便梳理下Vue中的组件注册的相关知识点,其中部分内容来自Vue.JS官方文档。

2024/03/20
WEDNESDAY
The best hearts are always the bravest.
心灵最高尚的人,也总是最勇敢的人。
01
Vue.JS「全局组件自动注册」
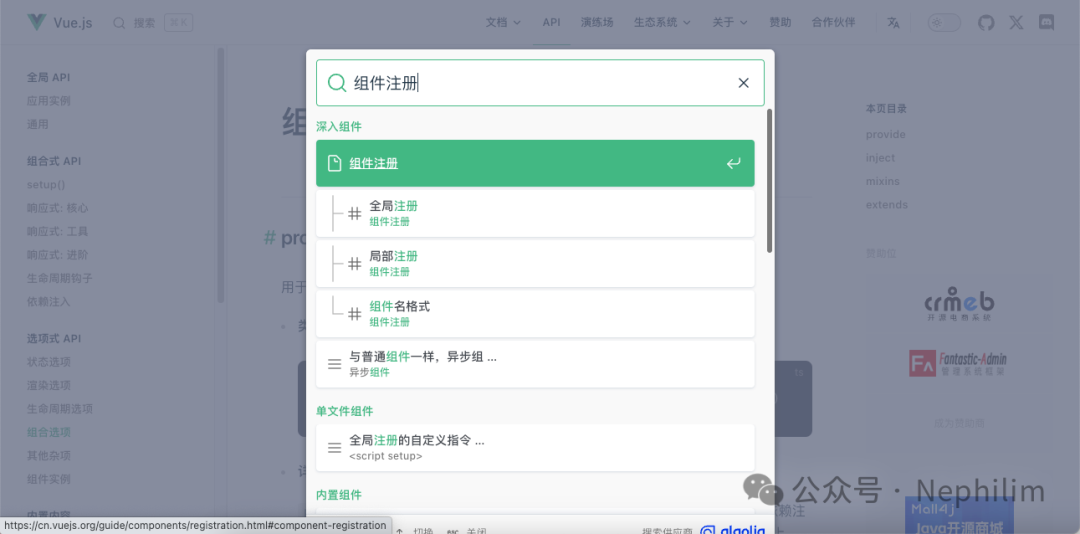
「Vue.JS」官方文档:
https://cn.vuejs.org/guide/components/registration.html#component-registration
在Vue.JS的前端框架中,一个组件在使用之前,需要先被「注册」,这样Vue才能在渲染模板的时候,找到其对应的实现。
在Vue中,组件的注册有两种方式:
全局注册
局部注册
02
全局注册
可以通过Vue应用实例的「.component()」方法,让组件在当前的Vue应用实例中全局可用。
代码「src/main.js」
import { createApp } from 'vue'const app = createApp({})app.component(// 注册的名字'MyComponent',// 组件的实现{/* ... */})
上面的代码可以看到「组件的实现」被整合到了组件的注册代码中;
在真实的开发场景中,我们的「组件实现」一般会独立出来,作为「单文件组件」引用;
因此,在真实的开发场景,或者真实的工作环境中,你所见到的绝大多数的项目中涉及到「组件注册」的部分,都会类似如下的代码所示:
import MyComponent from './App.vue'app.component('MyComponent', MyComponent)
先从「单文件组件」的单独文件中,将组件导入「src/main.js」;
然后通过Vue的应用实例「app」进行注册;
「.component()」方法可以被链式调用:
app.component('ComponentA', ComponentA).component('ComponentB', ComponentB).component('ComponentC', ComponentC)
这意味着,你可以集中注册多个组件到Vue的应用实例。
了解了什么是组件注册后,回到这一小节的标题「全局注册」
什么是全局注册?
简单的说就是,在「src/main.js」中实现的组件注册;
因为「src/main.js」通常是整个Vue项目的入口函数,所以在这里实现的组件注册可以在当前应用的任意组件的模板中使用,所有的子组件可以使用全局注册的组件;
因此,在「src/main.js」中实现的组件注册,就是「全局注册」。
全局注册虽然很方便,但有以下几个问题:
全局注册,但并没有被使用的组件无法在生产打包时被自动移除 (也叫“tree-shaking”)。如果你全局注册了一个组件,即使它并没有被实际使用,它仍然会出现在打包后的 JS 文件中。
全局注册在大型项目中使项目的依赖关系变得不那么明确。在父组件中使用子组件时,不太容易定位子组件的实现。和使用过多的全局变量一样,这可能会影响应用长期的可维护性。
03
局部注册
局部注册的组件,需要在使用它的父组件中显式导入,并且只能在该父组件中使用;
局部注册的优点是:使组件之间的依赖关系更加明确,并且对 tree-shaking 更加友好。
由于Vue的组件代码有两种组织方式:
选项式
组合式
因此局部组件注册也有两种方式:
组合式:
在使用<script setup>的组合式单文件组件中,导入的组件可以直接在模板中使用,无须注册。
<script setup>import ComponentA from './ComponentA.vue'</script><template><ComponentA ></template>
选项式:
在选项式的单文件组件中,导入的组件,需要通过「components」选项来显式注册。
ES2015缩写语法
import ComponentA from './ComponentA.js'export default {components: {ComponentA},setup() {// ...}}
完整语法
export default {components: {ComponentA: ComponentA}// ...}
对于每个「components」对象中的属性,他们的 key 名就是注册的组件名,而值就是相对应的组件实现。
注册的组件名可以在模板(template)中,直接作为HTML的标签使用。
04
组件名的命名格式
在整个指引中,我们都使用 PascalCase 作为组件名的注册格式,这是因为:
PascalCase 是合法的 JavaScript 标识符。这使得在 JavaScript 中导入和注册组件都很容易,同时 IDE 也能提供较好的自动补全。
<PascalCase >
在模板中更明显地表明了这是一个 Vue 组件,而不是原生 HTML 元素。同时也能够将 Vue 组件和自定义元素 (web components) 区分开来。
在单文件组件和内联字符串模板中,我们都推荐这样做。但是,PascalCase 的标签名在 DOM 内模板中是不可用的,详情参见 DOM 内模板解析注意事项(https://cn.vuejs.org/guide/essentials/component-basics.html#in-dom-template-parsing-caveats)。
为了方便,Vue 支持将模板中使用 kebab-case 的标签解析为使用 PascalCase 注册的组件。这意味着一个以 MyComponent
为名注册的组件,在模板中可以通过 <MyComponent>
或 <my-component>
引用。这让我们能够使用同样的 JavaScript 组件注册代码来配合不同来源的模板。
05
自动全局注册组件
对于一些较小的项目,为了方便,我们可能不想在每个组件中去声明组件的名称而直接使用,因此我们需要「全局注册组件」
但随着我们项目的变大,我们的组件可能非常多,如果每个组件都按照上面的方式在「main.js」中重复的写「app.component()」方法全局注册,会非常麻烦。
因此,我们需要一个方式,让我们每次新增了一个单文件组件,就自动的帮我们注册到全局。
06
代码实现
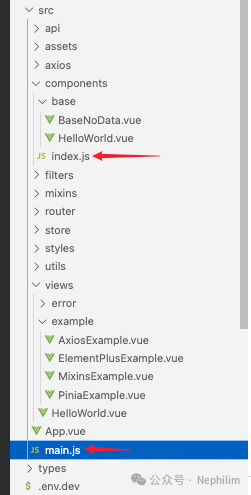
在实现「自动全局注册」中,最重要的两个文件,如上图所示:
「src/components/index.js」
「src/main.js」
一、文件「src/components/index.js」
// 全局组件注册// ==============================// 写法一const modulesFiles = import.meta.glob("@/components/*/*.vue", {eager: true,});const modules = {};for (const key in modulesFiles) {const moduleName = key.replace(/(.*\/)*([^.]+).*/gi, "$2");const value = modulesFiles[key];modules[moduleName] = value.default;// modules[moduleName] = key;console.log("00000000000000000000");console.log("key:: " + key);console.log("moduleName:: " + moduleName);// console.log("value:: " + value);}console.log("+++++++++++++++++++");console.log(modules);export default modules;// ==============================
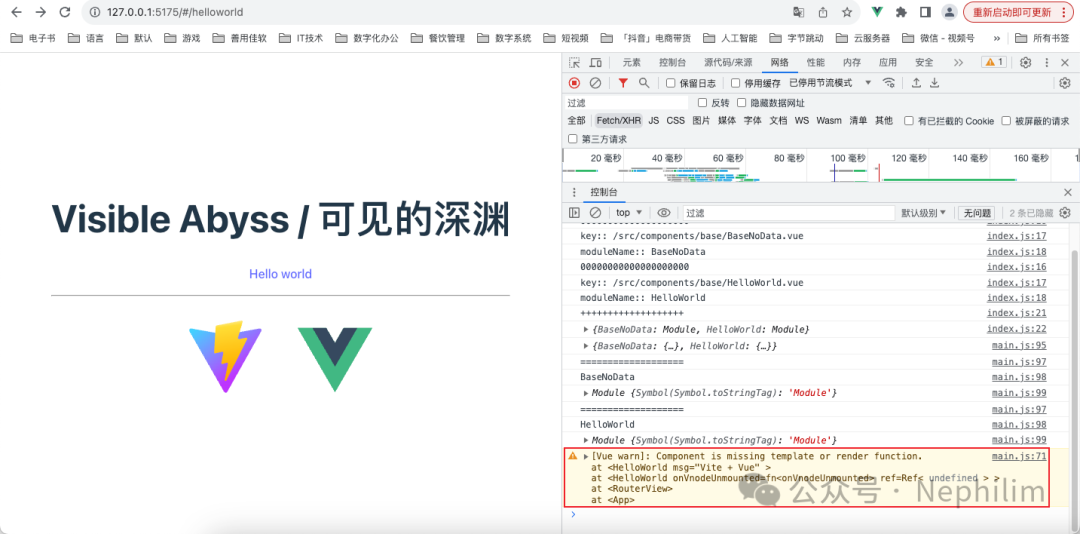
这里,需要注意的是,第13行的代码「modules[moduleName] = value.default;」
如果在赋值的时候没有「value.default」,而是直接「value」
那么,在前端渲染的时候,你会遇到如下的错误:
[Vue warn]: Component is missing template or render function.at <HelloWorld msg="Vite + Vue" >at <HelloWorld onVnodeUnmounted=fn<onVnodeUnmounted> ref=Ref< undefined > >at <RouterView>at <App>
具体如下图所示:
二、文件「src/main.js」
其中,涉及到全局组件自动注册的代码:
// 全局组件注册import customComponent from "@/components/index";console.log(JSON.parse(JSON.stringify(customComponent)));Object.keys(customComponent).forEach((key) => {console.log("===================");console.log(key);console.log(customComponent[key]);// app.component(key, JSON.parse(JSON.stringify(customComponent[key])));app.component(key, customComponent[key]);});
文件「src/main.js」的完整内容:
// 引入函数「createApp」import { createApp } from "vue";// 引入样式import "@/styles/index.scss";// 引入 Element Plusimport ElementPlus from "element-plus";import "element-plus/dist/index.css";// 引入所有图标import * as ElementPlusIconsVue from "@element-plus/icons-vue";// 引入组件import App from "./App.vue";// 路由import router from "./router";// Piniaimport { createPinia } from "pinia";// Pinia 持久化// - 普通用法// import piniaPluginPersistedstate from "pinia-plugin-persistedstate";// - 进阶用法import { createPersistedState } from "pinia-plugin-persistedstate";// 创建 Pinia 实例const pinia = createPinia();// 添加 Pinia 持久化插件// - 普通用法// pinia.use(piniaPluginPersistedstate);// - 进阶用法pinia.use(createPersistedState({// 启用所有Store默认持久化auto: true,// 将数据持久化到哪里// storage: sessionStorage,}),);// - 重写 $reset 方法 解决组合式API中无法使用的问题pinia.use(({ store }) => {const initialState = JSON.parse(JSON.stringify(store.$state));store.$reset = () => {store.$patch(initialState);};});// 创建 Vue 实例const app = createApp(App);// AXIOSimport axios from "axios";import VueAxios from "vue-axios";app.use(VueAxios, axios);// 配置全局 APIimport api from "@/api/index.js";app.config.globalProperties.$api = api;// 使用 Piniaapp.use(pinia);// 配置全局 Storeimport store from "@/store/index.js";app.config.globalProperties.$store = store;// 使用路由app.use(router);// 使用 Element Plusapp.use(ElementPlus, {// size: "small",// zIndex: 3000,});// 注册所有图标// console.log(ElementPlusIconsVue);for (const [key, component] of Object.entries(ElementPlusIconsVue)) {app.component(key, component);}// 混入「Mixins」import mixin from "@/mixins/index.js";app.mixin(mixin);// 过滤器(Filters)import { filters } from "@/filters/index.js";app.config.globalProperties.$filters = filters;// 全局组件注册import customComponent from "@/components/index";console.log(JSON.parse(JSON.stringify(customComponent)));Object.keys(customComponent).forEach((key) => {console.log("===================");console.log(key);console.log(customComponent[key]);// app.component(key, JSON.parse(JSON.stringify(customComponent[key])));app.component(key, customComponent[key]);});// for (const key of Object.entries(customComponent)) {// console.log(key);// app.component(key, customComponent[key]);// }// for (const [key, component] of Object.entries(customComponent)) {// const componentObj = JSON.parse(JSON.stringify(component));// app.component(key, componentObj);// }// 挂载Vue实例app.mount("#app");
这样,组件的「全局自动注册」就配置好了。
07
验证
修改视图「views/HelloWorld.vue」
我们这次不引入「HelloWorld.vue」组件,而是直接使用它:
<script setup>// import HelloWorld from "../components/base/HelloWorld.vue";</script><template><div><a href="https://vitejs.dev" target="_blank"><img src="/vite.svg" class="logo" alt="Vite logo" ></a><a href="https://vuejs.org/" target="_blank"><img src="@/assets/vue.svg" class="logo vue" alt="Vue logo" ></a></div><HelloWorld msg="Vite + Vue" ></template><style scoped>.logo {height: 6em;padding: 1.5em;transition: filter 300ms;will-change: filter;}.logo:hover {filter: drop-shadow(0 0 2em #646cffaa);}.logo.vue:hover {filter: drop-shadow(0 0 2em #42b883aa);}</style>
访问页面:
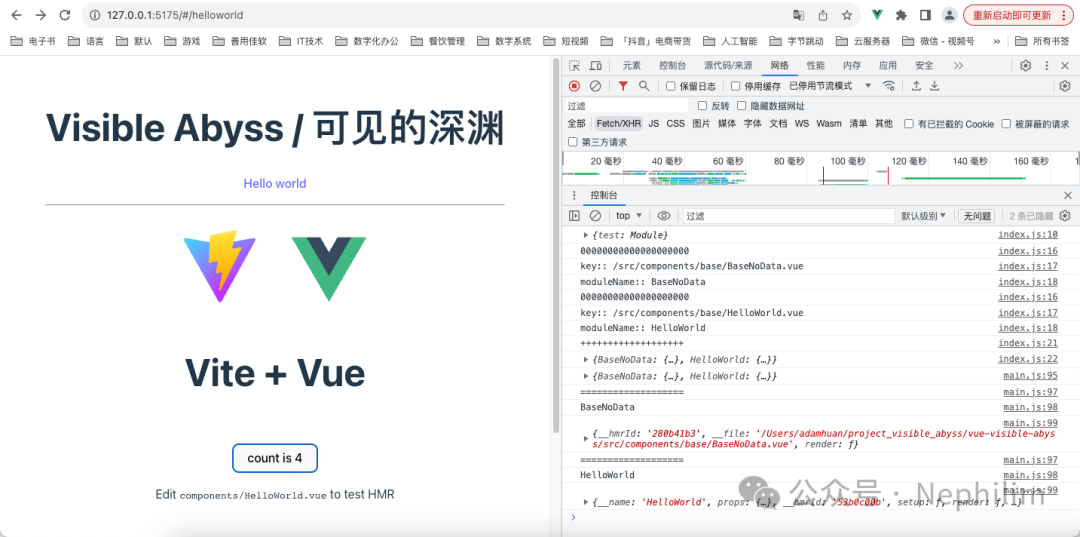
可以看到,组件「HelloWorld」全局自动注册成功,被Vue成功渲染了出来。
END
温馨提示
如果你喜欢本文,请分享到朋友圈,想要获得更多信息,请关注我。
