


本文介绍在操作系统CentOS Linux 7.9的环境下如何部署OceanBase4.3.3数据库,以及此版本的新功能列存及向量检索实现的体验!
一、OB4.3.3的安装
1.安装环境
⑴.软件
[angel@centos79 ~]$ lsb_release -d
Description:	CentOS Linux release 7.9.2009 (Core)

⑵.硬件
2核CPU、32G内存和500G硬盘。
2.OB4.3.3安装包下载、解压
OB提供了两个版本,一个是RPM版本,另一个是all-in-one安装版。
⑴.下载RPM版本
从 OceanBase 软件下载中心下载最新的安装包V4.3.3_CE_BP1的X86版-el7,之后解压。
下载地址:
https://www.oceanbase.com/softwarecenter?_gl=1*1j3lrty*_ga*MTMwMzYyMzc1MS4xNjYyNjQyNTAx*_ga_T35KTM57DZ*MTczMjU5NDcyOS42MDMuMS4xNzMyNTk3MjY0LjMwLjAuMA..
显示文件名是:
oceanbase-ce-4.3.3.1-101000012024102216.el7.x86_64.rpm
这个版本大小为138M。
新建安装文件夹:
[angel@centos79 ~]$ mkdir lxsdownload
进入安装文件夹:
[angel@centos79 ~]$ cd lxsdownload

将安装包文件从下载的文件夹中复制到安装文件夹:
[angel@centos79 lxsdownload]$ cp /home/angel/下载/oceanbase-ce-4.3.3.1-101000012024102216.el7.x86_64.rpm /home/angel/lxsdownload

备注:由于RPM版本使用起来不方便,又下载了all-in-one安装版!
⑵.all-in-one安装版
为了降低产品上手复杂度,OceanBase 为用户提供的一键离线安装包OceanBase All in One,大小是1.9G容量。下面是下载地址:
https://www.oceanbase.com/product/oceanbase-all-in-one-rn/releaseNote#V4.3.3_BP1
将安装包文件从下载的文件夹中复制到安装文件夹,并显示该文件:
cp /home/angel/下载/oceanbase-all-in-one-4.3.3.1_20241023.el7.x86_64.tar.gz /home/angel/lxsdownload
angel@centos79 lxsdownload]$ ll
总用量 2106436
-rw-rw-r--. 1 angel angel 2012116740 11月 26 16:18 oceanbase-all-in-one-4.3.3.1_20241023.el7.x86_64.tar.gz

3.进入安装文件夹,执行安装命令
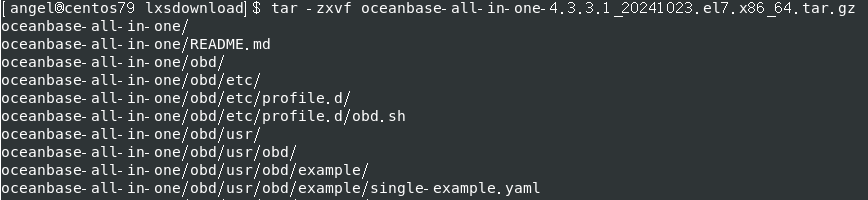
⑴.将安装包解压
[angel@centos79 lxsdownload]$ tar -zxvf oceanbase-all-in-one-4.3.3.1_20241023.el7.x86_64.tar.gz
[angel@centos79 lxsdownload]$ tar -zxvf oceanbase-all-in-one-4.3.3.1_20241023.el7.x86_64.tar.gz
oceanbase-all-in-one/
oceanbase-all-in-one/README.md
oceanbase-all-in-one/obd/
oceanbase-all-in-one/obd/etc/
oceanbase-all-in-one/obd/etc/profile.d/
oceanbase-all-in-one/obd/etc/profile.d/obd.sh
oceanbase-all-in-one/obd/usr/
oceanbase-all-in-one/obd/usr/obd/
oceanbase-all-in-one/obd/usr/obd/example/
oceanbase-all-in-one/obd/usr/obd/example/single-example.yaml
...
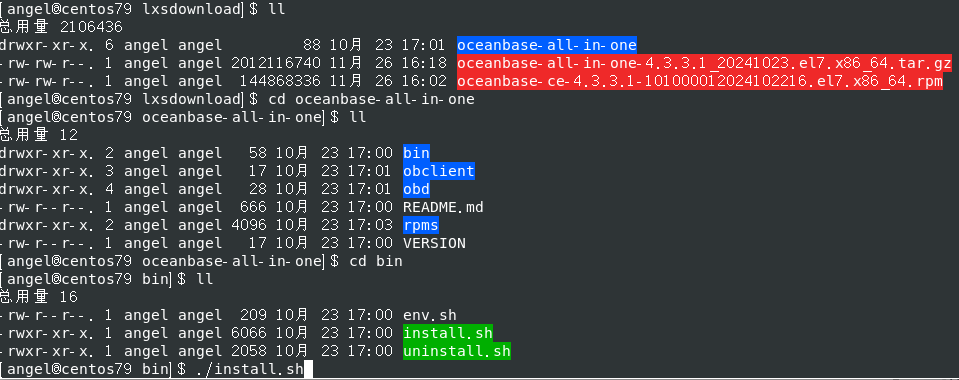
⑵.进入安装目录,执行安装命令
[angel@centos79 lxsdownload]$ cd oceanbase-all-in-one
[angel@centos79 oceanbase-all-in-one]$ ll
总用量 12
drwxr-xr-x. 2 angel angel   58 10月 23 17:00 bin
drwxr-xr-x. 3 angel angel   17 10月 23 17:01 obclient
drwxr-xr-x. 4 angel angel   28 10月 23 17:01 obd
-rw-r--r--. 1 angel angel  666 10月 23 17:00 README.md
drwxr-xr-x. 2 angel angel 4096 10月 23 17:03 rpms
-rw-r--r--. 1 angel angel   17 10月 23 17:00 VERSION
[angel@centos79 oceanbase-all-in-one]$ cd bin
[angel@centos79 bin]$ ll
总用量 16
-rw-r--r--. 1 angel angel  209 10月 23 17:00 env.sh
-rwxr-xr-x. 1 angel angel 6066 10月 23 17:00 install.sh
-rwxr-xr-x. 1 angel angel 2058 10月 23 17:00 uninstall.sh
[angel@centos79 bin]$ ./install.sh
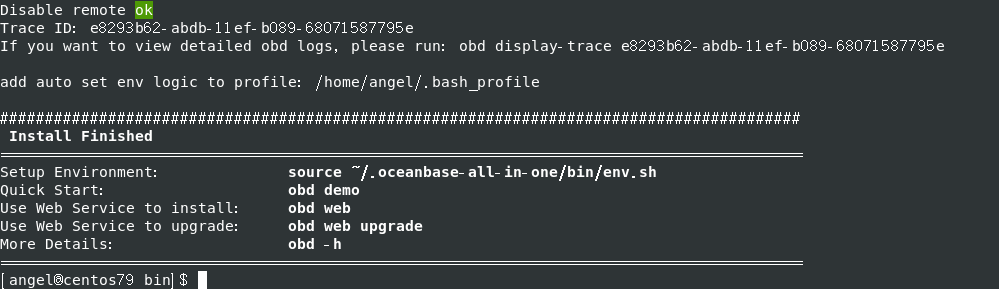
⑶.安装完成
Disable remote ok
Trace ID: e8293b62-abdb-11ef-b089-68071587795e
If you want to view detailed obd logs, please run: obd display-trace e8293b62-abdb-11ef-b089-68071587795e

add auto set env logic to profile: /home/angel/.bash_profile

#########################################################################################
 Install Finished
=========================================================================================
Setup Environment:              source ~/.oceanbase-all-in-one/bin/env.sh
Quick Start:                    obd demo
Use Web Service to install:     obd web
Use Web Service to upgrade:     obd web upgrade
More Details:                   obd -h
=========================================================================================
[angel@centos79 bin]$
⑷.问题
安装完成后显示:
Disable remote ok
不明白什么意思?论坛求助后,淇铭老师告诉我是“禁用了远程的拉取,本地安装”。

二、启动OB4.3.3
1.初始化环境
[angel@localhost bin]$ source ~/.oceanbase-all-in-one/bin/env.sh

2.执行OBD

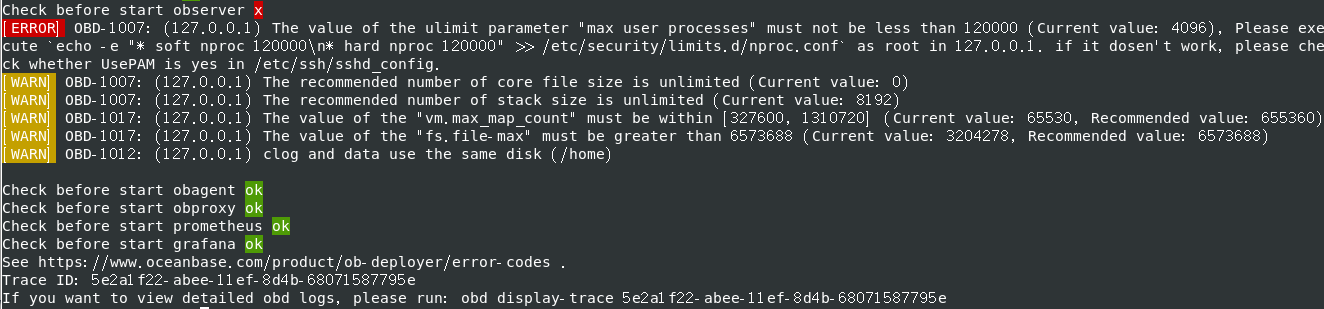
启动集群过程中提示有几个参数值需要更改:
Check before start observer x
[ERROR] OBD-1007: (127.0.0.1) The value of the ulimit parameter "max user processes" must not be less than 120000 (Current value: 4096), Please execute `echo -e "* soft nproc 120000\n* hard nproc 120000" >> /etc/security/limits.d/nproc.conf` as root in 127.0.0.1. if it dosen't work, please check whether UsePAM is yes in /etc/ssh/sshd_config.
[WARN] OBD-1007: (127.0.0.1) The recommended number of core file size is unlimited (Current value: 0)
[WARN] OBD-1007: (127.0.0.1) The recommended number of stack size is unlimited (Current value: 8192)
[WARN] OBD-1017: (127.0.0.1) The value of the "vm.max_map_count" must be within [327600, 1310720] (Current value: 65530, Recommended value: 655360)
[WARN] OBD-1017: (127.0.0.1) The value of the "fs.file-max" must be greater than 6573688 (Current value: 3204278, Recommended value: 6573688)
[WARN] OBD-1012: (127.0.0.1) clog and data use the same disk (/home)

Check before start obagent ok
Check before start obproxy ok
Check before start prometheus ok
Check before start grafana ok
See https://www.oceanbase.com/product/ob-deployer/error-codes .
Trace ID: 5e2a1f22-abee-11ef-8d4b-68071587795e
If you want to view detailed obd logs, please run: obd display-trace 5e2a1f22-abee-11ef-8d4b-68071587795e
[angel@centos79 bin]$
3.环境参数调整
Check before start observer x
⑴.启动前检查发现几个问题
[ERROR] 是致命性问题,必须更改![WARN] 是警告,可以不改,或者有需求时再更改也可以!
max user processes">= 120000 (Current value: 4096), Please execute echo -e "* soft nproc 120000\n* hard nproc 120000" >> /etc/security/limits.d/nproc.conf as root in 127.0.0.1. if it dosen’t work, please check whether UsePAM is yes in /etc/ssh/sshd_config
[WARN] OBD-1007: (127.0.0.1) The recommended number of core file size is unlimited (Current value: 0)
[WARN] OBD-1007: (127.0.0.1) The recommended number of stack size is unlimited (Current value: 8192)
[WARN] OBD-1017: (127.0.0.1) The value of the “vm.max_map_count” must be within [327600, 1310720] (Current value: 65530, Recommended value: 655360)
[WARN] OBD-1017: (127.0.0.1) The value of the “fs.file-max” must be greater than 6573688 (Current value: 3204278, Recommended value: 6573688)
[WARN] OBD-1012: (127.0.0.1) clog and data use the same disk (/home)
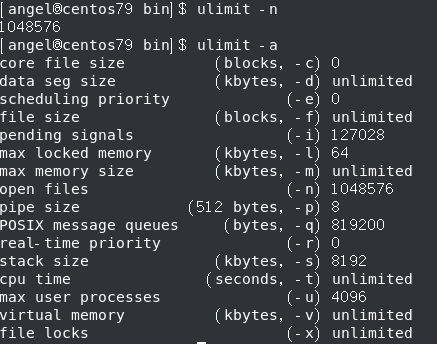
⑵.当前参数
[angel@centos79 bin]$ ulimit -n
1048576
[angel@centos79 bin]$ ulimit -a
core file size          (blocks, -c) 0
data seg size           (kbytes, -d) unlimited
scheduling priority             (-e) 0
file size               (blocks, -f) unlimited
pending signals                 (-i) 127028
max locked memory       (kbytes, -l) 64
max memory size         (kbytes, -m) unlimited
open files                      (-n) 1048576
pipe size            (512 bytes, -p) 8
POSIX message queues     (bytes, -q) 819200
real-time priority              (-r) 0
stack size              (kbytes, -s) 8192
cpu time               (seconds, -t) unlimited
max user processes              (-u) 4096
virtual memory          (kbytes, -v) unlimited
file locks                      (-x) unlimited
⑶.当前参数问题的解决办法
切换到管理员帐户:用vim编辑limits.conf
[root@localhost security]# vim /etc/security/limits.conf
更改文件数后查看参数命令:
[root@localhost bin]# ulimit -n
⑷.[WARN]是小问题
不解决不影响OB数据库集群成功。
4.问题解决


[ERROR]的问题是大问题,在OB网站论坛求助,banjin老师指导后,执行以下操作:
echo -e "* soft nproc 120000\n* hard nproc 120000" >> /etc/security/limits.d/nproc.conf

感谢banjin老师的指导,数据库顺利安装成功!
5.查看进程
ps -ef|grep observer

6.查看监听
netstat –ntlp
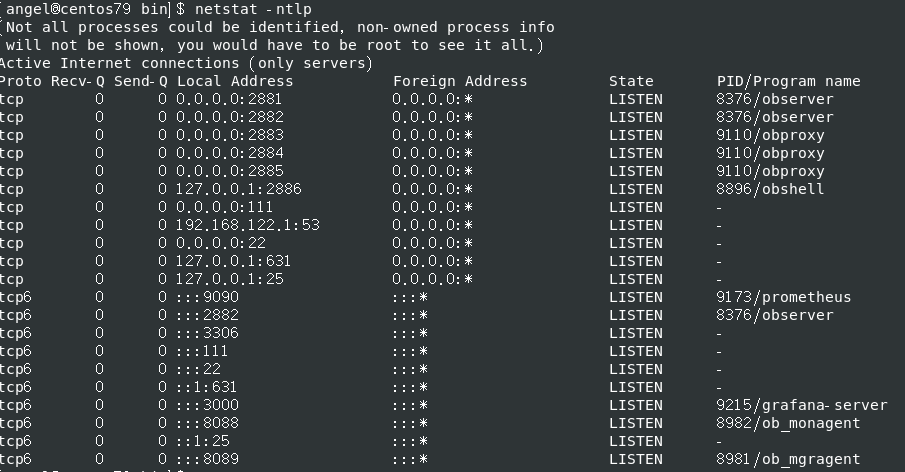
OB启动成功!
三、OB4.3.3集群
1.集群失败
[angel@centos79 bin]$ obclient -h 127.0.0.1 -P 2881 -uroot  -c -A
ERROR 1045 (42000): Access denied for user 'root'@'xxx.xxx.xxx.xxx' (using password: NO)

集群更密失敗!
/home/angel/.obd/cluster/demo
yaml文件存放地址,里面有集群密码。

2.集群的坑
以前的版本都是默认的密码,4.3.3版本是要求填写yaml文件里的密码,更改密码后仍然无法启动,在论坛发贴和钉钉群求助后OB的辞霜老师指导和帮助我。

同时,辞霜老师告诉我停止集群不能直接关机,需要用命令:
obd cluster stop demo
重新启动集群,需要用命令:
obd cluster restart demo
还有,辞霜老师告诉看文档,但是我一直没有遇到困难求助文档的习惯,以后一定要更改这种坏习惯!

3.OB重启成功
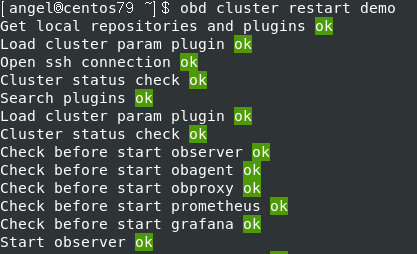
[angel@centos79 ~]$ obd cluster restart demo
Get local repositories and plugins ok
Load cluster param plugin ok
Open ssh connection ok
Cluster status check ok
Search plugins ok
Load cluster param plugin ok
Cluster status check ok
Check before start observer ok
Check before start obagent ok
Check before start obproxy ok
Check before start prometheus ok
Check before start grafana ok
Start observer ok
observer program health check ok
obshell program health check ok
Connect to observer 127.0.0.1:2881 ok
Start obagent ok
obagent program health check ok
Connect to Obagent ok
Start obproxy ok
obproxy program health check ok
Connect to obproxy ok
Initialize obproxy-ce ok
Start promethues ok
prometheus program health check ok
Connect to Prometheus ok
Initialize prometheus ok
Start grafana ok
grafana program health check ok
Connect to grafana ok
Initialize grafana ok
Wait for observer init ok
Check before restart observer ok
[WARN] OBD-1017: (127.0.0.1) The value of the "vm.max_map_count" must be within [327600, 1310720] (Current value: 65530, Recommended value: 655360)
[WARN] OBD-1017: (127.0.0.1) The value of the "fs.file-max" must be greater than 6573688 (Current value: 3204281, Recommended value: 6573688)
Connect to observer ok
Server check ok
Observer restart ok
cluster scenario: express_oltp
Wait for observer init ok
+---------------------------------------------+
| oceanbase-ce |
+-----------+---------+------+-------+--------+
| ip | version | port | zone | status |
+-----------+---------+------+-------+--------+
| 127.0.0.1 | 4.3.3.1 | 2881 | zone1 | ACTIVE |
+-----------+---------+------+-------+--------+
obclient -h127.0.0.1 -P2881 -uroot -p'HmJVw3WqiMyvrB1jaLma' -Doceanbase -A
cluster unique id: bbcb1ea8-e501-591f-997c-40be474d660d-1936ba73a67-01030304
Check before start obagent ok
Stop obagent ok
Check before start obagent ok
Start obagent ok
obagent program health check ok
Connect to Obagent ok
+-------------------------------------------------------------------+
| obagent |
+----------------+--------------------+--------------------+--------+
| ip | mgragent_http_port | monagent_http_port | status |
+----------------+--------------------+--------------------+--------+
| 192.168.43.196 | 8089 | 8088 | active |
+----------------+--------------------+--------------------+--------+
Check before start obproxy ok
[WARN] OBD-4521: The config observer_sys_password in obproxy-ce did not take effect, please config it in oceanbase-ce
Stop obproxy ok
Start obproxy ok
obproxy program health check ok
Connect to obproxy ok
+---------------------------------------------+
| obproxy-ce |
+-----------+------+-----------------+--------+
| ip | port | prometheus_port | status |
+-----------+------+-----------------+--------+
| 127.0.0.1 | 2883 | 2884 | active |
+-----------+------+-----------------+--------+
obclient -h127.0.0.1 -P2883 -uroot -p'HmJVw3WqiMyvrB1jaLma' -Doceanbase -A
Check before start prometheus ok
Stop prometheus ok
Start promethues ok
prometheus program health check ok
Connect to prometheus ok
+-------------------------------------------------------+
| prometheus |
+----------------------------+------+----------+--------+
| url | user | password | status |
+----------------------------+------+----------+--------+
| http://192.168.43.196:9090 | | | active |
+----------------------------+------+----------+--------+
Check before start grafana ok
Stop grafana ok
Start grafana ok
grafana program health check ok
Connect to Grafana ok
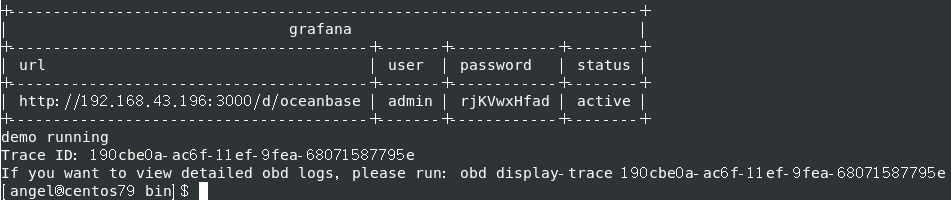
+----------------------------------------------------------------------+
| grafana |
+----------------------------------------+-------+------------+--------+
| url | user | password | status |
+----------------------------------------+-------+------------+--------+
| http://192.168.43.196:3000/d/oceanbase | admin | rjKVwxHfad | active |
+----------------------------------------+-------+------------+--------+
demo restart
Trace ID: 0031705e-ad70-11ef-8e5d-68071587795e
If you want to view detailed obd logs, please run: obd display-trace 0031705e-ad70-11ef-8e5d-68071587795e
启动成功:

4.查看进程
[angel@centos79 ~]$ ps -ef|grep observer
angel     6471     1 61 18:04 ?        00:01:02 /home/angel/oceanbase-ce/bin/observer -p 2881
angel     7984  4561  0 18:05 pts/0    00:00:00 grep --color=auto observer

5.启动OB集群
[angel@centos79 ~]$ obclient -h127.0.0.1 -P2881 -uroot -pHmJVw3WqiMyvrB1jaLma -c -A
Welcome to the OceanBase.  Commands end with ; or \g.
Your OceanBase connection id is 3221487760
Server version: OceanBase_CE 4.3.3.1 (r101000012024102216-2df04a2a7a203b498f23e1904d4b7a000457ce43) (Built Oct 22 2024 17:46:45)

Copyright (c) 2000, 2018, OceanBase and/or its affiliates. All rights reserved.

Type 'help;' or '\h' for help. Type '\c' to clear the current input statement.

obclient [(none)]> show tables;

6.查看OB数据库列表
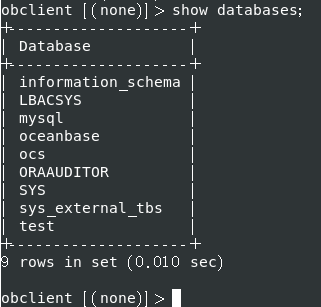
obclient [(none)]> show databases;
+--------------------+
| Database           |
+--------------------+
| information_schema |
| LBACSYS            |
| mysql              |
| oceanbase          |
| ocs                |
| ORAAUDITOR         |
| SYS                |
| sys_external_tbs   |
| test               |
+--------------------+
9 rows in set (0.010 sec)

obclient [(none)]>
7.打开OB数据库
obclient [(none)]> use oceanbase;
Database changed

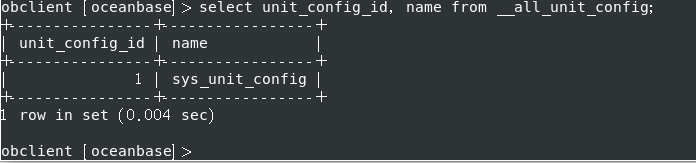
8.查看当前资源规格
obclient [oceanbase]> select unit_config_id, name from __all_unit_config;
+----------------+-----------------+
| unit_config_id | name            |
+----------------+-----------------+
|              1 | sys_unit_config |
+----------------+-----------------+
1 row in set (0.004 sec)
obclient [oceanbase]>
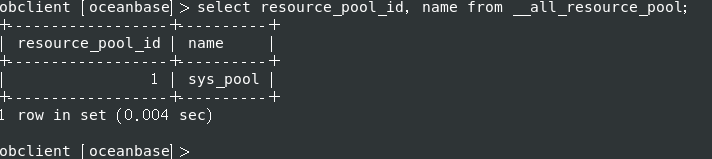
9.查看当前资源池
obclient [oceanbase]> select resource_pool_id, name from __all_resource_pool;
+------------------+----------+
| resource_pool_id | name     |
+------------------+----------+
|                1 | sys_pool |
+------------------+----------+
1 row in set (0.004 sec)

obclient [oceanbase]>
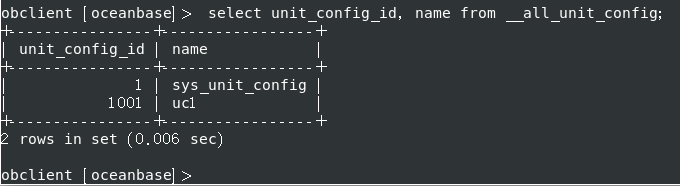
10.创建新资源规格
创建新资源规格时报错,到OB官网查看了创建资源规格的方式,问题解决办法的题目链接如下:
OceanBase 4.3.3 租户的资源管理
https://www.oceanbase.com/docs/common-oceanbase-database-cn-1000000001429672
重新创建资源配置
CREATE RESOURCE UNIT uc1 MAX_CPU 5, MIN_CPU 4, MEMORY_SIZE '36G', MAX_IOPS 128000, MIN_IOPS 128000, LOG_DISK_SIZE '2T' ;

显示创建资源单元成功。
11.创建新资源池
CREATE RESOURCE POOL rp1 UNIT 'uc1', UNIT_NUM 1, ZONE_LIST ('zone1');
创建资源池失败:
obclient [oceanbase]> CREATE RESOURCE POOL rp1 UNIT 'uc1', UNIT_NUM 1, ZONE_LIST ('zone1');
ERROR 4733 (HY000): zone 'zone1' resource not enough to hold 1 unit. You can check resource info by views: DBA_OB_UNITS, GV$OB_UNITS, GV$OB_SERVERS.
server '"127.0.0.1:2882"' MEMORY resource not enough

官网解释如下:
任何一个资源单元一定需要放置在资源足够容纳下它的物理机上,并且单台物理机上最多能放置同一个资源池下的一个资源单元,如果 zone1 或 zone2 上的物理机个数小于 2,或物理机的资源小于 uc1 的规格,上述创建资源池的示例语句将无法执行成功,资源池最终会创建失败。

但是无法理解,只能求助!
12.创建资源池的坑
⑴.根据老师的指导修改了内存
⑵.内存数值修改后资源池创建又失败
obclient [oceanbase]> ALTER RESOURCE UNIT uc1 MAX_CPU 16,  MIN_CPU 16, MEMORY_SIZE '20G', LOG_DISK_SIZE '40G';
Query OK, 0 rows affected (0.022 sec)

obclient [oceanbase]> CREATE RESOURCE POOL rp1 UNIT 'uc1', UNIT_NUM 1, ZONE_LIST ('zone1');
ERROR 4733 (HY000): zone 'zone1' resource not enough to hold 1 unit. You can check resource info by views: DBA_OB_UNITS, GV$OB_UNITS, GV$OB_SERVERS.
server '"127.0.0.1:2882"' CPU resource not enough

⑶.CPU数值修改后资源池创建成功
obclient [oceanbase]> ALTER RESOURCE UNIT uc1 MAX_CPU 10,  MIN_CPU 10, MEMORY_SIZE '20G', LOG_DISK_SIZE '40G';
Query OK, 0 rows affected (0.014 sec)

obclient [oceanbase]> CREATE RESOURCE POOL rp1 UNIT 'uc1', UNIT_NUM 1, ZONE_LIST ('zone1');
Query OK, 0 rows affected (0.034 sec)

感谢淇铭老师两天来加班指导!
⑷.小结与感悟
之所以创建资源池失败,是由于一开始创建资源单元配置时直接用文档的语句命令,如下:
CREATE RESOURCE UNIT uc1 MAX_CPU 5, MIN_CPU 4, MEMORY_SIZE ‘36G’, MAX_IOPS 128000, MIN_IOPS 128000, LOG_DISK_SIZE ‘2T’ ;
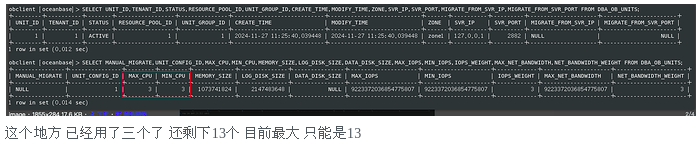
Carlos12138老师给我的视图已经明确显示了问题,是由于内存不足。但是我不知道内存分配的原理,如下图:


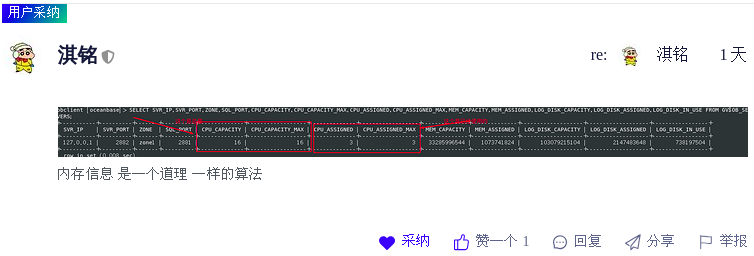
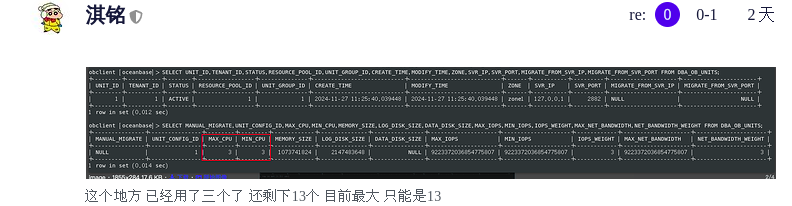
辞霜老师告诉了我内存分配的原理,但是需要修改的地方有点多了,我不知道如何操作,如下图:

感谢淇铭老师不辞辛苦地耐心告诉了我直到最后修改完成。
13.创建租户
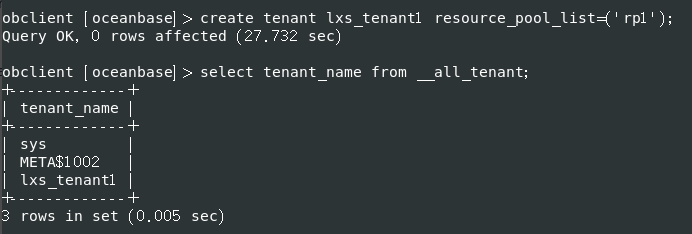
obclient [oceanbase]> create tenant lxs_tenant1 resource_pool_list=('rp1');
Query OK, 0 rows affected (27.732 sec)
obclient [oceanbase]> select tenant_name from __all_tenant;
+-------------+
| tenant_name |
+-------------+
| sys         |
| META$1002   |
| lxs_tenant1 |
+-------------+
3 rows in set (0.005 sec)
四、数据库新功能体验
1.以租户身份登录数据库
obclient -h127.0.0.1 -P2881 -uroot@lxs_tenant1 -Doceanbase -A -c
[angel@centos79 demo]$ obclient -h127.0.0.1 -P2881 -uroot@lxs_tenant1  -Doceanbase -A -c
Welcome to the OceanBase.  Commands end with ; or \g.
Your OceanBase connection id is 3221612591
Server version: OceanBase_CE 4.3.3.1 (r101000012024102216-2df04a2a7a203b498f23e1904d4b7a000457ce43) (Built Oct 22 2024 17:46:45)
Copyright (c) 2000, 2018, OceanBase and/or its affiliates. All rights reserved.
Type 'help;' or '\h' for help. Type '\c' to clear the current input statement.
obclient [oceanbase]>
2.创建数据库
obclient [oceanbase]> create database lxs_db;
Query OK, 1 row affected (0.159 sec)

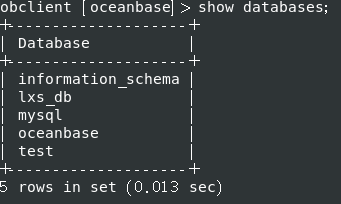
3.查询数据库
obclient [oceanbase]> show databases;
+--------------------+
| Database           |
+--------------------+
| information_schema |
| lxs_db             |
| mysql              |
| oceanbase          |
| test               |
+--------------------+
5 rows in set (0.013 sec)
4.打开数据库
obclient [oceanbase]> use lxs_db;
Database changed

5.创建表
obclient [lxs_db]> create table lxs_student(id int, name varchar(20));
Query OK, 0 rows affected (0.240 sec)
obclient [lxs_db]>

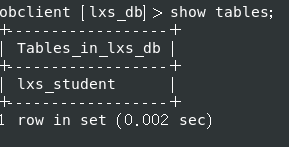
6.查询表
obclient [lxs_db]> show tables;
+------------------+
| Tables_in_lxs_db |
+------------------+
| lxs_student      |
+------------------+
1 row in set (0.002 sec)
7.在表中插入两条数据
obclient [lxs_db]> insert into lxs_student(id, name) value(1, 'angel');
Query OK, 1 row affected (0.040 sec)

obclient [lxs_db]> insert into lxs_student(id, name) value(2, 'alice');
Query OK, 1 row affected (0.003 sec)

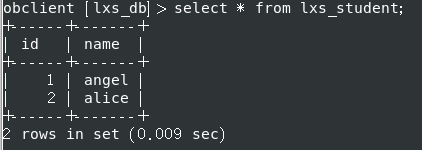
8.查询在表中插入两条数据后的结果
obclient [lxs_db]> select * from lxs_student;
+------+-------+
| id   | name  |
+------+-------+
|    1 | angel |
|    2 | alice |
+------+-------+
2 rows in set (0.009 sec)
小结:至此,OB4.3.3版本的常规功能已经展示完成,下面几步开始展示新功能列存与向量检索功能。
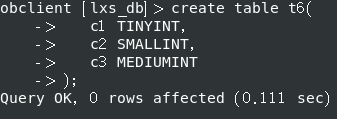
9.创建行存表
建行存表并且插入3列:
create table t6(
   c1 TINYINT,
   c2 SMALLINT,
   c3 MEDIUMINT
);
create /*+ parallel(2) */ index idx1 on t6(c3) with column group (each column);
10.创建列存索引
为表t6的每一个列创建一个列组索引:
obclient [lxs_db]> create /*+ parallel(2) */ index idx1 on t6(c3) with column group (each column);
Query OK, 0 rows affected (0.531 sec)

create index idx1_c1 on t6(c1) with column group;
create index idx1_c2 on t6(c2) with column group;
create index idx1_c3 on t6(c3) with column group;

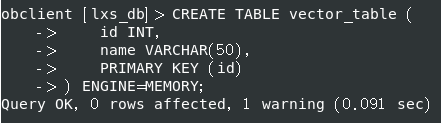
11.创建列向量表
创建一个向量表:
CREATE TABLE vector_table (
    id INT,
    name VARCHAR(50),
    PRIMARY KEY (id)
) ENGINE=MEMORY;
12.设置向量检索环境参数
将向量索引可用内存配置为租户内存的 30%:
ALTER SYSTEM SET ob_vector_memory_limit_percentage = 30;

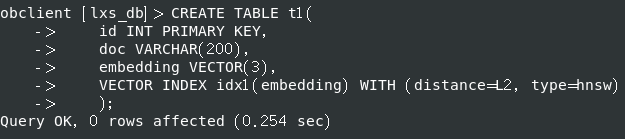
13.创建向量列和索引
创建水果向量t1,OpenAI水果向量数据维度有一千五百多,此处仅为了考察OB数据库功能以3个维度为例,并在列上创建HNSW索引,指定距离算法为欧式距离 L2:
CREATE TABLE t1(
    id INT PRIMARY KEY,
    doc VARCHAR(200),
    embedding VECTOR(3),
    VECTOR INDEX idx1(embedding) WITH (distance=L2, type=hnsw)
    );
Query OK, 0 rows affected (0.254 sec)
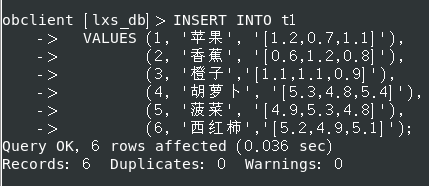
14.写入向量数据
obclient [lxs_db]> INSERT INTO t1
    ->   VALUES (1, '苹果', '[1.2,0.7,1.1]'),
    ->          (2, '香蕉', '[0.6,1.2,0.8]'),
    ->          (3, '橙子','[1.1,1.1,0.9]'),
    ->          (4, '胡萝卜', '[5.3,4.8,5.4]'),
    ->          (5, '菠菜', '[4.9,5.3,4.8]'),
    ->          (6, '西红柿','[5.2,4.9,5.1]');
Query OK, 6 rows affected (0.036 sec)
Records: 6  Duplicates: 0  Warnings: 0
15.查询表中的数据
查看是否写入成功并且返回查询结果:
obclient [lxs_db]> SELECT * FROM t1;
+----+-----------+---------------+
| id | doc       | embedding     |
+----+-----------+---------------+
|  1 | 苹果      | [1.2,0.7,1.1] |
|  2 | 香蕉      | [0.6,1.2,0.8] |
|  3 | 橙子      | [1.1,1.1,0.9] |
|  4 | 胡萝卜    | [5.3,4.8,5.4] |
|  5 | 菠菜      | [4.9,5.3,4.8] |
|  6 | 西红柿    | [5.2,4.9,5.1] |
+----+-----------+---------------+
6 rows in set (0.062 sec)

成功写入并且正确返回预期结果。
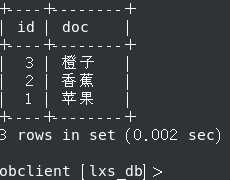
16.执行向量检索
进行向量检索需要提供向量作为搜索条件。假设我们需要找到所有 ‘水果’,其对应的向量为 [0.9, 1.0, 0.9],则对应 SQL 为:
obclient [lxs_db]> SELECT id, doc FROM t1 ORDER BY l2_distance(embedding, '[0.9, 1.0, 0.9]') APPROXIMATE LIMIT 3;

17.向量检索结果
完美返回预期结果:
+----+--------+
| id | doc    |
+----+--------+
|  3 | 橙子   |
|  2 | 香蕉   |
|  1 | 苹果   |
+----+--------+
3 rows in set (0.037 sec)
18.体验小结
本次升级版本不但保留了OB数据库的常规功能,还增加了列存和向量检索的能力。但是不足之处是与其它列存向量库的命令兼容方面还有待于完善,现在的向量数据库都不相互兼容。如果OB数据库能够独树一帜兼容其它向量数据库,其它向量数据库向OB数据库迁移的难度将会大大降低。如果这样,用户接受OB的意愿会更加强烈。再加上支持内置的Embedding方法和内置模型算法,很多企业将会首选OB数据库构建AI应用。
五、总结
随着数字化的普及,以及各种数据的不断增长,向量数据与常规数据结合的综合检索能力将成为数据库的基本功能,在这一方面,OB数据库走在了前面,随着OB数据库生态的不断完善,将使那些没有拥抱OB数据库者越来越不习惯于时代进步后驾驭现代社会的方方面面将不再是危言耸听。
六、致谢
虽然此文有很多错误之处,但是能够得以成稿需要感谢小墨老师的帮助,还有淇铭老师、辞霜老师、banjin老师和Carlos12138老师在我遇到困难时对我及时的帮助,还有很多帮助过我的老师但是我想不起来的以及OB社区前台幕后默默工作的老师和同学们,是他们长年辛勤地付出让我获得OB数据库的知识与技能。
