


点击蓝字关注我们
可以通过多种方式进行PGD的安装和部署,比如可以通过TPA方式、可以通过ansible方式,也可以通过手工方式进行安装和部署,按照EDB官方介绍,建议的安装部署方式是通过TPA方式进行,为此本文我们就以TPA方式进行PGD的安装部署演示,其它方式的安装部署我们可以在后续的文章中再做介绍。
PGD可以运行在多种平台和环境中,PGD可以运行中docker环境中,可以运行在AWS云计算环境,可以运行在虚拟机环境中,也可以运行在裸机环境中。PGD支持的系统平台是主要是Linux,支持centos7(x86_64,ppc64)、Debian 10,11(x86_64),RHEL7~9(x86_64,ppc64),Rocky/Alam/Oracle Linux 8,9(x86_64),SLES12,15(x86_64,ppc64),Ubuntu 20.04 LTS(x86_64),Ubuntu 22.04(x86_64)等。
一、 TPA 和 PGD 简介
我们创建 TPA 是为了轻松重复安装和管理各种 Postgres 配置。 TPA 协调创建和部署 Postgres。上篇文章中我们已经对TPA做过介绍。
PGD 是 Postgres 的多主复制实现,旨在实现高性能和可用性。 PGD 的安装由 TPA 编排。通过TPA 可以生成 PGD集群的配置文件。
TPA Linux 主机选项允许任何云或 VM 平台的用户使用 TPA 来配置PGD。TPA 所需要的只是为目标系统配置Linux 操作系统并使用 SSH 进行访问。与其他 TPA 平台(Docker 和 AWS)不同,Linux 主机配置不会去配置目标主机。
本集群示例使用linux主机来部署集群节点,这些节点包括三个复制的数据库节点、三个共存的连接代理proxy和一个备份节点。然后,TPA 可以向每个节点配置、准备和部署所需的PGD软件和配置。
二、 先决条件
配置 Linux 主机
准备四台linux主机,每台主机安装PGD支持的linux操作系统,每台主机配置为使用证书密钥对进行 SSH 访问,这样可以不用输入密码实现主机间的访问。
主机名称 | 操作系统 | 公共IP地址 | 私有IP地址 |
linuxhost-1 | Oracle linux 8.5 x86_64 | 10.10.31.247 | 10.10.31.247 |
linuxhost-2 | Oracle linux 8.5 x86_64 | 10.10.31.248 | 10.10.31.248 |
linuxhost-3 | Oracle linux 8.5 x86_64 | 10.10.31.249 | 10.10.31.249 |
linuxhost-4 | Oracle linux 8.5 x86_64 | 10.10.31.250 | 10.10.31.250 |
*本例在本地机器安装,只有192私有ip地址。
设置主机管理员用户
为简单起见,在所有主机上使用相同用户。还要在每台主机上配置该用户,这样就可以通过 SSH 登录主机,而不会提示输入密码。确保赋予该用户在主机上的 sudo 权限。在四台主机上,用户 nuser 已经配置了 sudo 权限。
三、 准备工作
EDB帐号
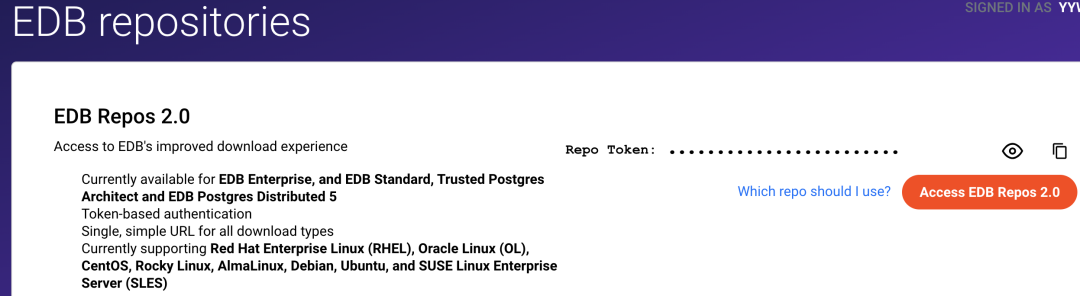
安装 TPA 和 PGD 都需要一个 EDB 账户。如果没有EDB账户,可以注册一个免费账户。注册后,您就可以试用 EDB 软件库。注册后,进入EDB Repos 2.0页面,您可以在其中获取您的repo token。第一次访问此页面时,选择请求访问权限以生成您的存储库令牌。使用复制令牌图标复制令牌,并将其安全存储。
设置环境变量
将EDB_SUBSCRIPTION_TOKEN环境变量设置为在 EDB 账户步骤中获得的 EDB repo Token。
在.bash_profile中或类似的 shell 配置文件中添加变量
export EDB_SUBSCRIPTION_TOKEN=<your-repo-token>
配置存储库
所需的所有软件都可以从PGD软件包存储库中获取。下载并运行脚本来配置PGD存储库。该存储库还包含 TPA 包。
curl -1sLf "https://downloads.enterprisedb.com/$EDB_SUBSCRIPTION_TOKEN/postgres_distributed/setup.deb.sh"| sudo -E bash
四、 安装Trusted Postgres Architect (TPA)
我们用TPA来安装PGD,所以首先安装TPA。通过上面的脚本,repository已经配置成功。直接运行命令就可以安装。
sudo dnf -y install tpaexec
配置TPA
配置TPA的Python环境。使用命令 tpaexec setup来配置所需的python及ansible运行环境:
sudo opt/EDB/TPA/bin/tpaexec setup[nuser@linuxhost-1 ~]$ sudo opt/EDB/TPA/bin/tpaexec setupCreating venv opt/EDB/TPA/tpa-venvRequirement already satisfied: pip>=10.0.1 in /opt/EDB/TPA/tpa-venv/lib/python3.9/site-packages (23.0.1)Collecting pip>=10.0.1Downloading pip-24.0-py3-none-any.whl (2.1 MB)━━━━━━━━━━━━━━━━━━━━━━━━━━━━━━━━━━ 2.1/2.1 MB 1.5 MB/s eta 0:00:00Collecting wheelDownloading wheel-0.43.0-py3-none-any.whl (65 kB)━━━━━━━━━━━━━━━━━━━━━━━━━━━━━━━━━━ 65.8/65.8 kB 9.4 MB/s eta 0:00:00Installing collected packages: wheel, pipAttempting uninstall: pipFound existing installation: pip 23.0.1Uninstalling pip-23.0.1:Successfully uninstalled pip-23.0.1Successfully installed pip-24.0 wheel-0.43.0WARNING: Package(s) not found: ansible-coreWARNING: Skipping ansible-core as it is not installed.Collecting ansible-core==2.15.9 (from -r /opt/EDB/TPA/requirements-ansible-8.txt (line 7))Downloading ansible_core-2.15.9-py3-none-any.whl (2.2 MB)━━━━━━━━━━━━━━━━━━━━━━━━━━━━━━━━━ 2.2/2.2 MB 4.5 MB/s eta 0:00:00Collecting cffi==1.16.0 (from -r /opt/EDB/TPA/requirements-ansible-8.txt (line 11))Downloading cffi-1.16.0-cp39-cp39-manylinux_2_17_x86_64.manylinux2014_x86_64.whl (443 kB)━━━━━━━━━━━━━━━━━━━━━━━━━━━━━━━━━ 443.4/443.4 kB 7.8 MB/s eta 0:00:00Collecting cryptography==42.0.5 (from -r /opt/EDB/TPA/requirements-ansible-8.txt (line 65))Downloading cryptography-42.0.5-cp39-abi3-manylinux_2_28_x86_64.whl (4.6 MB)━━━━━━━━━━━━━━━━━━━━━━━━━━━━━━━━━ 4.6/4.6 MB 2.7 MB/s eta 0:00:00Collecting importlib-resources==5.0.7 (from -r /opt/EDB/TPA/requirements-ansible-8.txt (line 99))Downloading importlib_resources-5.0.7-py3-none-any.whl (24 kB)Collecting jinja2==3.1.3 (from -r /opt/EDB/TPA/requirements-ansible-8.txt (line 103))Downloading Jinja2-3.1.3-py3-none-any.whl (133 kB)━━━━━━━━━━━━━━━━━━━━━━━━━━━━━━━━━ 133.2/133.2 kB 4.8 MB/s eta 0:00:00Collecting markupsafe==2.1.5 (from -r /opt/EDB/TPA/requirements-ansible-8.txt (line 107))Downloading MarkupSafe-2.1.5-cp39-cp39-manylinux_2_17_x86_64.manylinux2014_x86_64.whl (25 kB)Collecting packaging==24.0 (from -r /opt/EDB/TPA/requirements-ansible-8.txt (line 169))Downloading packaging-24.0-py3-none-any.whl (53 kB)━━━━━━━━━━━━━━━━━━━━━━━━━━━━━━━━━ 53.5/53.5 kB 10.9 MB/s eta 0:00:00Collecting pycparser==2.21 (from -r /opt/EDB/TPA/requirements-ansible-8.txt (line 173))Downloading pycparser-2.21-py2.py3-none-any.whl (118 kB)━━━━━━━━━━━━━━━━━━━━━━━━━━━━━━━━━ 118.7/118.7 kB 4.7 MB/s eta 0:00:00Collecting pyyaml==6.0.1 (from -r /opt/EDB/TPA/requirements-ansible-8.txt (line 177))Downloading PyYAML-6.0.1-cp39-cp39-manylinux_2_17_x86_64.manylinux2014_x86_64.whl (738 kB)━━━━━━━━━━━━━━━━━━━━━━━━━━━━━━━━━ 738.9/738.9 kB 4.2 MB/s eta 0:00:00Collecting resolvelib==1.0.1 (from -r /opt/EDB/TPA/requirements-ansible-8.txt (line 230))Downloading resolvelib-1.0.1-py2.py3-none-any.whl (17 kB)Collecting boto3==1.34.64 (from -r /opt/EDB/TPA/requirements.txt (line 7))Downloading boto3-1.34.64-py3-none-any.whl (139 kB)━━━━━━━━━━━━━━━━━━━━━━━━━━━━━━━━━ 139.3/139.3 kB 4.6 MB/s eta 0:00:00Collecting botocore==1.34.64 (from -r /opt/EDB/TPA/requirements.txt (line 11))Downloading botocore-1.34.64-py3-none-any.whl (12.0 MB)━━━━━━━━━━━━━━━━━━━━━━━━━━━━━━━━━ 12.0/12.0 MB 4.1 MB/s eta 0:00:00Collecting certifi==2024.2.2 (from -r /opt/EDB/TPA/requirements.txt (line 17))Downloading certifi-2024.2.2-py3-none-any.whl (163 kB)━━━━━━━━━━━━━━━━━━━━━━━━━━━━━━━━━ 163.8/163.8 kB 4.3 MB/s eta 0:00:00Collecting charset-normalizer==3.3.2 (from -r /opt/EDB/TPA/requirements.txt (line 77))Downloading charset_normalizer-3.3.2-cp39-cp39-manylinux_2_17_x86_64.manylinux2014_x86_64.whl (142 kB)━━━━━━━━━━━━━━━━━━━━━━━━━━━━━━━━━ 142.3/142.3 kB 4.8 MB/s eta 0:00:00Collecting docker==7.0.0 (from -r /opt/EDB/TPA/requirements.txt (line 205))Downloading docker-7.0.0-py3-none-any.whl (147 kB)━━━━━━━━━━━━━━━━━━━━━━━━━━━━━━━━━ 147.6/147.6 kB 4.7 MB/s eta 0:00:00Collecting idna==3.6 (from -r /opt/EDB/TPA/requirements.txt (line 209))Downloading idna-3.6-py3-none-any.whl (61 kB)━━━━━━━━━━━━━━━━━━━━━━━━━━━━━━━━━ 61.6/61.6 kB 5.9 MB/s eta 0:00:00Collecting importlib-metadata==7.0.2 (from -r /opt/EDB/TPA/requirements.txt (line 213))Downloading importlib_metadata-7.0.2-py3-none-any.whl (24 kB)Collecting jaraco-classes==3.3.1 (from -r /opt/EDB/TPA/requirements.txt (line 217))Downloading jaraco.classes-3.3.1-py3-none-any.whl (6.8 kB)Collecting jeepney==0.8.0 (from -r /opt/EDB/TPA/requirements.txt (line 221))Downloading jeepney-0.8.0-py3-none-any.whl (48 kB)━━━━━━━━━━━━━━━━━━━━━━━━━━━━━━━━━ 48.4/48.4 kB 7.3 MB/s eta 0:00:00Collecting jmespath==1.0.1 (from -r /opt/EDB/TPA/requirements.txt (line 231))Downloading jmespath-1.0.1-py3-none-any.whl (20 kB)Collecting keyring==24.3.1 (from -r /opt/EDB/TPA/requirements.txt (line 237))Downloading keyring-24.3.1-py3-none-any.whl (38 kB)Collecting more-itertools==10.2.0 (from -r /opt/EDB/TPA/requirements.txt (line 303))Downloading more_itertools-10.2.0-py3-none-any.whl (57 kB)━━━━━━━━━━━━━━━━━━━━━━━━━━━━━━━━━ 57.0/57.0 kB 7.2 MB/s eta 0:00:00Collecting netaddr==1.2.1 (from -r /opt/EDB/TPA/requirements.txt (line 307))Downloading netaddr-1.2.1-py3-none-any.whl (2.3 MB)━━━━━━━━━━━━━━━━━━━━━━━━━━━━━━━━━ 2.3/2.3 MB 4.2 MB/s eta 0:00:00Collecting passlib==1.7.4 (from -r /opt/EDB/TPA/requirements.txt (line 315))Downloading passlib-1.7.4-py2.py3-none-any.whl (525 kB)━━━━━━━━━━━━━━━━━━━━━━━━━━━━━━━━━ 525.6/525.6 kB 4.3 MB/s eta 0:00:00Collecting psutil==5.9.8 (from -r /opt/EDB/TPA/requirements.txt (line 319))Downloading psutil-5.9.8-cp36-abi3-manylinux_2_12_x86_64.manylinux2010_x86_64.manylinux_2_17_x86_64.manylinux2014_x86_64.whl (288 kB)━━━━━━━━━━━━━━━━━━━━━━━━━━━━━━━━━ 288.2/288.2 kB 4.4 MB/s eta 0:00:00Collecting python-dateutil==2.9.0.post0 (from -r /opt/EDB/TPA/requirements.txt (line 341))Downloading python_dateutil-2.9.0.post0-py2.py3-none-any.whl (229 kB)━━━━━━━━━━━━━━━━━━━━━━━━━━━━━━━━━ 229.9/229.9 kB 4.5 MB/s eta 0:00:00Collecting requests==2.31.0 (from -r /opt/EDB/TPA/requirements.txt (line 400))Downloading requests-2.31.0-py3-none-any.whl (62 kB)━━━━━━━━━━━━━━━━━━━━━━━━━━━━━━━━━ 62.6/62.6 kB 5.2 MB/s eta 0:00:00Collecting s3transfer==0.10.1 (from -r /opt/EDB/TPA/requirements.txt (line 404))Downloading s3transfer-0.10.1-py3-none-any.whl (82 kB)━━━━━━━━━━━━━━━━━━━━━━━━━━━━━━━━━ 82.2/82.2 kB 7.0 MB/s eta 0:00:00Collecting secretstorage==3.3.3 (from -r /opt/EDB/TPA/requirements.txt (line 408))Downloading SecretStorage-3.3.3-py3-none-any.whl (15 kB)Collecting six==1.16.0 (from -r /opt/EDB/TPA/requirements.txt (line 412))Downloading six-1.16.0-py2.py3-none-any.whl (11 kB)Collecting urllib3==1.26.18 (from -r /opt/EDB/TPA/requirements.txt (line 416))Downloading urllib3-1.26.18-py2.py3-none-any.whl (143 kB)━━━━━━━━━━━━━━━━━━━━━━━━━━━━━━━━━ 143.8/143.8 kB 4.6 MB/s eta 0:00:00Collecting zipp==3.18.1 (from -r /opt/EDB/TPA/requirements.txt (line 423))Downloading zipp-3.18.1-py3-none-any.whl (8.2 kB)Installing collected packages: resolvelib, passlib, zipp, urllib3, six, pyyaml, pycparser, psutil, packaging, netaddr, more-itertools, markupsafe, jmespath, jeepney, importlib-resources, idna, charset-normalizer, certifi, requests, python-dateutil, jinja2, jaraco-classes, importlib-metadata, cffi, docker, cryptography, botocore, secretstorage, s3transfer, ansible-core, keyring, boto3Successfully installed ansible-core-2.15.9 boto3-1.34.64 botocore-1.34.64 certifi-2024.2.2 cffi-1.16.0 charset-normalizer-3.3.2 cryptography-42.0.5 docker-7.0.0 idna-3.6 importlib-metadata-7.0.2 importlib-resources-5.0.7 jaraco-classes-3.3.1 jeepney-0.8.0 jinja2-3.1.3 jmespath-1.0.1 keyring-24.3.1 markupsafe-2.1.5 more-itertools-10.2.0 netaddr-1.2.1 packaging-24.0 passlib-1.7.4 psutil-5.9.8 pycparser-2.21 python-dateutil-2.9.0.post0 pyyaml-6.0.1 requests-2.31.0 resolvelib-1.0.1 s3transfer-0.10.1 secretstorage-3.3.3 six-1.16.0 urllib3-1.26.18 zipp-3.18.1Installing ansible collectionsStarting galaxy collection install processProcess install dependency mapStarting collection install processDownloading https://galaxy.ansible.com/api/v3/plugin/ansible/content/published/collections/artifacts/community-crypto-2.16.1.tar.gz to /root/.ansible/tmp/ansible-local-1137468dvj1d3dd/tmpjjfrm0b7/community-crypto-2.16.1-l8qxco83Installing 'community.crypto:2.16.1' to '/opt/EDB/TPA/tpa-venv/collections/ansible_collections/community/crypto'community.crypto:2.16.1 was installed successfullyDownloading https://galaxy.ansible.com/api/v3/plugin/ansible/content/published/collections/artifacts/community-aws-6.4.0.tar.gz to /root/.ansible/tmp/ansible-local-1137468dvj1d3dd/tmpjjfrm0b7/community-aws-6.4.0-_6h0e3neInstalling 'community.aws:6.4.0' to '/opt/EDB/TPA/tpa-venv/collections/ansible_collections/community/aws'Downloading https://galaxy.ansible.com/api/v3/plugin/ansible/content/published/collections/artifacts/amazon-aws-6.5.0.tar.gz to /root/.ansible/tmp/ansible-local-1137468dvj1d3dd/tmpjjfrm0b7/amazon-aws-6.5.0-xlr91s18community.aws:6.4.0 was installed successfullyInstalling 'amazon.aws:6.5.0' to '/opt/EDB/TPA/tpa-venv/collections/ansible_collections/amazon/aws'Downloading https://galaxy.ansible.com/api/v3/plugin/ansible/content/published/collections/artifacts/community-postgresql-2.4.3.tar.gz to /root/.ansible/tmp/ansible-local-1137468dvj1d3dd/tmpjjfrm0b7/community-postgresql-2.4.3-oc7roguzamazon.aws:6.5.0 was installed successfullyInstalling 'community.postgresql:2.4.3' to '/opt/EDB/TPA/tpa-venv/collections/ansible_collections/community/postgresql'Downloading https://galaxy.ansible.com/api/v3/plugin/ansible/content/published/collections/artifacts/community-general-7.5.2.tar.gz to /root/.ansible/tmp/ansible-local-1137468dvj1d3dd/tmpjjfrm0b7/community-general-7.5.2-tbt67qpccommunity.postgresql:2.4.3 was installed successfullyInstalling 'community.general:7.5.2' to '/opt/EDB/TPA/tpa-venv/collections/ansible_collections/community/general'Downloading https://galaxy.ansible.com/api/v3/plugin/ansible/content/published/collections/artifacts/ansible-posix-1.5.4.tar.gz to /root/.ansible/tmp/ansible-local-1137468dvj1d3dd/tmpjjfrm0b7/ansible-posix-1.5.4-t9n7nrxmcommunity.general:7.5.2 was installed successfullyInstalling 'ansible.posix:1.5.4' to '/opt/EDB/TPA/tpa-venv/collections/ansible_collections/ansible/posix'Downloading https://galaxy.ansible.com/api/v3/plugin/ansible/content/published/collections/artifacts/community-docker-3.8.0.tar.gz to /root/.ansible/tmp/ansible-local-1137468dvj1d3dd/tmpjjfrm0b7/community-docker-3.8.0-12ws9c2uansible.posix:1.5.4 was installed successfullyInstalling 'community.docker:3.8.0' to '/opt/EDB/TPA/tpa-venv/collections/ansible_collections/community/docker'community.docker:3.8.0 was installed successfullyDownloading https://galaxy.ansible.com/api/v3/plugin/ansible/content/published/collections/artifacts/community-library_inventory_filtering_v1-1.0.1.tar.gz to /root/.ansible/tmp/ansible-local-1137468dvj1d3dd/tmpjjfrm0b7/community-library_inventory_filtering_v1-1.0.1-_hirf2okInstalling 'community.library_inventory_filtering_v1:1.0.1' to '/opt/EDB/TPA/tpa-venv/collections/ansible_collections/community/library_inventory_filtering_v1'community.library_inventory_filtering_v1:1.0.1 was installed successfully
在.bash_profile或对应的shell中添加tpaexec的路径到PATH变量
export PATH=$PATH:/opt/EDB/TPA/bin
测试 TPA 安装
运行 selftest 来验证 TPA 是否已正确安装,确保检测都是ok:
tpaexec selftest[nuser@linuxhost-1 ~]$ tpaexec selftest# TPAexec 23.31tpaexec=/opt/EDB/TPA/bin/tpaexecTPA_DIR=/opt/EDB/TPAPYTHON=/opt/EDB/TPA/tpa-venv/bin/python3 (v3.9.18, venv)TPA_VENV=/opt/EDB/TPA/tpa-venvANSIBLE=/opt/EDB/TPA/tpa-venv/bin/ansible (v2.15.9)Validated: 5599b821fd880c29a516a125f16218f66298eaed11658f51f736be2b78e59a8f [OK]ansible [core 2.15.9]config file = /opt/EDB/TPA/ansible/ansible.cfgconfigured module search path = ['/opt/EDB/TPA/library']ansible python module location = /opt/EDB/TPA/tpa-venv/lib/python3.9/site-packages/ansibleansible collection location = /opt/EDB/TPA/tpa-venv/collectionsexecutable location = /opt/EDB/TPA/tpa-venv/bin/ansiblepython version = 3.9.18 (main, Nov 6 2023, 04:27:58) [GCC 8.5.0 20210514 (Red Hat 8.5.0-18)] (/opt/EDB/TPA/tpa-venv/bin/python3)jinja version = 3.1.3libyaml = TruePLAY [localhost] *****************************************************************************************TASK [include_role : selftest] ****************************************************************************TASK [selftest : Gather facts on localhost]*********************************************************ok: [localhost]TASK [selftest : Check for Python and Ansible versions] ****************************************************ok: [localhost] => {"changed": false,"msg": "All assertions passed"}TASK [selftest : Ensure that local dependencies are installed] ********************************************ok: [localhost] => (item=flock) => {"ansible_loop_var": "item","changed": false,"item": "flock","msg": "All assertions passed"}TASK [selftest : Ensure that all required Ansible collections have been installed] **************************ok: [localhost] => (item=community.crypto) => {"ansible_loop_var": "item","changed": false,"item": "community.crypto","msg": "All assertions passed"}ok: [localhost] => (item=community.aws) => {"ansible_loop_var": "item","changed": false,"item": "community.aws","msg": "All assertions passed"}ok: [localhost] => (item=amazon.aws) => {"ansible_loop_var": "item","changed": false,"item": "amazon.aws","msg": "All assertions passed"}ok: [localhost] => (item=community.postgresql) => {"ansible_loop_var": "item","changed": false,"item": "community.postgresql","msg": "All assertions passed"}ok: [localhost] => (item=community.general) => {"ansible_loop_var": "item","changed": false,"item": "community.general","msg": "All assertions passed"}ok: [localhost] => (item=ansible.posix) => {"ansible_loop_var": "item","changed": false,"item": "ansible.posix","msg": "All assertions passed"}ok: [localhost] => (item=community.docker) => {"ansible_loop_var": "item","changed": false,"item": "community.docker","msg": "All assertions passed"}PLAY RECAP **************************************************************************************************************localhost : ok=4 changed=0 unreachable=0 failed=0 skipped=0 rescued=0 ignored=0
五、 使用 TPA 安装 PGD
生成配置文件
运行tpaexec configure命令生成配置文件夹:
tpaexec configure pgddemo1 \--architecture PGD-Always-ON \--platform bare \--edb-postgres-advanced 16 \--redwood \--no-git \--location-names datacenter1 \--pgd-proxy-routing local \--hostnames-unsorted
指定 PGD-Always-ON 架构 (--architecture PGD-Always-ON),它会设置 PGD 5 的 Always On架构的配置。作为默认架构的一部分,它为集群配置了三个数据节点,三个 PGD 代理服务器和一个用于备份的 Barman 节点。
对于 Linux 主机,指定的目标是“裸机” (--platform bare)。 TPA 将在部署期间确定每个主机上运行的 Linux 版本及兼容性。
指定数据节点将运行具有 Oracle 兼容性 (--redwood) 的 EDB Postgres Advanced Server v16 (--edb-postgres-advanced 16)。
使用--location-names将节点的名义位置设置为datacenter1。然后,您将--pgd-proxy-routing设置为local,以便代理路由可以将流量路由到名义位置内的所有节点。
默认情况下,TPA 将配置更改提交到 Git存储库。对于本示例,不需要这样做,因此可以设置--no-git参数。
--hostnames-unsorted要求TPA为节点生成可重复的主机名。否则,它会从预定义的列表中随机选择主机名。
此命令会在当前目录中创建一个名为 pgddemo1 的子目录。它包含 TPA 用于创建集群的config.yml配置文件。
接下来需要编辑配置文件,添加与 Linux 主机相关的详细信息,如管理员用户名以及公共和私有 IP 地址。
编辑配置文件
在生成的目录pgddemo1目录下编辑config.yml, 搜索包含ansible_user: root 的行。将 root 更改为有 SSH 访问权限和 sudo 权限的用户名nuser,修改如下:
instance_defaults:platform: barevars:ansible_user: nusermanage_ssh_hostkeys: yes
接下来,搜索 node: 1,这是第一个节点 linuxhost-1 的配置设置。在node: 1行之后,添加节点的ip地址(或公共和私有IP地址)。使用linuxhost-1作为此节点的主机。修改后内容显示如下:
- Name: linuxhost-1backup: linuxhost-4location: datacenter1node: 1ip_address: 192.168.31.247role:- bdr- pgd-proxyvars:bdr_child_group: datacenter1_subgroupbdr_node_options:route_priority: 100
如果节点有公共ip和私有ip,可替换ip_address为public_ip:xx.xx.xx.xx和private_ip:xx.xx.xx.xx,如下
public_ip: 172.19.16.26private_ip: 192.168.2.41
同理,修改node:2,node:3,node:4其它三个节点。
- Name: linuxhost-2location: datacenter1node: 2ip_address: 192.168.31.248role:- bdr- pgd-proxyvars:bdr_child_group: datacenter1_subgroupbdr_node_options:route_priority: 100- Name: linuxhost-3location: datacenter1node: 3ip_address: 192.168.31.249role:- bdr- pgd-proxyvars:bdr_child_group: datacenter1_subgroupbdr_node_options:route_priority: 100- Name: linuxhost-4location: datacenter1node: 4ip_address: 192.168.31.250role:- barman
Provisioning cluster装配集群
tpaexec provision pgddemo1localhost : ok=59 changed=3 unreachable=0 failed=0 skipped=30 rescued=0 ignored=0
运行上面命令为部署集群做准备,确保无误。
对于 Linux 主机,此过程的一部分包括为主机创建密钥对以供稍后进行SSH操作。创建这些密钥对后,需要将密钥对的公钥复制到其它主机。使用ssh-copy-id完成,为每个主机提供pgddemo1 身份 (-i) 和登录名。如下:
ssh-copy-id -i pgddemo1/id_ pgddemo1 nuser@192.168.31.247ssh-copy-id -i pgddemo1/id_ pgddemo1 nuser@192.168.31.248ssh-copy-id -i pgddemo1/id_ pgddemo1 nuser@192.168.31.249ssh-copy-id -i pgddemo1/id_ pgddemo1 nuser@192.168.31.250
使用 ssh-keyscan对每个主机的输出附加到 tpa_known_hosts:
ssh-keyscan -H 192.168.31.247 >> pgddemo1/tpa_known_hostsssh-keyscan -H 192.168.31.248 >> pgddemo1/tpa_known_hostsssh-keyscan -H 192.168.31.249 >> pgddemo1/tpa_known_hostsssh-keyscan -H 192.168.31.250 >> pgddemo1/tpa_known_hosts
部署集群
通过上面的准备工作,现在可以正式部署PGD集群。
tpaexec deploy pgddemo1
等待几分钟,就可以成功完成部署。如果部署中出现错误,可以在pgddemo1目录中的ansible.log中排查问题。
至此,我们的3个数据节点的PGD集群安装完成。
六、 连接到集群
困为上面已经配置好ssh无密码连接,所以可以直接通过ssh以nuser身份登录到集群主机节点。
cd pgddemo1ssh -F ssh_config linuxhost-1
由于本实验我们安装的是EDB Advanced Server,所以安装过程会自动创建enterprisedb用户及权限。
切换到enterprisedb用户
sudo -iu enterprisedb
现在可以运行 psql 命令来访问 bdrdb 数据库,进行psql操作:
psql bdrdbenterprisedb@linuxhost-1:~ $ psql bdrdbpsql (16.2.0)Type "help" for help.bdrdb=#
使用 PGD CLI查看集群状态
PGD实用程序也称为 PGD CLI,用于控制和管理PGD集群。默认已经安装在数据节点上。
可以通过运行 pgd check-health 使用它来检查集群的运行状况:
enterprisedb@linuxhost-1:~ $ pgd check-healthCheck Status Message----- ------ -------ClockSkew Ok All BDR node pairs have clockskew within permissible limitConnection Ok All BDR nodes are accessibleRaft Ok Raft Consensus is working correctlyReplslots Ok All BDR replication slots are working correctlyVersion Ok All nodes are running same BDR versions
使用 pgd show-nodes 要求 PGD 显示集群中的数据承载节点:
enterprisedb@linuxhost-1:~ $ pgd show-nodesNode Node ID Group Type Current State Target State Status Seq ID---- ------- ----- ---- ------------- ------------ ------ ------linuxhost-1 419798964 datacenter1_subgroup data ACTIVE ACTIVE Up 1linuxhost-2 3768972443 datacenter1_subgroup data ACTIVE ACTIVE Up 3linuxhost-3 3649072720 datacenter1_subgroup data ACTIVE ACTIVE Up 2
使用 pgd show-proxies 显示代理连接节点:
enterprisedb@linuxhost-1:~ $ pgd show-proxiesProxy Group Listen Addresses Listen Port----- ----- ---------------- -----------linuxhost-1 datacenter1_subgroup [0.0.0.0] 6432linuxhost-2 datacenter1_subgroup [0.0.0.0] 6432linuxhost-3 datacenter1_subgroup [0.0.0.0] 6432
代理为应用程序提供与数据节点集群的高可用性连接。您可以使用 psql -h linuxhost-1,linuxhost-2,linuxhost-3 -p 6432 bdrdb 命令连接代理,进而连接数据库:
enterprisedb@linuxhost-1:~ $ psql -h linuxhost-1,linuxhost-2,linuxhost-3 -p 6432 bdrdbpsql (16.2.0)SSL connection (protocol: TLSv1.3, cipher: TLS_AES_256_GCM_SHA384, compression: off)Type "help" for help.bdrdb=#
七、 后续
后续的文章我们会进一步管理和操作PGD集群,包括:
♦将数据库连接到应用程序
♦通过实践练习探索故障转移
♦通过创建和监控冲突来了解冲突
♦手工安装PGD
发现“分享”和“赞”了吗,戳我看看吧
