配置推送镜像
配置Gitlab允许外部访问
配置gitlab api token
配置jenkins项目可经由gitlab上的事件触发
Jenkins项目pipeline as code
创建Jenkins链接Kubernetes的认证
实现CD
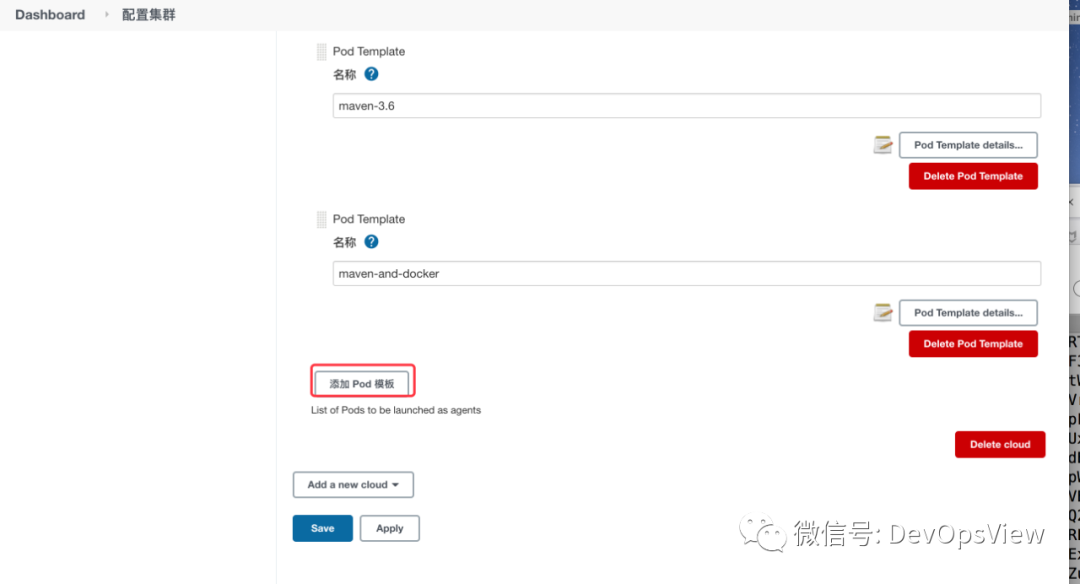
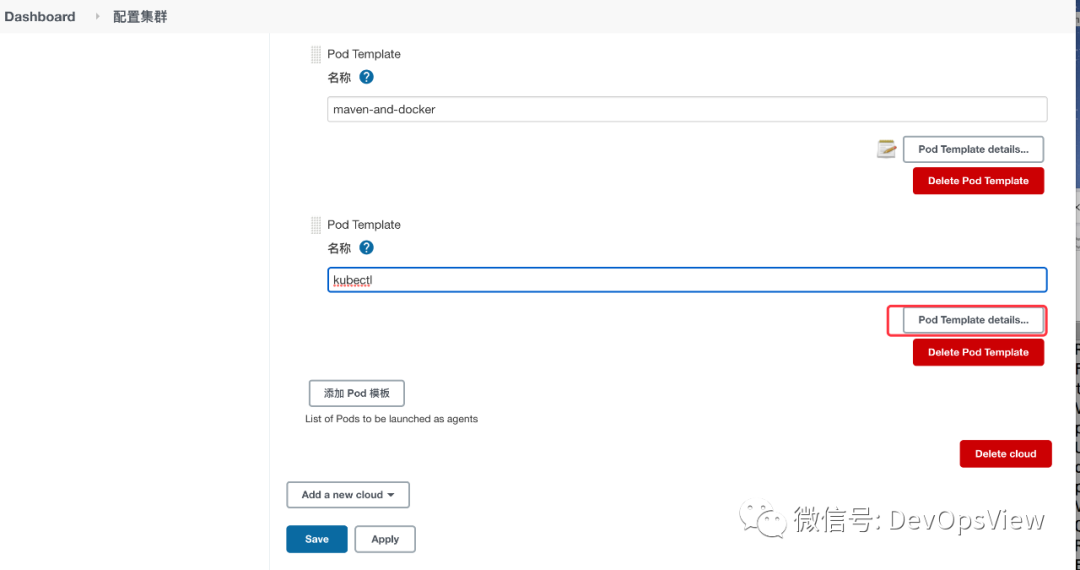
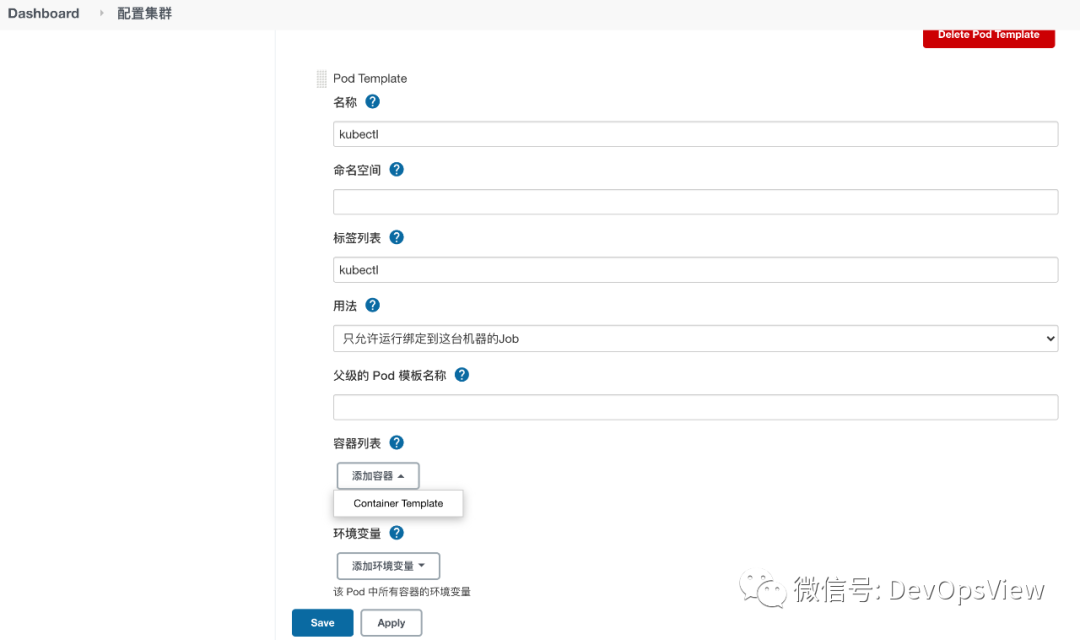
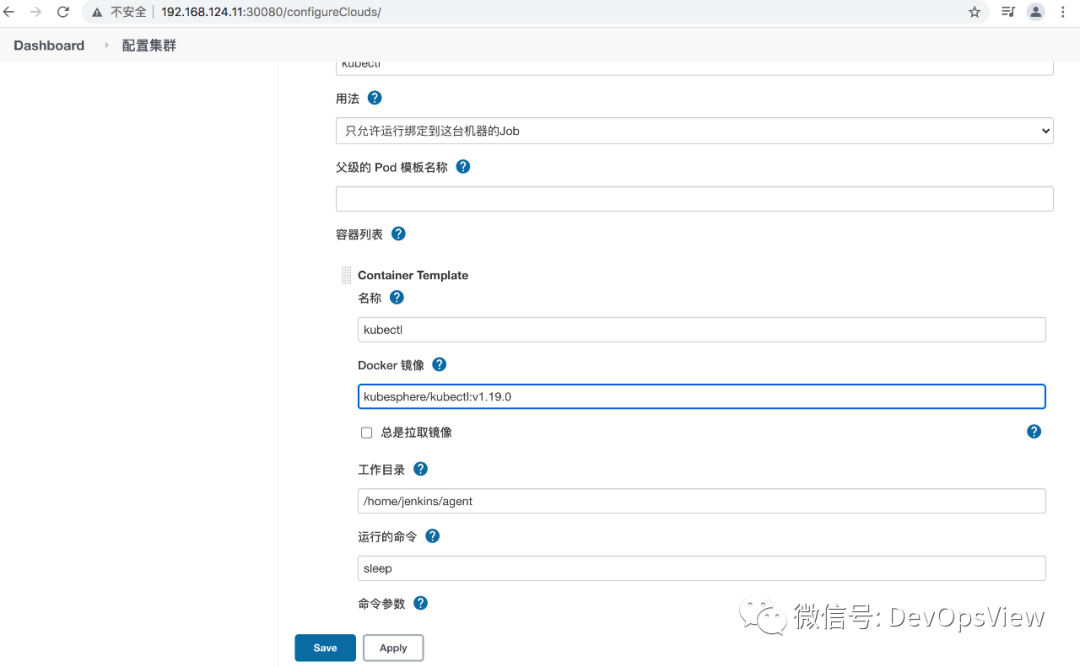
添加Pod模版
安装kubernetes插件并部署服务到Kubernetes集群
最近一段时间比较忙一些,最后一篇最近这几天才整理好,还希望大家谅解。此外今天是高考的第一天,祝愿考生们超常发挥。
配置推送镜像
1、在jenkins上创建认证
系统管理--->Manage Credentials
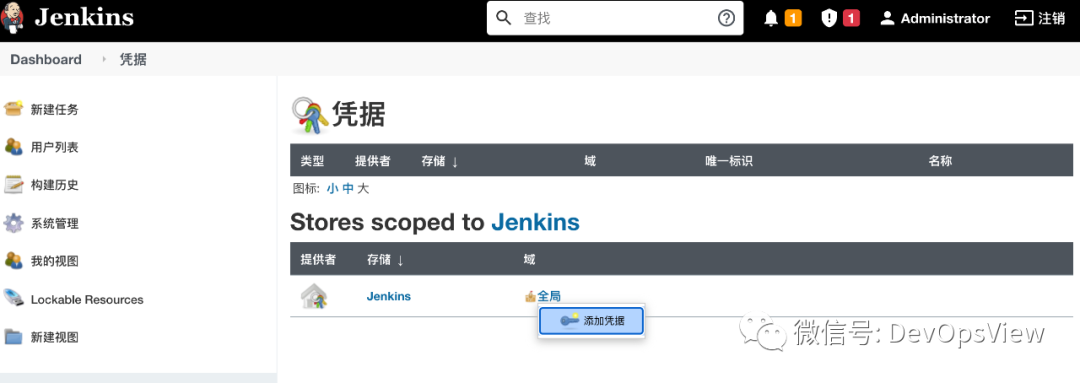
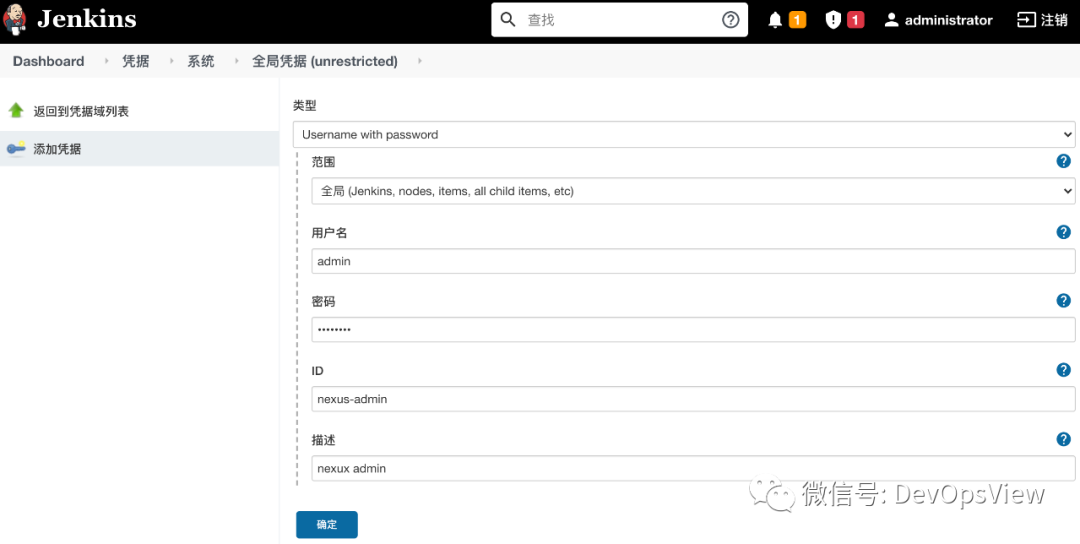
用户名与密码为nexus的账户和密码
2、在所有node节点配置解析
# vim /etc/hosts
10.1.80.40 sonatype-nexus.nexus.svc.cluster.local
10.1.80.40为nexus的ClusterIP
3、所有node节点的/etc/docker/daemon.json添加如下内容
# vim /etc/docker/daemon.json
{
    "insecure-registries": ["sonatype-nexus.nexus.svc.cluster.local:8082"]
}
4、重启docker服务,并进行docker login
# docker login sonatype-nexus.nexus.svc.cluster.local:8082
Username: admin
Password:
WARNING! Your password will be stored unencrypted in /root/.docker/config.json.
Configure a credential helper to remove this warning. See
https://docs.docker.com/engine/reference/commandline/login/#credentials-store

Login Succeeded
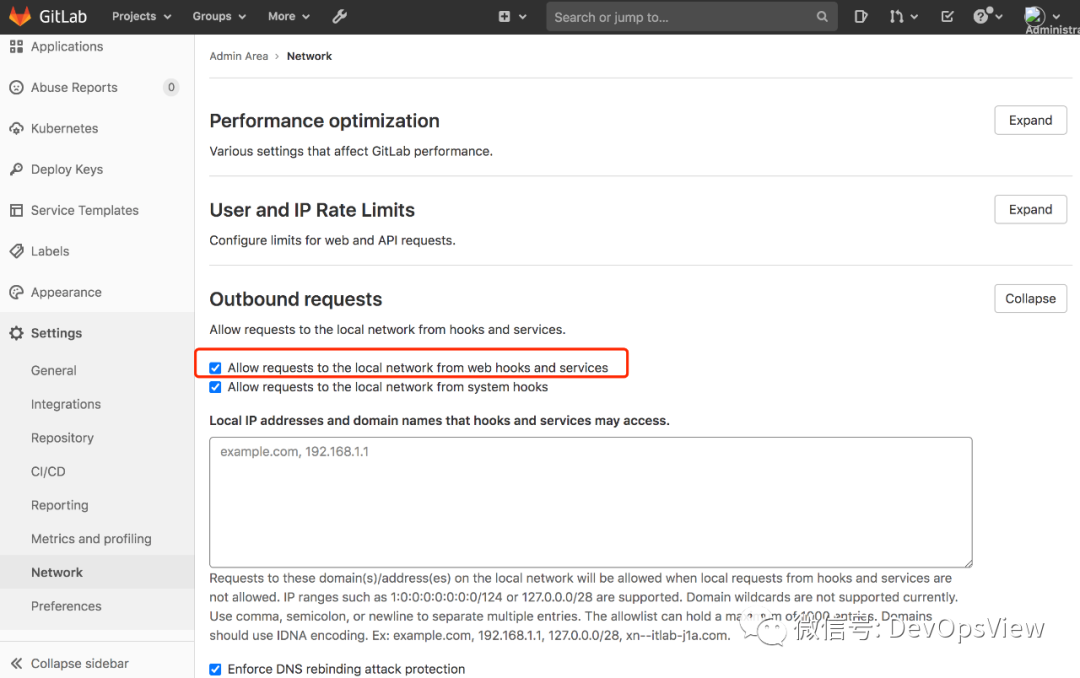
配置Gitlab允许外部访问
1、依次打开admin area--->settings--->Network
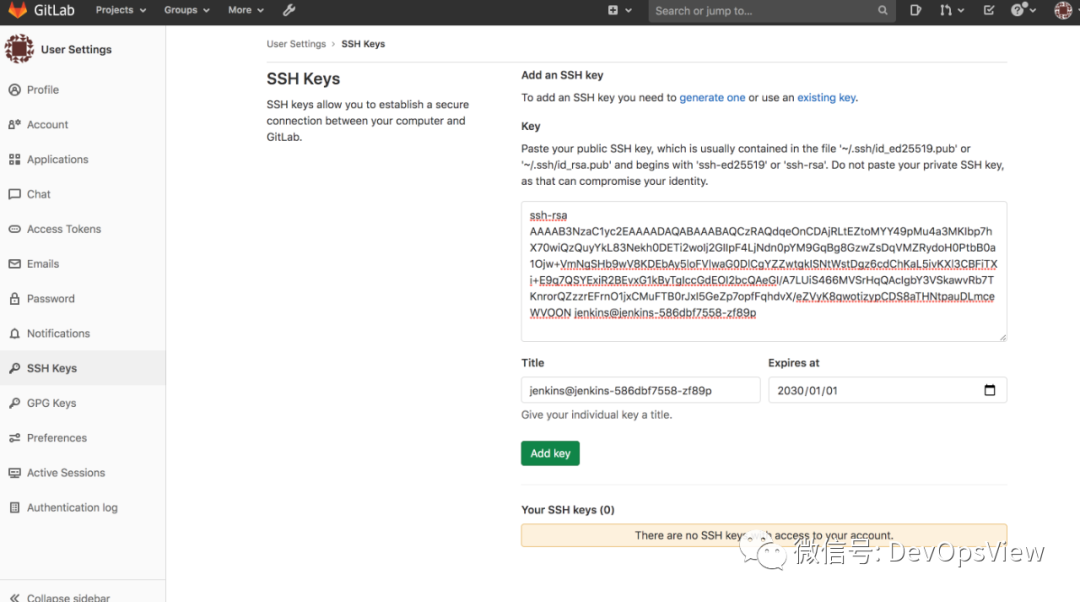
2、进入jenkins server 容器上以jenkins用户的身份执行
# kubectl exec -it jenkins-586dbf7558-zf89p -n jenkins /bin/bash
$ ssh-keygen -t rsa -P ''
将公钥id_rsa.pub 内容复制粘贴到gitlab ssh-key中
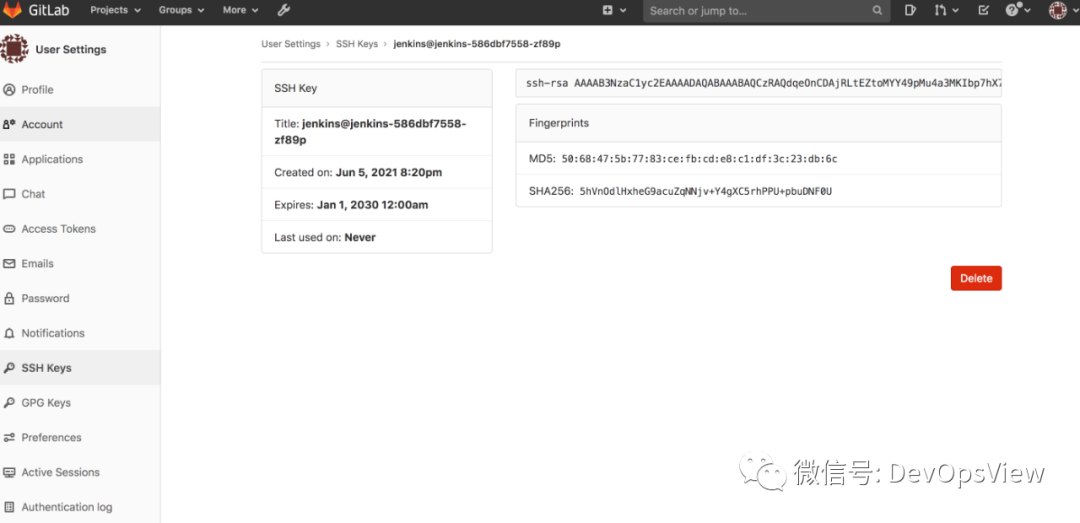
3、将密钥id_rsa在jenkins上创建认证
系统管理-->Manage Credentials
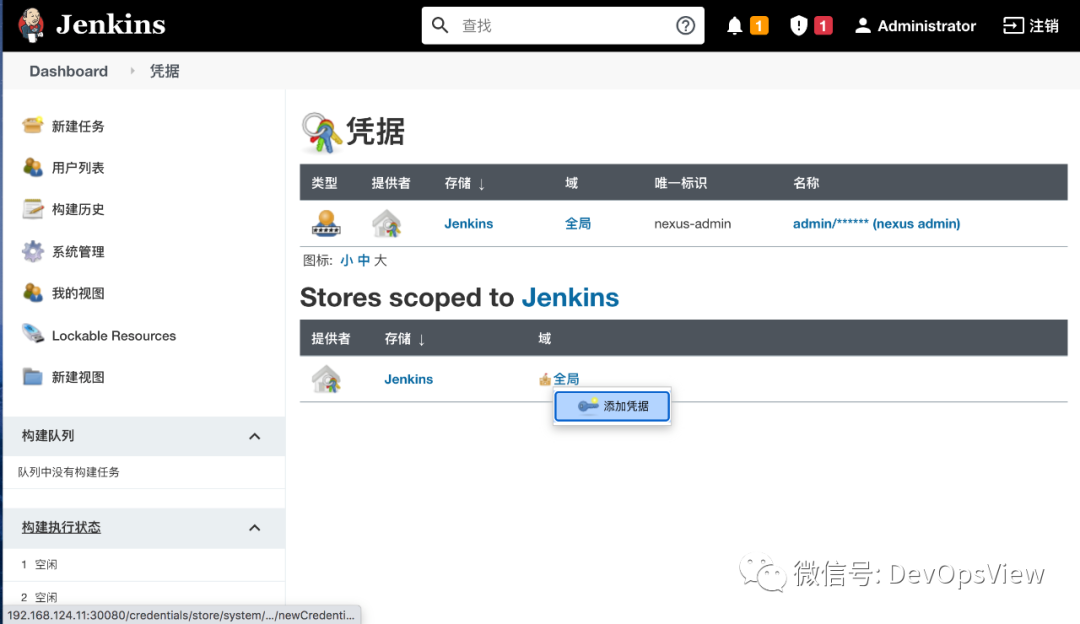
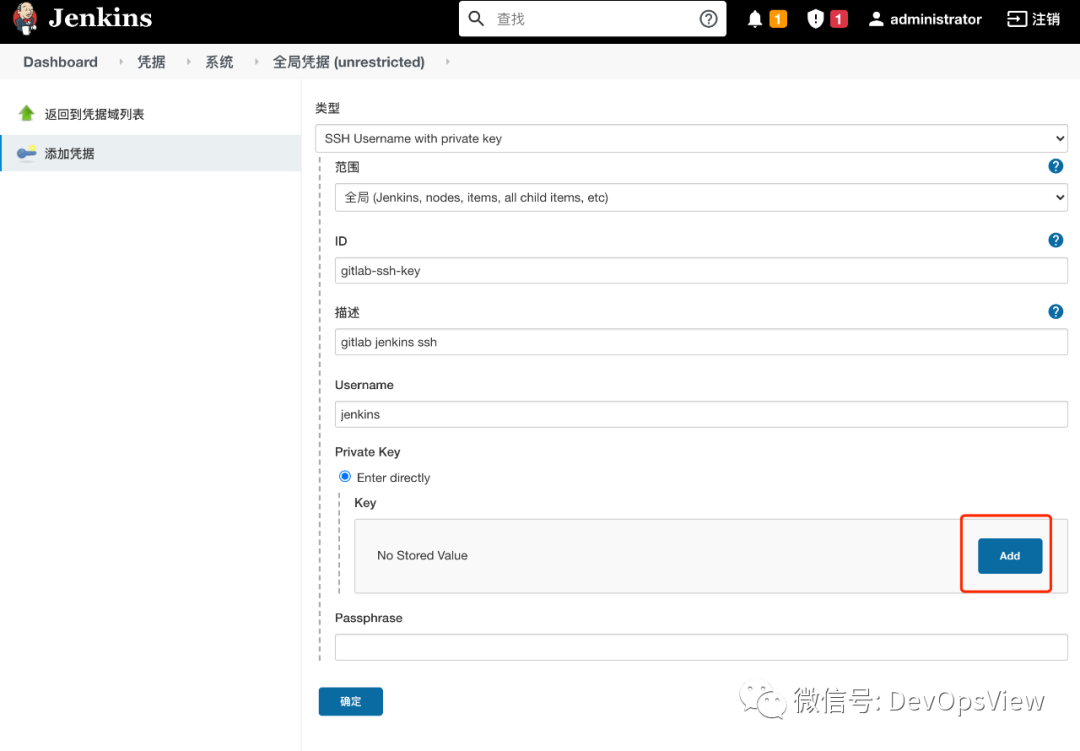
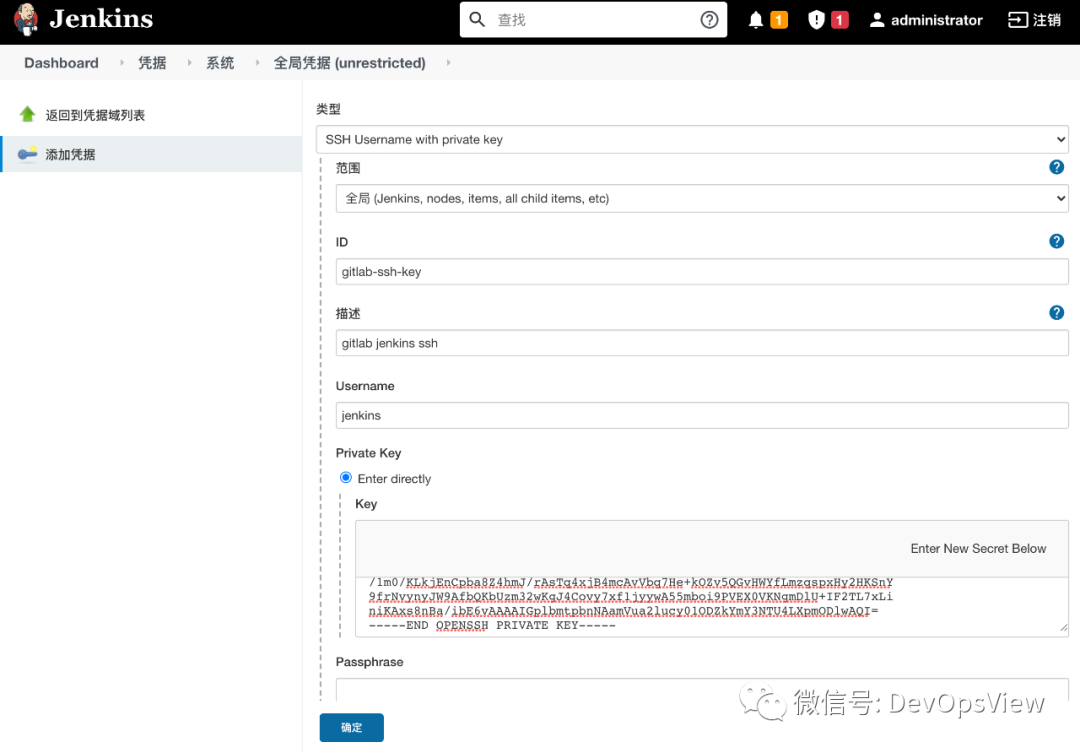
将id_rsa内容复制粘贴进去
配置gitlab api token
1、在Access Tokens页面创建access token
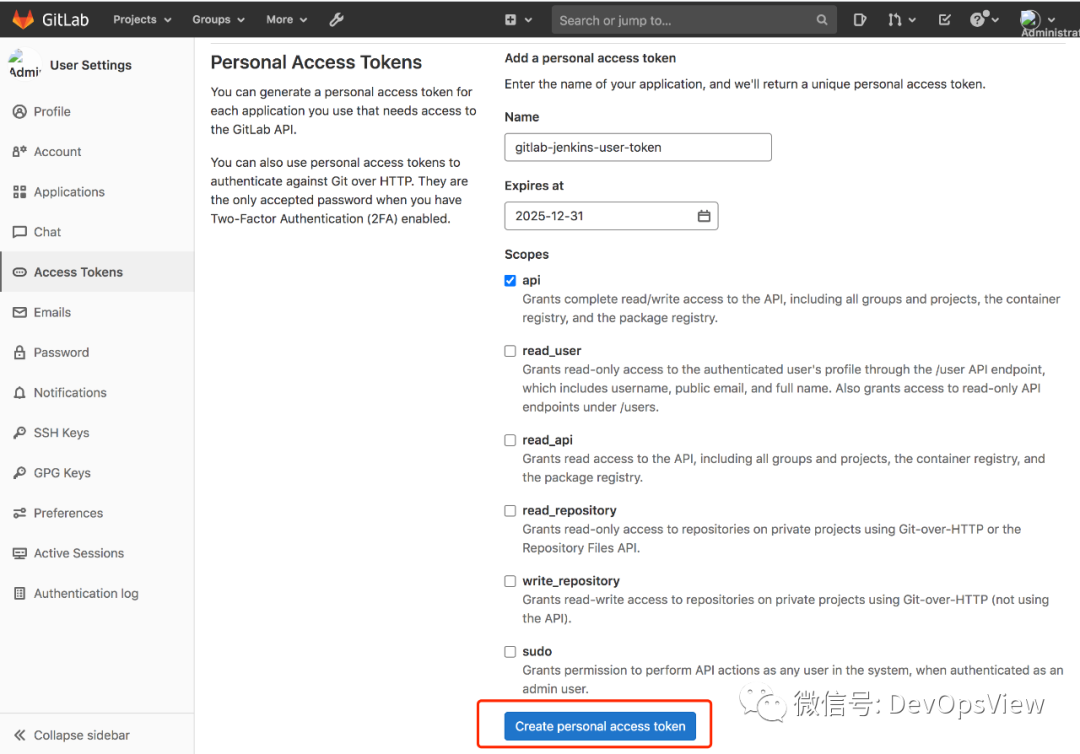
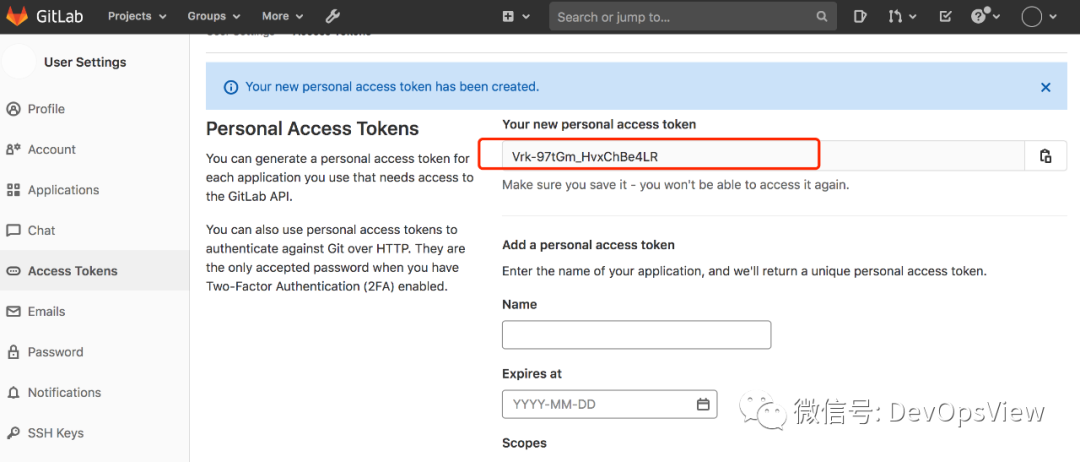
将token记下来
2、在Jenkins上安装Gitlab插件
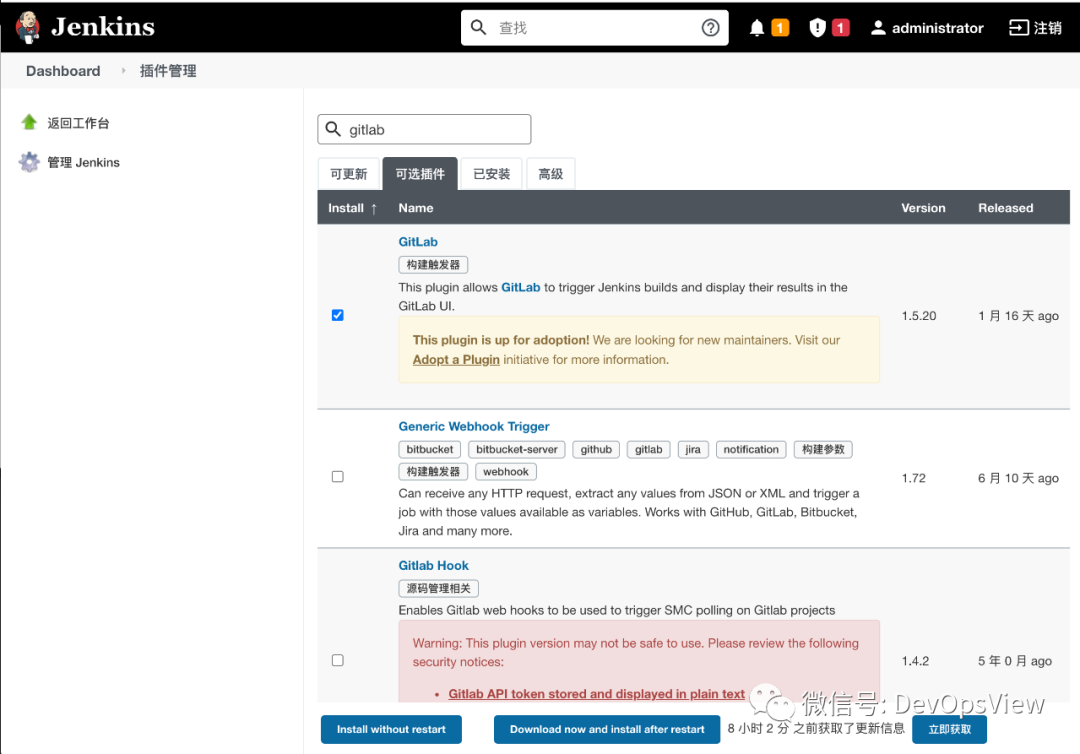
3、配置认证
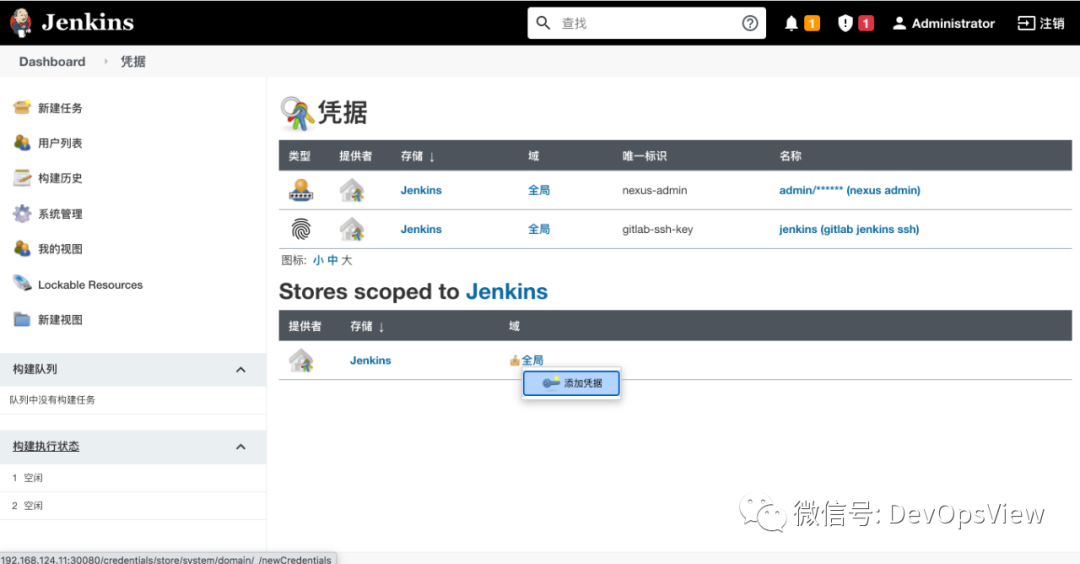
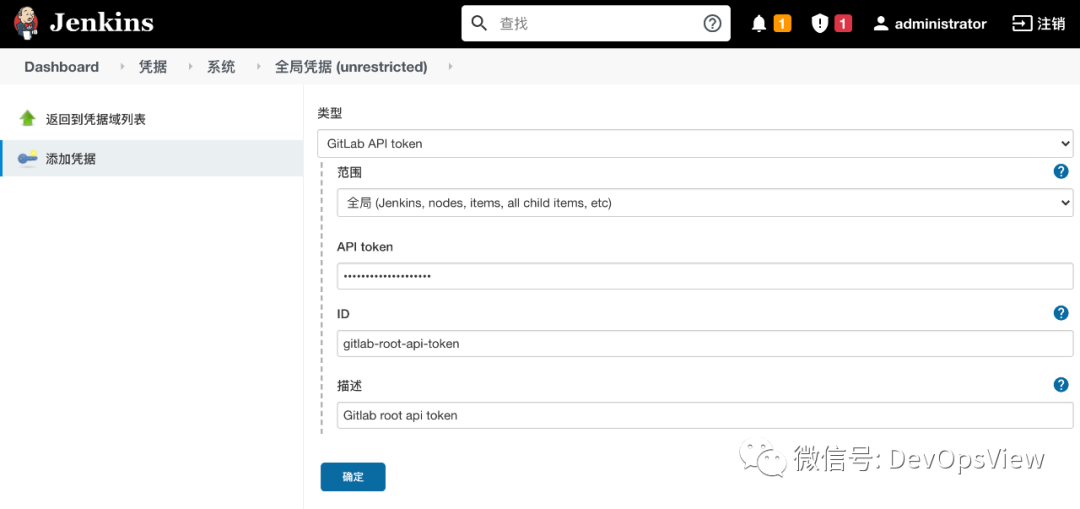
gitlab创建的access-token贴到API token
4、jenkin配置连接Gitlab
系统管理-->系统配置
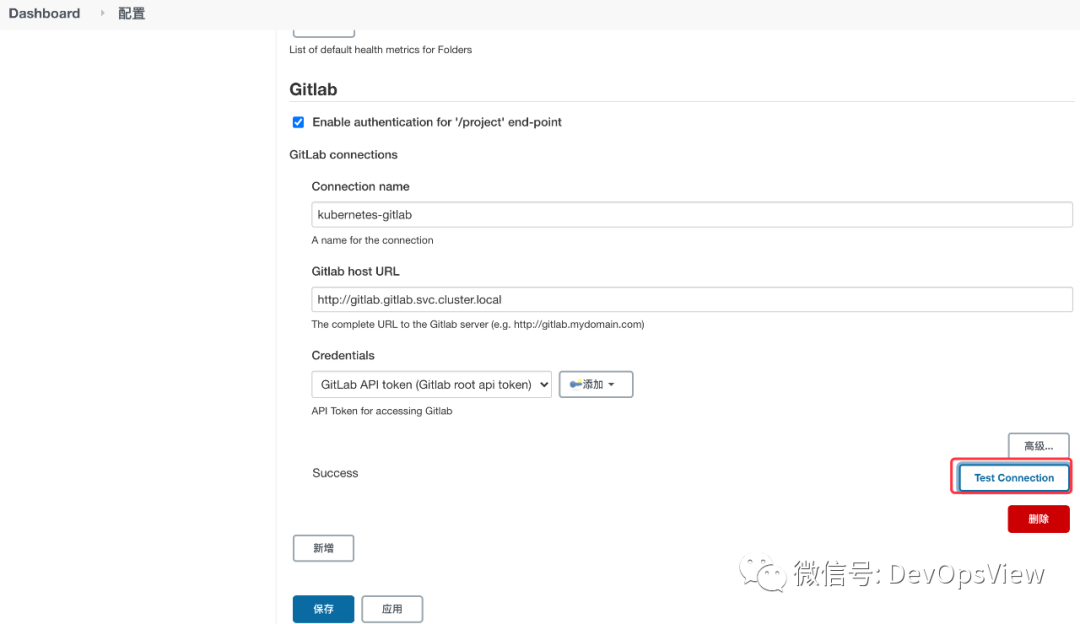
配置jenkins项目可经由gitlab上的事件触发
1、配置构建触发器
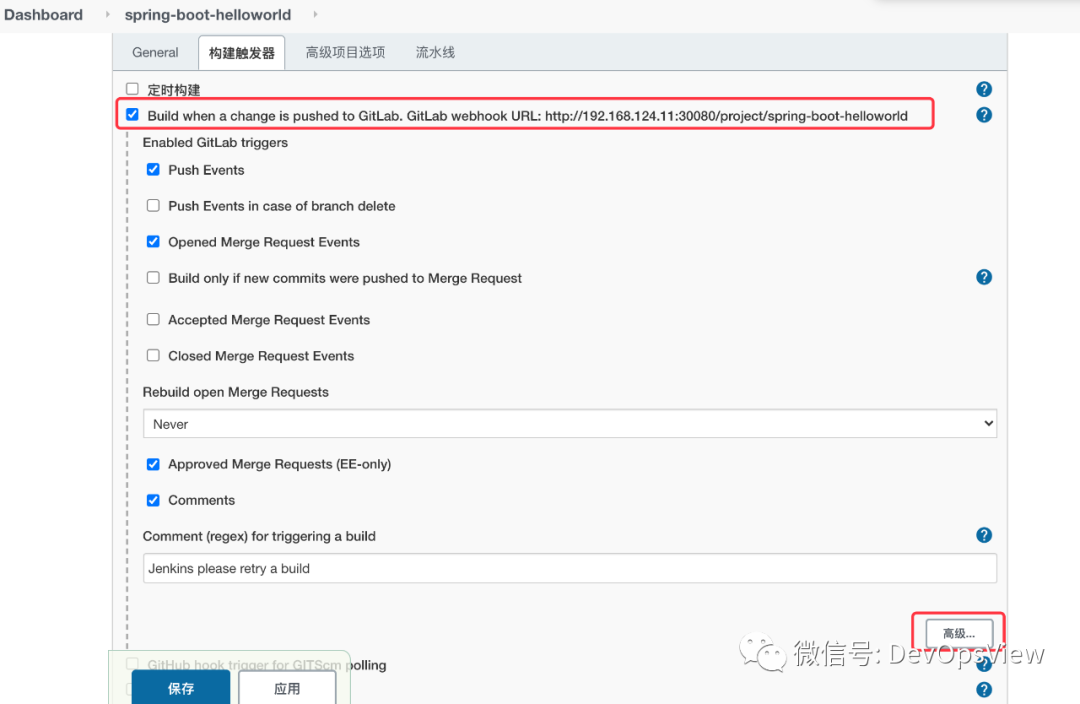
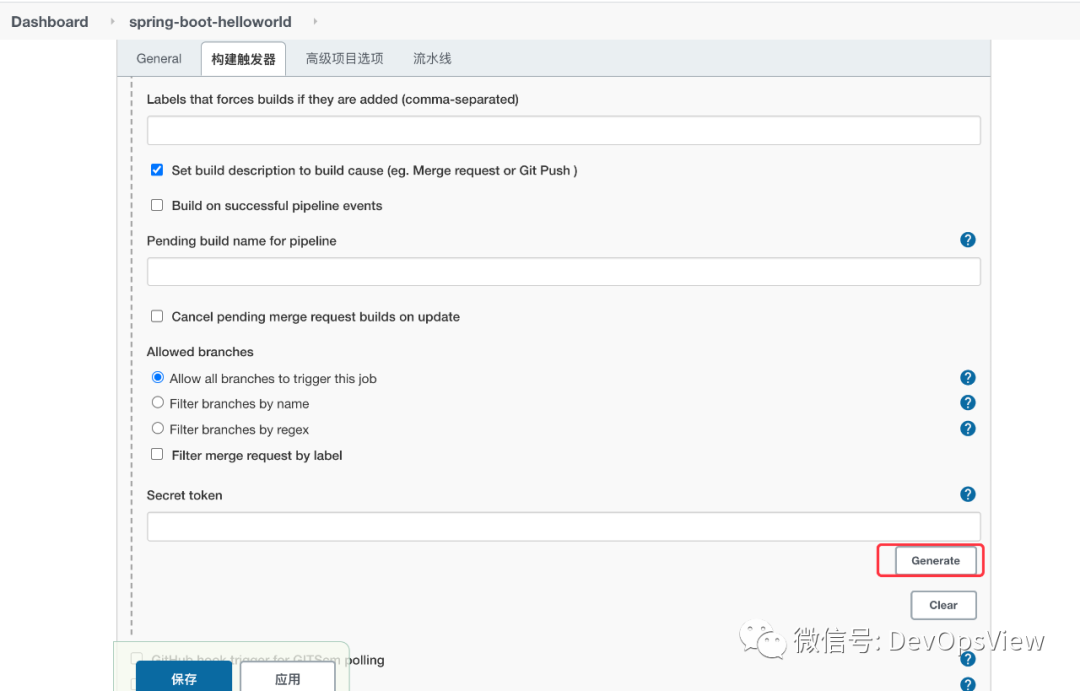
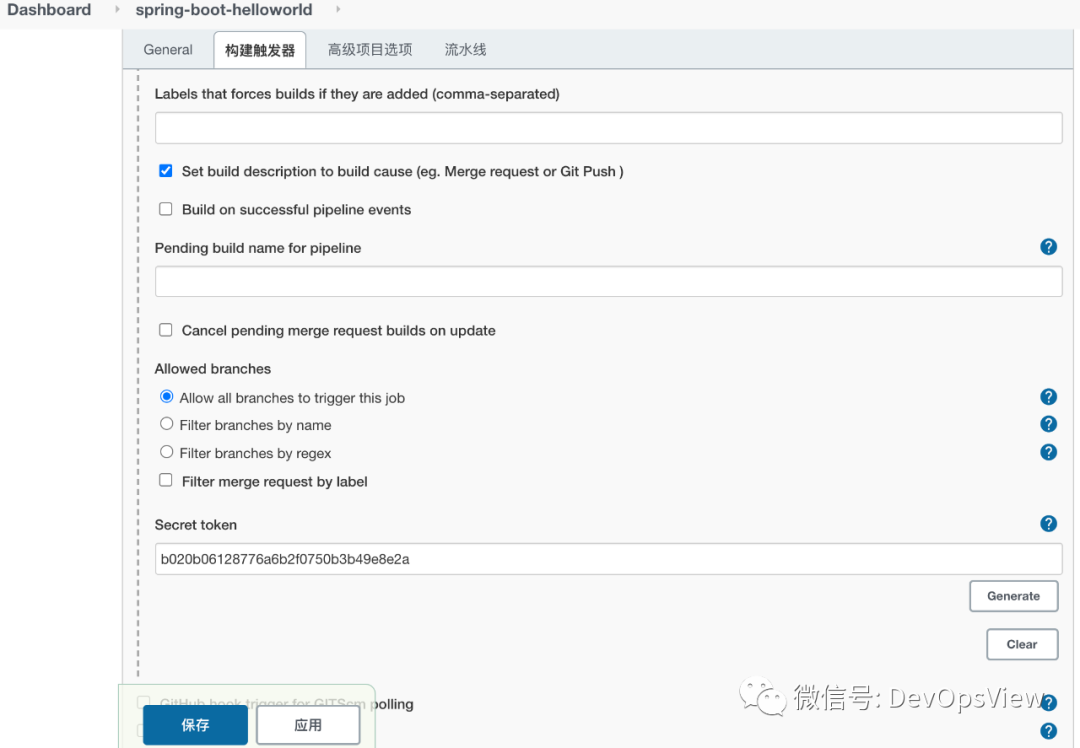
记住生成的token
2、在代码仓库中设置webhooks
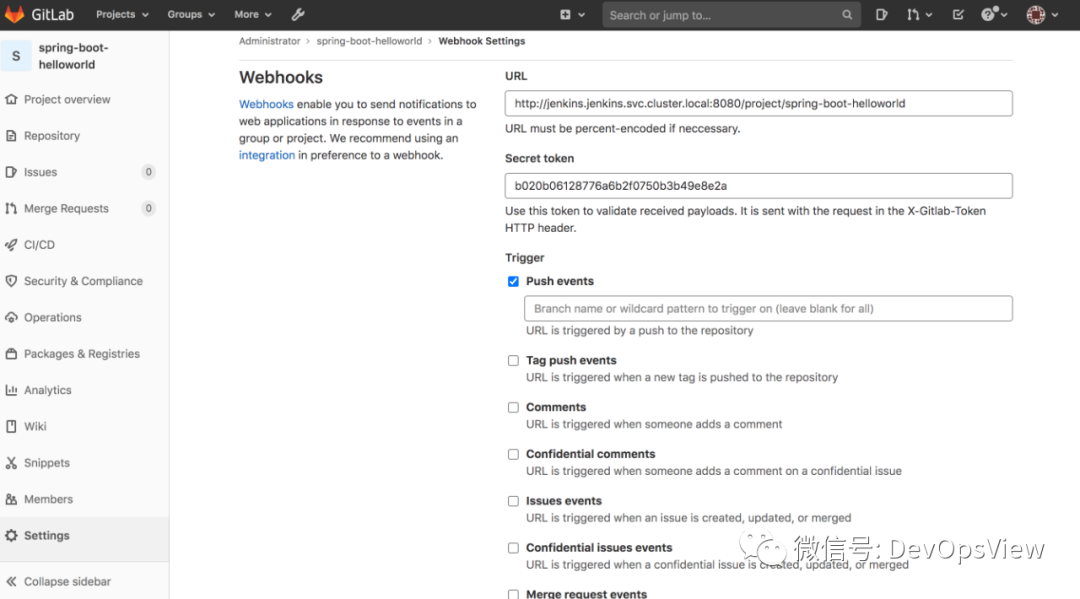
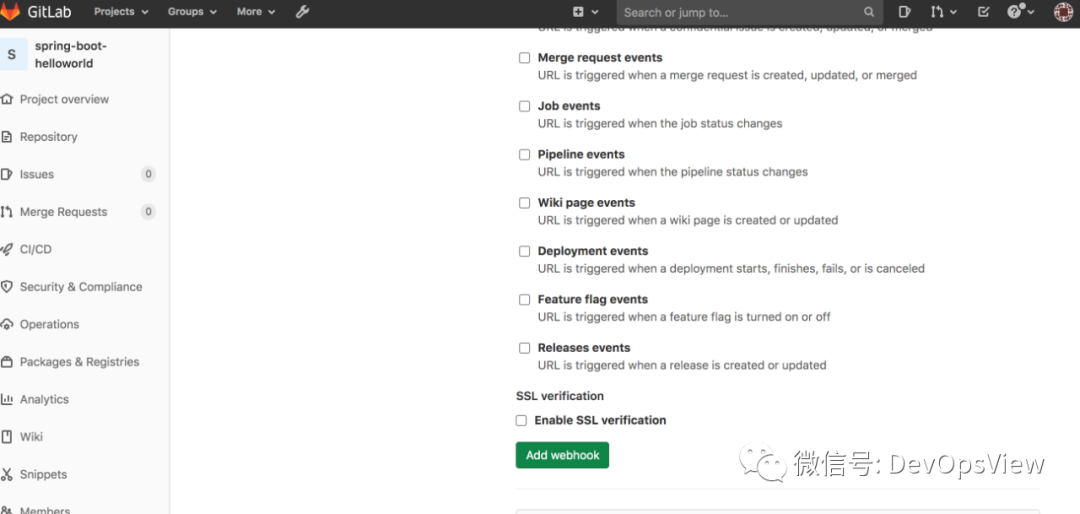
Jenkins项目pipeline as code
1、切换到代码目录,将流水线的构建过程修改为Jenkinsfile
# cd spring-boot-helloworld/
# vim Jenkinsfile
pipeline {
    environment {
        appName = "spring-boot-helloworld"
        appVersion = "v0.9.0"
    }
    agent {
        kubernetes {
            inheritFrom "maven-and-docker"
        }
    }

    stages {
        stage('code'){
            steps{
                git branch: 'master', url: 'http://gitlab.gitlab.svc.cluster.local/root/spring-boot-helloworld.git'
            }
        }
        stage('build'){
            steps{
                container('maven'){
                    sh 'mvn clean test package'
                }
            }
        }
        stage('build image'){
            steps{
                container('docker'){
                    script{
                        dockerImage = docker.build appName + ":" + appVersion
                    }
                }
            }
        }
        stage('Push image') {
            steps {
                container('docker') {
                    script {
                        docker.withRegistry( "http://sonatype-nexus.nexus.svc.cluster.local:8082", "nexus-admin" ) {
                            dockerImage.push()
                        }
                    }
                }
            }
        }
    }
}
添加了将镜像推送到nexus仓库
2、修改流水线构建
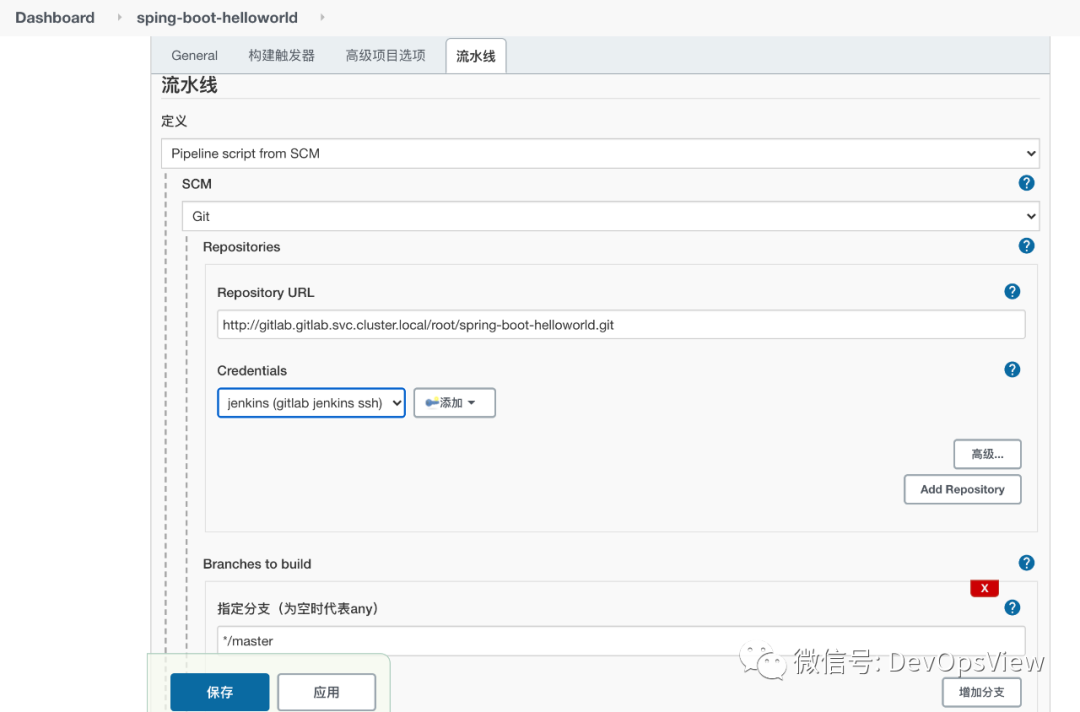
创建Jenkins链接Kubernetes的认证
系统管理--->Manage Credentials
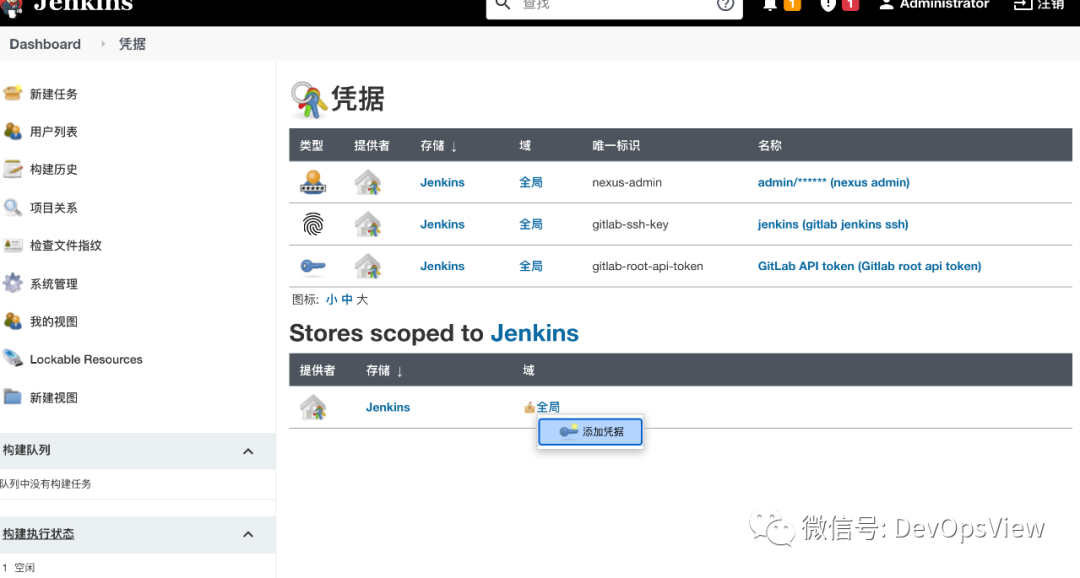
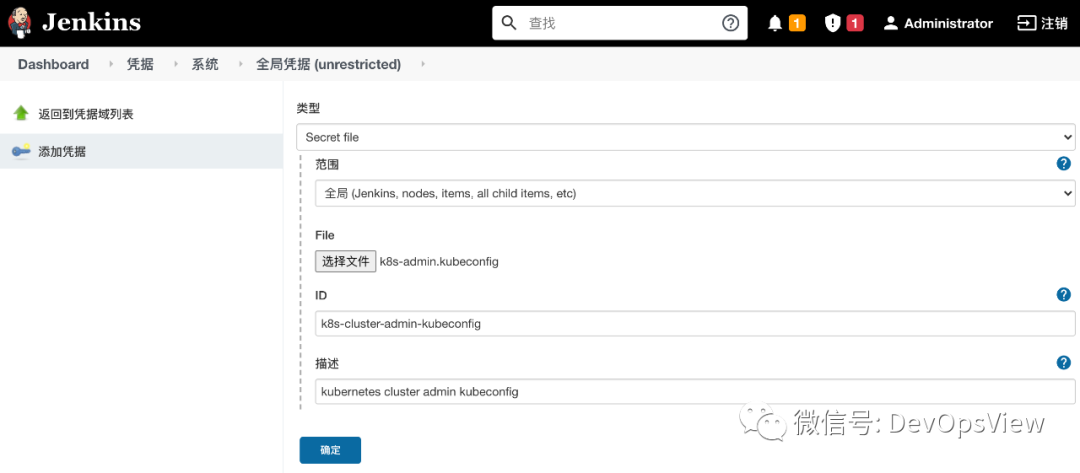
文件为kubeconfig文件,需要修改的内容如下
......
    server: https://kubernetes.default.svc.cluster.local:443
......
实现CD
正常情况下CI与CD是分别由对应的CI Server和CD Server提供,并且是相互分离的,这里使用的是传统的Jenkins。同时也应该实现仓库的分离,即CI和CD使用的不是同一个仓库。
1、在gitlab创建spring-deployment仓库,用于CD。
# git clone http://192.168.124.11:31080/root/spring-deployment.git
# cd spring-deployment/
# mkdir kubernetes
# vim namespace.yaml
kind: Namespace
apiVersion: v1
metadata:
  name: spring
# vim service.yaml
---
kind: Service
apiVersion: v1
metadata:
  name: spring-boot-helloworld
  namespace: spring
  labels:
    app: spring-boot-helloworld
spec:
  type: NodePort
  ports:
    - name: http
      protocol: TCP
      port: 80
      targetPort: http
      nodePort: 30666
  selector:
    app: spring-boot-helloworld
# vim deployment.yaml
kind: Deployment
apiVersion: apps/v1
metadata:
  name: spring-boot-helloworld
  namespace: spring
  labels:
    app: spring-boot-helloworld
spec:
  replicas: 2
  selector:
    matchLabels:
      app: spring-boot-helloworld
  template:
    metadata:
      name: spring-boot-helloworld
      labels:
        app: spring-boot-helloworld
    spec:
      containers:
      - name: spring-boot-helloworld
        image: 'sonatype-nexus.nexus.svc.cluster.local:8082/spring-boot-helloworld:v0.9.0'
        ports:
        - name: http
          containerPort: 80
          protocol: TCP
# vim Jenkinsfile
pipeline {
    agent {
        kubernetes {
            inheritFrom "kubectl"
        }
    }

    stages {
        stage('code'){
            steps{
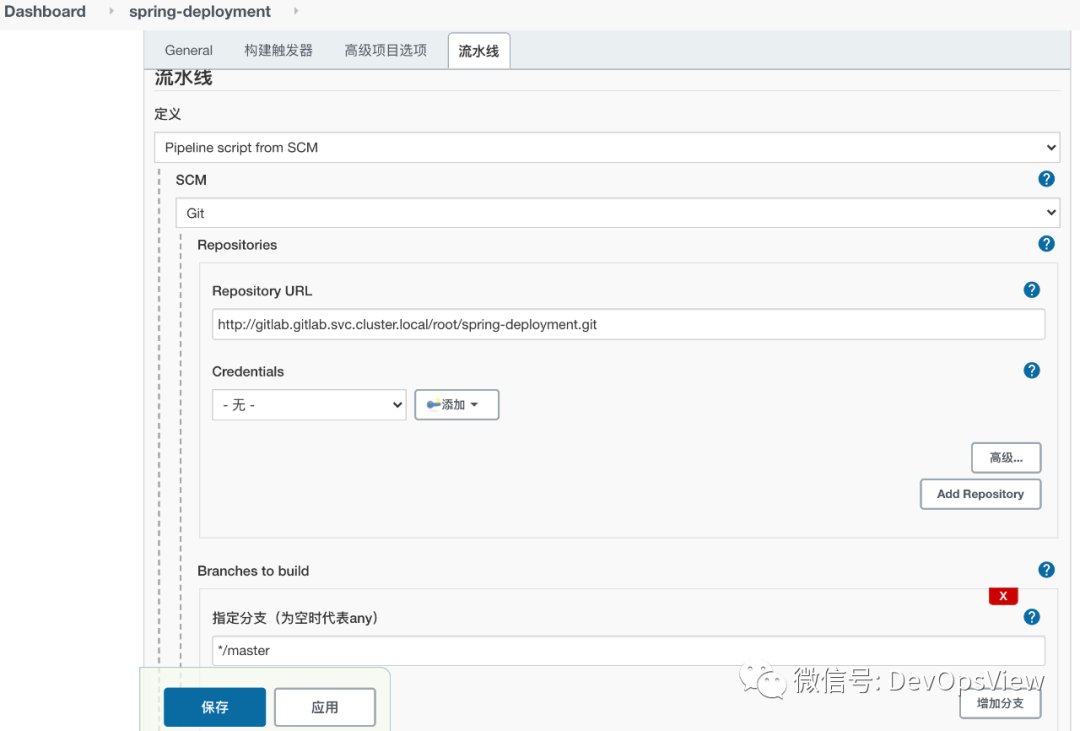
                git branch: 'master', url: 'http://gitlab.gitlab.svc.cluster.local/root/spring-deployment.git'
            }
        }
        stage('deploy'){
            steps{
                container('kubectl'){
                    withKubeConfig([credentialsId: 'k8s-cluster-admin-kubeconfig']){
                        sh 'kubectl apply -f kubernetes/'
                    }
                }
            }
        }
    }
}
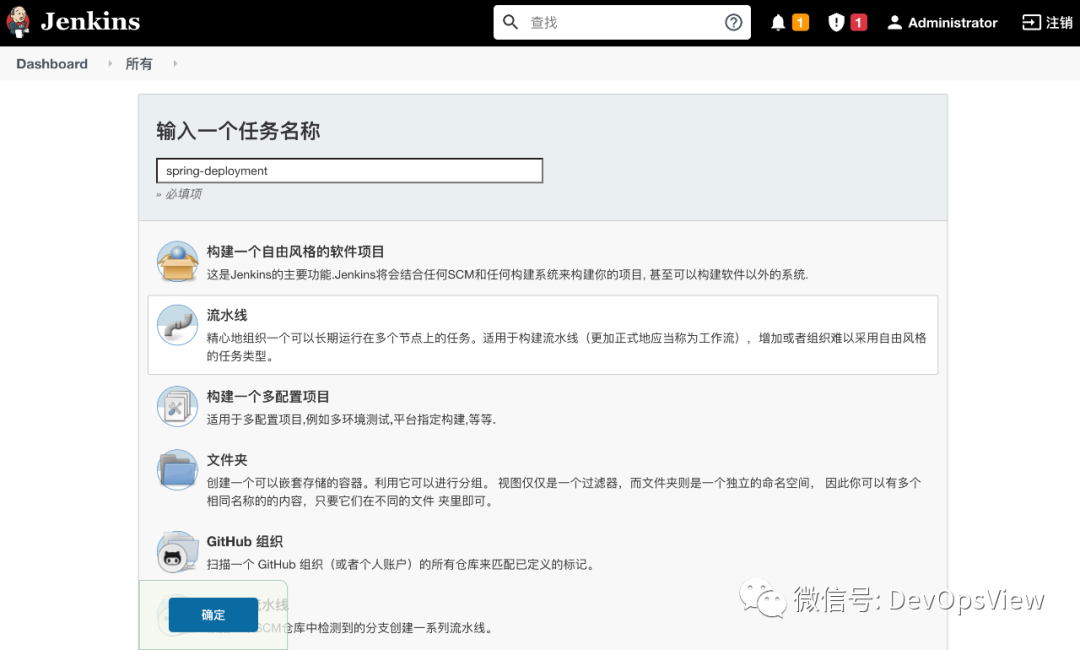
2、在jenkins创建新任务,用于实现CD
添加Pod模版
系统管理--->节点管理--->节点管理--->configure clouds
安装kubernetes插件并部署业务到Kubernetes集群
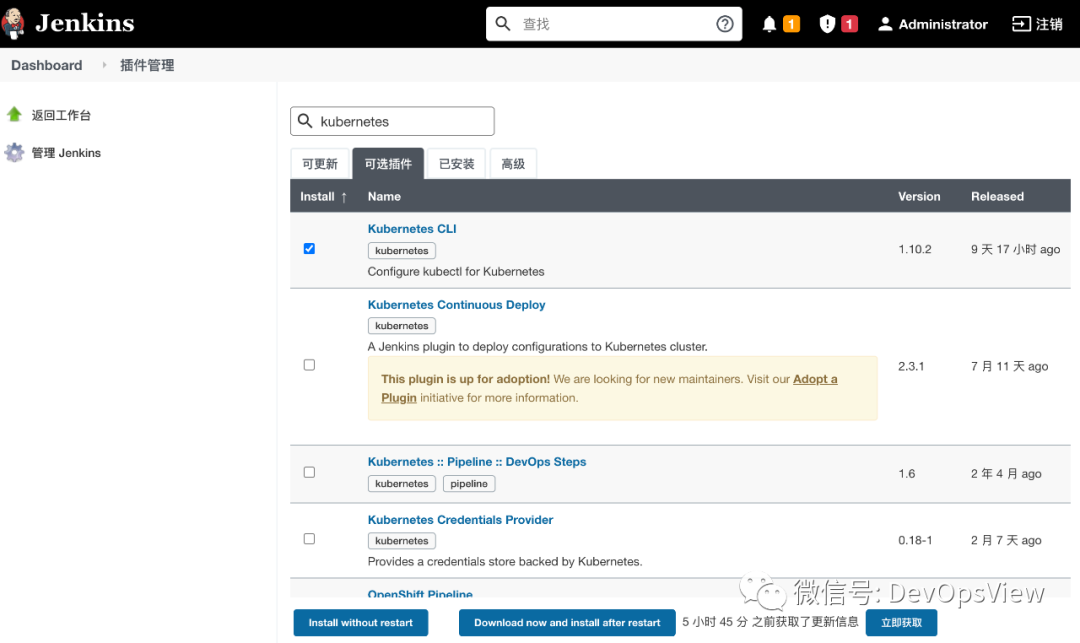
安装好后手动构建下spring-deployment,构建完成后进行查看
# kubectl get pod -n spring
NAME                                      READY   STATUS    RESTARTS   AGE
spring-boot-helloworld-57b99897b4-4lxb2   1/1     Running   0          26s
spring-boot-helloworld-57b99897b4-654lh   1/1     Running   0          26s
说明是能正常部署pod。
到这里就实现了研发将代码push到代码仓库里自动触发CI流程,实现构建镜像并将镜像推送到镜像仓库,运维人员修改部署文件后自动部署应用到Kubernetes集群。
这里使用传统的工具Jenkins来作为CI Servder和CD Server。可以采用CNCF孵化的项目Argo来进行,此外还有Flux等优秀的项目也可以实现。