


DB-GPT介绍
🤖️ DB-GPT是一个开源的AI原生数据应用开发框架(AI Native Data App Development framework with AWEL(Agentic Workflow Expression Language) and Agents)。
目的是构建大模型领域的基础设施,通过开发多模型管理(SMMF)、Text2SQL效果优化、RAG框架以及优化、Multi-Agents框架协作、AWEL(智能体工作流编排)等多种技术能力,让围绕数据库构建大模型应用更简单,更方便。
OceanBase 从 4.3.3 版本开始支持了向量数据类型的存储和检索,并且经过适配可以作为 DB-GPT 的可选向量数据库,支持 DB-GPT 对结构化数据和向量数据的存取需求,有力地支撑其上 LLM 应用的开发和落地,同时 DB-GPT 也通过 chat data、chat db 等应用为 OceanBase 提升易用性。
鉴于传统 RAG 在概括性问题上存在的问题,DB-GPT 实现了一种基于知识图谱进行相关文档召回的 RAG 技术 —— GraphRAG。实现依赖图数据库和向量数据库作为文档数据存储和检索的基础组件。TuGraph是作为一个高效的图形数据库,支持高数据量、低延迟查找和快速图形分析的图数据库,可以与 OceanBase 的向量存储功能相结合,共同支持 DB-GPT GraphRAG 功能。
平台搭建步骤-源码安装
1. 获取DB-GPT源代码
[root@localhost ~]# cd /usr/local
[root@localhost local]# git clone https://gitee.com/mirrors/DB-GPT.git
......
[root@localhost local]# ls
DB-GPT
[root@localhost local]# cd DB-GPT/
2.Miniconda环境安装
默认数据库使用SQLite,因此默认启动模式下,无需安装数据库。 如果需要使用其他数据库,可以看后面的高级教程。 我们推荐通过conda的虚拟环境来进行Python虚拟环境的安装。
[root@localhost ~]# mkdir -p ~/miniconda3
[root@localhost ~]# wget https://repo.anaconda.com/miniconda/Miniconda3-latest-Linux-x86_64.sh -O ~/miniconda3/miniconda.sh
--2025-01-07 11:43:30--  https://repo.anaconda.com/miniconda/Miniconda3-latest-Linux-x86_64.sh
正在解析主机 repo.anaconda.com (repo.anaconda.com)... 104.16.191.158, 104.16.32.241, 2606:4700::6810:20f1, ...
正在连接 repo.anaconda.com (repo.anaconda.com)|104.16.191.158|:443... 已连接。
已发出 HTTP 请求,正在等待回应... 200 OK
长度:147784736 (141M) [application/octet-stream]
正在保存至: “/root/miniconda3/miniconda.sh”

100%[====================================================================================================================================================>] 147,784,736  338KB/s 用时 6m 46s

2025-01-07 11:50:17 (355 KB/s) - 已保存 “/root/miniconda3/miniconda.sh” [147784736/147784736])

[root@localhost ~]# bash ~/miniconda3/miniconda.sh -b -u -p ~/miniconda3/
PREFIX=/root/miniconda3
Unpacking payload ...

Installing base environment...

Preparing transaction: ...working... done
Executing transaction: ...working... done
installation finished.
- 初始化Miniconda
[root@localhost ~]# ~/miniconda3/bin/conda init bash
no change     /root/miniconda3/condabin/conda
no change     /root/miniconda3/bin/conda
no change     /root/miniconda3/bin/conda-env
no change     /root/miniconda3/bin/activate
no change     /root/miniconda3/bin/deactivate
no change     /root/miniconda3/etc/profile.d/conda.sh
no change     /root/miniconda3/etc/fish/conf.d/conda.fish
no change     /root/miniconda3/shell/condabin/Conda.psm1
no change     /root/miniconda3/shell/condabin/conda-hook.ps1
no change     /root/miniconda3/lib/python3.12/site-packages/xontrib/conda.xsh
no change     /root/miniconda3/etc/profile.d/conda.csh
modified      /root/.bashrc

==> For changes to take effect, close and re-open your current shell. <==
- 使conda环境生效:会看到在终端用户名前面添加了(base)标志
[root@localhost ~]# source ~/.bashrc
(base) [root@localhost ~]#
3. 部署:Python虚拟环境 python >= 3.10
- 创建dbgpt_env python=3.10环境
(base) [root@localhost DB-GPT]# conda create -n dbgpt_env python=3.10
Channels:
 - defaults
Platform: linux-64
Collecting package metadata (repodata.json): done
Solving environment: done

## Package Plan ##

  environment location: /root/miniconda3/envs/dbgpt_env

  added / updated specs:
    - python=3.10


The following packages will be downloaded:

    package                    |            build
    ---------------------------|-----------------
    pip-24.2                   |  py310h06a4308_0         2.3 MB
    python-3.10.16             |       he870216_1        26.9 MB
    setuptools-75.1.0          |  py310h06a4308_0         1.7 MB
    wheel-0.44.0               |  py310h06a4308_0         109 KB
    ------------------------------------------------------------
                                           Total:        31.0 MB

The following NEW packages will be INSTALLED:

  _libgcc_mutex      pkgs/main/linux-64::_libgcc_mutex-0.1-main
  _openmp_mutex      pkgs/main/linux-64::_openmp_mutex-5.1-1_gnu
  bzip2              pkgs/main/linux-64::bzip2-1.0.8-h5eee18b_6
  ca-certificates    pkgs/main/linux-64::ca-certificates-2024.11.26-h06a4308_0
  ld_impl_linux-64   pkgs/main/linux-64::ld_impl_linux-64-2.40-h12ee557_0
  libffi             pkgs/main/linux-64::libffi-3.4.4-h6a678d5_1
  libgcc-ng          pkgs/main/linux-64::libgcc-ng-11.2.0-h1234567_1
  libgomp            pkgs/main/linux-64::libgomp-11.2.0-h1234567_1
  libstdcxx-ng       pkgs/main/linux-64::libstdcxx-ng-11.2.0-h1234567_1
  libuuid            pkgs/main/linux-64::libuuid-1.41.5-h5eee18b_0
  ncurses            pkgs/main/linux-64::ncurses-6.4-h6a678d5_0
  openssl            pkgs/main/linux-64::openssl-3.0.15-h5eee18b_0
  pip                pkgs/main/linux-64::pip-24.2-py310h06a4308_0
  python             pkgs/main/linux-64::python-3.10.16-he870216_1
  readline           pkgs/main/linux-64::readline-8.2-h5eee18b_0
  setuptools         pkgs/main/linux-64::setuptools-75.1.0-py310h06a4308_0
  sqlite             pkgs/main/linux-64::sqlite-3.45.3-h5eee18b_0
  tk                 pkgs/main/linux-64::tk-8.6.14-h39e8969_0
  tzdata             pkgs/main/noarch::tzdata-2024b-h04d1e81_0
  wheel              pkgs/main/linux-64::wheel-0.44.0-py310h06a4308_0
  xz                 pkgs/main/linux-64::xz-5.4.6-h5eee18b_1
  zlib               pkgs/main/linux-64::zlib-1.2.13-h5eee18b_1


Proceed ([y]/n)? y


Downloading and Extracting Packages:

Preparing transaction: done
Verifying transaction: done
Executing transaction: done
#
# To activate this environment, use
#
#     $ conda activate dbgpt_env
#
# To deactivate an active environment, use
#
#     $ conda deactivate
4. 激活相应的环境来工作
(base) [root@localhost DB-GPT]# conda activate dbgpt_env
(dbgpt_env) [root@localhost DB-GPT]#
5. 安装依赖-(耗时有点长)
(dbgpt_env) [root@localhost DB-GPT]# pip3 install -e ".[default]" -i https://mirrors.aliyun.com/pypi/simple/
Looking in indexes: https://mirrors.aliyun.com/pypi/simple/
Obtaining file:///usr/local/DB-GPT
  Preparing metadata (setup.py) ... done
Collecting aiohttp==3.8.4 (from dbgpt==0.5.8)
  Downloading https://mirrors.aliyun.com/pypi/packages/81/97/90debed02e5be15d4e63fb96ba930e35b66d4e518fa7065dd442345a448b/aiohttp-3.8.4-cp310-cp310-manylinux_2_17_x86_64.manylinux2014_x86_64.whl (1.0 MB)
     ━━━━━━━━━━━━━━━━━━━━━━━━━━━━━━━━━━━━━━━━ 1.0/1.0 MB 385.6 kB/s eta 0:00:00
略......
- 命令注释:
pip install -e . 是一个常用于开发环境的 pip 命令,用于安装一个 Python 包并保持对源代码的“可编辑”链接。
参数解释:
-e 或 --editable:表示安装包以“可编辑”或“开发”模式。这意味着,如果你更改了本地源代码,这些更改会立即反映到系统中该包的行为上,无需重新安装。

.:指的是当前目录,即从当前目录的 setup.py 文件安装包。

这个命令需要一个 setup.py 文件,该文件包含了如何安装这个包的指令。
- 注:此环境使用DB-GPT目录下的setup.py 文件
(base) [root@localhost DB-GPT]# cp .env.template .env
6.模型下载:
DB-GPT可以通过代理模式部署在硬件较低的服务器上,也可以在GPU下进行私有化本地模型的部署。 如果您的硬件配置较低,可以使用第三方大模型API服务,如OpenAI、Azure、通义、文心等进行安装。
⚠️ 注意: 需要确保安装了git-lfs
Git LFS(Large File Storage)是一个Git扩展,用于管理大型文件的版本控制。它通过将大型文件存储在Git仓库之外,以减轻Git仓库的负担,并提供高效的版本控制和协作。
● CentOS安装: yum install git-lfs
● Ubuntu安装: apt-get install git-lfs
● MacOS安装: brew install git-lfs
- 安装:git-lfs
(base) [root@localhost ~]# wget https://github.com/git-lfs/git-lfs/releases/download/v3.2.0/git-lfs-linux-amd64-v3.2.0.tar.gz
(base) [root@localhost ~]# tar -zxvf git-lfs-linux-amd64-v3.2.0.tar.gz -C /usr/local/
(base) [root@localhost ~]# cd /usr/local/git-lfs-3.2.0/
(base) [root@localhost git-lfs-3.2.0]# ./git-lfs install
Git LFS initialized.
(base) [root@localhost git-lfs-3.2.0]# ./git-lfs version
git-lfs/3.2.0 (GitHub; linux amd64; go 1.18.2)
(base) [root@localhost git-lfs-3.2.0]# vim /etc/profile
export PATH=$PATH:/mysql/bin:/usr/local/git-lfs-3.2.0
7.本地模型
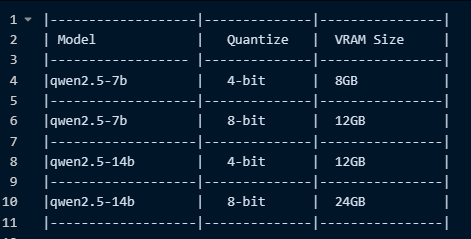
- 说明: 部署时优先选择评测效果更好的模型,推荐Qwen2.5系列
- 硬件需求说明
- 创建目录
(base) [root@localhost DB-GPT]# mkdir models
(base) [root@localhost DB-GPT]# cd models
- 下载语言模型:text2vec-large-chinese
(base) [root@localhost models]# git clone https://www.modelscope.cn/Jerry0/text2vec-large-chinese.git
正克隆到 'text2vec-large-chinese'...
remote: Enumerating objects: 29, done.
remote: Counting objects: 100% (29/29), done.
remote: Compressing objects: 100% (28/28), done.
remote: Total 29 (delta 8), reused 0 (delta 0), pack-reused 0
Unpacking objects: 100% (29/29), done.
Downloading model.safetensors (1.3 GB)
Downloading pytorch_model.bin (1.3 GB)
(base) [root@localhost models]# du -sh *
4.9G	text2vec-large-chinese
- 下载Qwen模型:Qwen2.5
(base) [root@localhost models]# git clone https://www.modelscope.cn/Qwen/Qwen2.5-14B-Instruct.git
正克隆到 'Qwen2.5-14B-Instruct'...
remote: Enumerating objects: 45, done.
remote: Total 45 (delta 0), reused 0 (delta 0), pack-reused 45
Unpacking objects: 100% (45/45), done.
Downloading model-00001-of-00008.safetensors (3.9 GB)
Downloading model-00002-of-00008.safetensors (4.0 GB)
Downloading model-00003-of-00008.safetensors (4.0 GB)
Downloading model-00004-of-00008.safetensors (4.0 GB)
Downloading model-00005-of-00008.safetensors (4.0 GB)
Downloading model-00006-of-00008.safetensors (4.0 GB)
Downloading model-00007-of-00008.safetensors (4.0 GB)
Downloading model-00008-of-00008.safetensors (1.7 GB)
Checking out files: 100% (19/19), done.
(base) [root@localhost models]# du -sh *
56G     Qwen2.5-14B-Instruct2
- 修改.env 参数:LLM_MODEL
(base) [root@localhost DB-GPT]# vim .env
# LLM_MODEL, see dbgpt/configs/model_config.LLM_MODEL_CONFIG
LLM_MODEL=Qwen2.5-14B-Instruct
LLM_MODEL_PATH=/usr/local/DB-GPT/models/Qwen2.5-14B-Instruct
- 测试数据
(dbgpt_env) [root@localhost DB-GPT]# bash ./scripts/examples/load_examples.sh
execute sql file: /usr/local/DB-GPT/scripts/examples/../../docker/examples/sqls/case_1_student_manager_sqlite.sql
execute sql file: /usr/local/DB-GPT/scripts/examples/../../docker/examples/sqls/case_2_ecom_sqlite.sql
execute sql file: /usr/local/DB-GPT/scripts/examples/../../docker/examples/sqls/test_case_info_sqlite.sql
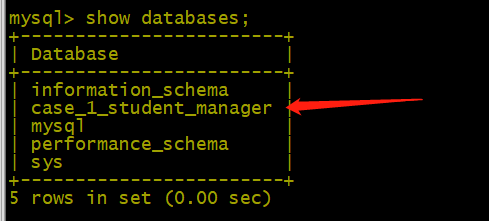
- 导入测试数据 (安装mysql略)
(base) [root@localhost sqls]# pwd
/usr/local/DB-GPT/docker/examples/sqls
(base) [root@localhost sqls]# mysql -uroot -proot < case_1_student_manager_mysql.sql
- 查看测试数据
8.运行服务
- DB-GPT服务被打包到一个server当中,可以通过如下命令启动整个DB-GPT服务
- 说明: v0.4.4 版本进行了代码与架构重构, v0.4.3(含) 之前的版本运行命令如下
- python pilot/server/dbgpt_server.py
(base) [root@localhost DB-GPT]# conda activate dbgpt_env
(dbgpt_env) [root@localhost DB-GPT]# python3 dbgpt/app/dbgpt_server.py
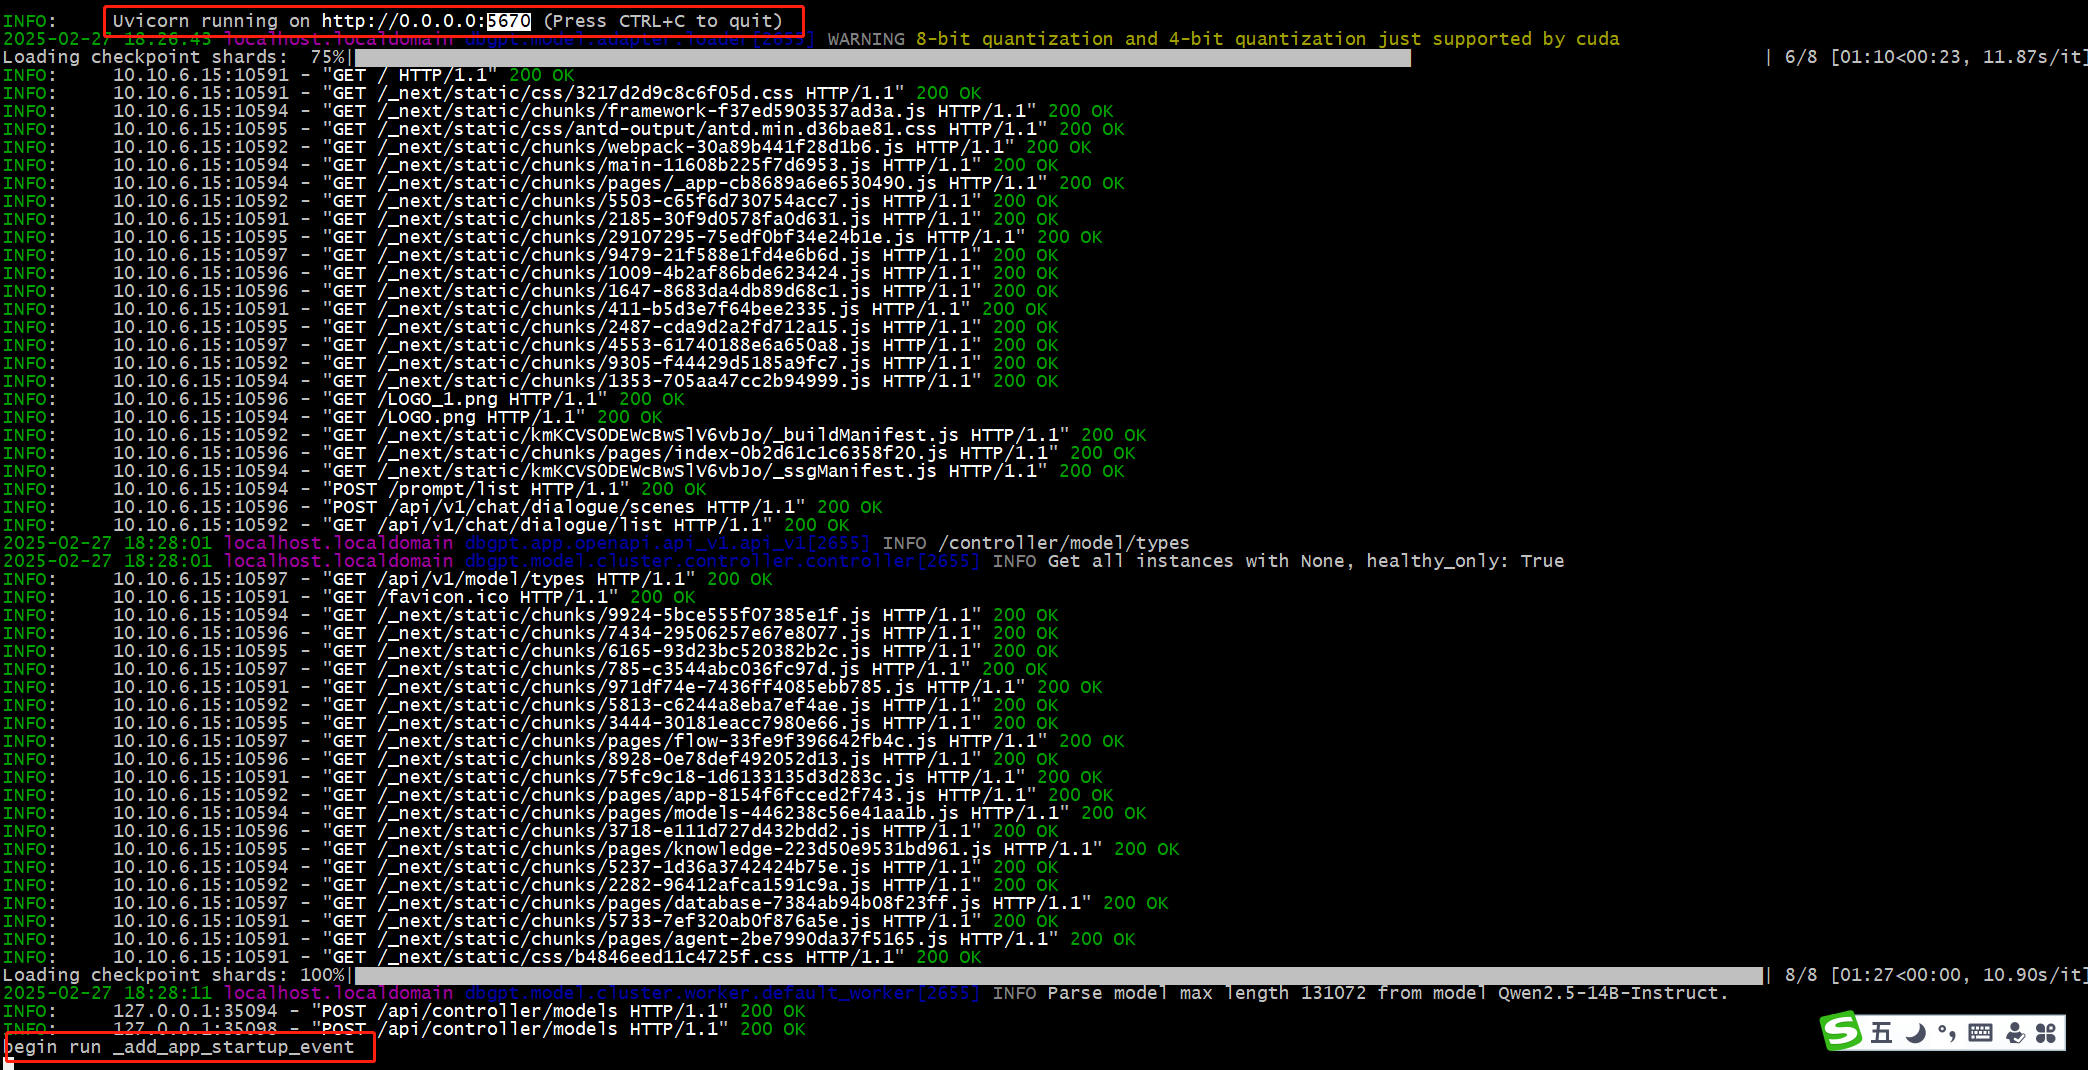
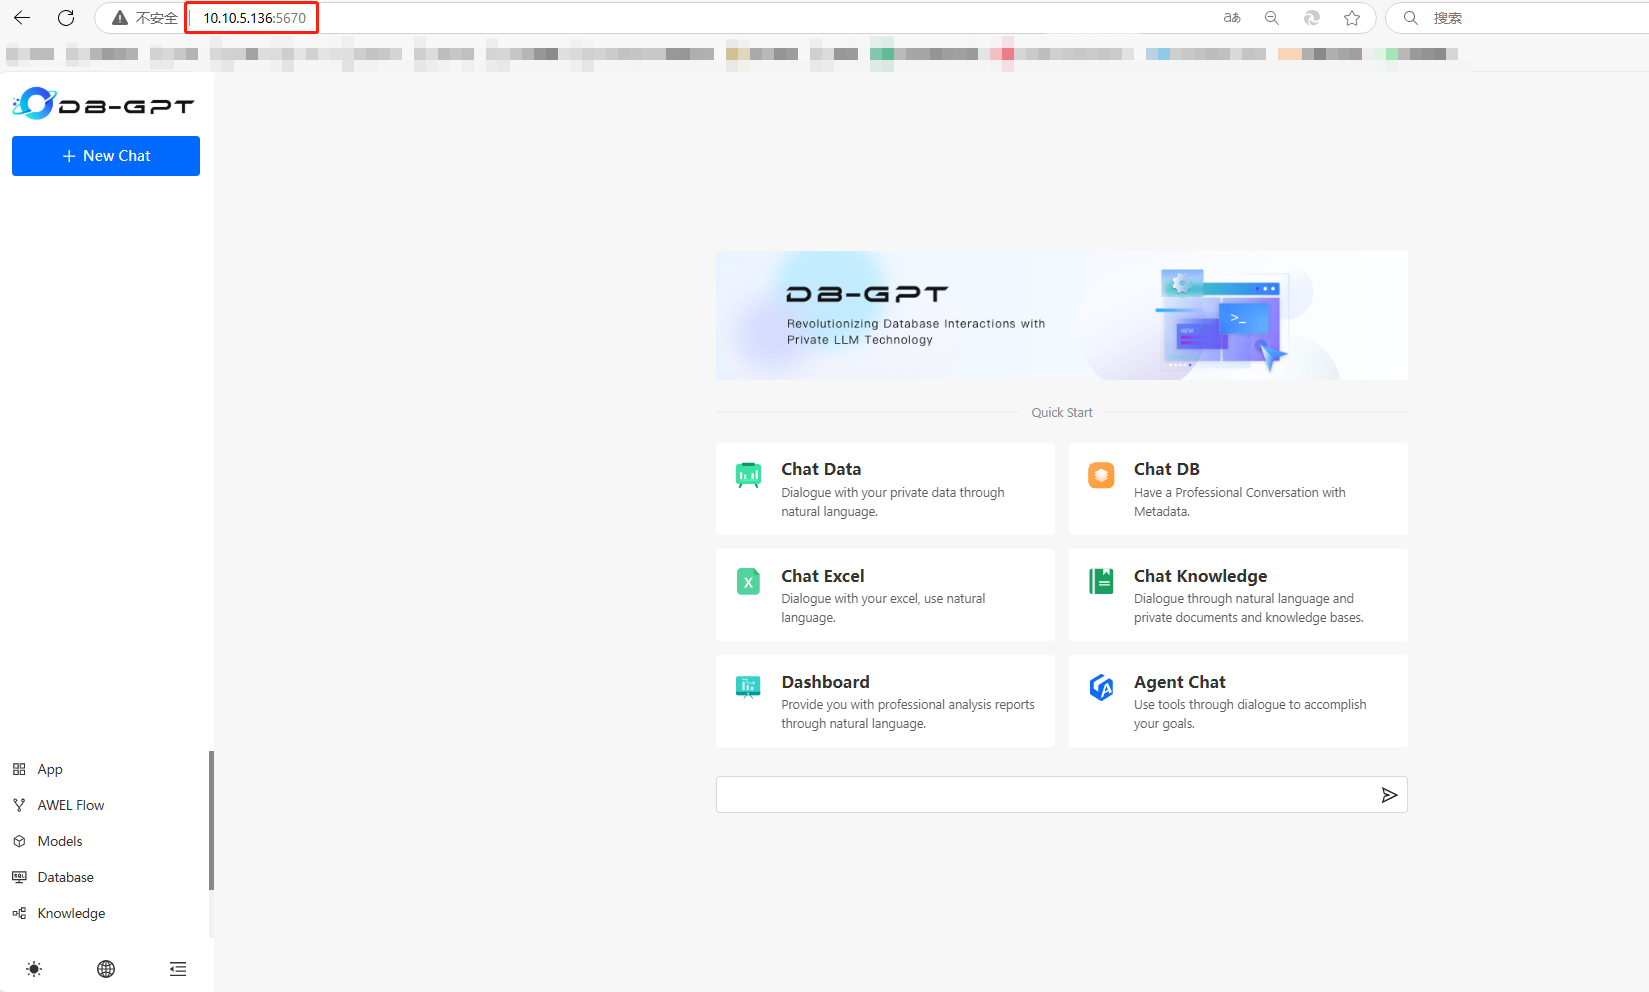
- 访问:http://10.10.5.136:5670
9.测试:没有GPU,只有CPU,字是一个一个蹦的。CPU都快跑废了。
- 提示:你是谁?

- 负载情况

问题汇总
- 问题一:模型路径未指定:–model_path
usage: dbgpt_server.py [-h] [--default_thread_pool_size DEFAULT_THREAD_POOL_SIZE] [--awel_dirs AWEL_DIRS] [--disable_alembic_upgrade] [--tracer_storage_cls TRACER_STORAGE_CLS]
                       [--tracer_file TRACER_FILE] [--log_file LOG_FILE] [--light] [--log_level {FATAL,ERROR,WARNING,WARNING,INFO,DEBUG,NOTSET}] [--remote_rerank] [--remote_embedding]
                       [--share] [--model_name MODEL_NAME] [--controller_addr CONTROLLER_ADDR] [--daemon] [--port PORT] [--host HOST]
dbgpt_server.py: error: unrecognized arguments: --model_path
- 解决:模型参数(LLM_MODEL_PATH)未指定目录,DG-GPT自带的配置文件未找到:Qwen2.5-14B-Instruct对应目录,需要手工配置如下:
(dbgpt_env) [root@localhost DB-GPT]# vim .env
# LLM_MODEL, see dbgpt/configs/model_config.LLM_MODEL_CONFIG
#LLM_MODEL=Qwen2.5-14B-Instruct
LLM_MODEL="Qwen2.5-14B-Instruct"
## LLM model path, by default, DB-GPT will read the model path from LLM_MODEL_CONFIG based on the LLM_MODEL.
## Of course you can specify your model path according to LLM_MODEL_PATH
## In DB-GPT, the priority from high to low to read model path:
##    1. environment variable with key: {LLM_MODEL}_MODEL_PATH (Avoid multi-model conflicts)
##    2. environment variable with key: MODEL_PATH
##    3. environment variable with key: LLM_MODEL_PATH
##    4. the config in dbgpt/configs/model_config.LLM_MODEL_CONFIG
LLM_MODEL_PATH=/usr/local/DB-GPT/models/Qwen2.5-14B-Instruct
# LLM_PROMPT_TEMPLATE=vicuna_v1.1
- 问题二:内存不足

- 解决:扩展到64G

- 问题三:连接数据库异常:PostgreSQL

- 解决:安装psycopg2包报错
(dbgpt_env) [root@localhost ~]# pip3  install psycopg2
Collecting psycopg2
  Using cached psycopg2-2.9.10.tar.gz (385 kB)
  Preparing metadata (setup.py) ... error
  error: subprocess-exited-with-error

  × python setup.py egg_info did not run successfully.
  │ exit code: 1
  ╰─> [23 lines of output]
      running egg_info
      creating /tmp/pip-pip-egg-info-qq6xsn79/psycopg2.egg-info
      writing /tmp/pip-pip-egg-info-qq6xsn79/psycopg2.egg-info/PKG-INFO
      writing dependency_links to /tmp/pip-pip-egg-info-qq6xsn79/psycopg2.egg-info/dependency_links.txt
      writing top-level names to /tmp/pip-pip-egg-info-qq6xsn79/psycopg2.egg-info/top_level.txt
      writing manifest file '/tmp/pip-pip-egg-info-qq6xsn79/psycopg2.egg-info/SOURCES.txt'

      Error: pg_config executable not found.

      pg_config is required to build psycopg2 from source.  Please add the directory
      containing pg_config to the $PATH or specify the full executable path with the
      option:

          python setup.py build_ext --pg-config /path/to/pg_config build ...

      or with the pg_config option in 'setup.cfg'.

      If you prefer to avoid building psycopg2 from source, please install the PyPI
      'psycopg2-binary' package instead.

      For further information please check the 'doc/src/install.rst' file (also at
      <https://www.psycopg.org/docs/install.html>).

      [end of output]

  note: This error originates from a subprocess, and is likely not a problem with pip.
error: metadata-generation-failed

× Encountered error while generating package metadata.
╰─> See above for output.

note: This is an issue with the package mentioned above, not pip.
hint: See above for details.
- 换:psycopg2-binary包进行安装
(dbgpt_env) [root@localhost ~]# pip3  install psycopg2-binary
Collecting psycopg2-binary
  Downloading psycopg2_binary-2.9.10-cp310-cp310-manylinux_2_17_x86_64.manylinux2014_x86_64.whl.metadata (4.9 kB)
Downloading psycopg2_binary-2.9.10-cp310-cp310-manylinux_2_17_x86_64.manylinux2014_x86_64.whl (3.0 MB)
   ━━━━━━━━━━━━━━━━━━━━━━━━━━━━━━━━━━━━━━━━ 3.0/3.0 MB 379.0 kB/s eta 0:00:00
Installing collected packages: psycopg2-binary
Successfully installed psycopg2-binary-2.9.10
WARNING: Running pip as the 'root' user can result in broken permissions and conflicting behaviour with the system package manager, possibly rendering your system unusable.It is recommended to use a virtual environment instead: https://pip.pypa.io/warnings/venv. Use the --root-user-action option if you know what you are doing and want to suppress this warning.
(dbgpt_env) [root@localhost ~]# python3
Python 3.10.16 (main, Dec 11 2024, 16:24:50) [GCC 11.2.0] on linux
Type "help", "copyright", "credits" or "license" for more information.
>>> import psycopg2
>>> exit()
(dbgpt_env) [root@localhost ~]#
- 问题四:mysql dbgpt库初始化
$ mysql -h127.0.0.1 -uroot -p{your_password} < ./assets/schema/dbgpt.sql
欢迎赞赏支持或留言指正

