


前言
随着信息技术的发展,数据库的选择成为了企业数字化转型的关键因素之一。openGauss,以其出色的性能和强大的功能,成为了众多企业的首选。作为一名技术爱好者,我有幸参与到openGauss的技术探索中,并决定记录下我在CentOS 7离线环境下部署openGauss 6.0 LTS版的经历,希望能够帮助到同样走在技术探索路上的你。
一、部署环境准备
由于是在离线环境中进行部署,首先需要在有网络连接的机器上准备好所有必要的文件和依赖项。这里我们将使用一台可以上网的机器来下载所需资源,然后将这些资源传输到目标离线机器上。
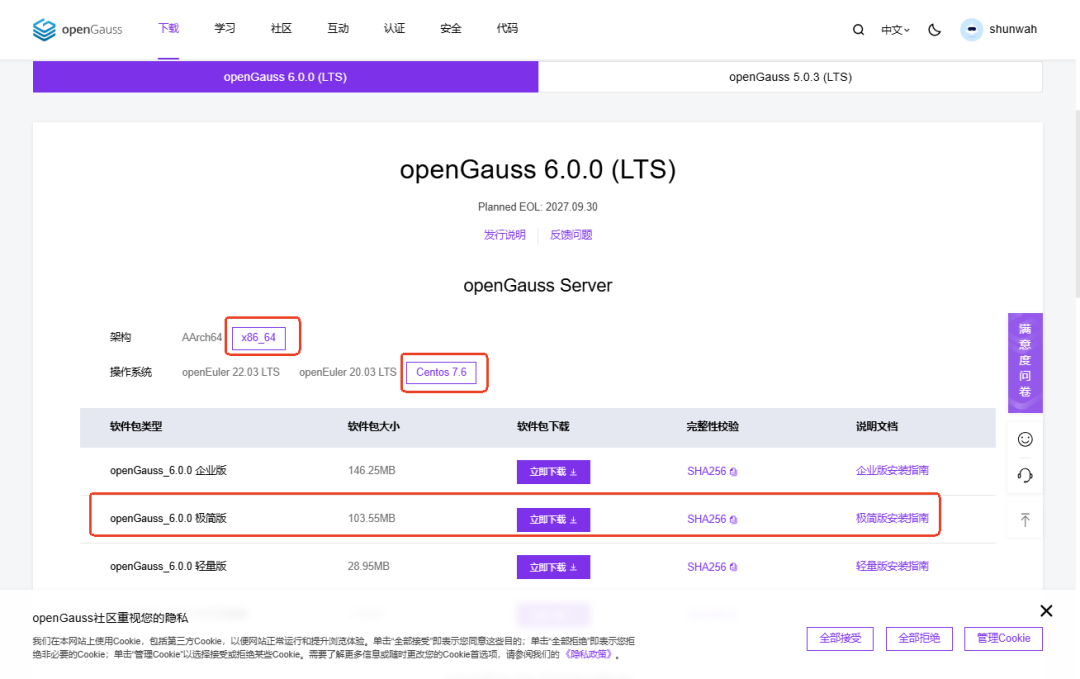
1、下载openGauss 6.0 LTS安装包:
访问openGauss官网或GitHub仓库,找到6.0 LTS版本的下载链接,下载适用于Linux的安装包。
https://opengauss.org/zh/download/
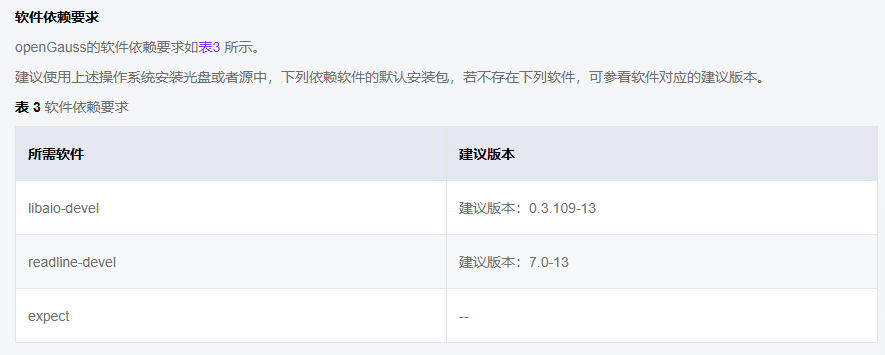
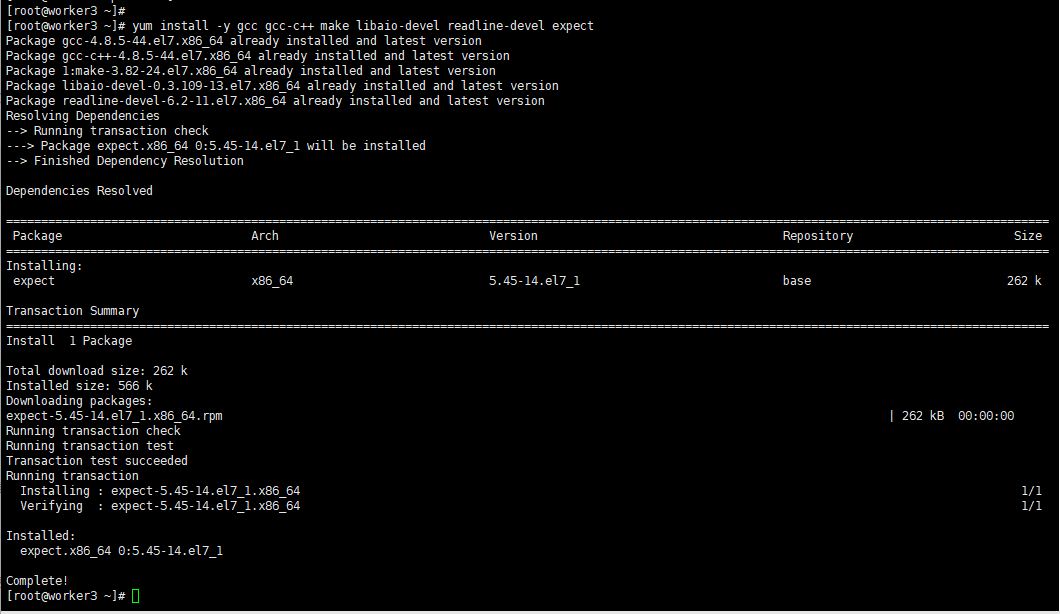
2、 安装依赖
[root@worker3 ~]# yum install -y gcc gcc-c++ make libaio-devel readline-devel expectPackage gcc-4.8.5-44.el7.x86_64 already installed and latest versionPackage gcc-c++-4.8.5-44.el7.x86_64 already installed and latest versionPackage 1:make-3.82-24.el7.x86_64 already installed and latest versionPackage libaio-devel-0.3.109-13.el7.x86_64 already installed and latest versionPackage readline-devel-6.2-11.el7.x86_64 already installed and latest versionResolving Dependencies--> Running transaction check---> Package expect.x86_64 0:5.45-14.el7_1 will be installed--> Finished Dependency Resolution
3、创建用户和组
为了安全起见,我们将在系统中创建一个专门用于运行openGauss的用户和组。
3.1 创建组:
[root@worker3 data]# groupadd gaussdb[root@worker3 data]#

3.2 创建用户:
[root@worker3 data]# useradd -g gaussdb gauss[root@worker3 data]#

3.3 设置用户密码:
[root@worker3 data]# passwd gaussChanging password for user gauss.New password:Retype new password:passwd: all authentication tokens updated successfully.[root@worker3 data]#

根据提示输入并确认密码。
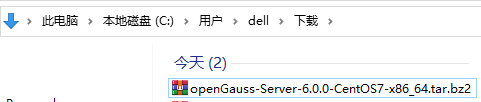
4、传输包装包文件:
使用XFTP将下载的openGauss安装包和依赖包从联网机器传输到离线机器。

5、解压安装包:
将openGauss 6.0 LTS的安装包解压到指定目录,例如(假定安装目录为/opt/software/openGauss,请用实际值替换)。
[root@worker3 data]# lsbackup es mysql ob4-3 redisdemo jpom nginx ob_elr.py testdocker_data mongo nginx-proxy openGauss-Server-6.0.0-CentOS7-x86_64.tar.bz2 WavesAudio.MaxxAudioProforDell2020_fh4rh281wavaa!App[root@worker3 data]# tar -jxf openGauss-Server-6.0.0-CentOS7-x86_64.tar.bz2 -C opt/software/openGauss/[root@worker3 data]#

6、设置安装目录权限
/opt/software/openGauss/ 设置权限chown -R gauss:gaussdb
[root@worker3 data]# chown -R gauss:gaussdb opt/software/openGauss/[root@worker3 data]#

二、安装部署数据库:
切换到gauss用户,部署数据库。
[root@worker3 data]# su - gauss[gauss@worker3 ~]$
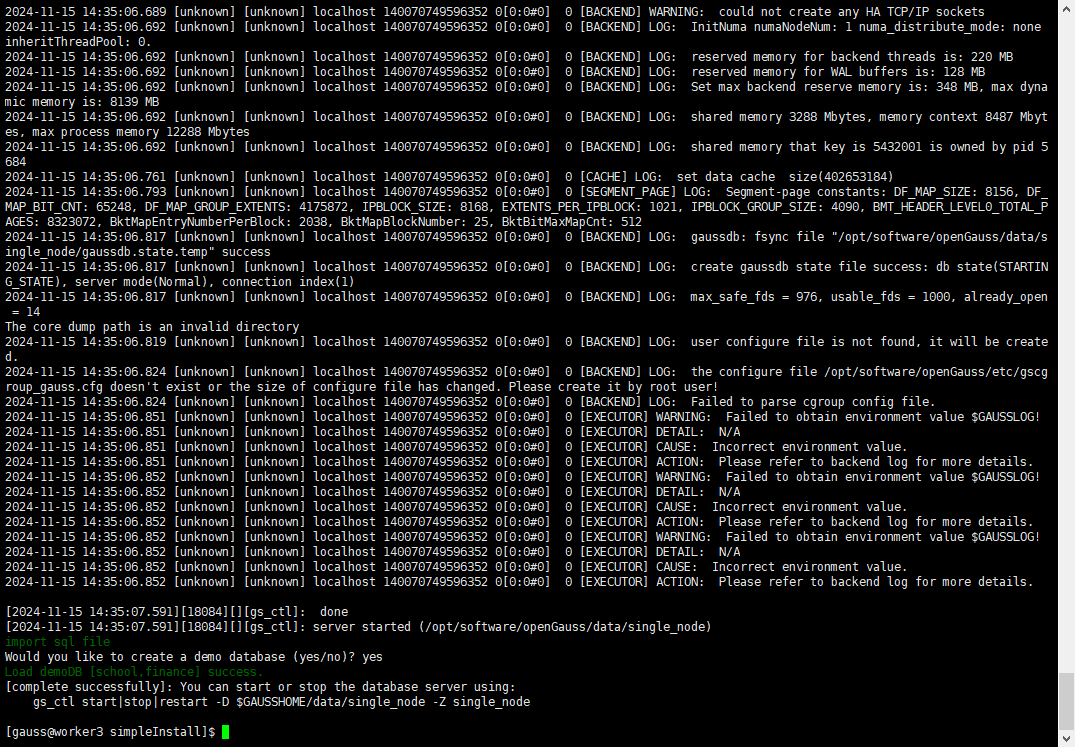
1、安装数据库
[gauss@worker3 ~]$ cd opt/software/openGauss/[gauss@worker3 openGauss]$ lsbin etc include jre lib logs share simpleInstall version.cfg[gauss@worker3 openGauss]$ cd simpleInstall/[gauss@worker3 simpleInstall]$ lsfinance.sql install.sh load.log README.md school.sql[gauss@worker3 simpleInstall]$ sh install.sh -w aBC@123678[step 1]: check parameter[step 2]: check install env and os setting[step 3]: change_gausshome_owner[step 4]: set environment variables/etc/profile.d/gcc.sh: line 1: $'\342\200\230nexport': command not found/home/gauss/.bashrc: line 16: ulimit: open files: cannot modify limit: Operation not permitted[step 6]: init datanodeThe files belonging to this database system will be owned by user "gauss".This user must also own the server process.The database cluster will be initialized with locale "en_US.UTF-8".The default database encoding has accordingly been set to "UTF8".The default text search configuration will be set to "english".creating directory opt/software/openGauss/data/single_node ... okcreating subdirectories ... in ordinary occasionokcreating configuration files ... okselecting default max_connections ... 100selecting default shared_buffers ... 1024MBBegin init undo subsystem meta.[INIT UNDO] Init undo subsystem meta successfully.creating template1 database in opt/software/openGauss/data/single_node/base/1 ... The core dump path is an invalid directory2024-11-15 14:34:55.928 [unknown] [unknown] localhost 140496757156544 0[0:0#0] [BACKEND] WARNING: macAddr is 80/1451333599, sysidentifier is 5265025/2547988916, randomNum is 3127785908ok
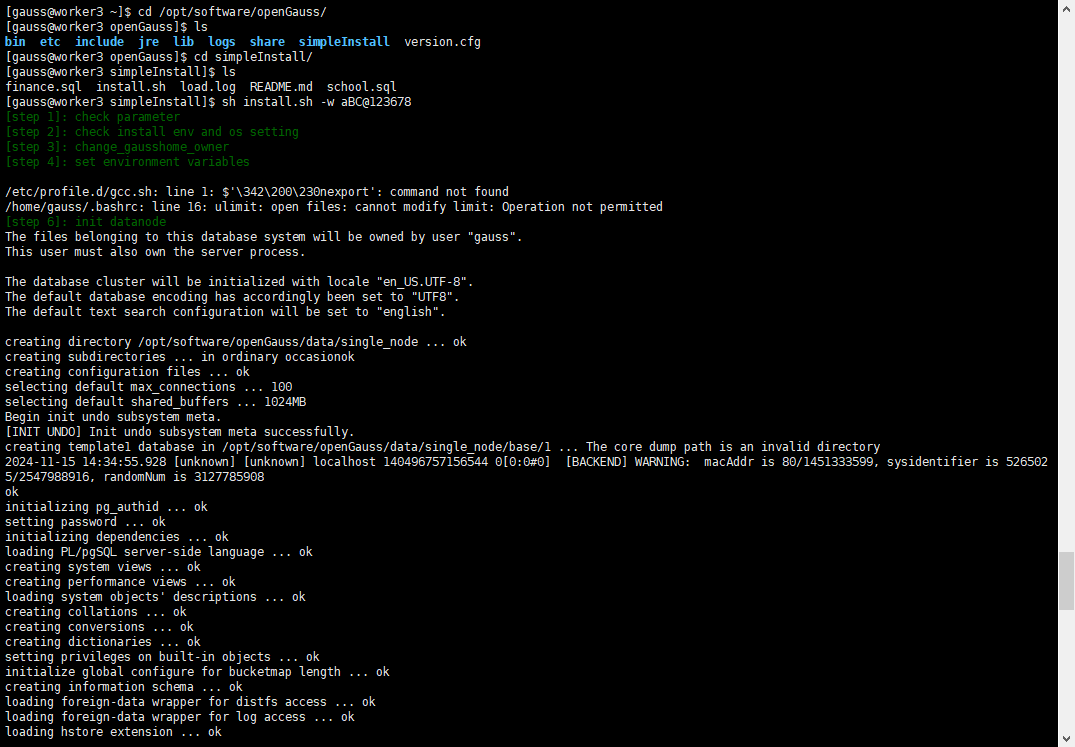
上述命令中,-w 是指初始化数据库密码(gs_initdb指定),安全需要必须设置。
2、设置环境变量:
编辑~/.bashrc文件,添加openGauss的相关路径。
[root@worker3 data]# echo 'export PATH=$PATH:/opt/software/openGauss/bin' >> ~/.bashrc[root@worker3 data]# echo 'export LD_LIBRARY_PATH=/opt/software/openGauss/lib:$LD_LIBRARY_PATH' >> ~/.bashrc[root@worker3 data]# source ~/.bashrc
3、安装执行完成后,使用ps和gs_ctl查看进程是否正常。
[gauss@worker3 ~]$ ps ux | grep gaussdbgauss 41043 10.7 3.0 6294532 890320 ? Ssl 14:51 0:00 opt/software/openGauss/bin/gaussdb -D opt/software/openGauss/data/single_nodegauss 41279 0.0 0.0 110480 908 pts/2 S+ 14:52 0:00 grep --color=auto gaussdb[gauss@worker3 ~]$

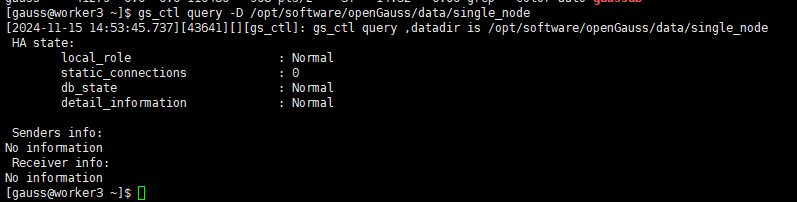
或
[gauss@worker3 ~]$ gs_ctl query -D opt/software/openGauss/data/single_node[2024-11-15 14:53:45.737][43641][][gs_ctl]: gs_ctl query ,datadir is opt/software/openGauss/data/single_nodeHA state:local_role : Normalstatic_connections : 0db_state : Normaldetail_information : NormalSenders info:No informationReceiver info:No information[gauss@worker3 ~]$
4、启动和管理数据库
4.1启动数据库:
使用gs_ctl命令启动数据库。
[gauss@worker3 ~]$ gs_ctl start -D $GAUSSHOME/data/single_node -Z single_node[2024-11-15 14:51:55.232][41040][][gs_ctl]: gs_ctl started,datadir is opt/software/openGauss/data/single_node[2024-11-15 14:51:55.276][41040][][gs_ctl]: waiting for server to start....0 LOG: [Alarm Module]can not read GAUSS_WARNING_TYPE env.

4.2 停止数据库:
当需要停止数据库时,使用以下命令:
[gauss@worker3 ~]$ gs_ctl stop -D $GAUSSHOME/data/single_node -Z single_node[2024-11-15 14:56:01.768][46698][][gs_ctl]: gs_ctl stopped ,datadir is opt/software/openGauss/data/single_nodewaiting for server to shut down.... doneserver stopped[gauss@worker3 ~]$

4.3 重启数据库:
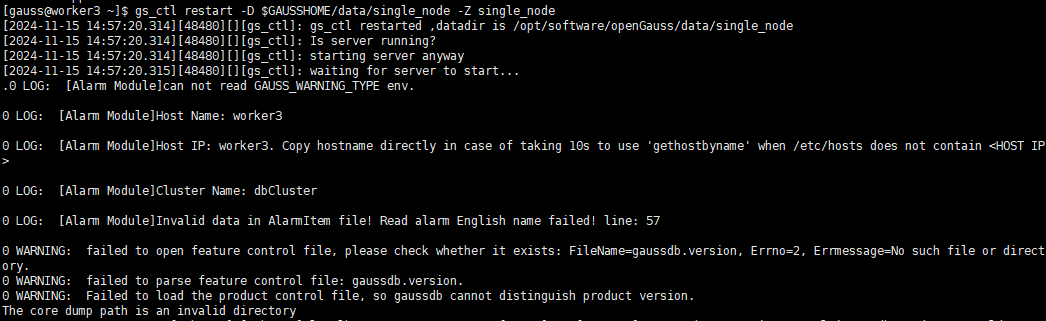
如果需要重启数据库,可以使用:
[gauss@worker3 ~]$ gs_ctl restart -D $GAUSSHOME/data/single_node -Z single_node[2024-11-15 14:57:20.314][48480][][gs_ctl]: gs_ctl restarted ,datadir is opt/software/openGauss/data/single_node[2024-11-15 14:57:20.314][48480][][gs_ctl]: Is server running?[2024-11-15 14:57:20.314][48480][][gs_ctl]: starting server anyway[2024-11-15 14:57:20.315][48480][][gs_ctl]: waiting for server to start....0 LOG: [Alarm Module]can not read GAUSS_WARNING_TYPE env.
4.4 查看数据库状态:
检查数据库的运行状态,确保一切正常。
[gauss@worker3 ~]$ gs_ctl status -D $GAUSSHOME/data/single_node -Z single_node[2024-11-15 14:58:23.839][50027][][gs_ctl]: gs_ctl status,datadir is opt/software/openGauss/data/single_nodegs_ctl: server is running (PID: 48481)/opt/software/openGauss/bin/gaussdb "-D" "/opt/software/openGauss/data/single_node"[gauss@worker3 ~]$

三、连接数据库
1、gsql客户端工具连接到openGauss数据库
完成上述步骤后,可以使用gsql客户端工具连接到openGauss数据库,验证安装是否成功。
[gauss@worker3 single_node]$ gsql -d postgres -p 5432 -Cgsql ((openGauss 6.0.0 build aee4abd5) compiled at 2024-09-29 18:38:08 commit 0 last mr )Non-SSL connection (SSL connection is recommended when requiring high-security)Type "help" for help.openGauss=#

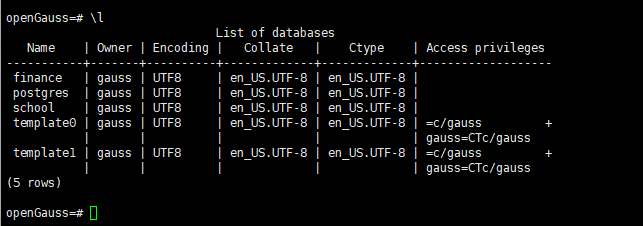
如果一切顺利,您将进入openGauss的命令行界面,可以开始使用这个强大的数据库系统了。
openGauss=# \lList of databasesName | Owner | Encoding | Collate | Ctype | Access privileges-----------+-------+----------+-------------+-------------+-------------------finance | gauss | UTF8 | en_US.UTF-8 | en_US.UTF-8 |postgres | gauss | UTF8 | en_US.UTF-8 | en_US.UTF-8 |school | gauss | UTF8 | en_US.UTF-8 | en_US.UTF-8 |template0 | gauss | UTF8 | en_US.UTF-8 | en_US.UTF-8 | =c/gauss +| | | | | gauss=CTc/gausstemplate1 | gauss | UTF8 | en_US.UTF-8 | en_US.UTF-8 | =c/gauss +| | | | | gauss=CTc/gauss(5 rows)openGauss=#
2、访问连接配置
2.1配置防火墙
为了确保外部可以访问openGauss数据库,需要配置防火墙规则。假设openGauss的默认端口为5432。
允许端口:
[root@worker3 data]# firewall-cmd --zone=public --add-port=5432/tcp --permanentsuccess[root@worker3 data]# firewall-cmd --reloadsuccess

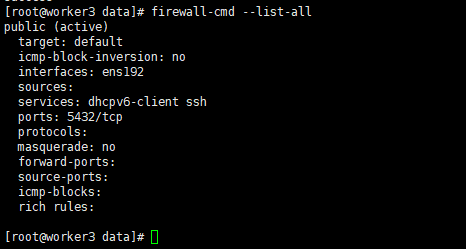
2.2 检查防火墙状态:
[root@worker3 data]# firewall-cmd --list-allpublic (active)target: defaulticmp-block-inversion: nointerfaces: ens192sources:services: dhcpv6-client sshports: 5432/tcpprotocols:masquerade: noforward-ports:source-ports:icmp-blocks:rich rules:[root@worker3 data]#
3、配置监听地址
为了让openGauss监听特定的IP地址,需要编辑postgresql.conf文件。
编辑配置文件:
[root@worker3 openGauss]# cd data/single_node/[root@worker3 single_node]# lsasp_data gs_profile pg_clog pg_ident.conf pg_multixact pg_snapshots pg_xlog postmaster.pid.lockbase gswlm_userinfo.cfg pg_csnlog pg_llog pg_notify pg_stat_tmp postgresql.conf sql_monitorgaussdb.state mem_log pg_ctl.lock pg_location pg_perf pg_tblspc postgresql.conf.lock undoglobal mot.conf pg_errorinfo pg_log pg_replslot pg_twophase postmaster.optsgs_gazelle.conf pg_audit pg_hba.conf pg_logical pg_serial PG_VERSION postmaster.pid[root@worker3 single_node]# vim postgresql.conf[root@worker3 single_node]# pwd/opt/software/openGauss/data/single_node[root@worker3 single_node]#

修改监听地址:
找到#listen_addresses = 'localhost’这一行,将其修改为:
listen_addresses = ‘0.0.0.0’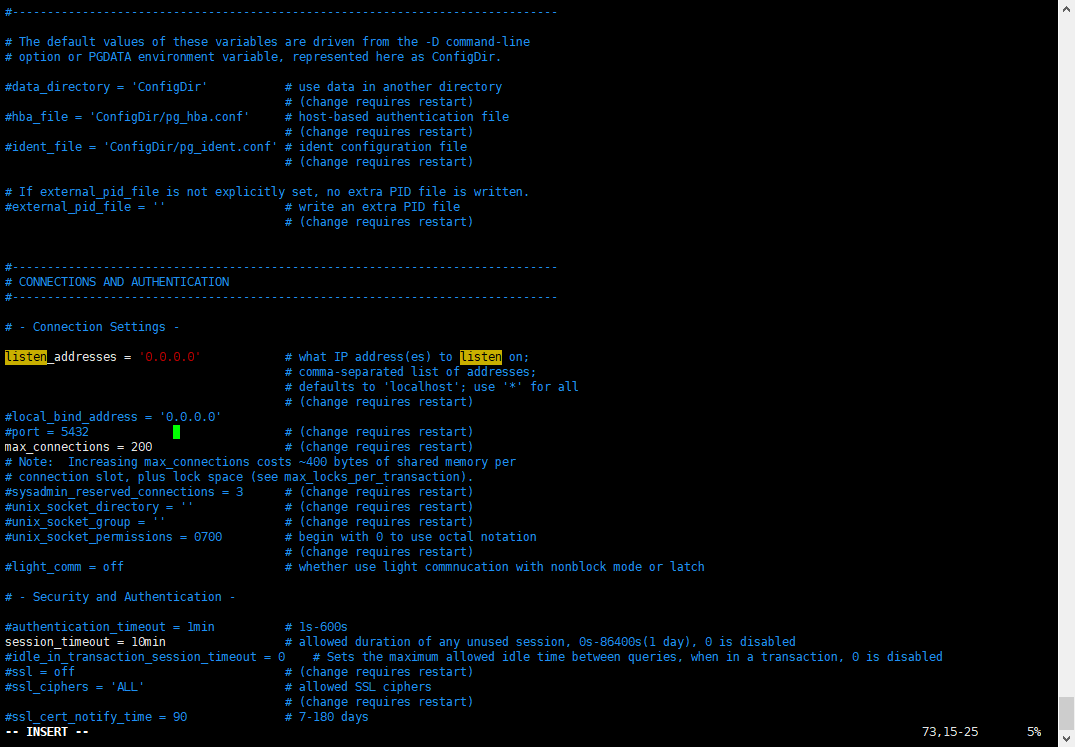
保存并退出:
按Esc键,输入:wq保存并退出。
4、重启数据库:
使配置生效。
[gauss@worker3 ~]$ gs_ctl restart -D $GAUSSHOME/data/single_node -Z single_node[2024-11-15 16:35:26.098][52124][][gs_ctl]: gs_ctl restarted ,datadir is /opt/software/openGauss/data/single_nodewaiting for server to shut down... doneserver stopped[2024-11-15 16:35:27.107][52124][][gs_ctl]: waiting for server to start....0 LOG: [Alarm Module]can not read GAUSS_WARNING_TYPE env.0 LOG: [Alarm Module]Host Name: worker30 LOG: [Alarm Module]Host IP: worker3. Copy hostname directly in case of taking 10s to use 'gethostbyname' when /etc/hosts does not contain <HOST IP>0 LOG: [Alarm Module]Cluster Name: dbCluster

5、配置远程访问
为了允许远程客户端连接到openGauss数据库,需要编辑pg_hba.conf文件。
编辑配置文件:
[root@worker3 ~]# cd /opt/software/openGauss/data/single_node/[root@worker3 single_node]# lsasp_data gs_profile pg_clog pg_ident.conf pg_multixact pg_snapshots pg_xlog postmaster.pid.lockbase gswlm_userinfo.cfg pg_csnlog pg_llog pg_notify pg_stat_tmp postgresql.conf sql_monitorgaussdb.state mem_log pg_ctl.lock pg_location pg_perf pg_tblspc postgresql.conf.lock undoglobal mot.conf pg_errorinfo pg_log pg_replslot pg_twophase postmaster.optsgs_gazelle.conf pg_audit pg_hba.conf pg_logical pg_serial PG_VERSION postmaster.pid[root@worker3 single_node]# vim pg_hba.conf[root@worker3 single_node]#

添加远程访问规则:
在文件末尾添加以下行,允许特定IP地址或子网的客户端连接:
host all all 172.20.2.0/24 md5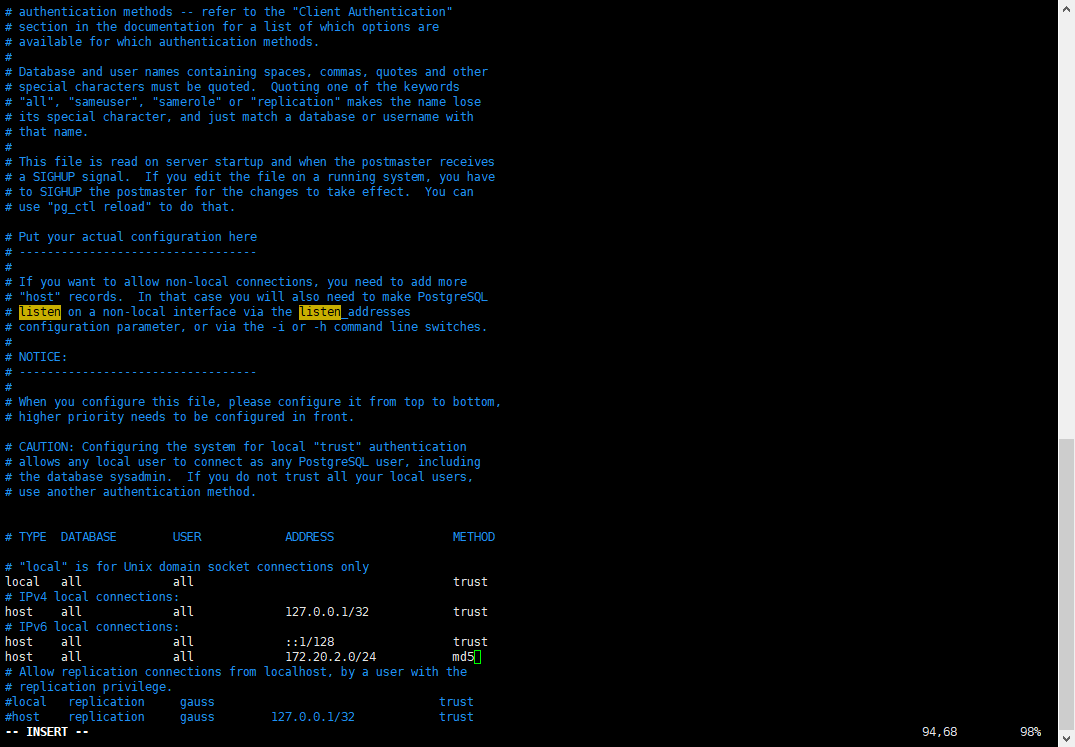
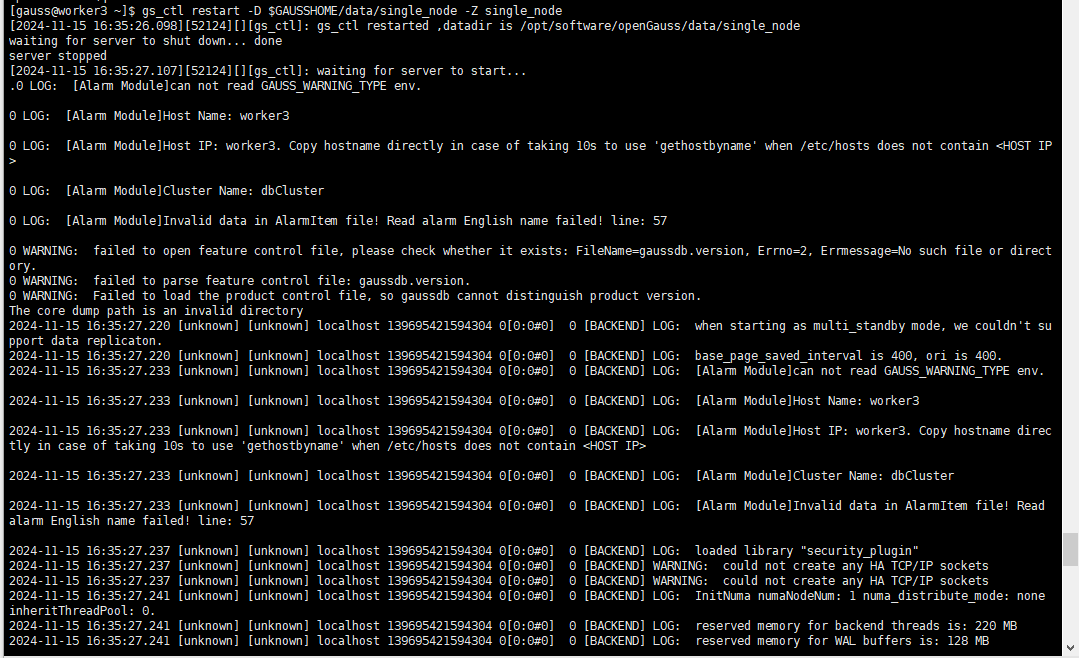
6、重启数据库:
使配置生效。
[gauss@worker3 ~]$ gs_ctl restart -D $GAUSSHOME/data/single_node -Z single_node[2024-11-15 16:35:26.098][52124][][gs_ctl]: gs_ctl restarted ,datadir is /opt/software/openGauss/data/single_nodewaiting for server to shut down... doneserver stopped[2024-11-15 16:35:27.107][52124][][gs_ctl]: waiting for server to start....0 LOG: [Alarm Module]can not read GAUSS_WARNING_TYPE env.0 LOG: [Alarm Module]Host Name: worker30 LOG: [Alarm Module]Host IP: worker3. Copy hostname directly in case of taking 10s to use 'gethostbyname' when /etc/hosts does not contain <HOST IP>0 LOG: [Alarm Module]Cluster Name: dbCluster
结语
通过本文测试,我学习完成了在CentOS 7离线环境下的openGauss 6.0 LTS版本的安装和配置,还体验了一次完整的数据库部署过程。openGauss的每一步发展都凝聚着社区成员的心血和智慧,我非常荣幸能够成为其中的一员。希望我的经历能够激励更多的技术爱好者加入openGauss社区,共同推动国产数据库技术的发展。如果你有任何疑问或建议,欢迎随时联系我,让我们一起在技术的道路上不断前行。
点击阅读原文跳转作者文章
