


温馨提示:本篇博客的详细代码已发布到 git : https://gitcode.com/nutpi/HarmonyosNext 可以下载运行哦!

HarmonyOS NEXT系列教程之 TabsConcaveCircle组件动画系统详解
本文将深入解析TabsConcaveCircle组件的动画系统实现,包括选项切换动画和圆球移动动画。
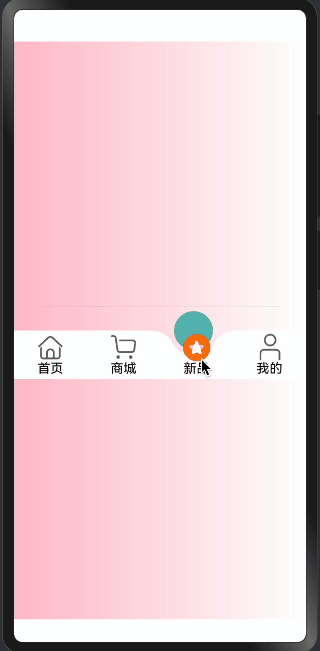
效果演示
1. 动画状态管理
private canvasAnimator: AnimatorResult | undefined = undefined;
@State animateTime: number = 1000;
@State animationPositionX: number = 0;
@State imageOffsetY: number = 0;
@State imageWH: number = 0;
动画相关状态说明:
-
动画控制器:
canvasAnimator: 存储动画实例- 用于控制动画的播放和暂停
-
动画参数:
animateTime: 动画持续时间animationPositionX: 当前凹槽位置imageOffsetY: 图片偏移量imageWH: 图片尺寸
2. 选项切换动画
getAnimateSelectIndex() {
  let animateDelay = 500;
  animateTo({
    duration: this.animateTime,
    delay: animateDelay
  }, () => {
    this.animateSelectIndex = this.selectIndex
  })
  this.createAnimation()
}
切换动画实现:
-
动画配置:
animateDelay: 500ms延迟duration: 动画持续时间
-
状态更新:
this.animateSelectIndex = this.selectIndex- 同步选中状态
- 触发UI更新
-
动画联动:
this.createAnimation()- 触发圆球移动动画
- 实现联动效果
3. 圆球移动动画
createAnimation() {
  if (!this.circleInfo) {
    return;
  }

  this.canvasAnimator = animator.create({
    duration: this.animateTime,
    easing: "ease",
    delay: 0,
    fill: "forwards",
    direction: "normal",
    iterations: 1,
    begin: this.animationPositionX,
    end: this.circleInfo?.getMenuCenterX(this.selectIndex)
  })

  this.canvasAnimator.onFrame = (value: number) => {
    this.animationPositionX = value;
    this.circleInfo?.setPositionXY({ x: value - this.circleInfo.circleRadius })
    this.createCanvas()
  }

  this.canvasAnimator.play()
}
移动动画详解:
-
动画创建:
animator.create({ duration: this.animateTime, easing: "ease", fill: "forwards", direction: "normal", iterations: 1, begin: this.animationPositionX, end: this.circleInfo?.getMenuCenterX(this.selectIndex) })- 设置动画时长
- 使用ease缓动函数
- 保持最终状态
- 设置起始和结束位置
-
帧动画处理:
this.canvasAnimator.onFrame = (value: number) => { this.animationPositionX = value; this.circleInfo?.setPositionXY({ x: value - this.circleInfo.circleRadius }) this.createCanvas() }- 更新位置状态
- 设置圆球位置
- 重绘Canvas内容
-
动画控制:
this.canvasAnimator.play()- 启动动画
- 自动执行帧更新
4. Canvas重绘实现
createCanvas() {
  if (this.circleInfo) {
    this.context.reset()
    CanvasCreateRectangle({
      context: this.context,
      tabsBgColor: this.tabsBgColor
    })
    CanvasClipGroove({
      context: this.context,
      menuLength: this.tabsMenu.length,
      center: this.animationPositionX,
    })
  }
}
Canvas更新流程:
-
重置画布:
this.context.reset()- 清除旧内容
- 准备新一帧
-
绘制背景:
CanvasCreateRectangle({ context: this.context, tabsBgColor: this.tabsBgColor })- 创建矩形背景
- 应用背景颜色
-
创建凹槽:
CanvasClipGroove({ context: this.context, menuLength: this.tabsMenu.length, center: this.animationPositionX, })- 绘制凹槽效果
- 使用当前位置
总结
TabsConcaveCircle组件的动画系统通过:
- 精确的状态管理
- 流畅的动画过渡
- 实时的Canvas更新
- 优雅的动画联动
实现了一个:
- 视觉效果出色
- 性能表现优异
- 用户体验流畅
- 可维护性强
的交互动画系统。
「喜欢这篇文章,您的关注和赞赏是给作者最好的鼓励」
关注作者
【版权声明】本文为墨天轮用户原创内容,转载时必须标注文章的来源(墨天轮),文章链接,文章作者等基本信息,否则作者和墨天轮有权追究责任。如果您发现墨天轮中有涉嫌抄袭或者侵权的内容,欢迎发送邮件至:contact@modb.pro进行举报,并提供相关证据,一经查实,墨天轮将立刻删除相关内容。
