


OB 在最近的伙伴生态大会上发布了企业版的单机版,主打中小规模业务场景。这种场景业务对数据库要求会降低运维、高可用要求,用于部署 OB 的服务器配置也不会很高。本文主要分享这个 OB 企业版单机版的部署和使用体验。欢迎大家留言交流。
软件下载
单机版主打就是中低配服务器上的部署,所有资源都投入 OB 的使用。单机版的部署借鉴了 OB 社区版的命令行下自动化部署工具 OBD ,社区版用户部署这个会非常熟悉。整个软件包名字叫:oceanbase-standalone-all-in-one-4.2.5.3-103000152025033110.el8.x86_64.tar.gz
软件解压缩后如下:
ncdu 1.16 ~ Use the arrow keys to navigate, press ? for help
--- root/soft/oceanbase-standalone-all-in-one -----------------
  621.6 MiB [########################]      7 rpms
  179.9 MiB [######                  ]  4,612 obd
   70.1 MiB [##                      ]     85 obclient
   52.0 KiB [                        ]      4 bin
    4.0 KiB [                        ]         README.md
    4.0 KiB [                        ]         VERSION
注意:这里强烈建议将这个软件解压缩到普通用户 admin
的目录下:/home/admin
。大部分用户都会忽略这点,默认解压缩到 root
用户下了。
部署步骤
这里会先按大部分用户常见的行为 将 OBD 以及相关软件部署在 root
用户下。后面会知道这个操作是有问题的,需要返工。 如果你一开始就只用普通用户 admin
操作,那就没有这个问题。
部署 OBD 软件
初次使用需要安装 OBD 环境,这个在软件包里有带。第一次运行下面命令。
[root@server69 oceanbase-standalone-all-in-one]# ls bin     env.sh  install_obd.sh  install_ob.sh  uninstall_obd.sh     [root@server69 oceanbase-standalone-all-in-one]# sh bin/install_obd.sh                                                 install obd as root                                         No previous obd installed, try install..., wait a moment     name: grafana                                               version: 7.5.17                                             release:1                                                   arch: x86_64                                                 md5: 1bf1f338d3a3445d8599dc6902e7aeed4de4e0d6               size: 177766248                                             add root/soft/oceanbase-standalone-all-in-one/rpms/grafana-7.5.17-1.el8.x86_64.rpm to local mirror                     name: obagent                                               version: 4.2.2                                               release:100000042024011120.el8                               arch: x86_64                                                 md5: bf152b880953c2043ddaf80d6180cf22bb8c8ac2               size: 72919140                                               add root/soft/oceanbase-standalone-all-in-one/rpms/obagent-4.2.2-100000042024011120.el8.x86_64.rpm to local mirror     name: ob-deploy                                             version: 3.2.0                                               release:2.el8                                               arch: x86_64
md5: 529076c3e548f690ea6cb4e50cd77b2dfc4bfc6d               size: 178634999                                             add root/soft/oceanbase-standalone-all-in-one/rpms/ob-deploy-3.2.0-2.el8.x86_64.rpm to local mirror                     name: oceanbase-diagnostic-tool                             version: 3.2.0                                               release:52025031411.el8                                     arch: x86_64
md5: e7aeaa17222aa079c8d9e0c74a73e1d7f9c5501b
size: 71147006
add root/soft/oceanbase-standalone-all-in-one/rpms/oceanbase-diagnostic-tool-3.2.0-52025031411.el8.x86_64.rpm to local mirror
name: oceanbase-standalone
version: 4.2.5.3
release:103000152025033110.el8
arch: x86_64
md5: 305669b55281773f5c53ff4e44ff9f7bed9f7bc0
size: 1813828757
add root/soft/oceanbase-standalone-all-in-one/rpms/oceanbase-standalone-4.2.5.3-103000152025033110.el8.x86_64.rpm to local mirror
name: oceanbase-standalone-libs
version: 4.2.5.3
release:103000152025033110.el8
arch: x86_64
md5: 84315910ce45d91ed361867215964369044185c0
size: 7848
add root/soft/oceanbase-standalone-all-in-one/rpms/oceanbase-standalone-libs-4.2.5.3-103000152025033110.el8.x86_64.rpm to local mirror
name: prometheus
version: 2.37.1
release:10000102022110211.el8
arch: x86_64
md5: e4f8a3e784512fca75bf1b3464247d1f31542cb9
size: 211224073
add root/soft/oceanbase-standalone-all-in-one/rpms/prometheus-2.37.1-10000102022110211.el8.x86_64.rpm to local mirror
Trace ID: 3eee036e-14e7-11f0-acab-0050569daf00
If you want to view detailed obd logs, please run: obd display-trace 3eee036e-14e7-11f0-acab-0050569daf00
Disable remote ok
Trace ID: 40bfca42-14e7-11f0-b5e2-0050569daf00
If you want to view detailed obd logs, please run: obd display-trace 40bfca42-14e7-11f0-b5e2-0050569daf00

add auto set env logic to profile: root/.bash_profile

Execute this command to apply the environment config:`source ~/.oceanbase-all-in-one/bin/env.sh `
安装后执行一下环境变量设置脚本。
[root@server69 oceanbase-standalone-all-in-one]# source ~/.oceanbase-all-in-one/bin/env.sh
查看 README.md 可以看到此后开局有两种做法:
run obd demo
to quickly start a local oceanbase clusterrun obd web
to start web service to do deployrun obd -h
for more details
第一种是快速生成一个默认的部署,参数都是自动设置的。第二种是起一个 WEB 界面,通过 WEB 部署一个 OCP,然后通过 OCP 部署 OB 。
如果选择第一种部署方式,参数是 OBD 自动设置的。我不太喜欢这种。但是第二种又要先部署一个 OCP 。在生产环境 OCP 是有必要的,但是这里我先不想通过 OCP 去部署。
交互式部署 OB (不带 OCP)
这里我期望直接部署一个 OB ,并且参数可控。一种方式就是手动部署,此前有文章分享。另外一种这里提供交互式部署 OB 的脚本(bin/install_ob.sh
)。这是新的部署方式,值得推荐一下。(我挺喜欢这个交互式部署脚本,它很友好)
[root@server69 oceanbase-standalone-all-in-one]# bin/install_ob.sh
Enter the IP (Default: 10.0.0.69) (only support local IP):
 Valid local IP: 10.0.0.69
Enter the current user password :
Trace ID: f0cc184e-14e9-11f0-87fe-0050569daf00
If you want to view detailed obd logs, please run: obd display-trace f0cc184e-14e9-11f0-87fe-0050569daf00
get system config ok
+-------------------------------------------------------------+
|                 System Parameter Change List                |
+-----------+------------------+---------------+--------------+
| ip        | need_change_var  | current_value | target_value |
+-----------+------------------+---------------+--------------+
| 10.0.0.69 | fs.aio-max-nr    | 256000        | 1048576      |
| 10.0.0.69 | vm.max_map_count | 65530         | 655360       |
+-----------+------------------+---------------+--------------+
Trace ID: f203e84a-14e9-11f0-baae-0050569daf00
If you want to view detailed obd logs, please run: obd display-trace f203e84a-14e9-11f0-baae-0050569daf00
Do you want to modify the parameters above? (y/n) (Default: y)n

Enter the cluster name (Default: standalone; allowed characters: letters, numbers, and underscores): obeedemo
Enter the OB SQL port (Default: 2881):
Enter the OB RPC port (Default: 2882):
Enter the obshell port (Default: 2886):
Enter the OB root password (Default: W4tKJD6zasxfEFZypMz0):
Confirm the OB root password:
Enter the OB cpu count (Default: 8):
Enter the OB memory limit (Configurable Range[6, 10], Default: 10, Unit: G): 12
 The memory limitfor OB cannot exceed 10G. Please try again.
Enter the OB memory limit (Configurable Range[6, 10], Default: 10, Unit: G): 12
 The memory limitfor OB cannot exceed 10G. Please try again.
Enter the OB memory limit (Configurable Range[6, 12], Default: 12, Unit: G): 12
Enter the OB installation directory (Default: root/obeedemo): home/admin/obeedemo
Enter the OB data directory (Default: data/1/obeedemo):     Enter the OB log directory (Default: data/log1/obeedemo):
Enter the OB datafile maxsize (Configurable Range[24, 90], Default: 90, Unit: G): 50
Enter the OB log disk size (Configurable Range[24, 45], Default: 45, Unit: G): 45
 Do you want to create tenant for your business workload? (y/n)(Default: y):
 Tenant: sys conifguration: 2C/1G/3G(CPU/Memory/Log disk)
 system_memory configuration(Unit: G): 5
Enter the tenant name (Default: test; allowed characters: letters, numbers, and underscores): oboracle
    Please select the tenant mode (enter the corresponding number):
    1) MySQL
    2) Oracle
Please enter your choice [1/2] (default 1):2
Enter the tenant cpu (Configurable Range[1, 6], Default: 6):
Enter the tenant memory (Configurable Range[1, 6], Default: 6, Unit: G):
Enter the tenant log disk size(Configurable Range[18, 41], Default: 41, Unit: G): 24
 Do you want to enable encryption for password security? (y/n) (Default: n):
 Do you need to install the monitoring components (OBAgent, Prometheus, Grafana)? (y/n) (Default: y):
Enter the OBAgent monitoring service port (Default: 8088):
Enter the OBAgent management service port (Default: 8089):
Enter the Prometheus port (Default: 9090):
 The port is already in use. Please enter a different one.
Enter the Prometheus port (Default: 9090): 19090
Enter the Grafana port (Default: 3000): 13000

#Saved configurations:
 cluster name: obeedemo
 mysql port: 2881
 rpc port: 2882
 obshell port: 2886
 cpu count: 8
 memory limit: 12G
 home path: home/admin/obeedemo
 data dir: data/1/obeedemo
log dir: data/log1/obeedemo
 datafile maxsize: 50G
log disk size: 45G
 tenant name: oboracle
 tenant cpu: 6
 tenant memory: 6G
 tenant log disk size: 24G
 OBAgent monitoring service port: 8088
 OBAgent management service port: 8089
 Prometheus port: 19090
 Grafana port: 13000

 Are you sure these configurations are correct? (y/n) (Default: y):
Configuration confirmed.


start cluster...
Package oceanbase-standalone-4.2.5.3-103000152025033110.el8 is available.
Package obagent-4.2.2-100000042024011120.el8 is available.
Package prometheus-2.37.1-10000102022110211.el8 is available.
Package grafana-7.5.17-1 is available.
install oceanbase-standalone-4.2.5.3 forlocal ok
install obagent-4.2.2 forlocal ok
install prometheus-2.37.1 forlocal ok
install grafana-7.5.17 forlocal ok
Cluster param config check ok
Open ssh connection ok
Generate obagent configuration ok
Generate prometheus configuration ok
Generate grafana configuration ok
+----------------------------------------------------------------------------------------------------+
|                                              Packages                                              |
+----------------------+---------+------------------------+------------------------------------------+
| Repository           | Version | Release                | Md5                                      |
+----------------------+---------+------------------------+------------------------------------------+
| oceanbase-standalone | 4.2.5.3 | 103000152025033110.el8 | 305669b55281773f5c53ff4e44ff9f7bed9f7bc0 |
| obagent              | 4.2.2   | 100000042024011120.el8 | bf152b880953c2043ddaf80d6180cf22bb8c8ac2 |
| prometheus           | 2.37.1  | 10000102022110211.el8  | e4f8a3e784512fca75bf1b3464247d1f31542cb9 |
| grafana              | 7.5.17  | 1                      | 1bf1f338d3a3445d8599dc6902e7aeed4de4e0d6 |
+----------------------+---------+------------------------+------------------------------------------+
Repository integrity check ok
Load param plugin ok
Open ssh connection ok
Initializes obagent work home ok
Initializes observer work home ok
Initializes prometheus work home ok
Initializes grafana work home ok
Parameter check ok
Remote oceanbase-standalone-4.2.5.3-103000152025033110.el8-305669b55281773f5c53ff4e44ff9f7bed9f7bc0 repository install ok
Remote oceanbase-standalone-4.2.5.3-103000152025033110.el8-305669b55281773f5c53ff4e44ff9f7bed9f7bc0 repository lib check ok
Remote obagent-4.2.2-100000042024011120.el8-bf152b880953c2043ddaf80d6180cf22bb8c8ac2 repository install ok
Remote obagent-4.2.2-100000042024011120.el8-bf152b880953c2043ddaf80d6180cf22bb8c8ac2 repository lib check ok
Remote prometheus-2.37.1-10000102022110211.el8-e4f8a3e784512fca75bf1b3464247d1f31542cb9 repository install ok
Remote prometheus-2.37.1-10000102022110211.el8-e4f8a3e784512fca75bf1b3464247d1f31542cb9 repository lib check ok
Remote grafana-7.5.17-1-1bf1f338d3a3445d8599dc6902e7aeed4de4e0d6 repository install ok
Remote grafana-7.5.17-1-1bf1f338d3a3445d8599dc6902e7aeed4de4e0d6 repository lib check ok
obeedemo deployed
Get local repositories ok
Load cluster param plugin ok
Open ssh connection ok
[WARN] OBD-1011: (10.0.0.69) The recommended value of fs.aio-max-nr is 1048576 (Current value: 256000)
[WARN] OBD-1007: (10.0.0.69) The recommended number of stack size is unlimited (Current value: 8192)
[WARN] OBD-1017: (10.0.0.69) The value of the "vm.max_map_count" must be within [327600, 1310720] (Current value: 65530, Recommended value: 655360)
Check before start obagent ok
Check before start prometheus ok
Check before start grafana ok
cluster scenario: None
Start observer ok
observer program health check ok
Connect to observer 10.0.0.69:2881 ok
oceanbase bootstrap ok
obshell start ok
obshell program health check ok
obshell bootstrap ok
Start obagent ok
obagent program health check ok
Start promethues ok
prometheus program health check ok
Start grafana ok
grafana program health check ok
Connect to grafana ok
Grafana modify password ok
Connect to observer 10.0.0.69:2881 ok
Wait for observer init ok
+---------------------------------------------+
|             oceanbase-standalone            |
+-----------+---------+------+-------+--------+
| ip        | version | port | zone  | status |
+-----------+---------+------+-------+--------+
| 10.0.0.69 | 4.2.5.3 | 2881 | zone1 | ACTIVE |
+-----------+---------+------+-------+--------+
obclient -h10.0.0.69 -P2881 -uroot@sys -p'aaAA11__' -Doceanbase -A

cluster unique id: f2dbd61d-2f04-5536-9ffa-6bd88e74d7a2-19618648985-03050204

Connect to Obagent ok
+--------------------------------------------------------------+
|                           obagent                            |
+-----------+--------------------+--------------------+--------+
| ip        | mgragent_http_port | monagent_http_port | status |
+-----------+--------------------+--------------------+--------+
| 10.0.0.69 | 8089               | 8088               | active |
+-----------+--------------------+--------------------+--------+
Connect to Prometheus ok
+------------------------------------------------------+
|                      prometheus                      |
+------------------------+-------+------------+--------+
| url                    | user  | password   | status |
+------------------------+-------+------------+--------+
| http://10.0.0.69:19090 | admin | 20RwHuJCB3 | active |
+------------------------+-------+------------+--------+
Connect to grafana ok
+-----------------------------------------------------------------+
|                             grafana                             |
+------------------------------------+-------+-----------+--------+
| url                                | user  | password  | status |
+------------------------------------+-------+-----------+--------+
| http://10.0.0.69:13000/d/oceanbase | admin | oceanbase | active |
+------------------------------------+-------+-----------+--------+
obeedemo running
Trace ID: 69102ebc-14ea-11f0-9447-0050569daf00
If you want to view detailed obd logs, please run: obd display-trace 69102ebc-14ea-11f0-9447-0050569daf00

create tenant...
Get local repositories ok
Open ssh connection ok
Connect to observer 10.0.0.69:2881 ok
Create tenant oboracle ok
Create user in oracle tenant is not supported and --password is not supported
Trace ID: 4993136e-14eb-11f0-a47a-0050569daf00
If you want to view detailed obd logs, please run: obd display-trace 4993136e-14eb-11f0-a47a-0050569daf00

You can access the oboracle tenant using the following command.:
 For security reasons, kindly reset the root password immeditely once the tenant has been successfully created.
 obclient -h10.0.0.69 -P2881 -uSYS@oboracle
If this cluster is for production use, please import a commercial license in time.
这个部署过程比较长,好在输入信息边界检查做的好,基本上填完信息后就一路自动化部署。这里总结一下上面部署的过程:
输入信息。包括 IP、软件目录、数据目录、日志目录;OB 的 CPU 个数、内存个数(提前用 free -h
命令确保有足够可用内存)、数据盘、日志盘空间;租户资源规格(包括 CPU、内存和日志空间)。安装 OB、ODP、Prometheus、Grafana、OBAgent 等软件包。 初始化一个 OB 集群。 初始化一个业务租户(这是必须的,不要把业务租户放到 OB 的默认管理租户 sys 下)。
整个部署使用的是 OBD 的技术。
查看集群列表
[root@server69 oceanbase-standalone-all-in-one]# obd cluster list
+----------------------------------------------------------+
|                       Cluster List                       |
+----------+-----------------------------+-----------------+
| Name     | Configuration Path          | Status (Cached) |
+----------+-----------------------------+-----------------+
| obeedemo | root/.obd/cluster/obeedemo | running         |
+----------+-----------------------------+-----------------+
Trace ID: 7bf4bf1e-14ec-11f0-bdf0-0050569daf00
If you want to view detailed obd logs, please run: obd display-trace 7bf4bf1e-14ec-11f0-bdf0-0050569daf00
查看集群详细组件部署信息
[root@server69 oceanbase-standalone-all-in-one]# obd cluster display obeedemo
Get local repositories and plugins ok
Open ssh connection ok
Connect to observer 10.0.0.69:2881 ok
Wait for observer init ok
+---------------------------------------------+
|             oceanbase-standalone            |
+-----------+---------+------+-------+--------+
| ip        | version | port | zone  | status |
+-----------+---------+------+-------+--------+
| 10.0.0.69 | 4.2.5.3 | 2881 | zone1 | ACTIVE |
+-----------+---------+------+-------+--------+
obclient -h10.0.0.69 -P2881 -uroot@sys -p'aaAA11__' -Doceanbase -A

cluster unique id: f2dbd61d-2f04-5536-9ffa-6bd88e74d7a2-19618648985-03050204

Connect to Obagent ok
+--------------------------------------------------------------+
|                           obagent                            |
+-----------+--------------------+--------------------+--------+
| ip        | mgragent_http_port | monagent_http_port | status |
+-----------+--------------------+--------------------+--------+
| 10.0.0.69 | 8089               | 8088               | active |
+-----------+--------------------+--------------------+--------+
Connect to Prometheus ok
+------------------------------------------------------+
|                      prometheus                      |
+------------------------+-------+------------+--------+
| url                    | user  | password   | status |
+------------------------+-------+------------+--------+
| http://10.0.0.69:19090 | admin | 20RwHuJCB3 | active |
+------------------------+-------+------------+--------+
Connect to grafana ok
+-----------------------------------------------------------------+
|                             grafana                             |
+------------------------------------+-------+-----------+--------+
| url                                | user  | password  | status |
+------------------------------------+-------+-----------+--------+
| http://10.0.0.69:13000/d/oceanbase | admin | oceanbase | active |
+------------------------------------+-------+-----------+--------+
Trace ID: b820e8b4-14ec-11f0-972e-0050569daf00
If you want to view detailed obd logs, please run: obd display-trace b820e8b4-14ec-11f0-972e-0050569daf00
查看 OBD 部署集群 obeedemo
时的配置文件(yaml
格式)
obd cluster edit-config obeedemo
现在我们来看看这个部署方式埋下的坑。 在前面交互式部署过程中,脚本引导软件默认安装目录是 /root/obeedemo
,我给修改到 admin
用户目录 /home/admin/obeedemo
。把数据库软件放在 root
用户目录是个错误的选择。 更要命的是,这个部署默认启动 OB 进程的时候是用 root
用户。这个在运维上也是错误的。
[root@server69 oceanbase-standalone-all-in-one]# ps -ef|grep observer
root     4128034       1 66 10:31 ?        00:11:49 home/admin/obeedemo/oceanbase/bin/observer -r 10.0.0.69:2882:2881 -p 2881 -P 2882 -z zone1 -n obeedemo -c 1744165891
 -d data/1/obeedemo -I 10.0.0.69 -o __min_full_resource_pool_memory=1073741824,cluster_name=obeedemo,cpu_count=8,memory_limit=12G,datafile_size=2G,datafile_maxsize=50G,
log_disk_size=45G,system_memory=5G,enable_syslog_wf=False,max_syslog_file_count=16
凡是通过 OCP 部署的 OB 集群,部属目录和进程启动用户都是在普通用户 admin
用户下。开源版本最初推出 OBD 部署方式的时候并没有意识到这点重要性,很容易默认就放在 root
用户下,
OB 企业版单机版部署也容易有这个问题。我们尝试修正一下这个问题。
修正 OBD 部署的 OB 用户
首先关闭 OB 集群
使用 OBD 命令停止集群。
[root@server69 oceanbase-standalone-all-in-one]# obd cluster stop obeedemo
Get local repositories ok
Get local repositories and plugins ok
Open ssh connection ok
Stop observer ok
Stop obshell ok
Stop obagent ok
Stop prometheus ok
Stop grafana ok
obeedemo stopped
Trace ID: bdb9b570-14ed-11f0-bb4a-0050569daf00
If you want to view detailed obd logs, please run: obd display-trace bdb9b570-14ed-11f0-bb4a-0050569daf00
修改 OB 相关软件目录的属主 这个时候大家就明白了为什么我不建议目录放在 /root
下。因为在那个位置是不能修改目录的owner
。
[root@server69 oceanbase-standalone-all-in-one]# chown -R admin.admin home/admin/obeedemo/
[root@server69 oceanbase-standalone-all-in-one]# ll home/admin/obeedemo/
总用量 0
drwxr-xr-x  9 admin admin 134  4月  9 10:35 grafana
drwxr-xr-x 12 admin admin 173  4月  9 10:35 obagent
drwxr-xr-x 14 admin admin 183  4月  9 10:33 oceanbase
drwxr-xr-x  8 admin admin 196  4月  9 10:35 prometheus

[root@server69 oceanbase-standalone-all-in-one]# chown -R admin.admin data/{1,log1}/obeedemo
[root@server69 oceanbase-standalone-all-in-one]# ls -lrth data/{1,log1}/obeedemo
/data/log1/obeedemo:
总用量 0
drwxr-xr-x 6 admin admin 76  4月  9 10:35 clog

/data/1/obeedemo:
总用量 0
lrwxrwxrwx 1 admin admin 24  4月  9 10:31 clog -> data/log1/obeedemo/clog
drwxr-xr-x 2 admin admin 24  4月  9 10:31 sstable
drwxr-xr-x 6 admin admin 74  4月  9 10:35 slog
修改集群的 OBD 部署配置文件。
这一步很简单,就是编辑配置文件,将第二行的 username: root
改为 username: admin
。
[root@server69 oceanbase-standalone-all-in-one]# obd cluster edit-config obeedemo

user:
  username: admin
  password: Yunqu123
  port: 22

:wx
推出后会提示运行下面命令生效配置。
Search param plugin and load ok
Parameter check ok
Save deploy "obeedemo" configuration
Use `obd cluster restart obeedemo --wp` to make changes take effect.
Trace ID: 332a1480-14ee-11f0-87fb-0050569daf00
If you want to view detailed obd logs, please run: obd display-trace 332a1480-14ee-11f0-87fb-0050569daf00
此时再启动,可惜还是报错了。
[root@server69 .obd]# obd cluster restart obeedemo --wp
Get local repositories and plugins ok
Load cluster param plugin ok
Open ssh connection ok
Cluster status check ok
Load cluster param plugin ok
Check before start obagent ok
Check before start prometheus ok
Check before start grafana ok
Start observer x
[ERROR] OBD-2002: Failed to start 10.0.0.69 observer: home/admin/obeedemo/oceanbase/bin/observer -p 2881
mysql port: 2881
ERROR: current user(uid=0) that starts observer is not the same with the original one(uid=1336), observer starts failed!
Fail check_uid_before_start, please use the initial user to start observer!
============= [AFTER_DESTROY] begin to show unstopped thread =============
[CHECK_KILL_GRACEFULLY][AFTER_DESTROY] detect unstopped thread, tid: 14641, name: observer
============= [AFTER_DESTROY] finish to show unstopped thread =============

[ERROR] OBD-1005: Some of the servers in the cluster have been stopped
See https://www.oceanbase.com/product/ob-deployer/error-codes .
Trace ID: 1815706a-14f1-11f0-b5e5-0050569daf00
If you want to view detailed obd logs, please run: obd display-trace 1815706a-14f1-11f0-b5e5-0050569daf00
[root@server69 .obd]#
这个报错是 OBD 经典的报错,意思是启动的用户不是当初最初的用户(不是 OB 目录的owner
)。这个就很奇怪了,明明已经改掉配置文件了。
切换到 admin
用户下,查看bin/observer
文件。
[root@server69 ~]# su - admin
上一次登录: 三 4月  9 11:14:19 CST 2025 pts/4 上
[admin@server69 ~]$ cd obeedemo/
[admin@server69 obeedemo]$ cd oceanbase/
[admin@server69 oceanbase]$ pwd
/home/admin/obeedemo/oceanbase
[admin@server69 oceanbase]$ ll bin/
总用量 0
lrwxrwxrwx 1 root root 109  4月  9 10:31 bench_io.sh -> root/.obd/repository/oceanbase-standalone/4.2.5.3/305669b55281773f5c53ff4e44ff9f7bed9f7bc0/bin/./bench_io.sh
lrwxrwxrwx 1 root root 103  4月  9 10:31 dooba -> root/.obd/repository/oceanbase-standalone/4.2.5.3/305669b55281773f5c53ff4e44ff9f7bed9f7bc0/bin/./dooba
lrwxrwxrwx 1 root root 116  4月  9 10:31 import_srs_data.py -> root/.obd/repository/oceanbase-standalone/4.2.5.3/305669b55281773f5c53ff4e44ff9f7bed9f7bc0/bin/./import_s
rs_data.py
lrwxrwxrwx 1 root root 122  4月  9 10:31 import_time_zone_info.py -> root/.obd/repository/oceanbase-standalone/4.2.5.3/305669b55281773f5c53ff4e44ff9f7bed9f7bc0/bin/./im
port_time_zone_info.py
lrwxrwxrwx 1 root root 106  4月  9 10:31 ob_admin -> root/.obd/repository/oceanbase-standalone/4.2.5.3/305669b55281773f5c53ff4e44ff9f7bed9f7bc0/bin/./ob_admin
lrwxrwxrwx 1 root root 108  4月  9 10:31 oblogminer -> root/.obd/repository/oceanbase-standalone/4.2.5.3/305669b55281773f5c53ff4e44ff9f7bed9f7bc0/bin/./oblogminer
lrwxrwxrwx 1 root root 106  4月  9 10:31 observer -> /root/.obd/repository/oceanbase-standalone/4.2.5.3/305669b55281773f5c53ff4e44ff9f7bed9f7bc0/bin/./observer
lrwxrwxrwx 1 root root 105  4月  9 10:31 obshell -> /root/.obd/repository/oceanbase-standalone/4.2.5.3/305669b55281773f5c53ff4e44ff9f7bed9f7bc0/bin/./obshell
lrwxrwxrwx 1 root root 105  4月  9 10:31 obstack -> /root/.obd/repository/oceanbase-standalone/4.2.5.3/305669b55281773f5c53ff4e44ff9f7bed9f7bc0/bin/./obstack
此时的发现 bin/
目录下所有的文件都是软链接,并且映射到 /root/.obd
用户下了。
在这个设计下,看来是没办法通过改文件属主的方式修正了。除非把 /root/.obd
整个目录迁移到 /home/admin/.obd
下并且逐个去修改 /home/admin/obeedemo
下文件的软链接。这无疑是非常麻烦的。
所以,唯一的修复方法就是:铲掉集群,重新到用户admin
下再走一次安装部署。
[root@server69 ~]# obd cluster destroy obeedemo
Are you sure to destroy the "obeedemo" cluster ? [y/n]: y
Get local repositories ok
Open ssh connection ok
Get deployment connections ok
Get standbys info ok
Cluster status check ok
oceanbase-standalone work dir cleaning ok
obagent work dir cleaning ok
prometheus work dir cleaning ok
grafana work dir cleaning ok
obeedemo destroyed
Trace ID: 22914e64-14f2-11f0-b3f7-0050569daf00
If you want to view detailed obd logs, please run: obd display-trace 22914e64-14f2-11f0-b3f7-0050569daf00

[root@server69 ~]# obd cluster list
+----------------------------------------------------------+
|                       Cluster List                       |
+----------+-----------------------------+-----------------+
| Name     | Configuration Path          | Status (Cached) |
+----------+-----------------------------+-----------------+
| obeedemo | /root/.obd/cluster/obeedemo | destroyed       |
+----------+-----------------------------+-----------------+
Trace ID: fccce106-14f2-11f0-aacd-0050569daf00
If you want to view detailed obd logs, please run: obd display-trace fccce106-14f2-11f0-aacd-0050569daf00
集群销毁后,为了永绝后患,卸载 OBD 以及删除相关目录 /root/.obd
。
[root@server69 ~]# /bin/rm -rf /root/.obd
[root@server69 ~]# rpm -e `rpm -qa|grep ob-deploy`
在普通用户 admin
下重新部署
重新解压缩软件包到普通用户 admin
的目录。
tar zxvf oceanbase-standalone-all-in-one-4.2.5.3-103000152025033110.el8.x86_64.tar.gz -C /home/admin/
chown -R admin.admin /home/admin/oceanbase-standalone-all-in-one/
su - admin
后面的步骤都要切换到 admin
用户下,然后就跟前面一样。
[admin@server69 oceanbase-standalone-all-in-one]$ bin/install_obd.sh
[admin@server69 oceanbase-standalone-all-in-one]$ source ~/.oceanbase-all-in-one/bin/env.sh
[admin@server69 oceanbase-standalone-all-in-one]$ bin/install_ob.sh
admin和
root的密码。如果想省麻烦,先把
admin加到
sudo用户组并免密码。
You can access the oboracle tenant using the following command.:
 For security reasons, kindly reset the root password immeditely once the tenant has been successfully created.
 obclient -h10.0.0.69 -P2881 -uSYS@oboracle
If this cluster is for production use, please import a commercial license in time.
使用 OBD 查看集群命令:obd cluster display obeedemo
查看集群详细部署信息。
此时 OB 进程都在 admin
用户下。
登录一下 ORACLE 租户看看
[admin@server69 oceanbase-standalone-all-in-one]$  obclient -h10.0.0.69 -P2881 -uSYS@oboracle -c -A
Welcome to the OceanBase.  Commands end with ; or \g.
Your OceanBase connection id is 3221522285
Server version: OceanBase 4.2.5.3 (r103000152025033110-f5b88cd987f23383677f2eb53cf76ed38a48979b) (Built Mar 31 2025 11:08:41)

Copyright (c) 2000, 2018, OceanBase and/or its affiliates. All rights reserved.

Type 'help;' or '\h'forhelp. Type '\c' to clear the current input statement.

obclient(SYS@oboracle)[SYS]> create user tpcc identified by "abc@ABC#123";
Query OK, 0 rows affected (0.103 sec)

obclient(SYS@oboracle)[SYS]> grant connect,resource,dba to tpcc;
Query OK, 0 rows affected (0.160 sec)

obclient(SYS@oboracle)[SYS]> status;
--------------
obclient  Ver 2.2.10 Distrib 10.4.18-MariaDB, for Linux (x86_64) using readline 5.1

Connection id:          3221522285
Current database:       SYS
Current user:           SYS
SSL:                    Not in use
Current pager:          stdout
Using outfile:          ''
Using delimiter:        ;
Server version:         OceanBase 4.2.5.3 (r103000152025033110-f5b88cd987f23383677f2eb53cf76ed38a48979b) (Built Mar 31 2025 11:08:41)
Protocol version:       10
Connection:             10.0.0.69 via TCP/IP
Server characterset:    utf8mb4
Db     characterset:    utf8mb4
Client characterset:    utf8mb4
Conn.  characterset:    utf8mb4
TCP port:               2881
Protocol:               Compressed
Active                  --------------
单机版解读
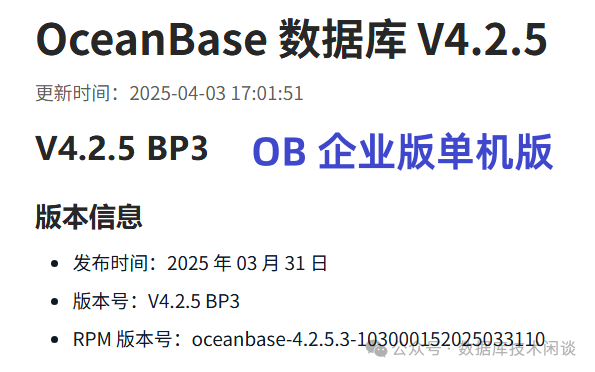
根据客户端连接信息看,版本号是:OceanBase 4.2.5.3
。查看 OB 官网文档 OB 企业版 4.2.5.3 发布说明,这是最新发布的 4.2.5 的 BP3 版本。也就是从这里初步推测就软件本身而言,OB 企业版的单机版软件跟原来的企业版是一脉相承的。区别可能只是商务策略上。
看到这里反而可以舒一口气。单机版并不是 OB 又搞出一个新的版本(像社区版),而更多的是强调 OB 的单机部署场景的能力。这个跟 OB 4.x 版本出来后一贯的宣传“单机分布式一体化”是一致的。其目的应该是强化用户心智,消除流传的错误观点的影响,比如“OB 一定要分布式部署或 OB 单机版性能不行”。OB 自从 4.x 重构了 CLOG 模块后,存储和事务引擎有了进一步优化的空间,可以大大提升在单机下的性能。其原理大概就是一些分布式事务、高可用的功能模块在单机下可以走更短的路径去实现(还有向量化引擎的功劳)。不管外界对 OB 怎么看,OB 还是那个 OB ,功能不断迭代,性能不断优化。
所以 OB 没有严格意义的“单机版”,也就没有单机版和分布式版本功能比较的必要性。如果硬要比较,无非就是单机版由于只有一个节点,就没有分布式事务了,也没有多副本的CLOG Paxos 强同步那个逻辑。但是分区表功能还是有,SQL引擎同时支持 OLTP和 OLAP 的能力还在,向量化能力还在,向量数据库、物化视图、列存引擎等能力都还在。单机版的 OB 扩容节点。无论是单 ZONE 加节点,还是扩容到分布式多 ZONE 模式,这个功能应该一直都在(后面会验证一下再分享)。
OBD WEB 部署 OB
OB 企业版单机版的另外一种部署方法建议是先部署 OCP ,再通过 OCP 部署 OB 。这个依然在生产环境强烈推荐。对于不熟悉 OB 的用户而言,有个 OCP 能极大降低 OB 运维门槛。
这个部署方法就是调用命令 obd web
,然后在 WEB 页面里根据向导操作。整个部署过程跟社区版 OCP 和 OB 的部署方法一样(区别 OCP 和 OB 软件包不一样)。这里就不重复介绍了。如果客户已经是 OB 企业版客户(有OCP 了),就不需要走这一步,用原来的 OCP 部署这个“单机版”软件即可(新部署或升级 OB 集群)
总结
总体上来说 OB 企业版单机版的版本号从 4.2.5.3 开始,部署方法也跟以前企业版有一点区别,不再经过 OAT 工具开始,而是借助了 OB 社区版的部署工具 OBD 。
OBD 命令熟悉的情况下,部署 OB 还是很方便的。不过扩容、升级等操作都是命令行下配置文件编辑和命令操作,没有 OCP 那么方便,并且排查问题也相对复杂一些。建议生产环境还是部署一下 OCP,然后通过 OCP 部署 OB 企业版单机版。对于已经用过 OB 企业版的客户(已经有 OCP ),单机版只是一个新的 RPM 包,依然用 OCP 去部署或升级 OB 集群即可,不需要去钻研 OBD 命令。
社区版的OBD 命令部署虽然方便,但是引入了一个极大的潜在风险就是 OB 相关软件很有可能就被用户部署在 root
用户下了,并且 OB 进程启动用户也是 root
。一旦部署后,想调整用户会非常麻烦。所以建议一开始部署的时候就使用普通用户 admin
操作。为了部署方便,可以临时对普通用户 admin
进行提权操作(加入到 sudo
用户组并免密。待部署成功后再降权)。将社区版技术引入到企业版部署中,也算是 OB 企业版的一个创新,这样以后大家有问题都可以去 OB 社区版论坛上交流。都是 OB 技术,企业版和社区版的用户不用彼此分的那么明显 :) 。
