


应用场景
两年前我就体验过,后端开发人员写完接口后,用一个Word文件写了接口文档发给我们这些做客户端开发的。首先接口文档写得清不清楚不说,后端程序员手写文档也是一件很浪费时间的事情。用了Swagger后就能自动生成接口文档。因为它有一定的规范,所以前端开发人员看得明白,后端开发人员也省事。
Swagger的简介
Swagger 是一个规范和完整的框架,用于生成、描述、调用和可视化 RESTful 风格的 Web 服务。总体目标是使客户端和文件系统作为服务器以同样的速度来更新。文件的方法,参数和模型紧密集成到服务器端的代码,允许API来始终保持同步。
Swagger是一组开源项目,其中主要要项目如下:
Swagger-tools: 提供各种与Swagger进行集成和交互的工具。例如模式检验、Swagger 1.2文档转换成Swagger 2.0文档等功能。
Swagger-core: 用于Java/Scala的的Swagger实现。与JAX-RS(Jersey、Resteasy、CXF…)、Servlets和Play框架进行集成。
Swagger-js: 用于JavaScript的Swagger实现。
Swagger-node-express: Swagger模块,用于node.js的Express web应用框架。
Swagger-ui:一个无依赖的HTML、JS和CSS集合,可以为Swagger兼容API动态生成优雅文档。
Swagger-codegen:一个模板驱动引擎,通过分析用户Swagger资源声明以各种语言生成客户端代码。
Swagger的实践
这里用上一篇JWT的项目继续。
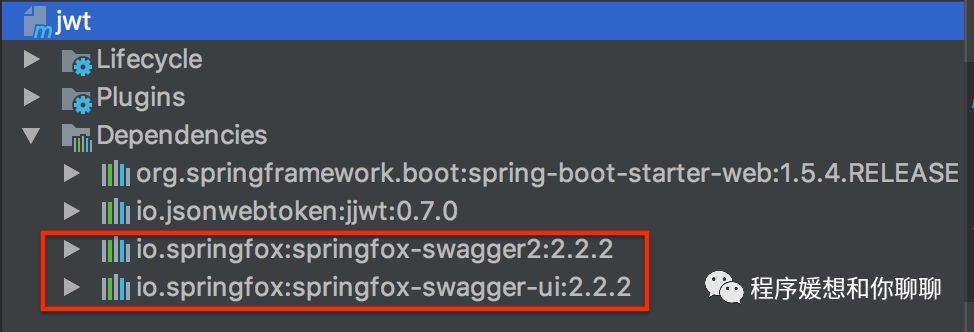
1、在pom.xml中加入Swagger的依赖:
 1<dependency>
 2      <groupId>io.springfox</groupId>
 3      <artifactId>springfox-swagger2</artifactId>
 4      <version>2.2.2</version>
 5</dependency>
 6
 7<dependency>
 8      <groupId>io.springfox</groupId>
 9      <artifactId>springfox-swagger-ui</artifactId>
10      <version>2.2.2</version>
11</dependency>
然后Maven自动下载依赖,下载完后:
2、在和UserApplication的同级目录下创建Swagger2的配置类:
 1package com.angel.example;
 2
 3import org.springframework.context.annotation.Bean;
 4import org.springframework.context.annotation.Configuration;
 5import springfox.documentation.builders.ApiInfoBuilder;
 6import springfox.documentation.builders.PathSelectors;
 7import springfox.documentation.builders.RequestHandlerSelectors;
 8import springfox.documentation.service.ApiInfo;
 9import springfox.documentation.spi.DocumentationType;
10import springfox.documentation.spring.web.plugins.Docket;
11import springfox.documentation.swagger2.annotations.EnableSwagger2;
12
13@Configuration
14@EnableSwagger2
15public class Swagger2 {
16
17    @Bean
18    public Docket createRestApi() {
19        return new Docket(DocumentationType.SWAGGER_2)
20                .apiInfo(apiInfo())
21                .select()
22
23                .apis(RequestHandlerSelectors.basePackage("com.angel.example.controller"))
24                .paths((PathSelectors.any())).build();
25    }
26
27    private ApiInfo apiInfo() {
28        return new ApiInfoBuilder()
29                .title("JWT项目的RESTful APIs")
30                .description("这是一个用来做JWT、Swagger等实战的项目")
31                .termsOfServiceUrl("http://localhost:8080/swagger-ui.html")
32                .contact("Angel")
33                .version("1.0")
34                .build();
35    }
36}
解释:
(0) apis.((RequestHandlerSelectors.basePackage(final String basePackage))): 最重要的是这个。这里写的是你项目里的Controller所在的目录,如果写得不对,这些Controller里的接口不会显示。
(1) title:描述你要为哪个项目做的API;
(2) description: 可以写对项目的一些描述;
(3) termsOfServiceUrl: 这个我试过写个https://swagger.io也没问题,感觉好像写啥都行;
(4) contact: 创建者;
(5) version: API版本。
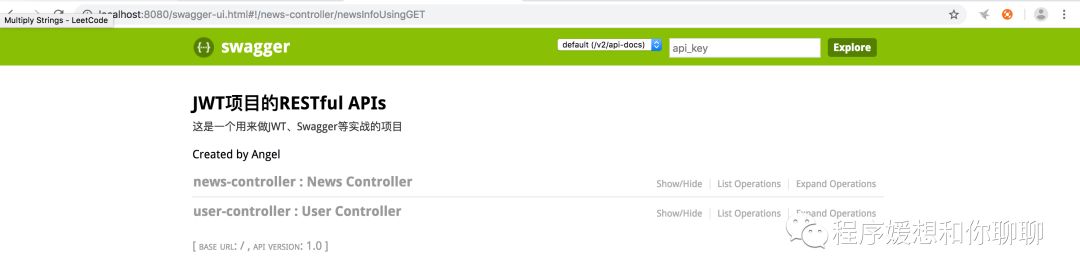
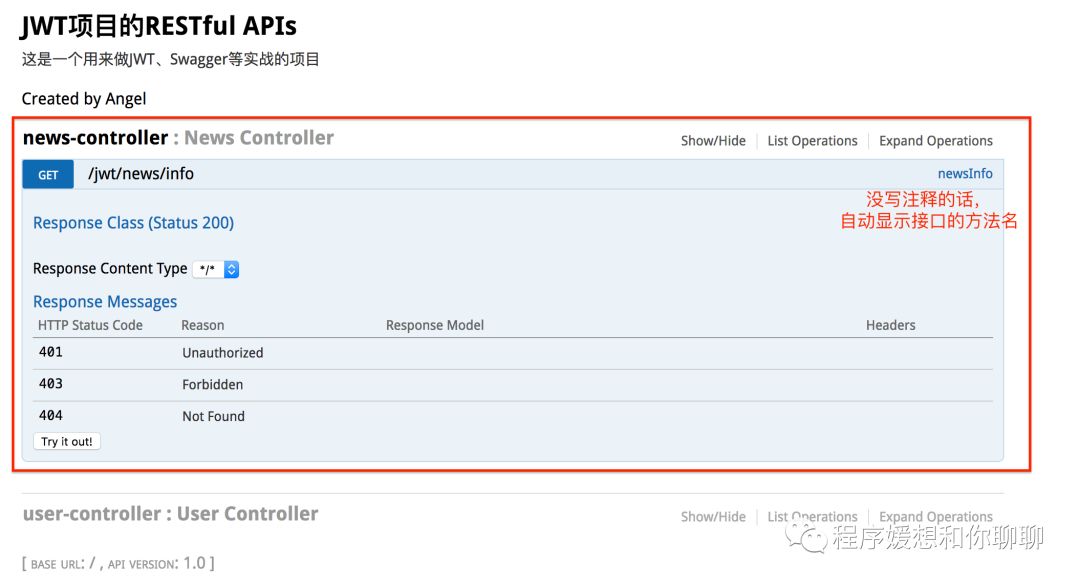
启动完项目,此时Swagger UI页面已经生成,通过浏览器打开http://localhost:8080/swagger-ui.html:
点开接口:
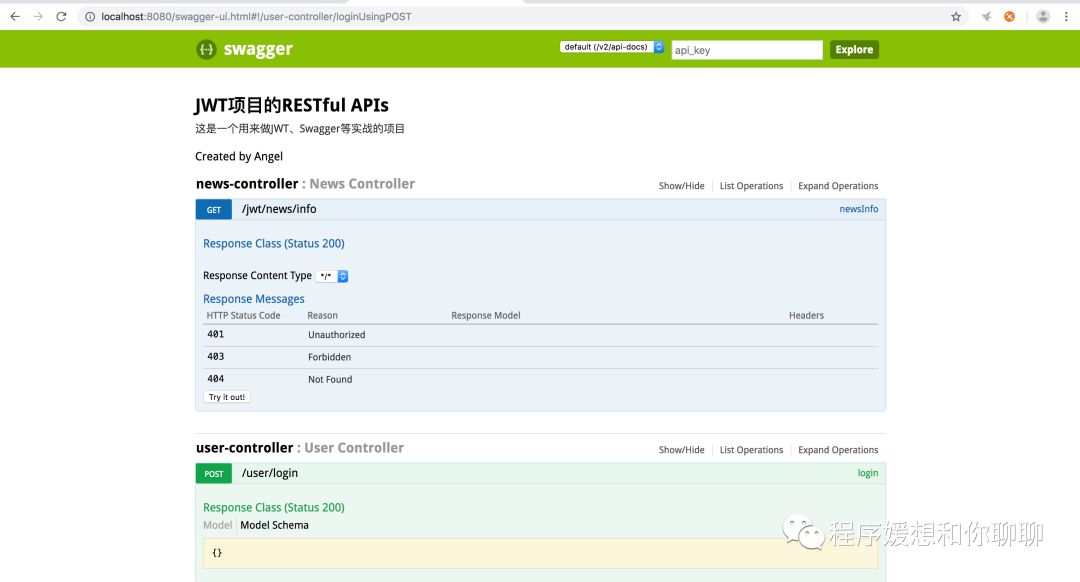
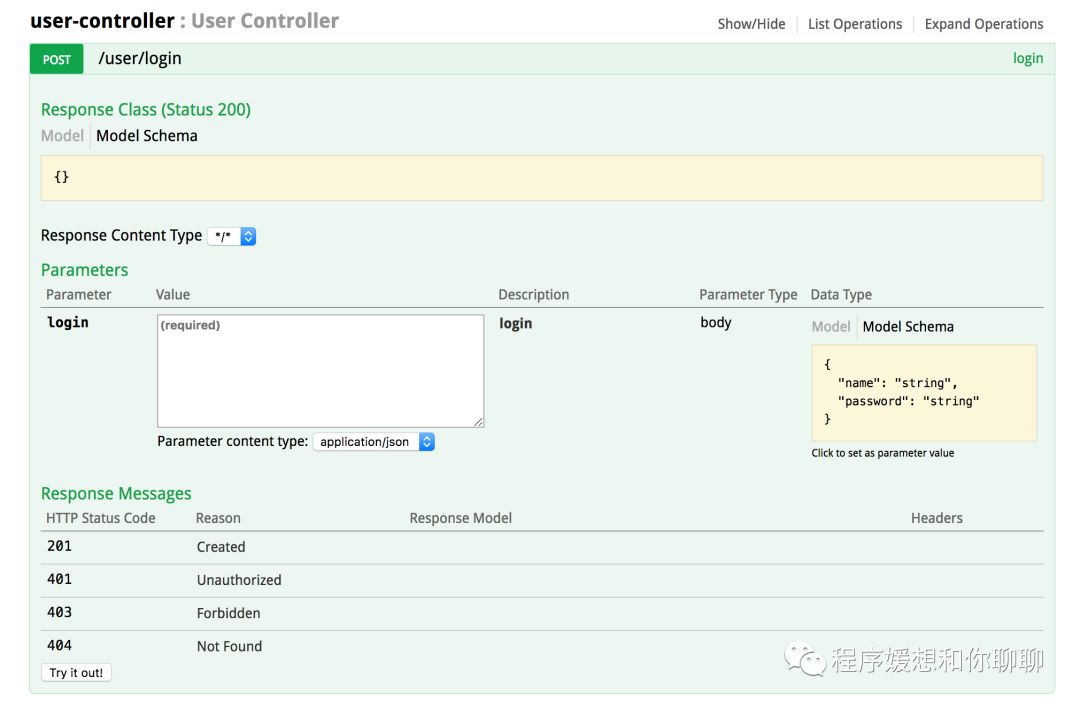
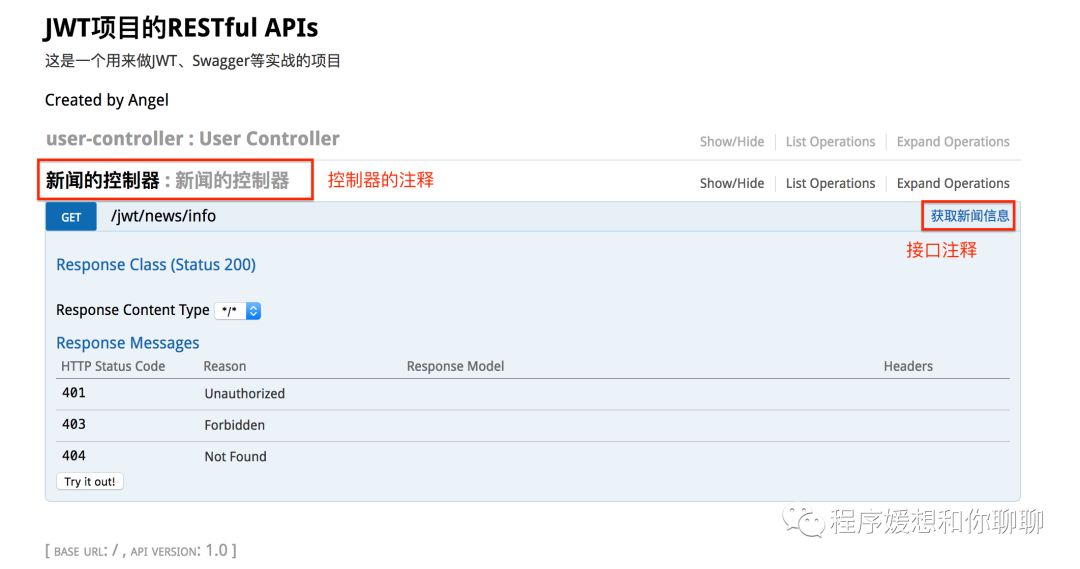
我们在页面可以看到在Swagger2的配置类里的一些信息,包括标题、创建者、版本等,各个Controller的接口,还有一些接口的参数字段等。
3、如果我们想给显示的Controller和接口加些注释,很简单,用注解就行了。
未加相关注解时代码:
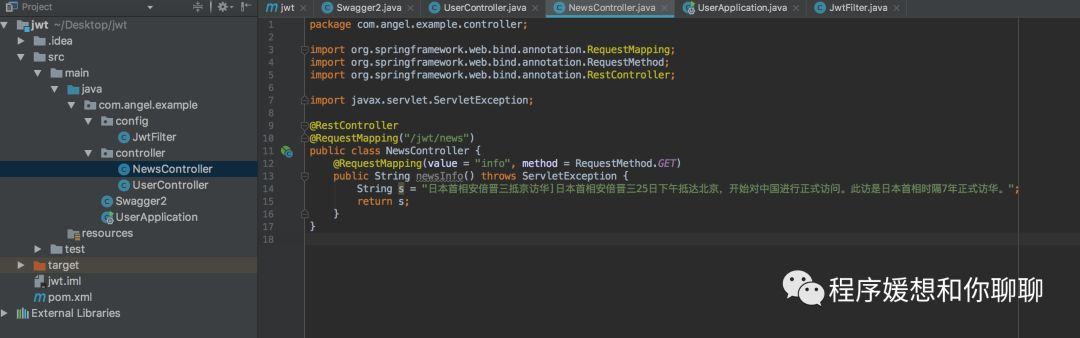
在Classs上面加上注解:
@Api(value = "新闻的控制器")在接口方法上加上注解:
@ApiOperation(value = "获取新闻信息")如下图所示:

然后我们来看看Swagger UI的变化:
由:
变成了:
最后,解释一下一些Swagger用的注解:
@Api:用在类上,说明该类的作用。
@ApiOperation:注解来给API增加方法说明。
@ApiImplicitParams : 用在方法上包含一组参数说明。
@ApiImplicitParam:用来注解来给方法入参增加说明。
@ApiResponses:用于表示一组响应
@ApiResponse:用在@ApiResponses中,一般用于表达一个错误的响应信息
code:数字,例如400
message:信息,例如"请求参数没填好"
response:抛出异常的类
@ApiModel:描述一个Model的信息(一般用在请求参数无法使用@ApiImplicitParam注解进行描述的时候)
@ApiModelProperty:描述一个model的属性
注意:@ApiImplicitParam的参数说明:
paramType:指定参数放在哪个地方 | header:请求参数放置于Request Header,使用@RequestHeader获取 query:请求参数放置于请求地址,使用@RequestParam获取 path:(用于restful接口)-->请求参数的获取:@PathVariable body:(不常用) form(不常用) |
name:参数名 | |
dataType:参数类型 | |
required:参数是否必须传 | true | false |
value:说明参数的意思 | |
defaultValue:参数的默认值 |
比如我们给登录的接口方法上面加上:
1@ApiImplicitParams({
2            @ApiImplicitParam(name = "name", value = "用户名", dataType = "String", paramType = "query"),
3            @ApiImplicitParam(name = "password", value = "密码", dataType = "String", paramType = "query")
4    })
然后Swagger UI由:
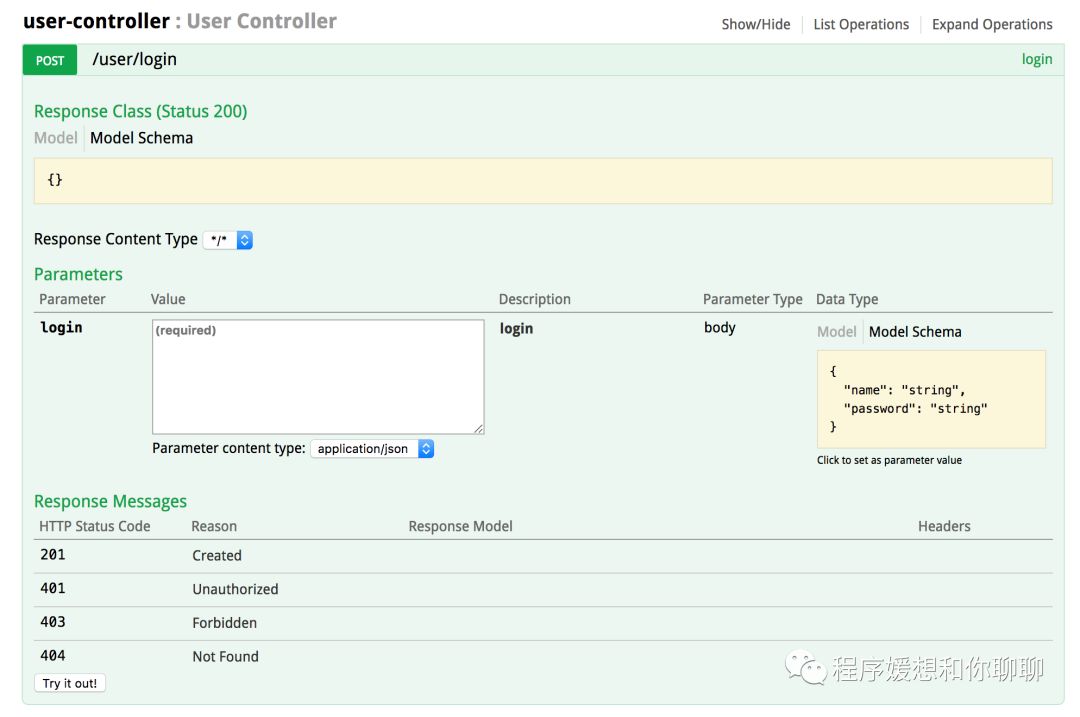
变成了:
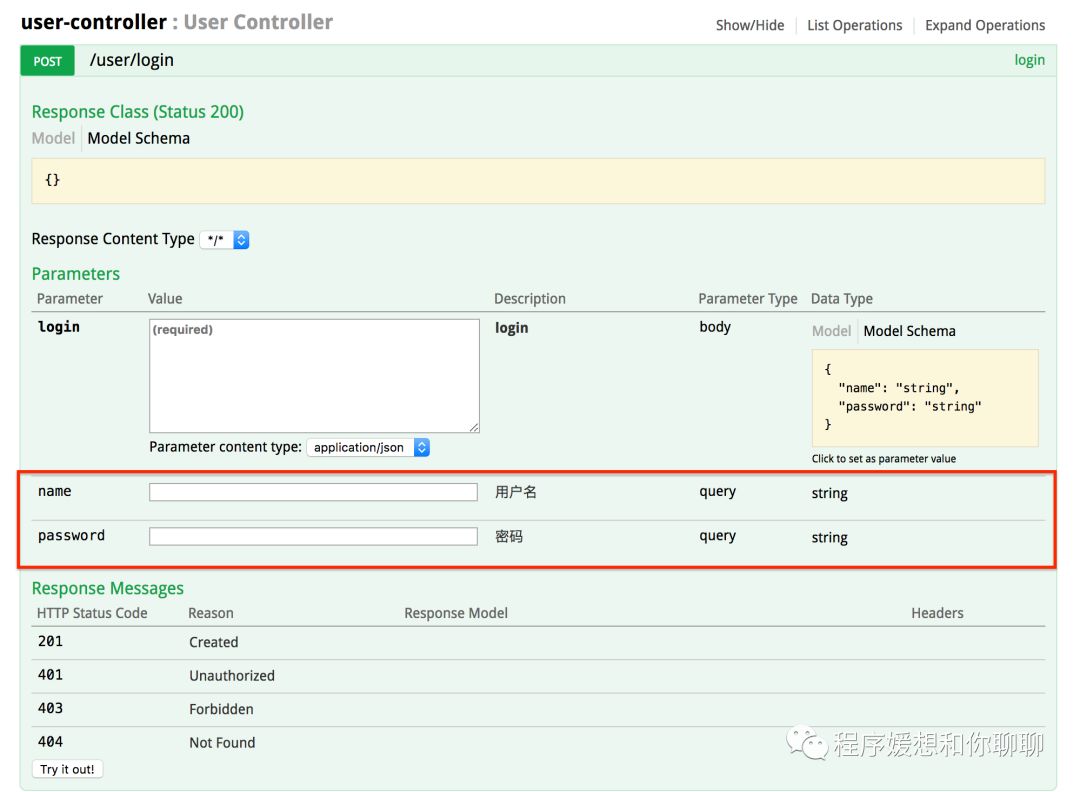
更加详细地说明了参数的一些信息。
- 本文参考:https://blog.csdn.net/sanyaoxu_2/article/details/80555328
