


[HarmonyOS NEXT 实战案例:聊天应用] 进阶篇 - 交互功能与状态管理
项目已开源,开源地址: https://gitcode.com/nutpi/HarmonyosNextCaseStudyTutorial , 欢迎fork & star
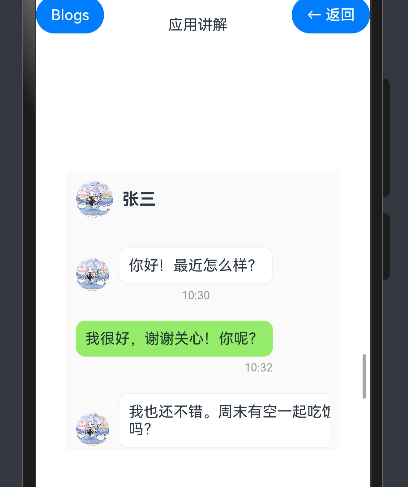
效果演示
引言
在基础篇中,我们学习了如何使用HarmonyOS NEXT的ColumnSplit组件构建聊天应用的基本布局。本篇教程将进一步深入,讲解如何为聊天应用添加交互功能和状态管理,包括消息发送、联系人切换、消息状态更新等功能,使界面更加动态和交互友好。
状态管理概述
在聊天应用中,我们需要管理多种状态,包括:
| 状态类型 | 描述 | 实现方式 |
|---|---|---|
| 消息列表 | 存储当前聊天的所有消息 | @State messages: Message[] |
| 联系人列表 | 存储所有联系人信息 | @State contacts: Contact[] |
| 当前联系人 | 记录当前选中的联系人 | @State currentContact: number |
| 新消息输入 | 存储用户正在输入的消息 | @State newMessage: string |
| 消息发送状态 | 记录消息是否正在发送 | @State isSending: boolean |
这些状态的变化会直接影响界面的显示和交互行为。通过合理的状态管理,我们可以实现流畅的用户体验。
交互功能实现
1. 联系人切换功能
当用户点击联系人列表中的某个联系人时,我们需要切换当前聊天的联系人,并显示与该联系人的聊天记录。
// 联系人项点击事件
.onClick(() => {
    this.currentContact = contact.id
    // 模拟加载与该联系人的聊天记录
    this.loadChatHistory(contact.id)
})

// 加载聊天记录的方法
private loadChatHistory(contactId: number) {
    // 在实际应用中,这里应该从数据库或服务器加载聊天记录
    // 这里使用模拟数据
    if (contactId === 1) {
        this.messages = [
            { id: 1, content: '你好!最近怎么样?', time: '10:30', isMe: false },
            { id: 2, content: '我很好,谢谢关心!你呢?', time: '10:32', isMe: true },
            { id: 3, content: '我也还不错。周末有空一起吃饭吗?', time: '10:33', isMe: false },
            { id: 4, content: '好啊,周六中午怎么样?', time: '10:35', isMe: true },
        ]
    } else if (contactId === 2) {
        this.messages = [
            { id: 1, content: '项目进展如何?', time: '昨天', isMe: false },
            { id: 2, content: '已经完成了大部分功能,还有一些细节需要调整', time: '昨天', isMe: true },
            { id: 3, content: '项目文档已经发给你了', time: '昨天', isMe: false },
        ]
    } else {
        this.messages = [
            { id: 1, content: '下周会议时间确定了吗?', time: '周一', isMe: false },
            { id: 2, content: '还没有,等确定了我会通知你', time: '周一', isMe: true },
        ]
    }
}
在这段代码中,我们为联系人项添加了点击事件,点击时更新当前选中的联系人ID,并调用loadChatHistory方法加载与该联系人的聊天记录。在实际应用中,这个方法应该从数据库或服务器加载真实的聊天记录,这里我们使用模拟数据进行演示。
2. 消息发送功能
当用户输入消息并点击发送按钮时,我们需要将新消息添加到消息列表中,并更新联系人列表中的最后一条消息。
// 发送按钮点击事件
.onClick(() => {
    if (this.newMessage.trim() !== '') {
        // 添加新消息到消息列表
        const newMsg = {
            id: this.messages.length + 1,
            content: this.newMessage,
            time: this.getCurrentTime(),
            isMe: true
        }
        this.messages.push(newMsg)

        // 更新联系人列表中的最后一条消息
        this.updateContactLastMessage(this.currentContact, newMsg)

        // 清空输入框
        this.newMessage = ''

        // 模拟对方回复
        this.simulateReply()
    }
})

// 更新联系人最后一条消息的方法
private updateContactLastMessage(contactId: number, message: Message) {
    const index = this.contacts.findIndex(contact => contact.id === contactId)
    if (index !== -1) {
        this.contacts[index] = {
            ...this.contacts[index],
            lastMessage: message.content,
            time: message.time,
            unread: 0
        }
    }
}

// 模拟对方回复的方法
private simulateReply() {
    // 设置发送状态为正在发送
    this.isSending = true

    // 延迟2秒,模拟网络延迟
    setTimeout(() => {
        // 生成随机回复内容
        const replies = [
            '好的,我知道了',
            '谢谢你的信息',
            '我稍后回复你',
            '这个想法不错',
            '我们需要再讨论一下'
        ]
        const randomIndex = Math.floor(Math.random() * replies.length)
        const replyContent = replies[randomIndex]

        // 添加回复消息到消息列表
        const replyMsg = {
            id: this.messages.length + 1,
            content: replyContent,
            time: this.getCurrentTime(),
            isMe: false
        }
        this.messages.push(replyMsg)

        // 更新联系人列表中的最后一条消息
        this.updateContactLastMessage(this.currentContact, replyMsg)

        // 设置发送状态为已完成
        this.isSending = false
    }, 2000)
}
在这段代码中,我们为发送按钮添加了点击事件,点击时检查消息是否为空,如果不为空,则将新消息添加到消息列表中,更新联系人列表中的最后一条消息,并清空输入框。然后调用simulateReply方法模拟对方回复,这个方法会在2秒后生成一条随机回复消息,并添加到消息列表中。
3. 未读消息处理
当收到新消息时,如果当前没有选中该联系人,我们需要增加该联系人的未读消息数。
// 接收新消息的方法
private receiveMessage(contactId: number, content: string) {
    // 创建新消息对象
    const newMsg = {
        id: this.messages.length + 1,
        content: content,
        time: this.getCurrentTime(),
        isMe: false
    }

    // 如果当前正在与该联系人聊天,直接添加到消息列表
    if (this.currentContact === contactId) {
        this.messages.push(newMsg)
    } else {
        // 否则增加未读消息数
        const index = this.contacts.findIndex(contact => contact.id === contactId)
        if (index !== -1) {
            this.contacts[index] = {
                ...this.contacts[index],
                lastMessage: content,
                time: newMsg.time,
                unread: this.contacts[index].unread + 1
            }
        }
    }
}

// 清除未读消息的方法
private clearUnread(contactId: number) {
    const index = this.contacts.findIndex(contact => contact.id === contactId)
    if (index !== -1 && this.contacts[index].unread > 0) {
        this.contacts[index] = {
            ...this.contacts[index],
            unread: 0
        }
    }
}
在这段代码中,我们定义了两个方法:receiveMessage和clearUnread。receiveMessage方法用于接收新消息,如果当前正在与该联系人聊天,则直接添加到消息列表;否则增加该联系人的未读消息数。clearUnread方法用于清除联系人的未读消息数,当用户点击联系人时调用。
4. 消息状态显示
我们可以为消息添加状态显示,如发送中、已发送、已读等状态。
// 扩展消息数据类型
interface Message {
    id: number
    content: string
    time: string
    isMe: boolean
    status?: 'sending' | 'sent' | 'read' // 消息状态:发送中、已发送、已读
}

// 消息项渲染
if (message.isMe) {
    // 自己发送的消息
    Row() {
        Column() {
            Text(message.content)
                .fontSize(16)
                .backgroundColor('#95ec69')
                .padding(10)
                .borderRadius(10)

            Row() {
                Text(message.time)
                    .fontSize(12)
                    .fontColor('#999999')

                // 显示消息状态
                if (message.status === 'sending') {
                    Text('发送中...')
                        .fontSize(12)
                        .fontColor('#999999')
                        .margin({ left: 5 })
                } else if (message.status === 'sent') {
                    Text('已发送')
                        .fontSize(12)
                        .fontColor('#999999')
                        .margin({ left: 5 })
                } else if (message.status === 'read') {
                    Text('已读')
                        .fontSize(12)
                        .fontColor('#999999')
                        .margin({ left: 5 })
                }
            }
            .margin({ top: 5 })
            .alignSelf(ItemAlign.End)
        }
        .margin({ right: 10 })
    }
    .justifyContent(FlexAlign.End)
    .margin({ top: 10, bottom: 10 })
}
在这段代码中,我们扩展了消息数据类型,添加了status字段表示消息状态。在消息项渲染中,我们根据消息状态显示不同的状态文本,如"发送中…"、“已发送”、"已读"等。
5. 消息输入增强
我们可以为消息输入框添加更多功能,如表情选择、图片发送等。
// 状态变量
@State isEmojiPickerVisible: boolean = false
@State emojis: string[] = ['😀', '😂', '😊', '😍', '🤔', '😎', '👍', '❤️', '🎉', '🔥']

// 消息输入区域
Row() {
    Button($r('app.media.02'))
        .width(30)
        .height(30)
        .backgroundColor(Color.Transparent)
        .onClick(() => {
            this.isEmojiPickerVisible = !this.isEmojiPickerVisible
        })

    TextInput({ text: this.newMessage, placeholder: '输入消息...' })
        .height(40)
        .layoutWeight(1)
        .margin({ left: 10, right: 10 })
        .borderRadius(20)
        .backgroundColor('#f5f5f5')
        .onChange((value: string) => {
            this.newMessage = value
        })

    Button($r('app.media.03'))
        .width(30)
        .height(30)
        .backgroundColor(Color.Transparent)
        .onClick(() => {
            this.sendMessage()
        })
}
.padding(10)
.border({
    width:{top:1,bottom:0,left:0,right:0},
    color:'#f0f0f0',
    style: {
        top: BorderStyle.Solid
    }
})

// 表情选择器
if (this.isEmojiPickerVisible) {
    Row() {
        ForEach(this.emojis, (emoji: string) => {
            Text(emoji)
                .fontSize(24)
                .padding(10)
                .onClick(() => {
                    this.newMessage += emoji
                    this.isEmojiPickerVisible = false
                })
        })
    }
    .padding(10)
    .backgroundColor('#ffffff')
    .border({
        width:{top:1,bottom:0,left:0,right:0},
        color:'#f0f0f0',
        style: {
            top: BorderStyle.Solid
        }
    })
}

// 发送消息的方法
private sendMessage() {
    if (this.newMessage.trim() !== '') {
        // 创建新消息对象,状态为发送中
        const newMsg = {
            id: this.messages.length + 1,
            content: this.newMessage,
            time: this.getCurrentTime(),
            isMe: true,
            status: 'sending'
        }

        // 添加到消息列表
        this.messages.push(newMsg)

        // 更新联系人列表中的最后一条消息
        this.updateContactLastMessage(this.currentContact, newMsg)

        // 清空输入框
        this.newMessage = ''

        // 模拟消息发送过程
        setTimeout(() => {
            // 更新消息状态为已发送
            const index = this.messages.findIndex(msg => msg.id === newMsg.id)
            if (index !== -1) {
                this.messages[index] = {
                    ...this.messages[index],
                    status: 'sent'
                }
            }

            // 模拟对方已读
            setTimeout(() => {
                // 更新消息状态为已读
                const index = this.messages.findIndex(msg => msg.id === newMsg.id)
                if (index !== -1) {
                    this.messages[index] = {
                        ...this.messages[index],
                        status: 'read'
                    }
                }

                // 模拟对方回复
                this.simulateReply()
            }, 2000)
        }, 1000)
    }
}
在这段代码中,我们添加了表情选择器功能。点击表情按钮时,显示或隐藏表情选择器。表情选择器使用Row和ForEach组件显示一组预定义的表情,点击表情时将其添加到输入框中。我们还重构了发送消息的方法,添加了消息状态的模拟过程,包括发送中、已发送、已读等状态。
高级状态管理
1. 消息分组显示
在实际的聊天应用中,我们通常会按照日期对消息进行分组显示,如"今天"、“昨天”、"更早"等。
// 消息分组数据类型
interface MessageGroup {
    date: string
    messages: Message[]
}

// 状态变量
@State messageGroups: MessageGroup[] = []

// 加载聊天记录时进行分组
private loadChatHistory(contactId: number) {
    // 加载消息数据(省略)

    // 对消息进行分组
    this.groupMessages(this.messages)
}

// 消息分组方法
private groupMessages(messages: Message[]) {
    // 清空现有分组
    this.messageGroups = []

    // 按日期对消息进行分组
    const groups: Map<string, Message[]> = new Map()

    messages.forEach(message => {
        // 根据消息时间获取日期分组
        let date = '今天'
        if (message.time.includes('昨天')) {
            date = '昨天'
        } else if (!message.time.includes(':')) {
            date = '更早'
        }

        // 将消息添加到对应的分组中
        if (groups.has(date)) {
            groups.get(date)?.push(message)
        } else {
            groups.set(date, [message])
        }
    })

    // 将分组转换为数组
    groups.forEach((messages, date) => {
        this.messageGroups.push({ date, messages })
    })
}

// 消息列表渲染
List() {
    ForEach(this.messageGroups, (group: MessageGroup) => {
        ListItem() {
            // 日期分隔线
            Text(group.date)
                .fontSize(12)
                .fontColor('#999999')
                .backgroundColor('#f0f0f0')
                .padding(5)
                .borderRadius(10)
                .alignSelf(ItemAlign.Center)
                .margin({ top: 10, bottom: 10 })
        }

        ForEach(group.messages, (message: Message) => {
            ListItem() {
                // 消息项渲染(省略)
            }
        })
    })
}
在这段代码中,我们定义了消息分组数据类型MessageGroup,并添加了messageGroups状态变量。在加载聊天记录时,我们调用groupMessages方法对消息进行分组,然后在消息列表渲染中使用嵌套的ForEach组件分别渲染日期分隔线和消息项。
2. 联系人排序
我们可以根据最后消息时间对联系人进行排序,使最近有消息的联系人显示在前面。
// 联系人排序方法
private sortContacts() {
    // 根据最后消息时间对联系人进行排序
    this.contacts.sort((a, b) => {
        // 将时间转换为可比较的格式
        const timeA = this.convertTimeToComparable(a.time)
        const timeB = this.convertTimeToComparable(b.time)

        // 降序排序,最近的消息在前面
        return timeB - timeA
    })
}

// 将时间转换为可比较的格式
private convertTimeToComparable(time: string): number {
    const now = new Date()
    const today = new Date(now.getFullYear(), now.getMonth(), now.getDate()).getTime()

    if (time.includes(':')) {
        // 今天的消息,格式为"小时:分钟"
        const [hour, minute] = time.split(':').map(Number)
        return today + hour * 3600000 + minute * 60000
    } else if (time === '昨天') {
        // 昨天的消息
        return today - 86400000
    } else if (time === '周一' || time === '周二' || time === '周三' || time === '周四' || time === '周五' || time === '周六' || time === '周日') {
        // 本周的消息
        const weekdays = ['周日', '周一', '周二', '周三', '周四', '周五', '周六']
        const dayIndex = weekdays.indexOf(time)
        const currentDay = now.getDay()
        const diff = currentDay - dayIndex
        return today - diff * 86400000
    } else {
        // 更早的消息
        return 0
    }
}
在这段代码中,我们定义了两个方法:sortContacts和convertTimeToComparable。sortContacts方法根据最后消息时间对联系人进行排序,convertTimeToComparable方法将时间字符串转换为可比较的数字格式。在接收新消息或发送消息后,我们可以调用sortContacts方法重新排序联系人列表。
3. 搜索功能
我们可以添加搜索功能,允许用户搜索联系人和消息。
// 状态变量
@State searchText: string = ''
@State searchResults: Contact[] = []
@State isSearching: boolean = false

// 搜索框
TextInput({ text: this.searchText, placeholder: '搜索联系人' })
    .width('90%')
    .height(40)
    .margin(10)
    .backgroundColor('#f5f5f5')
    .borderRadius(20)
    .onChange((value: string) => {
        this.searchText = value
        this.searchContacts()
    })

// 搜索联系人方法
private searchContacts() {
    if (this.searchText.trim() === '') {
        this.isSearching = false
        return
    }

    this.isSearching = true

    // 根据搜索文本过滤联系人
    this.searchResults = this.contacts.filter(contact => {
        return contact.name.toLowerCase().includes(this.searchText.toLowerCase())
    })
}

// 联系人列表渲染
List() {
    ForEach(this.isSearching ? this.searchResults : this.contacts, (contact: Contact) => {
        // 联系人项渲染(省略)
    })
}
在这段代码中,我们添加了三个状态变量:searchText、searchResults和isSearching。当用户在搜索框中输入文本时,我们调用searchContacts方法根据搜索文本过滤联系人,并将结果存储在searchResults中。在联系人列表渲染中,我们根据isSearching状态决定显示所有联系人还是搜索结果。
优化策略
1. 性能优化
在处理大量消息和联系人时,我们需要注意性能优化,避免不必要的重新渲染和计算。
// 使用懒加载加载更多消息
private loadMoreMessages() {
    // 模拟加载更多历史消息
    const oldestMessageId = this.messages.length > 0 ? this.messages[0].id : 0

    // 加载10条历史消息
    const historyMessages: Message[] = []
    for (let i = 1; i <= 10; i++) {
        historyMessages.push({
            id: oldestMessageId - i,
            content: `历史消息 ${oldestMessageId - i}`,
            time: '更早',
            isMe: i % 2 === 0
        })
    }

    // 将历史消息添加到消息列表的前面
    this.messages = [...historyMessages.reverse(), ...this.messages]

    // 重新分组消息
    this.groupMessages(this.messages)
}

// 在消息列表顶部添加加载更多按钮
List() {
    ListItem() {
        Button('加载更多')
            .onClick(() => {
                this.loadMoreMessages()
            })
    }
    .justifyContent(FlexAlign.Center)

    // 消息分组和消息项渲染(省略)
}
在这段代码中,我们添加了loadMoreMessages方法用于加载更多历史消息,并在消息列表顶部添加了一个"加载更多"按钮。当用户点击按钮时,我们模拟加载10条历史消息,并将它们添加到消息列表的前面,然后重新分组消息。
2. 用户体验优化
我们可以添加一些动画和过渡效果,提升用户体验。
// 消息项动画
ListItem() {
    if (message.isMe) {
        // 自己发送的消息
        Row() {
            // 消息内容(省略)
        }
        .justifyContent(FlexAlign.End)
        .margin({ top: 10, bottom: 10 })
        .opacity(message.status === 'sending' ? 0.7 : 1) // 发送中的消息透明度降低
        .animation({ // 添加动画效果
            duration: 300,
            curve: Curve.EaseOut
        })
    } else {
        // 对方发送的消息
        Row() {
            // 消息内容(省略)
        }
        .margin({ top: 10, bottom: 10 })
        .animation({ // 添加动画效果
            duration: 300,
            curve: Curve.EaseOut
        })
    }
}
在这段代码中,我们为消息项添加了动画效果,使消息的显示更加平滑。对于正在发送的消息,我们降低了透明度,使用户能够直观地看到消息的发送状态。
3. 错误处理
在实际应用中,我们需要处理各种错误情况,如消息发送失败、网络连接中断等。
// 消息发送失败处理
private handleSendFailure(messageId: number) {
    // 查找消息
    const index = this.messages.findIndex(msg => msg.id === messageId)
    if (index !== -1) {
        // 更新消息状态为发送失败
        this.messages[index] = {
            ...this.messages[index],
            status: 'failed'
        }
    }
}

// 重试发送消息
private retrySendMessage(messageId: number) {
    // 查找消息
    const index = this.messages.findIndex(msg => msg.id === messageId)
    if (index !== -1) {
        // 更新消息状态为发送中
        this.messages[index] = {
            ...this.messages[index],
            status: 'sending'
        }

        // 模拟重新发送
        setTimeout(() => {
            // 随机决定是否发送成功
            const isSuccess = Math.random() > 0.3

            if (isSuccess) {
                // 发送成功
                this.messages[index] = {
                    ...this.messages[index],
                    status: 'sent'
                }

                // 模拟对方已读和回复
                setTimeout(() => {
                    this.messages[index] = {
                        ...this.messages[index],
                        status: 'read'
                    }

                    this.simulateReply()
                }, 2000)
            } else {
                // 发送失败
                this.handleSendFailure(messageId)
            }
        }, 1000)
    }
}

// 消息项渲染中添加重试按钮
if (message.status === 'failed') {
    Row() {
        Text('发送失败')
            .fontSize(12)
            .fontColor('#ff0000')

        Button('重试')
            .fontSize(12)
            .fontColor('#ffffff')
            .backgroundColor('#ff0000')
            .borderRadius(10)
            .padding({ left: 5, right: 5, top: 2, bottom: 2 })
            .margin({ left: 5 })
            .onClick(() => {
                this.retrySendMessage(message.id)
            })
    }
    .margin({ top: 5 })
    .alignSelf(ItemAlign.End)
}
在这段代码中,我们添加了两个方法:handleSendFailure和retrySendMessage。handleSendFailure方法用于处理消息发送失败的情况,将消息状态更新为发送失败。retrySendMessage方法用于重试发送失败的消息,将消息状态更新为发送中,然后模拟重新发送过程。在消息项渲染中,我们为发送失败的消息添加了重试按钮,点击时调用retrySendMessage方法。
小结
在本教程中,我们详细讲解了如何为聊天应用添加交互功能和状态管理,包括联系人切换、消息发送、未读消息处理、消息状态显示、表情选择等功能。我们还介绍了一些高级状态管理技巧,如消息分组显示、联系人排序和搜索功能,以及一些优化策略,如性能优化、用户体验优化和错误处理。
