


1. 注册账号
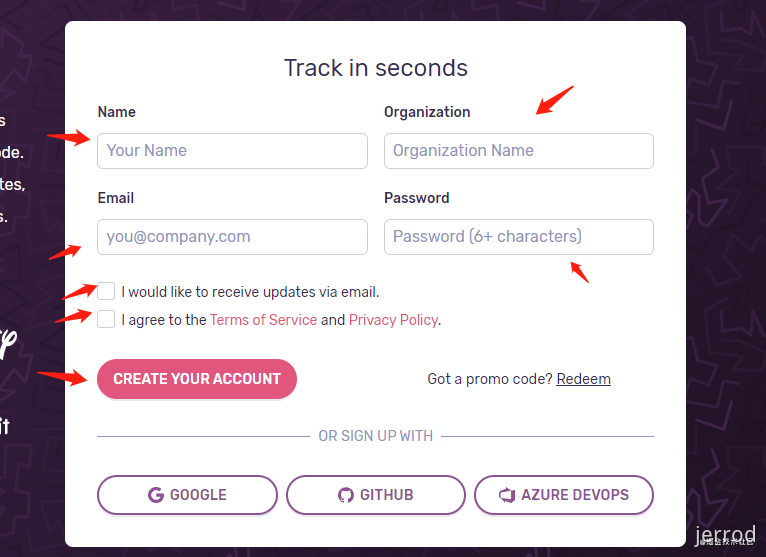
打开 https://sentry.io/signup/ 网站,进行注册。
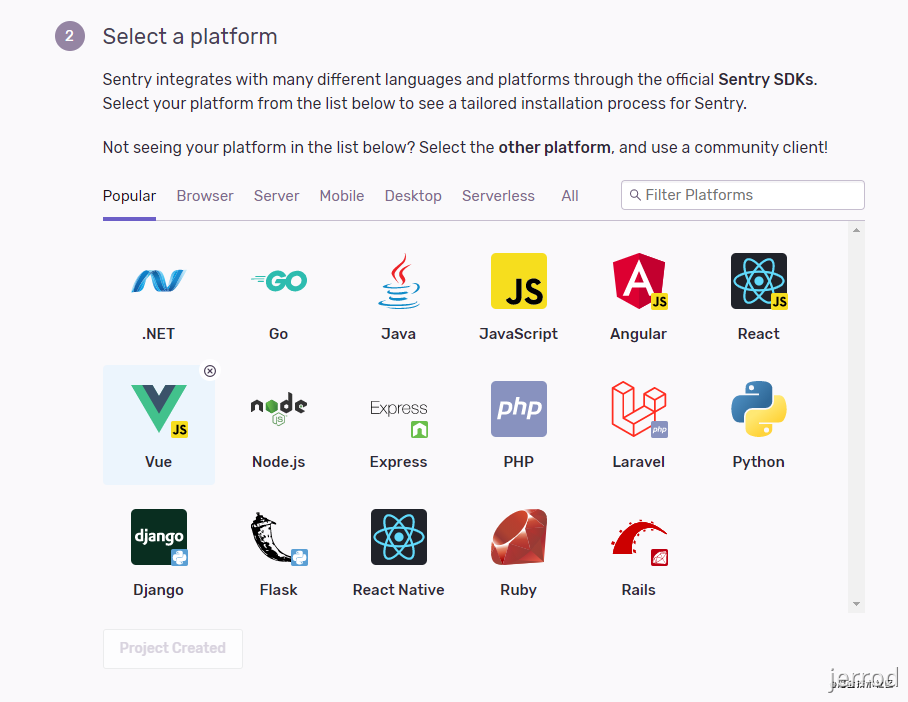
选择项目,我选的 Vue。
2. 安装 sentry 依赖
选完项目,下面会有具体的 sentry 依赖安装指南。
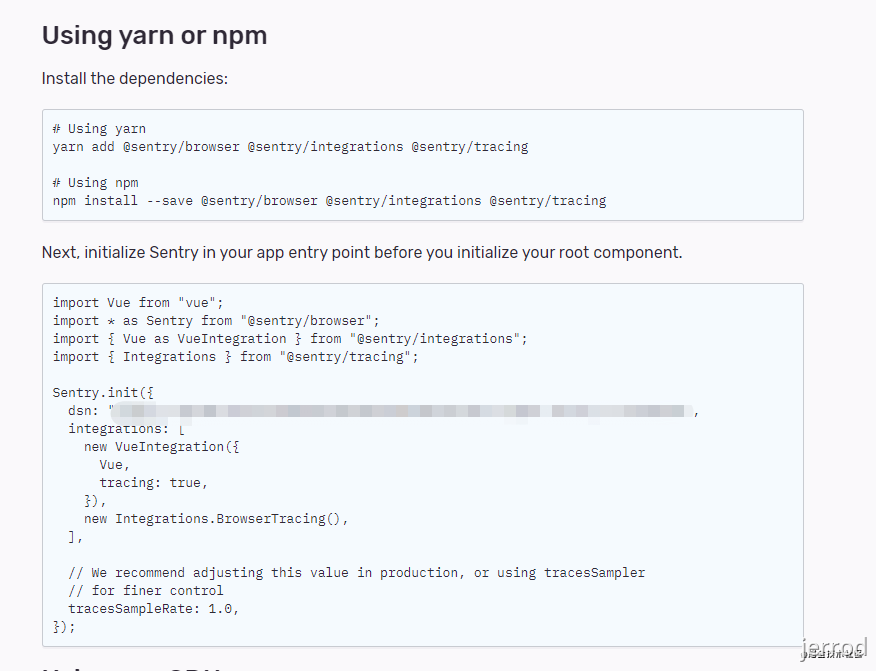
根据提示,在你的 Vue 项目执行这段代码 npm install --save @sentry/browser @sentry/integrations @sentry/tracing,安装 sentry 所需的依赖。
在package.json中
"dependencies": {
    "@sentry/browser": "^5.15.5",
    "@sentry/tracing": "^1.52.3",
    "@sentry/integrations": "^5.15.5",
    "@sentry/webpack-plugin": "^1.11.1",
  //..
}
3. 全局引入
再将下面的代码拷到你的 main.js,放在 new Vue() 之前。
import * as Sentry from "@sentry/browser";
import { Vue as VueIntegration } from "@sentry/integrations";
import { Integrations } from "@sentry/tracing";
Sentry.init({
  dsn: "xxxxx", // 这里是你的 dsn 地址,注册完就有
  integrations: [
    new VueIntegration({
      Vue,
      tracing: true,
    }),
    new Integrations.BrowserTracing(),
  ],
  // We recommend adjusting this value in production, or using tracesSampler
  // for finer control
  tracesSampleRate: 1.0,
});
然后点击第一步中的 skip this onboarding,进入控制台页面。
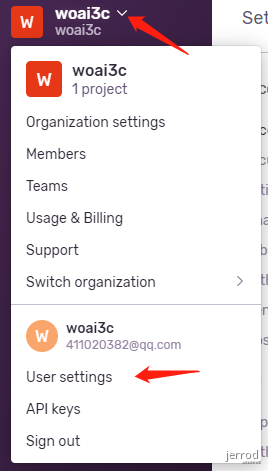
如果忘了自己的 DSN,请点击左边的菜单栏选择 Settings -> Projects -> 点击自己的项目 -> Client Keys(DSN)。
4. 创建第一个错误
在你的 Vue 项目执行一个打印语句 console.log(b)。
这时点开 sentry 主页的 issues 一项,可以发现有一个报错信息 b is not defined:
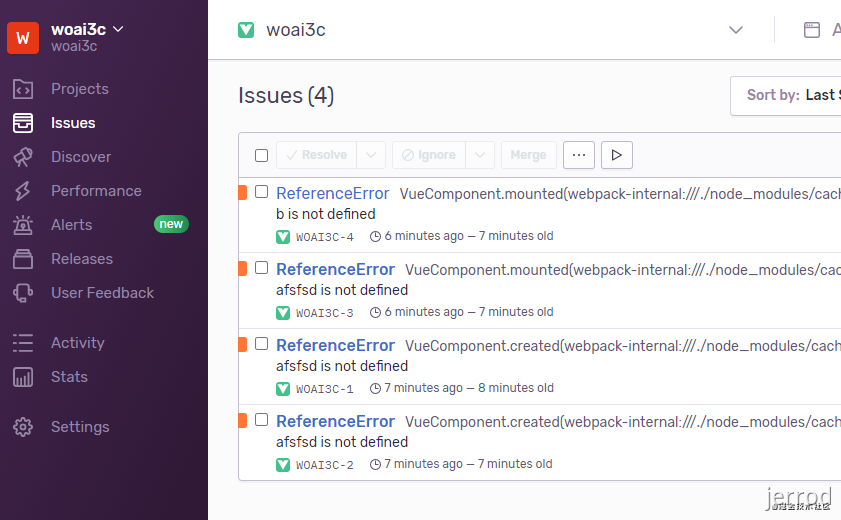
这个报错信息包含了错误的具体信息,还有你的 IP、浏览器信息等等。
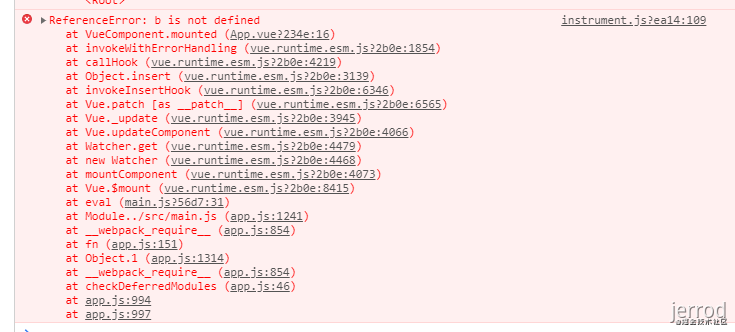
但奇怪的是,我们的浏览器控制台并没有输出报错信息。
这是因为被 sentry 屏蔽了,所以我们需要加上一个选项 logErrors: true。

然后再查看页面,发现控制台也有报错信息了:
5. 上传 sourcemap
一般打包后的代码都是经过压缩的,如果没有 sourcemap,即使有报错信息,你也很难根据提示找到对应的源码在哪。
下面来看一下如何上传 sourcemap。
5.1. 首先创建 auth token
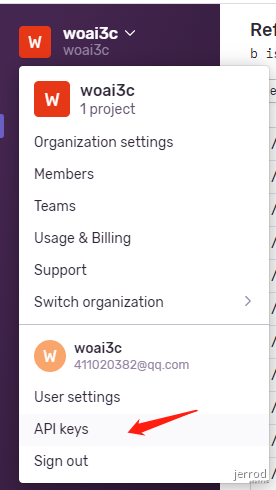
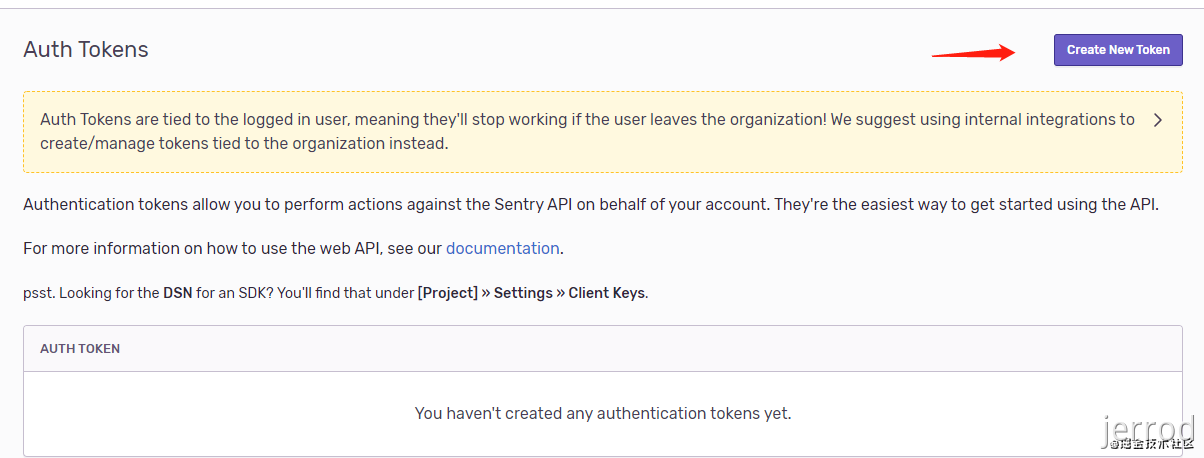
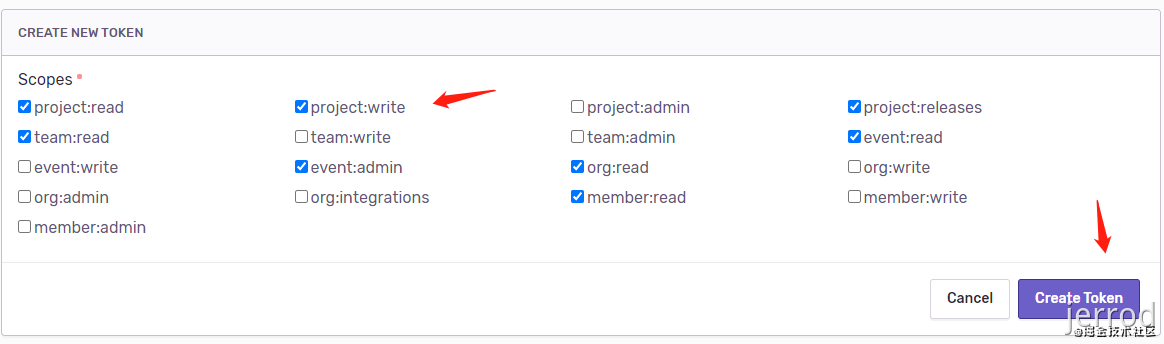

这个生成的 token 一会要用到。
5.2. 安装插件
安装 sentry-cli 和 @sentry/webpack-plugin:
npm install sentry-cli-binary -g
npm install --save-dev @sentry/webpack-plugin
5.3. 配置.sentryclirc 文件
安装完上面两个插件后,在项目根目录创建一个 .sentryclirc 文件(不要忘了在 .gitignore 把这个文件添加上,以免暴露 token),内容如下:
[auth]
token=xxx
[defaults]
url=https://sentry.io/
org=woai3c
project=woai3c
把 xxx 替换成刚才生成的 token。
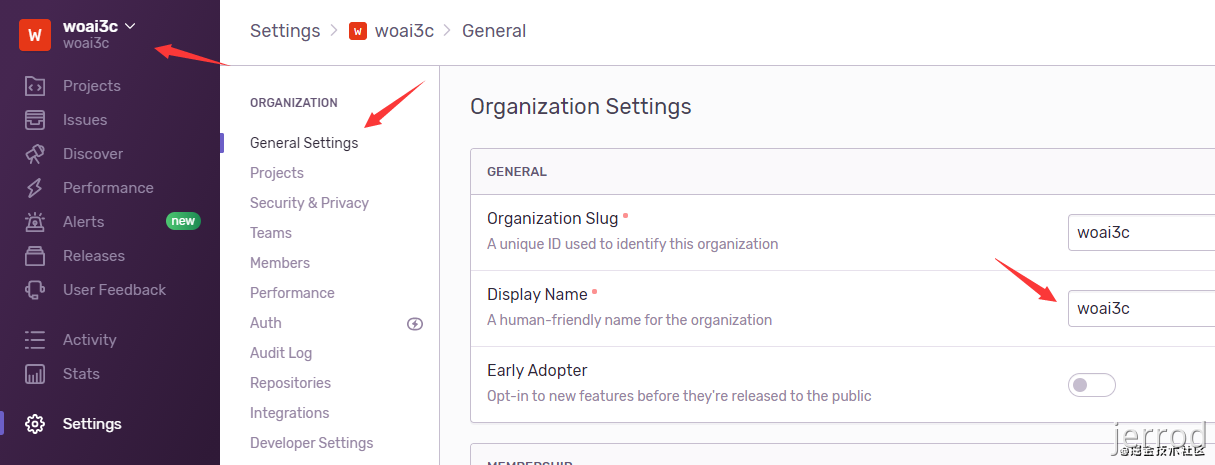
org 是你的组织名称。
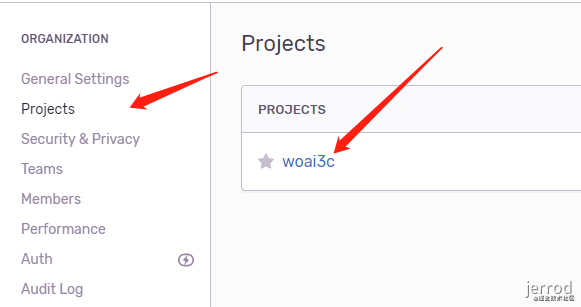
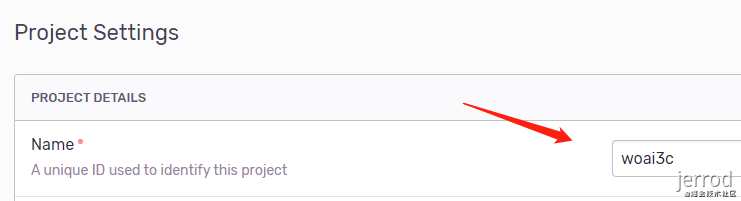
project 是你的项目名称,根据下面的提示可以找到。
5.4. 配置vue.config.js 文件
在项目下新建 vue.config.js 文件,把下面的内容填进去:
const path = require('path')
const CompressionWebpackPlugin = require('compression-webpack-plugin')
// const WorkboxPlugin = require('workbox-webpack-plugin')
const loading = require('./src/components/pre-render-loading')
const WebpackBuildNotifierPlugin = require('webpack-build-notifier')
const GetTempListPlugin = require('./getTempListPlugin')
const SentryWebpackPlugin = require('@sentry/webpack-plugin')
// const pkg = require('./package.json')

const resolvePath = dir => path.join(__dirname, dir)
const isProd = process.env.NODE_ENV === 'production'

module.exports = {
  // 项目部署基础
  // 默认情况下,我们假设你的应用将被部署在域的根目录下,
  // 例如:https://www.my-app.com/
  // 默认:'/'
  // 如果您的应用程序部署在子路径中,则需要在这指定子路径
  // 例如:https://www.foobar.com/my-app/
  // 需要将它改为'/my-app/'
  publicPath: isProd ? process.env.PUBLIC_PATH : '/',
  // 如果你不需要使用eslint,把 lintOnSave 设为false即可
  lintOnSave: true,
  // 提供了一个 webpack 原始配置的上层抽象,
  // 使其可以定义具名的 loader 规则和具名插件,
  // 并有机会在后期进入这些规则并对它们的选项进行修改。
  chainWebpack: config => {
    config.resolve.alias
      .set('@', resolvePath('src')) // key,value自行定义,比如.set('@@', resolvePath('src/components'))
      .set('_c', resolvePath('src/components'))
      .set('_v', resolvePath('src/views'))
    // 这里是对环境的配置,不同环境对应不同的REQUEST_URL,以便axios的请求地址不同
    config.plugin('define').tap(args => {
      args[0]['process.env'].REQUEST_URL = JSON.stringify(process.env.REQUEST_URL)
      return args
    })
    // 将一个使用vue编写的loading组件在webpack编译过程中将虚拟dom预渲染到html中
    config.plugin('html').tap(args => {
      args[0].loading = loading
      return args
    })
    // 对于 vue、vue-router、vuex 、axios和 element-ui 等等这些不经常改动的库,
    // 我们让webpack不对他们进行打包,通过cdn引入,
    // 可以减少代码的大小、也可以减少服务器的带宽,更能把这些文件缓存到客户端,客户端加载的会更快。
    if (isProd) {
      // 生产环境忽略打包的文件
      // 通过该配置可以告诉 webpack 在 javascript 运行环境中已经内置了哪些全局变量,
      // 不用讲这些全局变量打包到代码中而是直接使用它们
      const externals = {
        // 将导入语句中的 vue 替换成运行环境里的全局变量 Vue
        vue: 'Vue',
        // 将导入语句中的 axios 替换成运行环境里的全局变量 axios
        axios: 'axios',
        // 将导入语句中的 vue-router 替换成运行环境里的全局变量 VueRouter
        'vue-router': 'VueRouter',
        // 将导入语句中的 vuex 替换成运行环境里的全局变量 Vuex
        vuex: 'Vuex',
        // 将导入语句中的 better-scroll 替换成运行环境里的全局变量 BScroll
        'better-scroll': 'BScroll'
      }
      config.externals(externals)
      const cdn = {
        css: [],
        js: [
          // vue
          '//cdn.staticfile.org/vue/2.6.10/vue.min.js',
          // vue-router
          '//cdn.staticfile.org/vue-router/3.1.3/vue-router.min.js',
          // vuex
          '//cdn.staticfile.org/vuex/3.1.2/vuex.min.js',
          // axios
          '//cdn.staticfile.org/axios/0.19.0/axios.min.js'
        ]
      }
      config.plugin('html')
        .tap(args => {
          args[0].cdn = cdn
          return args
        })
    }
  },
  // 该方法的第一个参数会收到已经解析好的配置。
  // 在函数内,你可以直接修改配置,或者返回一个将会被合并的对象
  configureWebpack: config => {
    // config.plugins.push(new VConsolePlugin({
    //   enable: !(isProd)
    // }))
    // 构建完成通知
    // 当你启动构建时,就可以隐藏控制台面板,专心去做其他事情啦,到“点”了自然会来叫你,它的效果就是下面这样,同时还有提示音噢~
    config.plugins.push(new WebpackBuildNotifierPlugin({
      title: '项目构建完成',
      logo: path.resolve('./public/favicon.ico'),
      suppressSuccess: true
    }), new GetTempListPlugin())
    if (isProd) {
      // 构建时开启gzip,降低服务器压缩对CPU资源的占用,服务器也要相应开启gzip
      config.plugins.push(
        new CompressionWebpackPlugin({
          test: new RegExp('\\.(' + ['js', 'css'].join('|') + ')$'),
          threshold: 8192,
          minRatio: 0.8
        })
      )
      // 自动上传sourcemap文件到sentry
      config.plugins.push(
        new SentryWebpackPlugin({
          include: './dist', // 打包后的目录
          ignoreFile: '.sentrycliignore',
          ignore: ['node_modules', 'vue.config.js'],
          configFile: 'sentry.properties',
          release: 'yolkworks-list-source-map' // 仅仅是sourcemap的名字
        })
      )
      // 生成sw文件,构建离线应用
      // 参考https://webpack.docschina.org/guides/progressive-web-application/
      // config.plugins.push(
      //   new WorkboxPlugin.GenerateSW({
      //     // 这些选项帮助 ServiceWorkers 快速启用
      //     // 不允许遗留任何“旧的” ServiceWorkers
      //     clientsClaim: true,
      //     skipWaiting: true
      //   })
      // )
    }
  },
  // 打包时不生成.map文件
  productionSourceMap: false,
  devServer: {
    port: 80,
    // open: true,
    disableHostCheck: true // 解决127.0.0.1指向其他域名时出现"Invalid Host header"问题
    // 这里写你调用接口的基础路径,来解决跨域,如果设置了代理,那你本地开发环境的axios的baseUrl要写为 '' ,即空字符串
    // proxy: {
    //   // 例如将'localhost:8080/api/xxx'代理到'https://yujihu.cn/api/xxx'
    //   '/h5/api': {
    //     target: 'http://car.jd.com', // 接口的域名
    //     secure: false, // 是否验证SSL证书,如果是https接口,需要配置这个参数
    //     changeOrigin: true, // 将主机标头的原点更改为目标URL,如果接口跨域,需要进行这个参数配置
    //     pathRewrite: {
    //       '^/h5/api': '' // pathRewrite 来重写地址,将前缀 '/api' 转为 '/'
    //     }
    //   }
    // }
  }
}
// TODO:
const SentryWebpackPlugin = require("@sentry/webpack-plugin");
const config = {
configureWebpack: {
plugins: [
new SentryWebpackPlugin({
include: "./dist", // 打包后的目录
ignore: ["node_modules", "vue.config.js", "babel.config.js"],
}),
],
},
};
// 只在生产环境下上传 sourcemap
module.exports = process.env.NODE_ENV == "production" ? config : {};填完以后,执行 npm run build,就可以看到 sourcemap 的上传结果了。

我们再来看一下没上传 sourcemap 和上传之后的报错信息对比。
5.5. 未上传 sourcemap


5.6. 已上传 sourcemap


可以看到,上传 sourcemap 后的报错信息更加准确。
6. 切换中文环境和时区

选完刷新即可。
7. 性能监控
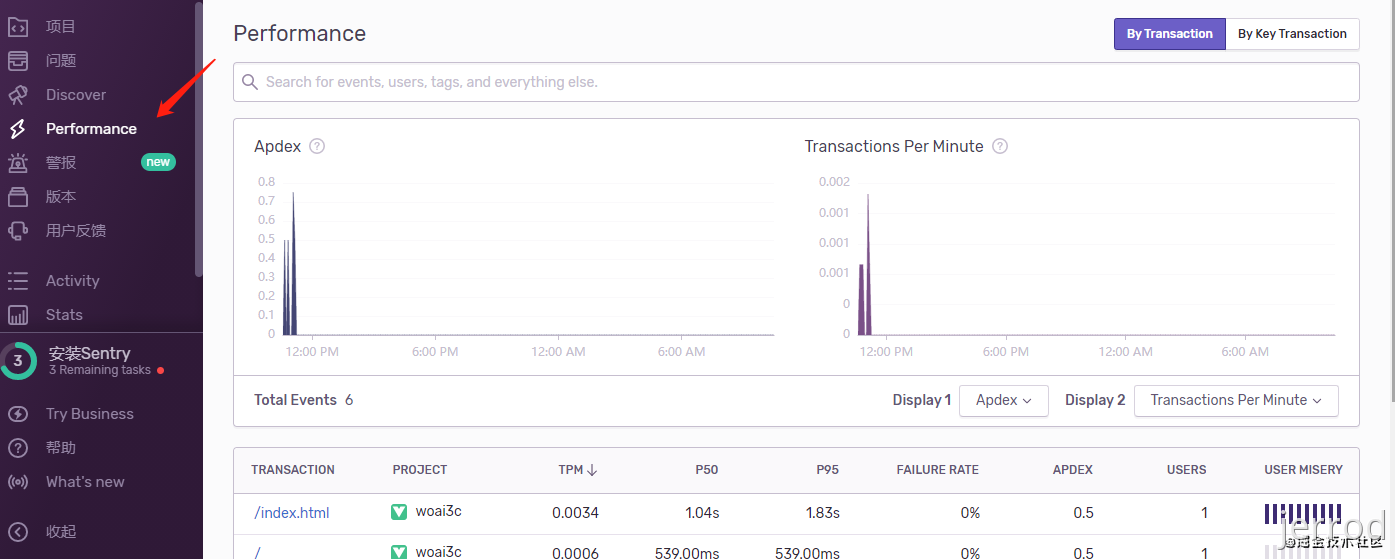
打开 performance 选项,就能看到你每个项目的运行情况。具体的参数解释请看文档 Performance Monitoring。
