


[HarmonyOS NEXT 实战案例四:SideBarContainer] 侧边栏容器实战:音乐播放器侧边栏 - 播放列表与歌单管理 进阶篇
项目已开源,开源地址: https://gitcode.com/nutpi/HarmonyosNextCaseStudyTutorial , 欢迎fork & star
效果演示
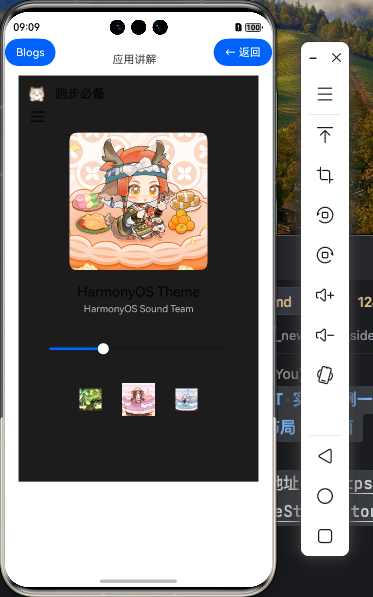
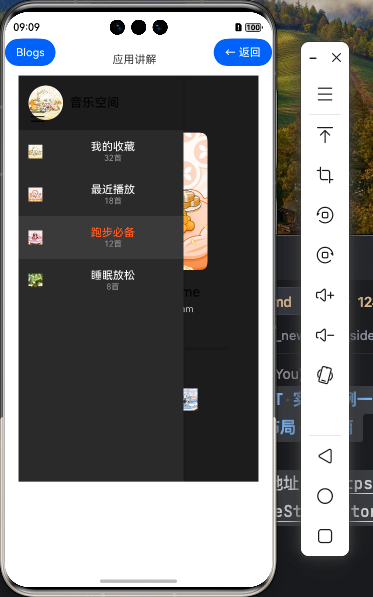
在基础篇中,我们学习了如何使用HarmonyOS NEXT的SideBarContainer组件创建音乐播放器的基本侧边栏布局。本篇教程将深入探讨如何为音乐播放器添加更多交互功能和状态管理,提升用户体验。
一、状态管理进阶
在实际应用中,状态管理是构建交互式UI的关键。对于音乐播放器,我们需要管理多种状态,如播放状态、播放模式、音量控制等。
1.1 状态变量设计
首先,让我们扩展MusicPlayer组件的状态变量:
@Entry
@Component
struct MusicPlayer {
  // 基础状态变量
  @State isSideBarShow: boolean = true
  @State currentSongIndex: number = 0
  @State isPlaying: boolean = false
  @State currentTime: number = 0
  @State totalTime: number = 280
  @State currentPlaylist: string = '最近播放'

  // 进阶状态变量
  @State volume: number = 70         // 音量(0-100)
  @State isMuted: boolean = false    // 是否静音
  @State playMode: PlayMode = PlayMode.LOOP  // 播放模式
  @State isLyricShow: boolean = false  // 是否显示歌词
  @State currentLyricIndex: number = -1  // 当前歌词索引
  @State isLiked: boolean = false    // 是否收藏当前歌曲
  @State isPlaylistEditing: boolean = false  // 是否处于播放列表编辑模式
  @State selectedSongs: Set<number> = new Set()  // 选中的歌曲索引集合

  // ...
}

// 播放模式枚举
enum PlayMode {
  LOOP,      // 列表循环
  SINGLE,    // 单曲循环
  RANDOM,    // 随机播放
  SEQUENCE   // 顺序播放
}
这些状态变量将帮助我们实现更复杂的交互功能:
volume和isMuted:控制音量和静音状态playMode:控制播放模式(列表循环、单曲循环、随机播放、顺序播放)isLyricShow和currentLyricIndex:控制歌词显示isLiked:标记当前歌曲是否被收藏isPlaylistEditing和selectedSongs:支持播放列表编辑功能
1.2 数据模型扩展
为了支持更多功能,我们需要扩展数据模型:
// 歌单信息数据模型(扩展)
interface PlaylistInfo {
  id: string       // 唯一标识符
  name: string     // 歌单名称
  cover: Resource  // 封面资源
  count: number    // 歌曲数量
  isDefault?: boolean  // 是否为默认歌单
  createdTime?: Date   // 创建时间
  description?: string // 歌单描述
}

// 歌曲信息数据模型(扩展)
interface SongInfo {
  id: string       // 唯一标识符
  title: string    // 歌曲标题
  artist: string   // 艺术家
  album?: string   // 专辑
  cover: Resource  // 封面资源
  duration: number // 时长(秒)
  url?: string     // 音频文件URL
  lyrics?: LyricLine[]  // 歌词
  isLiked?: boolean     // 是否收藏
}

// 歌词行数据模型
interface LyricLine {
  time: number     // 时间点(秒)
  text: string     // 歌词文本
}
这些扩展的数据模型将帮助我们更好地组织和管理应用数据,提高代码的可维护性。
1.3 模拟数据生成
为了支持新功能,我们需要扩展模拟数据:
// 扩展歌曲数据,添加歌词
private songs: SongInfo[] = [
  {
    id: 'song1',
    title: '夜曲',
    artist: '周杰伦',
    album: '十一月的萧邦',
    cover: $r('app.media.song1'),
    duration: 280,
    isLiked: true,
    lyrics: [
      { time: 0, text: '夜曲 - 周杰伦' },
      { time: 5, text: '词:方文山' },
      { time: 10, text: '曲:周杰伦' },
      { time: 15, text: '一群嗜血的蚂蚁 被腐肉所吸引' },
      { time: 20, text: '我面无表情 看孤独的风景' },
      { time: 25, text: '失去你 爱恨开始分明' },
      { time: 30, text: '失去你 还有什么事好关心' },
      { time: 35, text: '当鸽子不再象征和平' },
      { time: 40, text: '我终于被提醒' },
      { time: 45, text: '广场上喂食的是秃鹰' },
      { time: 50, text: '我用漂亮的押韵' },
      { time: 55, text: '形容被掠夺一空的爱情' }
      // 更多歌词...
    ]
  },
  // 其他歌曲数据...
]

// 扩展歌单数据
private playlists: PlaylistInfo[] = [
  { id: 'recent', name: '最近播放', cover: $r('app.media.playlist1'), count: 28, isDefault: true },
  { id: 'favorite', name: '我喜欢的', cover: $r('app.media.playlist2'), count: 45, isDefault: true },
  { id: 'pop', name: '流行音乐', cover: $r('app.media.playlist3'), count: 32, createdTime: new Date('2023-01-15'), description: '精选流行歌曲' },
  { id: 'light', name: '轻音乐', cover: $r('app.media.playlist4'), count: 18, createdTime: new Date('2023-03-22'), description: '放松心情的轻音乐' },
  { id: 'rock', name: '摇滚', cover: $r('app.media.playlist5'), count: 24, createdTime: new Date('2023-05-10'), description: '激情四射的摇滚乐' }
]
二、交互功能实现
2.1 播放模式切换
播放模式切换是音乐播放器的基本功能,让我们实现这个功能:
// 播放模式按钮
Image(this.getPlayModeIcon())
  .width(30)
  .height(30)
  .margin({ right: 20 })
  .onClick(() => {
    this.switchPlayMode()
  })

// 获取播放模式图标
private getPlayModeIcon(): Resource {
  switch (this.playMode) {
    case PlayMode.LOOP:
      return $r('app.media.ic_mode_loop')
    case PlayMode.SINGLE:
      return $r('app.media.ic_mode_single')
    case PlayMode.RANDOM:
      return $r('app.media.ic_mode_random')
    case PlayMode.SEQUENCE:
      return $r('app.media.ic_mode_sequence')
    default:
      return $r('app.media.ic_mode_loop')
  }
}

// 切换播放模式
private switchPlayMode() {
  // 按顺序循环切换播放模式
  switch (this.playMode) {
    case PlayMode.LOOP:
      this.playMode = PlayMode.SINGLE
      this.showToast('单曲循环')
      break
    case PlayMode.SINGLE:
      this.playMode = PlayMode.RANDOM
      this.showToast('随机播放')
      break
    case PlayMode.RANDOM:
      this.playMode = PlayMode.SEQUENCE
      this.showToast('顺序播放')
      break
    case PlayMode.SEQUENCE:
      this.playMode = PlayMode.LOOP
      this.showToast('列表循环')
      break
  }
}

// 显示提示信息
private showToast(message: string) {
  // 在实际应用中,这里会显示一个Toast提示
  // 例如:ToastUtil.showToast(message)
  console.info(message)
}
2.2 音量控制
音量控制是音乐播放器的基本功能,让我们实现这个功能:
// 音量控制区域
Row() {
  // 静音按钮
  Image(this.isMuted ? $r('app.media.ic_volume_mute') : $r('app.media.ic_volume'))
    .width(24)
    .height(24)
    .margin({ right: 10 })
    .onClick(() => {
      this.isMuted = !this.isMuted
    })

  // 音量滑块
  Slider({
    value: this.isMuted ? 0 : this.volume,
    min: 0,
    max: 100,
    step: 1,
    style: SliderStyle.OutSet
  })
    .width(120)
    .onChange((value: number) => {
      if (value > 0 && this.isMuted) {
        this.isMuted = false
      }
      this.volume = value
    })
}
.margin({ top: 20 })
2.3 歌词显示
歌词显示是音乐播放器的重要功能,让我们实现这个功能:
// 歌词显示切换按钮
Button(this.isLyricShow ? '隐藏歌词' : '显示歌词')
  .width(120)
  .height(36)
  .fontSize(14)
  .margin({ top: 20 })
  .onClick(() => {
    this.isLyricShow = !this.isLyricShow
  })

// 歌词显示区域
if (this.isLyricShow) {
  Column() {
    Text('歌词')
      .fontSize(18)
      .fontWeight(FontWeight.Bold)
      .margin({ top: 20, bottom: 10 })

    List({ space: 10 }) {
      ForEach(this.getCurrentSongLyrics(), (lyric: LyricLine, index: number) => {
        ListItem() {
          Text(lyric.text)
            .fontSize(16)
            .fontColor(this.currentLyricIndex === index ? '#007DFF' : '#666666')
            .fontWeight(this.currentLyricIndex === index ? FontWeight.Bold : FontWeight.Normal)
        }
        .width('100%')
        .padding(10)
      })
    }
    .width('90%')
    .height(200)
  }
  .width('100%')
  .margin({ top: 20 })
}

// 获取当前歌曲歌词
private getCurrentSongLyrics(): LyricLine[] {
  const currentSong = this.songs[this.currentSongIndex]
  return currentSong.lyrics || []
}

// 更新当前歌词索引
private updateCurrentLyricIndex() {
  const lyrics = this.getCurrentSongLyrics()
  if (lyrics.length === 0) {
    this.currentLyricIndex = -1
    return
  }

  // 查找当前时间对应的歌词
  let index = -1
  for (let i = lyrics.length - 1; i >= 0; i--) {
    if (this.currentTime >= lyrics[i].time) {
      index = i
      break
    }
  }

  this.currentLyricIndex = index
}
2.4 播放列表编辑
播放列表编辑是音乐播放器的高级功能,让我们实现这个功能:
// 播放列表编辑按钮
Button(this.isPlaylistEditing ? '完成' : '编辑')
  .width(80)
  .height(36)
  .fontSize(14)
  .margin({ right: 16 })
  .onClick(() => {
    this.isPlaylistEditing = !this.isPlaylistEditing
    if (!this.isPlaylistEditing) {
      // 退出编辑模式时清空选中状态
      this.selectedSongs.clear()
    }
  })

// 播放列表项(编辑模式)
ForEach(this.songs, (song: SongInfo, index: number) => {
  ListItem() {
    Row() {
      // 编辑模式下显示复选框
      if (this.isPlaylistEditing) {
        Checkbox({ name: index.toString(), group: 'songs' })
          .select(this.selectedSongs.has(index))
          .onChange((value: boolean) => {
            if (value) {
              this.selectedSongs.add(index)
            } else {
              this.selectedSongs.delete(index)
            }
          })
          .margin({ right: 10 })
      } else {
        Text(`${index + 1}`)
          .fontSize(16)
          .fontColor('#888888')
          .width(30)
      }

      // 歌曲信息...
    }
    // 样式设置...
  }
  // 点击事件...
})

// 编辑模式下的操作按钮
if (this.isPlaylistEditing && this.selectedSongs.size > 0) {
  Row() {
    Button('添加到歌单')
      .width(120)
      .height(40)
      .fontSize(14)
      .margin({ right: 20 })
      .onClick(() => {
        this.showAddToPlaylistDialog()
      })

    Button('从列表中删除')
      .width(120)
      .height(40)
      .fontSize(14)
      .onClick(() => {
        this.removeSelectedSongs()
      })
  }
  .width('100%')
  .justifyContent(FlexAlign.Center)
  .padding({ top: 10, bottom: 10 })
  .backgroundColor('#F5F5F5')
}

// 显示添加到歌单对话框
private showAddToPlaylistDialog() {
  // 在实际应用中,这里会显示一个对话框,让用户选择要添加到的歌单
  // 例如:
  // AlertDialog.show({
  //   title: '添加到歌单',
  //   message: '请选择要添加到的歌单',
  //   // ...
  // })
  console.info('显示添加到歌单对话框')
}

// 从列表中删除选中的歌曲
private removeSelectedSongs() {
  // 在实际应用中,这里会从播放列表中删除选中的歌曲
  // 例如:
  // const newSongs = this.songs.filter((_, index) => !this.selectedSongs.has(index))
  // this.songs = newSongs
  console.info('从列表中删除选中的歌曲')
}
2.5 歌曲收藏功能
歌曲收藏是音乐播放器的常见功能,让我们实现这个功能:
// 收藏按钮
Image(this.isLiked ? $r('app.media.ic_heart_filled') : $r('app.media.ic_heart'))
  .width(30)
  .height(30)
  .margin({ right: 20 })
  .onClick(() => {
    this.toggleLike()
  })

// 切换收藏状态
private toggleLike() {
  this.isLiked = !this.isLiked

  // 更新歌曲数据
  const currentSong = this.songs[this.currentSongIndex]
  currentSong.isLiked = this.isLiked

  // 在实际应用中,这里会更新数据库或发送网络请求
  if (this.isLiked) {
    this.showToast('已添加到我喜欢的')
  } else {
    this.showToast('已从我喜欢的中移除')
  }
}
三、播放器核心功能增强
3.1 播放控制增强
让我们增强播放控制功能,支持不同的播放模式:
// 播放下一首
private playNext() {
  let nextIndex = this.currentSongIndex

  switch (this.playMode) {
    case PlayMode.LOOP:
    case PlayMode.SEQUENCE:
      // 列表循环或顺序播放:播放下一首
      nextIndex = (this.currentSongIndex + 1) % this.songs.length
      break
    case PlayMode.SINGLE:
      // 单曲循环:继续播放当前歌曲
      nextIndex = this.currentSongIndex
      break
    case PlayMode.RANDOM:
      // 随机播放:随机选择一首歌曲
      nextIndex = Math.floor(Math.random() * this.songs.length)
      break
  }

  // 顺序播放模式下,如果已经是最后一首,则停止播放
  if (this.playMode === PlayMode.SEQUENCE && this.currentSongIndex === this.songs.length - 1 && nextIndex === 0) {
    this.isPlaying = false
    return
  }

  this.currentSongIndex = nextIndex
  this.currentTime = 0
  this.totalTime = this.songs[this.currentSongIndex].duration
  this.isPlaying = true
  this.isLiked = this.songs[this.currentSongIndex].isLiked || false
}

// 播放上一首
private playPrevious() {
  let prevIndex = this.currentSongIndex

  switch (this.playMode) {
    case PlayMode.LOOP:
    case PlayMode.SEQUENCE:
      // 列表循环或顺序播放:播放上一首
      prevIndex = (this.currentSongIndex - 1 + this.songs.length) % this.songs.length
      break
    case PlayMode.SINGLE:
      // 单曲循环:继续播放当前歌曲
      prevIndex = this.currentSongIndex
      break
    case PlayMode.RANDOM:
      // 随机播放:随机选择一首歌曲
      prevIndex = Math.floor(Math.random() * this.songs.length)
      break
  }

  this.currentSongIndex = prevIndex
  this.currentTime = 0
  this.totalTime = this.songs[this.currentSongIndex].duration
  this.isPlaying = true
  this.isLiked = this.songs[this.currentSongIndex].isLiked || false
}

// 歌曲播放完成后的处理
private onSongComplete() {
  // 根据播放模式决定下一步操作
  switch (this.playMode) {
    case PlayMode.LOOP:
      // 列表循环:播放下一首
      this.playNext()
      break
    case PlayMode.SINGLE:
      // 单曲循环:重新播放当前歌曲
      this.currentTime = 0
      break
    case PlayMode.RANDOM:
      // 随机播放:随机选择一首歌曲
      this.currentSongIndex = Math.floor(Math.random() * this.songs.length)
      this.currentTime = 0
      this.totalTime = this.songs[this.currentSongIndex].duration
      break
    case PlayMode.SEQUENCE:
      // 顺序播放:如果是最后一首,则停止播放;否则播放下一首
      if (this.currentSongIndex === this.songs.length - 1) {
        this.isPlaying = false
        this.currentTime = this.totalTime
      } else {
        this.playNext()
      }
      break
  }
}
3.2 播放进度模拟
在实际应用中,我们需要模拟播放进度的更新:
// 播放定时器
private playTimer: number = -1

// 开始播放
private startPlaying() {
  // 清除之前的定时器
  if (this.playTimer !== -1) {
    clearInterval(this.playTimer)
    this.playTimer = -1
  }

  // 创建新的定时器,每秒更新一次播放进度
  this.playTimer = setInterval(() => {
    if (this.isPlaying) {
      this.currentTime += 1

      // 更新当前歌词索引
      this.updateCurrentLyricIndex()

      // 检查是否播放完成
      if (this.currentTime >= this.totalTime) {
        this.onSongComplete()
      }
    }
  }, 1000)
}

// 停止播放
private stopPlaying() {
  if (this.playTimer !== -1) {
    clearInterval(this.playTimer)
    this.playTimer = -1
  }
}

// 监听播放状态变化
aboutToAppear() {
  // 初始化数据...

  // 监听播放状态变化
  this.$watch('isPlaying', (newValue: boolean) => {
    if (newValue) {
      this.startPlaying()
    } else {
      this.stopPlaying()
    }
  })
}

aboutToDisappear() {
  // 清理资源
  this.stopPlaying()
}
四、生命周期管理
在实际应用中,我们需要合理管理组件的生命周期,包括初始化数据、释放资源等。
4.1 组件生命周期函数
@Entry
@Component
struct MusicPlayer {
  // 状态变量和私有变量...

  aboutToAppear() {
    // 初始化数据
    this.initData()

    // 监听播放状态变化
    this.$watch('isPlaying', (newValue: boolean) => {
      if (newValue) {
        this.startPlaying()
      } else {
        this.stopPlaying()
      }
    })

    // 初始化收藏状态
    this.isLiked = this.songs[this.currentSongIndex].isLiked || false
  }

  aboutToDisappear() {
    // 清理资源
    this.stopPlaying()

    // 保存状态
    this.savePlayerState()
  }

  // 初始化数据
  private initData() {
    // 在实际应用中,这里会从本地存储或网络加载数据
    // 例如:加载上次播放的歌曲、播放列表、播放模式等

    // 加载播放器状态
    this.loadPlayerState()
  }

  // 加载播放器状态
  private loadPlayerState() {
    // 在实际应用中,这里会从本地存储加载播放器状态
    // 例如:
    // const state = AppStorage.Get<string>('playerState')
    // if (state) {
    //   const playerState = JSON.parse(state)
    //   this.currentSongIndex = playerState.currentSongIndex || 0
    //   this.playMode = playerState.playMode || PlayMode.LOOP
    //   this.volume = playerState.volume || 70
    //   this.isMuted = playerState.isMuted || false
    // }
  }

  // 保存播放器状态
  private savePlayerState() {
    // 在实际应用中,这里会将播放器状态保存到本地存储
    // 例如:
    // const playerState = {
    //   currentSongIndex: this.currentSongIndex,
    //   playMode: this.playMode,
    //   volume: this.volume,
    //   isMuted: this.isMuted
    // }
    // AppStorage.SetOrCreate('playerState', JSON.stringify(playerState))
  }
}
4.2 页面状态保存与恢复
在实际应用中,我们可能需要在页面切换时保存和恢复状态:
@Entry
@Component
struct MusicPlayer {
  // 状态变量和私有变量...

  // 页面显示时调用
  onPageShow() {
    // 恢复播放状态
    if (this.isPlaying) {
      this.startPlaying()
    }
  }

  // 页面隐藏时调用
  onPageHide() {
    // 暂停播放
    if (this.isPlaying) {
      this.isPlaying = false
    }

    // 保存状态
    this.savePlayerState()
  }
}
五、高级交互特性
5.1 歌单管理
在音乐播放器中,歌单管理是重要的功能,让我们实现这个功能:
// 添加新歌单按钮
Button('新建歌单')
  .width(120)
  .height(36)
  .fontSize(14)
  .margin({ top: 10, bottom: 10 })
  .onClick(() => {
    this.showCreatePlaylistDialog()
  })

// 歌单项长按菜单
ListItem() {
  // 歌单项内容...
}
.gesture(
  LongPressGesture()
    .onAction(() => {
      // 只对非默认歌单显示菜单
      if (!playlist.isDefault) {
        this.showPlaylistMenu(playlist)
      }
    })
)

// 显示创建歌单对话框
private showCreatePlaylistDialog() {
  // 在实际应用中,这里会显示一个对话框,让用户输入歌单名称
  // 例如:
  // TextInputDialog.show({
  //   title: '新建歌单',
  //   placeholder: '请输入歌单名称',
  //   onAccept: (name: string) => {
  //     this.createPlaylist(name)
  //   }
  // })
  console.info('显示创建歌单对话框')
}

// 创建歌单
private createPlaylist(name: string) {
  // 在实际应用中,这里会创建一个新歌单
  // 例如:
  // const newPlaylist: PlaylistInfo = {
  //   id: `playlist_${Date.now()}`,
  //   name: name,
  //   cover: $r('app.media.playlist_default'),
  //   count: 0,
  //   createdTime: new Date(),
  //   description: ''
  // }
  // this.playlists.push(newPlaylist)
  console.info(`创建歌单:${name}`)
}

// 显示歌单菜单
private showPlaylistMenu(playlist: PlaylistInfo) {
  // 在实际应用中,这里会显示一个菜单,提供编辑、删除等选项
  // 例如:
  // ActionSheet.show({
  //   title: playlist.name,
  //   options: [
  //     { text: '编辑歌单信息', action: () => this.editPlaylist(playlist) },
  //     { text: '删除歌单', action: () => this.deletePlaylist(playlist) }
  //   ]
  // })
  console.info(`显示歌单菜单:${playlist.name}`)
}

// 编辑歌单
private editPlaylist(playlist: PlaylistInfo) {
  // 在实际应用中,这里会显示一个对话框,让用户编辑歌单信息
  console.info(`编辑歌单:${playlist.name}`)
}

// 删除歌单
private deletePlaylist(playlist: PlaylistInfo) {
  // 在实际应用中,这里会删除歌单
  // 例如:
  // this.playlists = this.playlists.filter(p => p.id !== playlist.id)
  console.info(`删除歌单:${playlist.name}`)
}
5.2 拖拽排序
在音乐播放器中,拖拽排序是一个高级功能,让我们实现这个功能:
@State dragIndex: number = -1
@State dropIndex: number = -1

// 播放列表项(支持拖拽)
ForEach(this.songs, (song: SongInfo, index: number) => {
  ListItem() {
    // 列表项内容...
  }
  .backgroundColor(this.dragIndex === index ? '#E0E0E0' : (this.currentSongIndex === index ? '#F0F0F0' : '#FFFFFF'))
  .gesture(
    PanGesture()
      .onActionStart(() => {
        this.dragIndex = index
      })
      .onActionUpdate((event: GestureEvent) => {
        // 计算当前拖拽到的位置
        const offsetY = event.offsetY
        const itemHeight = 60 // 假设每个列表项高度为60
        const newDropIndex = Math.floor(offsetY / itemHeight)
        if (newDropIndex >= 0 && newDropIndex < this.songs.length) {
          this.dropIndex = newDropIndex
        }
      })
      .onActionEnd(() => {
        // 完成拖拽,调整顺序
        if (this.dragIndex >= 0 && this.dropIndex >= 0 && this.dragIndex !== this.dropIndex) {
          this.reorderSongs(this.dragIndex, this.dropIndex)
        }
        this.dragIndex = -1
        this.dropIndex = -1
      })
  )
})

// 重新排序歌曲
private reorderSongs(fromIndex: number, toIndex: number) {
  // 保存当前播放的歌曲ID
  const currentSongId = this.songs[this.currentSongIndex].id

  // 重新排序
  const songs = [...this.songs]
  const [removed] = songs.splice(fromIndex, 1)
  songs.splice(toIndex, 0, removed)
  this.songs = songs

  // 更新当前播放歌曲索引
  const newIndex = this.songs.findIndex(song => song.id === currentSongId)
  if (newIndex >= 0) {
    this.currentSongIndex = newIndex
  }
}
5.3 均衡器设置
均衡器是音乐播放器的高级功能,让我们实现一个简单的均衡器设置:
@State isEqualizerShow: boolean = false
@State equalizerBands: number[] = [50, 50, 50, 50, 50] // 5个频段,初始值为50

// 均衡器按钮
Button('均衡器')
  .width(100)
  .height(36)
  .fontSize(14)
  .margin({ top: 20 })
  .onClick(() => {
    this.isEqualizerShow = !this.isEqualizerShow
  })

// 均衡器设置面板
if (this.isEqualizerShow) {
  Column() {
    Text('均衡器')
      .fontSize(18)
      .fontWeight(FontWeight.Bold)
      .margin({ top: 20, bottom: 10 })

    Row() {
      ForEach(this.equalizerBands, (value: number, index: number) => {
        Column() {
          Slider({
            value: value,
            min: 0,
            max: 100,
            step: 1,
            direction: SliderDirection.Vertical,
            style: SliderStyle.OutSet
          })
            .height(150)
            .onChange((value: number) => {
              this.equalizerBands[index] = value
              this.applyEqualizerSettings()
            })

          Text(this.getFrequencyLabel(index))
            .fontSize(12)
            .margin({ top: 5 })
        }
        .width(0)
        .layoutWeight(1)
        .alignItems(HorizontalAlign.Center)
      })
    }
    .width('90%')
    .margin({ top: 10 })

    Button('重置')
      .width(100)
      .height(36)
      .fontSize(14)
      .margin({ top: 20 })
      .onClick(() => {
        this.resetEqualizerSettings()
      })
  }
  .width('100%')
  .padding(10)
  .backgroundColor('#F5F5F5')
  .borderRadius(10)
  .margin({ top: 20 })
}

// 获取频率标签
private getFrequencyLabel(index: number): string {
  const frequencies = ['60Hz', '230Hz', '910Hz', '3kHz', '14kHz']
  return frequencies[index] || ''
}

// 应用均衡器设置
private applyEqualizerSettings() {
  // 在实际应用中,这里会应用均衡器设置
  // 例如:调用音频处理API设置各个频段的增益
  console.info('应用均衡器设置:', this.equalizerBands)
}

// 重置均衡器设置
private resetEqualizerSettings() {
  this.equalizerBands = [50, 50, 50, 50, 50]
  this.applyEqualizerSettings()
}
六、实战案例:添加音频可视化
音频可视化是音乐播放器的高级功能,可以增强用户体验。让我们实现一个简单的音频可视化效果:
@State isVisualizerShow: boolean = false
@State visualizerData: number[] = [] // 音频可视化数据

// 音频可视化按钮
Button('可视化')
  .width(100)
  .height(36)
  .fontSize(14)
  .margin({ top: 20, left: 20 })
  .onClick(() => {
    this.isVisualizerShow = !this.isVisualizerShow
    if (this.isVisualizerShow) {
      this.startVisualizer()
    } else {
      this.stopVisualizer()
    }
  })

// 音频可视化显示区域
if (this.isVisualizerShow) {
  Row() {
    ForEach(this.visualizerData, (value: number) => {
      Column() {
        Divider()
          .vertical(true)
          .height(value)
          .color('#007DFF')
          .width(4)
          .lineCap(LineCapStyle.Round)
      }
      .width(0)
      .layoutWeight(1)
      .height(100)
      .alignItems(HorizontalAlign.Center)
      .justifyContent(FlexAlign.End)
    })
  }
  .width('90%')
  .height(100)
  .margin({ top: 20 })
}

// 可视化定时器
private visualizerTimer: number = -1

// 开始音频可视化
private startVisualizer() {
  // 清除之前的定时器
  if (this.visualizerTimer !== -1) {
    clearInterval(this.visualizerTimer)
    this.visualizerTimer = -1
  }

  // 初始化可视化数据
  this.visualizerData = Array(32).fill(0).map(() => Math.random() * 100)

  // 创建新的定时器,定期更新可视化数据
  this.visualizerTimer = setInterval(() => {
    if (this.isPlaying) {
      // 生成随机数据模拟音频频谱
      this.visualizerData = this.visualizerData.map(value => {
        // 生成一个新的随机值,但保持一定的连续性
        const newValue = value + (Math.random() * 30 - 15)
        // 确保值在有效范围内
        return Math.max(5, Math.min(100, newValue))
      })
    }
  }, 100)
}

// 停止音频可视化
private stopVisualizer() {
  if (this.visualizerTimer !== -1) {
    clearInterval(this.visualizerTimer)
    this.visualizerTimer = -1
  }
}

// 在组件销毁时清理资源
aboutToDisappear() {
  // 清理播放定时器
  this.stopPlaying()

  // 清理可视化定时器
  this.stopVisualizer()

  // 保存状态
  this.savePlayerState()
}
七、总结
本教程深入探讨了如何为音乐播放器添加交互功能和状态管理,通过这些功能的实现,我们的音乐播放器变得更加交互式和用户友好。SideBarContainer组件与状态管理的结合,为用户提供了流畅的导航体验和丰富的功能。
在实际开发中,可以根据具体需求进一步扩展这些功能,例如添加在线音乐搜索、歌曲下载、社交分享等。HarmonyOS NEXT提供的丰富组件和状态管理机制,为开发高质量的音乐播放器应用提供了强大支持。
