


Linux 在虚拟机中安装以及环境的配置
镜像下载地址:http://pan.baidu.com/s/1dENJjs1 密码:z46s , 如果出现无法连接请联系作者。虚拟机的版本是11,镜像为CentOS-6.7 64 并以此在以下机器上执行操作:
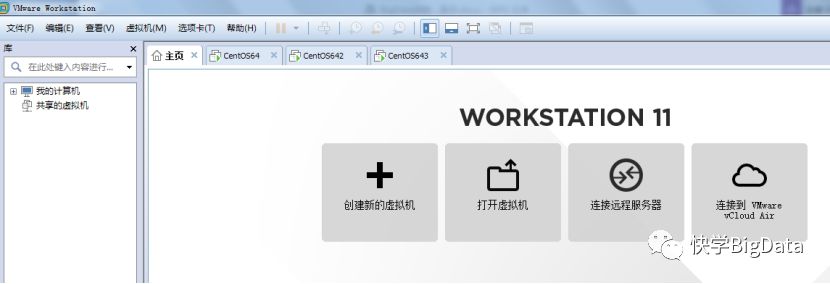
1-1)、安装虚拟机
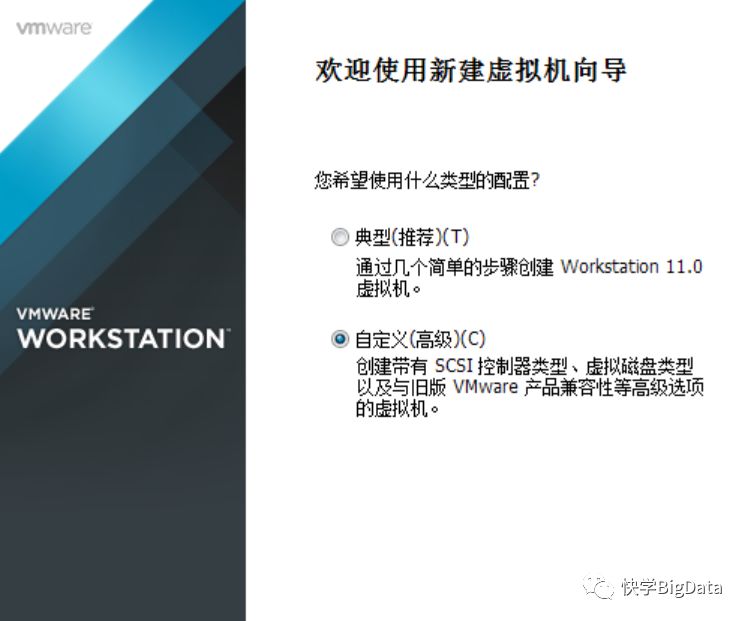
1-2)、在虚拟机中安装Centos
A)、安装向导
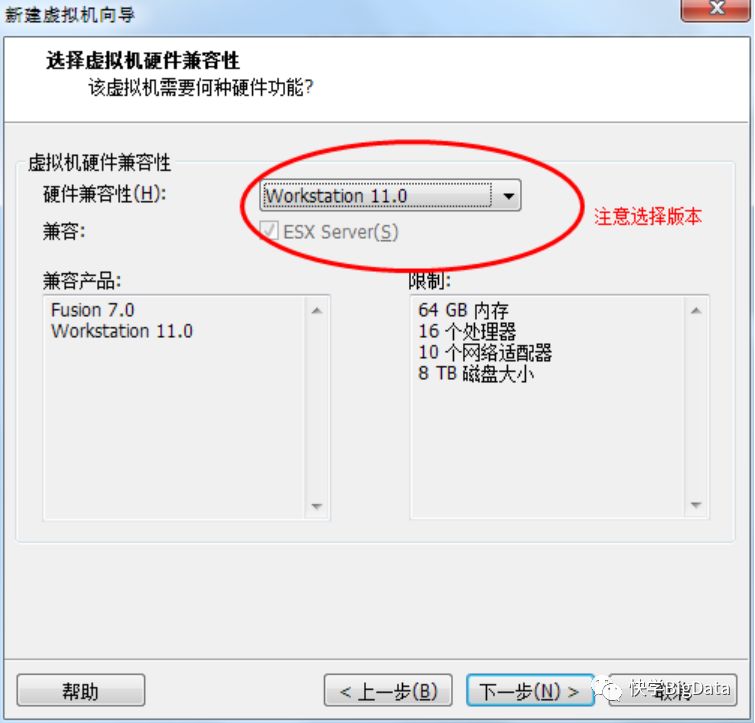
B)、选择硬件兼容模式
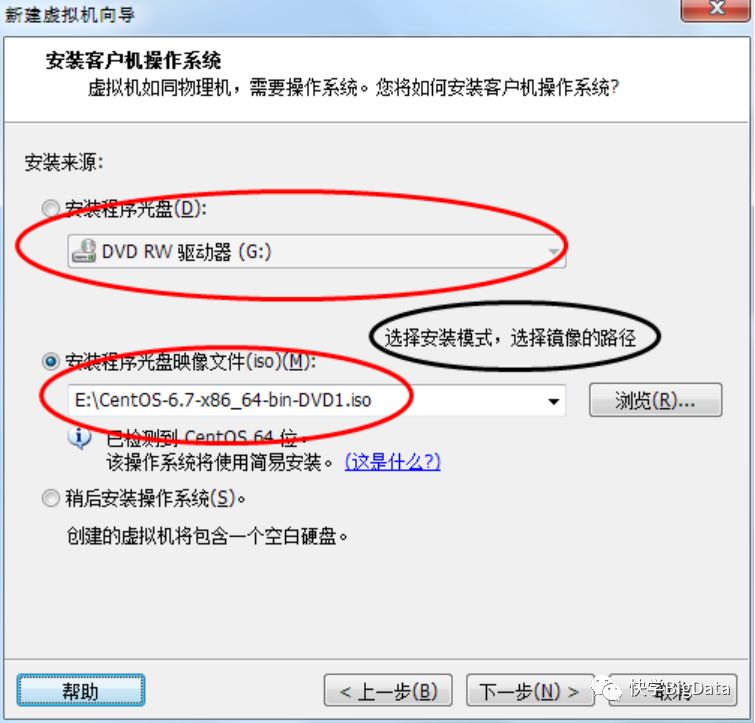
C)、选择系统所在路径
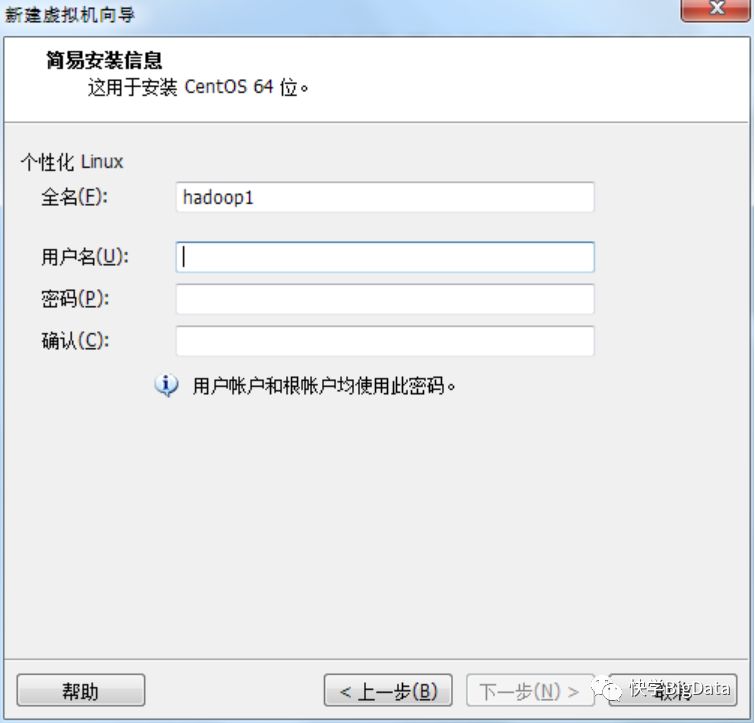
D)、输入用户名与密码
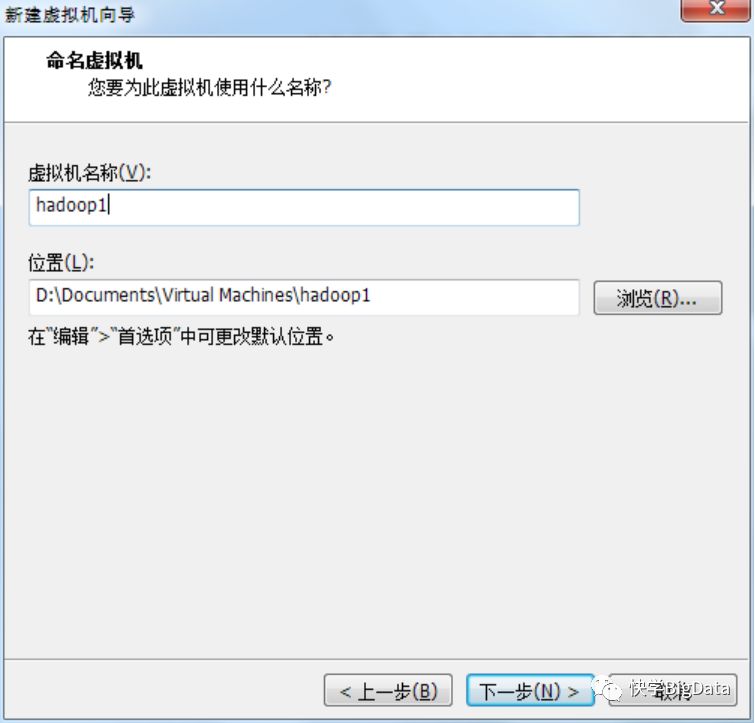
E)、设置虚拟机的名字
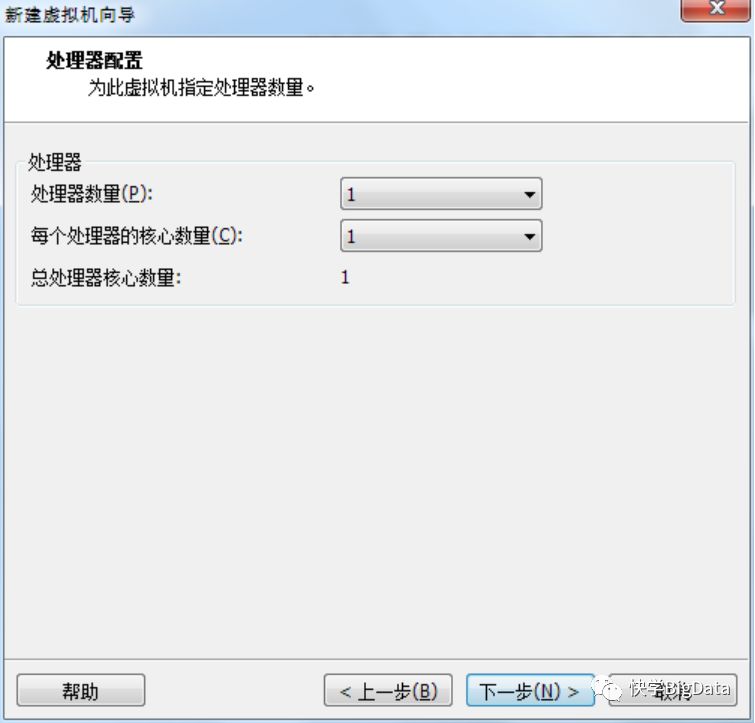
F)、设置虚拟机的核数
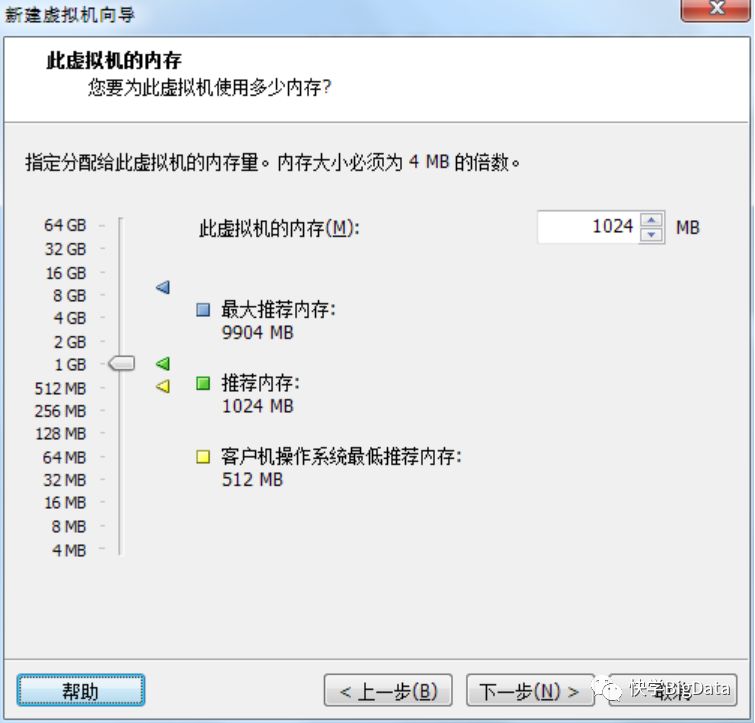
G)、设置虚拟机的内存
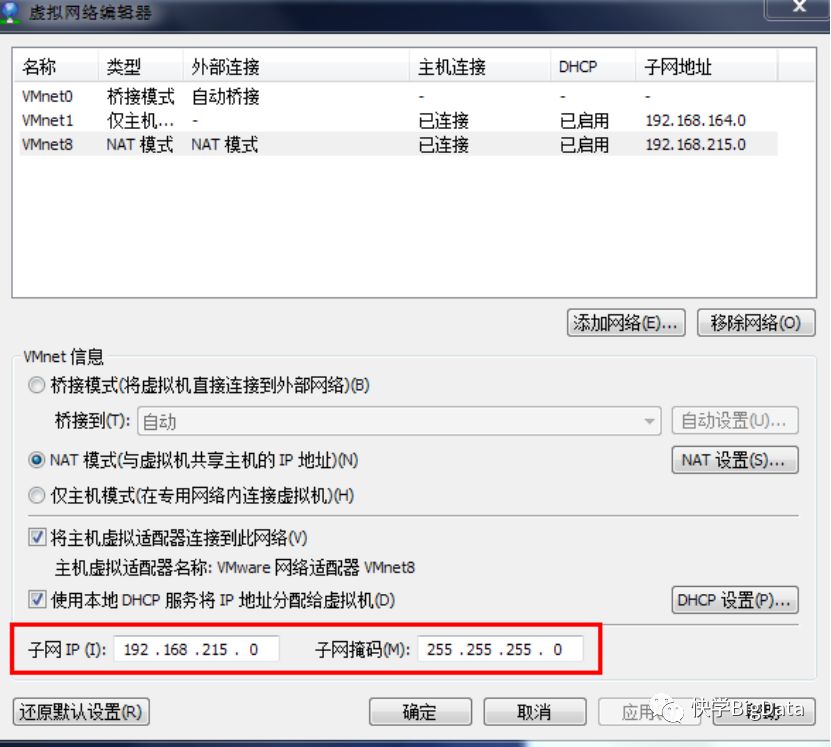
H)、设置虚拟机的网络类型
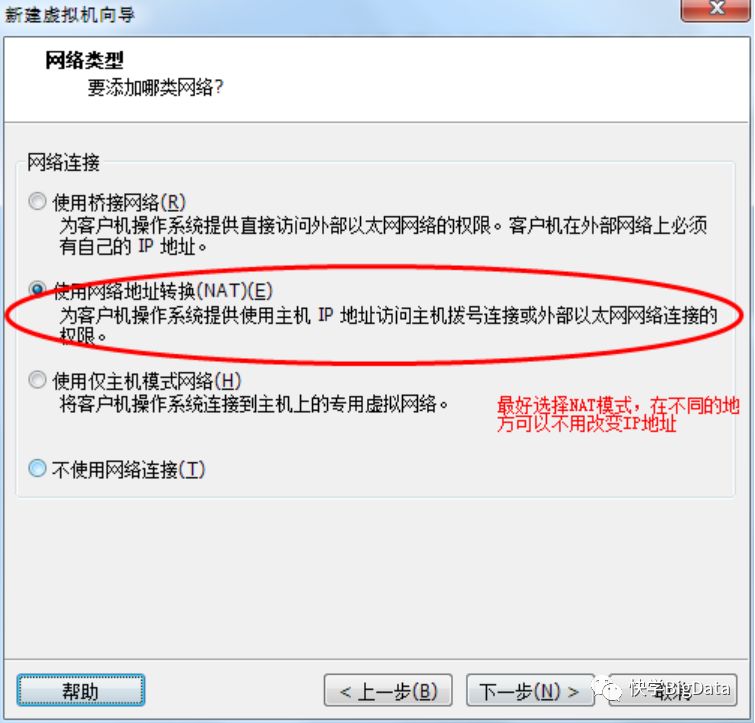
在此主要讲解前三种,即桥接模式,NAT模式,仅主机模式
1-1)、桥接模式
桥接网络是指本地物理网卡和虚拟网卡通过VMnet0虚拟交换机进行桥接,物理网卡和虚拟网卡在拓扑图上处于同等地位(虚拟网卡既不是VMware Network Adepter VMnet1也不是VMware Network Adepter VMnet8)。桥接模式必须要使用交换机或路由器才能和外界通信,此时,虚拟机自身和物理机是相互独立的,处于同等地位,如果虚拟机和物理机的网卡在同一网段,是相互能通信的。
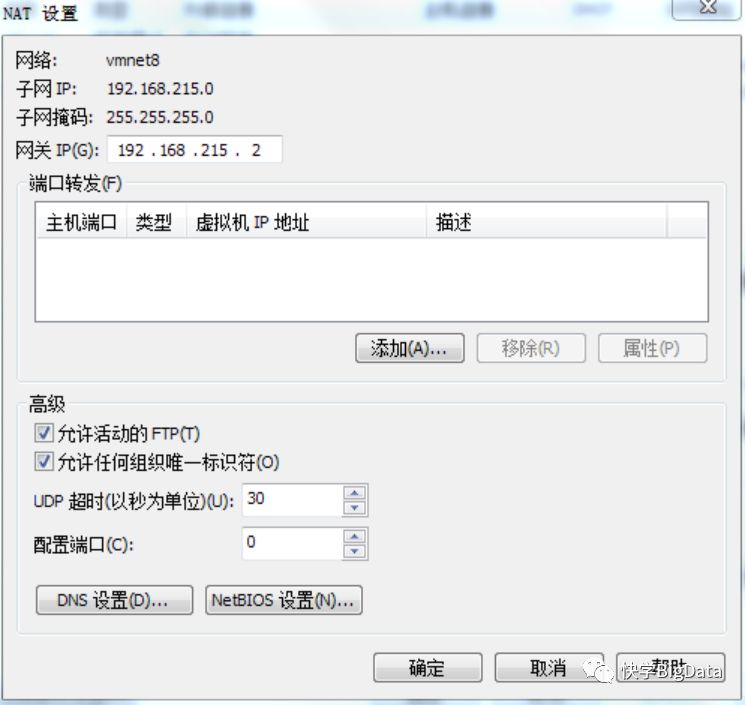
1-2)、NAT模式
在NAT网络中,会用到VMware Network Adepter VMnet8虚拟网卡,主机上的VMware Network Adepter VMnet8虚拟网卡被直接连接到VMnet8虚拟交换机上与虚拟网卡进行通信。VMware Network Adepter VMnet8虚拟网卡的作用仅限于和VMnet8网段进行通信,它不给VMnet8网段提供路由功能,所以虚拟机虚拟一个NAT服务器,使虚拟网卡可以连接到Internet。VMware Network Adepter VMnet8虚拟网卡的IP地址是在安装VMware时由系统DHCP指定生成的,我们不要修改这个数值,否则会使主机和虚拟机无法通信。
1-3)、仅主机模式
在Host-Only模式下,虚拟网络是一个全封闭的网络,它唯一能够访问的就是主机。其实Host-Only网络和NAT网络很相似,不同的地方就是Host-Only网络没有NAT服务,所以虚拟网络不能连接到Internet。主机和虚拟机之间的通信是通过VMware Network Adepter VMnet1虚拟网卡来实现的。
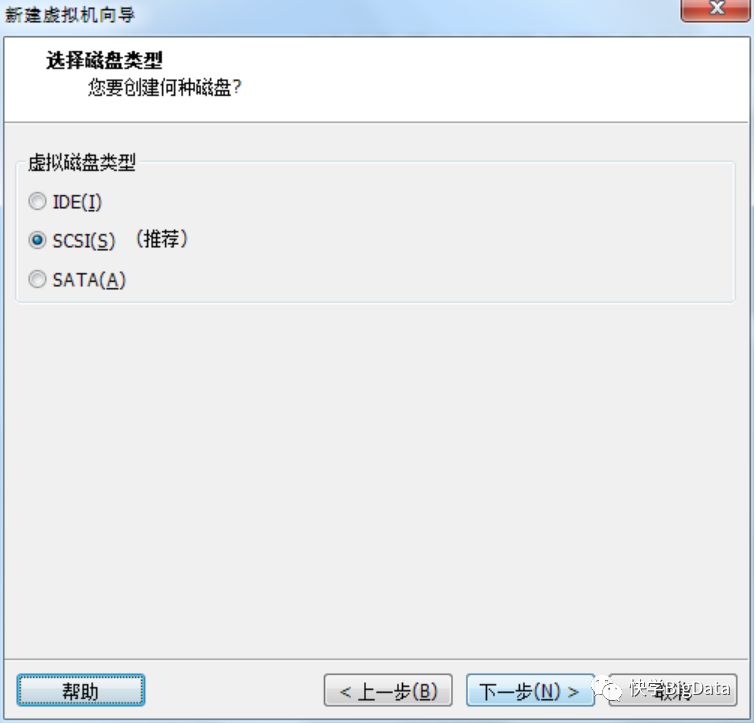
I)、选择磁盘的类型
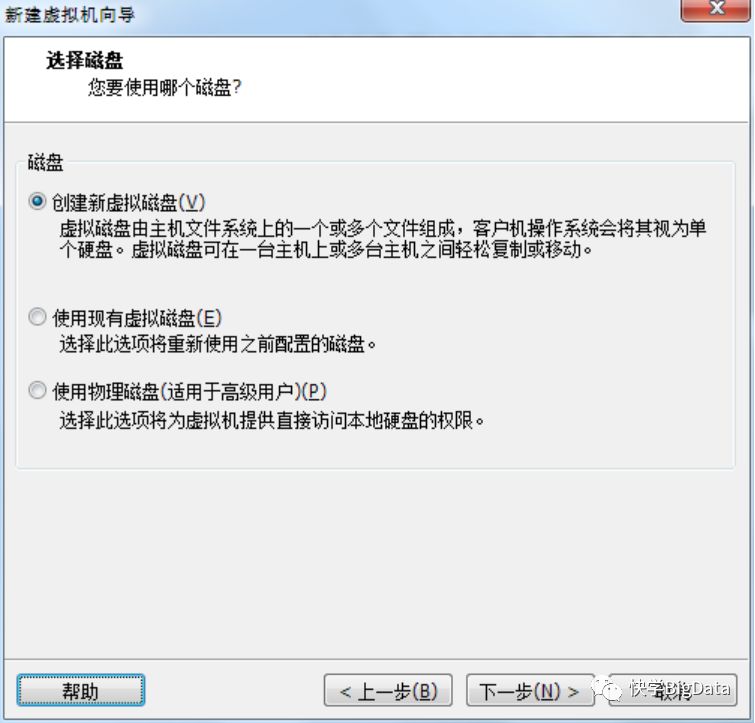
J)、选择磁盘
K)、指定磁盘的大小

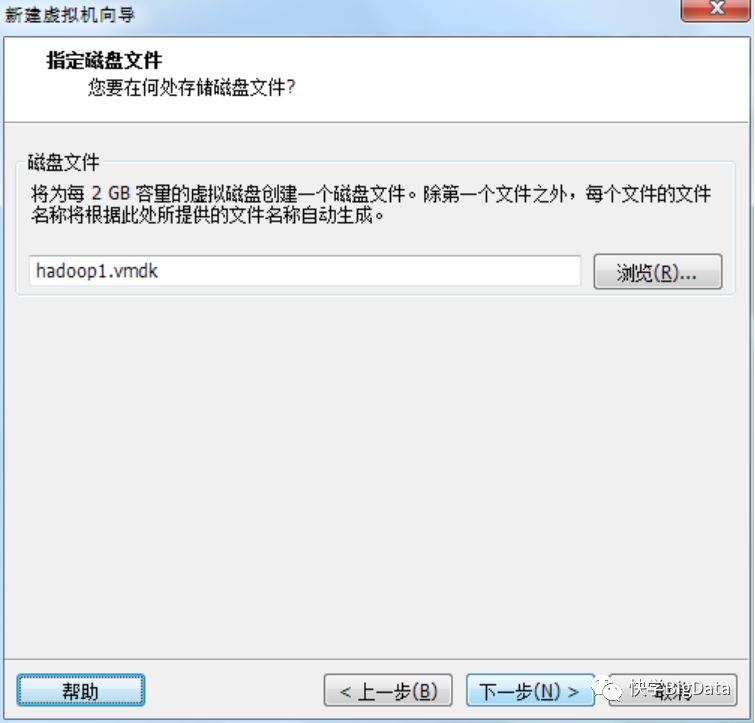
L)、指定磁盘文件
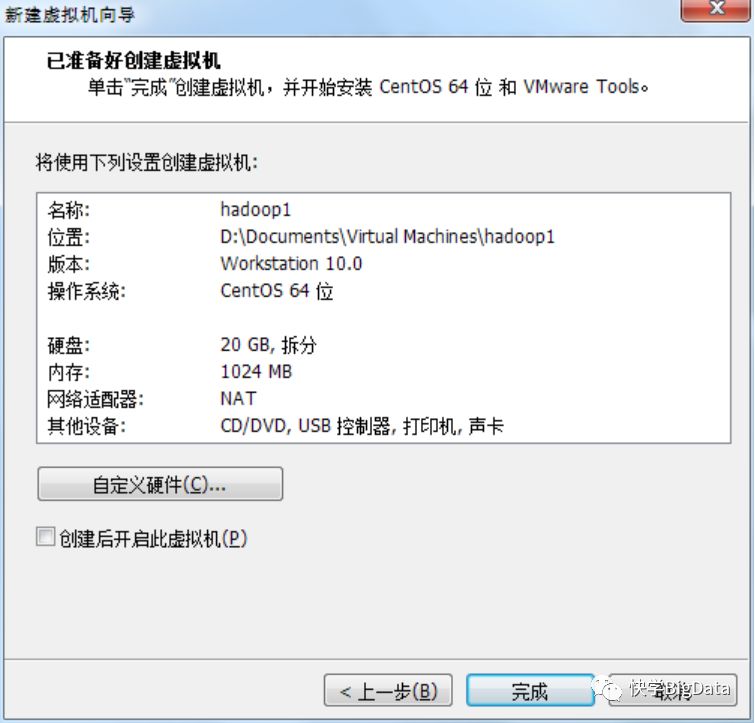
M)、准备创建好磁盘
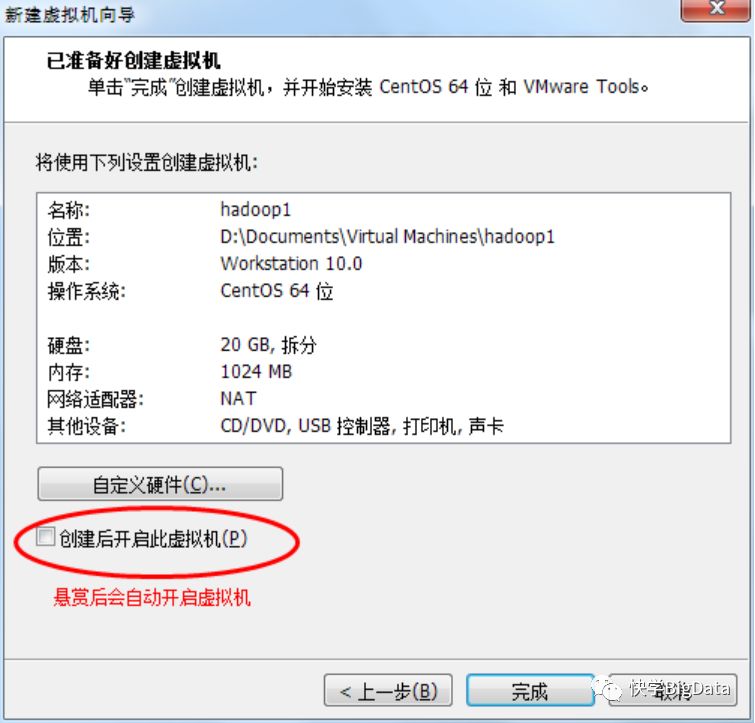
N)、创建好虚拟机并启动
1-3)、修改主机名字
[root@hadoop1 sbin]# vi /etc/sysconfig/network
NETWORKING=yes
HOSTNAME=hadoop1
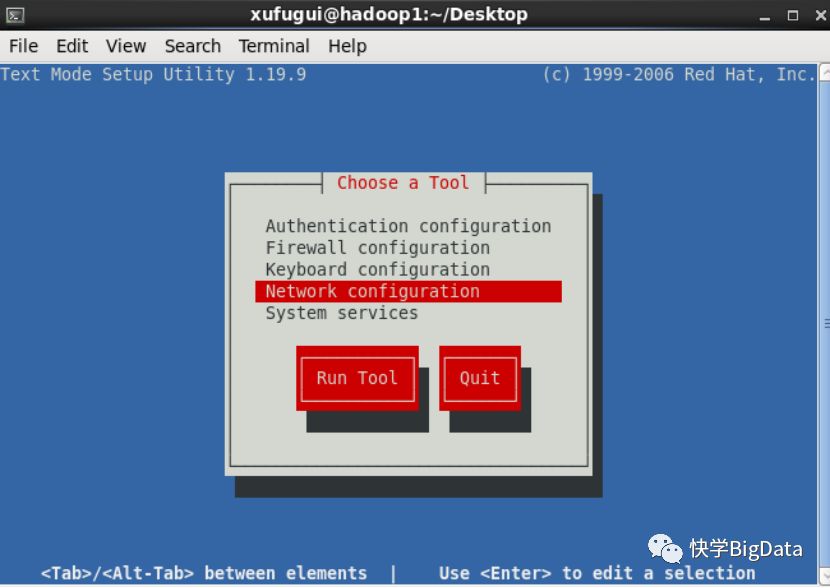
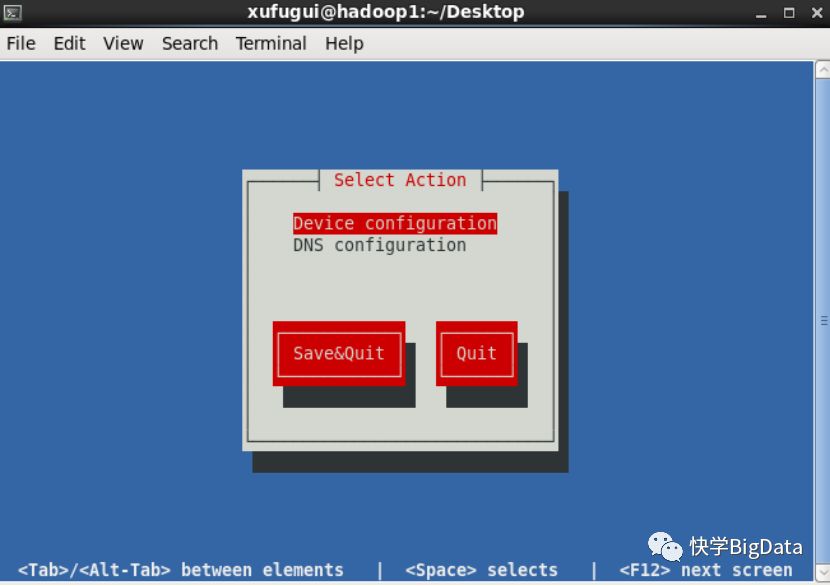
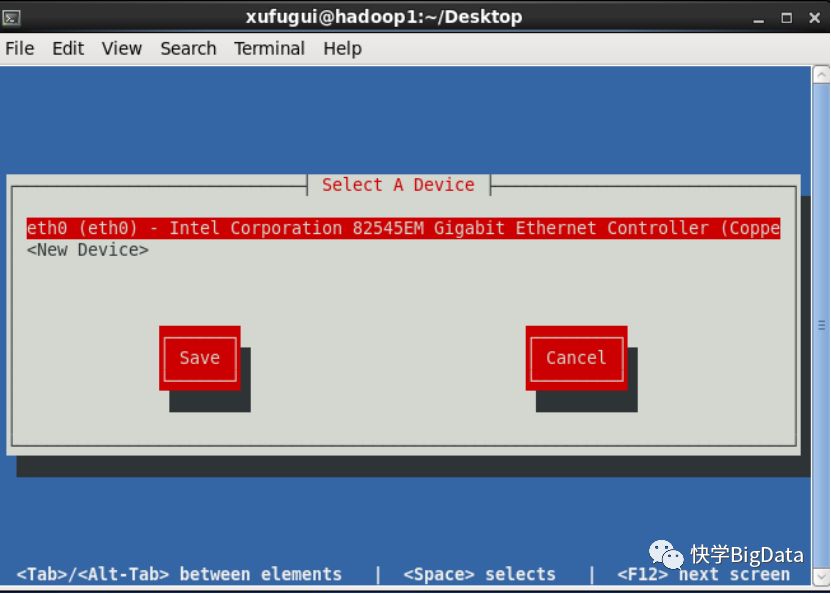
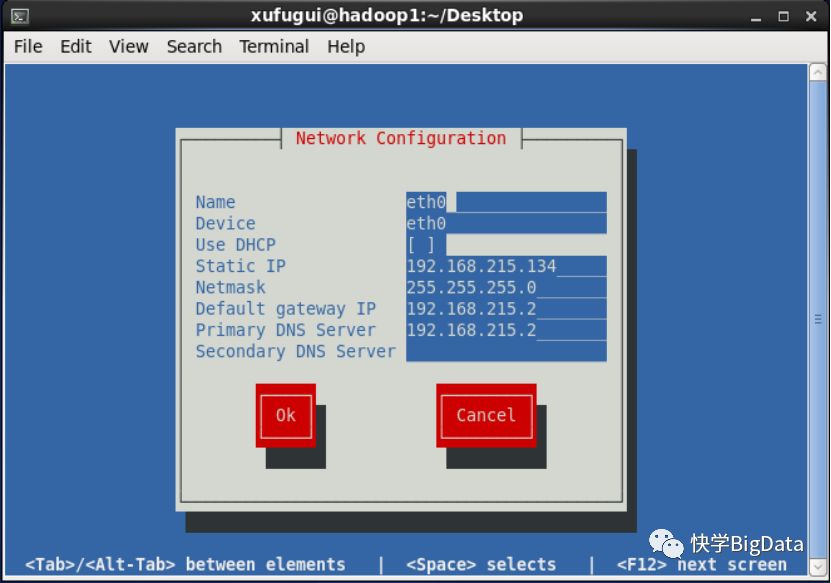
1-4)、Linux 网络配置
或者在终端上输入setup 进去到IP的设计界面
1-5)、给超级管理员设置密码
[hadoop@hadoop1 root]$ su
[root@hadoop1 ~]# passwd
Changing password for user root.
New password:
BAD PASSWORD: it is based on a dictionary word
BAD PASSWORD: is too simple
Retype new password:
1-6)、生成秘钥
[root@hadoop1 ~]# cd /root/
[root@hadoop1 root]# ssh-keygen
1-7)、传送秘钥
[root@hadoop1 /]# ssh-copy-id hadoop2
[root@hadoop1 /]# ssh-copy-id hadoop3
1-8)、修改时间与日期
A)、如果当前为中国标准时间执行一下操作
[root@hadoop1 /]# date -s "2016-09-27 16:40:30"
[root@hadoop1 /]# clock -w
或
[root@hadoop1 ~]# hwclock -w
B)、设置中国区域的时区
[root@ckycloud1 ~]# cat /etc/sysconfig/clock
ZONE="America/Los_Angeles"
[root@hadoop1 ~]# tzselect
Please identify a location so that time zone rules can be set correctly.
Please select a continent or ocean.
1) Africa
2) Americas
3) Antarctica
4) Arctic Ocean
5) Asia
6) Atlantic Ocean
7) Australia
8) Europe
9) Indian Ocean
10) Pacific Ocean
11) none - I want to specify the time zone using the Posix TZ format.
#? 5
Please select a country.
1) Afghanistan 18) Israel 35) Palestine
2) Armenia 19) Japan 36) Philippines
3) Azerbaijan 20) Jordan 37) Qatar
4) Bahrain 21) Kazakhstan 38) Russia
5) Bangladesh 22) Korea (North) 39) Saudi Arabia
6) Bhutan 23) Korea (South) 40) Singapore
7) Brunei 24) Kuwait 41) Sri Lanka
8) Cambodia 25) Kyrgyzstan 42) Syria
9) China 26) Laos 43) Taiwan
10) Cyprus 27) Lebanon 44) Tajikistan
11) East Timor 28) Macau 45) Thailand
12) Georgia 29) Malaysia 46) Turkmenistan
13) Hong Kong 30) Mongolia 47) United Arab Emirates
14) India 31) Myanmar (Burma) 48) Uzbekistan
15) Indonesia 32) Nepal 49) Vietnam
16) Iran 33) Oman 50) Yemen
17) Iraq 34) Pakistan
#? 9
Please select one of the following time zone regions.
1) east China - Beijing, Guangdong, Shanghai, etc.
2) Heilongjiang (except Mohe), Jilin
3) central China - Sichuan, Yunnan, Guangxi, Shaanxi, Guizhou, etc.
4) most of Tibet & Xinjiang
5) west Tibet & Xinjiang
#? 1
The following information has been given:
China
east China - Beijing, Guangdong, Shanghai, etc.
Therefore TZ='Asia/Shanghai' will be used.
Local time is now:Sat Dec 31 22:25:15 CST 2016.
Universal Time is now:Sat Dec 31 14:25:15 UTC 2016.
Is the above information OK?
1) Yes
2) No
#? 1
You can make this change permanent for yourself by appending the line
TZ='Asia/Shanghai'; export TZ
to the file '.profile' in your home directory; then log out and log in again.
Here is that TZ value again, this time on standard output so that you
can use the /usr/bin/tzselect command in shell scripts:
Asia/Shanghai
[root@ckycloud1 opt]# cp /usr/share/zoneinfo/Asia/Shanghai /etc/localtime
[root@ckycloud1 opt]# hwclock
[root@ckycloud1 opt]# date
Sat Dec 31 23:09:50 CST 2016
写入到本地的时间,输入yes覆盖本地的文件
[root@ckycloud1 opt]# cp /usr/share/zoneinfo/Asia/Shanghai /etc/localtime
D)、查看当前的月份
[root@ckycloud1 opt]# cal
December 2016
Su Mo Tu We Th Fr Sa
1 2 3
4 5 6 7 8 9 10
11 12 13 14 15 16 17
18 19 20 21 22 23 24
25 26 27 28 29 30 31
E)、使用ntpdate同步时间
[root@hadoop1 testData]# ntpdate asia.pool.ntp.org 或 [root@hadoop1 testData]# ntpdate 210.72.145.44
1-9)、添加其他的机器的地址
[root@hadoop1 /]# vi /etc/hosts
192.168.215.314 hadoop1
192.168.215.135 hadoop2
192.168.215.136 hadoop3
