


简介: 本文将为大家介绍用户如何定义 UDF,并完整展示了如何安装 PyFlink,如何在 PyFlink 中定义/注册/调用 UDF,以及如何执行作业。

镜像下载、域名解析、时间同步请点击 阿里巴巴开源镜像站
一、安装 PyFlink
我们需要先安装 PyFlink,可以通过 PyPI 获得,并且可以使用 pip install 进行便捷安装。
注意: 安装和运行 PyFlink 需要 Python 3.5 或更高版本。
$ python -m pip install apache-Apache Flink二、定义一个 UDF
除了扩展基类 ScalarFunction 之外,定义 Python UDF 的方法有很多。下面的示例显示了定义 Python UDF 的不同方法,该函数以 BIGINT 类型的两列作为输入参数,并返回它们的和作为结果。
- Option 1: extending the base class ScalarFunction
class Add(ScalarFunction):
  def eval(self, i, j):
    return i + j
add = udf(Add(), [DataTypes.BIGINT(), DataTypes.BIGINT()], DataTypes.BIGINT())
- Option 2: Python function
@udf(input_types=[DataTypes.BIGINT(), DataTypes.BIGINT()], result_type=DataTypes.BIGINT())
def add(i, j):
  return i + j
- Option 3: lambda function
add = udf(lambda i, j: i + j, [DataTypes.BIGINT(), DataTypes.BIGINT()], DataTypes.BIGINT())- Option 4: callable function
class CallableAdd(object):
  def __call__(self, i, j):
    return i + j
add = udf(CallableAdd(), [DataTypes.BIGINT(), DataTypes.BIGINT()], DataTypes.BIGINT())
- Option 5: partial function
return i + j + k
add = udf(functools.partial(partial_add, k=1), [DataTypes.BIGINT(), DataTypes.BIGINT()],
          DataTypes.BIGINT())
三、注册一个UDF
- register the Python function
table_env.register_function("add", add)- Invoke a Python UDF
my_table.select(```js
"add(a, b)")
- Example Code
下面是一个使用 Python UDF 的完整示例。
from PyFlink.table import StreamTableEnvironment, DataTypes
from PyFlink.table.descriptors import Schema, OldCsv, FileSystem
from PyFlink.table.udf import udf
env = StreamExecutionEnvironment.get_execution_environment()
env.set_parallelism(1)
t_env = StreamTableEnvironment.create(env)
t_env.register_function("add", udf(lambda i, j: i + j, [DataTypes.BIGINT(), DataTypes.BIGINT()], DataTypes.BIGINT()))
t_env.connect(FileSystem().path('/tmp/input')) \
    .with_format(OldCsv()
                 .field('a', DataTypes.BIGINT())
                 .field('b', DataTypes.BIGINT())) \
    .with_schema(Schema()
                 .field('a', DataTypes.BIGINT())
                 .field('b', DataTypes.BIGINT())) \
    .create_temporary_table('mySource')
t_env.connect(FileSystem().path('/tmp/output')) \
    .with_format(OldCsv()
                 .field('sum', DataTypes.BIGINT())) \
    .with_schema(Schema()
                 .field('sum', DataTypes.BIGINT())) \
    .create_temporary_table('mySink')
t_env.from_path('mySource')\
    .select("add(a, b)") \
    .insert_into('mySink')
t_env.execute("tutorial_job")
- 提交作业
首先,您需要在“ / tmp / input”文件中准备输入数据。例如,
$ echo "1,2" > /tmp/input接下来,您可以在命令行上运行此示例:
$ python python_udf_sum.py通过该命令可在本地小集群中构建并运行 Python Table API 程序。您还可以使用不同的命令行将 Python Table API 程序提交到远程集群。
最后,您可以在命令行上查看执行结果:
$ cat /tmp/output
3
四、Python UDF 的依赖管理
在许多情况下,您可能希望在 Python UDF 中导入第三方依赖。下面的示例将指导您如何管理依赖项。
假设您想使用 mpmath 来执行上述示例中两数的和。Python UDF 逻辑可能如下:
@udf(input_types=[DataTypes.BIGINT(), DataTypes.BIGINT()], result_type=DataTypes.BIGINT())
def add(i, j):
    from mpmath import fadd # add third-party dependency
    return int(fadd(1, 2))
要使其在不包含依赖项的工作节点上运行,可以使用以下 API 指定依赖项:
# echo mpmath==1.1.0 > requirements.txt
# pip download -d cached_dir -r requirements.txt --no-binary :all:
t_env.set_python_requirements("/path/of/requirements.txt", "/path/of/cached_dir")
用户需要提供一个 requirements.txt 文件,并且在里面申明使用的第三方依赖。如果无法在群集中安装依赖项(网络问题),则可以使用参数“requirements_cached_dir”,指定包含这些依赖项的安装包的目录,如上面的示例所示。依赖项将上传到群集并脱机安装。
下面是一个使用依赖管理的完整示例:
from PyFlink.datastream import StreamExecutionEnvironment
from PyFlink.table import StreamTableEnvironment, DataTypes
from PyFlink.table.descriptors import Schema, OldCsv, FileSystem
from PyFlink.table.udf import udf
env = StreamExecutionEnvironment.get_execution_environment()
env.set_parallelism(1)
t_env = StreamTableEnvironment.create(env)
@udf(input_types=[DataTypes.BIGINT(), DataTypes.BIGINT()], result_type=DataTypes.BIGINT())
def add(i, j):
    from mpmath import fadd
    return int(fadd(1, 2))
t_env.set_python_requirements("/tmp/requirements.txt", "/tmp/cached_dir")
t_env.register_function("add", add)
t_env.connect(FileSystem().path('/tmp/input')) \
    .with_format(OldCsv()
                 .field('a', DataTypes.BIGINT())
                 .field('b', DataTypes.BIGINT())) \
    .with_schema(Schema()
                 .field('a', DataTypes.BIGINT())
                 .field('b', DataTypes.BIGINT())) \
    .create_temporary_table('mySource')
t_env.connect(FileSystem().path('/tmp/output')) \
    .with_format(OldCsv()
                 .field('sum', DataTypes.BIGINT())) \
    .with_schema(Schema()
                 .field('sum', DataTypes.BIGINT())) \
    .create_temporary_table('mySink')
t_env.from_path('mySource')\
    .select("add(a, b)") \
    .insert_into('mySink')
t_env.execute("tutorial_job")
- 提交作业
首先,您需要在“/ tmp / input”文件中准备输入数据。例如,
echo "1,2" > /tmp/input
1
2
其次,您可以准备依赖项需求文件和缓存目录:
$ echo "mpmath==1.1.0" > /tmp/requirements.txt
$ pip download -d /tmp/cached_dir -r /tmp/requirements.txt --no-binary :all:
接下来,您可以在命令行上运行此示例:
$ python python_udf_sum.py最后,您可以在命令行上查看执行结果:
$ cat /tmp/output
3
五、快速上手
PyFlink 为大家提供了一种非常方便的开发体验方式 - PyFlink Shell。当成功执行 python -m pip install apache-flink 之后,你可以直接以 pyflink-shell.sh local 来启动一个 PyFlink Shell 进行开发体验,如下所示:

六、更多场景
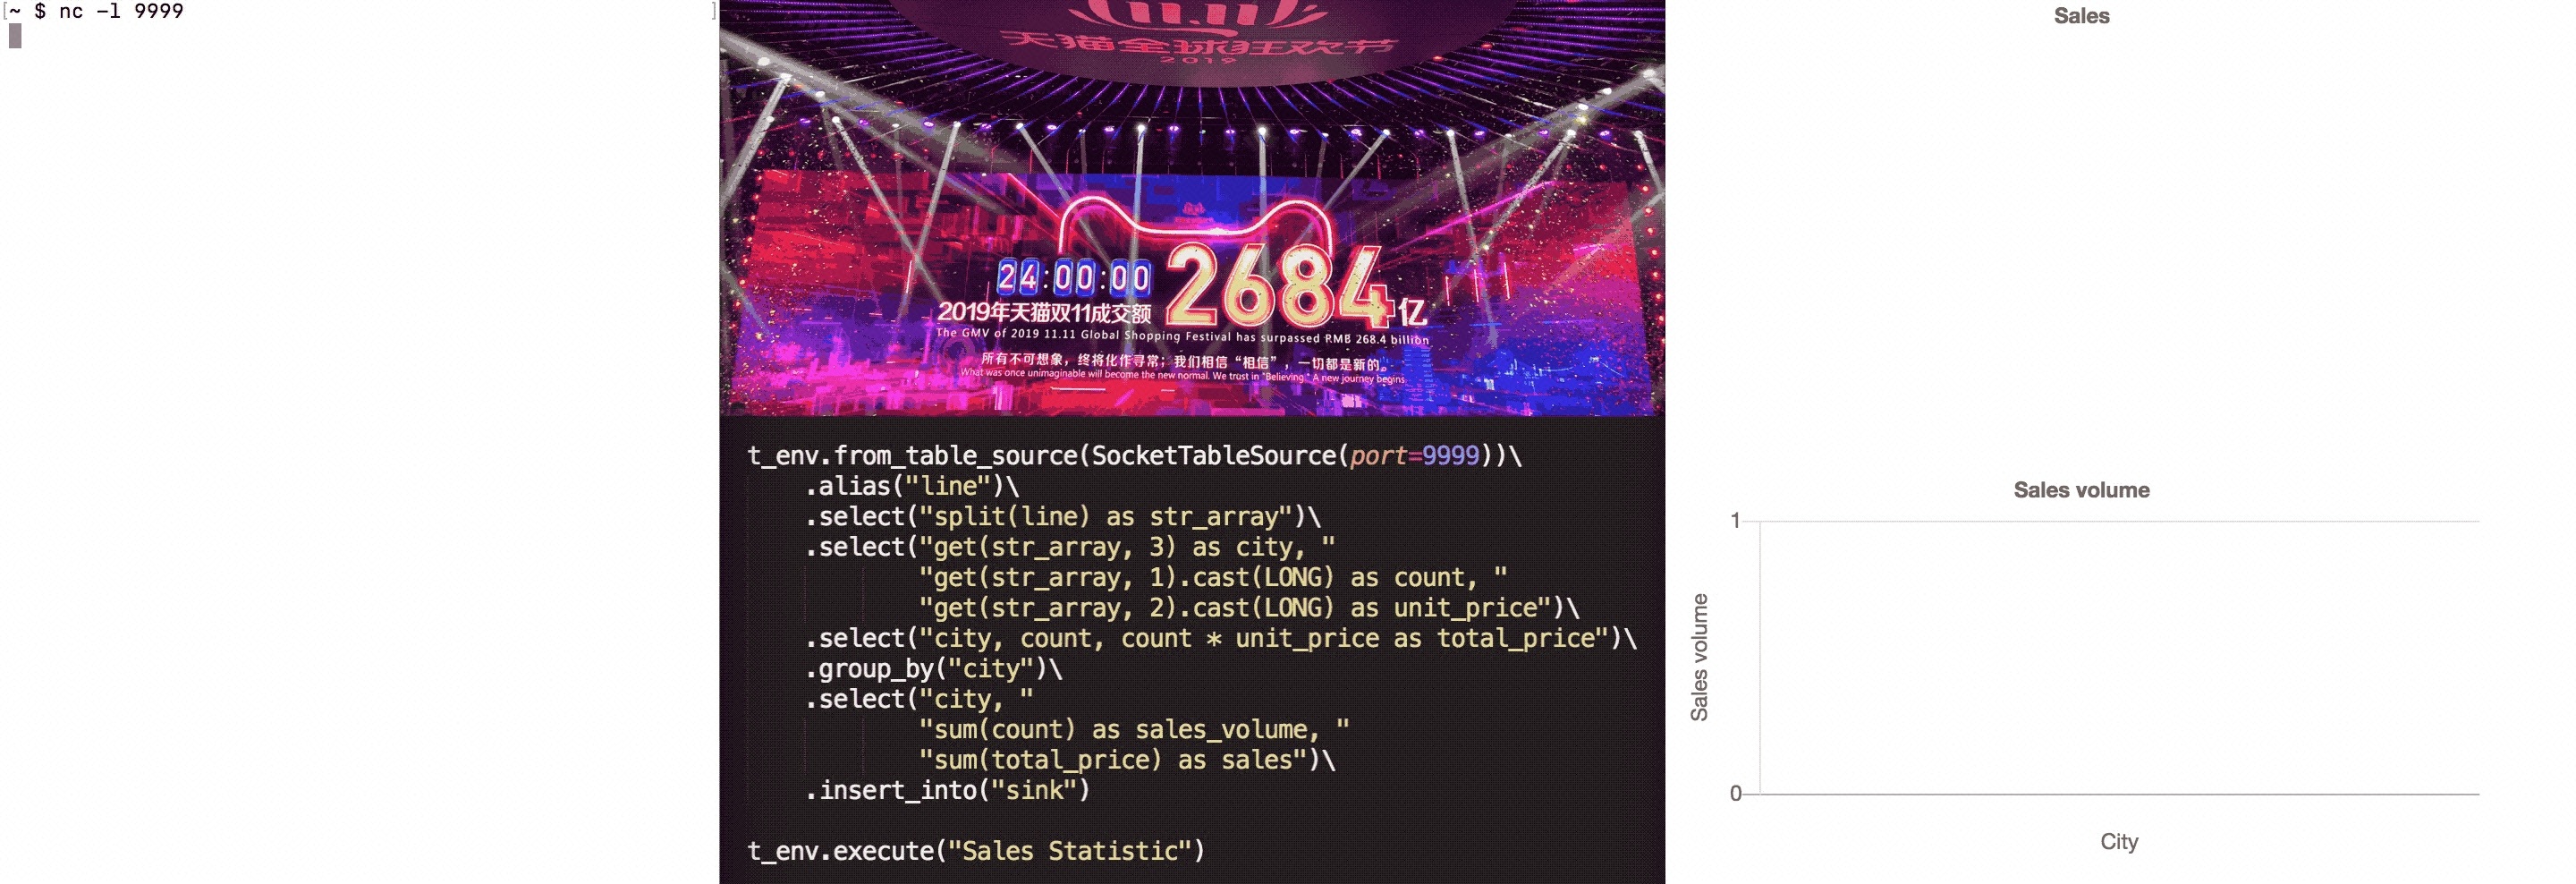
不仅仅是简单的 ETL 场景支持,PyFlink 可以完成很多复杂场的业务场景需求,比如我们最熟悉的双 11 大屏的场景,如下:
关于上面示例的更多详细请查阅:https://enjoyment.cool/2019/12/05/Apache-Flink-说道系列-如何在PyFlink-1-10中自定义Python-UDF/
本文转自: 如何在 Apache Flink 1.10 中使用 Python UDF?-阿里云开发者社区
