


Oracle Linux 9.7 + VMware 搭建 Oracle 26ai RAC 实战指南
一、安装规划
1.1 软件规划
| 序号 | 软件 | 版本 |
|---|---|---|
| 1 | 虚拟化软件 | VMware®Workstation 16 Pro 16.2.4 build-20089737 |
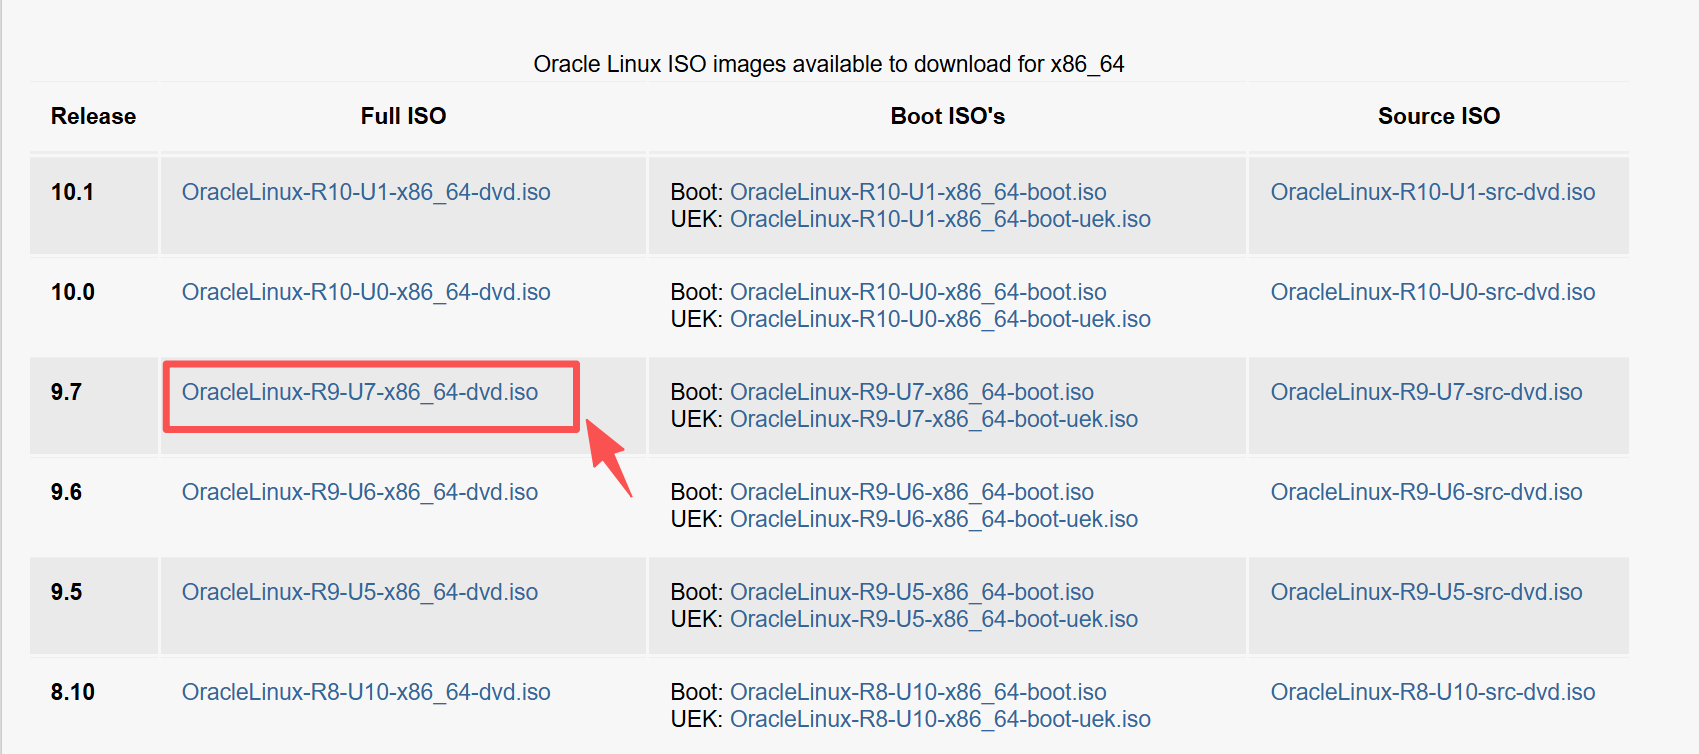
| 2 | 操作系统软件 | OracleLinux-R9-U7-Server-x86_64-dvd.iso,要求9.2以上 |
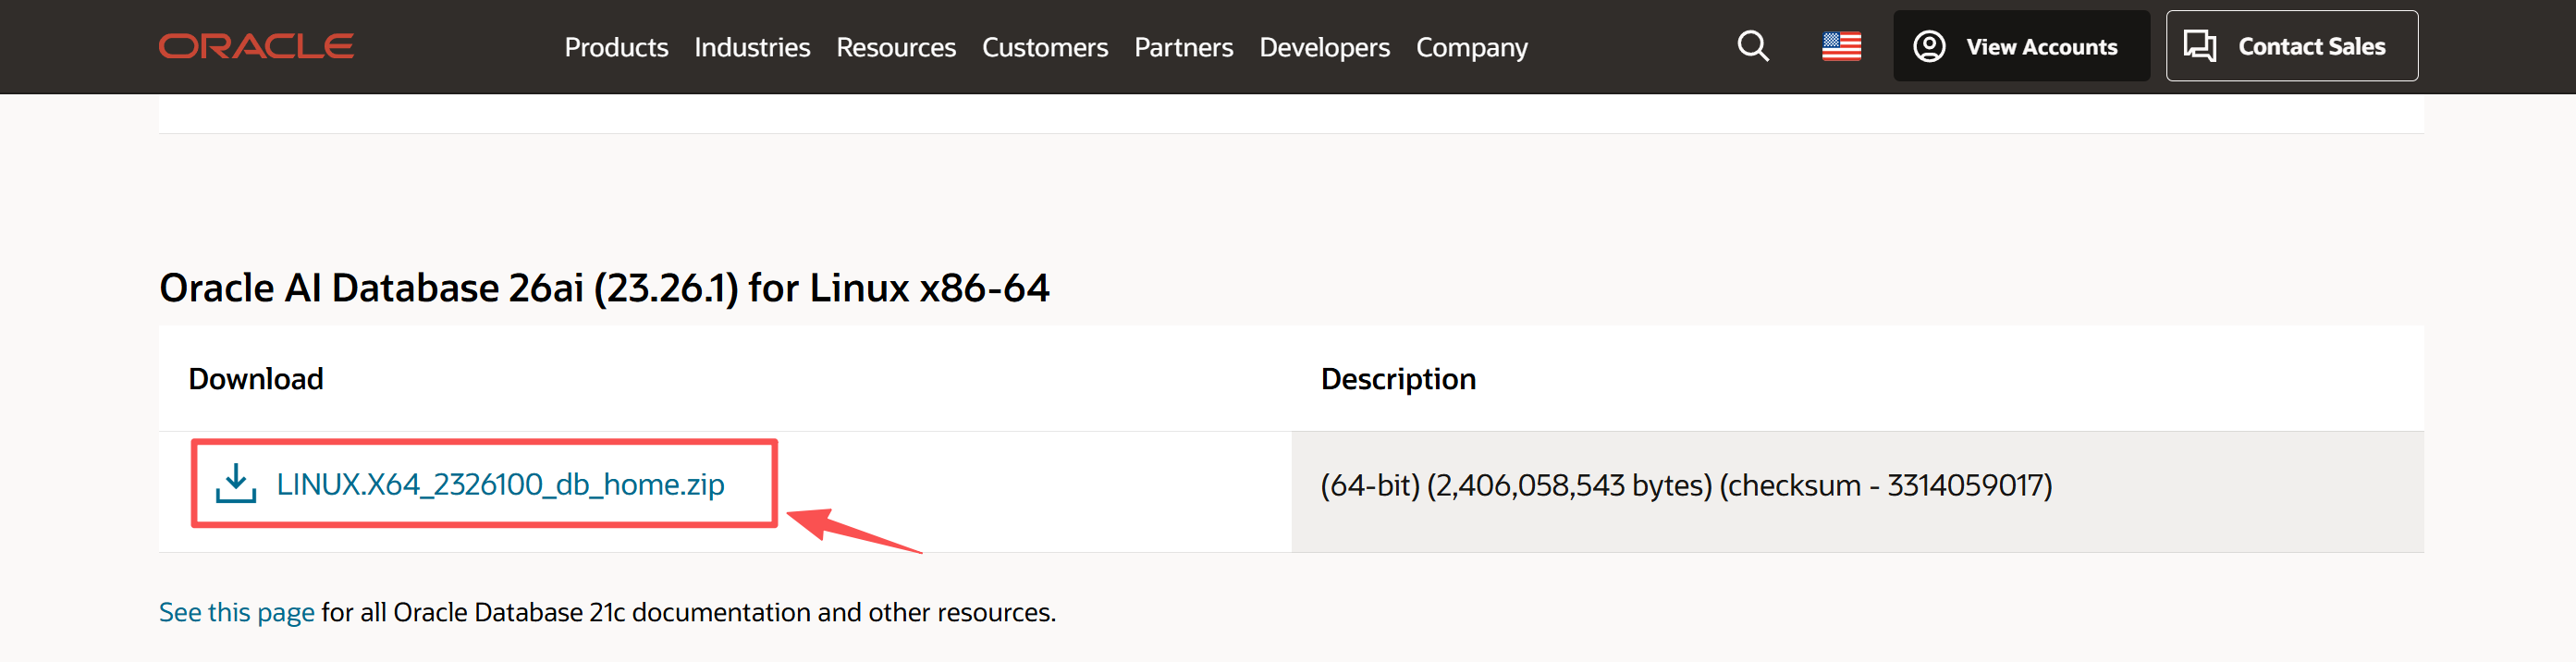
| 3 | Oracle软件 | LINUX.X64_2326100_db_home.zip |
| 4 | GI软件 | LINUX.X64_2326100_grid_home.zip |
1.1.1 软件下载
1.1.1.1 操作系统下载
操作系统我们选择官网推荐的访问https://yum.oracle.com/oracle-linux-isos.html,Oracle Linux 9.7版本下载OracleLinux-R9-U7-x86_64-dvd.iso
1.1.1.2 RAC软件下载
首先RAC软件访问https://www.oracle.com/database/technologies/oracle26ai-linux-downloads.html下载LINUX.X64_2326100_db_home.zip和LINUX.X64_2326100_grid_home.zip

可以利用sha256sum检验软件的完整性。
1.1.2 操作系统认证
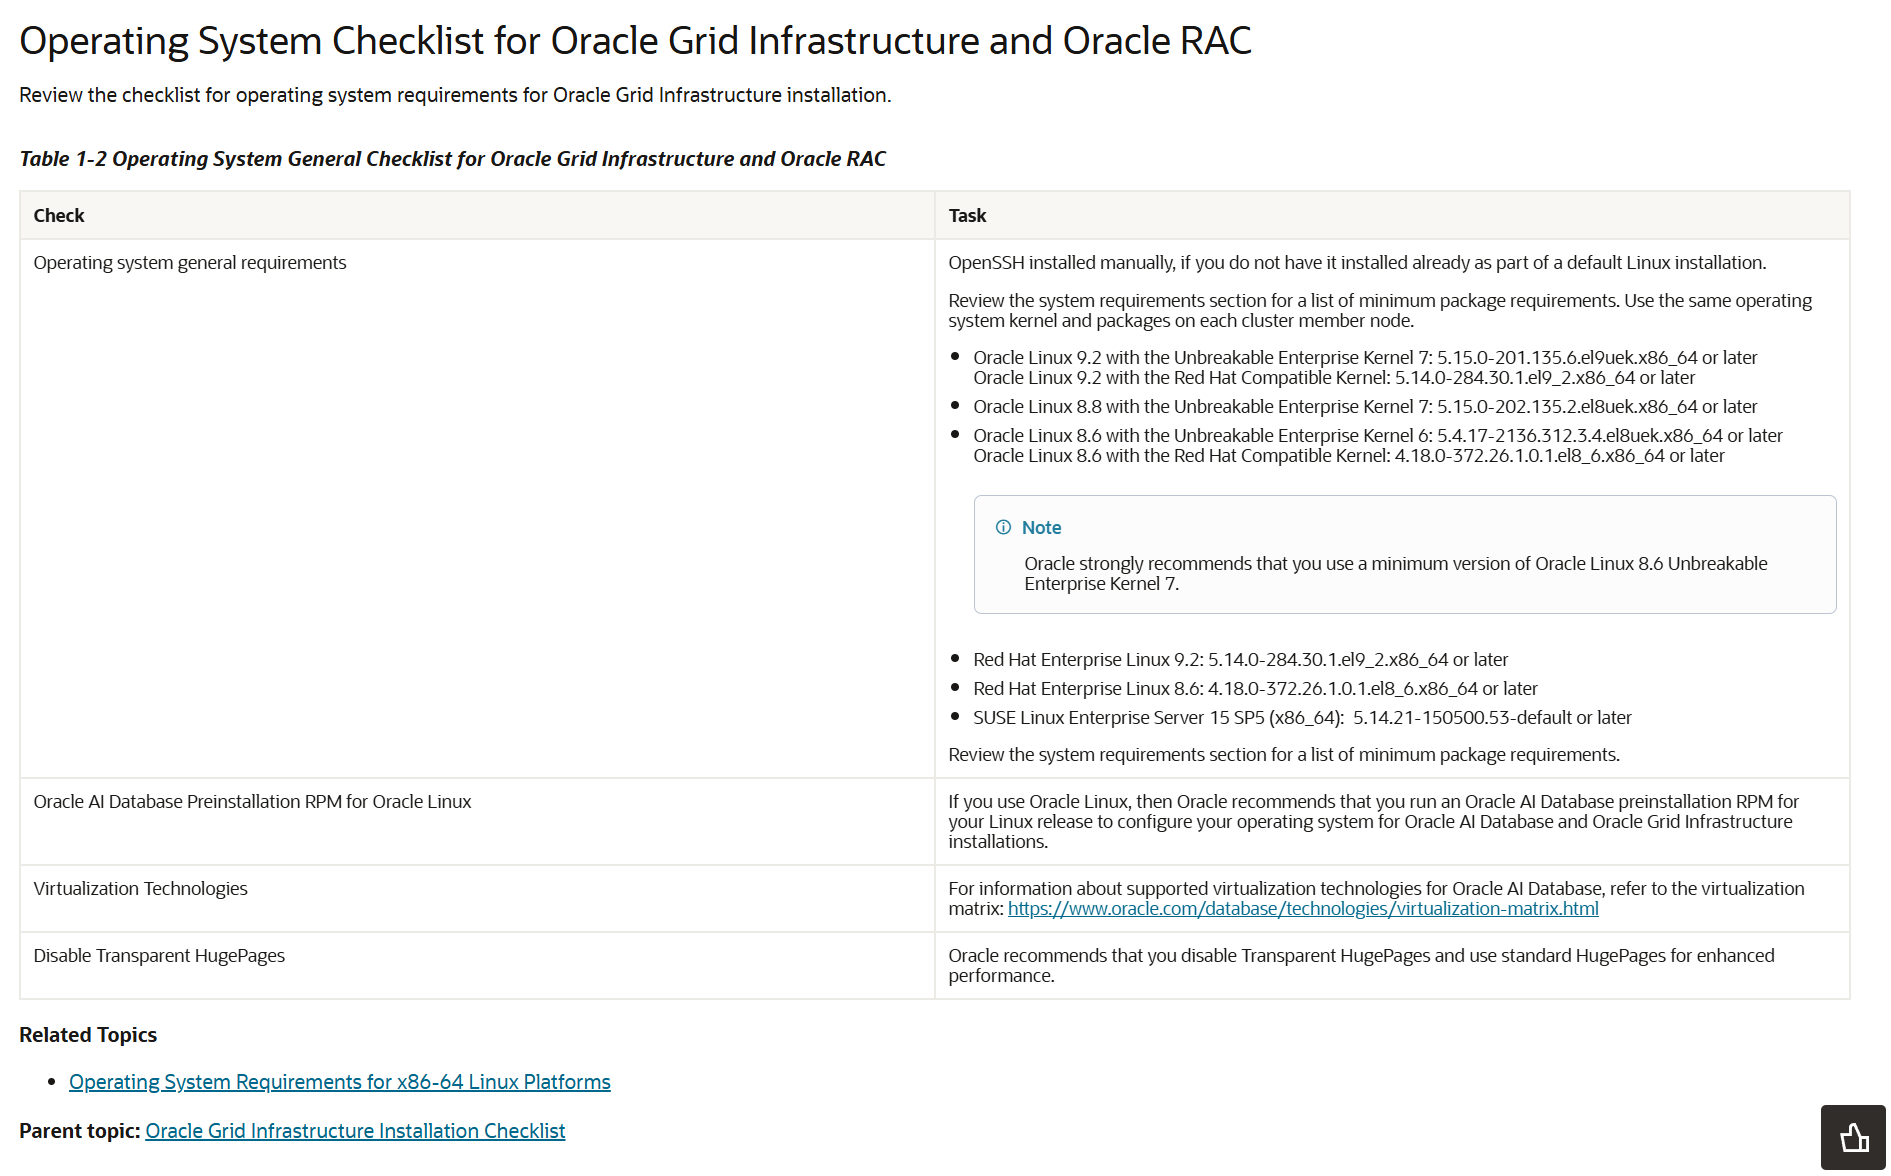
因此安装Oracle26ai RAC,选择Oracle Linux 9操作系统,要求在9.2版本以上,这点请注意。
1.2 虚拟机规划
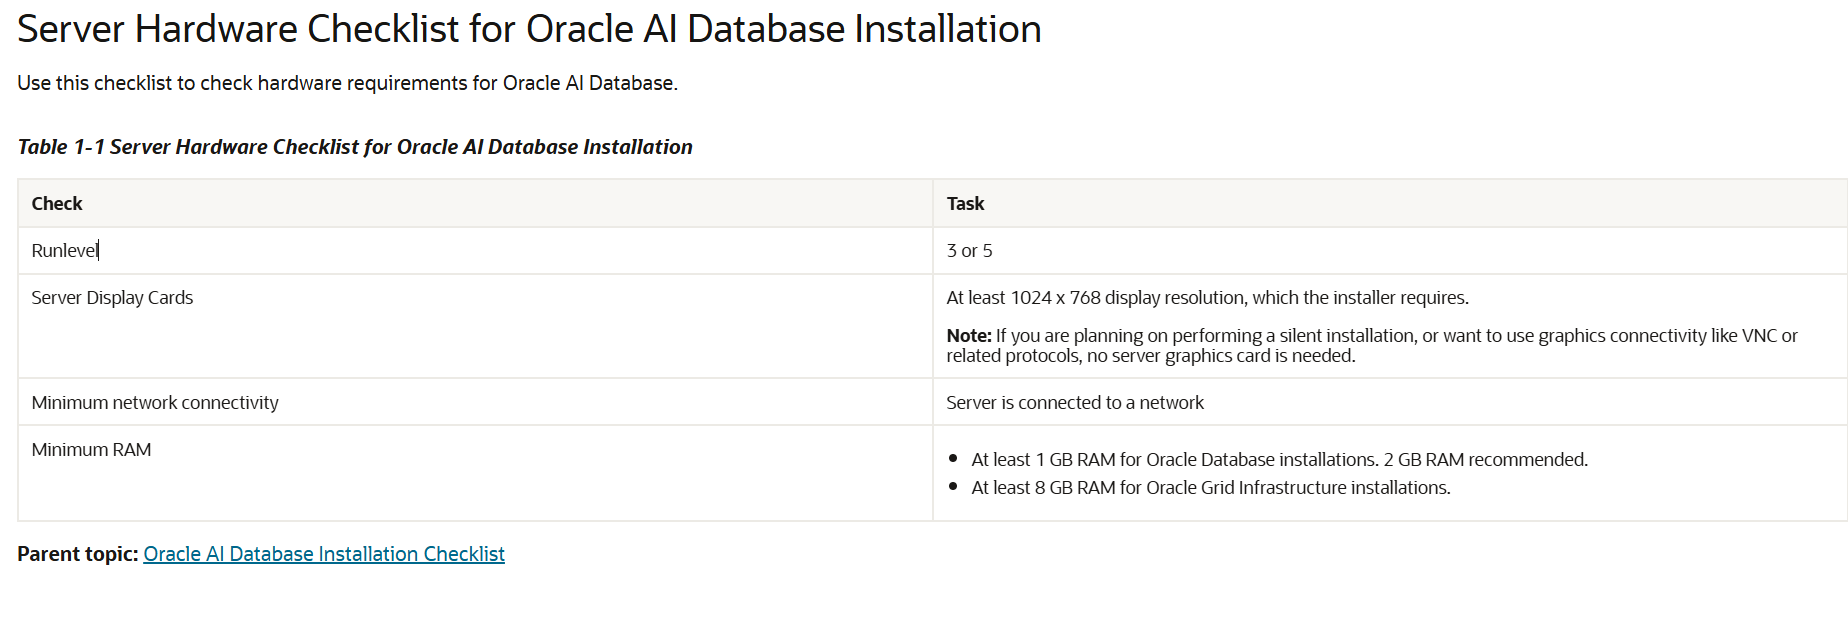
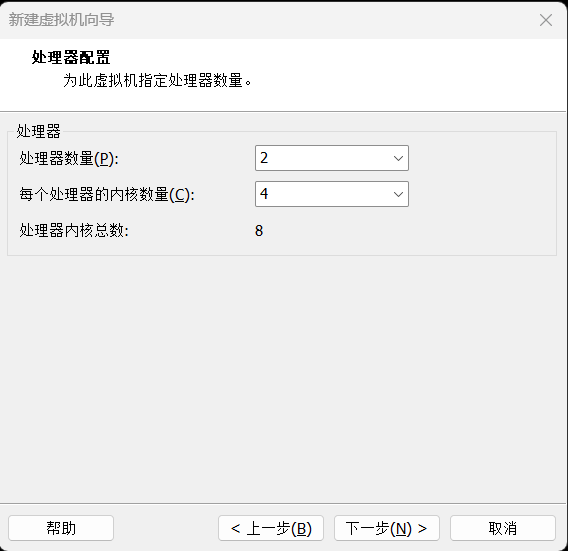
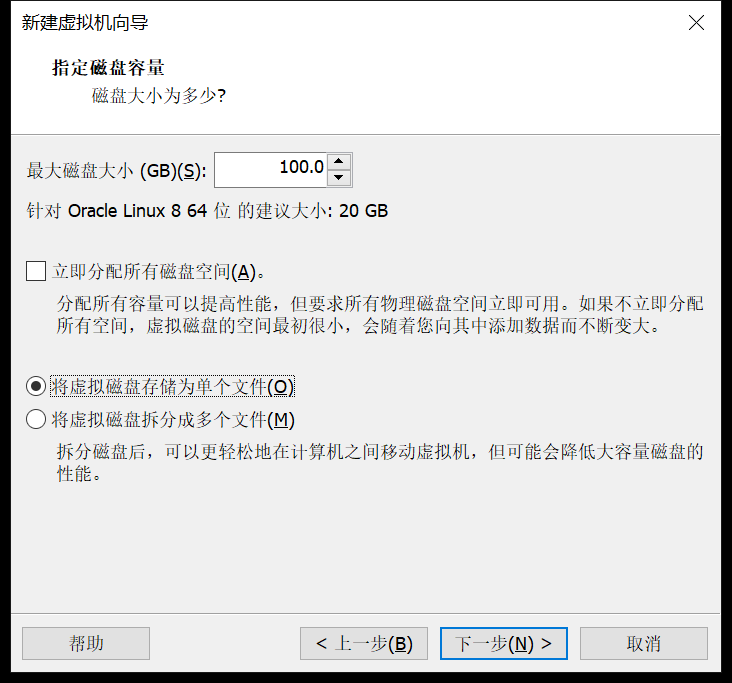
Oracle 数据库安装至少需要 1 GB 内存。建议使用 2 GB 内存。Oracle Grid Infrastructure 安装至少需要 8 GB 内存,我们这里给两台虚拟机各4颗CPU,16G内存,磁盘100G。
| CPU | 内存 | 磁盘空间 | 网卡 | 操作系统版本 |
|---|---|---|---|---|
| 4C | 16G | 100G | 两个网卡,一块Public IP、一块Private IP | Oracle Linux Server release 9.7 |
| 4C | 16G | 100G | 两个网卡,一块Public IP、一块Private IP | Oracle Linux Server release 9.7 |
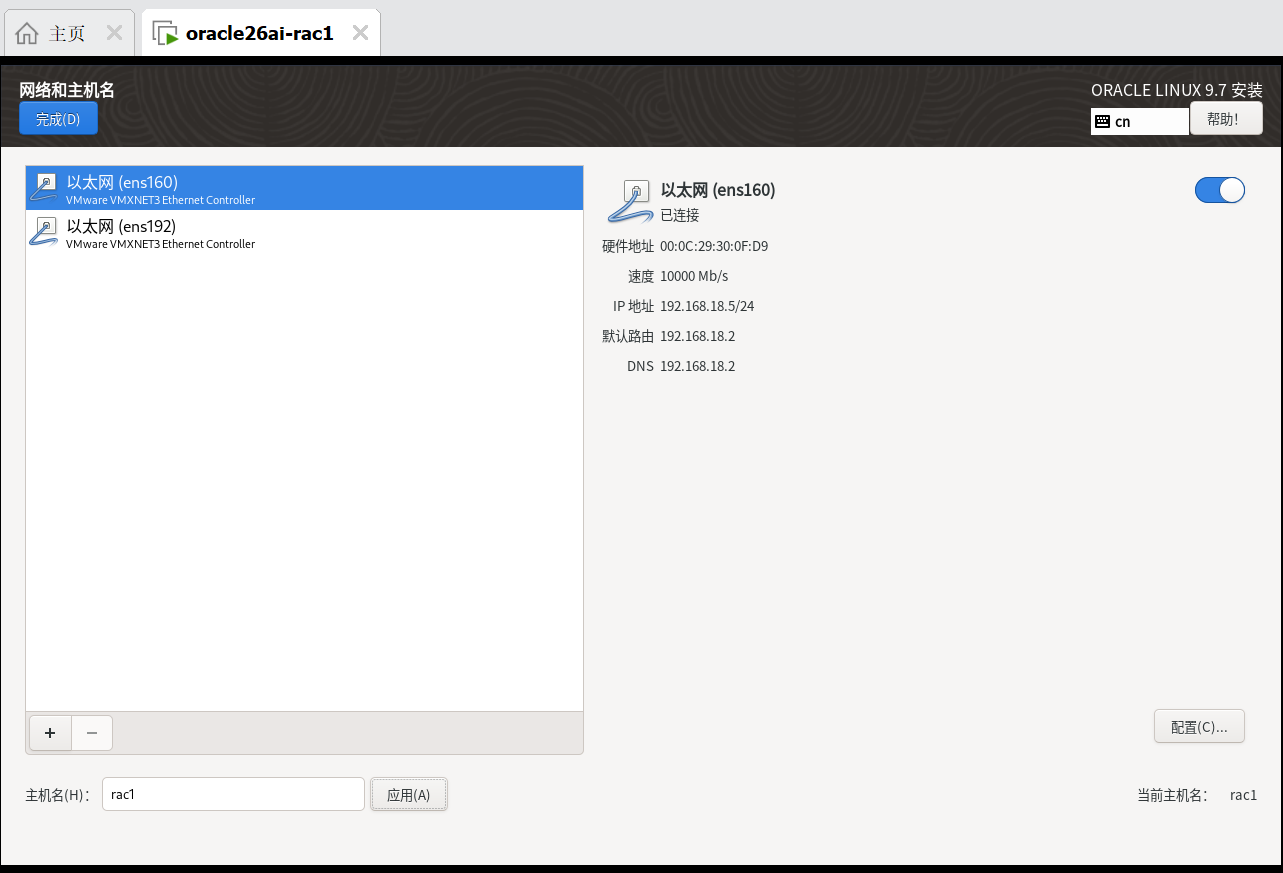
1.3 网络规划
从Oracle 11g开始,一共至少7个IP地址,2块网卡,其中public、vip和scan都在同一个网段,private在另一个网段,主机名不要包含下横线,如:RAC_01是不允许的;通过执行ifconfig -a检查2个节点的网卡名称必须一致。另外,在安装之前,公网、私网共4个IP可以ping通,其它3个不能ping通才是正常的。从18c开始,生产环境scan建议至少3个。
| 节点名称 | Public IP(NAT) | Private IP(HOST) | Virtual IP | SCAN 名称 | SCAN IP |
|---|---|---|---|---|---|
| rac1 | 192.168.18.5 | 18.18.18.5 | 192.168.18.7 | rac-scan | 192.168.18.9 |
| rac2 | 192.168.18.6 | 18.18.18.6 | 192.168.18.8 |
1.4 操作系统规划
Table 1-3 Server Configuration Checklist for Oracle AI Database
| Check | Task |
|---|---|
Disk space allocated to the /tmp directory |
At least 1 GB of space in the /tmp directory. |
| Swap space allocation relative to RAM (Oracle AI Database) | Between 1 GB and 2 GB: 1.5 times the size of the RAM Between 2 GB and 16 GB: Equal to the size of the RAM More than 16 GB: 16 GB Note: If you enable HugePages for your Linux servers, then you should deduct the memory allocated to HugePages from the available RAM before calculating swap space. |
| Swap space allocation relative to RAM (Oracle Restart) | Between 8 GB and 16 GB: Equal to the size of the RAM More than 16 GB: 16 GB Note: If you enable HugePages for your Linux servers, then you should deduct the memory allocated to HugePages from the available RAM before calculating swap space. |
| Oracle Inventory (oraInventory) and OINSTALL Group Requirements | For upgrades, the installer detects an existing oraInventory directory from the /etc/oraInst.loc file, and uses the existing oraInventory.For new installs, if you have not configured an oraInventory directory, then you can specify the oraInventory directory during the software installation and Oracle Universal Installer will set up the software directories for you. The Oracle inventory is one directory level up from the Oracle base for the Oracle software installation and designates the installation owner’s primary group as the Oracle inventory group. Ensure that the oraInventory path that you specify is in compliance with the Oracle Optimal Flexible Architecture recommendations.The Oracle Inventory directory is the central inventory of Oracle software installed on your system. Users who have the Oracle Inventory group as their primary group are granted the OINSTALL privilege to write to the central inventory.The OINSTALL group must be the primary group of all Oracle software installation owners on the server. It should be writable by any Oracle installation owner. |
| Groups and users | Oracle recommends that you create groups and user accounts required for your security plans before starting installation. Installation owners have resource limits settings and other requirements. Group and user names must use only ASCII characters.You can use the Preinstallation RPM to automatically create the oracle user and the oraInventory (oinstall) and OSDBA (dba) groups for you. |
| Mount point paths for the software binaries | Oracle recommends that you create an Optimal Flexible Architecture configuration as described in the appendix “Optimal Flexible Architecture” in Oracle AI Database Installation Guide for your platform. |
| Ensure that the Oracle home (the Oracle home path you select for Oracle AI Database) uses only ASCII characters | The ASCII character restriction includes installation owner user names, which are used as a default for some home paths, as well as other directory names you may select for paths. |
| Unset Oracle software environment variables | If you have an existing Oracle software installation, and you are using the same user to install this installation, then unset the following environment variables: $ORACLE_HOME,$ORA_NLS10, and $TNS_ADMIN.If you have set $ORA_CRS_HOME as an environment variable, then unset it before starting an installation or upgrade. Do not use $ORA_CRS_HOME as a user environment variable, except as directed by Oracle Support. |
| Set locale (if needed) | Specify the language and the territory, or locale, in which you want to use Oracle components. A locale is a linguistic and cultural environment in which a system or program is running. NLS (National Language Support) parameters determine the locale-specific behavior on both servers and clients. The locale setting of a component determines the language of the user interface of the component, and the globalization behavior, such as date and number formatting. |
| Check Shared Memory File System Mount | By default, your operating system includes an entry in /etc/fstab to mount /dev/shm. However, if your Configuration Verification Utility (CVU) or installer checks fail, ensure that the /dev/shm mount area is of type tmpfs and is mounted with the following options:rw and exec permissions set on itWithout noexec or nosuid set on itNote: These options may not be listed as they are usually set as the default permissions by your operating system. |
| Symlinks | Oracle home or Oracle base cannot be symlinks, nor can any of their parent directories, all the way to up to the root directory. |
1.4.1 操作系统目录
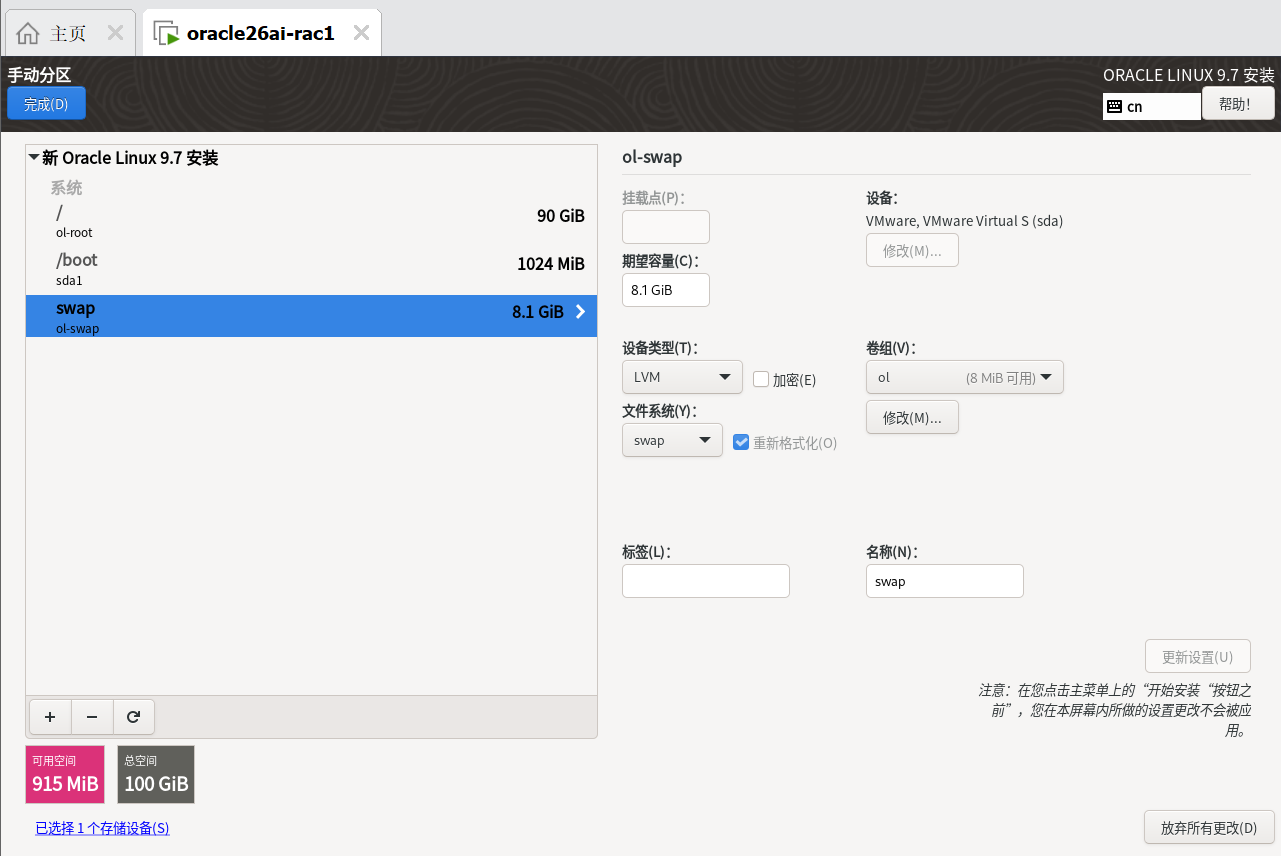
由于我们是测试这里把所有空间都给到/目录,生产环境我们可以划分成/目录100G,/boot目录1G,swap目录16G,/u01软件目录300G,/tmp目录20G,/home目录50G,
| 分区 | 大小 |
|---|---|
| /boot | 1G |
| / | 83G |
| swap | 16.1G |
1.4.2 软件包
Table 4-1 x86-64 Oracle Linux 9 Minimum Operating System Requirements
| Item | Requirements |
|---|---|
| SSH Requirement | Ensure that OpenSSH is installed on your servers. OpenSSH is the required SSH software. |
| Oracle Linux 9 | Minimum supported versions:Oracle Linux 9.2 with the Unbreakable Enterprise Kernel 7: 5.15.0-201.135.6.el9uek.x86_64 or laterOracle Linux 9.2 with the Red Hat Compatible Kernel: 5.14.0-284.30.1.el9_2.x86_64 or laterNote: Oracle recommends that you update Oracle Linux to the latest available version and release level. |
| Packages for Oracle Linux 9 | Install the latest released versions of the following packages:Subscribe to the Oracle Linux 9 channel on the Unbreakable Linux Network, or configure a yum repository from the Oracle Linux yum server website, and then install the Oracle AI Database Preinstallation RPM, oracle-ai-database-preinstall-26ai. The Oracle AI Database Preinstallation RPM, oracle-ai-database-preinstall-26ai, automatically installs all required packages listed in the table below, their dependencies for Oracle Grid Infrastructure and Oracle AI Database installations, and also performs other system configuration. If you install the Oracle AI Database Preinstallation RPM, oracle-ai-database-preinstall-26ai, then you do not have to install these packages, as the Oracle AI Database Preinstallation RPM automatically installs them. bc binutils compat-openssl11 elfutils-libelf fontconfig glibc glibc-devel glibc-headers ksh libaio libasan liblsan libX11 libXau libXi libXrender libXtst libxcrypt-compat libgcc libibverbs librdmacm libstdc++ libxcb libvirt-libs make policycoreutils policycoreutils-python-utils smartmontools sysstat |
| Optional Packages for Oracle Linux 9 | Based on your requirement, install the latest released versions of the following packages: ipmiutil (for Intelligent Platform Management Interface) libnsl2 (for Oracle Database Client only) libnsl2-devel (for Oracle Database Client only) net-tools (for Oracle RAC and Oracle Clusterware) nfs-utils (for Oracle ACFS) |
1.5 共享存储规划
Table 1-6 Oracle Grid Infrastructure Storage Configuration Checks
| Check | Task |
|---|---|
| Minimum disk space (local or shared) for Oracle Grid Infrastructure Software | At least 12 GB of space for the Oracle Grid Infrastructure for a cluster home (Grid home). Oracle recommends that you allocate 100 GB to allow additional space for patches. At least 10 GB for Oracle AI Database Enterprise Edition.Allocate additional storage space as per your cluster configuration, as described in Oracle Clusterware Storage Space Requirements. |
| Select Oracle ASM Storage Options | During installation, based on the cluster configuration, you are asked to provide Oracle ASM storage paths for the Oracle Clusterware files. These path locations must be writable by the Oracle Grid Infrastructure installation owner (Grid user). These locations must be shared across all nodes of the cluster on Oracle ASM because the files in the Oracle ASM disk group created during installation must be available to all cluster member nodes.For Oracle Grid Infrastructure deployment to manage Oracle RAC databases, shared storage, either Oracle ASM or shared file system, is locally mounted on each of the cluster nodes.Voting files are files that Oracle Clusterware uses to verify cluster node membership and status. Oracle Cluster Registry files (OCR) contain cluster and database configuration information for Oracle Clusterware. |
Table 8-1 Minimum Available Space Requirements for Oracle Grid Infrastructure Deployment to Manage Oracle RAC Databases
| Redundancy Level | DATA Disk Group | Oracle Fleet Patching and Provisioning | Total Storage |
|---|---|---|---|
| External | 1 GB | 1 GB | 2 GB |
| Normal | 2 GB | 2 GB | 4 GB |
| High/Flex/Extended | 3 GB | 3 GB | 6 GB |
- Oracle recommends that you use a separate disk group, other than
DATA, for Oracle Clusterware backup files. - The initial sizing for the Oracle Grid Infrastructure deployment to manage Oracle RAC databases is for up to four nodes. You must add additional storage space to the disk group containing Oracle Clusterware backup files for each new node added to the cluster.
- By default, all new Oracle Grid Infrastructure deployments to manage Oracle RAC databases are configured with Oracle Fleet Patching and Provisioning for patching that cluster only. This deployment requires a minimal ACFS file system that is automatically configured.
根据要求,采用的磁盘组策略如下:
| ASM磁盘名称 | 磁盘组名称 | 冗余方式 | 大小 | 用途 | 备注 |
|---|---|---|---|---|---|
| /dev/asm-ocrvote | OCRVOTE | External | 3*5G | OCR+VOTINGDISK | 建议用3块 |
| /dev/asm-data | DATA | External | 2*20G | 存储数据库数据文件 |
1.6 Oracle规划
1.6.1 软件规划
| 软件 | 版本 |
|---|---|
| Oracle软件 | LINUX.X64_2326100_db_home.zip(安装包) |
| GI软件 | LINUX.X64_2326100_db_home.zip(安装包) |
| RU软件 | |
| opatch版本 |
1.6.2 用户组和用户
常见用户组说明
| 组 | 角色 | 权限 |
|---|---|---|
| oinstall | 安装和升级oracle软件 | |
| dba | sysdba | 创建、删除、修改、启动、关闭数据库,切换日志归档模式,备份恢复数据库 |
| oper | sysoper | 启动、关闭、修改、备份、恢复数据库,修改归档模式 |
| asmdba | sysdba自动存储管理 | 管理ASM实例 |
| asmoper | sysoper自动存储管理 | 启动、停止ASM实例 |
| asmadmin | sysasm | 挂载、卸载磁盘组,管理其他存储设备 |
| backupdba | sysbackup | 启动关闭和执行备份恢复(12c) |
| dgdba | sysdg | 管理Data Guard(12c) |
| kmdba | syskm | 加密管理相关操作 |
| racdba | rac管理 |
| GroupName | GroupID | 说明 |
|---|---|---|
| oinstall | 54321 | Oracle清单和软件所有者 |
| dba | 54322 | 数据库管理员 |
| oper | 54323 | DBA操作员组 |
| backupdba | 54324 | 备份管理员 |
| dgdba | 54325 | DG管理员 |
| kmdba | 54326 | KM管理员 |
| asmdba | 54327 | ASM数据库管理员组 |
| asmoper | 54328 | ASM操作员组 |
| asmadmin | 54329 | Oracle自动存储管理组 |
| racdba | 54330 | RAC管理员 |
| 用户UID | OS用户 | 主 | 用户目录 | 默认shell | |
|---|---|---|---|---|---|
| 54321 | oracle | oinstall | dba,oper,backupdba,dgdba,kmdba,asmdba,asmoper,asmadmin,racdba | /home/oracle | bash |
| 54331 | grid | oinstall | dba,asmadmin,asmdba,asmoper,racdba grid | /home/grid | bash |
1.6.3 软件目录规划
| 目录名称 | 路径 | 说明 |
|---|---|---|
| ORACLE_BASE (oracle) | /u01/app/oracle | oracle基目录 |
| ORACLE_HOME (oracle) | /u01/app/oracle/product/23.0.0/dbhome_1/ | oracle用户HOME目录 |
| ORACLE_BASE (grid) | /u01/app/grid | grid基目录 |
| ORACLE_HOME (grid) | /u01/app/23.0.0/grid | grid用户HOME目录 |
1.6.4 整体数据库安装规划
| 规划内容 | 规划描述 |
|---|---|
| PDB | ocrlpdb |
| 内存规划 | SGA PGA |
| processes | 1000 |
| 字符集 | ZHS16GBK |
| 归档模式 | 非 |
| redo | 5组 每组200M |
| undo | 2G 自动扩展 最大4G |
| temp | 4G |
| 闪回配置 | 4G大小 |
| 归档模式 | 非归档(手工调整归档模式) |
1.6.5 RU升级规划
二、虚拟机安装
两台虚拟机创建方式相同,只是IP和主机名不同,因此相关说明只截取一台
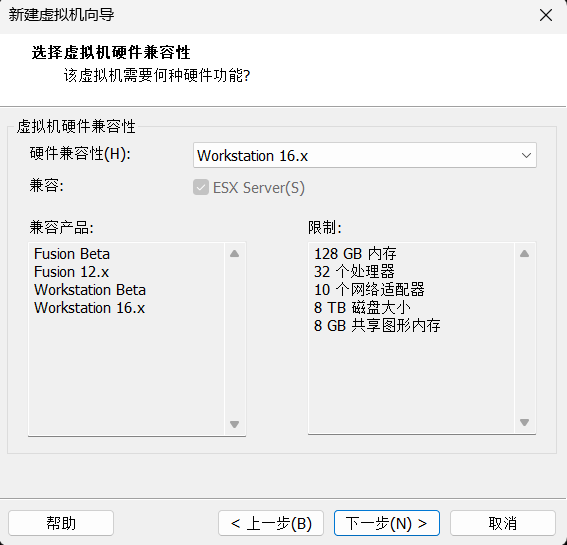
2.1 选择硬件兼容性
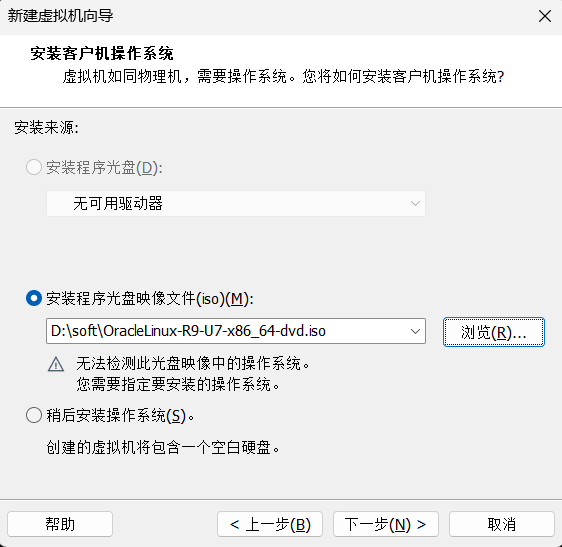
2.2 选择操作系统ISO
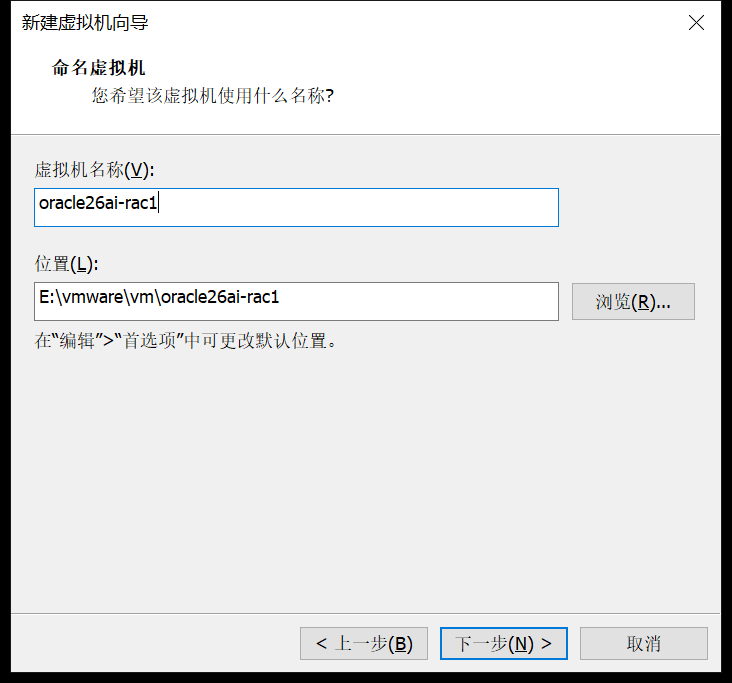
2.3 命名虚拟机
2.4 CPU
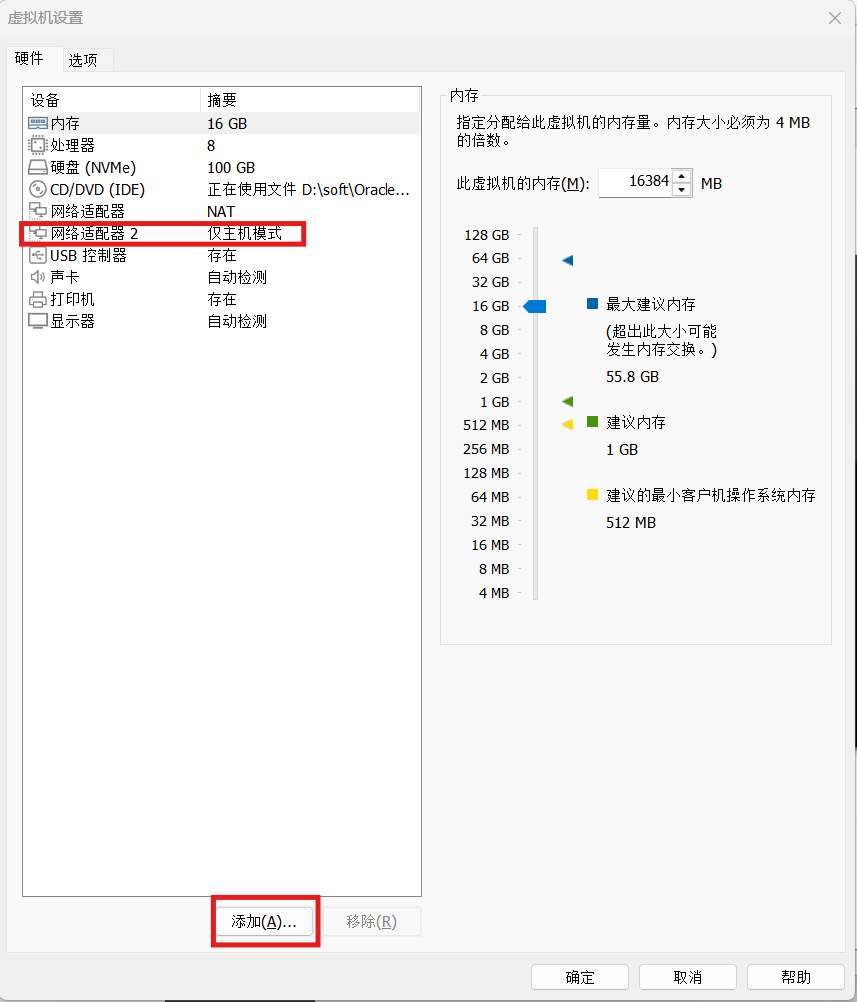
2.5 内存

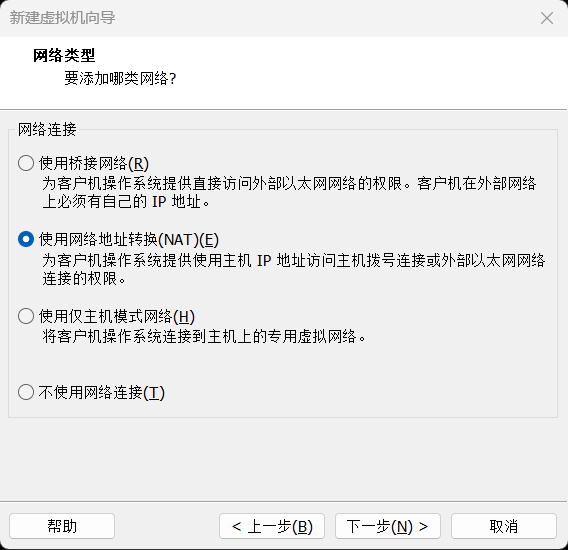
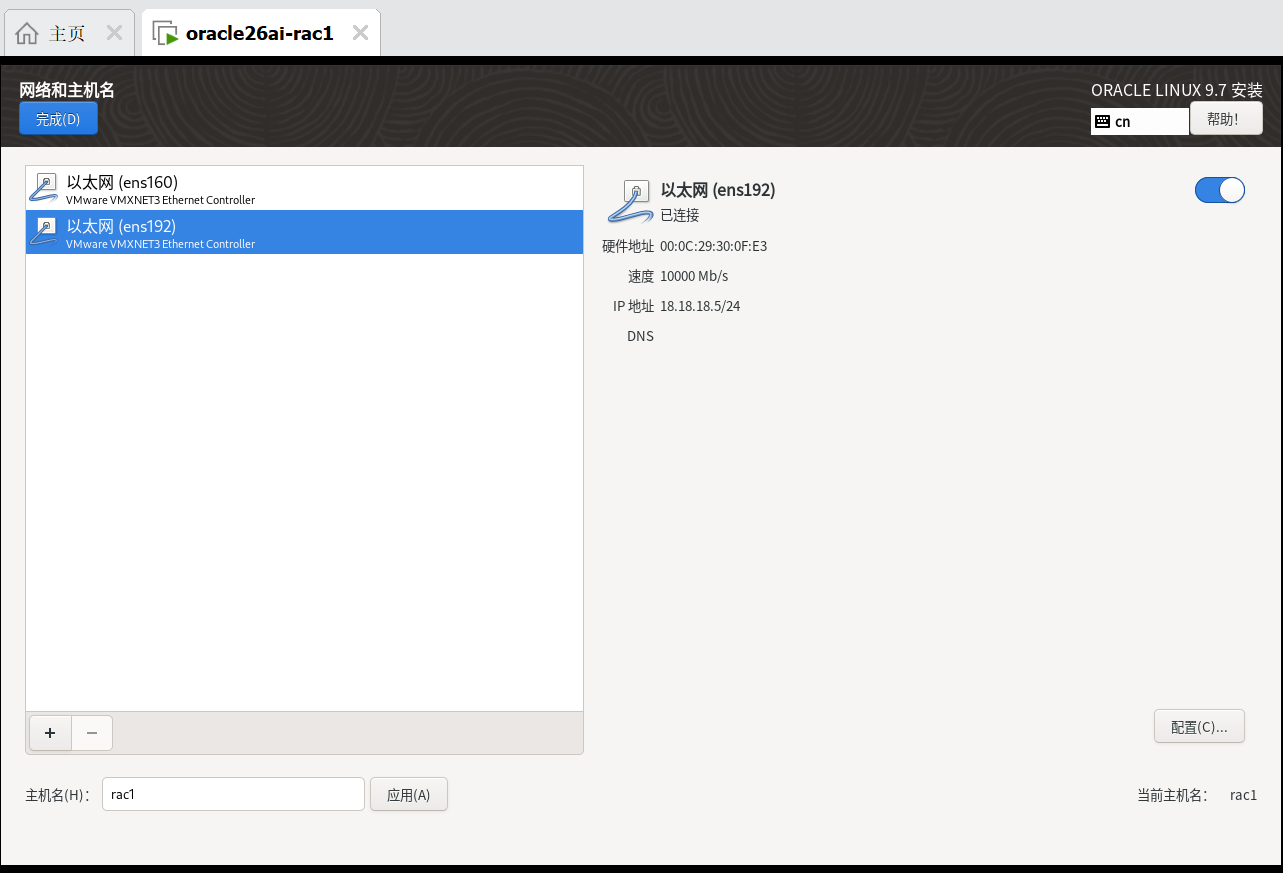
2.6 网卡
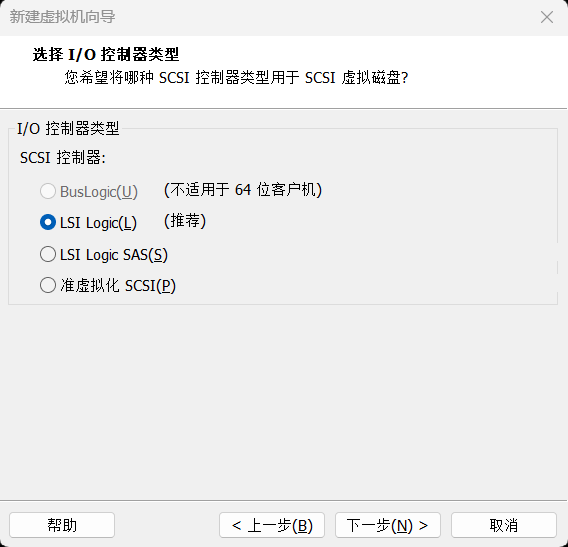
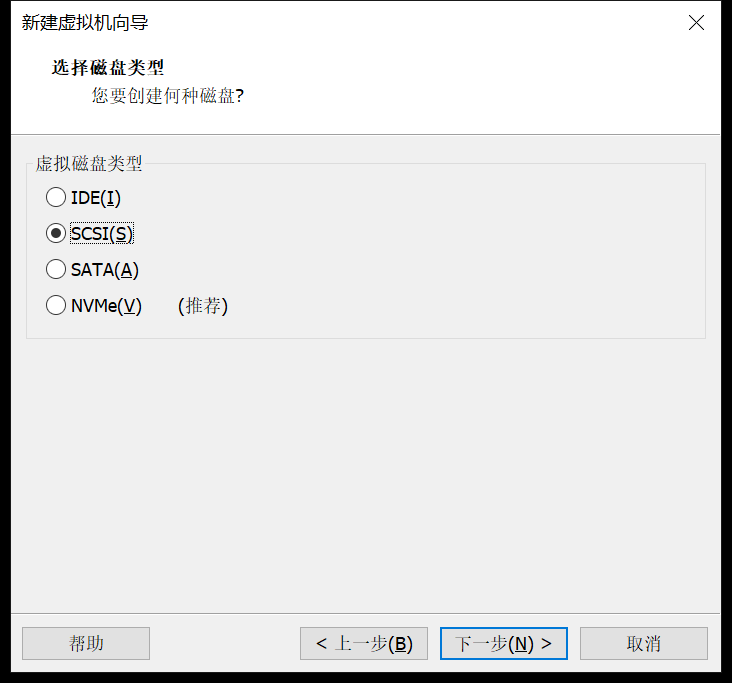
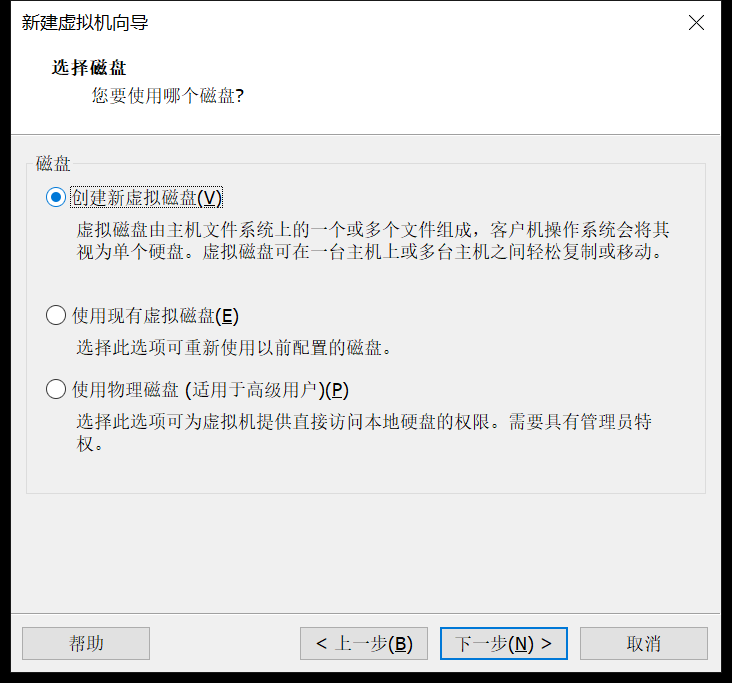
2.7 硬盘

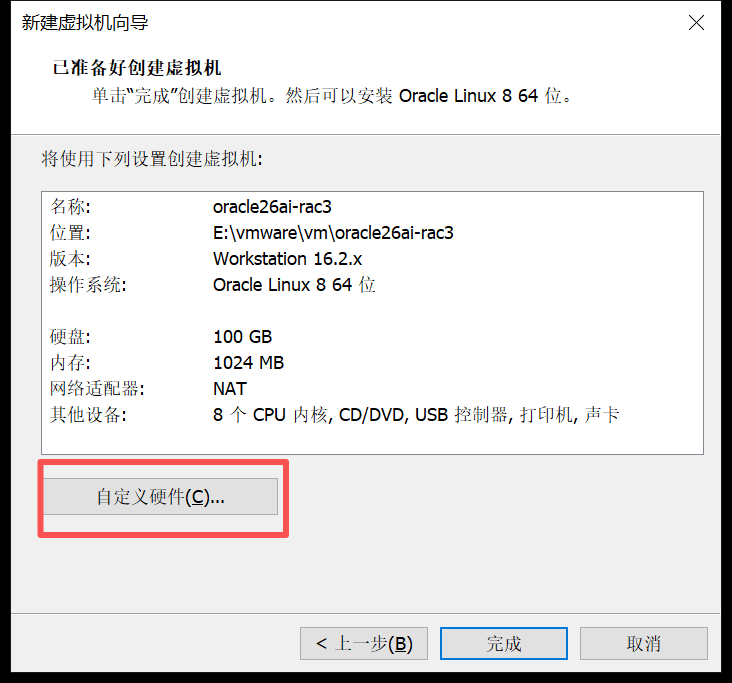
最后选择自定义硬件
2.8 添加网卡
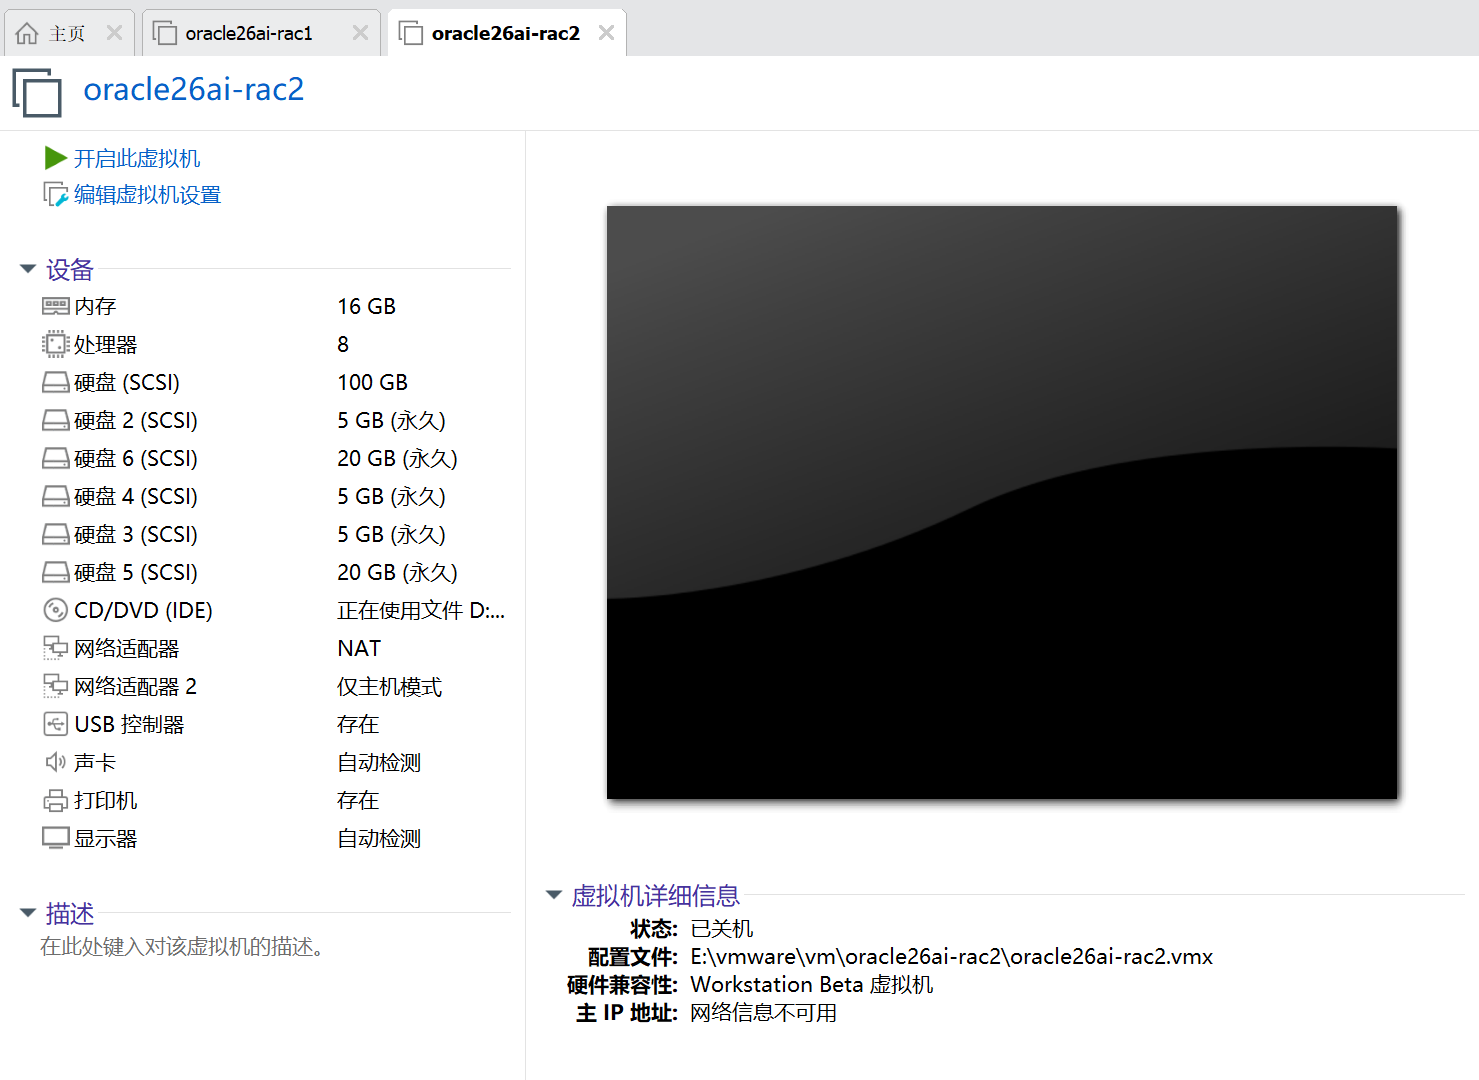
2.9 同样方式创建RAC2节点
省略
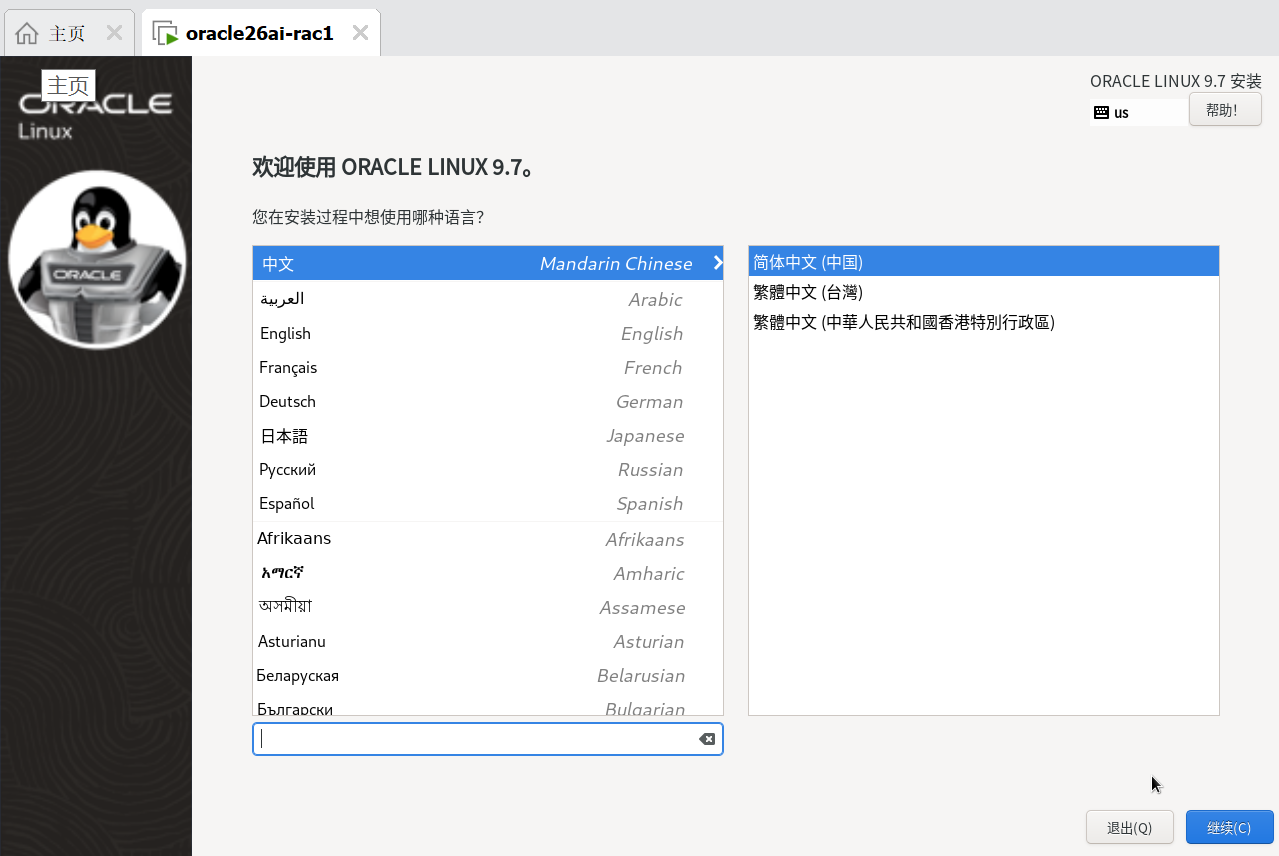
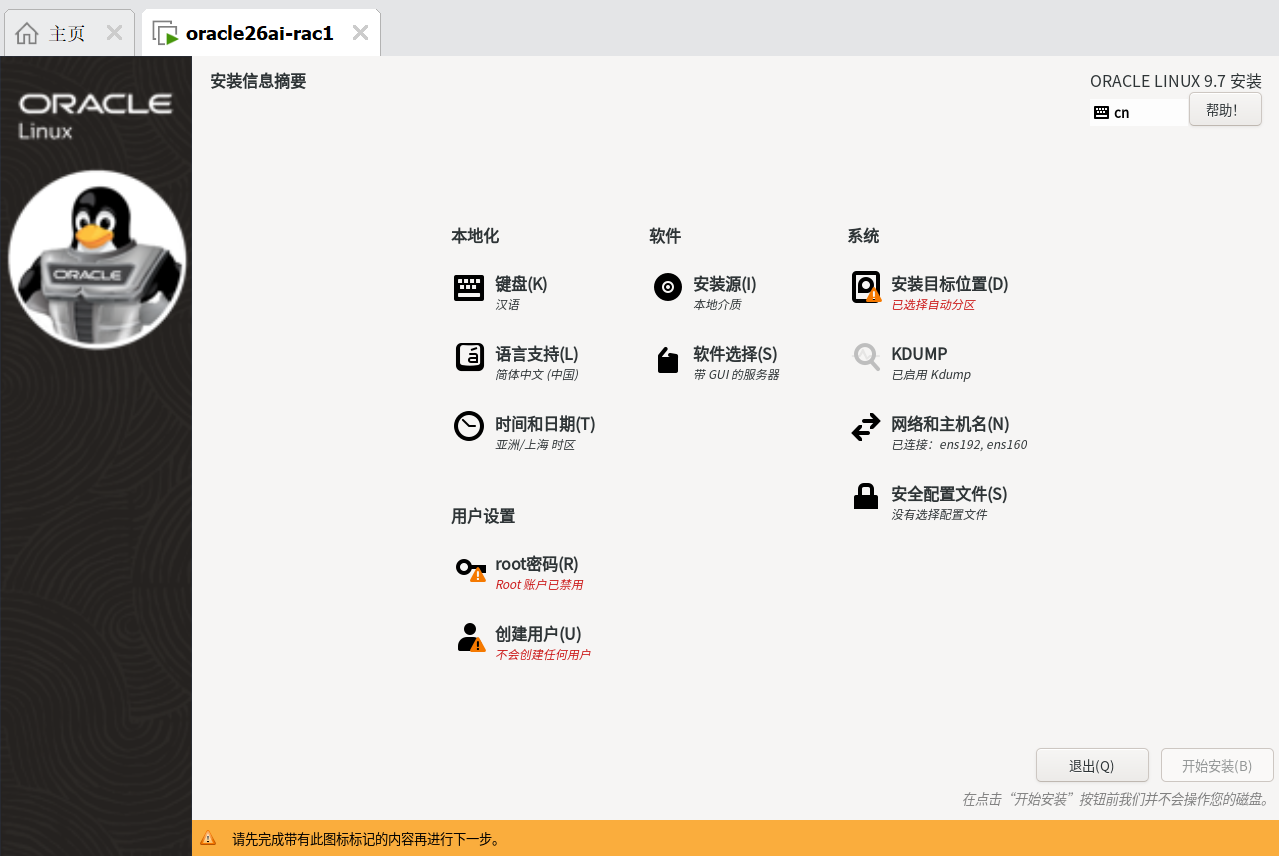
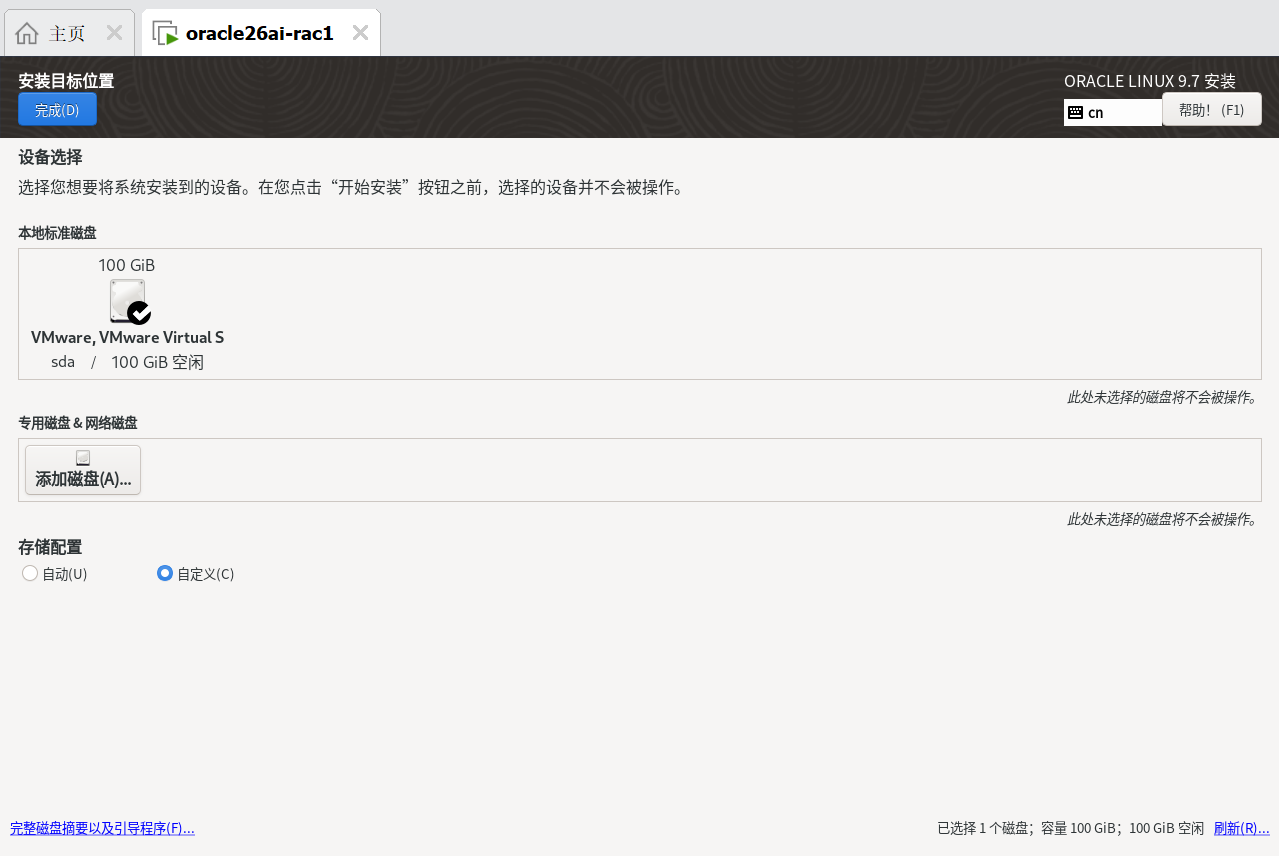
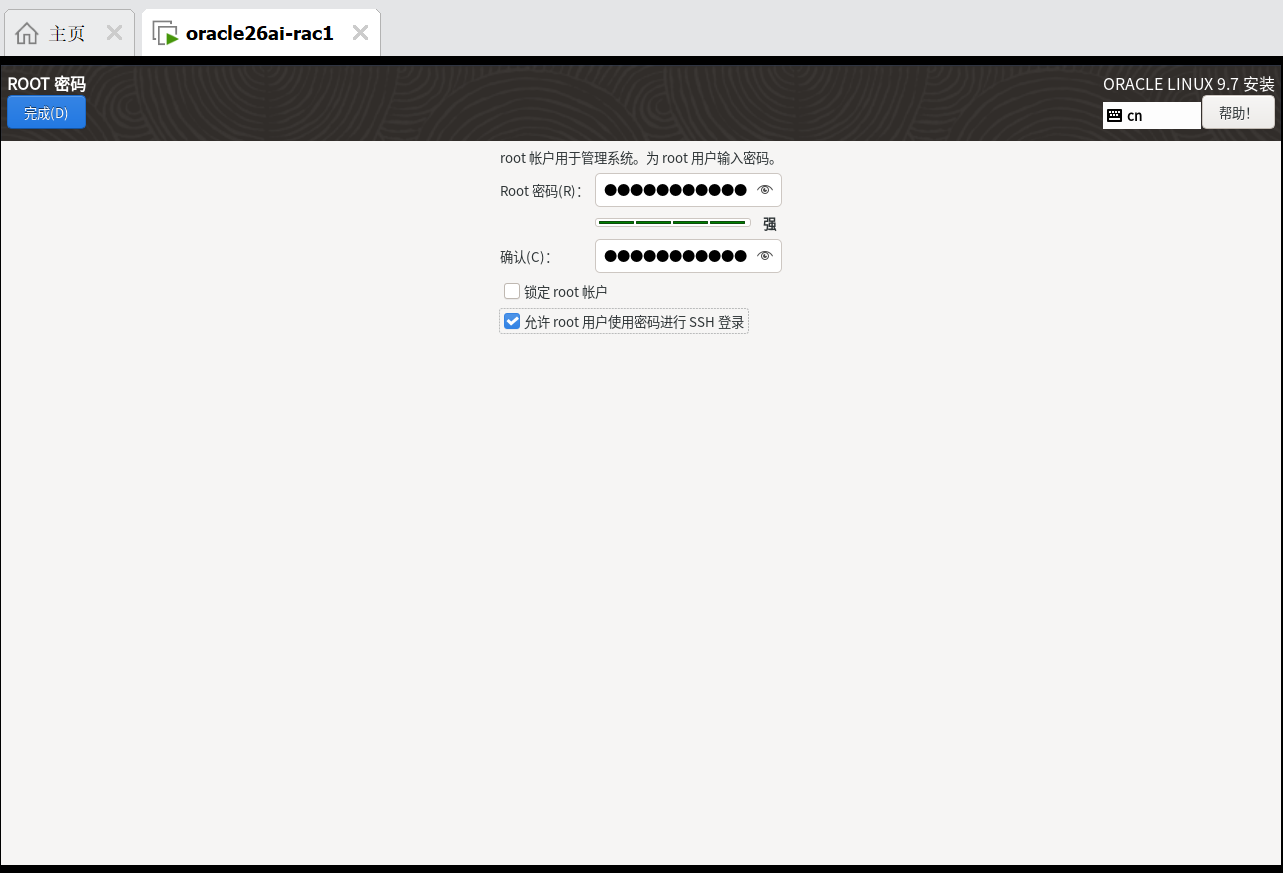
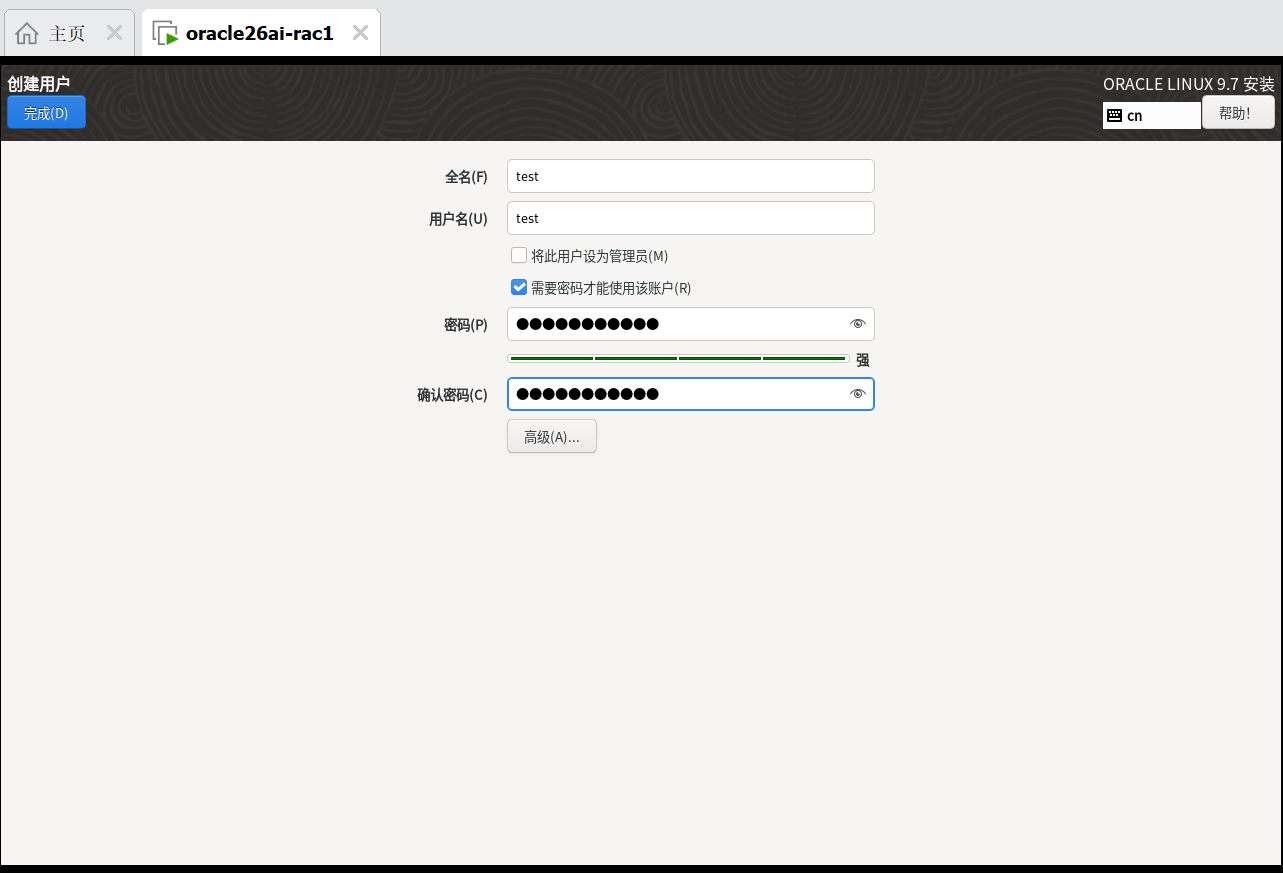
2.10 分别安装操作系统

2.11 安装完成之后,加快SSH登录
--配置LoginGraceTime参数为0, 将timeout wait设置为无限制

cp /etc/ssh/sshd_config /etc/ssh/sshd_config_`date +"%Y%m%d_%H%M%S"` && sed -i '/#LoginGraceTime 2m/ s/#LoginGraceTime 2m/LoginGraceTime 0/' /etc/ssh/sshd_config && grep LoginGraceTime /etc/ssh/sshd_config

--加快SSH登陆速度,禁用DNS

cp /etc/ssh/sshd_config /etc/ssh/sshd_config_`date +"%Y%m%d_%H%M%S"` && sed -i '/#UseDNS yes/ s/#UseDNS yes/UseDNS no/' /etc/ssh/sshd_config && grep UseDNS /etc/ssh/sshd_config
三、共享存储配置
3.1 创建共享磁盘-命令行
D:
cd '.\Program Files (x86)\VMware\VMware Workstation\'
.\vmware-vdiskmanager.exe -c -s 5g -t 2 "E:\vmware\vm\sharedisk\ocrvote1.vmdk"
.\vmware-vdiskmanager.exe -c -s 5g -t 2 "E:\vmware\vm\sharedisk\ocrvote2.vmdk"
.\vmware-vdiskmanager.exe -c -s 5g -t 2 "E:\vmware\vm\sharedisk\ocrvote3.vmdk"
.\vmware-vdiskmanager.exe -c -s 20GB -t 2 "E:\vmware\vm\sharedisk\data1.vmdk"
.\vmware-vdiskmanager.exe -c -s 20GB -t 2 "E:\vmware\vm\sharedisk\data2.vmdk"


执行过程:
Windows PowerShell
版权所有 (C) Microsoft Corporation。保留所有权利。

尝试新的跨平台 PowerShell https://aka.ms/pscore6

PS C:\Windows\system32> D:
PS D:\> cd '.\Program Files (x86)\VMware\VMware Workstation\'
PS D:\Program Files (x86)\VMware\VMware Workstation> .\vmware-vdiskmanager.exe -c -s 5g -t 2 "E:\vmware\vm\sharedisk\ocrvote1.vmdk"
Creating disk 'E:\vmware\vm\sharedisk\ocrvote1.vmdk'
  Create: 100% done.
Virtual disk creation successful.
PS D:\Program Files (x86)\VMware\VMware Workstation> .\vmware-vdiskmanager.exe -c -s 5g -t 2 "E:\vmware\vm\sharedisk\ocrvote2.vmdk"
Creating disk 'E:\vmware\vm\sharedisk\ocrvote2.vmdk'
  Create: 100% done.
Virtual disk creation successful.
PS D:\Program Files (x86)\VMware\VMware Workstation> .\vmware-vdiskmanager.exe -c -s 5g -t 2 "E:\vmware\vm\sharedisk\ocrvote3.vmdk"
Creating disk 'E:\vmware\vm\sharedisk\ocrvote3.vmdk'
  Create: 100% done.
Virtual disk creation successful.
PS D:\Program Files (x86)\VMware\VMware Workstation> .\vmware-vdiskmanager.exe -c -s 20GB -t 2 "E:\vmware\vm\sharedisk\data1.vmdk"
Creating disk 'E:\vmware\vm\sharedisk\data1.vmdk'
  Create: 100% done.
Virtual disk creation successful.
PS D:\Program Files (x86)\VMware\VMware Workstation> .\vmware-vdiskmanager.exe -c -s 20GB -t 2 "E:\vmware\vm\sharedisk\data2.vmdk"
Creating disk 'E:\vmware\vm\sharedisk\data2.vmdk'
  Create: 100% done.
Virtual disk creation successful.
PS D:\Program Files (x86)\VMware\VMware Workstation>


相关命令说明:
vmware-vdiskmanager [选项]
这里的选项你必须包含以下的一些选择项或参数
选项和参数
描述

虚拟磁盘文件的名字。虚拟磁盘文件必须是.vmdk为扩展名。你能够指定一个你想要储存的虚拟磁盘文件的路径。如果你在你的宿主机中映射了网络共享,你也可以提供确切的虚拟磁盘文件的路径信息来创建虚拟磁盘在这个网络共享中

-c
创建虚拟磁盘。你必须用-a, -s 和 -t 并指定选项参数,然后你需要指定所要创建的虚拟磁盘文件的文件名。

-s [GB|MB]
指定虚拟磁盘的大小。确定大小用GB或MB做单位。你必须在创建磁盘时指定其大小。
尽管你必须指定虚拟磁盘的大小,但当你增长它的大小时,你不能用-s这个选项。
可以指定的磁盘大小规定:IDE和SCSI适配器都为最小100MB,最大950GB。

-a [ ide | buslogic | lsilogic ]
指定磁盘适配器的类型。你在创建新的虚拟磁盘时必须指定其类型。选择以下类型之一:
ide —— IDE接口适配器
buslogic —— BusLogic SCSI接口适配器
lsilogic —— LSI Logic SCSI接口适配器


-t [0|1|2|3]
你在创建一个新的虚拟磁盘或者重新配置一个虚拟磁盘时必须指定虚拟磁盘的类型。指定以下类型之一:
0 —— 创建一个包含在单一虚拟文件中的可增长虚拟磁盘
1 —— 创建一个被分割为每个文件2GB大小的可增长虚拟磁盘
2 —— 创建一个包含在单一虚拟文件中的预分配虚拟磁盘
3 —— 创建一个被分割为每个文件2GB大小的预分配虚拟磁盘
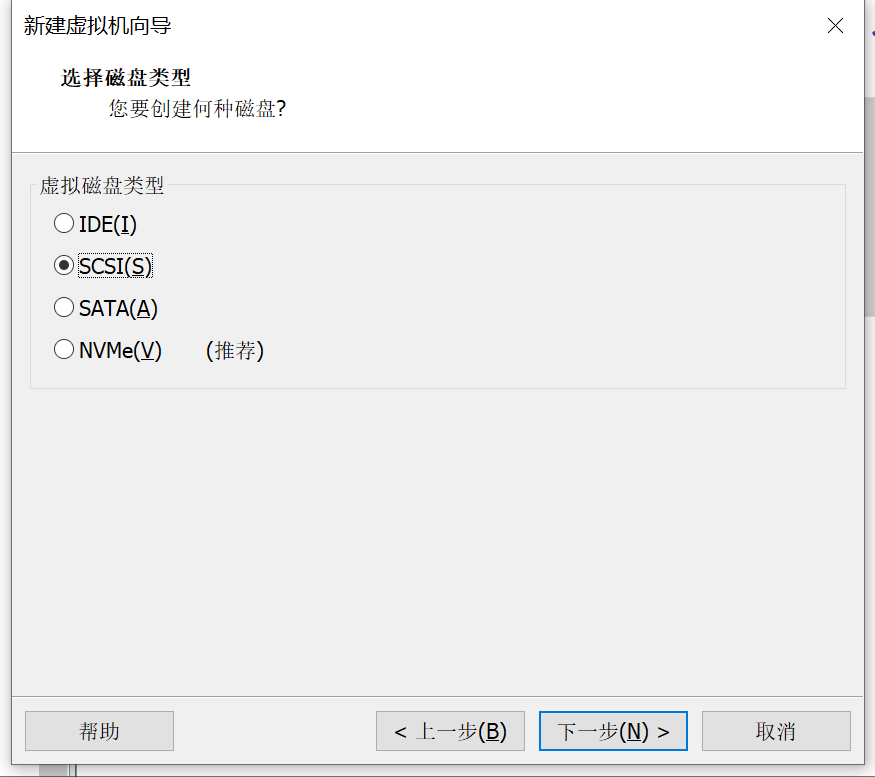
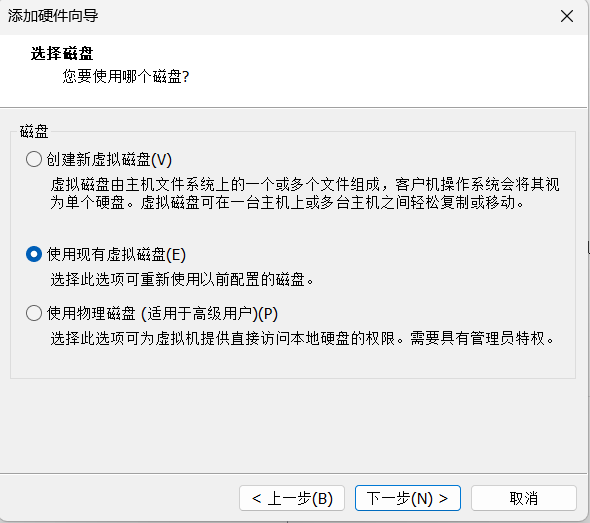
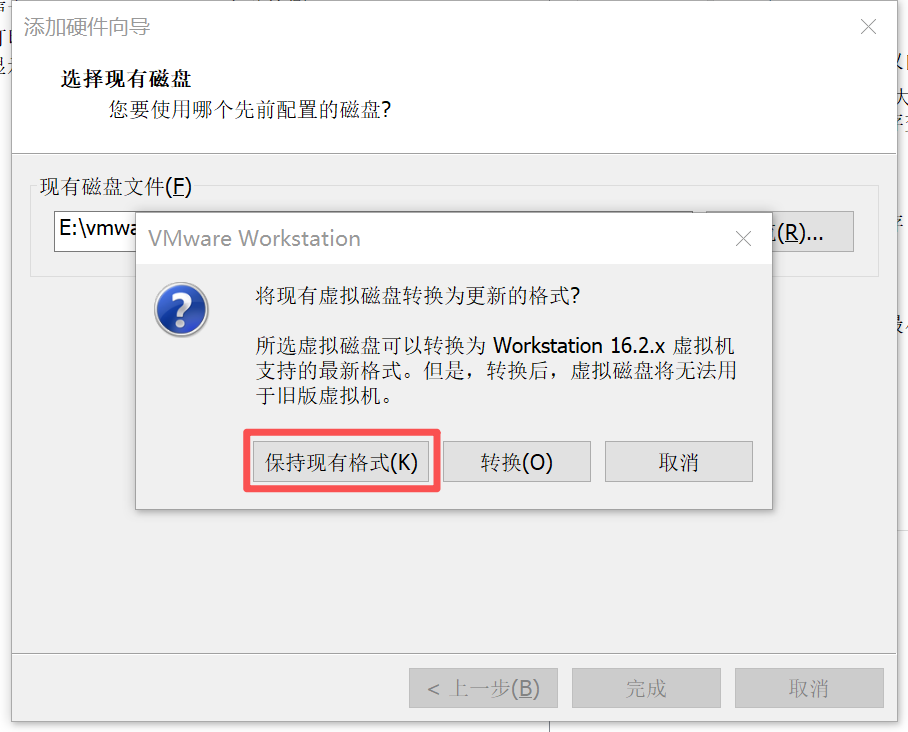
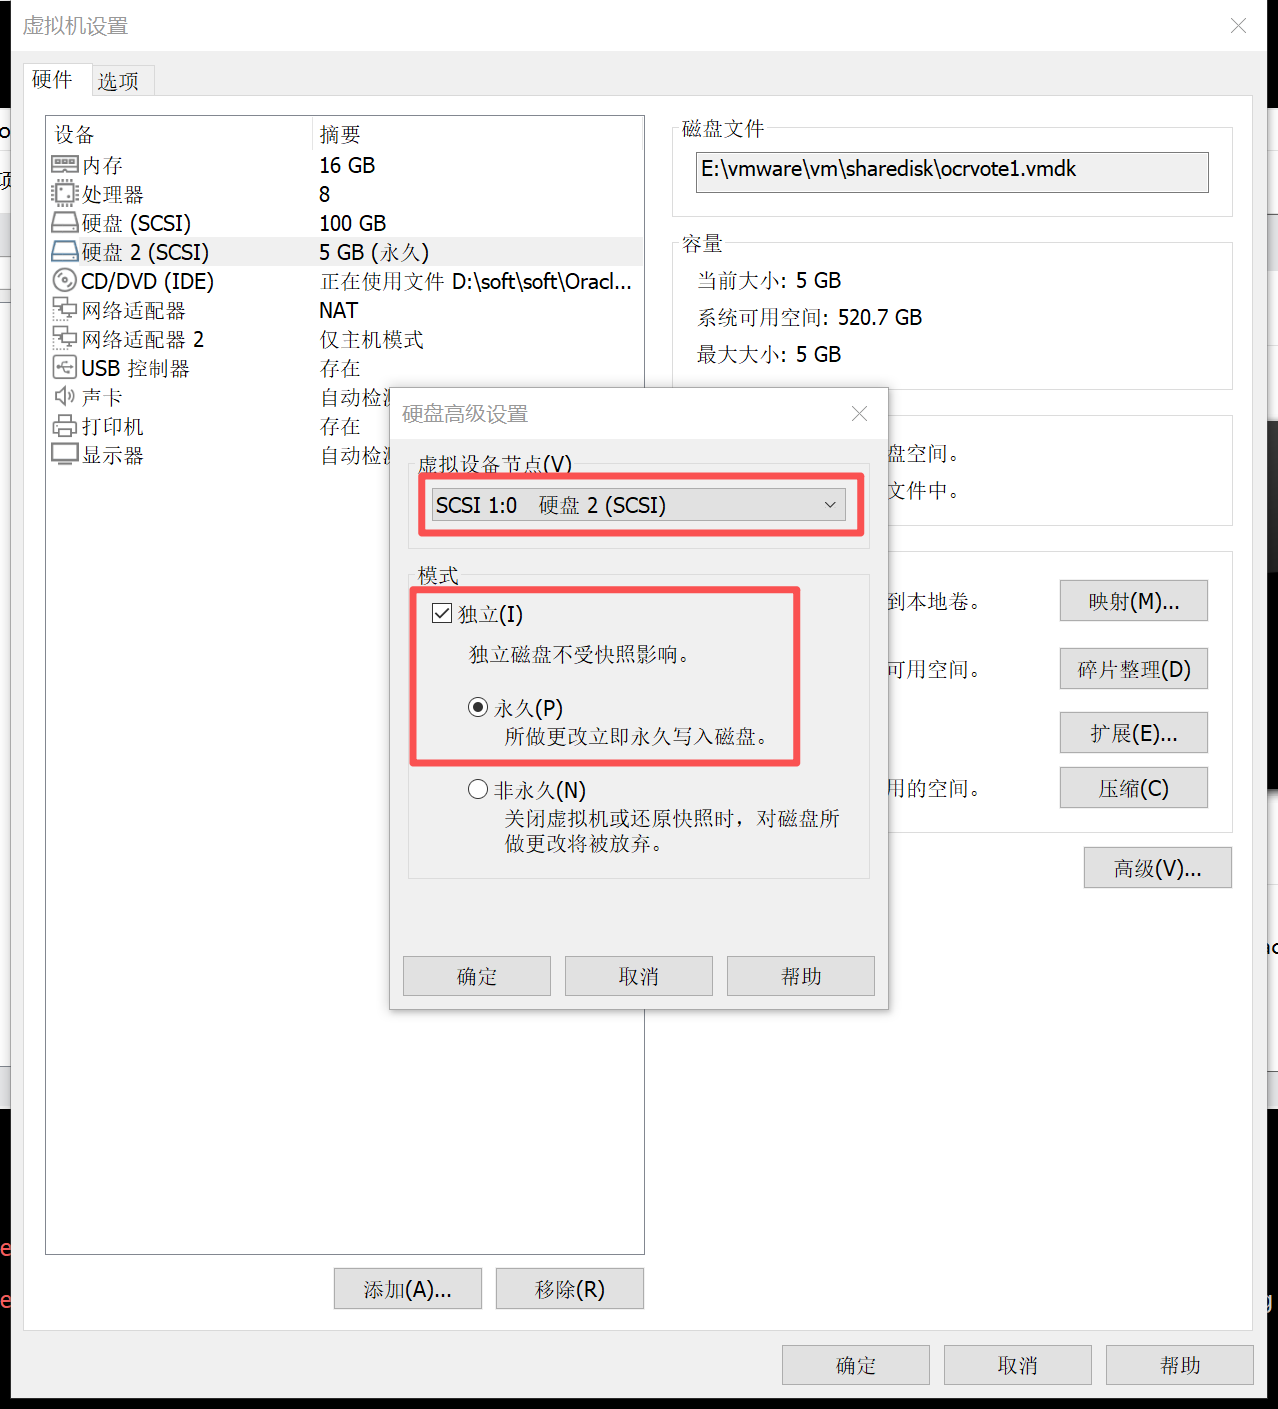
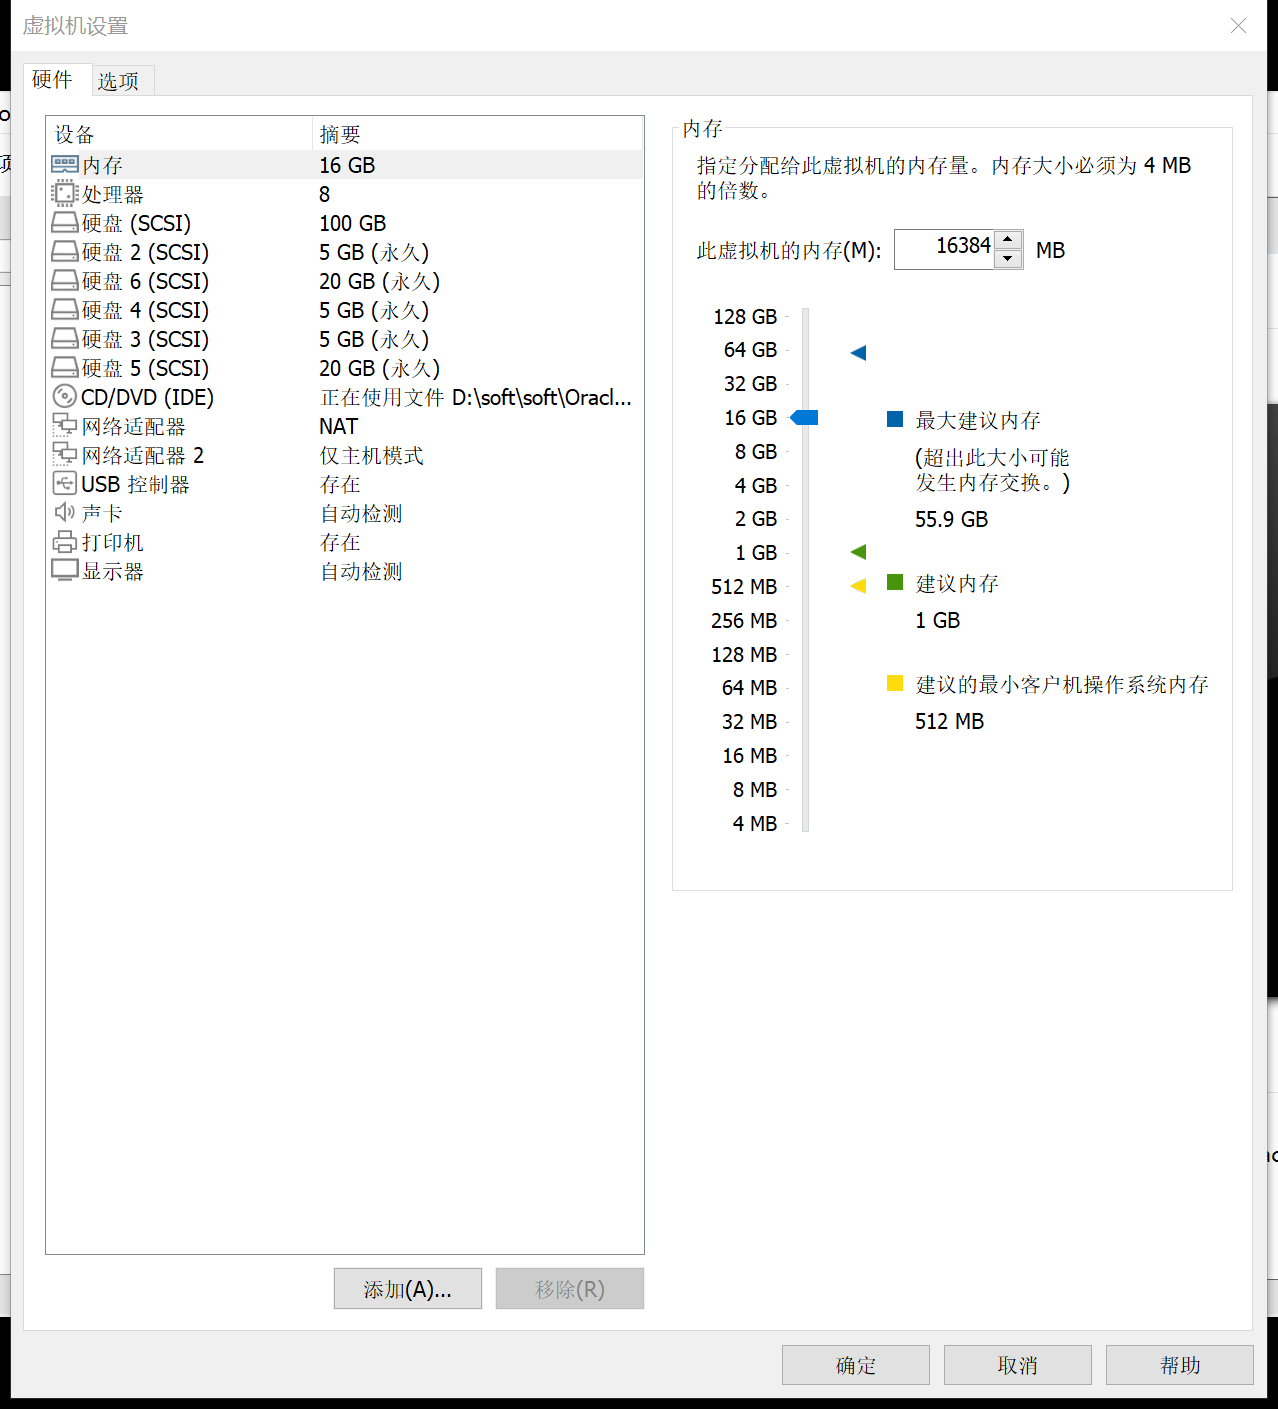
3.2 创建共享磁盘-图形(可选,本次未采用)
通过界面创建方法:
添加硬盘
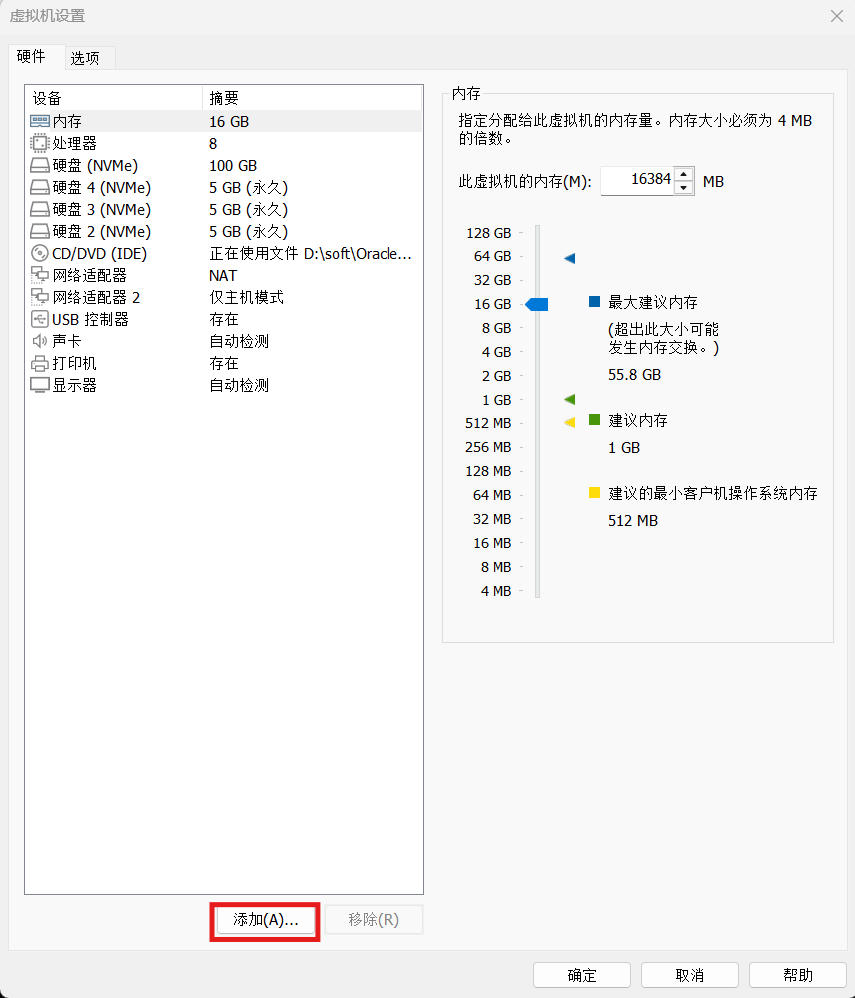


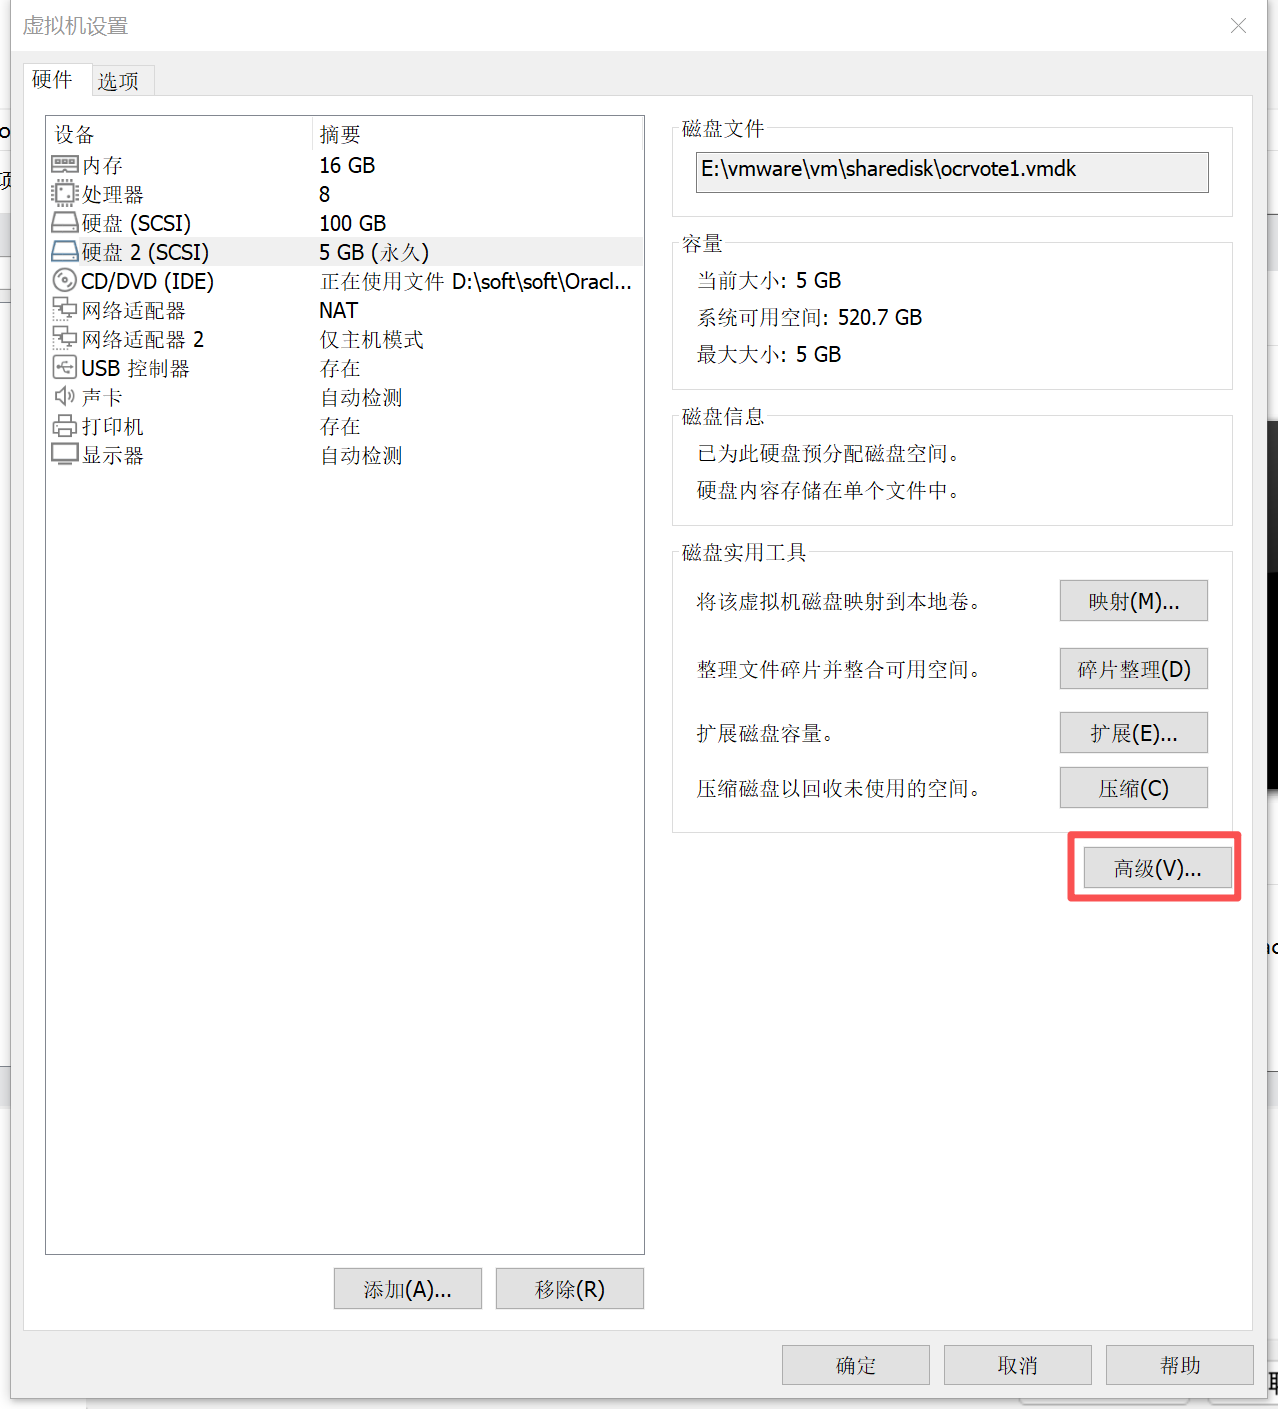
在节点二 添加硬盘
3.3 关闭两台虚拟机,编辑相关vmx文件
#shared disks configure
diskLib.dataCacheMaxSize=0
diskLib.dataCacheMaxReadAheadSize=0
diskLib.dataCacheMinReadAheadSize=0
diskLib.dataCachePageSize=4096
diskLib.maxUnsyncedWrites = "0"
disk.EnableUUID = "TRUE"
disk.locking = "FALSE"
scsi1.sharedBus = "virtual"
scsi1.virtualDev = "lsilogic"
scsi1.present = "TRUE"
scsi1:0.fileName = "E:\vmware\vm\sharedisk\ocrvote1.vmdk"
scsi1:0.mode = "independent-persistent"
scsi1:0.present = "TRUE"
scsi1:4.fileName = "E:\vmware\vm\sharedisk\data2.vmdk"
scsi1:4.mode = "independent-persistent"
scsi1:4.present = "TRUE"
scsi1:2.fileName = "E:\vmware\vm\sharedisk\ocrvote3.vmdk"
scsi1:2.mode = "independent-persistent"
scsi1:2.present = "TRUE"
scsi1:1.fileName = "E:\vmware\vm\sharedisk\ocrvote2.vmdk"
scsi1:1.mode = "independent-persistent"
scsi1:1.present = "TRUE"
scsi1:3.fileName = "E:\vmware\vm\sharedisk\data1.vmdk"
scsi1:3.mode = "independent-persistent"
scsi1:3.present = "TRUE"
3.4 重新启动虚拟机
重新打开虚拟机设置进行确认

四、26ai RAC安装准备工作
4.1 硬件配置和系统情况
4.1.1 检查操作系统
cat /etc/oracle-release

[root@rac1 ~]# cat /etc/oracle-release
Oracle Linux Server release 9.7
[root@rac1 ~]#

[root@rac2 ~]# cat /etc/oracle-release
Oracle Linux Server release 9.7
[root@rac2 ~]#

[root@rac1 ~]# dmidecode |grep Name
        Product Name: VMware Virtual Platform
        Product Name: 440BX Desktop Reference Platform
        Manufacturer Name: Intel
[root@rac1 ~]#

[root@rac2 ~]# dmidecode |grep Name
        Product Name: VMware Virtual Platform
        Product Name: 440BX Desktop Reference Platform
        Manufacturer Name: Intel
[root@rac2 ~]#


CPU:
lscpu

[root@rac1 ~]# lscpu
架构:                       x86_64
  CPU 运行模式:             32-bit, 64-bit
  Address sizes:             45 bits physical, 48 bits virtual
  字节序:                   Little Endian
CPU:                         8
  在线 CPU 列表:            0-7
厂商 ID:                    AuthenticAMD
  BIOS Vendor ID:            AuthenticAMD
  型号名称:                 AMD Ryzen 9 5950X 16-Core Processor
    BIOS Model name:         AMD Ryzen 9 5950X 16-Core Processor
    CPU 系列:               25
    型号:                   33
    每个核的线程数:         1
    每个座的核数:           4
    座:                     2
    步进:                   2
    BogoMIPS:               6799.98
    标记:                   fpu vme de pse tsc msr pae mce cx8 apic sep mtrr pge mca cmov pat pse36 clflush mmx fxsr sse sse2 ht syscall nx mmxext pdpe1gb rdtscp lm constant_tsc rep_good nopl xtopology tsc_reliable nonstop_tsc cpuid extd_ap
                             icid tsc_known_freq pni pclmulqdq ssse3 fma cx16 sse4_1 sse4_2 x2apic movbe popcnt aes xsave avx f16c rdrand hypervisor lahf_lm cmp_legacy cr8_legacy abm sse4a misalignsse 3dnowprefetch osvw topoext ibpb vmmcall
                             fsgsbase bmi1 avx2 smep bmi2 erms rdseed adx smap clflushopt clwb sha_ni xsaveopt xsavec xgetbv1 xsaves clzero arat umip vaes vpclmulqdq rdpid overflow_recov succor fsrm
Virtualization features:
  超管理器厂商:             VMware
  虚拟化类型:               完全
Caches (sum of all):
  L1d:                       256 KiB (8 instances)
  L1i:                       256 KiB (8 instances)
  L2:                        4 MiB (8 instances)
  L3:                        64 MiB (2 instances)
NUMA:
  NUMA 节点:                1
  NUMA 节点0 CPU:           0-7
Vulnerabilities:
  Gather data sampling:      Not affected
  Indirect target selection: Not affected
  Itlb multihit:             Not affected
  L1tf:                      Not affected
  Mds:                       Not affected
  Meltdown:                  Not affected
  Mmio stale data:           Not affected
  Reg file data sampling:    Not affected
  Retbleed:                  Not affected
  Spec rstack overflow:      Vulnerable: Safe RET, no microcode
  Spec store bypass:         Vulnerable
  Spectre v1:                Mitigation; usercopy/swapgs barriers and __user pointer sanitization
  Spectre v2:                Mitigation; Retpolines; IBPB conditional; STIBP disabled; RSB filling; PBRSB-eIBRS Not affected; BHI Not affected
  Srbds:                     Not affected
  Tsa:                       Vulnerable: Clear CPU buffers attempted, no microcode
  Tsx async abort:           Not affected
  Vmscape:                   Not affected
[root@rac1 ~]#


[root@rac2 ~]# lscpu
架构:                       x86_64
  CPU 运行模式:             32-bit, 64-bit
  Address sizes:             45 bits physical, 48 bits virtual
  字节序:                   Little Endian
CPU:                         8
  在线 CPU 列表:            0-7
厂商 ID:                    AuthenticAMD
  BIOS Vendor ID:            AuthenticAMD
  型号名称:                 AMD Ryzen 9 5950X 16-Core Processor
    BIOS Model name:         AMD Ryzen 9 5950X 16-Core Processor
    CPU 系列:               25
    型号:                   33
    每个核的线程数:         1
    每个座的核数:           4
    座:                     2
    步进:                   2
    BogoMIPS:               6799.98
    标记:                   fpu vme de pse tsc msr pae mce cx8 apic sep mtrr pge mca cmov pat pse36 clflush mmx fxsr sse sse2 ht syscall nx mmxext pdpe1gb rdtscp lm constant_tsc rep_good nopl xtopology tsc_reliable nonstop_tsc cpuid extd_ap
                             icid tsc_known_freq pni pclmulqdq ssse3 fma cx16 sse4_1 sse4_2 x2apic movbe popcnt aes xsave avx f16c rdrand hypervisor lahf_lm cmp_legacy cr8_legacy abm sse4a misalignsse 3dnowprefetch osvw topoext ibpb vmmcall
                             fsgsbase bmi1 avx2 smep bmi2 erms rdseed adx smap clflushopt clwb sha_ni xsaveopt xsavec xgetbv1 xsaves clzero arat umip vaes vpclmulqdq rdpid overflow_recov succor fsrm
Virtualization features:
  超管理器厂商:             VMware
  虚拟化类型:               完全
Caches (sum of all):
  L1d:                       256 KiB (8 instances)
  L1i:                       256 KiB (8 instances)
  L2:                        4 MiB (8 instances)
  L3:                        64 MiB (2 instances)
NUMA:
  NUMA 节点:                1
  NUMA 节点0 CPU:           0-7
Vulnerabilities:
  Gather data sampling:      Not affected
  Indirect target selection: Not affected
  Itlb multihit:             Not affected
  L1tf:                      Not affected
  Mds:                       Not affected
  Meltdown:                  Not affected
  Mmio stale data:           Not affected
  Reg file data sampling:    Not affected
  Retbleed:                  Not affected
  Spec rstack overflow:      Vulnerable: Safe RET, no microcode
  Spec store bypass:         Vulnerable
  Spectre v1:                Mitigation; usercopy/swapgs barriers and __user pointer sanitization
  Spectre v2:                Mitigation; Retpolines; IBPB conditional; STIBP disabled; RSB filling; PBRSB-eIBRS Not affected; BHI Not affected
  Srbds:                     Not affected
  Tsa:                       Vulnerable: Clear CPU buffers attempted, no microcode
  Tsx async abort:           Not affected
  Vmscape:                   Not affected
[root@rac2 ~]#
4.1.2 检查内存
dmidecode|grep -A5 "Memory Device"|grep Size|grep -v No |grep -v Range
free -h
grep MemTotal /proc/meminfo | awk '{print $2}'

[root@rac1 ~]# dmidecode|grep -A5 "Memory Device"|grep Size|grep -v No |grep -v Range
        Size: 16 GB
[root@rac1 ~]# free -h
               total        used        free      shared  buff/cache   available
Mem:            15Gi       941Mi        14Gi        15Mi       391Mi        14Gi
Swap:           16Gi          0B        16Gi
[root@rac1 ~]# grep MemTotal /proc/meminfo | awk '{print $2}'
16370520
[root@rac1 ~]#


[root@rac2 ~]# dmidecode|grep -A5 "Memory Device"|grep Size|grep -v No |grep -v Range
        Size: 16 GB
[root@rac2 ~]# free -h
               total        used        free      shared  buff/cache   available
Mem:            15Gi       933Mi        14Gi        17Mi       394Mi        14Gi
Swap:           16Gi          0B        16Gi
[root@rac2 ~]# grep MemTotal /proc/meminfo | awk '{print $2}'
16370520
[root@rac2 ~]#
4.1.3 检查swap
free -h
grep SwapTotal /proc/meminfo | awk '{print $2}'

[root@rac1 ~]# free -h
               total        used        free      shared  buff/cache   available
Mem:            15Gi       941Mi        14Gi        15Mi       391Mi        14Gi
Swap:           16Gi          0B        16Gi
[root@rac1 ~]# grep MemTotal /proc/meminfo | awk '{print $2}'
16370520
[root@rac1 ~]#


[root@rac2 ~]# free -h
               total        used        free      shared  buff/cache   available
Mem:            15Gi       933Mi        14Gi        17Mi       394Mi        14Gi
Swap:           16Gi          0B        16Gi
[root@rac2 ~]# grep MemTotal /proc/meminfo | awk '{print $2}'
16370520
[root@rac2 ~]#
4.1.4 检查/tmp
df -h /tmp

[root@rac1 ~]# df -h /tmp
文件系统             容量  已用  可用 已用% 挂载点
/dev/mapper/ol-root   83G  5.4G   78G    7% /
[root@rac1 ~]#


[root@rac2 ~]# df -h /tmp
文件系统             容量  已用  可用 已用% 挂载点
/dev/mapper/ol-root   83G  5.4G   78G    7% /
[root@rac2 ~]#
4.1.4 检查时间和时区
检查时间和时区
设置时区:
timedatectl set-timezone "Asia/Shanghai" && timedatectl status|grep Local

[root@rac1 ~]# date
2026年 02月 09日 星期一 11:30:26 CST
[root@rac1 ~]#

[root@rac2 ~]# date
2026年 02月 09日 星期一 11:30:29 CST
[root@rac2 ~]#


时区:
[root@rac1 ~]# timedatectl status|grep Local
               Local time: 一 2026-02-09 12:55:14 CST
[root@rac1 ~]# date -R
Mon, 09 Feb 2026 12:55:18 +0800
[root@rac1 ~]# timedatectl | grep "Asia/Shanghai"
                Time zone: Asia/Shanghai (CST, +0800)
[root@rac1 ~]#

[root@rac2 ~]# timedatectl status|grep Local
               Local time: 一 2026-02-09 12:54:53 CST
[root@rac2 ~]# date -R
Mon, 09 Feb 2026 12:54:57 +0800
[root@rac2 ~]# timedatectl | grep "Asia/Shanghai"
                Time zone: Asia/Shanghai (CST, +0800)
[root@rac2 ~]#
4.2 主机名和hosts文件
4.2.1 设置和检查主机名
[root@rac1 ~]# hostnamectl status
 Static hostname: rac1
       Icon name: computer-vm
         Chassis: vm 🖴
      Machine ID: 4388f15b239441fabbac3930963e9c28
         Boot ID: db76f06d736145649a7330a03095e6c5
  Virtualization: vmware
Operating System: Oracle Linux Server 9.7
     CPE OS Name: cpe:/o:oracle:linux:9:7:server
          Kernel: Linux 6.12.0-105.51.5.el9uek.x86_64
    Architecture: x86-64
 Hardware Vendor: VMware, Inc.
  Hardware Model: VMware Virtual Platform
Firmware Version: 6.00
[root@rac1 ~]#

[root@rac2 ~]# hostnamectl status
 Static hostname: rac2
       Icon name: computer-vm
         Chassis: vm 🖴
      Machine ID: 91bdf6eceebb415ba1ed3fffe804bdff
         Boot ID: 947004c2a5bb4a538af6a148783e8058
  Virtualization: vmware
Operating System: Oracle Linux Server 9.7
     CPE OS Name: cpe:/o:oracle:linux:9:7:server
          Kernel: Linux 6.12.0-105.51.5.el9uek.x86_64
    Architecture: x86-64
 Hardware Vendor: VMware, Inc.
  Hardware Model: VMware Virtual Platform
Firmware Version: 6.00
[root@rac2 ~]#

设置方法:
hostnamectl set-hostname rac1
hostnamectl set-hostname rac2
主机名允许使用小写字母、数字和中横线(-),并且只能以小写字母开头。
4.2.2 调整hosts文件
cp /etc/hosts /etc/hosts_`date +"%Y%m%d_%H%M%S"`
echo '

#public ip
192.168.18.5     rac1
192.168.18.6     rac2
#private ip
18.18.18.5       rac1-priv
18.18.18.6       rac2-priv
#vip
192.168.18.7     rac1-vip
192.168.18.8     rac2-vip
#scanip
192.168.18.9     rac-scan

'>> /etc/hosts

[root@rac1 ~]# cat /etc/hosts
127.0.0.1   localhost localhost.localdomain localhost4 localhost4.localdomain4
::1         localhost localhost.localdomain localhost6 localhost6.localdomain6


#public ip
192.168.18.5     rac1
192.168.18.6     rac2
#private ip
18.18.18.5       rac1-priv
18.18.18.6       rac2-priv
#vip
192.168.18.7     rac1-vip
192.168.18.8     rac2-vip
#scanip
192.168.18.9     rac-scan


[root@rac1 ~]#


[root@rac2 ~]# cat /etc/hosts
127.0.0.1   localhost localhost.localdomain localhost4 localhost4.localdomain4
::1         localhost localhost.localdomain localhost6 localhost6.localdomain6


#public ip
192.168.18.5     rac1
192.168.18.6     rac2
#private ip
18.18.18.5       rac1-priv
18.18.18.6       rac2-priv
#vip
192.168.18.7     rac1-vip
192.168.18.8     rac2-vip
#scanip
192.168.18.9     rac-scan


[root@rac2 ~]#
4.3 网卡(虚拟)配置、netwok文件
4.3.1 (可选)禁用虚拟网卡
systemctl stop libvirtd
systemctl disable libvirtd

[root@rac1 ~]# systemctl stop libvirtd
Failed to stop libvirtd.service: Unit libvirtd.service not loaded.
[root@rac1 ~]# systemctl disable libvirtd
Failed to disable unit: Unit file libvirtd.service does not exist.
[root@rac1 ~]#
Note:对于虚拟机可选,需要重启操作系统
4.3.2 检查节点的网卡名和IP
[root@rac1 ~]# ip a
1: lo: <LOOPBACK,UP,LOWER_UP> mtu 65536 qdisc noqueue state UNKNOWN group default qlen 1000
    link/loopback 00:00:00:00:00:00 brd 00:00:00:00:00:00
    inet 127.0.0.1/8 scope host lo
       valid_lft forever preferred_lft forever
    inet6 ::1/128 scope host
       valid_lft forever preferred_lft forever
2: ens160: <BROADCAST,MULTICAST,UP,LOWER_UP> mtu 1500 qdisc mq state UP group default qlen 1000
    link/ether 00:0c:29:30:0f:d9 brd ff:ff:ff:ff:ff:ff
    altname enp3s0
    inet 192.168.18.5/24 brd 192.168.18.255 scope global noprefixroute ens160
       valid_lft forever preferred_lft forever
3: ens192: <BROADCAST,MULTICAST,UP,LOWER_UP> mtu 1500 qdisc mq state UP group default qlen 1000
    link/ether 00:0c:29:30:0f:e3 brd ff:ff:ff:ff:ff:ff
    altname enp11s0
    inet 18.18.18.5/24 brd 18.18.18.255 scope global noprefixroute ens192
       valid_lft forever preferred_lft forever
[root@rac1 ~]#


[root@rac2 ~]# ip a
1: lo: <LOOPBACK,UP,LOWER_UP> mtu 65536 qdisc noqueue state UNKNOWN group default qlen 1000
    link/loopback 00:00:00:00:00:00 brd 00:00:00:00:00:00
    inet 127.0.0.1/8 scope host lo
       valid_lft forever preferred_lft forever
    inet6 ::1/128 scope host
       valid_lft forever preferred_lft forever
2: ens160: <BROADCAST,MULTICAST,UP,LOWER_UP> mtu 1500 qdisc mq state UP group default qlen 1000
    link/ether 00:0c:29:cc:64:2d brd ff:ff:ff:ff:ff:ff
    altname enp3s0
    inet 192.168.18.6/24 brd 192.168.18.255 scope global noprefixroute ens160
       valid_lft forever preferred_lft forever
3: ens192: <BROADCAST,MULTICAST,UP,LOWER_UP> mtu 1500 qdisc mq state UP group default qlen 1000
    link/ether 00:0c:29:cc:64:37 brd ff:ff:ff:ff:ff:ff
    altname enp11s0
    inet 18.18.18.6/24 brd 18.18.18.255 scope global noprefixroute ens192
       valid_lft forever preferred_lft forever
[root@rac2 ~]#


需要确认两个节点的网卡名一致,否者安装会出现问题。
如何两个节点名称不一致,可以通过如下方式修改某一个节点

[root@rac1 ~]# cd /etc/NetworkManager/system-connections/
[root@rac1 system-connections]# ll
总用量 8
-rw-------. 1 root root 299  2月  9 10:29 ens160.nmconnection
-rw-------. 1 root root 258  2月  9 10:29 ens192.nmconnection
[root@rac1 system-connections]# mv ens160.nmconnection ens33.nmconnection
# 编辑新配置文件,指定新网卡名和静态IP
vi ens33.nmconnection
# 设置配置文件权限为600(仅root可读可写)
chmod 600 ens33.nmconnection

# 创建/编辑udev规则文件(70开头表示规则优先级,确保优先生效)
vi /etc/udev/rules.d/70-persistent-net.rules
SUBSYSTEM=="net", ACTION=="add", ATTR{address}=="00:0c:29:19:08:da", NAME="ens33"

# 重新加载udev规则(无需重启系统,让新规则生效)
udevadm control --reload-rules
udevadm trigger

# 重新加载NetworkManager配置(读取修改后的ens33.nmconnection)
nmcli connection reload

# 重启系统(核心!让网卡重新被识别,udev规则生效)
reboot
4.3.3 测试连通性
[root@rac1 ~]# ping rac1
PING rac1 (192.168.18.5) 56(84) 比特的数据。
64 比特,来自 rac1 (192.168.18.5): icmp_seq=1 ttl=64 时间=0.037 毫秒
64 比特,来自 rac1 (192.168.18.5): icmp_seq=2 ttl=64 时间=0.049 毫秒
64 比特,来自 rac1 (192.168.18.5): icmp_seq=3 ttl=64 时间=0.048 毫秒
^C
--- rac1 ping 统计 ---
已发送 3 个包, 已接收 3 个包, 0% packet loss, time 2085ms
rtt min/avg/max/mdev = 0.037/0.044/0.049/0.005 ms
[root@rac1 ~]# ping rac2
PING rac2 (192.168.18.6) 56(84) 比特的数据。
64 比特,来自 rac2 (192.168.18.6): icmp_seq=1 ttl=64 时间=0.577 毫秒
64 比特,来自 rac2 (192.168.18.6): icmp_seq=2 ttl=64 时间=0.449 毫秒
64 比特,来自 rac2 (192.168.18.6): icmp_seq=3 ttl=64 时间=0.310 毫秒
^C
--- rac2 ping 统计 ---
已发送 3 个包, 已接收 3 个包, 0% packet loss, time 2036ms
rtt min/avg/max/mdev = 0.310/0.445/0.577/0.109 ms
[root@rac1 ~]# ping rac1-priv
PING rac1-priv (18.18.18.5) 56(84) 比特的数据。
64 比特,来自 rac1-priv (18.18.18.5): icmp_seq=1 ttl=64 时间=0.030 毫秒
64 比特,来自 rac1-priv (18.18.18.5): icmp_seq=2 ttl=64 时间=0.047 毫秒
64 比特,来自 rac1-priv (18.18.18.5): icmp_seq=3 ttl=64 时间=0.045 毫秒
^C
--- rac1-priv ping 统计 ---
已发送 3 个包, 已接收 3 个包, 0% packet loss, time 2062ms
rtt min/avg/max/mdev = 0.030/0.040/0.047/0.007 ms
[root@rac1 ~]# ping rac2-priv
PING rac2-priv (18.18.18.6) 56(84) 比特的数据。
64 比特,来自 rac2-priv (18.18.18.6): icmp_seq=1 ttl=64 时间=0.838 毫秒
64 比特,来自 rac2-priv (18.18.18.6): icmp_seq=2 ttl=64 时间=0.336 毫秒
64 比特,来自 rac2-priv (18.18.18.6): icmp_seq=3 ttl=64 时间=0.285 毫秒
^C
--- rac2-priv ping 统计 ---
已发送 3 个包, 已接收 3 个包, 0% packet loss, time 2052ms
rtt min/avg/max/mdev = 0.285/0.486/0.838/0.249 ms
[root@rac1 ~]#


[root@rac2 ~]# ping rac1
PING rac1 (192.168.18.5) 56(84) 比特的数据。
64 比特,来自 rac1 (192.168.18.5): icmp_seq=1 ttl=64 时间=0.361 毫秒
64 比特,来自 rac1 (192.168.18.5): icmp_seq=2 ttl=64 时间=0.619 毫秒
^C
--- rac1 ping 统计 ---
已发送 2 个包, 已接收 2 个包, 0% packet loss, time 1055ms
rtt min/avg/max/mdev = 0.361/0.490/0.619/0.129 ms
[root@rac2 ~]# ping rac2
PING rac2 (192.168.18.6) 56(84) 比特的数据。
64 比特,来自 rac2 (192.168.18.6): icmp_seq=1 ttl=64 时间=0.026 毫秒
64 比特,来自 rac2 (192.168.18.6): icmp_seq=2 ttl=64 时间=0.049 毫秒
64 比特,来自 rac2 (192.168.18.6): icmp_seq=3 ttl=64 时间=0.045 毫秒
^C
--- rac2 ping 统计 ---
已发送 3 个包, 已接收 3 个包, 0% packet loss, time 2082ms
rtt min/avg/max/mdev = 0.026/0.040/0.049/0.010 ms
[root@rac2 ~]# ping rac1-priv
PING rac1-priv (18.18.18.5) 56(84) 比特的数据。
64 比特,来自 rac1-priv (18.18.18.5): icmp_seq=1 ttl=64 时间=0.323 毫秒
64 比特,来自 rac1-priv (18.18.18.5): icmp_seq=2 ttl=64 时间=0.267 毫秒
64 比特,来自 rac1-priv (18.18.18.5): icmp_seq=3 ttl=64 时间=0.246 毫秒
64 比特,来自 rac1-priv (18.18.18.5): icmp_seq=4 ttl=64 时间=0.273 毫秒
^C
--- rac1-priv ping 统计 ---
已发送 4 个包, 已接收 4 个包, 0% packet loss, time 3099ms
rtt min/avg/max/mdev = 0.246/0.277/0.323/0.028 ms
[root@rac2 ~]# ping rac2-priv
PING rac2-priv (18.18.18.6) 56(84) 比特的数据。
64 比特,来自 rac2-priv (18.18.18.6): icmp_seq=1 ttl=64 时间=0.032 毫秒
64 比特,来自 rac2-priv (18.18.18.6): icmp_seq=2 ttl=64 时间=0.046 毫秒
64 比特,来自 rac2-priv (18.18.18.6): icmp_seq=3 ttl=64 时间=0.044 毫秒
^C
--- rac2-priv ping 统计 ---
已发送 3 个包, 已接收 3 个包, 0% packet loss, time 2085ms
rtt min/avg/max/mdev = 0.032/0.040/0.046/0.006 ms
[root@rac2 ~]#
4.3.4 调整network
当使用Oracle集群的时候,Zero Configuration Network一样可能会导致节点间的通信问题,所以也应该停掉
Without zeroconf, a network administrator must set up network services, such as Dynamic Host Configuration Protocol (DHCP) and Domain Name System (DNS), or configure each computer's network settings manually.
在使用平常的网络设置方式的情况下是可以停掉Zero Conf的

两个节点执行
echo "NOZEROCONF=yes"  >>/etc/sysconfig/network && cat /etc/sysconfig/network

[root@rac1 ~]# echo "NOZEROCONF=yes"  >>/etc/sysconfig/network && cat /etc/sysconfig/network
# Created by anaconda
NOZEROCONF=yes
[root@rac1 ~]#

[root@rac2 ~]# echo "NOZEROCONF=yes"  >>/etc/sysconfig/network && cat /etc/sysconfig/network
# Created by anaconda
NOZEROCONF=yes
[root@rac2 ~]#
4.4 调整/dev/shm
[root@rac1 ~]# df -h
文件系统             容量  已用  可用 已用% 挂载点
devtmpfs             4.0M     0  4.0M    0% /dev
tmpfs                7.6G     0  7.6G    0% /dev/shm
tmpfs                3.1G   12M  3.1G    1% /run
/dev/mapper/ol-root   90G  6.1G   84G    7% /
/dev/sda1            960M  464M  497M   49% /boot
tmpfs                1.6G   52K  1.6G    1% /run/user/42
tmpfs                1.6G   36K  1.6G    1% /run/user/0
[root@rac1 ~]#

[root@rac2 ~]# df -h
文件系统             容量  已用  可用 已用% 挂载点
devtmpfs             4.0M     0  4.0M    0% /dev
tmpfs                7.9G     0  7.9G    0% /dev/shm
tmpfs                3.2G  9.4M  3.2G    1% /run
/dev/mapper/ol-root   90G  5.8G   85G    7% /
/dev/sda1            960M  427M  534M   45% /boot
tmpfs                1.6G   52K  1.6G    1% /run/user/42
tmpfs                1.6G   36K  1.6G    1% /run/user/0
[root@rac2 ~]#


# 如果需要把/dev/shm调整到8G,操作下面命令:
cp /etc/fstab /etc/fstab_`date +"%Y%m%d_%H%M%S"`
echo "tmpfs    /dev/shm    tmpfs    rw,exec,size=8G    0 0">>/etc/fstab
cat /etc/fstab
mount -o remount /dev/shm
df -h
4.5 设置THP和numa
# 检查:
cat /sys/kernel/mm/transparent_hugepage/enabled
cat /sys/kernel/mm/transparent_hugepage/defrag

# 特别注意这里官网是建议设置成madvise
sed -i 's/quiet/quiet transparent_hugepage=madvise numa=off/' /etc/default/grub
grep quiet  /etc/default/grub
grub2-mkconfig -o /boot/grub2/grub.cfg --update-bls-cmdline

# 重启后检查是否生效:
cat /sys/kernel/mm/transparent_hugepage/enabled
cat /proc/cmdline

#不重启
echo madvise > /sys/kernel/mm/transparent_hugepage/enabled
cat /sys/kernel/mm/transparent_hugepage/enabled

[root@rac1 ~]# cat /sys/kernel/mm/transparent_hugepage/enabled
[always] madvise never
[root@rac1 ~]# cat /sys/kernel/mm/transparent_hugepage/defrag
always defer defer+madvise [madvise] never
[root@rac1 ~]# sed -i 's/quiet/quiet transparent_hugepage=madvise numa=off/' /etc/default/grub
[root@rac1 ~]# grub2-mkconfig -o /boot/grub2/grub.cfg --update-bls-cmdline
Generating grub configuration file ...
Adding boot menu entry for UEFI Firmware Settings ...
done
[root@rac1 ~]# init 6
[root@rac1 ~]#


[root@rac2 ~]# cat /sys/kernel/mm/transparent_hugepage/enabled
[always] madvise never
[root@rac2 ~]# cat /sys/kernel/mm/transparent_hugepage/defrag
always defer defer+madvise [madvise] never
[root@rac2 ~]# sed -i 's/quiet/quiet transparent_hugepage=madvise numa=off/' /etc/default/grub
[root@rac2 ~]# grub2-mkconfig -o /boot/grub2/grub.cfg --update-bls-cmdline
Generating grub configuration file ...
Adding boot menu entry for UEFI Firmware Settings ...
done
[root@rac2 ~]# init 6
[root@rac2 ~]#
4.6 关闭防火墙
#关闭防火墙
systemctl stop firewalld
systemctl disable firewalld
systemctl status firewalld

[root@rac1 ~]# systemctl stop firewalld
systemctl disable firewalld
systemctl status firewalld
Removed "/etc/systemd/system/multi-user.target.wants/firewalld.service".
Removed "/etc/systemd/system/dbus-org.fedoraproject.FirewallD1.service".
○ firewalld.service - firewalld - dynamic firewall daemon
     Loaded: loaded (/usr/lib/systemd/system/firewalld.service; disabled; preset: enabled)
     Active: inactive (dead)
       Docs: man:firewalld(1)

2月 09 13:02:35 rac1 systemd[1]: Starting firewalld - dynamic firewall daemon...
2月 09 13:02:36 rac1 systemd[1]: Started firewalld - dynamic firewall daemon.
2月 09 13:03:27 rac1 systemd[1]: Stopping firewalld - dynamic firewall daemon...
2月 09 13:03:27 rac1 systemd[1]: firewalld.service: Deactivated successfully.
2月 09 13:03:27 rac1 systemd[1]: Stopped firewalld - dynamic firewall daemon.
[root@rac1 ~]#


[root@rac2 ~]# systemctl stop firewalld
systemctl disable firewalld
systemctl status firewalld
Removed "/etc/systemd/system/multi-user.target.wants/firewalld.service".
Removed "/etc/systemd/system/dbus-org.fedoraproject.FirewallD1.service".
○ firewalld.service - firewalld - dynamic firewall daemon
     Loaded: loaded (/usr/lib/systemd/system/firewalld.service; disabled; preset: enabled)
     Active: inactive (dead)
       Docs: man:firewalld(1)

2月 09 13:03:14 rac2 systemd[1]: Starting firewalld - dynamic firewall daemon...
2月 09 13:03:16 rac2 systemd[1]: Started firewalld - dynamic firewall daemon.
2月 09 13:03:30 rac2 systemd[1]: Stopping firewalld - dynamic firewall daemon...
2月 09 13:03:30 rac2 systemd[1]: firewalld.service: Deactivated successfully.
2月 09 13:03:30 rac2 systemd[1]: Stopped firewalld - dynamic firewall daemon.
[root@rac2 ~]#
4.7 关闭selinux
cp /etc/selinux/config /etc/selinux/config_`date +"%Y%m%d_%H%M%S"`&& sed -i 's/SELINUX\=enforcing/SELINUX\=disabled/g' /etc/selinux/config
cat /etc/selinux/config
#不重启
setenforce 0
getenforce
sestatus

[root@rac1 ~]# cp /etc/selinux/config /etc/selinux/config_`date +"%Y%m%d_%H%M%S"`&& sed -i 's/SELINUX\=enforcing/SELINUX\=disabled/g' /etc/selinux/config
cat /etc/selinux/config

# This file controls the state of SELinux on the system.
# SELINUX= can take one of these three values:
#     enforcing - SELinux security policy is enforced.
#     permissive - SELinux prints warnings instead of enforcing.
#     disabled - No SELinux policy is loaded.
# See also:
# https://docs.oracle.com/en/operating-systems/oracle-linux/selinux/selinux-SettingSELinuxModes.html
#
# NOTE: In earlier Oracle Linux kernel builds, SELINUX=disabled would also
# fully disable SELinux during boot. If you need a system with SELinux
# fully disabled instead of SELinux running with no policy loaded, you
# need to pass selinux=0 to the kernel command line. You can use grubby
# to persistently set the bootloader to boot with selinux=0:
#
#    grubby --update-kernel ALL --args selinux=0
#
# To revert back to SELinux enabled:
#
#    grubby --update-kernel ALL --remove-args selinux
#
SELINUX=disabled
# SELINUXTYPE= can take one of these three values:
#     targeted - Targeted processes are protected,
#     mls - Multi Level Security protection.
SELINUXTYPE=targeted


[root@rac1 ~]# setenforce 0
getenforce
sestatus
Permissive
SELinux status:                 enabled
SELinuxfs mount:                /sys/fs/selinux
SELinux root directory:         /etc/selinux
Loaded policy name:             targeted
Current mode:                   permissive
Mode from config file:          disabled
Policy MLS status:              enabled
Policy deny_unknown status:     allowed
Memory protection checking:     actual (secure)
Max kernel policy version:      33
[root@rac1 ~]#


[root@rac2 ~]# cp /etc/selinux/config /etc/selinux/config_`date +"%Y%m%d_%H%M%S"`&& sed -i 's/SELINUX\=enforcing/SELINUX\=disabled/g' /etc/selinux/config
cat /etc/selinux/config

# This file controls the state of SELinux on the system.
# SELINUX= can take one of these three values:
#     enforcing - SELinux security policy is enforced.
#     permissive - SELinux prints warnings instead of enforcing.
#     disabled - No SELinux policy is loaded.
# See also:
# https://docs.oracle.com/en/operating-systems/oracle-linux/selinux/selinux-SettingSELinuxModes.html
#
# NOTE: In earlier Oracle Linux kernel builds, SELINUX=disabled would also
# fully disable SELinux during boot. If you need a system with SELinux
# fully disabled instead of SELinux running with no policy loaded, you
# need to pass selinux=0 to the kernel command line. You can use grubby
# to persistently set the bootloader to boot with selinux=0:
#
#    grubby --update-kernel ALL --args selinux=0
#
# To revert back to SELinux enabled:
#
#    grubby --update-kernel ALL --remove-args selinux
#
SELINUX=disabled
# SELINUXTYPE= can take one of these three values:
#     targeted - Targeted processes are protected,
#     mls - Multi Level Security protection.
SELINUXTYPE=targeted


[root@rac2 ~]# setenforce 0
getenforce
sestatus
Permissive
SELinux status:                 enabled
SELinuxfs mount:                /sys/fs/selinux
SELinux root directory:         /etc/selinux
Loaded policy name:             targeted
Current mode:                   permissive
Mode from config file:          disabled
Policy MLS status:              enabled
Policy deny_unknown status:     allowed
Memory protection checking:     actual (secure)
Max kernel policy version:      33
[root@rac2 ~]#
4.8 配置软件yum源(可选)
#mount cdrom
mount /dev/cdrom /mnt
#设置
cd /etc/yum.repos.d/
mkdir bak
mv *.repo ./bak/
cat >> /etc/yum.repos.d/local.repo << "EOF"
[local]
name=local
baseurl=file:///mnt/AppStream
gpgcheck=0
enabled=1
EOF
#测试
yum clean all
yum makecache
yum repolist

# 由于我们这里有外网。不需要配置本地yum源
[root@rac1 ~]# yum repolist
仓库 id                                                                                                 仓库名称
ol9_UEKR8                                                                                               Oracle Linux 9 UEK Release 8 (x86_64)
ol9_appstream                                                                                           Oracle Linux 9 Application Stream Packages (x86_64)
ol9_baseos_latest                                                                                       Oracle Linux 9 BaseOS Latest (x86_64)
[root@rac1 ~]#


[root@rac2 ~]# yum repolist
仓库 id                                                                                                 仓库名称
ol9_UEKR8                                                                                               Oracle Linux 9 UEK Release 8 (x86_64)
ol9_appstream                                                                                           Oracle Linux 9 Application Stream Packages (x86_64)
ol9_baseos_latest                                                                                       Oracle Linux 9 BaseOS Latest (x86_64)
[root@rac2 ~]#
4.8 安装软件包
#安装软件包和工具包
dnf install -y bc
dnf install -y binutils
dnf install -y compat-openssl11
dnf install -y elfutils-libelf
dnf install -y fontconfig
dnf install -y glibc
dnf install -y glibc-devel
dnf install -y glibc-headers
dnf install -y ksh
dnf install -y libaio
dnf install -y libasan
dnf install -y liblsan
dnf install -y libX11
dnf install -y libXau
dnf install -y libXi
dnf install -y libXrender
dnf install -y libXtst
dnf install -y libxcrypt-compat
dnf install -y libgcc
dnf install -y libibverbs
dnf install -y librdmacm
dnf install -y libstdc++
dnf install -y libxcb
dnf install -y libvirt-libs
dnf install -y make
dnf install -y policycoreutils
dnf install -y policycoreutils-python-utils
dnf install -y smartmontools
dnf install -y sysstat
dnf install -y nfs-utils


# 检查(根据官方文档要求)
rpm -q bc binutils compat-openssl11 elfutils-libelf fontconfig glibc glibc-devel glibc-headers ksh libaio libasan libX11 libXau libXi libXrender libXtst libxcrypt-compat libgcc libibverbs librdmacm libstdc++ libxcb libvirt-libs make policycoreutils policycoreutils-python-utils smartmontools sysstat nfs-utils | grep "not installed"


[root@rac1 ~]# rpm -q bc binutils compat-openssl11 elfutils-libelf fontconfig glibc glibc-devel glibc-headers ksh libaio libasan libX11 libXau libXi libXrender libXtst libxcrypt-compat libgcc libibverbs librdmacm libstdc++ libxcb libvirt-libs make policycoreutils policycoreutils-python-utils smartmontools sysstat nfs-utils | grep "not installed"
[root@rac1 ~]#


[root@rac2 ~]# rpm -q bc binutils compat-openssl11 elfutils-libelf fontconfig glibc glibc-devel glibc-headers ksh libaio libasan libX11 libXau libXi libXrender libXtst libxcrypt-compat libgcc libibverbs librdmacm libstdc++ libxcb libvirt-libs make policycoreutils policycoreutils-python-utils smartmontools sysstat nfs-utils | grep "not installed"
[root@rac2 ~]#
4.9 配置核心参数
# 参考恩墨核心配置

cp /etc/sysctl.conf /etc/sysctl.conf.bak
memTotal=$(grep MemTotal /proc/meminfo | awk '{print $2}')
totalMemory=$((memTotal / 2048))
shmall=$((memTotal / 4))
if [ $shmall -lt 2097152 ]; then
	shmall=2097152
fi
shmmax=$((memTotal * 1024 - 1))
if [ "$shmmax" -lt 4294967295 ]; then
	shmmax=4294967295
fi
cat <<EOF>>/etc/sysctl.conf
fs.aio-max-nr = 1048576
fs.file-max = 6815744
kernel.shmall = $shmall
kernel.shmmax = $shmmax
kernel.shmmni = 4096
kernel.sem = 250 32000 100 128
net.ipv4.ip_local_port_range = 9000 65500
net.core.rmem_default = 16777216
net.core.rmem_max = 16777216
net.core.wmem_max = 16777216
net.core.wmem_default = 16777216
fs.aio-max-nr = 6194304
vm.dirty_ratio=20
vm.dirty_background_ratio=3
vm.dirty_writeback_centisecs=100
vm.dirty_expire_centisecs=500
vm.swappiness=10
vm.min_free_kbytes=524288
net.core.netdev_max_backlog = 30000
net.core.netdev_budget = 600
#vm.nr_hugepages =
net.ipv4.conf.all.rp_filter = 2
net.ipv4.conf.default.rp_filter = 2
net.ipv4.ipfrag_time = 60
net.ipv4.ipfrag_low_thresh = 3145728
net.ipv4.ipfrag_high_thresh = 8388608
kernel.panic_on_oops = 1
kernel.panic = 2
EOF
sysctl -p

[root@rac1 ~]# cp /etc/sysctl.conf /etc/sysctl.conf.bak
memTotal=$(grep MemTotal /proc/meminfo | awk '{print $2}')
totalMemory=$((memTotal / 2048))
shmall=$((memTotal / 4))
if [ $shmall -lt 2097152 ]; then
        shmall=2097152
fi
shmmax=$((memTotal * 1024 - 1))
if [ "$shmmax" -lt 4294967295 ]; then
        shmmax=4294967295
fi
cat <<EOF>>/etc/sysctl.conf
fs.aio-max-nr = 1048576
fs.file-max = 6815744
kernel.shmall = $shmall
kernel.shmmax = $shmmax
kernel.shmmni = 4096
kernel.sem = 250 32000 100 128
net.ipv4.ip_local_port_range = 9000 65500
net.core.rmem_default = 16777216
net.core.rmem_max = 16777216
net.core.wmem_max = 16777216
net.core.wmem_default = 16777216
fs.aio-max-nr = 6194304
vm.dirty_ratio=20
vm.dirty_background_ratio=3
vm.dirty_writeback_centisecs=100
vm.dirty_expire_centisecs=500
vm.swappiness=10
vm.min_free_kbytes=524288
net.core.netdev_max_backlog = 30000
net.core.netdev_budget = 600
#vm.nr_hugepages =
net.ipv4.conf.all.rp_filter = 2
net.ipv4.conf.default.rp_filter = 2
net.ipv4.ipfrag_time = 60
net.ipv4.ipfrag_low_thresh = 3145728
net.ipv4.ipfrag_high_thresh = 8388608
kernel.panic_on_oops = 1
kernel.panic = 2
EOF
[root@rac1 ~]# sysctl -p
fs.aio-max-nr = 1048576
fs.file-max = 6815744
kernel.shmall = 3977942
kernel.shmmax = 16293650431
kernel.shmmni = 4096
kernel.sem = 250 32000 100 128
net.ipv4.ip_local_port_range = 9000 65500
net.core.rmem_default = 16777216
net.core.rmem_max = 16777216
net.core.wmem_max = 16777216
net.core.wmem_default = 16777216
fs.aio-max-nr = 6194304
vm.dirty_ratio = 20
vm.dirty_background_ratio = 3
vm.dirty_writeback_centisecs = 100
vm.dirty_expire_centisecs = 500
vm.swappiness = 10
vm.min_free_kbytes = 524288
net.core.netdev_max_backlog = 30000
net.core.netdev_budget = 600
net.ipv4.conf.all.rp_filter = 2
net.ipv4.conf.default.rp_filter = 2
net.ipv4.ipfrag_time = 60
net.ipv4.ipfrag_low_thresh = 3145728
net.ipv4.ipfrag_high_thresh = 8388608
kernel.panic_on_oops = 1
kernel.panic = 2
[root@rac1 ~]#


[root@rac2 ~]# cp /etc/sysctl.conf /etc/sysctl.conf.bak
memTotal=$(grep MemTotal /proc/meminfo | awk '{print $2}')
totalMemory=$((memTotal / 2048))
shmall=$((memTotal / 4))
if [ $shmall -lt 2097152 ]; then
        shmall=2097152
fi
shmmax=$((memTotal * 1024 - 1))
if [ "$shmmax" -lt 4294967295 ]; then
        shmmax=4294967295
fi
cat <<EOF>>/etc/sysctl.conf
fs.aio-max-nr = 1048576
fs.file-max = 6815744
kernel.shmall = $shmall
kernel.shmmax = $shmmax
kernel.shmmni = 4096
kernel.sem = 250 32000 100 128
net.ipv4.ip_local_port_range = 9000 65500
net.core.rmem_default = 16777216
net.core.rmem_max = 16777216
net.core.wmem_max = 16777216
net.core.wmem_default = 16777216
fs.aio-max-nr = 6194304
vm.dirty_ratio=20
vm.dirty_background_ratio=3
vm.dirty_writeback_centisecs=100
vm.dirty_expire_centisecs=500
vm.swappiness=10
vm.min_free_kbytes=524288
net.core.netdev_max_backlog = 30000
net.core.netdev_budget = 600
#vm.nr_hugepages =
net.ipv4.conf.all.rp_filter = 2
net.ipv4.conf.default.rp_filter = 2
net.ipv4.ipfrag_time = 60
net.ipv4.ipfrag_low_thresh = 3145728
net.ipv4.ipfrag_high_thresh = 8388608
kernel.panic_on_oops = 1
kernel.panic = 2
EOF
[root@rac2 ~]# sysctl -p
fs.aio-max-nr = 1048576
fs.file-max = 6815744
kernel.shmall = 4092630
kernel.shmmax = 16763412479
kernel.shmmni = 4096
kernel.sem = 250 32000 100 128
net.ipv4.ip_local_port_range = 9000 65500
net.core.rmem_default = 16777216
net.core.rmem_max = 16777216
net.core.wmem_max = 16777216
net.core.wmem_default = 16777216
fs.aio-max-nr = 6194304
vm.dirty_ratio = 20
vm.dirty_background_ratio = 3
vm.dirty_writeback_centisecs = 100
vm.dirty_expire_centisecs = 500
vm.swappiness = 10
vm.min_free_kbytes = 524288
net.core.netdev_max_backlog = 30000
net.core.netdev_budget = 600
net.ipv4.conf.all.rp_filter = 2
net.ipv4.conf.default.rp_filter = 2
net.ipv4.ipfrag_time = 60
net.ipv4.ipfrag_low_thresh = 3145728
net.ipv4.ipfrag_high_thresh = 8388608
kernel.panic_on_oops = 1
kernel.panic = 2
[root@rac2 ~]#
4.10 关闭avahi服务
systemctl stop avahi-daemon
systemctl disable avahi-daemon

[root@rac1 ~]# systemctl stop avahi-daemon
Warning: Stopping avahi-daemon.service, but it can still be activated by:
  avahi-daemon.socket
[root@rac1 ~]# systemctl disable avahi-daemon
Removed "/etc/systemd/system/multi-user.target.wants/avahi-daemon.service".
Removed "/etc/systemd/system/sockets.target.wants/avahi-daemon.socket".
Removed "/etc/systemd/system/dbus-org.freedesktop.Avahi.service".
[root@rac1 ~]#


[root@rac2 ~]# systemctl stop avahi-daemon
Warning: Stopping avahi-daemon.service, but it can still be activated by:
  avahi-daemon.socket
[root@rac2 ~]# systemctl disable avahi-daemon
Removed "/etc/systemd/system/multi-user.target.wants/avahi-daemon.service".
Removed "/etc/systemd/system/sockets.target.wants/avahi-daemon.socket".
Removed "/etc/systemd/system/dbus-org.freedesktop.Avahi.service".
[root@rac2 ~]#
4.11 关闭其他服务(可选)
--禁用开机启动
systemctl disable accounts-daemon.service
systemctl disable atd.service
systemctl disable avahi-daemon.service
systemctl disable avahi-daemon.socket
systemctl disable bluetooth.service
systemctl disable brltty.service
--systemctl disable chronyd.service
systemctl disable colord.service
systemctl disable cups.service
systemctl disable debug-shell.service
systemctl disable firewalld.service
systemctl disable gdm.service
systemctl disable ksmtuned.service
systemctl disable ktune.service
systemctl disable libstoragemgmt.service
systemctl disable mcelog.service
systemctl disable ModemManager.service
--systemctl disable ntpd.service
systemctl disable postfix.service
systemctl disable postfix.service
systemctl disable rhsmcertd.service
systemctl disable rngd.service
systemctl disable rpcbind.service
systemctl disable rtkit-daemon.service
systemctl disable tuned.service
systemctl disable upower.service
systemctl disable wpa_supplicant.service
--停止服务
systemctl stop accounts-daemon.service
systemctl stop atd.service
systemctl stop avahi-daemon.service
systemctl stop avahi-daemon.socket
systemctl stop bluetooth.service
systemctl stop brltty.service
--systemctl stop chronyd.service
systemctl stop colord.service
systemctl stop cups.service
systemctl stop debug-shell.service
systemctl stop firewalld.service
systemctl stop gdm.service
systemctl stop ksmtuned.service
systemctl stop ktune.service
systemctl stop libstoragemgmt.service
systemctl stop mcelog.service
systemctl stop ModemManager.service
--systemctl stop ntpd.service
systemctl stop postfix.service
systemctl stop postfix.service
systemctl stop rhsmcertd.service
systemctl stop rngd.service
systemctl stop rpcbind.service
systemctl stop rtkit-daemon.service
systemctl stop tuned.service
systemctl stop upower.service
systemctl stop wpa_supplicant.service

暂时不停止chrony和ntp


[root@rac1 ~]# systemctl disable avahi-daemon
Removed "/etc/systemd/system/multi-user.target.wants/avahi-daemon.service".
Removed "/etc/systemd/system/sockets.target.wants/avahi-daemon.socket".
Removed "/etc/systemd/system/dbus-org.freedesktop.Avahi.service".
[root@rac1 ~]# systemctl disable --now postfix
Failed to disable unit: Unit file postfix.service does not exist.
[root@rac1 ~]# systemctl disable --now cups
Removed "/etc/systemd/system/multi-user.target.wants/cups.path".
Removed "/etc/systemd/system/multi-user.target.wants/cups.service".
Removed "/etc/systemd/system/sockets.target.wants/cups.socket".
Removed "/etc/systemd/system/printer.target.wants/cups.service".
[root@rac1 ~]# systemctl disable --now avahi-daemon
Warning: Stopping avahi-daemon.service, but it can still be activated by:
  avahi-daemon.socket
[root@rac1 ~]# systemctl disable --now bluetooth
Removed "/etc/systemd/system/dbus-org.bluez.service".
Removed "/etc/systemd/system/bluetooth.target.wants/bluetooth.service".
[root@rac1 ~]# systemctl disable --now kdump
[root@rac1 ~]#


[root@rac2 ~]# systemctl stop avahi-daemon
Warning: Stopping avahi-daemon.service, but it can still be activated by:
  avahi-daemon.socket
[root@rac2 ~]# systemctl disable avahi-daemon
Removed "/etc/systemd/system/multi-user.target.wants/avahi-daemon.service".
Removed "/etc/systemd/system/sockets.target.wants/avahi-daemon.socket".
Removed "/etc/systemd/system/dbus-org.freedesktop.Avahi.service".
[root@rac2 ~]# systemctl disable avahi-daemon
[root@rac2 ~]# systemctl disable --now postfix
Failed to disable unit: Unit file postfix.service does not exist.
[root@rac2 ~]# systemctl disable --now cups
Removed "/etc/systemd/system/multi-user.target.wants/cups.path".
Removed "/etc/systemd/system/multi-user.target.wants/cups.service".
Removed "/etc/systemd/system/sockets.target.wants/cups.socket".
Removed "/etc/systemd/system/printer.target.wants/cups.service".
[root@rac2 ~]# systemctl disable --now avahi-daemon
Warning: Stopping avahi-daemon.service, but it can still be activated by:
  avahi-daemon.socket
[root@rac2 ~]# systemctl disable --now bluetooth
Removed "/etc/systemd/system/dbus-org.bluez.service".
Removed "/etc/systemd/system/bluetooth.target.wants/bluetooth.service".
[root@rac2 ~]# systemctl disable --now kdump
Removed "/etc/systemd/system/multi-user.target.wants/kdump.service".
[root@rac2 ~]#
4.12 配置ssh服务
--配置LoginGraceTime参数为0, 将timeout wait设置为无限制
cp /etc/ssh/sshd_config /etc/ssh/sshd_config_`date +"%Y%m%d_%H%M%S"` && sed -i '/#LoginGraceTime 2m/ s/#LoginGraceTime 2m/LoginGraceTime 0/' /etc/ssh/sshd_config && grep LoginGraceTime /etc/ssh/sshd_config
--加快SSH登陆速度,禁用DNS
cp /etc/ssh/sshd_config /etc/ssh/sshd_config_`date +"%Y%m%d_%H%M%S"` && sed -i '/#UseDNS yes/ s/#UseDNS yes/UseDNS no/' /etc/ssh/sshd_config && grep UseDNS /etc/ssh/sshd_config
4.13 hugepage配置(可选)
与AMM冲突
如果您有较大的RAM和SGA,则HugePages对于在Linux上提高Oracle数据库性能至关重要
grep HugePagesize /proc/meminfo
Hugepagesize:    2048 kB

chmod 755 hugepages_settings.sh
需要在数据库启动情况下执行

脚本:
cat hugepages_settings.sh
#!/bin/bash
#
# hugepages_settings.sh
#
# Linux bash script to compute values for the
# recommended HugePages/HugeTLB configuration
# on Oracle Linux
#
# Note: This script does calculation for all shared memory
# segments available when the script is run, no matter it
# is an Oracle RDBMS shared memory segment or not.
#
# This script is provided by Doc ID 401749.1 from My Oracle Support
# http://support.oracle.com

# Welcome text
echo "
This script is provided by Doc ID 401749.1 from My Oracle Support
(http://support.oracle.com) where it is intended to compute values for
the recommended HugePages/HugeTLB configuration for the current shared
memory segments on Oracle Linux. Before proceeding with the execution please note following:
 * For ASM instance, it needs to configure ASMM instead of AMM.
 * The 'pga_aggregate_target' is outside the SGA and
   you should accommodate this while calculating the overall size.
 * In case you changes the DB SGA size,
   as the new SGA will not fit in the previous HugePages configuration,
   it had better disable the whole HugePages,
   start the DB with new SGA size and run the script again.
And make sure that:
 * Oracle Database instance(s) are up and running
 * Oracle Database 11g Automatic Memory Management (AMM) is not setup
   (See Doc ID 749851.1)
 * The shared memory segments can be listed by command:
     # ipcs -m


Press Enter to proceed..."

read

# Check for the kernel version
KERN=`uname -r | awk -F. '{ printf("%d.%d/n",$1,$2); }'`

# Find out the HugePage size
HPG_SZ=`grep Hugepagesize /proc/meminfo | awk '{print $2}'`
if [ -z "$HPG_SZ" ];then
    echo "The hugepages may not be supported in the system where the script is being executed."
    exit 1
fi

# Initialize the counter
NUM_PG=0

# Cumulative number of pages required to handle the running shared memory segments
for SEG_BYTES in `ipcs -m | cut -c44-300 | awk '{print $1}' | grep "[0-9][0-9]*"`
do
    MIN_PG=`echo "$SEG_BYTES/($HPG_SZ*1024)" | bc -q`
    if [ $MIN_PG -gt 0 ]; then
        NUM_PG=`echo "$NUM_PG+$MIN_PG+1" | bc -q`
    fi
done

RES_BYTES=`echo "$NUM_PG * $HPG_SZ * 1024" | bc -q`

# An SGA less than 100MB does not make sense
# Bail out if that is the case
if [ $RES_BYTES -lt 100000000 ]; then
    echo "***********"
    echo "** ERROR **"
    echo "***********"
    echo "Sorry! There are not enough total of shared memory segments allocated for
HugePages configuration. HugePages can only be used for shared memory segments
that you can list by command:

    # ipcs -m

of a size that can match an Oracle Database SGA. Please make sure that:
 * Oracle Database instance is up and running
 * Oracle Database 11g Automatic Memory Management (AMM) is not configured"
    exit 1
fi

# Finish with results
case $KERN in
    '2.4') HUGETLB_POOL=`echo "$NUM_PG*$HPG_SZ/1024" | bc -q`;
           echo "Recommended setting: vm.hugetlb_pool = $HUGETLB_POOL" ;;
    '2.6') echo "Recommended setting: vm.nr_hugepages = $NUM_PG" ;;
    '3.8') echo "Recommended setting: vm.nr_hugepages = $NUM_PG" ;;
    '3.10') echo "Recommended setting: vm.nr_hugepages = $NUM_PG" ;;
    '4.1') echo "Recommended setting: vm.nr_hugepages = $NUM_PG" ;;
    '4.14') echo "Recommended setting: vm.nr_hugepages = $NUM_PG" ;;
    '4.18') echo "Recommended setting: vm.nr_hugepages = $NUM_PG" ;;
    '5.4') echo "Recommended setting: vm.nr_hugepages = $NUM_PG" ;;
    *) echo "Kernel version $KERN is not supported by this script (yet). Exiting." ;;
esac

# End
计算需要的页数:
linux 一个大页的大小为 2M,开启大页的总内存应该比 sga_max_size 稍稍大一点,比如
sga_max_size=3g,则: hugepages > (3*1024)/2 = 1536
配置 sysctl.conf 文件,添加:
[root@ node01 ~]$ vi /etc/sysctl.conf
vm.nr_hugepages = 1550
配置/etc/security/limits.conf,添加(比 sga_max_size 稍大,官方建议为总物理内存的 90%,以 K 为
单位):
[root@ node01 ~]$ vi /etc/security/limits.conf
oracle soft memlock 3400000
oracle hard memlock 3400000


# vim /etc/sysctl.conf
vm.nr_hugepages = xxxx

# sysctl -p
vim /etc/security/limits.conf
oracle soft memlock unlimited
oracle hard memlock unlimited
4.14 修改login配置
cat >> /etc/pam.d/login <<EOF
session required pam_limits.so
EOF

[root@rac1 ~]# cat >> /etc/pam.d/login <<EOF
session required pam_limits.so
EOF
[root@rac1 ~]#


[root@rac2 ~]# cat >> /etc/pam.d/login <<EOF
session required pam_limits.so
EOF
[root@rac2 ~]#
4.15 配置用户限制
cat >> /etc/security/limits.conf <<EOF
grid  soft  nproc  2047
grid  hard  nproc  16384
grid  soft   nofile  1024
grid  hard  nofile  65536
grid  soft   stack  10240
grid  hard  stack  32768
grid soft memlock 3145728
grid hard memlock 3145728

oracle  soft  nproc  2047
oracle  hard  nproc  16384
oracle  soft  nofile  1024
oracle  hard  nofile  65536
oracle  soft  stack  10240
oracle  hard  stack  32768
oracle soft memlock 3145728
oracle hard memlock 3145728
EOF

[root@rac1 ~]# cat >> /etc/pam.d/login <<EOF
session required pam_limits.so
EOF
[root@rac1 ~]# cat >> /etc/security/limits.conf <<EOF
grid  soft  nproc  2047
grid  hard  nproc  16384
grid  soft   nofile  1024
grid  hard  nofile  65536
grid  soft   stack  10240
grid  hard  stack  32768
grid soft memlock 3145728
grid hard memlock 3145728

oracle  soft  nproc  2047
oracle  hard  nproc  16384
oracle  soft  nofile  1024
oracle  hard  nofile  65536
oracle  soft  stack  10240
oracle  hard  stack  32768
oracle soft memlock 3145728
oracle hard memlock 3145728
EOF
[root@rac1 ~]#


[root@rac2 ~]# cat >> /etc/pam.d/login <<EOF
session required pam_limits.so
EOF
[root@rac2 ~]# cat >> /etc/security/limits.conf <<EOF
grid  soft  nproc  2047
grid  hard  nproc  16384
grid  soft   nofile  1024
grid  hard  nofile  65536
grid  soft   stack  10240
grid  hard  stack  32768
grid soft memlock 3145728
grid hard memlock 3145728

oracle  soft  nproc  2047
oracle  hard  nproc  16384
oracle  soft  nofile  1024
oracle  hard  nofile  65536
oracle  soft  stack  10240
oracle  hard  stack  32768
oracle soft memlock 3145728
oracle hard memlock 3145728
EOF
[root@rac2 ~]#
4.16 配置NTP服务(可选)
ntp
chony
-x
4.16.1 使用ctss
各节点系统时间校对:
--检验时间和时区确认正确
date

--关闭chrony服务,移除chrony配置文件(后续使用ctss)
systemctl list-unit-files|grep chronyd
systemctl status chronyd

systemctl disable chronyd
systemctl stop chronyd

mv /etc/chrony.conf /etc/chrony.conf_bak
mv /etc/ntp.conf /etc/ntp.conf_bak
systemctl list-unit-files|grep -E 'ntp|chrony'

[root@rac1 ~]# systemctl list-unit-files|grep chronyd
chronyd-restricted.service                 disabled        disabled
chronyd.service                            enabled         enabled
[root@rac1 ~]# systemctl status chronyd
● chronyd.service - NTP client/server
     Loaded: loaded (/usr/lib/systemd/system/chronyd.service; enabled; preset: enabled)
     Active: active (running) since Mon 2026-02-09 13:02:36 CST; 17min ago
       Docs: man:chronyd(8)
             man:chrony.conf(5)
   Main PID: 1225 (chronyd)
      Tasks: 1 (limit: 99016)
     Memory: 1.4M (peak: 2.2M)
        CPU: 51ms
     CGroup: /system.slice/chronyd.service
             └─1225 /usr/sbin/chronyd -F 2

2月 09 13:02:36 rac1 chronyd[1225]: Loaded 0 symmetric keys
2月 09 13:02:36 rac1 chronyd[1225]: Using right/UTC timezone to obtain leap second data
2月 09 13:02:36 rac1 chronyd[1225]: Frequency 4.239 +/- 0.405 ppm read from /var/lib/chrony/drift
2月 09 13:02:36 rac1 chronyd[1225]: Loaded seccomp filter (level 2)
2月 09 13:02:36 rac1 systemd[1]: Started NTP client/server.
2月 09 13:02:47 rac1 chronyd[1225]: Selected source 119.28.206.193 (2.pool.ntp.org)
2月 09 13:02:47 rac1 chronyd[1225]: System clock wrong by -1.205485 seconds
2月 09 13:02:46 rac1 chronyd[1225]: System clock was stepped by -1.205485 seconds
2月 09 13:02:46 rac1 chronyd[1225]: System clock TAI offset set to 37 seconds
2月 09 13:17:54 rac1 chronyd[1225]: Selected source 111.230.189.174 (2.pool.ntp.org)
[root@rac1 ~]# systemctl disable chronyd
systemctl stop chronyd
Removed "/etc/systemd/system/multi-user.target.wants/chronyd.service".
[root@rac1 ~]# mv /etc/chrony.conf /etc/chrony.conf_bak
[root@rac1 ~]# mv /etc/ntp.conf /etc/ntp.conf_bak
mv: 无法获取'/etc/ntp.conf' 的文件状态(stat): 没有那个文件或目录
[root@rac1 ~]# systemctl list-unit-files|grep -E 'ntp|chrony'
chrony-wait.service                        disabled        disabled
chronyd-restricted.service                 disabled        disabled
chronyd.service                            disabled        enabled
[root@rac1 ~]#


[root@rac2 ~]# systemctl list-unit-files|grep chronyd
chronyd-restricted.service                 disabled        disabled
chronyd.service                            enabled         enabled
[root@rac2 ~]# systemctl status chronyd
● chronyd.service - NTP client/server
     Loaded: loaded (/usr/lib/systemd/system/chronyd.service; enabled; preset: enabled)
     Active: active (running) since Mon 2026-02-09 13:03:16 CST; 16min ago
       Docs: man:chronyd(8)
             man:chrony.conf(5)
   Main PID: 1223 (chronyd)
      Tasks: 1 (limit: 101883)
     Memory: 1.4M (peak: 2.1M)
        CPU: 52ms
     CGroup: /system.slice/chronyd.service
             └─1223 /usr/sbin/chronyd -F 2

2月 09 13:03:16 rac2 chronyd[1223]: chronyd version 4.6.1 starting (+CMDMON +NTP +REFCLOCK +RTC +PRIVDROP +SCFILTER +SIGND +ASYNCDNS +NTS +SECHASH +IPV6 +DEBUG)
2月 09 13:03:16 rac2 chronyd[1223]: Loaded 0 symmetric keys
2月 09 13:03:16 rac2 chronyd[1223]: Using right/UTC timezone to obtain leap second data
2月 09 13:03:16 rac2 chronyd[1223]: Frequency 4.192 +/- 0.422 ppm read from /var/lib/chrony/drift
2月 09 13:03:16 rac2 chronyd[1223]: Loaded seccomp filter (level 2)
2月 09 13:03:16 rac2 systemd[1]: Started NTP client/server.
2月 09 13:03:27 rac2 chronyd[1223]: Selected source 111.230.189.174 (2.pool.ntp.org)
2月 09 13:03:27 rac2 chronyd[1223]: System clock wrong by -1.206441 seconds
2月 09 13:03:26 rac2 chronyd[1223]: System clock was stepped by -1.206441 seconds
2月 09 13:03:26 rac2 chronyd[1223]: System clock TAI offset set to 37 seconds
[root@rac2 ~]# systemctl disable chronyd
systemctl stop chronyd
Removed "/etc/systemd/system/multi-user.target.wants/chronyd.service".
[root@rac2 ~]# mv /etc/chrony.conf /etc/chrony.conf_bak
[root@rac2 ~]# mv /etc/ntp.conf /etc/ntp.conf_bak
systemctl list-unit-files|grep -E 'ntp|chrony'
mv: 无法获取'/etc/ntp.conf' 的文件状态(stat): 没有那个文件或目录

chrony-wait.service                        disabled        disabled
chronyd-restricted.service                 disabled        disabled
chronyd.service                            disabled        enabled
[root@rac2 ~]#
这里实验环境,选择不使用NTP和chrony,这样Oracle会自动使用自己的ctss服务
4.16.2 使用ntp
1)修改所有节点的/etc/ntp.conf
【命令】vi /etc/ntp.conf
【内容】
restrict 192.168.17.5 nomodify notrap nopeer noquery          //当前节点IP地址
restrict 192.168.17.2 mask 255.255.255.0 nomodify notrap  //集群所在网段的网关(Gateway),子网掩码(Genmask)

2)选择一个主节点,修改其/etc/ntp.conf
【命令】vi /etc/ntp.conf
【内容】在server部分添加一下部分,并注释掉server 0 ~ n

server 127.127.1.0
Fudge 127.127.1.0 stratum 10

3)主节点以外,继续修改/etc/ntp.conf
【命令】vi /etc/ntp.conf
【内容】在server部分添加如下语句,将server指向主节点。
server 192.168.17.5
Fudge 192.168.17.5 stratum 10

节点1
echo
systemctl status ntpd
systemctl stop ntpd
systemctl stop chronyd
systemctl disable chronyd
sed -i 's/OPTIONS="-g"/OPTIONS="-g -x"/' /etc/sysconfig/ntpd
vim /etc/ntp.conf
注释server
sed '/^server/s/^/#/' /etc/ntp.conf -i
server 127.127.1.0
Fudge 127.127.1.0 stratum 10
# Hosts on local network are less restricted.
restrict 192.168.17.0 mask 255.255.255.0 nomodify notrap
把网段改为 192.168.17.0,取消注释
# Use public servers from the pool.ntp.org project.
# Please consider joining the pool (http://www.pool.ntp.org/join.html).
#server 0.rhel.pool.ntp.org iburst
#server 1.rhel.pool.ntp.org iburst
#server 2.rhel.pool.ntp.org iburst
#server 3.rhel.pool.ntp.org iburst

server 127.127.1.0
Fudge 127.127.1.0 stratum 10

#broadcast 192.168.1.255 autokey        # broadcast server
#broadcastclient                        # broadcast client
#broadcast 224.0.1.1 autokey            # multicast server
#multicastclient 224.0.1.1              # multicast client
#manycastserver 239.255.254.254         # manycast server
#manycastclient 239.255.254.254 autokey # manycast client

# Enable public key cryptography.
#crypto

includefile /etc/ntp/crypto/pw

# Key file containing the keys and key identifiers used when operating
# with symmetric key cryptography.
keys /etc/ntp/keys
---
把网段改为 192.168.17.0

systemctl start ntpd
systemctl enable ntpd
echo

节点2
echo
systemctl stop ntpd
systemctl stop chronyd
systemctl disable chronyd
sed -i 's/OPTIONS="-g"/OPTIONS="-g -x"/' /etc/sysconfig/ntpd
sed -i 's/^server/#server/g' /etc/ntp.conf
sed -i '$a server 192.168.17.141  iburst' /etc/ntp.conf

systemctl start ntpd
systemctl enable ntpd
echo

检查ntp配置文件/etc/sysconfig/ntpd,也已经从默认值OPTIONS="-g"修改成OPTIONS="-x -g",但是在使用命令$ cluvfy comp clocksync -n all –verbose检查时为什么会失败呢?

通过MOS文档《Linux:CVU NTP Prerequisite check fails with PRVF-7590, PRVG-1024 and PRVF-5415 (Doc ID2126223.1)》分析可以看出:If var/run/ntpd.pid does not existon the server, the CVU command fails. This is due to unpublished bug 19427746 which has been fixed in Oracle 12.2.(意思是:如果服务器上不存在/var/run/ntpd.pid,则CVU命令失败。这是由于未发布的错误BUG 19427746,该错误已在Oracle 12.2中修复。)
4.16.3 使用chony
最小化安装没有安装相关包
需要自行安装 yum -y install chrony
配置文件说明
$ cat /etc/chrony.conf

# 使用pool.ntp.org项目中的公共服务器。以server开,理论上你想添加多少时间服务器都可以。
# Please consider joining the pool (http://www.pool.ntp.org/join.html).
server 0.centos.pool.ntp.org iburst
server 1.centos.pool.ntp.org iburst
server 2.centos.pool.ntp.org iburst
server 3.centos.pool.ntp.org iburst

# 根据实际时间计算出服务器增减时间的比率,然后记录到一个文件中,在系统重启后为系统做出最佳时间补偿调整。
driftfile /var/lib/chrony/drift

# chronyd根据需求减慢或加速时间调整,
# 在某些情况下系统时钟可能漂移过快,导致时间调整用时过长。
# 该指令强制chronyd调整时期,大于某个阀值时步进调整系统时钟。
# 只有在因chronyd启动时间超过指定的限制时(可使用负值来禁用限制)没有更多时钟更新时才生效。
makestep 1.0 3

# 将启用一个内核模式,在该模式中,系统时间每11分钟会拷贝到实时时钟(RTC)。
rtcsync

# Enable hardware timestamping on all interfaces that support it.
# 通过使用hwtimestamp指令启用硬件时间戳
#hwtimestamp eth0
#hwtimestamp eth1
#hwtimestamp *

# Increase the minimum number of selectable sources required to adjust
# the system clock.
#minsources 2

# 指定一台主机、子网,或者网络以允许或拒绝NTP连接到扮演时钟服务器的机器
#allow 192.168.0.0/16
#deny 192.168/16

# Serve time even if not synchronized to a time source.
local stratum 10

# 指定包含NTP验证密钥的文件。
#keyfile /etc/chrony.keys

# 指定日志文件的目录。
logdir /var/log/chrony

# Select which information is logged.
#log measurements statistics tracking
RAC1:

1 先注释server :
sed '/^server/s/^/#/' /etc/chrony.conf -i
注释server

2
# vi /etc/chrony.conf
# Serve time even if not synchronized to a time source.开启该服务,在不与外网同步时间的情况下,依然为下层终端提供同步服务

local stratum 10

#allow用来标记允许同步的网段或主机,下例是允许192.168.17.0/24这个网段的终端来同步,127/8是本机和自己同步。

allow 192.168.17.0/24

server 127.0.0.1 iburst  --表示本机同步
allow						#允许所有网段连入
local stratum 10

3 重新启动 systemctl restart chronyd.service

RAC2:

1 先注释server :
sed '/^server/s/^/#/' /etc/chrony.conf -i
注释server

2
# vi /etc/chrony.conf
server 192.168.17.141 iburst  --表示RAC1同步


重启时间同步服务:
systemctl restart chronyd.service
systemctl enable chronyd.service
查看时间同步源:
# chronyc sources -v
chronyc sourcestats -v

查看 ntp_servers 是否在线
chronyc activity -v

查看 ntp 详细信息
chronyc tracking -v
4.17 创建组和用户
groupadd -g 54321 oinstall
groupadd -g 54322 dba
groupadd -g 54323 oper
groupadd -g 54324 backupdba
groupadd -g 54325 dgdba
groupadd -g 54326 kmdba
groupadd -g 54327 asmdba
groupadd -g 54328 asmoper
groupadd -g 54329 asmadmin
groupadd -g 54330 racdba
useradd -g oinstall -G dba,oper,backupdba,dgdba,kmdba,asmdba,asmoper,asmadmin,racdba -u 54321 oracle
useradd -g oinstall -G dba,asmadmin,asmdba,asmoper,racdba -u 54331 grid
echo "oracle" | passwd --stdin oracle
echo "grid" | passwd --stdin grid

[root@rac1 ~]# systemctl list-unit-files|grep -E 'ntp|chrony'
chrony-wait.service                        disabled        disabled
chronyd-restricted.service                 disabled        disabled
chronyd.service                            disabled        enabled
[root@rac1 ~]# groupadd -g 54321 oinstall
groupadd -g 54322 dba
groupadd -g 54323 oper
groupadd -g 54324 backupdba
groupadd -g 54325 dgdba
groupadd -g 54326 kmdba
groupadd -g 54327 asmdba
groupadd -g 54328 asmoper
groupadd -g 54329 asmadmin
groupadd -g 54330 racdba
useradd -g oinstall -G dba,oper,backupdba,dgdba,kmdba,asmdba,asmoper,asmadmin,racdba -u 54321 oracle
useradd -g oinstall -G dba,asmadmin,asmdba,asmoper,racdba -u 54331 grid
echo "oracle" | passwd --stdin oracle
echo "grid" | passwd --stdin grid
更改用户 oracle 的密码 。
passwd:所有的身份验证令牌已经成功更新。
更改用户 grid 的密码 。
passwd:所有的身份验证令牌已经成功更新。
[root@rac1 ~]# id oracle
用户id=54321(oracle) 组id=54321(oinstall) 组=54321(oinstall),54322(dba),54323(oper),54324(backupdba),54325(dgdba),54326(kmdba),54327(asmdba),54328(asmoper),54329(asmadmin),54330(racdba)
[root@rac1 ~]# id grid
用户id=54331(grid) 组id=54321(oinstall) 组=54321(oinstall),54322(dba),54327(asmdba),54328(asmoper),54329(asmadmin),54330(racdba)
[root@rac1 ~]#


[root@rac2 ~]# groupadd -g 54321 oinstall
groupadd -g 54322 dba
groupadd -g 54323 oper
groupadd -g 54324 backupdba
groupadd -g 54325 dgdba
groupadd -g 54326 kmdba
groupadd -g 54327 asmdba
groupadd -g 54328 asmoper
groupadd -g 54329 asmadmin
groupadd -g 54330 racdba
useradd -g oinstall -G dba,oper,backupdba,dgdba,kmdba,asmdba,asmoper,asmadmin,racdba -u 54321 oracle
useradd -g oinstall -G dba,asmadmin,asmdba,asmoper,racdba -u 54331 grid
echo "oracle" | passwd --stdin oracle
echo "grid" | passwd --stdin grid
更改用户 oracle 的密码 。
passwd:所有的身份验证令牌已经成功更新。
更改用户 grid 的密码 。
passwd:所有的身份验证令牌已经成功更新。
[root@rac2 ~]# id oracle
用户id=54321(oracle) 组id=54321(oinstall) 组=54321(oinstall),54322(dba),54323(oper),54324(backupdba),54325(dgdba),54326(kmdba),54327(asmdba),54328(asmoper),54329(asmadmin),54330(racdba)
[root@rac2 ~]# id grid
用户id=54331(grid) 组id=54321(oinstall) 组=54321(oinstall),54322(dba),54327(asmdba),54328(asmoper),54329(asmadmin),54330(racdba)
[root@rac2 ~]#
4.18 创建目录
mkdir -p /u01/app/23.0.0/grid
mkdir -p /u01/app/grid
mkdir -p /u01/app/oracle/product/23.0.0/dbhome_1/
chown -R grid:oinstall /u01
chown -R oracle:oinstall /u01/app/oracle
chmod -R 775 /u01/

[root@rac1 ~]# mkdir -p /u01/app/23.0.0/grid
mkdir -p /u01/app/grid
mkdir -p /u01/app/oracle/product/23.0.0/dbhome_1/
chown -R grid:oinstall /u01
chown -R oracle:oinstall /u01/app/oracle
chmod -R 775 /u01/
[root@rac1 ~]#


[root@rac2 ~]# mkdir -p /u01/app/23.0.0/grid
mkdir -p /u01/app/grid
mkdir -p /u01/app/oracle/product/23.0.0/dbhome_1/
chown -R grid:oinstall /u01
chown -R oracle:oinstall /u01/app/oracle
chmod -R 775 /u01/
[root@rac2 ~]#
4.19 配置用户环境变量
4.19.1 grid
cat >> /home/grid/.bash_profile << "EOF"
################add#########################
umask 022
export TMP=/tmp
export TMPDIR=$TMP
export ORACLE_BASE=/u01/app/grid
export ORACLE_HOME=/u01/app/23.0.0/grid
export TNS_ADMIN=$ORACLE_HOME/network/admin
export NLS_LANG=AMERICAN_AMERICA.AL32UTF8
export LD_LIBRARY_PATH=$ORACLE_HOME/lib:/lib:/usr/lib
export ORACLE_SID=+ASM1
export PATH=/usr/sbin:$PATH
export PATH=$ORACLE_HOME/bin:$ORACLE_HOME/OPatch:$PATH
alias sas='sqlplus / as sysasm'
export PS1="[\`whoami\`@\`hostname\`:"'$PWD]\$ '


EOF


cat >> /home/grid/.bash_profile << "EOF"
################ enmo add#########################
umask 022
export TMP=/tmp
export TMPDIR=$TMP
export ORACLE_BASE=/u01/app/grid
export ORACLE_HOME=/u01/app/23.0.0/grid
export TNS_ADMIN=$ORACLE_HOME/network/admin
export NLS_LANG=AMERICAN_AMERICA.AL32UTF8
export LD_LIBRARY_PATH=$ORACLE_HOME/lib:/lib:/usr/lib
export ORACLE_SID=+ASM2
export PATH=/usr/sbin:$PATH
export PATH=$ORACLE_HOME/bin:$ORACLE_HOME/OPatch:$PATH
alias sas='sqlplus / as sysasm'
export PS1="[\`whoami\`@\`hostname\`:"'$PWD]\$ '


EOF

[root@rac1 ~]# su - grid
[grid@rac1 ~]$ cat >> /home/grid/.bash_profile << "EOF"
################add#########################
umask 022
export TMP=/tmp
export TMPDIR=$TMP
export ORACLE_BASE=/u01/app/grid
export ORACLE_HOME=/u01/app/23.0.0/grid
export TNS_ADMIN=$ORACLE_HOME/network/admin
export NLS_LANG=AMERICAN_AMERICA.AL32UTF8
export LD_LIBRARY_PATH=$ORACLE_HOME/lib:/lib:/usr/lib
export ORACLE_SID=+ASM1
export PATH=/usr/sbin:$PATH
export PATH=$ORACLE_HOME/bin:$ORACLE_HOME/OPatch:$PATH
alias sas='sqlplus / as sysasm'
export PS1="[\`whoami\`@\`hostname\`:"'$PWD]\$ '


EOF
[grid@rac1 ~]$


[root@rac2 ~]# su - grid
[grid@rac2 ~]$ cat >> /home/grid/.bash_profile << "EOF"
################ enmo add#########################
umask 022
export TMP=/tmp
export TMPDIR=$TMP
export ORACLE_BASE=/u01/app/grid
export ORACLE_HOME=/u01/app/23.0.0/grid
export TNS_ADMIN=$ORACLE_HOME/network/admin
export NLS_LANG=AMERICAN_AMERICA.AL32UTF8
export LD_LIBRARY_PATH=$ORACLE_HOME/lib:/lib:/usr/lib
export ORACLE_SID=+ASM2
export PATH=/usr/sbin:$PATH
export PATH=$ORACLE_HOME/bin:$ORACLE_HOME/OPatch:$PATH
alias sas='sqlplus / as sysasm'
export PS1="[\`whoami\`@\`hostname\`:"'$PWD]\$ '


EOF
[grid@rac2 ~]$
4.19.2 oracle
cat >> /home/oracle/.bash_profile << "EOF"
################ add#########################
umask 022
export TMP=/tmp
export TMPDIR=$TMP
export NLS_LANG=AMERICAN_AMERICA.AL32UTF8
export ORACLE_BASE=/u01/app/oracle
export ORACLE_HOME=$ORACLE_BASE/product/23.0.0/dbhome_1
export ORACLE_HOSTNAME=rac1
export TNS_ADMIN=$ORACLE_HOME/network/admin
export LD_LIBRARY_PATH=$ORACLE_HOME/lib:/lib:/usr/lib
export ORACLE_SID=orcl1
export PATH=/usr/sbin:$PATH
export PATH=$ORACLE_HOME/bin:$ORACLE_HOME/OPatch:$PATH
alias sas='sqlplus / as sysdba'
export PS1="[\`whoami\`@\`hostname\`:"'$PWD]\$ '
EOF

cat >> /home/oracle/.bash_profile << "EOF"
################ add#########################
umask 022
export TMP=/tmp
export TMPDIR=$TMP
export NLS_LANG=AMERICAN_AMERICA.AL32UTF8
export ORACLE_BASE=/u01/app/oracle
export ORACLE_HOME=$ORACLE_BASE/product/23.0.0/dbhome_1
export ORACLE_HOSTNAME=rac2
export TNS_ADMIN=$ORACLE_HOME/network/admin
export LD_LIBRARY_PATH=$ORACLE_HOME/lib:/lib:/usr/lib
export ORACLE_SID=orcl2
export PATH=/usr/sbin:$PATH
export PATH=$ORACLE_HOME/bin:$ORACLE_HOME/OPatch:$PATH
alias sas='sqlplus / as sysdba'
export PS1="[\`whoami\`@\`hostname\`:"'$PWD]\$ '
EOF

[root@rac1 ~]# su - oracle
[oracle@rac1 ~]$ cat >> /home/oracle/.bash_profile << "EOF"
################ add#########################
umask 022
export TMP=/tmp
export TMPDIR=$TMP
export NLS_LANG=AMERICAN_AMERICA.AL32UTF8
export ORACLE_BASE=/u01/app/oracle
export ORACLE_HOME=$ORACLE_BASE/product/23.0.0/dbhome_1
export ORACLE_HOSTNAME=rac1
export TNS_ADMIN=$ORACLE_HOME/network/admin
export LD_LIBRARY_PATH=$ORACLE_HOME/lib:/lib:/usr/lib
export ORACLE_SID=orcl1
export PATH=/usr/sbin:$PATH
export PATH=$ORACLE_HOME/bin:$ORACLE_HOME/OPatch:$PATH
alias sas='sqlplus / as sysdba'
export PS1="[\`whoami\`@\`hostname\`:"'$PWD]\$ '
EOF
[oracle@rac1 ~]$


[root@rac2 ~]# su - oracle
[oracle@rac2 ~]$ cat >> /home/oracle/.bash_profile << "EOF"
################ add#########################
umask 022
export TMP=/tmp
export TMPDIR=$TMP
export NLS_LANG=AMERICAN_AMERICA.AL32UTF8
export ORACLE_BASE=/u01/app/oracle
export ORACLE_HOME=$ORACLE_BASE/product/23.0.0/dbhome_1
export ORACLE_HOSTNAME=rac2
export TNS_ADMIN=$ORACLE_HOME/network/admin
export LD_LIBRARY_PATH=$ORACLE_HOME/lib:/lib:/usr/lib
export ORACLE_SID=orcl2
export PATH=/usr/sbin:$PATH
export PATH=$ORACLE_HOME/bin:$ORACLE_HOME/OPatch:$PATH
alias sas='sqlplus / as sysdba'
export PS1="[\`whoami\`@\`hostname\`:"'$PWD]\$ '
EOF
[oracle@rac2 ~]$
4.20 配置共享存储(multipath+udev)
这次我们配置选择(multipath+udev)
4.20.1 multipath
##安装multipath
dnf install -y device-mapper*
mpathconf --enable --with_multipathd y
##查看共享盘的scsi_id
/usr/lib/udev/scsi_id -g -u /dev/sdb
/usr/lib/udev/scsi_id -g -u /dev/sdc
/usr/lib/udev/scsi_id -g -u /dev/sdd
/usr/lib/udev/scsi_id -g -u /dev/sde
/usr/lib/udev/scsi_id -g -u /dev/sdf
##配置multipath,wwid的值为上面获取的scsi_id,alias可自定义,这里配置3块OCR盘,2块DATA盘
defaults {
user_friendly_names yes
}
这里可以和之前的冲突了
cp /etc/multipath.conf /etc/multipath.conf.bak
sed '/^/s/^/#/' /etc/multipath.conf -i 注释所有的行
cat <<EOF>> /etc/multipath.conf
defaults {
user_friendly_names yes
}
blacklist {
devnode "^sda"
}
multipaths {
multipath {
wwid "36000c29c2199f445e6c28a483068676f"
alias OCRVOTE01
}
multipath {
wwid "36000c296e58e5e22e6fca2e526238c7a"
alias OCRVOTE02
}
multipath {
wwid "36000c2900352ea2cc26022e3d8307c8e"
alias OCRVOTE03
}
multipath {
wwid "36000c29dc198a2ae28aca1a24ddc303b"
alias DATA01
}
multipath {
wwid "36000c297c1ceaf5039485fec0dc39e5e"
alias DATA02
}
}
EOF
激活multipath多路径:
multipath -F
multipath -v2
multipath -ll
[root@rac1 ~]# dnf install -y device-mapper*
上次元数据过期检查:0:00:27 前,执行于 2026年02月09日 星期一 16时10分45秒。
软件包 device-mapper-9:1.02.206-2.el9.x86_64 已安装。
软件包 device-mapper-event-9:1.02.206-2.el9.x86_64 已安装。
软件包 device-mapper-event-libs-9:1.02.206-2.el9.x86_64 已安装。
软件包 device-mapper-libs-9:1.02.206-2.el9.x86_64 已安装。
软件包 device-mapper-multipath-0.8.7-39.el9.x86_64 已安装。
软件包 device-mapper-multipath-libs-0.8.7-39.el9.x86_64 已安装。
软件包 device-mapper-persistent-data-1.1.0-1.el9.x86_64 已安装。
依赖关系解决。
=================================================================================================================================================================================================================================================
软件包 架构 版本 仓库 大小
=================================================================================================================================================================================================================================================
升级:
device-mapper x86_64 9:1.02.206-2.el9_7.1 ol9_baseos_latest 154 k
device-mapper-event x86_64 9:1.02.206-2.el9_7.1 ol9_baseos_latest 38 k
device-mapper-event-libs x86_64 9:1.02.206-2.el9_7.1 ol9_baseos_latest 31 k
device-mapper-libs x86_64 9:1.02.206-2.el9_7.1 ol9_baseos_latest 179 k
device-mapper-multipath x86_64 0.8.7-39.el9_7.1 ol9_baseos_latest 173 k
device-mapper-multipath-libs x86_64 0.8.7-39.el9_7.1 ol9_baseos_latest 302 k
kpartx x86_64 0.8.7-39.el9_7.1 ol9_baseos_latest 58 k
lvm2 x86_64 9:2.03.32-2.el9_7.1 ol9_baseos_latest 1.6 M
lvm2-libs x86_64 9:2.03.32-2.el9_7.1 ol9_baseos_latest 1.0 M
事务概要
=================================================================================================================================================================================================================================================
升级 9 软件包
总下载:3.5 M
下载软件包:
正在等待 pid 为19560的进程退出。
(1/9): device-mapper-event-1.02.206-2.el9_7.1.x86_64.rpm 12 kB/s | 38 kB 00:03
(2/9): device-mapper-event-libs-1.02.206-2.el9_7.1.x86_64.rpm 10 kB/s | 31 kB 00:03
(3/9): device-mapper-1.02.206-2.el9_7.1.x86_64.rpm 44 kB/s | 154 kB 00:03
(4/9): device-mapper-libs-1.02.206-2.el9_7.1.x86_64.rpm 285 kB/s | 179 kB 00:00
(5/9): device-mapper-multipath-0.8.7-39.el9_7.1.x86_64.rpm 259 kB/s | 173 kB 00:00
(6/9): kpartx-0.8.7-39.el9_7.1.x86_64.rpm 250 kB/s | 58 kB 00:00
(7/9): device-mapper-multipath-libs-0.8.7-39.el9_7.1.x86_64.rpm 578 kB/s | 302 kB 00:00
(8/9): lvm2-libs-2.03.32-2.el9_7.1.x86_64.rpm 772 kB/s | 1.0 MB 00:01
(9/9): lvm2-2.03.32-2.el9_7.1.x86_64.rpm 1.0 MB/s | 1.6 MB 00:01
-------------------------------------------------------------------------------------------------------------------------------------------------------------------------------------------------------------------------------------------------
总计 684 kB/s | 3.5 MB 00:05
运行事务检查
事务检查成功。
运行事务测试
事务测试成功。
运行事务
准备中 : 1/1
升级 : device-mapper-libs-9:1.02.206-2.el9_7.1.x86_64 1/18
升级 : device-mapper-9:1.02.206-2.el9_7.1.x86_64 2/18
升级 : device-mapper-event-libs-9:1.02.206-2.el9_7.1.x86_64 3/18
升级 : device-mapper-event-9:1.02.206-2.el9_7.1.x86_64 4/18
运行脚本: device-mapper-event-9:1.02.206-2.el9_7.1.x86_64 4/18
升级 : lvm2-libs-9:2.03.32-2.el9_7.1.x86_64 5/18
升级 : device-mapper-multipath-libs-0.8.7-39.el9_7.1.x86_64 6/18
升级 : kpartx-0.8.7-39.el9_7.1.x86_64 7/18
升级 : device-mapper-multipath-0.8.7-39.el9_7.1.x86_64 8/18
运行脚本: device-mapper-multipath-0.8.7-39.el9_7.1.x86_64 8/18
升级 : lvm2-9:2.03.32-2.el9_7.1.x86_64 9/18
运行脚本: lvm2-9:2.03.32-2.el9_7.1.x86_64 9/18
运行脚本: device-mapper-multipath-0.8.7-39.el9.x86_64 10/18
清理 : device-mapper-multipath-0.8.7-39.el9.x86_64 10/18
运行脚本: device-mapper-multipath-0.8.7-39.el9.x86_64 10/18
清理 : device-mapper-multipath-libs-0.8.7-39.el9.x86_64 11/18
清理 : kpartx-0.8.7-39.el9.x86_64 12/18
运行脚本: lvm2-9:2.03.32-2.el9.x86_64 13/18
清理 : lvm2-9:2.03.32-2.el9.x86_64 13/18
运行脚本: lvm2-9:2.03.32-2.el9.x86_64 13/18
清理 : lvm2-libs-9:2.03.32-2.el9.x86_64 14/18
运行脚本: device-mapper-event-9:1.02.206-2.el9.x86_64 15/18
清理 : device-mapper-event-9:1.02.206-2.el9.x86_64 15/18
清理 : device-mapper-event-libs-9:1.02.206-2.el9.x86_64 16/18
清理 : device-mapper-libs-9:1.02.206-2.el9.x86_64 17/18
清理 : device-mapper-9:1.02.206-2.el9.x86_64 18/18
运行脚本: device-mapper-9:1.02.206-2.el9.x86_64 18/18
验证 : device-mapper-9:1.02.206-2.el9_7.1.x86_64 1/18
验证 : device-mapper-9:1.02.206-2.el9.x86_64 2/18
验证 : device-mapper-event-9:1.02.206-2.el9_7.1.x86_64 3/18
验证 : device-mapper-event-9:1.02.206-2.el9.x86_64 4/18
验证 : device-mapper-event-libs-9:1.02.206-2.el9_7.1.x86_64 5/18
验证 : device-mapper-event-libs-9:1.02.206-2.el9.x86_64 6/18
验证 : device-mapper-libs-9:1.02.206-2.el9_7.1.x86_64 7/18
验证 : device-mapper-libs-9:1.02.206-2.el9.x86_64 8/18
验证 : device-mapper-multipath-0.8.7-39.el9_7.1.x86_64 9/18
验证 : device-mapper-multipath-0.8.7-39.el9.x86_64 10/18
验证 : device-mapper-multipath-libs-0.8.7-39.el9_7.1.x86_64 11/18
验证 : device-mapper-multipath-libs-0.8.7-39.el9.x86_64 12/18
验证 : kpartx-0.8.7-39.el9_7.1.x86_64 13/18
验证 : kpartx-0.8.7-39.el9.x86_64 14/18
验证 : lvm2-9:2.03.32-2.el9_7.1.x86_64 15/18
验证 : lvm2-9:2.03.32-2.el9.x86_64 16/18
验证 : lvm2-libs-9:2.03.32-2.el9_7.1.x86_64 17/18
验证 : lvm2-libs-9:2.03.32-2.el9.x86_64 18/18
已升级:
device-mapper-9:1.02.206-2.el9_7.1.x86_64 device-mapper-event-9:1.02.206-2.el9_7.1.x86_64 device-mapper-event-libs-9:1.02.206-2.el9_7.1.x86_64 device-mapper-libs-9:1.02.206-2.el9_7.1.x86_64
device-mapper-multipath-0.8.7-39.el9_7.1.x86_64 device-mapper-multipath-libs-0.8.7-39.el9_7.1.x86_64 kpartx-0.8.7-39.el9_7.1.x86_64 lvm2-9:2.03.32-2.el9_7.1.x86_64
lvm2-libs-9:2.03.32-2.el9_7.1.x86_64
完毕!
[root@rac1 ~]# mpathconf --enable --with_multipathd y
[root@rac1 ~]# /usr/lib/udev/scsi_id -g -u /dev/sdb
36000c29c2199f445e6c28a483068676f
[root@rac1 ~]# /usr/lib/udev/scsi_id -g -u /dev/sdc
36000c296e58e5e22e6fca2e526238c7a
[root@rac1 ~]# /usr/lib/udev/scsi_id -g -u /dev/sdd
36000c29dc198a2ae28aca1a24ddc303b
[root@rac1 ~]# /usr/lib/udev/scsi_id -g -u /dev/sde
36000c2900352ea2cc26022e3d8307c8e
[root@rac1 ~]# /usr/lib/udev/scsi_id -g -u /dev/sdf
36000c297c1ceaf5039485fec0dc39e5e
[root@rac1 ~]# cp /etc/multipath.conf /etc/multipath.conf.bak
[root@rac1 ~]# lsblk
NAME MAJ:MIN RM SIZE RO TYPE MOUNTPOINTS
sda 8:0 0 100G 0 disk
├─sda1 8:1 0 1G 0 part /boot
└─sda2 8:2 0 98.9G 0 part
├─ol-root 252:0 0 82.8G 0 lvm /
└─ol-swap 252:1 0 16.1G 0 lvm [SWAP]
sdb 8:16 0 5G 0 disk
sdc 8:32 0 5G 0 disk
sdd 8:48 0 20G 0 disk
sde 8:64 0 5G 0 disk
sdf 8:80 0 20G 0 disk
sr0 11:0 1 13.5G 0 rom
[root@rac1 ~]# sed '/^/s/^/#/' /etc/multipath.conf -i
[root@rac1 ~]# cat <<EOF>> /etc/multipath.conf
defaults {
user_friendly_names yes
}
blacklist {
devnode "^sda"
}
multipaths {
multipath {
wwid "36000c29c2199f445e6c28a483068676f"
alias OCRVOTE01
}
multipath {
wwid "36000c296e58e5e22e6fca2e526238c7a"
alias OCRVOTE02
}
multipath {
wwid "36000c2900352ea2cc26022e3d8307c8e"
alias OCRVOTE03
}
multipath {
wwid "36000c29dc198a2ae28aca1a24ddc303b"
alias DATA01
}
multipath {
wwid "36000c297c1ceaf5039485fec0dc39e5e"
alias DATA02
}
}
EOF
[root@rac1 ~]# multipath -F
[root@rac1 ~]# multipath -v2
670.898978 | OCRVOTE02: addmap [0 10485760 multipath 0 0 1 1 service-time 0 1 1 8:32 1]
create: OCRVOTE02 (36000c296e58e5e22e6fca2e526238c7a) undef VMware,,VMware Virtual S
size=5.0G features='0' hwhandler='0' wp=undef
`-+- policy='service-time 0' prio=1 status=undef
`- 3:0:0:0 sdc 8:32 undef ready running
670.960115 | OCRVOTE01: addmap [0 10485760 multipath 0 0 1 1 service-time 0 1 1 8:16 1]
create: OCRVOTE01 (36000c29c2199f445e6c28a483068676f) undef VMware,,VMware Virtual S
size=5.0G features='0' hwhandler='0' wp=undef
`-+- policy='service-time 0' prio=1 status=undef
`- 3:0:1:0 sdb 8:16 undef ready running
671.013828 | OCRVOTE03: addmap [0 10485760 multipath 0 0 1 1 service-time 0 1 1 8:64 1]
create: OCRVOTE03 (36000c2900352ea2cc26022e3d8307c8e) undef VMware,,VMware Virtual S
size=5.0G features='0' hwhandler='0' wp=undef
`-+- policy='service-time 0' prio=1 status=undef
`- 3:0:2:0 sde 8:64 undef ready running
671.068251 | DATA01: addmap [0 41943040 multipath 0 0 1 1 service-time 0 1 1 8:48 1]
create: DATA01 (36000c29dc198a2ae28aca1a24ddc303b) undef VMware,,VMware Virtual S
size=20G features='0' hwhandler='0' wp=undef
`-+- policy='service-time 0' prio=1 status=undef
`- 3:0:3:0 sdd 8:48 undef ready running
671.116454 | DATA02: addmap [0 41943040 multipath 0 0 1 1 service-time 0 1 1 8:80 1]
create: DATA02 (36000c297c1ceaf5039485fec0dc39e5e) undef VMware,,VMware Virtual S
size=20G features='0' hwhandler='0' wp=undef
`-+- policy='service-time 0' prio=1 status=undef
`- 3:0:4:0 sdf 8:80 undef ready running
[root@rac1 ~]# multipath -ll
DATA01 (36000c29dc198a2ae28aca1a24ddc303b) dm-5 VMware,,VMware Virtual S
size=20G features='0' hwhandler='0' wp=rw
`-+- policy='service-time 0' prio=1 status=active
`- 3:0:3:0 sdd 8:48 active ready running
DATA02 (36000c297c1ceaf5039485fec0dc39e5e) dm-6 VMware,,VMware Virtual S
size=20G features='0' hwhandler='0' wp=rw
`-+- policy='service-time 0' prio=1 status=active
`- 3:0:4:0 sdf 8:80 active ready running
OCRVOTE01 (36000c29c2199f445e6c28a483068676f) dm-3 VMware,,VMware Virtual S
size=5.0G features='0' hwhandler='0' wp=rw
`-+- policy='service-time 0' prio=1 status=active
`- 3:0:1:0 sdb 8:16 active ready running
OCRVOTE02 (36000c296e58e5e22e6fca2e526238c7a) dm-2 VMware,,VMware Virtual S
size=5.0G features='0' hwhandler='0' wp=rw
`-+- policy='service-time 0' prio=1 status=active
`- 3:0:0:0 sdc 8:32 active ready running
OCRVOTE03 (36000c2900352ea2cc26022e3d8307c8e) dm-4 VMware,,VMware Virtual S
size=5.0G features='0' hwhandler='0' wp=rw
`-+- policy='service-time 0' prio=1 status=active
`- 3:0:2:0 sde 8:64 active ready running
[root@rac1 ~]#
[root@rac2 ~]# dnf install -y device-mapper*
正在等待 pid 为2426的进程退出。
上次元数据过期检查:0:00:03 前,执行于 2026年02月09日 星期一 16时14分27秒。
软件包 device-mapper-9:1.02.206-2.el9.x86_64 已安装。
软件包 device-mapper-event-9:1.02.206-2.el9.x86_64 已安装。
软件包 device-mapper-event-libs-9:1.02.206-2.el9.x86_64 已安装。
软件包 device-mapper-libs-9:1.02.206-2.el9.x86_64 已安装。
软件包 device-mapper-multipath-0.8.7-39.el9.x86_64 已安装。
软件包 device-mapper-multipath-libs-0.8.7-39.el9.x86_64 已安装。
软件包 device-mapper-persistent-data-1.1.0-1.el9.x86_64 已安装。
依赖关系解决。
=================================================================================================================================================================================================================================================
软件包 架构 版本 仓库 大小
=================================================================================================================================================================================================================================================
升级:
device-mapper x86_64 9:1.02.206-2.el9_7.1 ol9_baseos_latest 154 k
device-mapper-event x86_64 9:1.02.206-2.el9_7.1 ol9_baseos_latest 38 k
device-mapper-event-libs x86_64 9:1.02.206-2.el9_7.1 ol9_baseos_latest 31 k
device-mapper-libs x86_64 9:1.02.206-2.el9_7.1 ol9_baseos_latest 179 k
device-mapper-multipath x86_64 0.8.7-39.el9_7.1 ol9_baseos_latest 173 k
device-mapper-multipath-libs x86_64 0.8.7-39.el9_7.1 ol9_baseos_latest 302 k
kpartx x86_64 0.8.7-39.el9_7.1 ol9_baseos_latest 58 k
lvm2 x86_64 9:2.03.32-2.el9_7.1 ol9_baseos_latest 1.6 M
lvm2-libs x86_64 9:2.03.32-2.el9_7.1 ol9_baseos_latest 1.0 M
事务概要
=================================================================================================================================================================================================================================================
升级 9 软件包
总下载:3.5 M
下载软件包:
(1/9): device-mapper-event-libs-1.02.206-2.el9_7.1.x86_64.rpm 9.8 kB/s | 31 kB 00:03
(2/9): device-mapper-event-1.02.206-2.el9_7.1.x86_64.rpm 12 kB/s | 38 kB 00:03
(3/9): device-mapper-1.02.206-2.el9_7.1.x86_64.rpm 41 kB/s | 154 kB 00:03
(4/9): device-mapper-multipath-0.8.7-39.el9_7.1.x86_64.rpm 229 kB/s | 173 kB 00:00
(5/9): kpartx-0.8.7-39.el9_7.1.x86_64.rpm 207 kB/s | 58 kB 00:00
(6/9): device-mapper-multipath-libs-0.8.7-39.el9_7.1.x86_64.rpm 479 kB/s | 302 kB 00:00
(7/9): lvm2-libs-2.03.32-2.el9_7.1.x86_64.rpm 1.4 MB/s | 1.0 MB 00:00
(8/9): device-mapper-libs-1.02.206-2.el9_7.1.x86_64.rpm 83 kB/s | 179 kB 00:02
(9/9): lvm2-2.03.32-2.el9_7.1.x86_64.rpm 1.6 MB/s | 1.6 MB 00:01
-------------------------------------------------------------------------------------------------------------------------------------------------------------------------------------------------------------------------------------------------
总计 686 kB/s | 3.5 MB 00:05
Oracle Linux 9 BaseOS Latest (x86_64) 6.1 MB/s | 6.2 kB 00:00
导入 GPG 公钥 0x8D8B756F:
Userid: "Oracle Linux (release key 1) <secalert_us@oracle.com>"
指纹: 3E6D 826D 3FBA B389 C2F3 8E34 BC4D 06A0 8D8B 756F
来自: /etc/pki/rpm-gpg/RPM-GPG-KEY-oracle
导入公钥成功
导入 GPG 公钥 0x8B4EFBE6:
Userid: "Oracle Linux (backup key 1) <secalert_us@oracle.com>"
指纹: 9822 3175 9C74 6706 5D0C E9B2 A7DD 0708 8B4E FBE6
来自: /etc/pki/rpm-gpg/RPM-GPG-KEY-oracle
导入公钥成功
运行事务检查
事务检查成功。
运行事务测试
事务测试成功。
运行事务
准备中 : 1/1
升级 : device-mapper-libs-9:1.02.206-2.el9_7.1.x86_64 1/18
升级 : device-mapper-9:1.02.206-2.el9_7.1.x86_64 2/18
升级 : device-mapper-event-libs-9:1.02.206-2.el9_7.1.x86_64 3/18
升级 : device-mapper-event-9:1.02.206-2.el9_7.1.x86_64 4/18
运行脚本: device-mapper-event-9:1.02.206-2.el9_7.1.x86_64 4/18
升级 : lvm2-libs-9:2.03.32-2.el9_7.1.x86_64 5/18
升级 : device-mapper-multipath-libs-0.8.7-39.el9_7.1.x86_64 6/18
升级 : kpartx-0.8.7-39.el9_7.1.x86_64 7/18
升级 : device-mapper-multipath-0.8.7-39.el9_7.1.x86_64 8/18
运行脚本: device-mapper-multipath-0.8.7-39.el9_7.1.x86_64 8/18
升级 : lvm2-9:2.03.32-2.el9_7.1.x86_64 9/18
运行脚本: lvm2-9:2.03.32-2.el9_7.1.x86_64 9/18
运行脚本: device-mapper-multipath-0.8.7-39.el9.x86_64 10/18
清理 : device-mapper-multipath-0.8.7-39.el9.x86_64 10/18
运行脚本: device-mapper-multipath-0.8.7-39.el9.x86_64 10/18
清理 : device-mapper-multipath-libs-0.8.7-39.el9.x86_64 11/18
清理 : kpartx-0.8.7-39.el9.x86_64 12/18
运行脚本: lvm2-9:2.03.32-2.el9.x86_64 13/18
清理 : lvm2-9:2.03.32-2.el9.x86_64 13/18
运行脚本: lvm2-9:2.03.32-2.el9.x86_64 13/18
清理 : lvm2-libs-9:2.03.32-2.el9.x86_64 14/18
运行脚本: device-mapper-event-9:1.02.206-2.el9.x86_64 15/18
清理 : device-mapper-event-9:1.02.206-2.el9.x86_64 15/18
清理 : device-mapper-event-libs-9:1.02.206-2.el9.x86_64 16/18
清理 : device-mapper-libs-9:1.02.206-2.el9.x86_64 17/18
清理 : device-mapper-9:1.02.206-2.el9.x86_64 18/18
运行脚本: device-mapper-9:1.02.206-2.el9.x86_64 18/18
验证 : device-mapper-9:1.02.206-2.el9_7.1.x86_64 1/18
验证 : device-mapper-9:1.02.206-2.el9.x86_64 2/18
验证 : device-mapper-event-9:1.02.206-2.el9_7.1.x86_64 3/18
验证 : device-mapper-event-9:1.02.206-2.el9.x86_64 4/18
验证 : device-mapper-event-libs-9:1.02.206-2.el9_7.1.x86_64 5/18
验证 : device-mapper-event-libs-9:1.02.206-2.el9.x86_64 6/18
验证 : device-mapper-libs-9:1.02.206-2.el9_7.1.x86_64 7/18
验证 : device-mapper-libs-9:1.02.206-2.el9.x86_64 8/18
验证 : device-mapper-multipath-0.8.7-39.el9_7.1.x86_64 9/18
验证 : device-mapper-multipath-0.8.7-39.el9.x86_64 10/18
验证 : device-mapper-multipath-libs-0.8.7-39.el9_7.1.x86_64 11/18
验证 : device-mapper-multipath-libs-0.8.7-39.el9.x86_64 12/18
验证 : kpartx-0.8.7-39.el9_7.1.x86_64 13/18
验证 : kpartx-0.8.7-39.el9.x86_64 14/18
验证 : lvm2-9:2.03.32-2.el9_7.1.x86_64 15/18
验证 : lvm2-9:2.03.32-2.el9.x86_64 16/18
验证 : lvm2-libs-9:2.03.32-2.el9_7.1.x86_64 17/18
验证 : lvm2-libs-9:2.03.32-2.el9.x86_64 18/18
已升级:
device-mapper-9:1.02.206-2.el9_7.1.x86_64 device-mapper-event-9:1.02.206-2.el9_7.1.x86_64 device-mapper-event-libs-9:1.02.206-2.el9_7.1.x86_64 device-mapper-libs-9:1.02.206-2.el9_7.1.x86_64
device-mapper-multipath-0.8.7-39.el9_7.1.x86_64 device-mapper-multipath-libs-0.8.7-39.el9_7.1.x86_64 kpartx-0.8.7-39.el9_7.1.x86_64 lvm2-9:2.03.32-2.el9_7.1.x86_64
lvm2-libs-9:2.03.32-2.el9_7.1.x86_64
完毕!
[root@rac2 ~]# mpathconf --enable --with_multipathd y
[root@rac2 ~]# /usr/lib/udev/scsi_id -g -u /dev/sdb
36000c296e58e5e22e6fca2e526238c7a
[root@rac2 ~]# /usr/lib/udev/scsi_id -g -u /dev/sdc
36000c29c2199f445e6c28a483068676f
[root@rac2 ~]# /usr/lib/udev/scsi_id -g -u /dev/sdd
36000c29dc198a2ae28aca1a24ddc303b
[root@rac2 ~]# /usr/lib/udev/scsi_id -g -u /dev/sde
36000c2900352ea2cc26022e3d8307c8e
[root@rac2 ~]# /usr/lib/udev/scsi_id -g -u /dev/sdf
36000c297c1ceaf5039485fec0dc39e5e
[root@rac2 ~]# lsblk
NAME MAJ:MIN RM SIZE RO TYPE MOUNTPOINTS
sda 8:0 0 100G 0 disk
├─sda1 8:1 0 1G 0 part /boot
└─sda2 8:2 0 98.9G 0 part
├─ol-root 252:0 0 82.8G 0 lvm /
└─ol-swap 252:1 0 16.1G 0 lvm [SWAP]
sdb 8:16 0 5G 0 disk
sdc 8:32 0 5G 0 disk
sdd 8:48 0 20G 0 disk
sde 8:64 0 5G 0 disk
sdf 8:80 0 20G 0 disk
sr0 11:0 1 13.5G 0 rom
[root@rac2 ~]# cp /etc/multipath.conf /etc/multipath.conf.bak
[root@rac2 ~]# sed '/^/s/^/#/' /etc/multipath.conf -i
[root@rac2 ~]# cat <<EOF>> /etc/multipath.conf
defaults {
user_friendly_names yes
}
blacklist {
devnode "^sda"
}
multipaths {
multipath {
wwid "36000c29c2199f445e6c28a483068676f"
alias OCRVOTE01
}
multipath {
wwid "36000c296e58e5e22e6fca2e526238c7a"
alias OCRVOTE02
}
multipath {
wwid "36000c2900352ea2cc26022e3d8307c8e"
alias OCRVOTE03
}
multipath {
wwid "36000c29dc198a2ae28aca1a24ddc303b"
alias DATA01
}
multipath {
wwid "36000c297c1ceaf5039485fec0dc39e5e"
alias DATA02
}
}
EOF
[root@rac2 ~]# multipath -F
[root@rac2 ~]# multipath -v2
1051.682658 | OCRVOTE02: addmap [0 10485760 multipath 0 0 1 1 service-time 0 1 1 8:16 1]
create: OCRVOTE02 (36000c296e58e5e22e6fca2e526238c7a) undef VMware,,VMware Virtual S
size=5.0G features='0' hwhandler='0' wp=undef
`-+- policy='service-time 0' prio=1 status=undef
`- 3:0:0:0 sdb 8:16 undef ready running
1051.772004 | OCRVOTE01: addmap [0 10485760 multipath 0 0 1 1 service-time 0 1 1 8:32 1]
create: OCRVOTE01 (36000c29c2199f445e6c28a483068676f) undef VMware,,VMware Virtual S
size=5.0G features='0' hwhandler='0' wp=undef
`-+- policy='service-time 0' prio=1 status=undef
`- 3:0:1:0 sdc 8:32 undef ready running
1051.823303 | OCRVOTE03: addmap [0 10485760 multipath 0 0 1 1 service-time 0 1 1 8:64 1]
create: OCRVOTE03 (36000c2900352ea2cc26022e3d8307c8e) undef VMware,,VMware Virtual S
size=5.0G features='0' hwhandler='0' wp=undef
`-+- policy='service-time 0' prio=1 status=undef
`- 3:0:2:0 sde 8:64 undef ready running
1051.873167 | DATA01: addmap [0 41943040 multipath 0 0 1 1 service-time 0 1 1 8:48 1]
create: DATA01 (36000c29dc198a2ae28aca1a24ddc303b) undef VMware,,VMware Virtual S
size=20G features='0' hwhandler='0' wp=undef
`-+- policy='service-time 0' prio=1 status=undef
`- 3:0:3:0 sdd 8:48 undef ready running
1051.920340 | DATA02: addmap [0 41943040 multipath 0 0 1 1 service-time 0 1 1 8:80 1]
create: DATA02 (36000c297c1ceaf5039485fec0dc39e5e) undef VMware,,VMware Virtual S
size=20G features='0' hwhandler='0' wp=undef
`-+- policy='service-time 0' prio=1 status=undef
`- 3:0:4:0 sdf 8:80 undef ready running
[root@rac2 ~]# multipath -ll
DATA01 (36000c29dc198a2ae28aca1a24ddc303b) dm-5 VMware,,VMware Virtual S
size=20G features='0' hwhandler='0' wp=rw
`-+- policy='service-time 0' prio=1 status=active
`- 3:0:3:0 sdd 8:48 active ready running
DATA02 (36000c297c1ceaf5039485fec0dc39e5e) dm-6 VMware,,VMware Virtual S
size=20G features='0' hwhandler='0' wp=rw
`-+- policy='service-time 0' prio=1 status=active
`- 3:0:4:0 sdf 8:80 active ready running
OCRVOTE01 (36000c29c2199f445e6c28a483068676f) dm-3 VMware,,VMware Virtual S
size=5.0G features='0' hwhandler='0' wp=rw
`-+- policy='service-time 0' prio=1 status=active
`- 3:0:1:0 sdc 8:32 active ready running
OCRVOTE02 (36000c296e58e5e22e6fca2e526238c7a) dm-2 VMware,,VMware Virtual S
size=5.0G features='0' hwhandler='0' wp=rw
`-+- policy='service-time 0' prio=1 status=active
`- 3:0:0:0 sdb 8:16 active ready running
OCRVOTE03 (36000c2900352ea2cc26022e3d8307c8e) dm-4 VMware,,VMware Virtual S
size=5.0G features='0' hwhandler='0' wp=rw
`-+- policy='service-time 0' prio=1 status=active
`- 3:0:2:0 sde 8:64 active ready running
[root@rac2 ~]#
4.20.2 UDEV
cd /dev/mapper
for i in OCRVOTE01 OCRVOTE02 OCRVOTE03 DATA01 DATA02; do
	printf "%s %s\n" "$i" "$(udevadm info --query=all --name=/dev/mapper/"$i" | grep -i dm_uuid)" >>/dev/mapper/udev_info
done
while read -r line; do
	dm_uuid=$(echo "$line" | awk -F'=' '{print $2}')
	disk_name=$(echo "$line" | awk '{print $1}')
	echo "KERNEL==\"dm-*\",ENV{DM_UUID}==\"${dm_uuid}\",SYMLINK+=\"oracleasm/disks/${disk_name}\",OWNER=\"grid\",GROUP=\"asmdba\",MODE=\"0660\"" >>/etc/udev/rules.d/99-oracle-asmdevices.rules
done < /dev/mapper/udev_info
##重载udev
udevadm control --reload-rules
udevadm trigger --type=devices
ll /dev/oracleasm/disks/

[root@rac1 mapper]# cd
[root@rac1 ~]# cd /dev/mapper
[root@rac1 mapper]# for i in OCRVOTE01 OCRVOTE02 OCRVOTE03 DATA01 DATA02; do
        printf "%s %s\n" "$i" "$(udevadm info --query=all --name=/dev/mapper/"$i" | grep -i dm_uuid)" >>/dev/mapper/udev_info
done
[root@rac1 mapper]# while read -r line; do
        dm_uuid=$(echo "$line" | awk -F'=' '{print $2}')
        disk_name=$(echo "$line" | awk '{print $1}')
        echo "KERNEL==\"dm-*\",ENV{DM_UUID}==\"${dm_uuid}\",SYMLINK+=\"oracleasm/disks/${disk_name}\",OWNER=\"grid\",GROUP=\"asmdba\",MODE=\"0660\"" >>/etc/udev/rules.d/99-oracle-asmdevices.rules
done < /dev/mapper/udev_info
[root@rac1 mapper]# ll /dev/mapper/udev_info
-rw-r--r--. 1 root root 299  2月  9 16:26 /dev/mapper/udev_info
[root@rac1 mapper]# cat /dev/mapper/udev_info
OCRVOTE01 E: DM_UUID=mpath-36000c29c2199f445e6c28a483068676f
OCRVOTE02 E: DM_UUID=mpath-36000c296e58e5e22e6fca2e526238c7a
OCRVOTE03 E: DM_UUID=mpath-36000c2900352ea2cc26022e3d8307c8e
DATA01 E: DM_UUID=mpath-36000c29dc198a2ae28aca1a24ddc303b
DATA02 E: DM_UUID=mpath-36000c297c1ceaf5039485fec0dc39e5e
[root@rac1 mapper]# cat /etc/udev/rules.d/99-oracle-asmdevices.rules
KERNEL=="dm-*",ENV{DM_UUID}=="mpath-36000c29c2199f445e6c28a483068676f",SYMLINK+="oracleasm/disks/OCRVOTE01",OWNER="grid",GROUP="asmdba",MODE="0660"
KERNEL=="dm-*",ENV{DM_UUID}=="mpath-36000c296e58e5e22e6fca2e526238c7a",SYMLINK+="oracleasm/disks/OCRVOTE02",OWNER="grid",GROUP="asmdba",MODE="0660"
KERNEL=="dm-*",ENV{DM_UUID}=="mpath-36000c2900352ea2cc26022e3d8307c8e",SYMLINK+="oracleasm/disks/OCRVOTE03",OWNER="grid",GROUP="asmdba",MODE="0660"
KERNEL=="dm-*",ENV{DM_UUID}=="mpath-36000c29dc198a2ae28aca1a24ddc303b",SYMLINK+="oracleasm/disks/DATA01",OWNER="grid",GROUP="asmdba",MODE="0660"
KERNEL=="dm-*",ENV{DM_UUID}=="mpath-36000c297c1ceaf5039485fec0dc39e5e",SYMLINK+="oracleasm/disks/DATA02",OWNER="grid",GROUP="asmdba",MODE="0660"
[root@rac1 mapper]# udevadm control --reload-rules
[root@rac1 mapper]# udevadm trigger --type=devices
[root@rac1 mapper]# ls -lh /dev/oracleasm/disks/
总用量 0
lrwxrwxrwx. 1 root root 10  2月  9 16:29 DATA01 -> ../../dm-5
lrwxrwxrwx. 1 root root 10  2月  9 16:29 DATA02 -> ../../dm-6
lrwxrwxrwx. 1 root root 10  2月  9 16:29 OCRVOTE01 -> ../../dm-3
lrwxrwxrwx. 1 root root 10  2月  9 16:29 OCRVOTE02 -> ../../dm-2
lrwxrwxrwx. 1 root root 10  2月  9 16:29 OCRVOTE03 -> ../../dm-4
[root@rac1 mapper]# init 6
[root@rac1 mapper]#


[root@rac2 ~]# rpm -q bc binutils compat-openssl11 elfutils-libelf fontconfig glibc glibc-devel glibc-headers ksh libaio libasan libX11 libXau libXi libXrender libXtst libxcrypt-compat libgcc libibverbs librdmacm libstdc++ libxcb libvirt-libs make policycoreutils policycoreutils-python-utils smartmontools sysstat nfs-utils | grep "not installed"
[root@rac2 ~]# cd /dev/mapper
for i in OCRVOTE01 OCRVOTE02 OCRVOTE03 DATA01 DATA02; do
        printf "%s %s\n" "$i" "$(udevadm info --query=all --name=/dev/mapper/"$i" | grep -i dm_uuid)" >>/dev/mapper/udev_info
done
while read -r line; do
        dm_uuid=$(echo "$line" | awk -F'=' '{print $2}')
        disk_name=$(echo "$line" | awk '{print $1}')
        echo "KERNEL==\"dm-*\",ENV{DM_UUID}==\"${dm_uuid}\",SYMLINK+=\"oracleasm/disks/${disk_name}\",OWNER=\"grid\",GROUP=\"asmdba\",MODE=\"0660\"" >>/etc/udev/rules.d/99-oracle-asmdevices.rules
done < /dev/mapper/udev_info
[root@rac2 mapper]# udevadm control --reload-rules
[root@rac2 mapper]# udevadm trigger --type=devices
[root@rac2 mapper]# ll /dev/oracleasm/disks/
总用量 0
lrwxrwxrwx 1 root root 10  2月  9 16:34 DATA01 -> ../../dm-5
lrwxrwxrwx 1 root root 10  2月  9 16:34 DATA02 -> ../../dm-6
lrwxrwxrwx 1 root root 10  2月  9 16:34 OCRVOTE01 -> ../../dm-3
lrwxrwxrwx 1 root root 10  2月  9 16:34 OCRVOTE02 -> ../../dm-2
lrwxrwxrwx 1 root root 10  2月  9 16:34 OCRVOTE03 -> ../../dm-4
[root@rac2 mapper]# init 6
[root@rac2 mapper]#
4.20.2 UDEV(非multipath)
for i in b c d e ;
do
echo "KERNEL==\"sd*\", ENV{DEVTYPE}==\"disk\", SUBSYSTEM==\"block\", PROGRAM==\"/lib/udev/scsi_id -g -u -d \$devnode\",
RESULT==\"`/lib/udev/scsi_id -g -u -d /dev/sd$i`\", SYMLINK+=\"asm-disk$i\", OWNER=\"grid\", GROUP=\"asmadmin\", MODE=
\"0660\""      >> /etc/udev/rules.d/99-oracle-asmdevices.rules
done
# 加载rules文件,重新加载udev rule
/sbin/udevadm control --reload
# 检查新的设备名称
/sbin/udevadm trigger --type=devices --action=change
# 诊断udev rule
/sbin/udevadm test /sys/block/*


用脚本生成udev 配置:

for i in b c d e f;
do
echo "KERNEL==/"sd*/",ENV{DEVTYPE}==/"disk/",SUBSYSTEM==/"block/",PROGRAM==/"/usr/lib/udev/scsi_id -g -u -d /$devnode/",RESULT==/"`/usr/lib/udev/scsi_id -g -u /dev/sd$i`/", RUN+=/"/bin/sh -c 'mknod /dev/asmdisk$i b  /$major /$minor; chown grid:asmadmin /dev/asmdisk$i; chmod 0660 /dev/asmdisk$i'/""
done
将脚本内容写入/etc/udev/rules.d/99-oracle-asmdevices.rules 文件。

[root@rac1 ~]# vi /etc/udev/rules.d/99-oracle-asmdevices.rules.bak
[root@rac1 ~]# cat /etc/udev/rules.d/99-oracle-asmdevices.rules.bak
##OCR
KERNEL=="sd*", SUBSYSTEM=="block", PROGRAM=="/lib/udev/scsi_id --whitelisted --replace-whitespace --device /dev/$name", RESULT=="36000c29f3aef7e4624b113f7fa3b814a", SYMLINK+="oracleasm/disks/OCRVOTE1", OWNER="grid",GROUP="asmadmin",MODE="0660"
KERNEL=="sd*", SUBSYSTEM=="block", PROGRAM=="/lib/udev/scsi_id --whitelisted --replace-whitespace --device /dev/$name", RESULT=="36000c29bb678b6eddfcc18bc14b700fd", SYMLINK+="oracleasm/disks/OCRVOTE2", OWNER="grid", GROUP="asmadmin", MODE="0660"
KERNEL=="sd*", SUBSYSTEM=="block", PROGRAM=="/lib/udev/scsi_id --whitelisted --replace-whitespace --device /dev/$name", RESULT=="36000c296f427a1940291bb5b8553421d", SYMLINK+="oracleasm/disks/OCRVOTE3", OWNER="grid", GROUP="asmadmin", MODE="0660"

##DATA
KERNEL=="sd*", SUBSYSTEM=="block", PROGRAM=="/lib/udev/scsi_id --whitelisted --replace-whitespace --device /dev/$name", RESULT=="36000c290a592be891e54e91ebc74f47a", SYMLINK+="oracleasm/disks/DATA01", OWNER="grid", GROUP="asmadmin", MODE="0660"
KERNEL=="sd*", SUBSYSTEM=="block", PROGRAM=="/lib/udev/scsi_id --whitelisted --replace-whitespace --device /dev/$name", RESULT=="36000c29c9bee73d24577ed3d66d99f5d", SYMLINK+="oracleasm/disks/DATA02", OWNER="grid", GROUP="asmadmin", MODE="0660"

[root@rac1 ~]#


让UDEV生效: /sbin/udevadm trigger —type=devices —action=change

or

KERNEL=="sdb", SUBSYSTEM=="block", PROGRAM=="/usr/lib/udev/scsi_id -g -u -d
/dev/$name",RESULT=="360003ff44dc75adc8cec9cce0033f402", OWNER="grid",
GROUP="asmadmin", MODE="0660"
KERNEL=="sdc", SUBSYSTEM=="block", PROGRAM=="/usr/lib/udev/scsi_id -g -u -d
/dev/$name",RESULT=="360003ff44dc75adc9ba684d395391bae", OWNER="grid",
GROUP="asmadmin", MODE="0660

ll /dev/oracleasm/disks/
4.20.3 ASMLib v3.1(最推荐)
先去网站https://www.oracle.com/linux/downloads/linux-asmlib-v9-downloads.html上下载oracleasmlib-3.1.1-1.el9.x86_64.rpm
# 安装oracleasm-support和oracleasmlib,oracleasm-support可以在通过在线yum源安装,oracleasmlib去官网下载上传安装
dnf --enablerepo=ol9_addons install oracleasm-support -y
dnf install -y oracleasmlib-3.1.1-1.el9.x86_64.rpm
[root@rac1 ~]# dnf --enablerepo=ol9_addons install oracleasm-support -y
Oracle Linux 9 Addons (x86_64) 21 kB/s | 811 kB 00:39
上次元数据过期检查:0:00:29 前,执行于 2026年02月09日 星期一 13时30分47秒。
依赖关系解决。
=================================================================================================================================================================================================================================================
软件包 架构 版本 仓库 大小
=================================================================================================================================================================================================================================================
安装:
oracleasm-support x86_64 3.1.1-4.el9 ol9_addons 131 k
事务概要
=================================================================================================================================================================================================================================================
安装 1 软件包
总下载:131 k
安装大小:318 k
下载软件包:
oracleasm-support-3.1.1-4.el9.x86_64.rpm 17 kB/s | 131 kB 00:07
-------------------------------------------------------------------------------------------------------------------------------------------------------------------------------------------------------------------------------------------------
总计 17 kB/s | 131 kB 00:07
运行事务检查
事务检查成功。
运行事务测试
事务测试成功。
运行事务
准备中 : 1/1
安装 : oracleasm-support-3.1.1-4.el9.x86_64 1/1
运行脚本: oracleasm-support-3.1.1-4.el9.x86_64 1/1
Created symlink /etc/systemd/system/multi-user.target.wants/oracleasm.service → /usr/lib/systemd/system/oracleasm.service.
验证 : oracleasm-support-3.1.1-4.el9.x86_64 1/1
已安装:
oracleasm-support-3.1.1-4.el9.x86_64
完毕!
[root@rac1 ~]# dnf install -y oracleasmlib-3.1.1-1.el9.x86_64.rpm
上次元数据过期检查:1:46:39 前,执行于 2026年02月09日 星期一 11时45分00秒。
依赖关系解决。
=================================================================================================================================================================================================================================================
软件包 架构 版本 仓库 大小
=================================================================================================================================================================================================================================================
安装:
oracleasmlib x86_64 3.1.1-1.el9 @commandline 53 k
事务概要
=================================================================================================================================================================================================================================================
安装 1 软件包
总计:53 k
安装大小:107 k
下载软件包:
运行事务检查
事务检查成功。
运行事务测试
事务测试成功。
运行事务
准备中 : 1/1
安装 : oracleasmlib-3.1.1-1.el9.x86_64 1/1
运行脚本: oracleasmlib-3.1.1-1.el9.x86_64 1/1
验证 : oracleasmlib-3.1.1-1.el9.x86_64 1/1
已安装:
oracleasmlib-3.1.1-1.el9.x86_64
完毕!
[root@rac1 ~]#
# 以交互模式运行配置实用程序以初始化配置
oracleasm configure -i
[root@rac1 ~]# oracleasm configure -i
Configuring the Oracle ASM system service.
This will configure the on-boot properties of the Oracle ASM system
service. The following questions will determine whether the service
is started on boot and what permissions it will have. The current
values will be shown in brackets ('[]'). Hitting <ENTER> without
typing an answer will keep that current value. Ctrl-C will abort.
Default user to own the ASM disk devices []: oracle
Default group to own the ASM disk devices []: dba
Start Oracle ASM system service on boot (y/n) [y]: y
Scan for Oracle ASM disks when starting the oracleasm service (y/n) [y]: y
Maximum number of ASM disks that can be used on system [2048]: 2048
Enable iofilter if kernel supports it (y/n) [y]: y
Writing Oracle ASM system service configuration: done
Configuration changes only come into effect after the Oracle ASM
system service is restarted. Please run 'systemctl restart oracleasm'
after making changes.
WARNING: All of your Oracle and ASM instances must be stopped prior
to restarting the oracleasm service.
[root@rac1 ~]#
# 启用并启动oracleasm服务
systemctl enable --now oracleasm
[root@rac1 ~]# systemctl enable --now oracleasm
[root@rac1 ~]#
# 使用 oracleasm createdisk 命令为磁盘添加标签。
fdisk /dev/sdb
fdisk /dev/sdc
fdisk /dev/sdd
fdisk /dev/sde
fdisk /dev/sdf
oracleasm createdisk OCRVOTE1 /dev/sdb1
oracleasm createdisk OCRVOTE2 /dev/sdc1
oracleasm createdisk OCRVOTE3 /dev/sdd1
oracleasm createdisk DATA1 /dev/sde1
oracleasm createdisk DATA2 /dev/sdf1
oracleasm listdisks
[root@rac1 ~]# fdisk /dev/sdb
欢迎使用 fdisk (util-linux 2.37.4)。
更改将停留在内存中,直到您决定将更改写入磁盘。
使用写入命令前请三思。
设备不包含可识别的分区表。
创建了一个磁盘标识符为 0xba39d816 的新 DOS 磁盘标签。
命令(输入 m 获取帮助):n
分区类型
p 主分区 (0 primary, 0 extended, 4 free)
e 扩展分区 (逻辑分区容器)
选择 (默认 p):p
分区号 (1-4, 默认 1):
第一个扇区 (2048-10485759, 默认 2048):
最后一个扇区,+/-sectors 或 +size{K,M,G,T,P} (2048-10485759, 默认 10485759):
创建了一个新分区 1,类型为“Linux”,大小为 5 GiB。
命令(输入 m 获取帮助):w
分区表已调整。
将调用 ioctl() 来重新读分区表。
正在同步磁盘。
[root@rac1 ~]# fdisk /dev/sdc
欢迎使用 fdisk (util-linux 2.37.4)。
更改将停留在内存中,直到您决定将更改写入磁盘。
使用写入命令前请三思。
设备不包含可识别的分区表。
创建了一个磁盘标识符为 0xdcbe1da6 的新 DOS 磁盘标签。
命令(输入 m 获取帮助):n
分区类型
p 主分区 (0 primary, 0 extended, 4 free)
e 扩展分区 (逻辑分区容器)
选择 (默认 p):p
分区号 (1-4, 默认 1): 1
第一个扇区 (2048-10485759, 默认 2048):
最后一个扇区,+/-sectors 或 +size{K,M,G,T,P} (2048-10485759, 默认 10485759):
创建了一个新分区 1,类型为“Linux”,大小为 5 GiB。
命令(输入 m 获取帮助):w
分区表已调整。
将调用 ioctl() 来重新读分区表。
正在同步磁盘。
[root@rac1 ~]# fdisk /dev/sdd
欢迎使用 fdisk (util-linux 2.37.4)。
更改将停留在内存中,直到您决定将更改写入磁盘。
使用写入命令前请三思。
设备不包含可识别的分区表。
创建了一个磁盘标识符为 0xfefc982e 的新 DOS 磁盘标签。
命令(输入 m 获取帮助):n
分区类型
p 主分区 (0 primary, 0 extended, 4 free)
e 扩展分区 (逻辑分区容器)
选择 (默认 p):p
分区号 (1-4, 默认 1):
第一个扇区 (2048-10485759, 默认 2048):
最后一个扇区,+/-sectors 或 +size{K,M,G,T,P} (2048-10485759, 默认 10485759):
创建了一个新分区 1,类型为“Linux”,大小为 5 GiB。
命令(输入 m 获取帮助):w
分区表已调整。
将调用 ioctl() 来重新读分区表。
正在同步磁盘。
[root@rac1 ~]# fdisk /dev/sde
欢迎使用 fdisk (util-linux 2.37.4)。
更改将停留在内存中,直到您决定将更改写入磁盘。
使用写入命令前请三思。
设备不包含可识别的分区表。
创建了一个磁盘标识符为 0xffa6b5a1 的新 DOS 磁盘标签。
命令(输入 m 获取帮助):n
分区类型
p 主分区 (0 primary, 0 extended, 4 free)
e 扩展分区 (逻辑分区容器)
选择 (默认 p):p
分区号 (1-4, 默认 1):
第一个扇区 (2048-41943039, 默认 2048):
最后一个扇区,+/-sectors 或 +size{K,M,G,T,P} (2048-41943039, 默认 41943039):
创建了一个新分区 1,类型为“Linux”,大小为 20 GiB。
命令(输入 m 获取帮助):w
分区表已调整。
将调用 ioctl() 来重新读分区表。
正在同步磁盘。
[root@rac1 ~]# fdisk /dev/sdf
欢迎使用 fdisk (util-linux 2.37.4)。
更改将停留在内存中,直到您决定将更改写入磁盘。
使用写入命令前请三思。
设备不包含可识别的分区表。
创建了一个磁盘标识符为 0xd80eda6a 的新 DOS 磁盘标签。
命令(输入 m 获取帮助):n
分区类型
p 主分区 (0 primary, 0 extended, 4 free)
e 扩展分区 (逻辑分区容器)
选择 (默认 p):p
分区号 (1-4, 默认 1):
第一个扇区 (2048-41943039, 默认 2048):
最后一个扇区,+/-sectors 或 +size{K,M,G,T,P} (2048-41943039, 默认 41943039):
创建了一个新分区 1,类型为“Linux”,大小为 20 GiB。
命令(输入 m 获取帮助):w
分区表已调整。
将调用 ioctl() 来重新读分区表。
正在同步磁盘。
[root@rac1 ~]# lsblk
NAME MAJ:MIN RM SIZE RO TYPE MOUNTPOINTS
sda 8:0 0 100G 0 disk
├─sda1 8:1 0 1G 0 part /boot
└─sda2 8:2 0 98.1G 0 part
├─ol-root 252:0 0 90G 0 lvm /
└─ol-swap 252:1 0 8.1G 0 lvm [SWAP]
sdb 8:16 0 5G 0 disk
└─sdb1 8:17 0 5G 0 part
sdc 8:32 0 5G 0 disk
└─sdc1 8:33 0 5G 0 part
sdd 8:48 0 5G 0 disk
└─sdd1 8:49 0 5G 0 part
sde 8:64 0 20G 0 disk
└─sde1 8:65 0 20G 0 part
sdf 8:80 0 20G 0 disk
└─sdf1 8:81 0 20G 0 part
sr0 11:0 1 13.5G 0 rom
[root@rac1 ~]# oracleasm createdisk OCRVOTE1 /dev/sdb1
Writing disk header: done
Instantiating disk: done
[root@rac1 ~]# oracleasm createdisk OCRVOTE2 /dev/sdc1
Writing disk header: done
Instantiating disk: done
[root@rac1 ~]# oracleasm createdisk OCRVOTE3 /dev/sdd1
Writing disk header: done
Instantiating disk: done
[root@rac1 ~]# oracleasm createdisk DATA1 /dev/sde1
Writing disk header: done
Instantiating disk: done
[root@rac1 ~]# oracleasm createdisk DATA2 /dev/sdf1
Writing disk header: done
Instantiating disk: done
[root@rac1 ~]# oracleasm listdisks
DATA1
DATA2
OCRVOTE1
OCRVOTE2
OCRVOTE3
[root@rac1 ~]#
# 安装oracleasm-support和oracleasmlib,oracleasm-support可以在通过在线yum源安装,oracleasmlib去官网下载上传安装
dnf --enablerepo=ol9_addons install oracleasm-support -y
dnf install -y oracleasmlib-3.1.1-1.el9.x86_64.rpm
[root@rac2 ~]# dnf --enablerepo=ol9_addons install oracleasm-support -y
Oracle Linux 9 Addons (x86_64) 49 kB/s | 811 kB 00:16
上次元数据过期检查:0:00:04 前,执行于 2026年02月09日 星期一 13时36分59秒。
依赖关系解决。
=================================================================================================================================================================================================================================================
软件包 架构 版本 仓库 大小
=================================================================================================================================================================================================================================================
安装:
oracleasm-support x86_64 3.1.1-4.el9 ol9_addons 131 k
事务概要
=================================================================================================================================================================================================================================================
安装 1 软件包
总下载:131 k
安装大小:318 k
下载软件包:
oracleasm-support-3.1.1-4.el9.x86_64.rpm 25 kB/s | 131 kB 00:05
-------------------------------------------------------------------------------------------------------------------------------------------------------------------------------------------------------------------------------------------------
总计 25 kB/s | 131 kB 00:05
运行事务检查
事务检查成功。
运行事务测试
事务测试成功。
运行事务
准备中 : 1/1
安装 : oracleasm-support-3.1.1-4.el9.x86_64 1/1
运行脚本: oracleasm-support-3.1.1-4.el9.x86_64 1/1
Created symlink /etc/systemd/system/multi-user.target.wants/oracleasm.service → /usr/lib/systemd/system/oracleasm.service.
验证 : oracleasm-support-3.1.1-4.el9.x86_64 1/1
已安装:
oracleasm-support-3.1.1-4.el9.x86_64
完毕!
[root@rac2 ~]# dnf install -y oracleasmlib-3.1.1-1.el9.x86_64.rpm
上次元数据过期检查:1:42:55 前,执行于 2026年02月09日 星期一 11时54分38秒。
依赖关系解决。
=================================================================================================================================================================================================================================================
软件包 架构 版本 仓库 大小
=================================================================================================================================================================================================================================================
安装:
oracleasmlib x86_64 3.1.1-1.el9 @commandline 53 k
事务概要
=================================================================================================================================================================================================================================================
安装 1 软件包
总计:53 k
安装大小:107 k
下载软件包:
运行事务检查
事务检查成功。
运行事务测试
事务测试成功。
运行事务
准备中 : 1/1
安装 : oracleasmlib-3.1.1-1.el9.x86_64 1/1
运行脚本: oracleasmlib-3.1.1-1.el9.x86_64 1/1
验证 : oracleasmlib-3.1.1-1.el9.x86_64 1/1
已安装:
oracleasmlib-3.1.1-1.el9.x86_64
完毕!
[root@rac2 ~]# lsblk
NAME MAJ:MIN RM SIZE RO TYPE MOUNTPOINTS
sda 8:0 0 100G 0 disk
├─sda1 8:1 0 1G 0 part /boot
└─sda2 8:2 0 98.1G 0 part
├─ol-root 252:0 0 90G 0 lvm /
└─ol-swap 252:1 0 8.1G 0 lvm [SWAP]
sdb 8:16 0 5G 0 disk
└─sdb1 8:17 0 5G 0 part
sdc 8:32 0 5G 0 disk
└─sdc1 8:33 0 5G 0 part
sdd 8:48 0 5G 0 disk
└─sdd1 8:49 0 5G 0 part
sde 8:64 0 20G 0 disk
└─sde1 8:65 0 20G 0 part
sdf 8:80 0 20G 0 disk
└─sdf1 8:81 0 20G 0 part
sr0 11:0 1 13.5G 0 rom
# 以交互模式运行配置实用程序以初始化配置
oracleasm configure -i
[root@rac2 ~]# oracleasm configure -i
Configuring the Oracle ASM system service.
This will configure the on-boot properties of the Oracle ASM system
service. The following questions will determine whether the service
is started on boot and what permissions it will have. The current
values will be shown in brackets ('[]'). Hitting <ENTER> without
typing an answer will keep that current value. Ctrl-C will abort.
Default user to own the ASM disk devices []: oracle
Default group to own the ASM disk devices []: dba
Start Oracle ASM system service on boot (y/n) [y]: y
Scan for Oracle ASM disks when starting the oracleasm service (y/n) [y]: y
Maximum number of ASM disks that can be used on system [2048]: 2048
Enable iofilter if kernel supports it (y/n) [y]: y
Writing Oracle ASM system service configuration: done
Configuration changes only come into effect after the Oracle ASM
system service is restarted. Please run 'systemctl restart oracleasm'
after making changes.
WARNING: All of your Oracle and ASM instances must be stopped prior
to restarting the oracleasm service.
[root@rac2 ~]#
# 启用并启动oracleasm服务
systemctl enable --now oracleasm
[root@rac2 ~]# systemctl enable --now oracleasm
[root@rac2 ~]# init 6
[root@rac2 ~]#
# 重启后,查看asmdisk
oracleasm listdisks
[root@rac2 ~]# oracleasm listdisks
DATA1
DATA2
OCRVOTE1
OCRVOTE2
OCRVOTE3
[root@rac2 ~]#
4.21 配置IO调度(可选)
说明这里测试我们不需要调整:
# cat /sys/block/${ASM_DISK}/queue/scheduler
noop [deadline] cfq

If the default disk I/O scheduler is not Deadline, then set it using a rules file:
1. Using a text editor, create a UDEV rules file for the Oracle ASM devices:
# vi /etc/udev/rules.d/60-oracle-schedulers.rules
2. Add the following line to the rules file and save it:
ACTION=="add|change", KERNEL=="sd[a-z]", ATTR{queue/rotational}=="0",
ATTR{queue/scheduler}="deadline"
3. On clustered systems, copy the rules file to all other nodes on the cluster. For
example:
$ scp 60-oracle-schedulers.rules root@node2:/etc/udev/rules.d/
4. Load the rules file and restart the UDEV service. For example:
a. Oracle Linux and Red Hat Enterprise Linux
#udevadm control --reload-rules && udevadm trigger

操作:
cat /etc/udev/rules.d/60-oracle-schedulers.rules
ACTION=="add|change", KERNEL=="dm-[a-z]", ATTR{queue/rotational}=="0", ATTR{queue/scheduler}="deadline"
udevadm control --reload-rules && udevadm trigger

[root@rac1 ~]# vi /etc/udev/rules.d/60-oracle-schedulers.rules
[root@rac1 ~]# cat /etc/udev/rules.d/60-oracle-schedulers.rules
ACTION=="add|change", KERNEL=="dm-[a-z]", ATTR{queue/rotational}=="0", ATTR{queue/scheduler}="deadline"
udevadm control --reload-rules && udevadm trigger
[root@rac1 ~]# udevadm control --reload-rules && udevadm trigger
[root@rac1 ~]# cat /sys/block/dm-2/queue/scheduler
[mq-deadline] kyber bfq none
[root@rac1 ~]# cat /sys/block/dm-3/queue/scheduler
[mq-deadline] kyber bfq none
[root@rac1 ~]# cat /sys/block/dm-4/queue/scheduler
[mq-deadline] kyber bfq none
[root@rac1 ~]# cat /sys/block/dm-5/queue/scheduler
[mq-deadline] kyber bfq none
[root@rac1 ~]# cat /sys/block/dm-6/queue/scheduler
[mq-deadline] kyber bfq none
[root@rac1 ~]#

[root@rac2 ~]# vi /etc/udev/rules.d/60-oracle-schedulers.rules
[root@rac2 ~]# udevadm control --reload-rules && udevadm trigger
[root@rac2 ~]# cat /etc/udev/rules.d/60-oracle-schedulers.rules
ACTION=="add|change", KERNEL=="dm-[a-z]", ATTR{queue/rotational}=="0", ATTR{queue/scheduler}="deadline"
udevadm control --reload-rules && udevadm trigger
[root@rac2 ~]# cat /sys/block/dm-2/queue/scheduler
[mq-deadline] kyber bfq none
[root@rac2 ~]# cat /sys/block/dm-3/queue/scheduler
[mq-deadline] kyber bfq none
[root@rac2 ~]# cat /sys/block/dm-4/queue/scheduler
[mq-deadline] kyber bfq none
[root@rac2 ~]# cat /sys/block/dm-5/queue/scheduler
[mq-deadline] kyber bfq none
[root@rac2 ~]# cat /sys/block/dm-6/queue/scheduler
[mq-deadline] kyber bfq none
[root@rac2 ~]#
4.22 重启OS
4.23 整体check脚本检查
###################################################################################
##   重启操作系统进行修改验证
##    需要人工干预
###################################################################################


###################################################################################
## 检查修改信息
###################################################################################
echo "###################################################################################"
echo "检查修改信息"
echo
echo "-----------------------------------------------------------------------------------"
echo
echo "/etc/selinux/config"
echo
cat /etc/selinux/config
echo
echo
echo "-----------------------------------------------------------------------------------"
echo
echo "/etc/sysconfig/network"
echo
cat /etc/sysconfig/network
echo
echo
echo "-----------------------------------------------------------------------------------"
echo
echo "/sys/kernel/mm/transparent_hugepage/enabled"
echo
cat  /sys/kernel/mm/transparent_hugepage/enabled
echo
echo
echo "-----------------------------------------------------------------------------------"
echo
echo "/etc/hosts"
echo
cat /etc/hosts
echo
echo
echo "-----------------------------------------------------------------------------------"
echo
echo "/etc/ntp.conf"
echo
cat /etc/ntp.conf
echo
echo
echo "-----------------------------------------------------------------------------------"
echo
echo "/etc/sysctl.conf"
echo
cat /etc/sysctl.conf
echo
echo
echo "-----------------------------------------------------------------------------------"
echo
echo "/etc/security/limits.conf"
echo
cat /etc/security/limits.conf
echo
echo
echo "-----------------------------------------------------------------------------------"
echo
echo "/etc/pam.d/login"
echo
cat /etc/pam.d/login
echo
echo
echo "-----------------------------------------------------------------------------------"
echo
echo "/etc/profile"
echo
cat /etc/profile
echo
echo
echo "-----------------------------------------------------------------------------------"
echo
echo "/home/grid/.bash_profile"
echo
cat /home/grid/.bash_profile
echo
echo
echo "-----------------------------------------------------------------------------------"
echo
echo "/home/oracle/.bash_profile"
echo
cat /home/oracle/.bash_profile
echo
echo
echo "--------------------------------systemctl------------------------------------------"
echo
systemctl status firewalld
echo
systemctl status avahi-daemon
echo
systemctl status nscd
echo
systemctl status ntpd
echo
echo
echo "-----------------------------------------------------------------------------------"
echo
rpm -q bc binutils compat-openssl11 elfutils-libelf fontconfig glibc glibc-devel glibc-headers ksh libaio libasan libX11 libXau libXi libXrender libXtst libxcrypt-compat libgcc libibverbs librdmacm libstdc++ libxcb libvirt-libs make policycoreutils policycoreutils-python-utils smartmontools sysstat nfs-utils | grep "not installed"
echo
echo "################请仔细核对所有文件信息 !!!!!!!################"


[root@rac1 ~]# ./check.sh
###################################################################################
检查修改信息

-----------------------------------------------------------------------------------

/etc/selinux/config


# This file controls the state of SELinux on the system.
# SELINUX= can take one of these three values:
#     enforcing - SELinux security policy is enforced.
#     permissive - SELinux prints warnings instead of enforcing.
#     disabled - No SELinux policy is loaded.
# See also:
# https://docs.oracle.com/en/operating-systems/oracle-linux/selinux/selinux-SettingSELinuxModes.html
#
# NOTE: In earlier Oracle Linux kernel builds, SELINUX=disabled would also
# fully disable SELinux during boot. If you need a system with SELinux
# fully disabled instead of SELinux running with no policy loaded, you
# need to pass selinux=0 to the kernel command line. You can use grubby
# to persistently set the bootloader to boot with selinux=0:
#
#    grubby --update-kernel ALL --args selinux=0
#
# To revert back to SELinux enabled:
#
#    grubby --update-kernel ALL --remove-args selinux
#
SELINUX=disabled
# SELINUXTYPE= can take one of these three values:
#     targeted - Targeted processes are protected,
#     mls - Multi Level Security protection.
SELINUXTYPE=targeted


-----------------------------------------------------------------------------------

/etc/sysconfig/network

# Created by anaconda
NOZEROCONF=yes


-----------------------------------------------------------------------------------

/sys/kernel/mm/transparent_hugepage/enabled

always [madvise] never


-----------------------------------------------------------------------------------

/etc/hosts

127.0.0.1   localhost localhost.localdomain localhost4 localhost4.localdomain4
::1         localhost localhost.localdomain localhost6 localhost6.localdomain6


#public ip
192.168.18.5     rac1
192.168.18.6     rac2
#private ip
18.18.18.5       rac1-priv
18.18.18.6       rac2-priv
#vip
192.168.18.7     rac1-vip
192.168.18.8     rac2-vip
#scanip
192.168.18.9     rac-scan


-----------------------------------------------------------------------------------

/etc/ntp.conf

cat: /etc/ntp.conf: 没有那个文件或目录


-----------------------------------------------------------------------------------

/etc/sysctl.conf

# sysctl settings are defined through files in
# /usr/lib/sysctl.d/, /run/sysctl.d/, and /etc/sysctl.d/.
#
# Vendors settings live in /usr/lib/sysctl.d/.
# To override a whole file, create a new file with the same in
# /etc/sysctl.d/ and put new settings there. To override
# only specific settings, add a file with a lexically later
# name in /etc/sysctl.d/ and put new settings there.
#
# For more information, see sysctl.conf(5) and sysctl.d(5).
fs.aio-max-nr = 1048576
fs.file-max = 6815744
kernel.shmall = 3977942
kernel.shmmax = 16293650431
kernel.shmmni = 4096
kernel.sem = 250 32000 100 128
net.ipv4.ip_local_port_range = 9000 65500
net.core.rmem_default = 16777216
net.core.rmem_max = 16777216
net.core.wmem_max = 16777216
net.core.wmem_default = 16777216
fs.aio-max-nr = 6194304
vm.dirty_ratio=20
vm.dirty_background_ratio=3
vm.dirty_writeback_centisecs=100
vm.dirty_expire_centisecs=500
vm.swappiness=10
vm.min_free_kbytes=524288
net.core.netdev_max_backlog = 30000
net.core.netdev_budget = 600
#vm.nr_hugepages =
net.ipv4.conf.all.rp_filter = 2
net.ipv4.conf.default.rp_filter = 2
net.ipv4.ipfrag_time = 60
net.ipv4.ipfrag_low_thresh = 3145728
net.ipv4.ipfrag_high_thresh = 8388608


-----------------------------------------------------------------------------------

/etc/security/limits.conf

# /etc/security/limits.conf
#
#This file sets the resource limits for the users logged in via PAM.
#It does not affect resource limits of the system services.
#
#Also note that configuration files in /etc/security/limits.d directory,
#which are read in alphabetical order, override the settings in this
#file in case the domain is the same or more specific.
#That means, for example, that setting a limit for wildcard domain here
#can be overridden with a wildcard setting in a config file in the
#subdirectory, but a user specific setting here can be overridden only
#with a user specific setting in the subdirectory.
#
#Each line describes a limit for a user in the form:
#
#<domain>        <type>  <item>  <value>
#
#Where:
#<domain> can be:
#        - a user name
#        - a group name, with @group syntax
#        - the wildcard *, for default entry
#        - the wildcard %, can be also used with %group syntax,
#                 for maxlogin limit
#
#<type> can have the two values:
#        - "soft" for enforcing the soft limits
#        - "hard" for enforcing hard limits
#
#<item> can be one of the following:
#        - core - limits the core file size (KB)
#        - data - max data size (KB)
#        - fsize - maximum filesize (KB)
#        - memlock - max locked-in-memory address space (KB)
#        - nofile - max number of open file descriptors
#        - rss - max resident set size (KB)
#        - stack - max stack size (KB)
#        - cpu - max CPU time (MIN)
#        - nproc - max number of processes
#        - as - address space limit (KB)
#        - maxlogins - max number of logins for this user
#        - maxsyslogins - max number of logins on the system
#        - priority - the priority to run user process with
#        - locks - max number of file locks the user can hold
#        - sigpending - max number of pending signals
#        - msgqueue - max memory used by POSIX message queues (bytes)
#        - nice - max nice priority allowed to raise to values: [-20, 19]
#        - rtprio - max realtime priority
#
#<domain>      <type>  <item>         <value>
#

#*               soft    core            0
#*               hard    rss             10000
#@student        hard    nproc           20
#@faculty        soft    nproc           20
#@faculty        hard    nproc           50
#ftp             hard    nproc           0
#@student        -       maxlogins       4

# End of file
grid  soft  nproc  2047
grid  hard  nproc  16384
grid  soft   nofile  1024
grid  hard  nofile  65536
grid  soft   stack  10240
grid  hard  stack  32768

oracle  soft  nproc  2047
oracle  hard  nproc  16384
oracle  soft  nofile  1024
oracle  hard  nofile  65536
oracle  soft  stack  10240
oracle  hard  stack  32768
oracle soft memlock 3145728
oracle hard memlock 3145728


-----------------------------------------------------------------------------------

/etc/pam.d/login

#%PAM-1.0
auth       substack     system-auth
auth       include      postlogin
account    required     pam_nologin.so
account    include      system-auth
password   include      system-auth
# pam_selinux.so close should be the first session rule
session    required     pam_selinux.so close
session    required     pam_loginuid.so
# pam_selinux.so open should only be followed by sessions to be executed in the user context
session    required     pam_selinux.so open
session    required     pam_namespace.so
session    optional     pam_keyinit.so force revoke
session    include      system-auth
session    include      postlogin
-session   optional     pam_ck_connector.so
session required pam_limits.so


-----------------------------------------------------------------------------------

/etc/profile

# /etc/profile

# System wide environment and startup programs, for login setup
# Functions and aliases go in /etc/bashrc

# It's NOT a good idea to change this file unless you know what you
# are doing. It's much better to create a custom.sh shell script in
# /etc/profile.d/ to make custom changes to your environment, as this
# will prevent the need for merging in future updates.

pathmunge () {
    case ":${PATH}:" in
        *:"$1":*)
            ;;
        *)
            if [ "$2" = "after" ] ; then
                PATH=$PATH:$1
            else
                PATH=$1:$PATH
            fi
    esac
}


if [ -x /usr/bin/id ]; then
    if [ -z "$EUID" ]; then
        # ksh workaround
        EUID=`/usr/bin/id -u`
        UID=`/usr/bin/id -ru`
    fi
    USER="`/usr/bin/id -un`"
    LOGNAME=$USER
    MAIL="/var/spool/mail/$USER"
fi

# Path manipulation
if [ "$EUID" = "0" ]; then
    pathmunge /usr/sbin
    pathmunge /usr/local/sbin
else
    pathmunge /usr/local/sbin after
    pathmunge /usr/sbin after
fi

HOSTNAME=$(/usr/bin/hostnamectl --transient 2>/dev/null) || \
HOSTNAME=$(/usr/bin/hostname 2>/dev/null) || \
HOSTNAME=$(/usr/bin/uname -n)

HISTSIZE=1000
if [ "$HISTCONTROL" = "ignorespace" ] ; then
    export HISTCONTROL=ignoreboth
else
    export HISTCONTROL=ignoredups
fi

export PATH USER LOGNAME MAIL HOSTNAME HISTSIZE HISTCONTROL

for i in /etc/profile.d/*.sh /etc/profile.d/sh.local ; do
    if [ -r "$i" ]; then
        if [ "${-#*i}" != "$-" ]; then
            . "$i"
        else
            . "$i" >/dev/null
        fi
    fi
done

unset i
unset -f pathmunge

if [ -n "${BASH_VERSION-}" ] ; then
        if [ -f /etc/bashrc ] ; then
                # Bash login shells run only /etc/profile
                # Bash non-login shells run only /etc/bashrc
                # Check for double sourcing is done in /etc/bashrc.
                . /etc/bashrc
       fi
fi


-----------------------------------------------------------------------------------

/home/grid/.bash_profile

# .bash_profile

# Get the aliases and functions
if [ -f ~/.bashrc ]; then
        . ~/.bashrc
fi

# User specific environment and startup programs
################add#########################
umask 022
export TMP=/tmp
export TMPDIR=$TMP
export ORACLE_BASE=/u01/app/grid
export ORACLE_HOME=/u01/app/23.0.0/grid
export TNS_ADMIN=$ORACLE_HOME/network/admin
export NLS_LANG=AMERICAN_AMERICA.AL32UTF8
export LD_LIBRARY_PATH=$ORACLE_HOME/lib:/lib:/usr/lib
export ORACLE_SID=+ASM1
export PATH=/usr/sbin:$PATH
export PATH=$ORACLE_HOME/bin:$ORACLE_HOME/OPatch:$PATH
alias sas='sqlplus / as sysasm'
export PS1="[\`whoami\`@\`hostname\`:"'$PWD]\$ '


-----------------------------------------------------------------------------------

/home/oracle/.bash_profile

# .bash_profile

# Get the aliases and functions
if [ -f ~/.bashrc ]; then
        . ~/.bashrc
fi

# User specific environment and startup programs
################ add#########################
umask 022
export TMP=/tmp
export TMPDIR=$TMP
export NLS_LANG=AMERICAN_AMERICA.AL32UTF8
export ORACLE_BASE=/u01/app/oracle
export ORACLE_HOME=$ORACLE_BASE/product/23.0.0/dbhome_1
export ORACLE_HOSTNAME=rac1
export TNS_ADMIN=$ORACLE_HOME/network/admin
export LD_LIBRARY_PATH=$ORACLE_HOME/lib:/lib:/usr/lib
export ORACLE_SID=orcl1
export PATH=/usr/sbin:$PATH
export PATH=$ORACLE_HOME/bin:$ORACLE_HOME/OPatch:$PATH
alias sas='sqlplus / as sysdba'
export PS1="[\`whoami\`@\`hostname\`:"'$PWD]\$ '


--------------------------------systemctl------------------------------------------

○ firewalld.service - firewalld - dynamic firewall daemon
     Loaded: loaded (/usr/lib/systemd/system/firewalld.service; disabled; preset: enabled)
     Active: inactive (dead)
       Docs: man:firewalld(1)

○ avahi-daemon.service - Avahi mDNS/DNS-SD Stack
     Loaded: loaded (/usr/lib/systemd/system/avahi-daemon.service; disabled; preset: enabled)
     Active: inactive (dead)
TriggeredBy: ○ avahi-daemon.socket

Unit nscd.service could not be found.

Unit ntpd.service could not be found.


-----------------------------------------------------------------------------------


################请仔细核对所有文件信息 !!!!!!!################
[root@rac1 ~]#
五、安装GI+RU
5.1 修改软件包权限
mkdir /soft
mv LINUX.X64_2326100_grid_home.zip /soft
chown -R grid:oinstall /soft
cd /soft/
ll

[root@rac1 ~]# mkdir /soft
[root@rac1 ~]# mv LINUX.X64_2326100_grid_home.zip /soft
[root@rac1 ~]# chown -R grid:oinstall /soft
[root@rac1 ~]# cd /soft/
[root@rac1 soft]# ll
总用量 1064012
-rw-r--r-- 1 grid oinstall 1089544451  2月  9 14:11 LINUX.X64_2326100_grid_home.zip
[root@rac1 soft]#
5.2 解压缩软件
5.2.1 解压缩grid 软件
安全软件2.7G.解压后6.0
su - grid
cd /soft/
unzip -q LINUX.X64_2326100_grid_home.zip -d $ORACLE_HOME

[root@rac1 soft]# su - grid
Last login: Thu Oct 23 13:41:28 CST 2025 on pts/0
[grid@rac1:/home/grid]$ cd /soft/
[grid@rac1:/soft]$ unzip -q LINUX.X64_193000_grid_home.zip -d $ORACLE_HOME
[grid@rac1:/soft]$
5.2.2 升级OPatch(可选)
不用打RU,无需操作
unzip p6880880_190000_Linux-x86-64.zip -d $ORACLE_HOME
opatch version

[grid@rac1:/home/grid]$ opatch version
OPatch Version: 12.2.0.1.17

OPatch succeeded.

[grid@rac1:/u01/app/23.0.0/grid]$ mv OPatch/ OPatchbak
[grid@rac1:/u01/app/23.0.0/grid]$ cd /u01/sw
[grid@rac1:/u01/sw]$ unzip p6880880_190000_Linux-x86-64.zip -d $ORACLE_HOME


[grid@rac1:/u01/sw]$ opatch version
OPatch Version: 12.2.0.1.25

OPatch succeeded.
5.2.3 解压缩26.2RU(可选)
不用打RU,无需操作
RU软件报是2.5G.解压缩为4.4G
目录是 /u01/sw/ru/...
5.3 安装cvuqdisk软件
cvuqdisk RPM 包含在 Oracle Grid Infrastructure 安装介质上的cv/rpm 目录中
设置环境变量 CVUQDISK_GRP,使其指向作为 cvuqdisk 的所有者所在的组(本文为 oinstall):
export CVUQDISK_GRP=oinstall
使用 CVU 验证是否满足 Oracle 集群件要求
记住要作为 grid 用户在将要执行 Oracle 安装的节点 (racnode1) 上运行。此外,必须为 grid
用户配置通过用户等效性实现的 SSH 连通性,
root执行
export CVUQDISK_GRP=oinstall
cd /u01/app/23.0.0/grid/cv/rpm/
ll
rpm -ivh cvuqdisk-1.0.10-1.rpm

[root@rac1 soft]# export CVUQDISK_GRP=oinstall
[root@rac1 soft]# cd /u01/app/23.0.0/grid/cv/rpm/
[root@rac1 rpm]# ll
总用量 24
-rw-r--r-- 1 grid oinstall 24520  1月 10 01:59 cvuqdisk-1.0.10-1.rpm
[root@rac1 rpm]# rpm -ivh cvuqdisk-1.0.10-1.rpm
警告:cvuqdisk-1.0.10-1.rpm: 头V3 RSA/SHA256 Signature, 密钥 ID ad986da3: NOKEY
Verifying...                          ################################# [100%]
准备中...                          ################################# [100%]
正在升级/安装...
   1:cvuqdisk-1.0.10-1                ################################# [100%]
[root@rac1 rpm]#


传输到第 2 个节点上和安装
[root@rac1 rpm]# scp cvuqdisk-1.0.10-1.rpm rac2:/root
The authenticity of host 'rac2 (192.168.18.6)' can't be established.
ED25519 key fingerprint is SHA256:2qOxLjQpn+3dH8lp3zKfDui6BjZI6/QY/NSSXQJUpDU.
This key is not known by any other names
Are you sure you want to continue connecting (yes/no/[fingerprint])? yes
Warning: Permanently added 'rac2' (ED25519) to the list of known hosts.
root@rac2's password:
cvuqdisk-1.0.10-1.rpm                                                                                                                                                                                          100%   24KB  16.9MB/s   00:00
[root@rac1 rpm]#


[root@rac2 ~]# export CVUQDISK_GRP=oinstall
[root@rac2 ~]# rpm -ivh cvuqdisk-1.0.10-1.rpm
警告:cvuqdisk-1.0.10-1.rpm: 头V3 RSA/SHA256 Signature, 密钥 ID ad986da3: NOKEY
Verifying...                          ################################# [100%]
准备中...                          ################################# [100%]
正在升级/安装...
   1:cvuqdisk-1.0.10-1                ################################# [100%]
[root@rac2 ~]#
5.4 配置grid 用户ssh(可选)
解决密钥长度太弱,被 OL9 的 OpenSSH/系统加密策略(尤其 FIPS / FUTURE)直接拒绝(最常见:老的 1024-bit 或更小的 RSA/DSA)
grid用户
mv -f /home/grid/.ssh/id_rsa /home/grid/.ssh/id_rsa.bak.$(date +%F_%H%M%S) 2>/dev/null
mv -f /home/grid/.ssh/id_rsa.pub /home/grid/.ssh/id_rsa.pub.bak.$(date +%F_%H%M%S) 2>/dev/null
ssh-keygen -t rsa -b 3072 -o -a 100 -f /home/grid/.ssh/id_rsa
ll

[grid@rac1:/home/grid]$ cd .ssh/
[grid@rac1:/home/grid/.ssh]$ mv -f /home/grid/.ssh/id_rsa /home/grid/.ssh/id_rsa.bak.$(date +%F_%H%M%S) 2>/dev/null
[grid@rac1:/home/grid/.ssh]$ mv -f /home/grid/.ssh/id_rsa.pub /home/grid/.ssh/id_rsa.pub.bak.$(date +%F_%H%M%S) 2>/dev/null
[grid@rac1:/home/grid/.ssh]$ ssh-keygen -t rsa -b 3072 -o -a 100 -f /home/grid/.ssh/id_rsa
Generating public/private rsa key pair.
Enter passphrase (empty for no passphrase):
Enter same passphrase again:
Your identification has been saved in /home/grid/.ssh/id_rsa
Your public key has been saved in /home/grid/.ssh/id_rsa.pub
The key fingerprint is:
SHA256:Jfko5lMkkaxhhBxPAI2w52Ig3dUsFcBgan1PHwVwNlM grid@rac1
The key's randomart image is:
+---[RSA 3072]----+
|+=o==++*+o*oE    |
|.o+Bo.=.o+ +     |
|+ =.+oo.= o      |
|o+  .. = * .     |
|...   o S o      |
|..   o o         |
|      o          |
|       .         |
|                 |
+----[SHA256]-----+
[grid@rac1:/home/grid/.ssh]$ ll
总用量 40
-rw-r--r-- 1 grid oinstall  446  2月  9 14:21 authorized_keys
-rw-r--r-- 1 grid oinstall    0  2月  9 14:20 authorized_keys.tmp
-rw-r--r-- 1 grid oinstall   23  2月  9 14:20 config
-rw-r--r-- 1 grid oinstall   21  2月  9 14:20 config.backup
-rw------- 1 grid oinstall 2590  2月  9 14:25 id_rsa
-rw------- 1 grid oinstall 1032  2月  9 14:18 id_rsa.bak.2026-02-09_142457
-rw-r--r-- 1 grid oinstall  563  2月  9 14:25 id_rsa.pub
-rw-r--r-- 1 grid oinstall  223  2月  9 14:18 id_rsa.pub.bak.2026-02-09_142502
-rw------- 1 grid oinstall 1620  2月  9 14:21 known_hosts
-rw------- 1 grid oinstall  896  2月  9 14:21 known_hosts.old
-rw-r--r-- 1 grid oinstall   86  2月  9 14:20 known_hosts.tmp
[grid@rac1:/home/grid/.ssh]$

grid用户
$ORACLE_HOME/oui/prov/resources/scripts/sshUserSetup.sh -user grid  -hosts "rac1 rac2"  -advanced -noPromptPassphrase
这里主要为了进行安装前检查设置的。
[grid@rac1:/home/grid/.ssh]$ /u01/app/23.0.0/grid/oui/prov/resources/scripts/sshUserSetup.sh -user grid  -hosts "rac1 rac2"  -advanced -noPromptPassphrase
The output of this script is also logged into /tmp/sshUserSetup_2026-02-09-14-26-40.log
Hosts are rac1 rac2
user is grid
Platform:- Linux
Checking if the remote hosts are reachable
PING rac1 (192.168.18.5) 56(84) 比特的数据。
64 比特,来自 rac1 (192.168.18.5): icmp_seq=1 ttl=64 时间=0.015 毫秒
64 比特,来自 rac1 (192.168.18.5): icmp_seq=2 ttl=64 时间=0.028 毫秒
64 比特,来自 rac1 (192.168.18.5): icmp_seq=3 ttl=64 时间=0.053 毫秒
64 比特,来自 rac1 (192.168.18.5): icmp_seq=4 ttl=64 时间=0.044 毫秒
64 比特,来自 rac1 (192.168.18.5): icmp_seq=5 ttl=64 时间=0.032 毫秒

--- rac1 ping 统计 ---
已发送 5 个包, 已接收 5 个包, 0% packet loss, time 4092ms
rtt min/avg/max/mdev = 0.015/0.034/0.053/0.013 ms
PING rac2 (192.168.18.6) 56(84) 比特的数据。
64 比特,来自 rac2 (192.168.18.6): icmp_seq=1 ttl=64 时间=0.233 毫秒
64 比特,来自 rac2 (192.168.18.6): icmp_seq=2 ttl=64 时间=0.260 毫秒
64 比特,来自 rac2 (192.168.18.6): icmp_seq=3 ttl=64 时间=0.235 毫秒
64 比特,来自 rac2 (192.168.18.6): icmp_seq=4 ttl=64 时间=0.286 毫秒
64 比特,来自 rac2 (192.168.18.6): icmp_seq=5 ttl=64 时间=0.256 毫秒

--- rac2 ping 统计 ---
已发送 5 个包, 已接收 5 个包, 0% packet loss, time 4093ms
rtt min/avg/max/mdev = 0.233/0.254/0.286/0.019 ms
Remote host reachability check succeeded.
The following hosts are reachable: rac1 rac2.
The following hosts are not reachable: .
All hosts are reachable. Proceeding further...
firsthost rac1
numhosts 2
The script will setup SSH connectivity from the host rac1 to all
the remote hosts. After the script is executed, the user can use SSH to run
commands on the remote hosts or copy files between this host rac1
and the remote hosts without being prompted for passwords or confirmations.

NOTE 1:
As part of the setup procedure, this script will use ssh and scp to copy
files between the local host and the remote hosts. Since the script does not
store passwords, you may be prompted for the passwords during the execution of
the script whenever ssh or scp is invoked.

NOTE 2:
AS PER SSH REQUIREMENTS, THIS SCRIPT WILL SECURE THE USER HOME DIRECTORY
AND THE .ssh DIRECTORY BY REVOKING GROUP AND WORLD WRITE PRIVILEGES TO THESE
directories.

Do you want to continue and let the script make the above mentioned changes (yes/no)?
yes

The user chose yes
User chose to skip passphrase related questions.
Creating .ssh directory on local host, if not present already
Creating authorized_keys file on local host
Changing permissions on authorized_keys to 644 on local host
Creating known_hosts file on local host
Changing permissions on known_hosts to 644 on local host
Creating config file on local host
If a config file exists already at /home/grid/.ssh/config, it would be backed up to /home/grid/.ssh/config.backup.
Creating .ssh directory and setting permissions on remote host rac1
THE SCRIPT WOULD ALSO BE REVOKING WRITE PERMISSIONS FOR group AND others ON THE HOME DIRECTORY FOR grid. THIS IS AN SSH REQUIREMENT.
The script would create ~grid/.ssh/config file on remote host rac1. If a config file exists already at ~grid/.ssh/config, it would be backed up to ~grid/.ssh/config.backup.
The user may be prompted for a password here since the script would be running SSH on host rac1.
Warning: Permanently added 'rac1' (ED25519) to the list of known hosts.
grid@rac1's password:
Done with creating .ssh directory and setting permissions on remote host rac1.
Creating .ssh directory and setting permissions on remote host rac2
THE SCRIPT WOULD ALSO BE REVOKING WRITE PERMISSIONS FOR group AND others ON THE HOME DIRECTORY FOR grid. THIS IS AN SSH REQUIREMENT.
The script would create ~grid/.ssh/config file on remote host rac2. If a config file exists already at ~grid/.ssh/config, it would be backed up to ~grid/.ssh/config.backup.
The user may be prompted for a password here since the script would be running SSH on host rac2.
Warning: Permanently added 'rac2' (ED25519) to the list of known hosts.
grid@rac2's password:
Done with creating .ssh directory and setting permissions on remote host rac2.
Copying local host public key to the remote host rac1
The user may be prompted for a password or passphrase here since the script would be using SCP for host rac1.
grid@rac1's password:
Done copying local host public key to the remote host rac1
Copying local host public key to the remote host rac2
The user may be prompted for a password or passphrase here since the script would be using SCP for host rac2.
grid@rac2's password:
Done copying local host public key to the remote host rac2
Creating keys on remote host rac1 if they do not exist already. This is required to setup SSH on host rac1.

Creating keys on remote host rac2 if they do not exist already. This is required to setup SSH on host rac2.

Updating authorized_keys file on remote host rac1
Updating known_hosts file on remote host rac1
Updating authorized_keys file on remote host rac2
Updating known_hosts file on remote host rac2
cat: /home/grid/.ssh/known_hosts.tmp: 没有那个文件或目录
cat: /home/grid/.ssh/authorized_keys.tmp: 没有那个文件或目录
SSH setup is complete.

------------------------------------------------------------------------
Verifying SSH setup
===================
The script will now run the date command on the remote nodes using ssh
to verify if ssh is setup correctly. IF THE SETUP IS CORRECTLY SETUP,
THERE SHOULD BE NO OUTPUT OTHER THAN THE DATE AND SSH SHOULD NOT ASK FOR
PASSWORDS. If you see any output other than date or are prompted for the
password, ssh is not setup correctly and you will need to resolve the
issue and set up ssh again.
The possible causes for failure could be:
1. The server settings in /etc/ssh/sshd_config file do not allow ssh
for user grid.
2. The server may have disabled public key based authentication.
3. The client public key on the server may be outdated.
4. ~grid or ~grid/.ssh on the remote host may not be owned by grid.
5. User may not have passed -shared option for shared remote users or
may be passing the -shared option for non-shared remote users.
6. If there is output in addition to the date, but no password is asked,
it may be a security alert shown as part of company policy. Append the
additional text to the <OMS HOME>/sysman/prov/resources/ignoreMessages.txt file.
------------------------------------------------------------------------
--rac1:--
Running /usr/bin/ssh -x -l grid rac1 date to verify SSH connectivity has been setup from local host to rac1.
IF YOU SEE ANY OTHER OUTPUT BESIDES THE OUTPUT OF THE DATE COMMAND OR IF YOU ARE PROMPTED FOR A PASSWORD HERE, IT MEANS SSH SETUP HAS NOT BEEN SUCCESSFUL. Please note that being prompted for a passphrase may be OK but being prompted for a password is ERROR.
2026年 02月 09日 星期一 14:27:07 CST
------------------------------------------------------------------------
--rac2:--
Running /usr/bin/ssh -x -l grid rac2 date to verify SSH connectivity has been setup from local host to rac2.
IF YOU SEE ANY OTHER OUTPUT BESIDES THE OUTPUT OF THE DATE COMMAND OR IF YOU ARE PROMPTED FOR A PASSWORD HERE, IT MEANS SSH SETUP HAS NOT BEEN SUCCESSFUL. Please note that being prompted for a passphrase may be OK but being prompted for a password is ERROR.
2026年 02月 09日 星期一 14:27:08 CST
------------------------------------------------------------------------
------------------------------------------------------------------------
Verifying SSH connectivity has been setup from rac1 to rac1
IF YOU SEE ANY OTHER OUTPUT BESIDES THE OUTPUT OF THE DATE COMMAND OR IF YOU ARE PROMPTED FOR A PASSWORD HERE, IT MEANS SSH SETUP HAS NOT BEEN SUCCESSFUL.
2026年 02月 09日 星期一 14:27:08 CST
------------------------------------------------------------------------
------------------------------------------------------------------------
Verifying SSH connectivity has been setup from rac1 to rac2
IF YOU SEE ANY OTHER OUTPUT BESIDES THE OUTPUT OF THE DATE COMMAND OR IF YOU ARE PROMPTED FOR A PASSWORD HERE, IT MEANS SSH SETUP HAS NOT BEEN SUCCESSFUL.
2026年 02月 09日 星期一 14:27:08 CST
------------------------------------------------------------------------
-Verification from complete-
SSH verification complete.
[grid@rac1:/home/grid/.ssh]$


测试:
[grid@rac1:/home/grid/.ssh]$ ssh rac1 date;ssh rac2 date;ssh rac1-priv date;ssh rac2-priv date
2026年 02月 09日 星期一 14:32:47 CST
2026年 02月 09日 星期一 14:32:47 CST
The authenticity of host 'rac1-priv (18.18.18.5)' can't be established.
ED25519 key fingerprint is SHA256:UafGoOKyAZbN82nQjIgXOqfFUlDzlktc9QOZpAUHh7k.
This host key is known by the following other names/addresses:
    ~/.ssh/known_hosts:1: rac1
    ~/.ssh/known_hosts:7: rac1
Are you sure you want to continue connecting (yes/no/[fingerprint])? yes
Warning: Permanently added 'rac1-priv' (ED25519) to the list of known hosts.
2026年 02月 09日 星期一 14:32:50 CST
The authenticity of host 'rac2-priv (18.18.18.6)' can't be established.
ED25519 key fingerprint is SHA256:2qOxLjQpn+3dH8lp3zKfDui6BjZI6/QY/NSSXQJUpDU.
This host key is known by the following other names/addresses:
    ~/.ssh/known_hosts:2: rac2
Are you sure you want to continue connecting (yes/no/[fingerprint])? yes
Warning: Permanently added 'rac2-priv' (ED25519) to the list of known hosts.
2026年 02月 09日 星期一 14:32:52 CST
[grid@rac1:/home/grid/.ssh]$ ssh rac1 date;ssh rac2 date;ssh rac1-priv date;ssh rac2-priv date
2026年 02月 09日 星期一 14:32:55 CST
2026年 02月 09日 星期一 14:32:55 CST
2026年 02月 09日 星期一 14:32:56 CST
2026年 02月 09日 星期一 14:32:56 CST
[grid@rac1:/home/grid/.ssh]$


oracle用户--oracle采用的图形方法
$ORACLE_HOME/oui/prov/resources/scripts/sshUserSetup.sh -user oracle  -hosts "rac1 rac2"  -advanced -noPromptPassphrase
普通配置方法
分别配置 grid 和 oracle 用户的 ssh 两个节点都执行
# su - oracle
$ mkdir -p ~/.ssh
$ chmod 700 ~/.ssh
$ ssh-keygen -t rsa ->回车->回车->回车
$ ssh-keygen -t dsa ->回车->回车->回车
----------------------------------------------------------------
# su - oracle
$ mkdir ~/.ssh
$ chmod 700 ~/.ssh
$ ssh-keygen -t rsa ->回车->回车->回车
$ ssh-keygen -t dsa ->回车->回车->回车
以上两个节点都执行,下面就一个节点执行即可
$ cat ~/.ssh/id_rsa.pub >> ~/.ssh/authorized_keys
$ cat ~/.ssh/id_dsa.pub >> ~/.ssh/authorized_keys
$ ssh rac2 cat ~/.ssh/id_rsa.pub >> ~/.ssh/authorized_keys ->输入 rac2 密码
$ ssh rac2 cat ~/.ssh/id_dsa.pub >> ~/.ssh/authorized_keys ->输入 rac2 密码
$ scp ~/.ssh/authorized_keys rac2:~/.ssh/authorized_keys ->输入 rac2 密码

测试两节点连通性:
$ ssh rac1 date
$ ssh rac2 date
$ ssh rac1-priv date
$ ssh rac2-priv date
$ ssh rac1 date
$ ssh rac2 date
$ ssh rac1-priv date
$ ssh rac2-priv date
5.5 安装前检查
- GRID 安装完成,在进行集群校验时,因为 SCAN NAME 没有使用 DNS 解析报失败,此情况正常,忽略
在 grid 软件目录里运行以下命令:
使用 CVU 验证硬件和操作系统设置
./runcluvfy.sh stage -pre crsinst -n rac1,rac2 -fixup -verbose
./runcluvfy.sh stage -pre crsinst -n rac1,rac2 -verbose
./runcluvfy.sh stage -post hwos -n rac1,rac2 -verbos
在grid的ORACLE_HOME下
执行./runcluvfy.sh stage -post hwos -n rac1,rac2 -verbos
export CVUQDISK_GRP=oinstall
./runcluvfy.sh stage -pre crsinst -n rac1,rac2 -verbose
[grid@rac1:/home/grid/.ssh]$ export CVUQDISK_GRP=oinstall
[grid@rac1:/home/grid/.ssh]$ cd $ORACLE_HOME
[grid@rac1:/u01/app/23.0.0/grid]$ ./runcluvfy.sh stage -pre crsinst -n rac1,rac2 -fixup -verbose
Initializing ...
Performing following verification checks ...
物理内存 ...
节点名 可用 必需 状态
------------ ------------------------ ------------------------ ----------
rac2 15.6121GB (1.637052E7KB) 8GB (8388608.0KB) 通过
rac1 15.6121GB (1.637052E7KB) 8GB (8388608.0KB) 通过
物理内存 ...通过
可用物理内存 ...
节点名 可用 必需 状态
------------ ------------------------ ------------------------ ----------
rac2 14.9835GB (1.5711288E7KB) 50MB (51200.0KB) 通过
rac1 14.6003GB (1.5309504E7KB) 50MB (51200.0KB) 通过
可用物理内存 ...通过
交换空间大小 ...
节点名 可用 必需 状态
------------ ------------------------ ------------------------ ----------
rac2 16.0977GB (1.6879612E7KB) 15.6121GB (1.637052E7KB) 通过
rac1 16.0977GB (1.6879612E7KB) 15.6121GB (1.637052E7KB) 通过
交换空间大小 ...通过
空闲空间: rac2:/usr,rac2:/var,rac2:/etc,rac2:/sbin,rac2:/tmp ...
路径 节点名 装载点 可用 必需 状态
---------------- ------------ ------------ ------------ ------------ ------------
/usr rac2 / 80.6934GB 25MB 通过
/var rac2 / 80.6934GB 5MB 通过
/etc rac2 / 80.6934GB 25MB 通过
/sbin rac2 / 80.6934GB 10MB 通过
/tmp rac2 / 80.6934GB 1GB 通过
空闲空间: rac2:/usr,rac2:/var,rac2:/etc,rac2:/sbin,rac2:/tmp ...通过
空闲空间: rac1:/usr,rac1:/var,rac1:/etc,rac1:/sbin,rac1:/tmp ...
路径 节点名 装载点 可用 必需 状态
---------------- ------------ ------------ ------------ ------------ ------------
/usr rac1 / 74.4733GB 25MB 通过
/var rac1 / 74.4733GB 5MB 通过
/etc rac1 / 74.4733GB 25MB 通过
/sbin rac1 / 74.4733GB 10MB 通过
/tmp rac1 / 74.4733GB 1GB 通过
空闲空间: rac1:/usr,rac1:/var,rac1:/etc,rac1:/sbin,rac1:/tmp ...通过
用户存在性: grid ...
节点名 状态 注释
------------ ------------------------ ------------------------
rac2 通过 存在(54331)
rac1 通过 存在(54331)
具有相同 UID 的用户: 54331 ...通过
用户存在性: grid ...通过
组存在性: asmadmin ...
节点名 状态 注释
------------ ------------------------ ------------------------
rac2 通过 存在
rac1 通过 存在
组存在性: asmadmin ...通过
组存在性: asmdba ...
节点名 状态 注释
------------ ------------------------ ------------------------
rac2 通过 存在
rac1 通过 存在
组存在性: asmdba ...通过
组存在性: oinstall ...
节点名 状态 注释
------------ ------------------------ ------------------------
rac2 通过 存在
rac1 通过 存在
组存在性: oinstall ...通过
组成员资格: asmdba ...
节点名 用户存在 组存在 组中的用户 状态
---------------- ------------ ------------ ------------ ----------------
rac2 是 是 是 通过
rac1 是 是 是 通过
组成员资格: asmdba ...通过
组成员资格: asmadmin ...
节点名 用户存在 组存在 组中的用户 状态
---------------- ------------ ------------ ------------ ----------------
rac2 是 是 是 通过
rac1 是 是 是 通过
组成员资格: asmadmin ...通过
组成员资格: oinstall(主) ...
节点名 用户存在 组存在 组中的用户 主 状态
---------------- ------------ ------------ ------------ ------------ ------------
rac2 是 是 是 是 通过
rac1 是 是 是 是 通过
组成员资格: oinstall(主) ...通过
运行级别 ...
节点名 运行级别 必需 状态
------------ ------------------------ ------------------------ ----------
rac2 5 3,5 通过
rac1 5 3,5 通过
运行级别 ...通过
硬性限制: 打开的文件描述符的最大数 ...
节点名 类型 可用 必需 状态
---------------- ------------ ------------ ------------ ----------------
rac2 硬性 65536 65536 通过
rac1 硬性 65536 65536 通过
硬性限制: 打开的文件描述符的最大数 ...通过
软性限制: 打开的文件描述符的最大数 ...
节点名 类型 可用 必需 状态
---------------- ------------ ------------ ------------ ----------------
rac2 软性 1024 1024 通过
rac1 软性 1024 1024 通过
软性限制: 打开的文件描述符的最大数 ...通过
硬性限制: 最大用户进程数 ...
节点名 类型 可用 必需 状态
---------------- ------------ ------------ ------------ ----------------
rac2 硬性 16384 16384 通过
rac1 硬性 16384 16384 通过
硬性限制: 最大用户进程数 ...通过
软性限制: 最大用户进程数 ...
节点名 类型 可用 必需 状态
---------------- ------------ ------------ ------------ ----------------
rac2 软性 2047 2047 通过
rac1 软性 2047 2047 通过
软性限制: 最大用户进程数 ...通过
软性限制: 最大堆栈大小 ...
节点名 类型 可用 必需 状态
---------------- ------------ ------------ ------------ ----------------
rac2 软性 10240 10240 通过
rac1 软性 10240 10240 通过
软性限制: 最大堆栈大小 ...通过
体系结构 ...
节点名 可用 必需 状态
------------ ------------------------ ------------------------ ----------
rac2 x86_64 x86_64 通过
rac1 x86_64 x86_64 通过
体系结构 ...通过
操作系统内核版本 ...
节点名 可用 必需 状态
------------ ------------------------ ------------------------ ----------
rac2 6.12.0-105.51.5.el9uek.x86_64 5.15.0 通过
rac1 6.12.0-105.51.5.el9uek.x86_64 5.15.0 通过
操作系统内核版本 ...通过
操作系统内核参数: semmsl ...
节点名 当前值 已配置 必需 状态 注释
---------------- ------------ ------------ ------------ ------------ ------------
rac1 250 250 250 通过
rac2 250 250 250 通过
操作系统内核参数: semmsl ...通过
操作系统内核参数: semmns ...
节点名 当前值 已配置 必需 状态 注释
---------------- ------------ ------------ ------------ ------------ ------------
rac1 32000 32000 32000 通过
rac2 32000 32000 32000 通过
操作系统内核参数: semmns ...通过
操作系统内核参数: semopm ...
节点名 当前值 已配置 必需 状态 注释
---------------- ------------ ------------ ------------ ------------ ------------
rac1 100 100 100 通过
rac2 100 100 100 通过
操作系统内核参数: semopm ...通过
操作系统内核参数: semmni ...
节点名 当前值 已配置 必需 状态 注释
---------------- ------------ ------------ ------------ ------------ ------------
rac1 128 128 128 通过
rac2 128 128 128 通过
操作系统内核参数: semmni ...通过
操作系统内核参数: shmmax ...
节点名 当前值 已配置 必需 状态 注释
---------------- ------------ ------------ ------------ ------------ ------------
rac1 16763412479 16763412479 8381706240 通过
rac2 16763412479 16763412479 8381706240 通过
操作系统内核参数: shmmax ...通过
操作系统内核参数: shmmni ...
节点名 当前值 已配置 必需 状态 注释
---------------- ------------ ------------ ------------ ------------ ------------
rac1 4096 4096 4096 通过
rac2 4096 4096 4096 通过
操作系统内核参数: shmmni ...通过
操作系统内核参数: shmall ...
节点名 当前值 已配置 必需 状态 注释
---------------- ------------ ------------ ------------ ------------ ------------
rac1 4092630 4092630 4092629 通过
rac2 4092630 4092630 4092629 通过
操作系统内核参数: shmall ...通过
操作系统内核参数: file-max ...
节点名 当前值 已配置 必需 状态 注释
---------------- ------------ ------------ ------------ ------------ ------------
rac1 6815744 6815744 6815744 通过
rac2 6815744 6815744 6815744 通过
操作系统内核参数: file-max ...通过
操作系统内核参数: ip_local_port_range ...
节点名 当前值 已配置 必需 状态 注释
---------------- ------------ ------------ ------------ ------------ ------------
rac1 between 9000 & 65500 between 9000 & 65500 between 9000 & 65535 通过
rac2 between 9000 & 65500 between 9000 & 65500 between 9000 & 65535 通过
操作系统内核参数: ip_local_port_range ...通过
操作系统内核参数: rmem_default ...
节点名 当前值 已配置 必需 状态 注释
---------------- ------------ ------------ ------------ ------------ ------------
rac1 16777216 16777216 262144 通过
rac2 16777216 16777216 262144 通过
操作系统内核参数: rmem_default ...通过
操作系统内核参数: rmem_max ...
节点名 当前值 已配置 必需 状态 注释
---------------- ------------ ------------ ------------ ------------ ------------
rac1 16777216 16777216 4194304 通过
rac2 16777216 16777216 4194304 通过
操作系统内核参数: rmem_max ...通过
操作系统内核参数: wmem_default ...
节点名 当前值 已配置 必需 状态 注释
---------------- ------------ ------------ ------------ ------------ ------------
rac1 16777216 16777216 262144 通过
rac2 16777216 16777216 262144 通过
操作系统内核参数: wmem_default ...通过
操作系统内核参数: wmem_max ...
节点名 当前值 已配置 必需 状态 注释
---------------- ------------ ------------ ------------ ------------ ------------
rac1 16777216 16777216 1048576 通过
rac2 16777216 16777216 1048576 通过
操作系统内核参数: wmem_max ...通过
操作系统内核参数: aio-max-nr ...
节点名 当前值 已配置 必需 状态 注释
---------------- ------------ ------------ ------------ ------------ ------------
rac1 6194304 6194304 1048576 通过
rac2 6194304 6194304 1048576 通过
操作系统内核参数: aio-max-nr ...通过
操作系统内核参数: panic_on_oops ...
节点名 当前值 已配置 必需 状态 注释
---------------- ------------ ------------ ------------ ------------ ------------
rac1 1 1 1 通过
rac2 1 1 1 通过
操作系统内核参数: panic_on_oops ...通过
操作系统内核参数: kernel.panic ...
节点名 当前值 已配置 必需 状态 注释
---------------- ------------ ------------ ------------ ------------ ------------
rac1 2 2 at least 1 通过
rac2 2 2 at least 1 通过
操作系统内核参数: kernel.panic ...通过
包: binutils-2.35.2 ...
节点名 可用 必需 状态
------------ ------------------------ ------------------------ ----------
rac2 binutils-2.35.2-67.0.1.el9_7.1 binutils-2.35.2 通过
rac1 binutils-2.35.2-67.0.1.el9_7.1 binutils-2.35.2 通过
包: binutils-2.35.2 ...通过
包: compat-openssl11-1.1.1 (x86_64) ...
节点名 可用 必需 状态
------------ ------------------------ ------------------------ ----------
rac2 compat-openssl11(x86_64)-1.1.1k-5.el9_6.1 compat-openssl11(x86_64)-1.1.1 通过
rac1 compat-openssl11(x86_64)-1.1.1k-5.el9_6.1 compat-openssl11(x86_64)-1.1.1 通过
包: compat-openssl11-1.1.1 (x86_64) ...通过
包: fontconfig-2.14.0 (x86_64) ...
节点名 可用 必需 状态
------------ ------------------------ ------------------------ ----------
rac2 fontconfig(x86_64)-2.14.0-2.el9_1 fontconfig(x86_64)-2.14.0 通过
rac1 fontconfig(x86_64)-2.14.0-2.el9_1 fontconfig(x86_64)-2.14.0 通过
包: fontconfig-2.14.0 (x86_64) ...通过
包: libxcrypt-compat-4.4.18 ...
节点名 可用 必需 状态
------------ ------------------------ ------------------------ ----------
rac2 libxcrypt-compat-4.4.18-3.el9 libxcrypt-compat-4.4.18 通过
rac1 libxcrypt-compat-4.4.18-3.el9 libxcrypt-compat-4.4.18 通过
包: libxcrypt-compat-4.4.18 ...通过
包: libgcc-11.3.1 (x86_64) ...
节点名 可用 必需 状态
------------ ------------------------ ------------------------ ----------
rac2 libgcc(x86_64)-11.5.0-11.0.2.el9 libgcc(x86_64)-11.3.1 通过
rac1 libgcc(x86_64)-11.5.0-11.0.2.el9 libgcc(x86_64)-11.3.1 通过
包: libgcc-11.3.1 (x86_64) ...通过
包: libstdc++-11.3.1 (x86_64) ...
节点名 可用 必需 状态
------------ ------------------------ ------------------------ ----------
rac2 libstdc++(x86_64)-11.5.0-11.0.2.el9 libstdc++(x86_64)-11.3.1 通过
rac1 libstdc++(x86_64)-11.5.0-11.0.2.el9 libstdc++(x86_64)-11.3.1 通过
包: libstdc++-11.3.1 (x86_64) ...通过
包: sysstat-12.5.4 ...
节点名 可用 必需 状态
------------ ------------------------ ------------------------ ----------
rac2 sysstat-12.5.4-9.0.2.el9 sysstat-12.5.4 通过
rac1 sysstat-12.5.4-9.0.2.el9 sysstat-12.5.4 通过
包: sysstat-12.5.4 ...通过
包: make-4.3 ...
节点名 可用 必需 状态
------------ ------------------------ ------------------------ ----------
rac2 make-4.3-8.el9 make-4.3 通过
rac1 make-4.3-8.el9 make-4.3 通过
包: make-4.3 ...通过
包: glibc-2.34 (x86_64) ...
节点名 可用 必需 状态
------------ ------------------------ ------------------------ ----------
rac2 glibc(x86_64)-2.34-231.0.1.el9_7.2 glibc(x86_64)-2.34 通过
rac1 glibc(x86_64)-2.34-231.0.1.el9_7.2 glibc(x86_64)-2.34 通过
包: glibc-2.34 (x86_64) ...通过
包: glibc-devel-2.34 (x86_64) ...
节点名 可用 必需 状态
------------ ------------------------ ------------------------ ----------
rac2 glibc-devel(x86_64)-2.34-231.0.1.el9_7.2 glibc-devel(x86_64)-2.34 通过
rac1 glibc-devel(x86_64)-2.34-231.0.1.el9_7.2 glibc-devel(x86_64)-2.34 通过
包: glibc-devel-2.34 (x86_64) ...通过
包: libaio-0.3.111 (x86_64) ...
节点名 可用 必需 状态
------------ ------------------------ ------------------------ ----------
rac2 libaio(x86_64)-0.3.111-13.el9 libaio(x86_64)-0.3.111 通过
rac1 libaio(x86_64)-0.3.111-13.el9 libaio(x86_64)-0.3.111 通过
包: libaio-0.3.111 (x86_64) ...通过
包: nfs-utils-2.5.4 ...
节点名 可用 必需 状态
------------ ------------------------ ------------------------ ----------
rac2 nfs-utils-2.5.4-38.0.1.el9 nfs-utils-2.5.4 通过
rac1 nfs-utils-2.5.4-38.0.1.el9 nfs-utils-2.5.4 通过
包: nfs-utils-2.5.4 ...通过
包: smartmontools-7.2-6 ...
节点名 可用 必需 状态
------------ ------------------------ ------------------------ ----------
rac2 smartmontools-7.2-9.el9 smartmontools-7.2-6 通过
rac1 smartmontools-7.2-9.el9 smartmontools-7.2-6 通过
包: smartmontools-7.2-6 ...通过
包: net-tools-2.0-0.62 ...
节点名 可用 必需 状态
------------ ------------------------ ------------------------ ----------
rac2 net-tools-2.0-0.64.20160912git.el9 net-tools-2.0-0.62 通过
rac1 net-tools-2.0-0.64.20160912git.el9 net-tools-2.0-0.62 通过
包: net-tools-2.0-0.62 ...通过
包: policycoreutils-3.5-1 ...
节点名 可用 必需 状态
------------ ------------------------ ------------------------ ----------
rac2 policycoreutils-3.6-3.el9 policycoreutils-3.5-1 通过
rac1 policycoreutils-3.6-3.el9 policycoreutils-3.5-1 通过
包: policycoreutils-3.5-1 ...通过
包: policycoreutils-python-utils-3.5-1 ...
节点名 可用 必需 状态
------------ ------------------------ ------------------------ ----------
rac2 policycoreutils-python-utils-3.6-3.el9 policycoreutils-python-utils-3.5-1 通过
rac1 policycoreutils-python-utils-3.6-3.el9 policycoreutils-python-utils-3.5-1 通过
包: policycoreutils-python-utils-3.5-1 ...通过
具有相同 UID 的用户: 0 ...通过
当前组 ID ...通过
Root 用户一致性 ...
节点名 状态
------------------------------------ ------------------------
rac2 通过
rac1 通过
Root 用户一致性 ...通过
包: psmisc-22.6-19 ...
节点名 可用 必需 状态
------------ ------------------------ ------------------------ ----------
rac2 psmisc-23.4-3.el9 psmisc-22.6-19 通过
rac1 psmisc-23.4-3.el9 psmisc-22.6-19 通过
包: psmisc-22.6-19 ...通过
主机名 ...通过
节点连接性 ...
主机文件 ...
节点名 状态
------------------------------------ ------------------------
rac1 通过
rac2 通过
主机文件 ...通过
节点 "rac1" 的接口信息
名称 IP 地址 子网 网关 默认网关 HW 地址 MTU
------ --------------- --------------- --------------- --------------- ----------------- ------
ens160 192.168.18.5 192.168.18.0 0.0.0.0 192.168.18.2 00:0C:29:30:0F:D9 1500
ens192 18.18.18.5 18.18.18.0 0.0.0.0 192.168.18.2 00:0C:29:30:0F:E3 1500
节点 "rac2" 的接口信息
名称 IP 地址 子网 网关 默认网关 HW 地址 MTU
------ --------------- --------------- --------------- --------------- ----------------- ------
ens160 192.168.18.6 192.168.18.0 0.0.0.0 192.168.18.2 00:0C:29:CC:64:2D 1500
ens192 18.18.18.6 18.18.18.0 0.0.0.0 192.168.18.2 00:0C:29:CC:64:37 1500
检查: 子网 "192.168.18.0" 的 MTU 一致性。
节点 名称 IP 地址 子网 MTU
---------------- ------------ ------------ ------------ ----------------
rac1 ens160 192.168.18.5 192.168.18.0 1500
rac2 ens160 192.168.18.6 192.168.18.0 1500
检查: 子网 "18.18.18.0" 的 MTU 一致性。
节点 名称 IP 地址 子网 MTU
---------------- ------------ ------------ ------------ ----------------
rac1 ens192 18.18.18.5 18.18.18.0 1500
rac2 ens192 18.18.18.6 18.18.18.0 1500
源 目标 是否已连接?
-------------------------- -------------------------- --------------------------
rac1[ens160:192.168.18.5] rac2[ens160:192.168.18.6] 是
源 目标 是否已连接?
-------------------------- -------------------------- --------------------------
rac1[ens192:18.18.18.5] rac2[ens192:18.18.18.6] 是
检查流经子网的最大 (MTU) 大小数据包 ...通过
子网 "192.168.18.0" 的子网掩码一致性 ...通过
子网 "18.18.18.0" 的子网掩码一致性 ...通过
节点连接性 ...通过
多点传送或广播检查 ...
正在检查子网 "192.168.18.0" 是否能够与多点传送组 "224.0.0.251" 进行多点传送通信
子网 网络类型 Multicast Enabled
------------ ------------------------ ------------------------
192.168.18.0 PUBLIC TRUE
多点传送或广播检查 ...通过
网络时间协议 (NTP) ...通过
相同核心文件名模式 ...通过
用户掩码 ...
节点名 可用 必需 注释
------------ ------------------------ ------------------------ ----------
rac2 0022 0022 通过
rac1 0022 0022 通过
用户掩码 ...通过
用户不在组中 "root": grid ...
节点名 状态 注释
------------ ------------------------ ------------------------
rac2 通过 不存在
rac1 通过 不存在
用户不在组中 "root": grid ...通过
时区一致性 ...通过
Path existence, ownership, permissions and attributes ...
Path "/var" ...通过
Path "/dev/shm" ...通过
Path existence, ownership, permissions and attributes ...通过
节点之间的时间偏移量 ...通过
resolv.conf 完整性 ...
节点名 状态
------------------------------------ ------------------------
rac1 通过
rac2 通过
检查 "/etc/resolv.conf" 中指定的每个名称服务器对名称 "rac1" 的响应
节点名 源 注释 状态
------------ ------------------------ ------------------------ ----------
rac1 192.168.18.2 IPv4 通过
检查 "/etc/resolv.conf" 中指定的每个名称服务器对名称 "rac2" 的响应
节点名 源 注释 状态
------------ ------------------------ ------------------------ ----------
rac2 192.168.18.2 IPv4 通过
resolv.conf 完整性 ...通过
DNS/NIS 名称服务 ...通过
守护程序 "avahi-daemon" 未配置且未运行 ...
节点名 已配置 状态
------------ ------------------------ ------------------------
rac2 否 通过
rac1 否 通过
节点名 正在运行? 状态
------------ ------------------------ ------------------------
rac2 否 通过
rac1 否 通过
守护程序 "avahi-daemon" 未配置且未运行 ...通过
守护程序 "proxyt" 未配置且未运行 ...
节点名 已配置 状态
------------ ------------------------ ------------------------
rac2 否 通过
rac1 否 通过
节点名 正在运行? 状态
------------ ------------------------ ------------------------
rac2 否 通过
rac1 否 通过
守护程序 "proxyt" 未配置且未运行 ...通过
域套接字 ...通过
等同用户 ...通过
RPM Package Manager 数据库 ...信息 (PRVG-11250)
最大锁定内存检查 ...通过
/dev/shm 作为临时文件系统装载 ...通过
proc 文件系统的文件系统装载选项 hidepid ...通过
SCP 二进制文件检查 ...通过
Systemd 登录管理器 IPC 参数 ...通过
cgroup 操作系统兼容性 ...信息 (PRVG-11250)
ORAchk health score ...信息 (PRVH-1507)
集群服务设置 的预检查成功。
RPM Package Manager 数据库 ...信息
PRVG-11250 : 由于检查 "RPM Package Manager 数据库" 需要 'root' 用户权限,未执行该检查。
Refer to My Oracle Support notes "2548970.1" for more details regarding errors
PRVG-11250".
cgroup 操作系统兼容性 ...信息
PRVG-11250 : 由于检查 "cgroup 操作系统兼容性" 需要 'root' 用户权限,未执行该检查。
Refer to My Oracle Support notes "2548970.1" for more details regarding errors
PRVG-11250".
ORAchk health score ...信息
PRVH-1507 : ORAchk/EXAchk checks are skipped.
CVU 操作已执行: stage -pre crsinst
日期: 2026年2月9日 下午4:46:00
CVU 版本: 23.26.1.0.0 (010926x8664)
CVU 主目录: /u01/app/23.0.0/grid
用户: grid
操作系统: Linux6.12.0-105.51.5.el9uek.x86_64
没有要修复的可修复验证故障
[grid@rac1:/u01/app/23.0.0/grid]$
5.6 执行安装
export DISPLAY=192.168.18.1:0.0  -推荐用mobaXterm方便
执行安装程序开始安装,通过-applyRU参数指向补丁解压位置,提前安装grid补丁 ./gridSetup.sh -applyRU /soft/32545008

cd $ORACLE_HOME
./gridSetup.sh

本次不需要升级:
[grid@rac1:/home/grid]$ cd $ORACLE_HOME
[grid@rac1:/u01/app/23.0.0/grid]$ ./gridSetup.sh
正在启动 Oracle Grid Infrastructure 安装向导...
5.6.1 图形截图
选择为新集群配置GI。
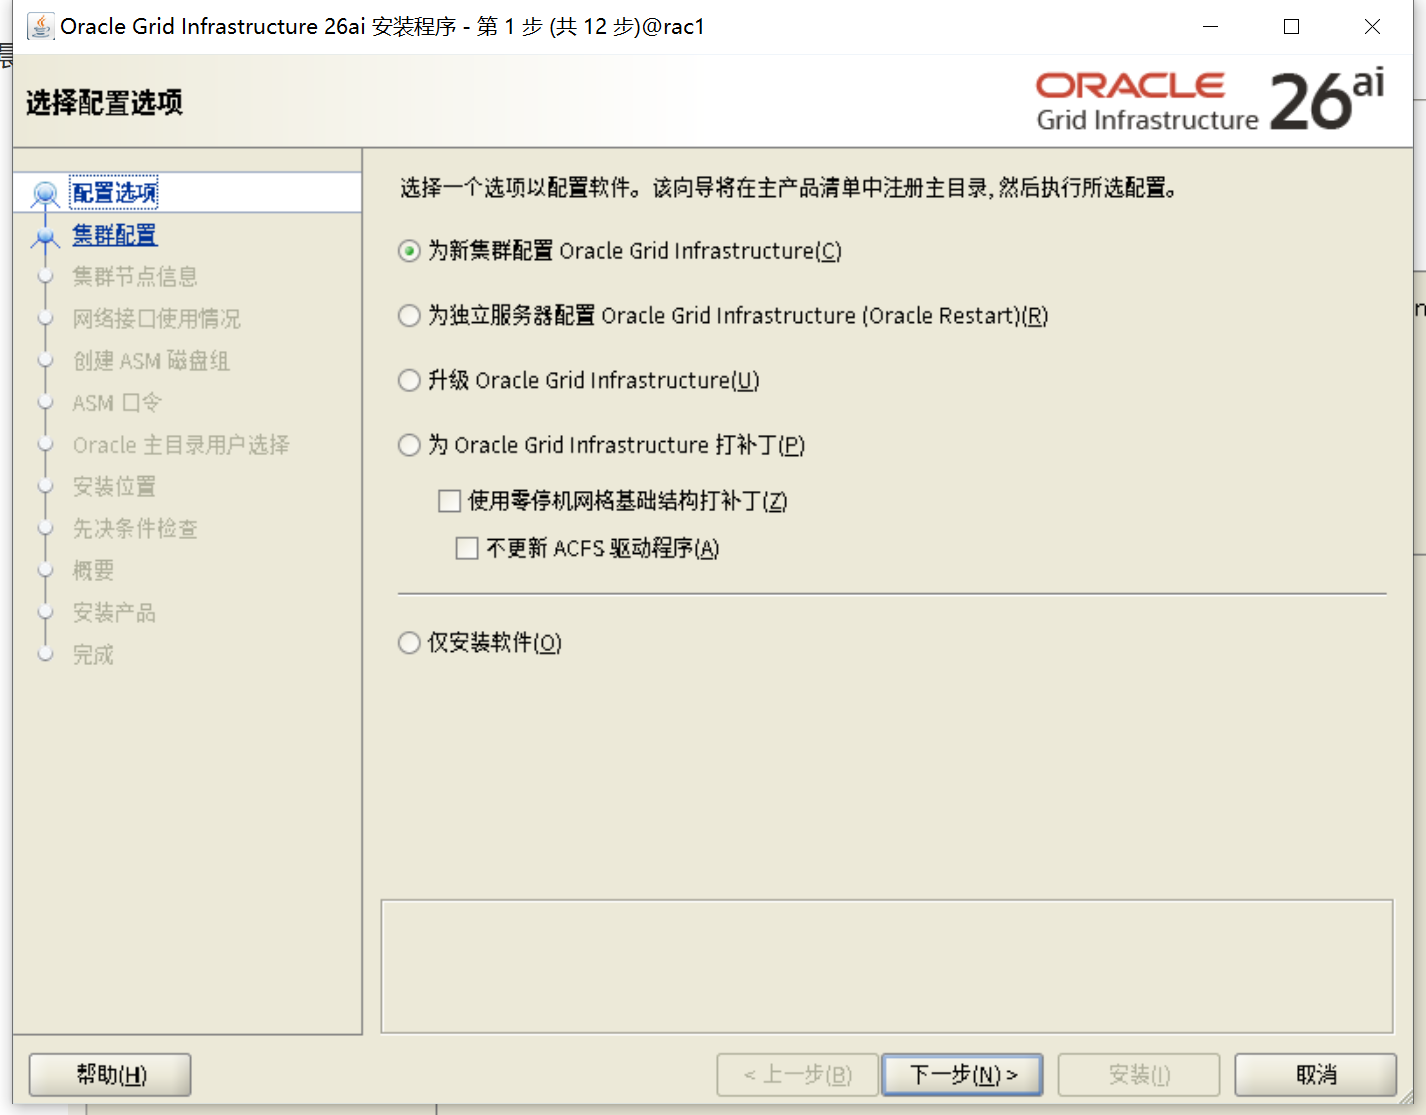
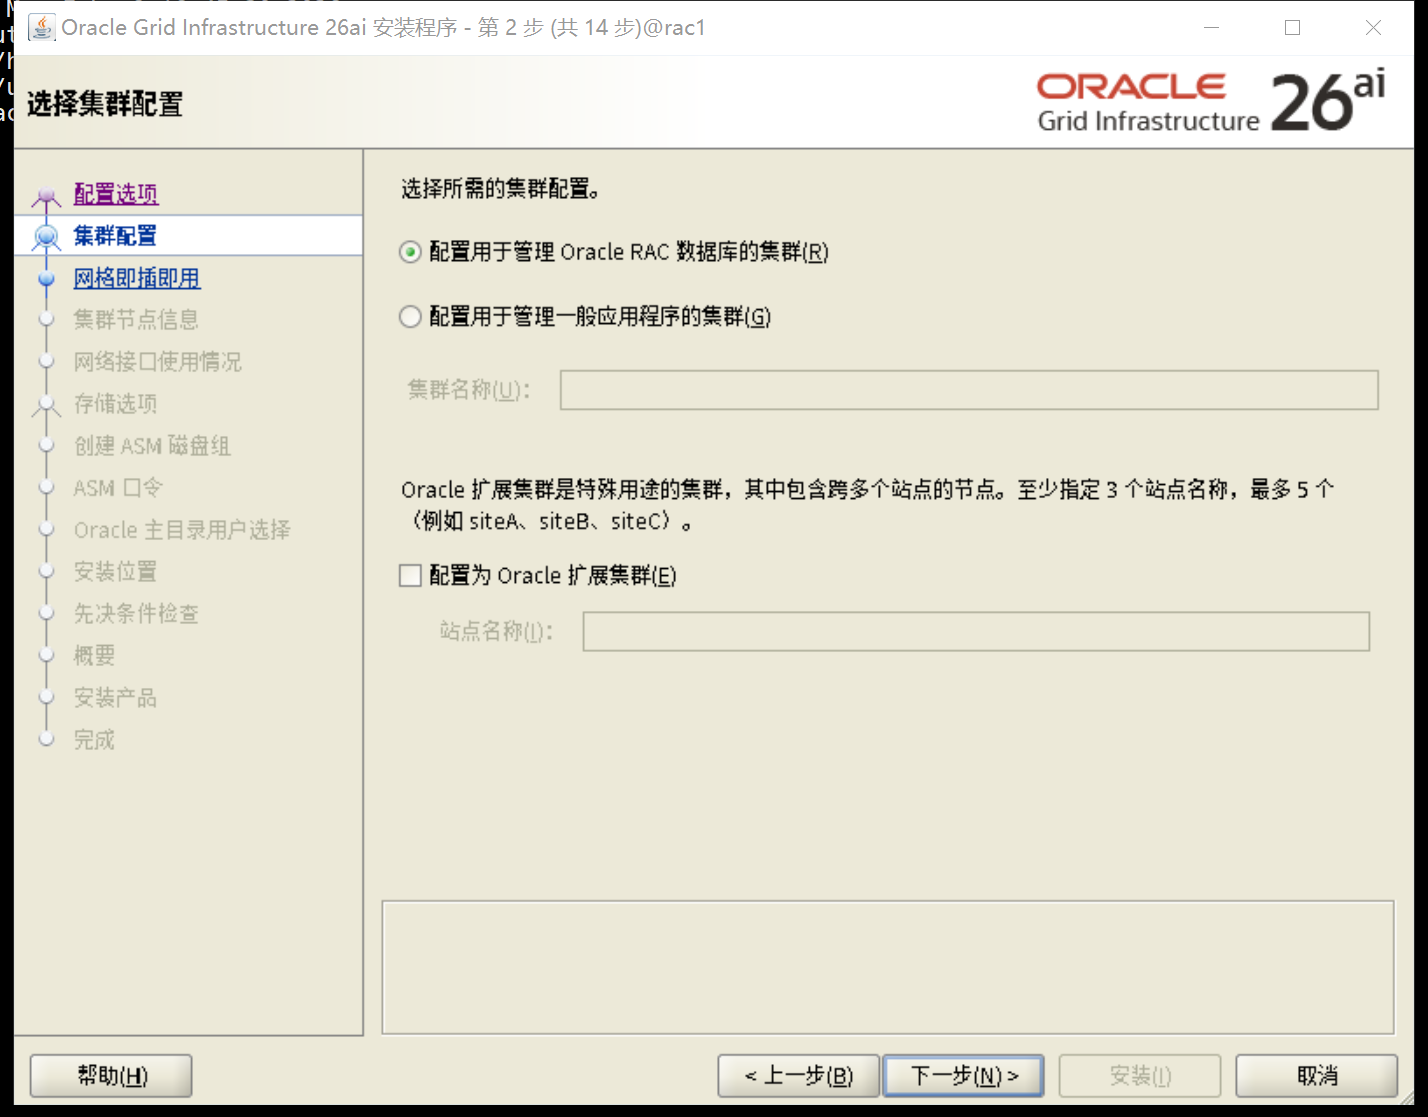
填写集群名称和scan名字,scan名字和/etc/hosts一致

添加节点二信息,进行互信
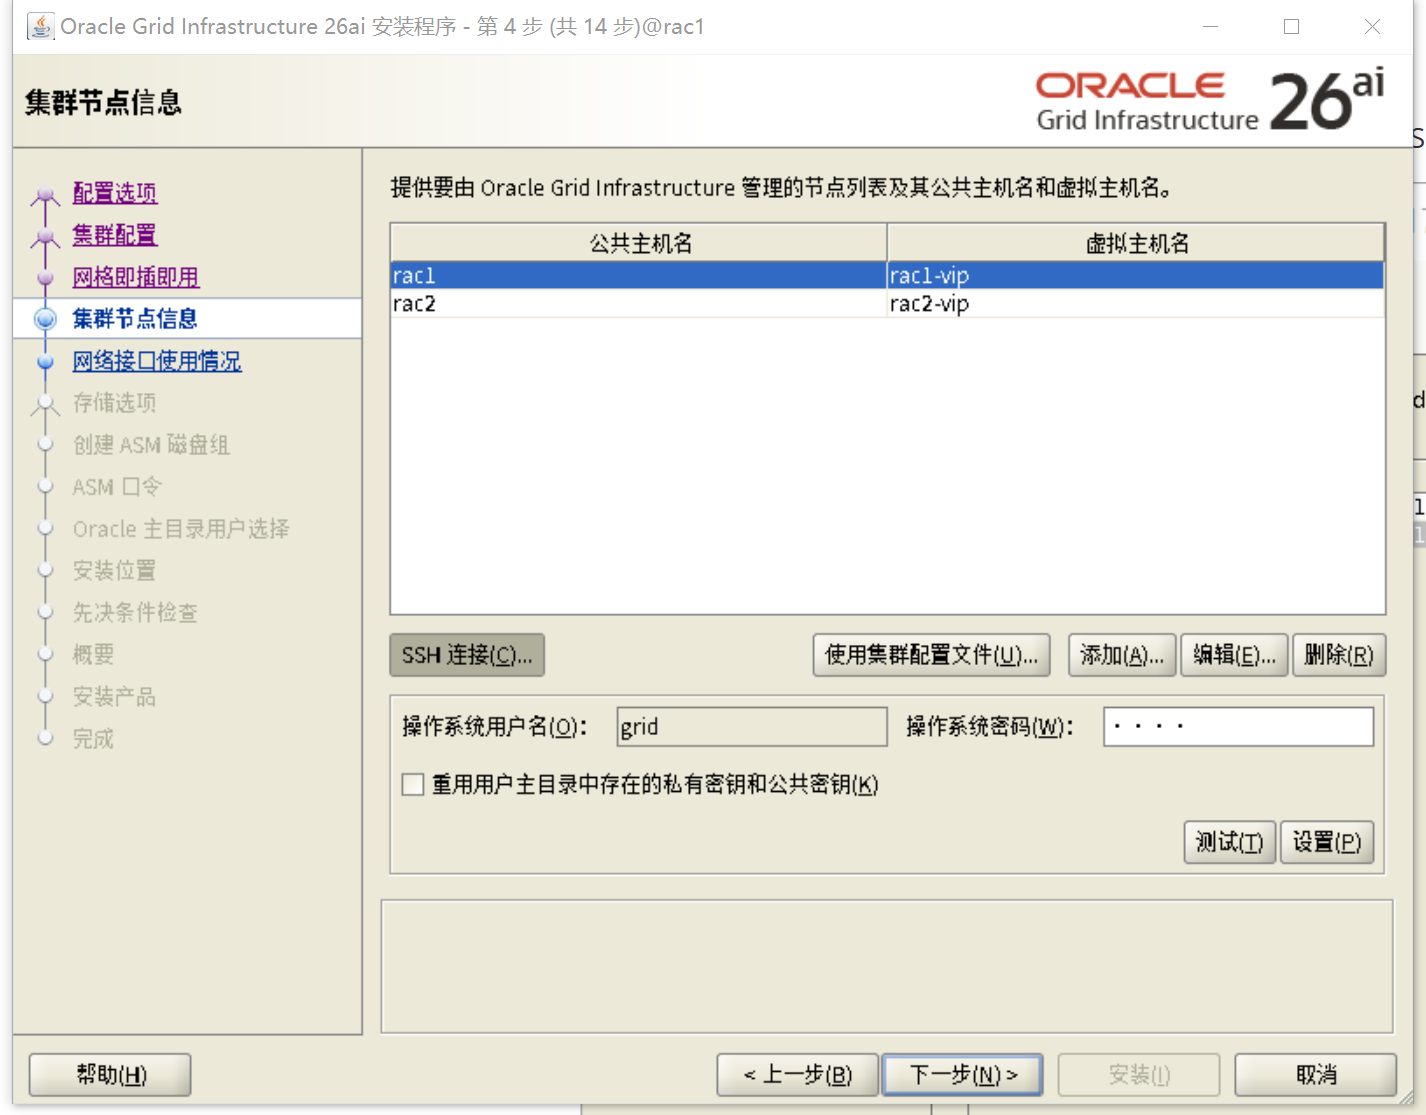
确保对应网卡和IP网段对应即可,19C心跳网段需要选ASM & Private,用于ASM实例的托管
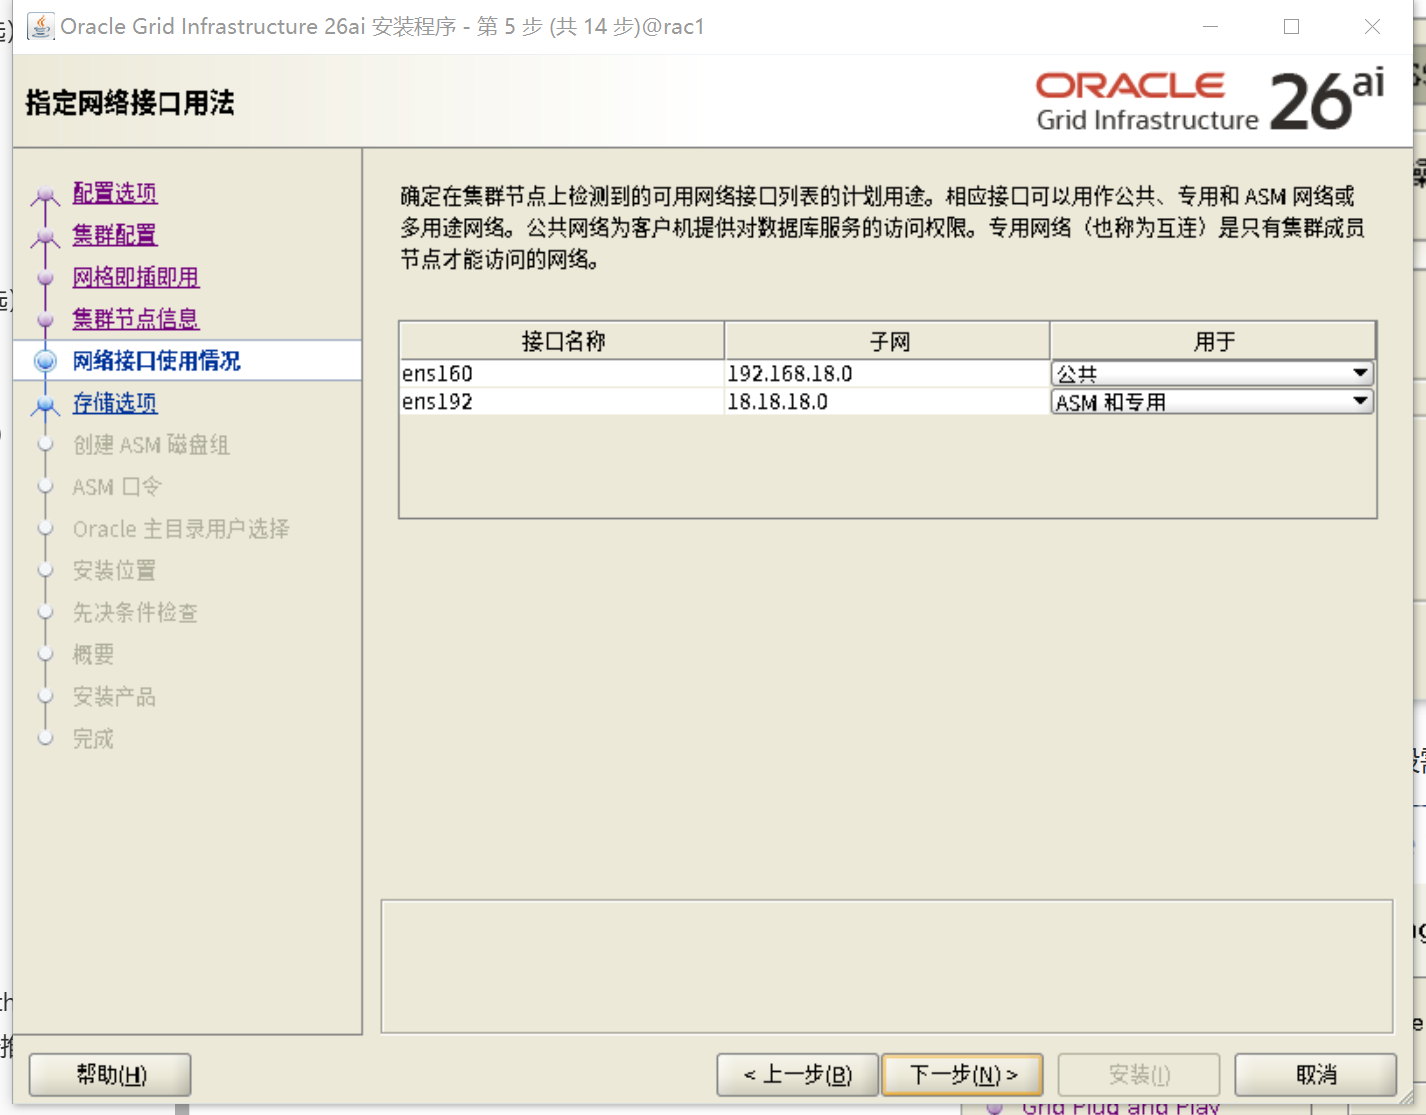
选择Oracle Flex ASM
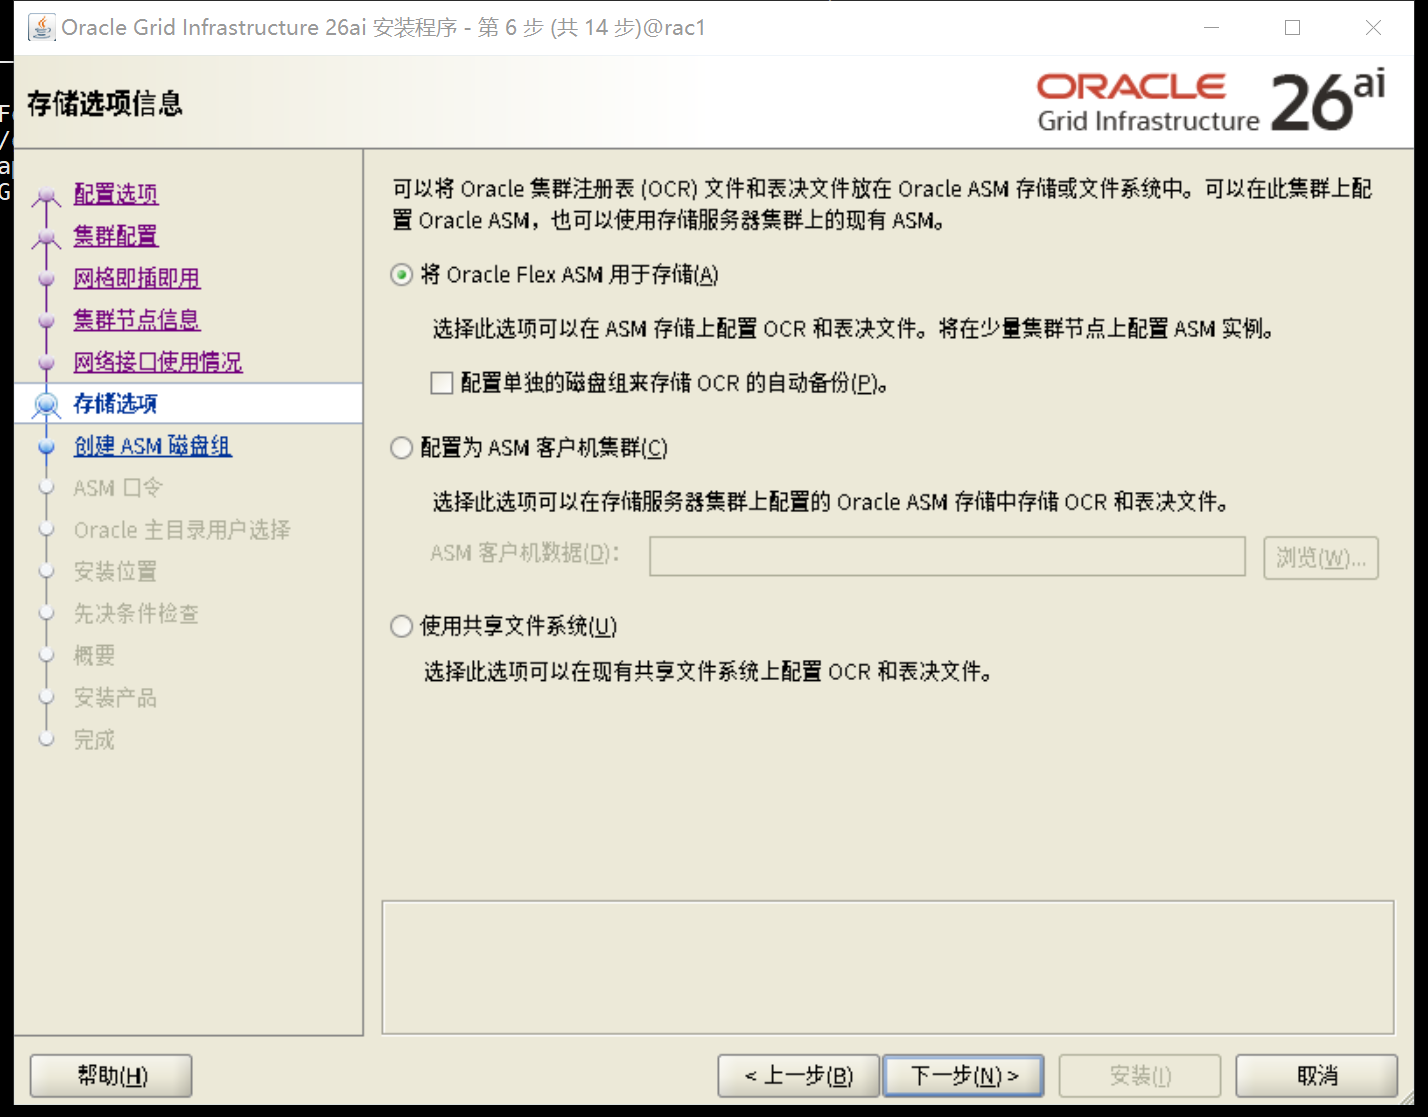
冗余选择普通,选择/dev/oracleasm/disks/OCRVOTE01,/dev/oracleasm/disks/OCRVOTE02,/dev/oracleasm/disks/OCRVOTE03
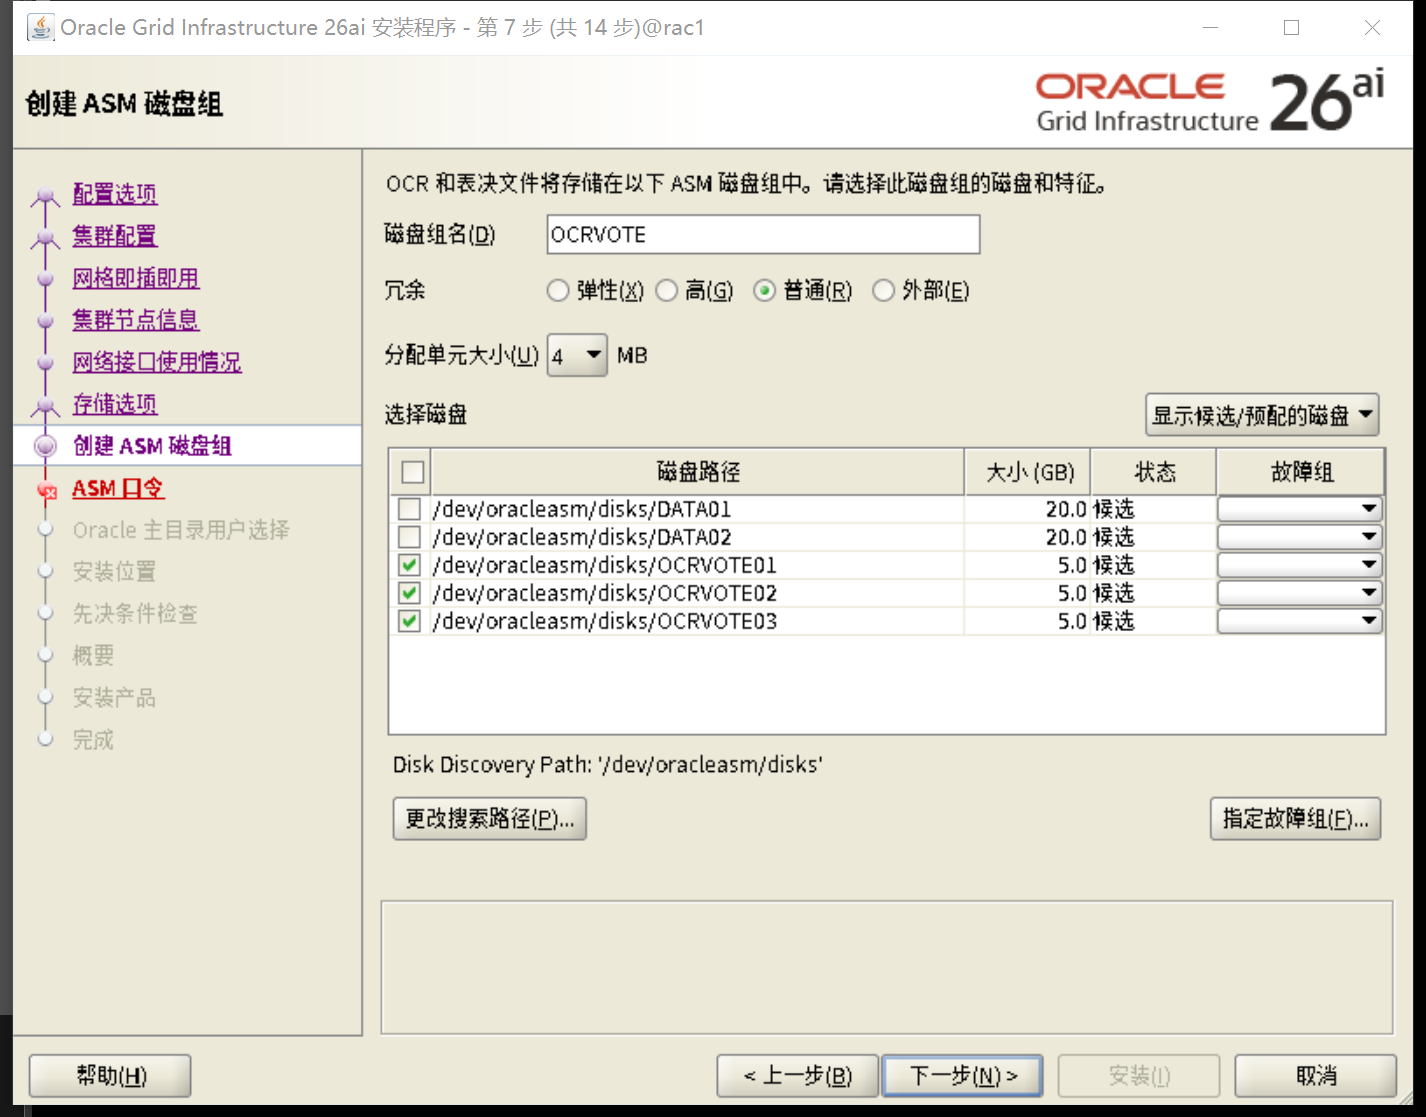
输入密码oracle
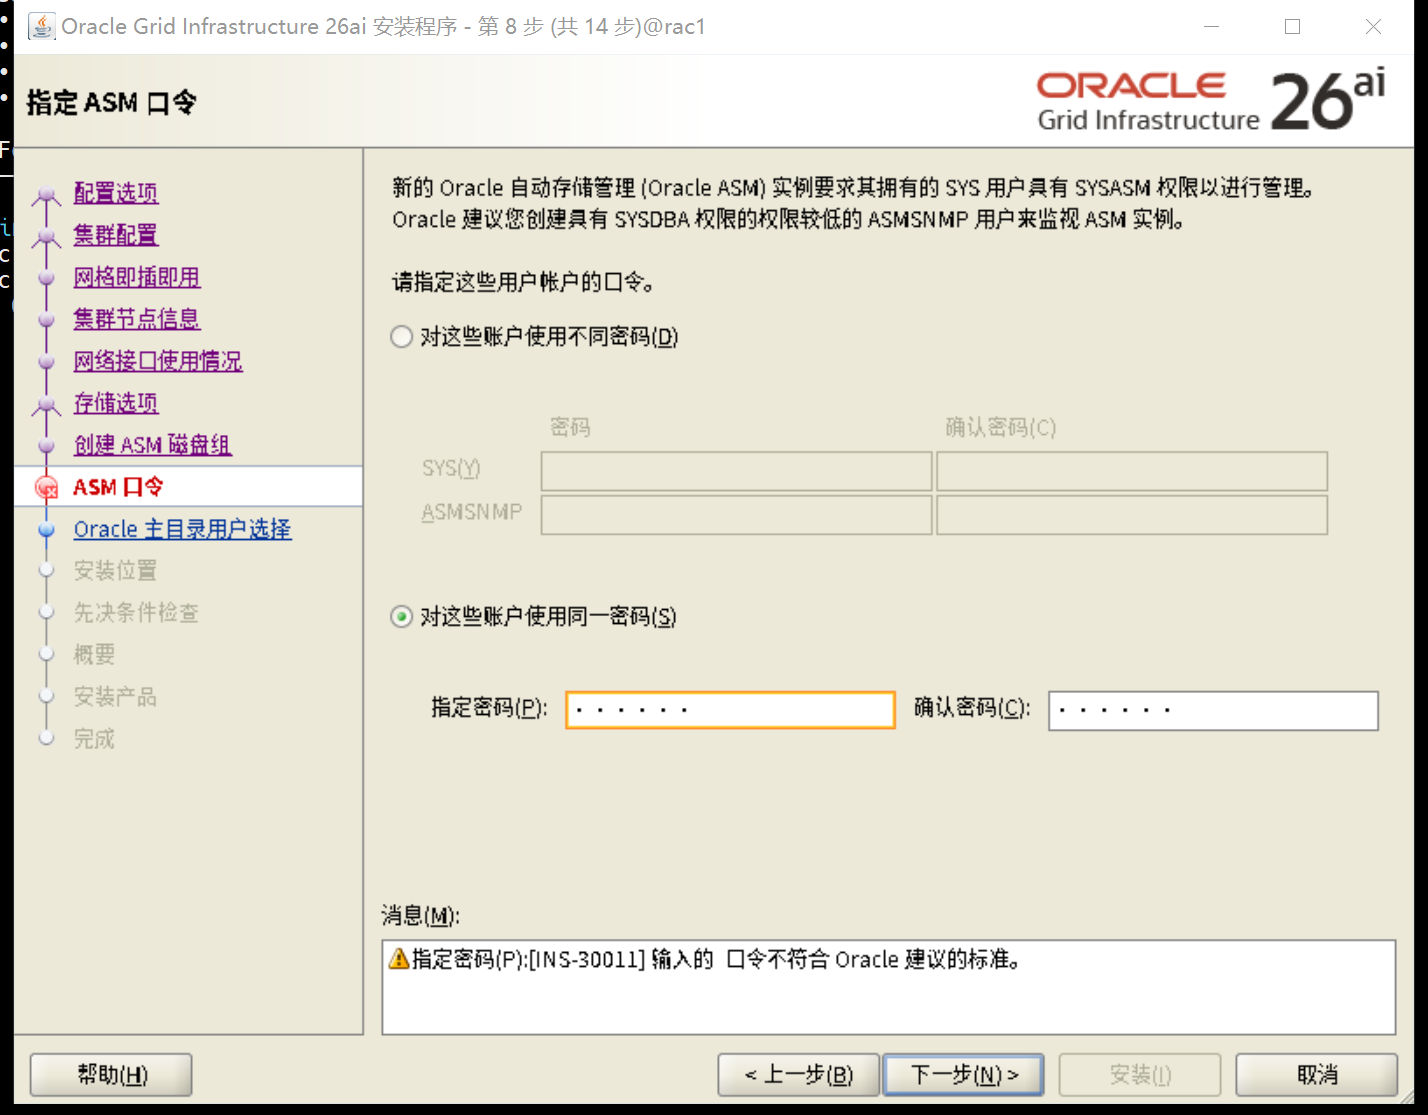
启用自动自行更正
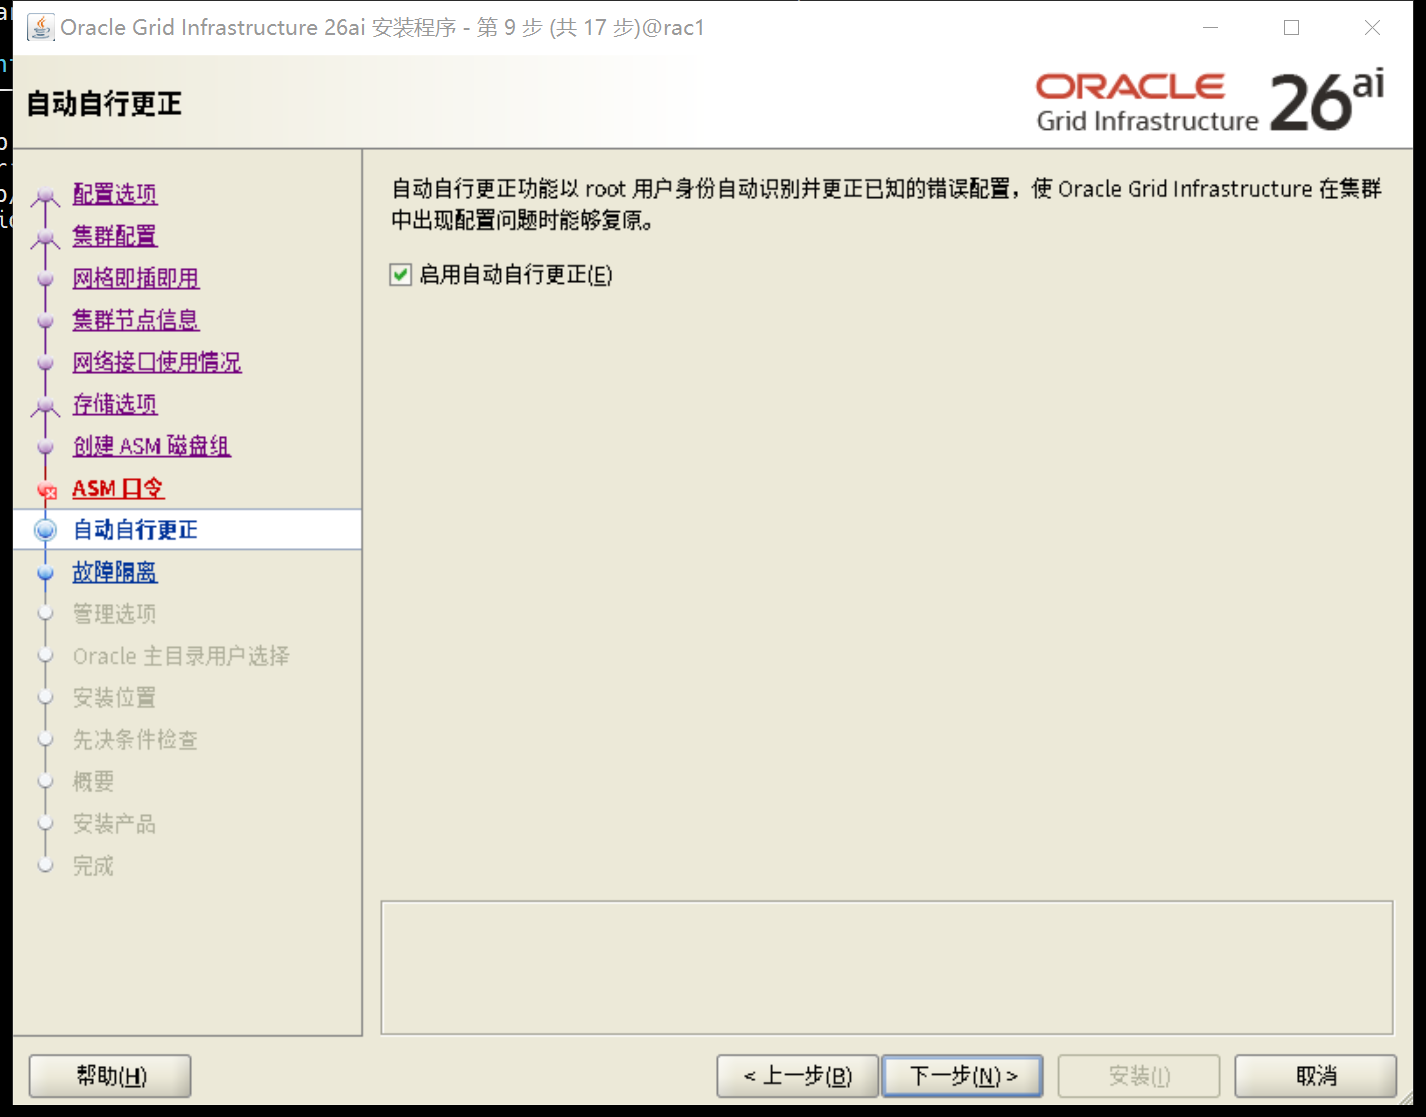
不启动IPMI
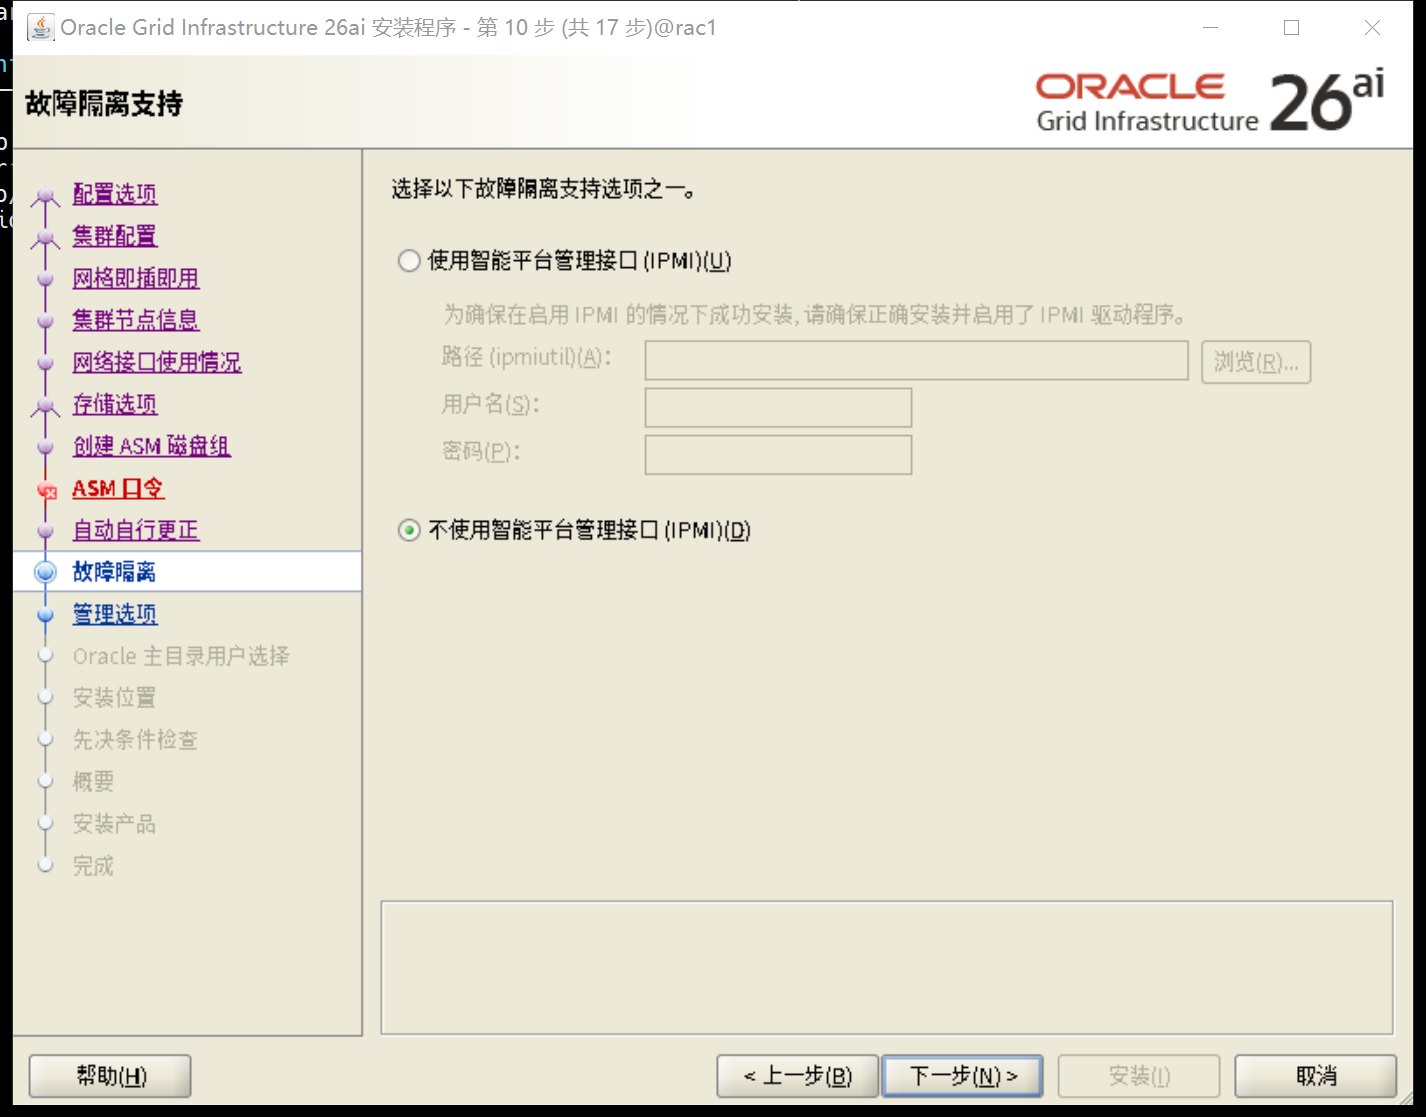
不注册EM
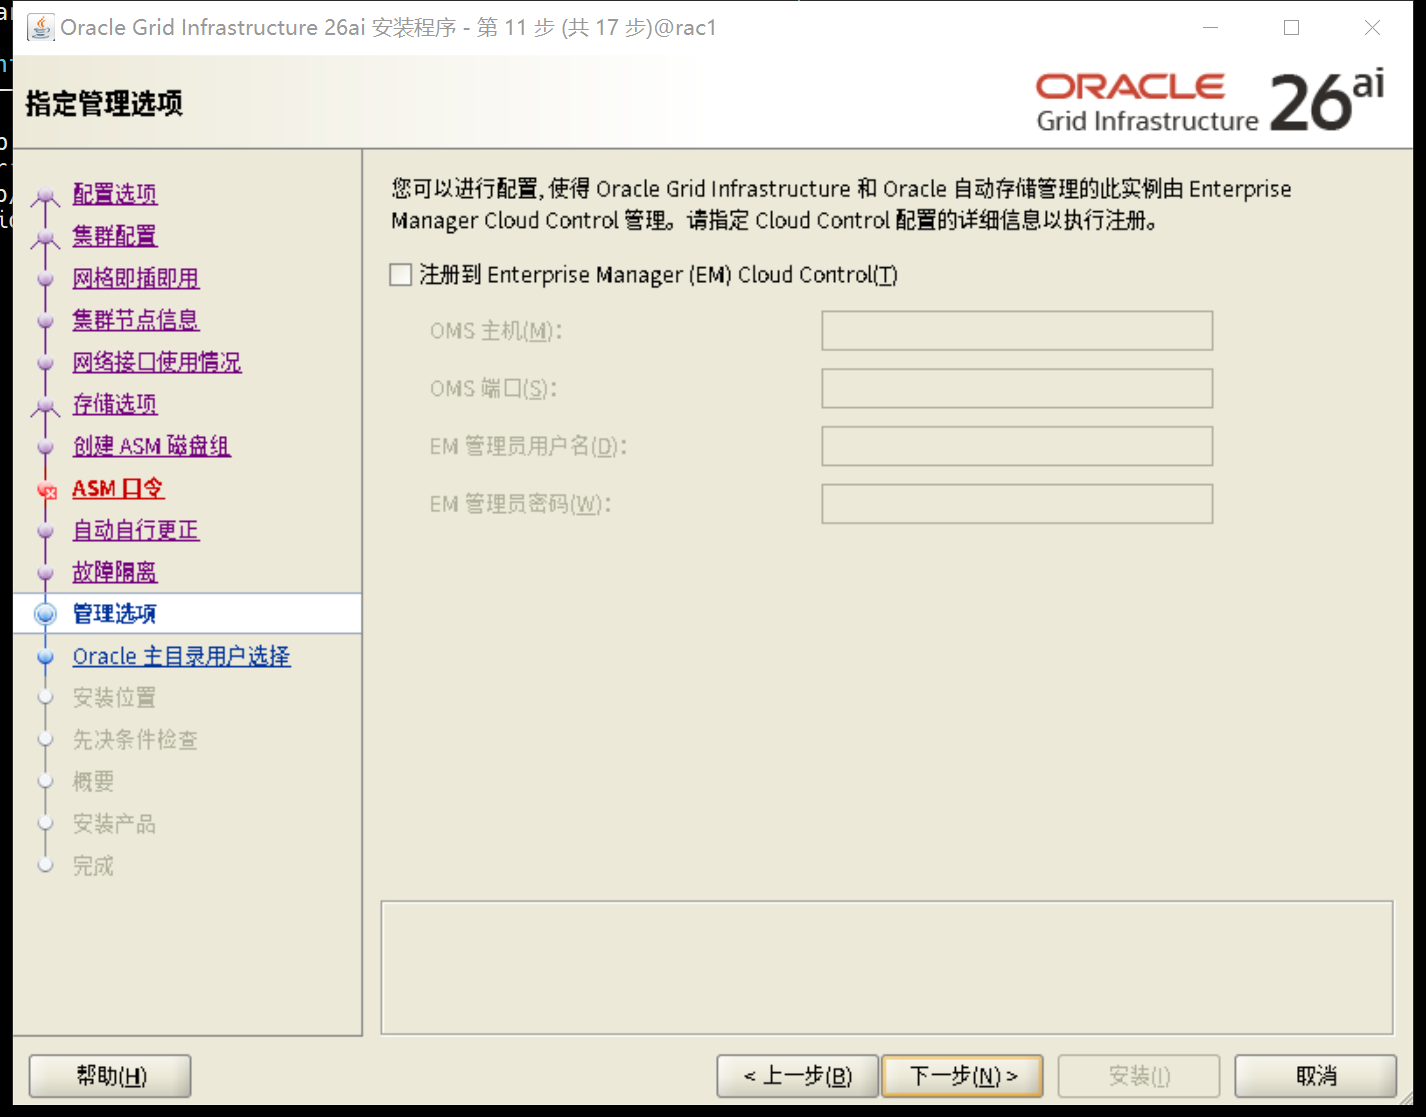
核对用户组
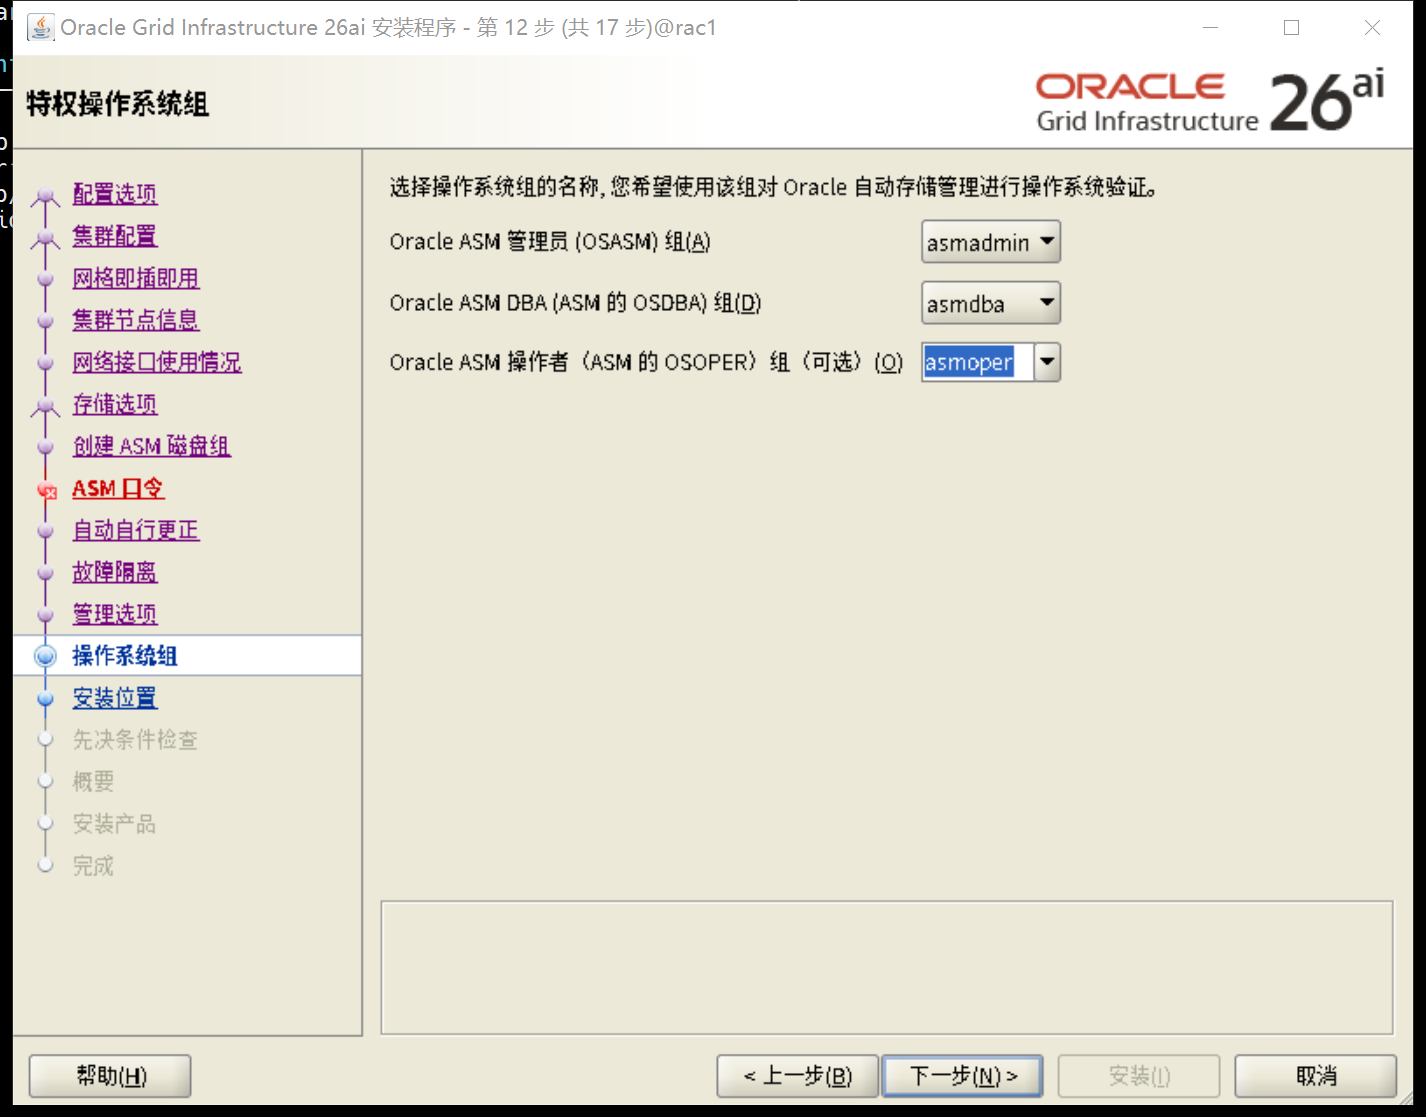
安装目录选择
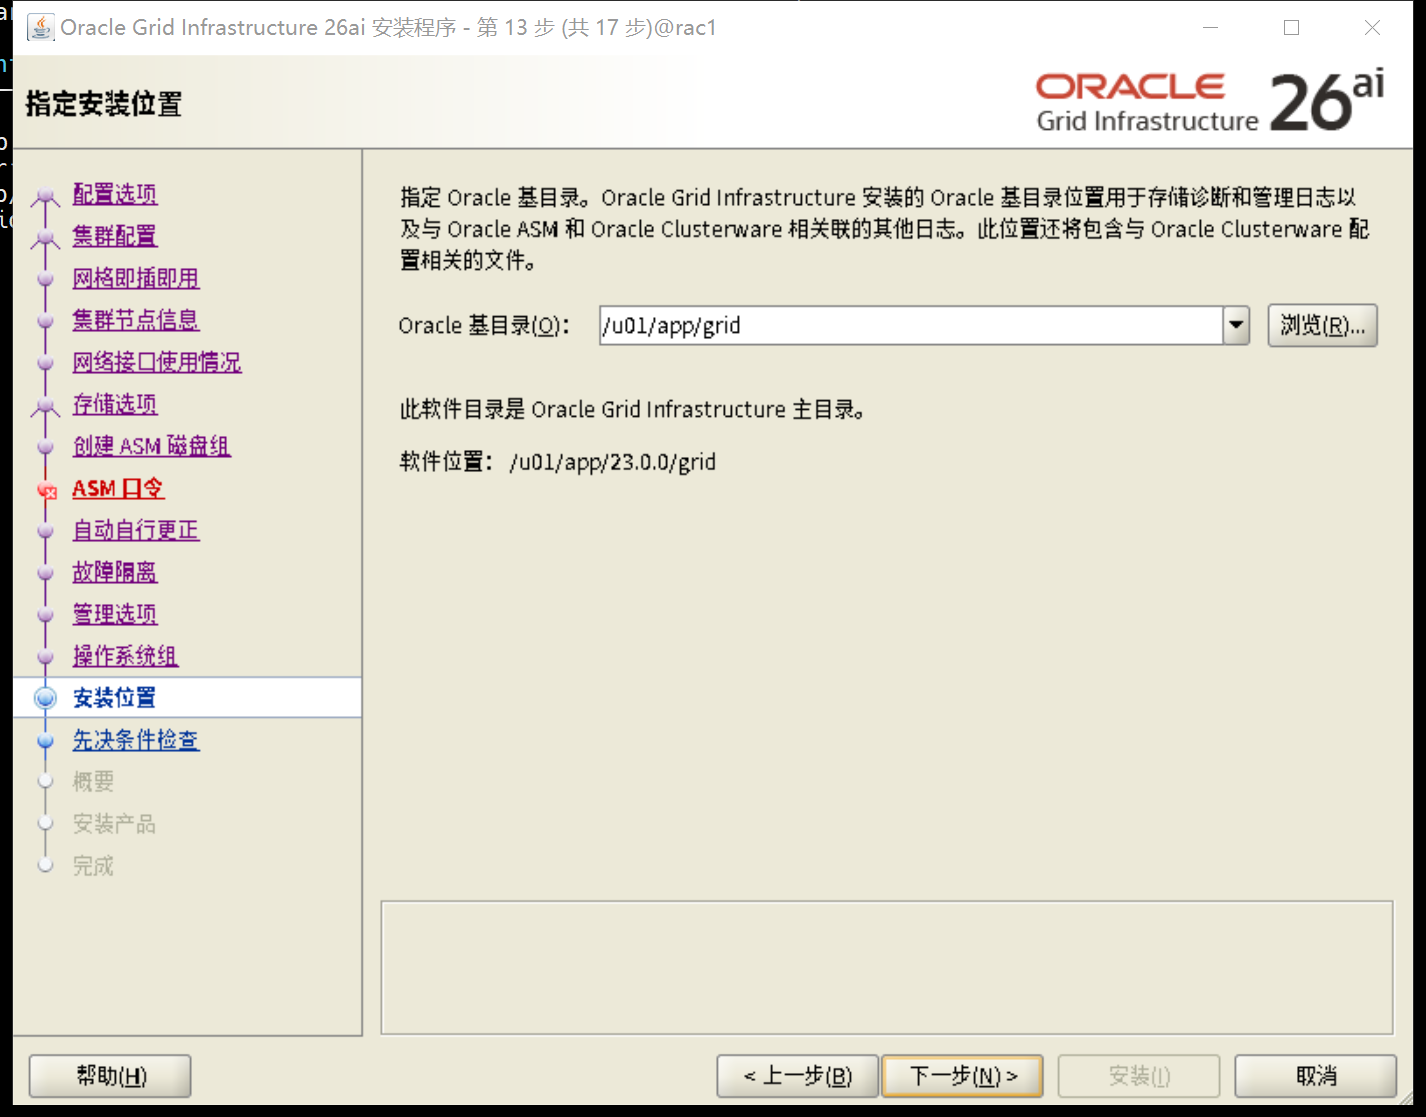
选择oraInventory目录
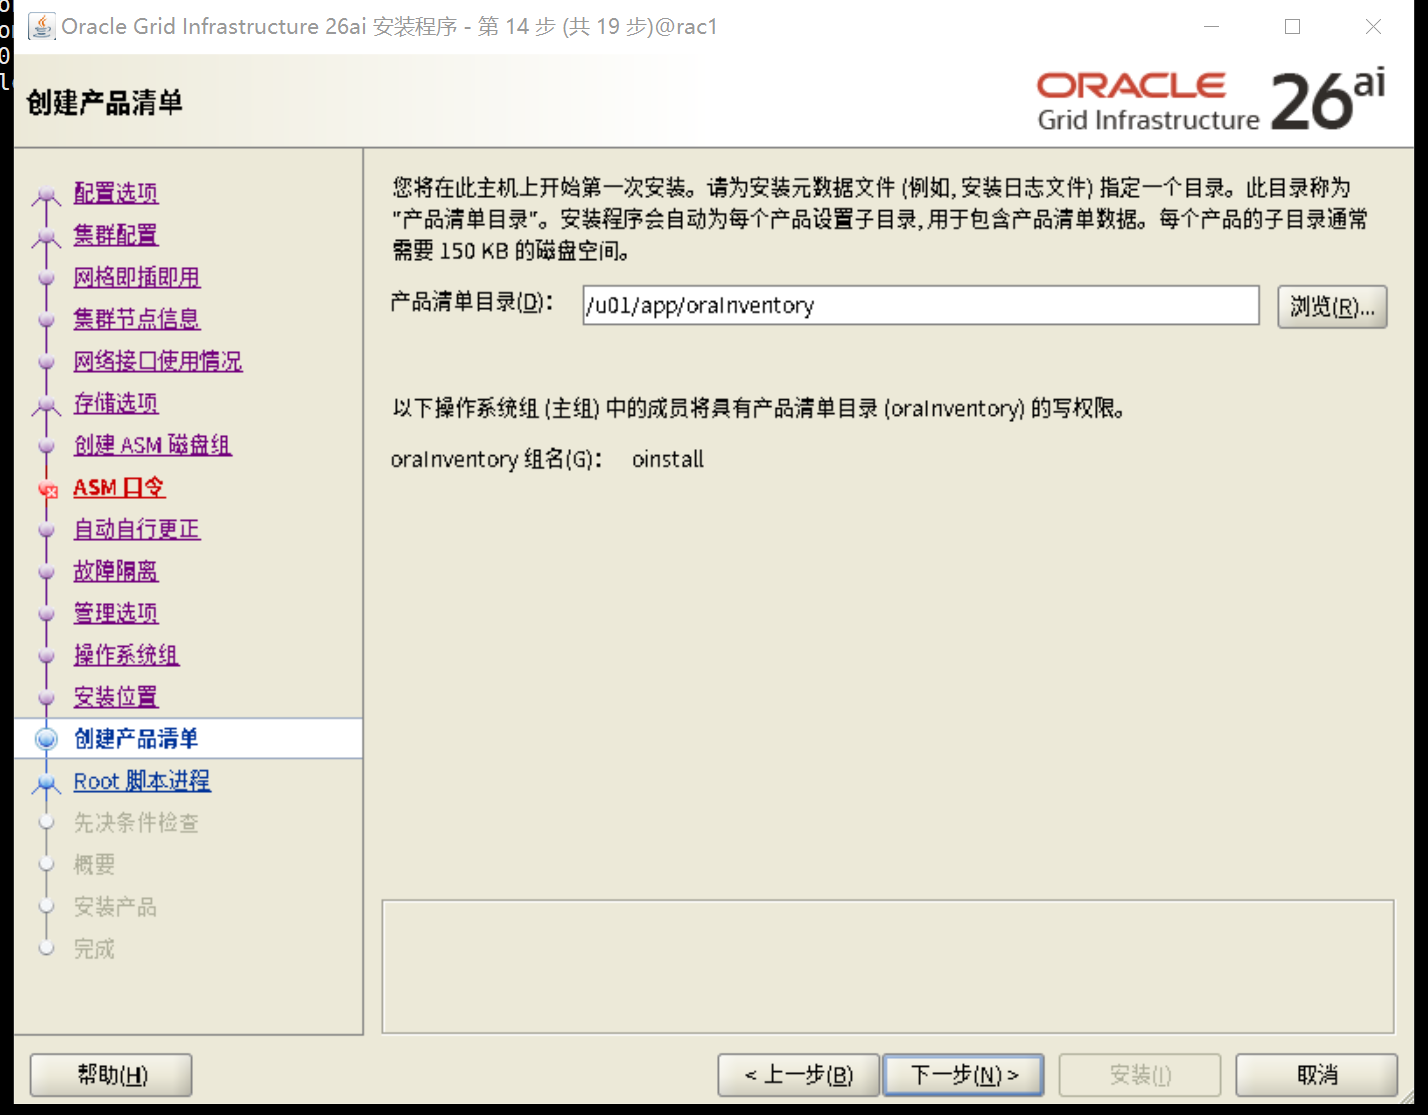
下一步

预检查
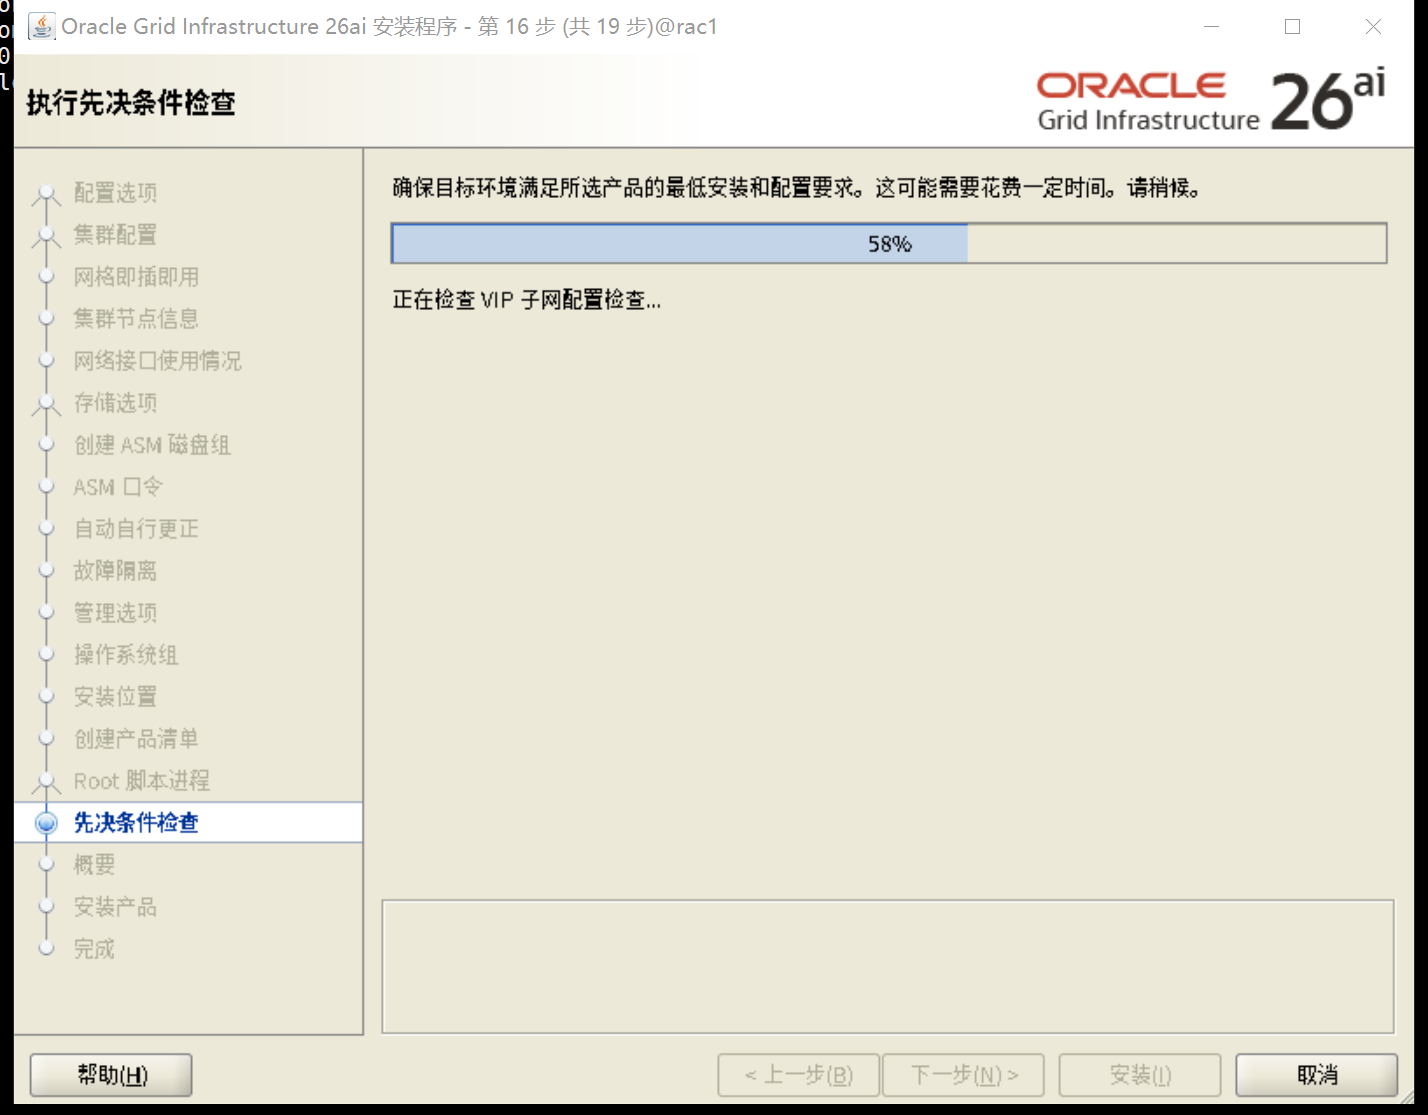
忽略全部,下一步
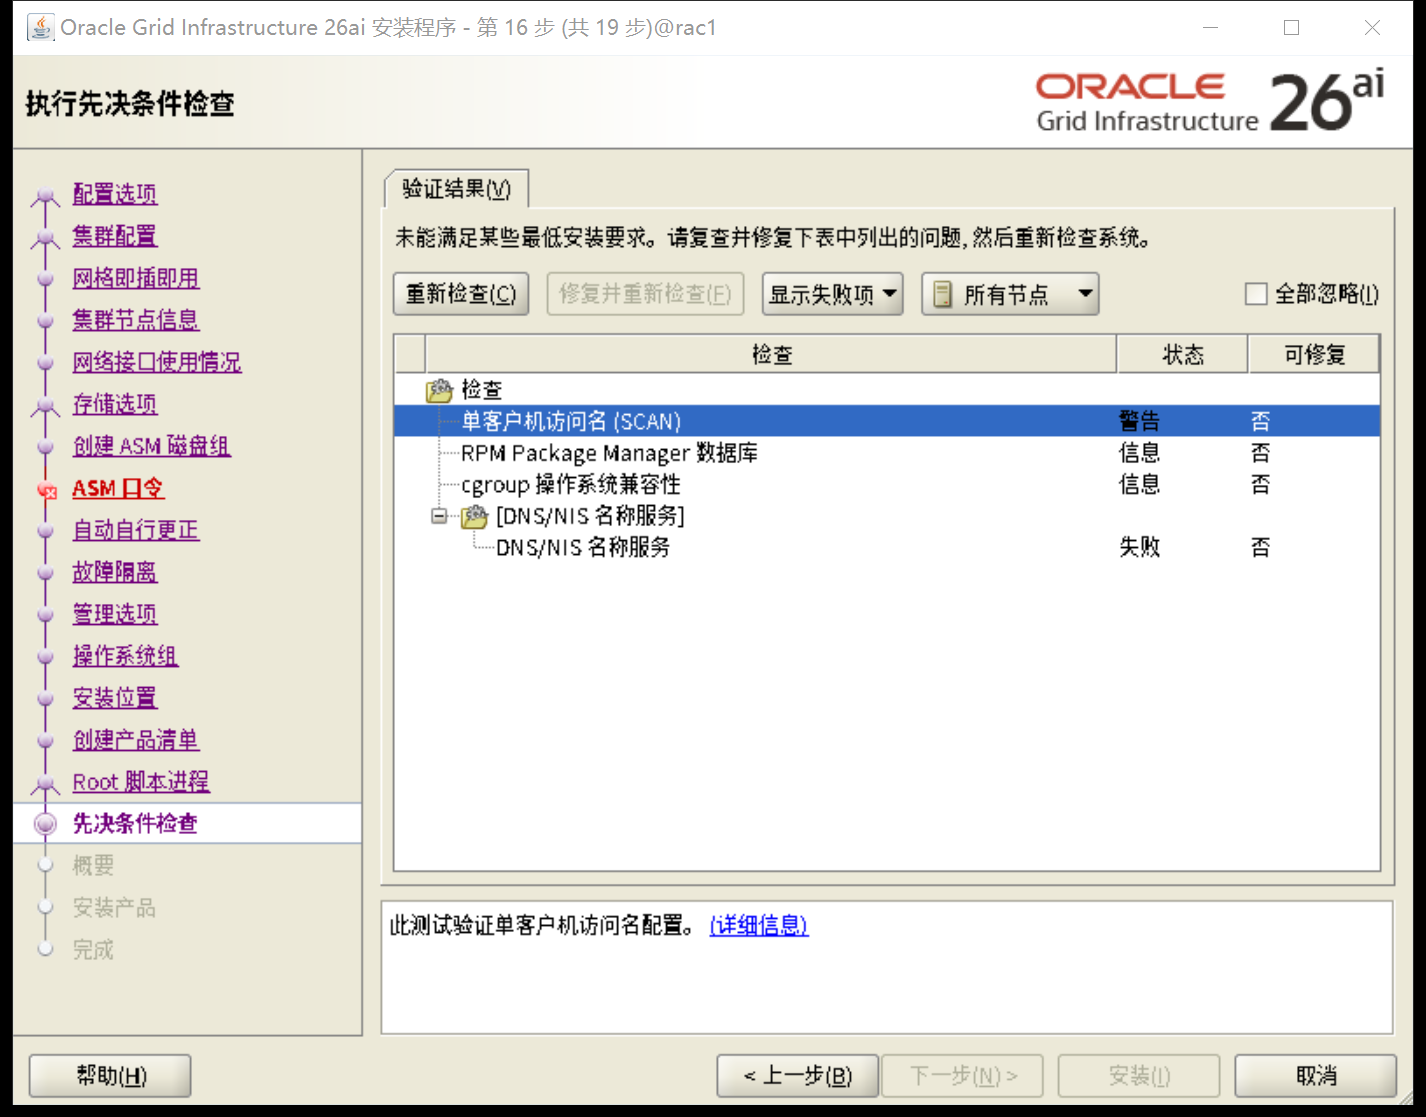
GI软件安装汇总,开始安装
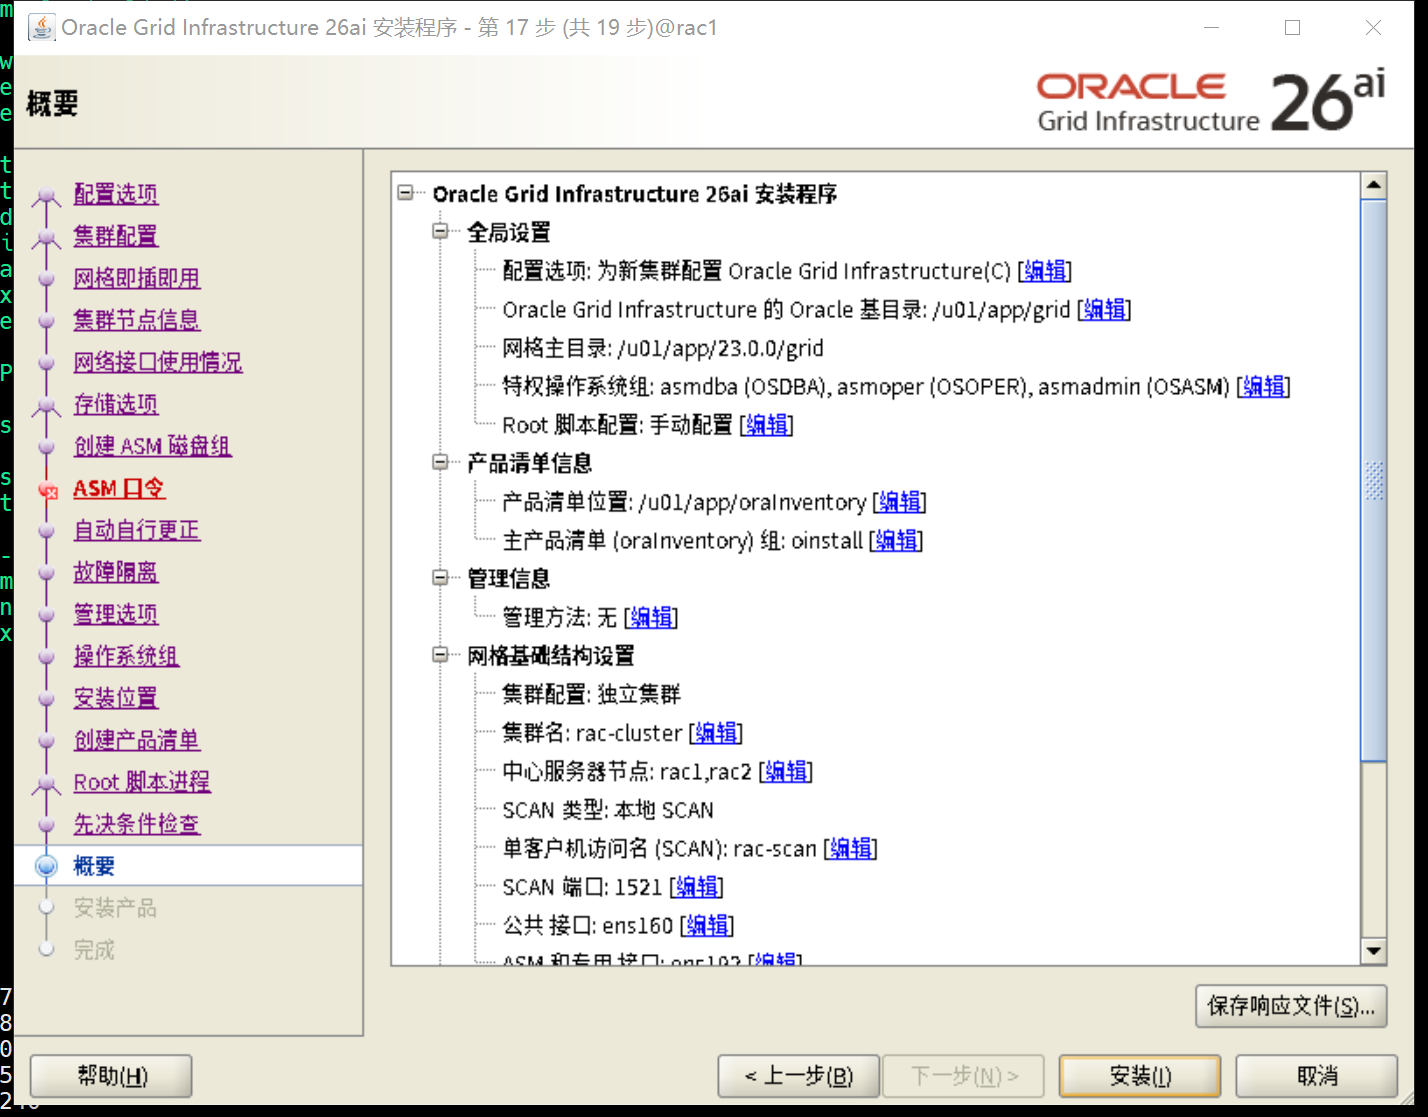
5.6.2 执行脚本
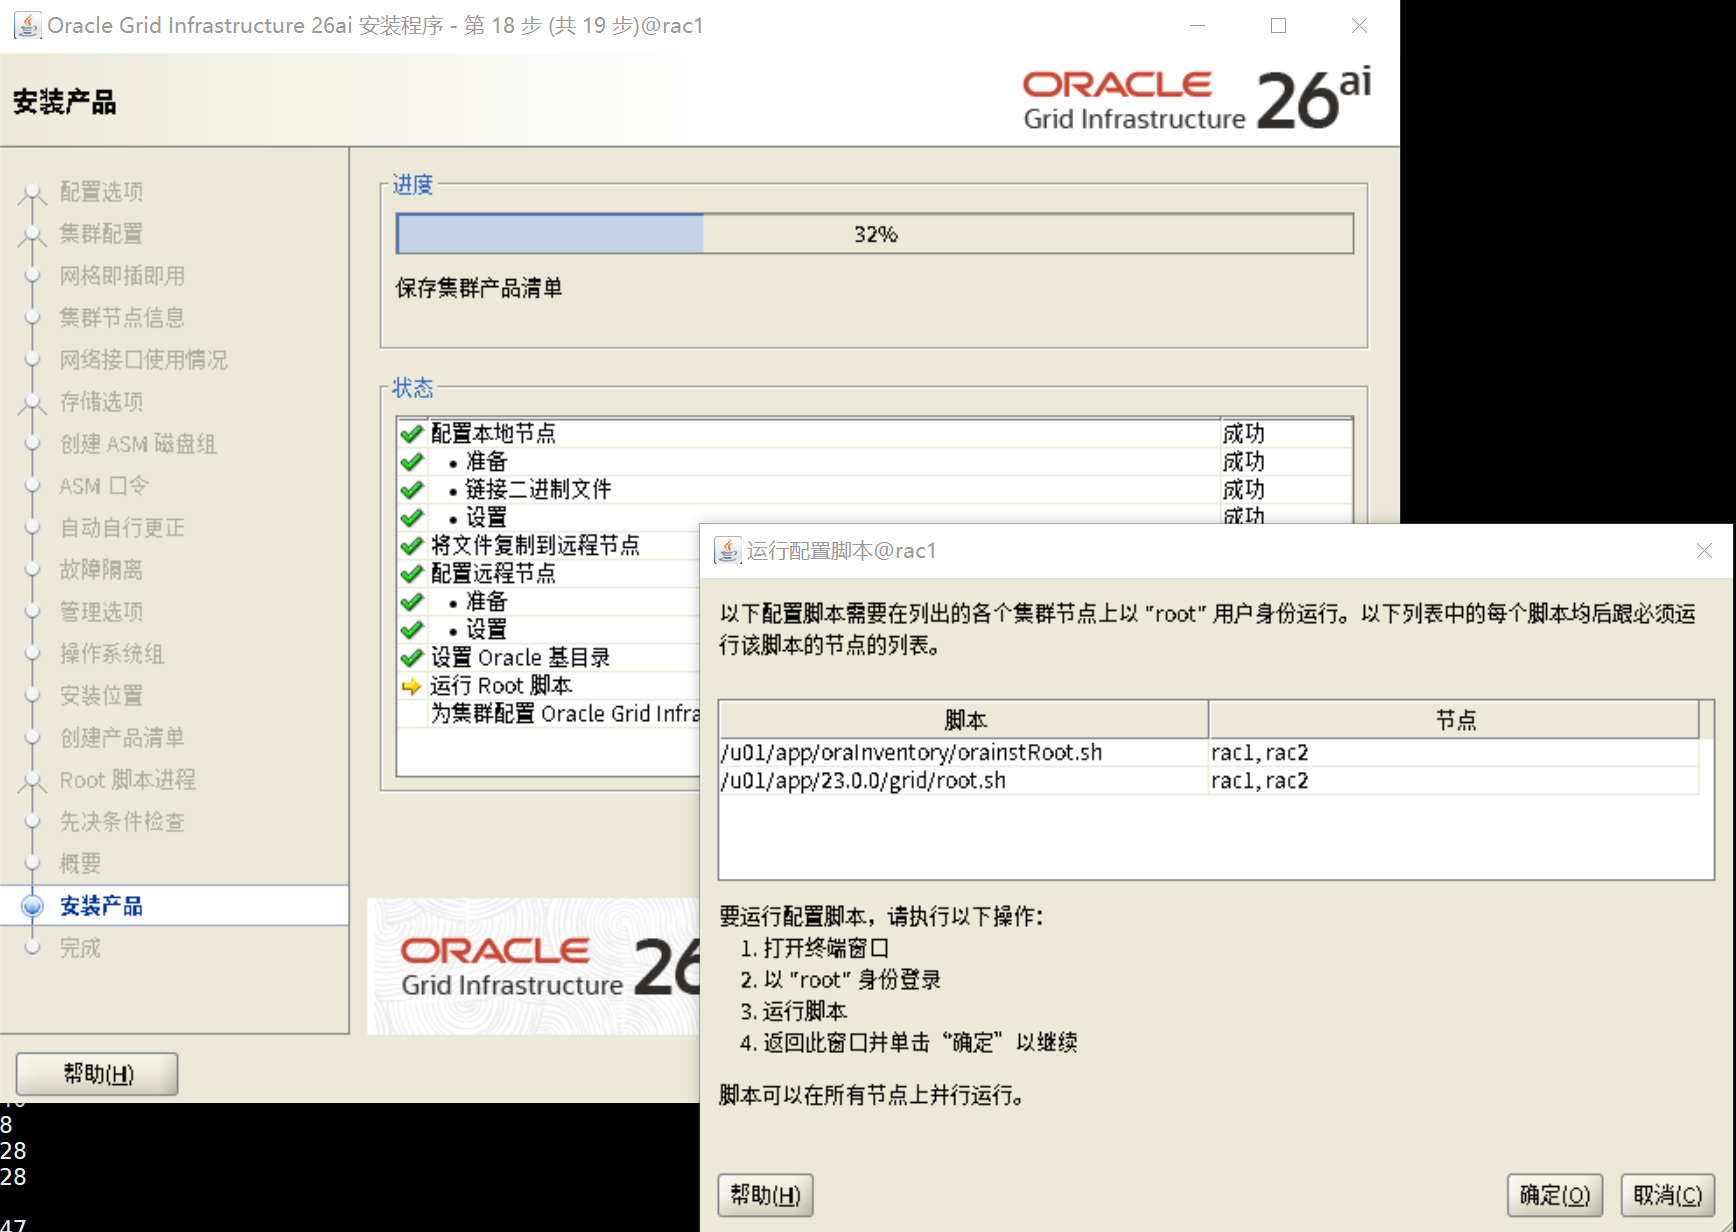
[root@rac1 ~]# /u01/app/oraInventory/orainstRoot.sh
更改权限/u01/app/oraInventory.
添加组的读取和写入权限。
删除全局的读取, 写入和执行权限。

更改组名/u01/app/oraInventory 到 oinstall.
脚本的执行已完成。
[root@rac1 ~]# /u01/app/23.0.0/grid/root.sh
Performing root user operation.

The following environment variables are set as:
    ORACLE_OWNER= grid
    ORACLE_HOME=  /u01/app/23.0.0/grid

Enter the full pathname of the local bin directory: [/usr/local/bin]:
   Copying dbhome to /usr/local/bin ...
   Copying oraenv to /usr/local/bin ...
   Copying coraenv to /usr/local/bin ...


Creating /etc/oratab file...
Entries will be added to the /etc/oratab file as needed by
Database Configuration Assistant when a database is created
Finished running generic part of root script.
Now product-specific root actions will be performed.
RAC option enabled on: Linux
Executing command '/u01/app/23.0.0/grid/perl/bin/perl -I/u01/app/23.0.0/grid/perl/lib -I/u01/app/23.0.0/grid/crs/install /u01/app/23.0.0/grid/crs/install/rootcrs.pl '
Using configuration parameter file: /u01/app/23.0.0/grid/crs/install/crsconfig_params
The log of current session can be found at:
  /u01/app/grid/crsdata/rac1/crsconfig/rootcrs_rac1_2026-02-09_05-11-40PM.log
2026/02/09 17:11:44 CLSRSC-594: 执行 18 的安装步骤 1: 'ValidateEnv'。
2026/02/09 17:11:44 CLSRSC-594: 执行 18 的安装步骤 2: 'CheckRootCert'。
2026/02/09 17:11:45 CLSRSC-594: 执行 18 的安装步骤 3: 'GenSiteGUIDs'。
2026/02/09 17:11:46 CLSRSC-594: 执行 18 的安装步骤 4: 'SetupOSD'。
Redirecting to /bin/systemctl restart rsyslog.service
2026/02/09 17:11:46 CLSRSC-594: 执行 18 的安装步骤 5: 'CheckCRSConfig'。
2026/02/09 17:11:46 CLSRSC-594: 执行 18 的安装步骤 6: 'SetupLocalGPNP'。
2026/02/09 17:11:49 CLSRSC-594: 执行 18 的安装步骤 7: 'CreateRootCert'。
2026/02/09 17:12:01 CLSRSC-594: 执行 18 的安装步骤 8: 'ConfigOLR'。
2026/02/09 17:12:04 CLSRSC-594: 执行 18 的安装步骤 9: 'ConfigCHMOS'。
2026/02/09 17:12:04 CLSRSC-594: 执行 18 的安装步骤 10: 'CreateOHASD'。
2026/02/09 17:12:05 CLSRSC-594: 执行 18 的安装步骤 11: 'ConfigOHASD'。
2026/02/09 17:12:13 CLSRSC-330: 正在向文件 'oracle-ohasd.service' 添加集群件条目
2026/02/09 17:12:30 CLSRSC-594: 执行 18 的安装步骤 12: 'SetupTFA'。
2026/02/09 17:12:30 CLSRSC-594: 执行 18 的安装步骤 13: 'InstallACFS'。
2026/02/09 17:12:52 CLSRSC-594: 执行 18 的安装步骤 14: 'CheckFirstNode'。
2026/02/09 17:12:53 CLSRSC-594: 执行 18 的安装步骤 15: 'InitConfig'。
2026/02/09 17:13:30 CLSRSC-4002: 已成功安装 Oracle Autonomous Health Framework (AHF)。
CRS-4256: 更新概要文件
已成功添加表决磁盘 7ecae8014ddb4f2fbf737811e66686a1。
已成功添加表决磁盘 b1bb79c499b04f7cbf69083bb5a9af99。
已成功添加表决磁盘 810f931fe52a4f63bf0d474beeca2518。
已成功将表决磁盘组替换为 +OCRVOTE。
CRS-4256: 更新概要文件
CRS-4266: 已成功替换表决文件
##  STATE    File Universal Id                File Name Disk group
--  -----    -----------------                --------- ---------
 1. ONLINE   7ecae8014ddb4f2fbf737811e66686a1 (/dev/oracleasm/disks/OCRVOTE01) [OCRVOTE]
 2. ONLINE   b1bb79c499b04f7cbf69083bb5a9af99 (/dev/oracleasm/disks/OCRVOTE03) [OCRVOTE]
 3. ONLINE   810f931fe52a4f63bf0d474beeca2518 (/dev/oracleasm/disks/OCRVOTE02) [OCRVOTE]
找到了 3 个表决磁盘。
2026/02/09 17:14:00 CLSRSC-594: 执行 18 的安装步骤 16: 'StartCluster'。
2026/02/09 17:14:32 CLSRSC-343: 已成功启动 Oracle Clusterware 堆栈
2026/02/09 17:14:34 CLSRSC-594: 执行 18 的安装步骤 17: 'ConfigNode'。
clscfg: EXISTING configuration version 23 detected.
Successfully accumulated necessary OCR keys.
Creating OCR keys for user 'root', privgrp 'root'..
Operation successful.
2026/02/09 17:15:27 CLSRSC-594: 执行 18 的安装步骤 18: 'PostConfig'。
2026/02/09 17:15:37 CLSRSC-325: 为集群配置 Oracle Grid Infrastructure...成功
[root@rac1 ~]#


[root@rac2 ~]# /u01/app/oraInventory/orainstRoot.sh
更改权限/u01/app/oraInventory.
添加组的读取和写入权限。
删除全局的读取, 写入和执行权限。

更改组名/u01/app/oraInventory 到 oinstall.
脚本的执行已完成。
[root@rac2 ~]# /u01/app/23.0.0/grid/root.sh
Performing root user operation.

The following environment variables are set as:
    ORACLE_OWNER= grid
    ORACLE_HOME=  /u01/app/23.0.0/grid

Enter the full pathname of the local bin directory: [/usr/local/bin]:
   Copying dbhome to /usr/local/bin ...
   Copying oraenv to /usr/local/bin ...
   Copying coraenv to /usr/local/bin ...


Creating /etc/oratab file...
Entries will be added to the /etc/oratab file as needed by
Database Configuration Assistant when a database is created
Finished running generic part of root script.
Now product-specific root actions will be performed.
RAC option enabled on: Linux
Executing command '/u01/app/23.0.0/grid/perl/bin/perl -I/u01/app/23.0.0/grid/perl/lib -I/u01/app/23.0.0/grid/crs/install /u01/app/23.0.0/grid/crs/install/rootcrs.pl '
Using configuration parameter file: /u01/app/23.0.0/grid/crs/install/crsconfig_params
The log of current session can be found at:
  /u01/app/grid/crsdata/rac2/crsconfig/rootcrs_rac2_2026-02-09_05-15-49PM.log
2026/02/09 17:15:53 CLSRSC-594: 执行 18 的安装步骤 1: 'ValidateEnv'。
2026/02/09 17:15:53 CLSRSC-594: 执行 18 的安装步骤 2: 'CheckRootCert'。
2026/02/09 17:15:54 CLSRSC-594: 执行 18 的安装步骤 3: 'GenSiteGUIDs'。
2026/02/09 17:15:54 CLSRSC-594: 执行 18 的安装步骤 4: 'SetupOSD'。
Redirecting to /bin/systemctl restart rsyslog.service
2026/02/09 17:15:54 CLSRSC-594: 执行 18 的安装步骤 5: 'CheckCRSConfig'。
2026/02/09 17:15:55 CLSRSC-594: 执行 18 的安装步骤 6: 'SetupLocalGPNP'。
2026/02/09 17:15:55 CLSRSC-594: 执行 18 的安装步骤 7: 'CreateRootCert'。
2026/02/09 17:15:55 CLSRSC-594: 执行 18 的安装步骤 8: 'ConfigOLR'。
2026/02/09 17:15:58 CLSRSC-594: 执行 18 的安装步骤 9: 'ConfigCHMOS'。
2026/02/09 17:15:58 CLSRSC-594: 执行 18 的安装步骤 10: 'CreateOHASD'。
2026/02/09 17:15:59 CLSRSC-594: 执行 18 的安装步骤 11: 'ConfigOHASD'。
2026/02/09 17:15:59 CLSRSC-330: 正在向文件 'oracle-ohasd.service' 添加集群件条目
2026/02/09 17:16:16 CLSRSC-594: 执行 18 的安装步骤 12: 'SetupTFA'。
2026/02/09 17:16:16 CLSRSC-594: 执行 18 的安装步骤 13: 'InstallACFS'。
2026/02/09 17:16:40 CLSRSC-594: 执行 18 的安装步骤 14: 'CheckFirstNode'。
2026/02/09 17:16:40 CLSRSC-594: 执行 18 的安装步骤 15: 'InitConfig'。
2026/02/09 17:17:04 CLSRSC-4002: 已成功安装 Oracle Autonomous Health Framework (AHF)。
2026/02/09 17:17:04 CLSRSC-594: 执行 18 的安装步骤 16: 'StartCluster'。
2026/02/09 17:17:36 CLSRSC-343: 已成功启动 Oracle Clusterware 堆栈
2026/02/09 17:17:36 CLSRSC-594: 执行 18 的安装步骤 17: 'ConfigNode'。
2026/02/09 17:17:36 CLSRSC-594: 执行 18 的安装步骤 18: 'PostConfig'。
2026/02/09 17:17:37 CLSRSC-325: 为集群配置 Oracle Grid Infrastructure...成功
[root@rac2 ~]#
继续执行图形,忽略
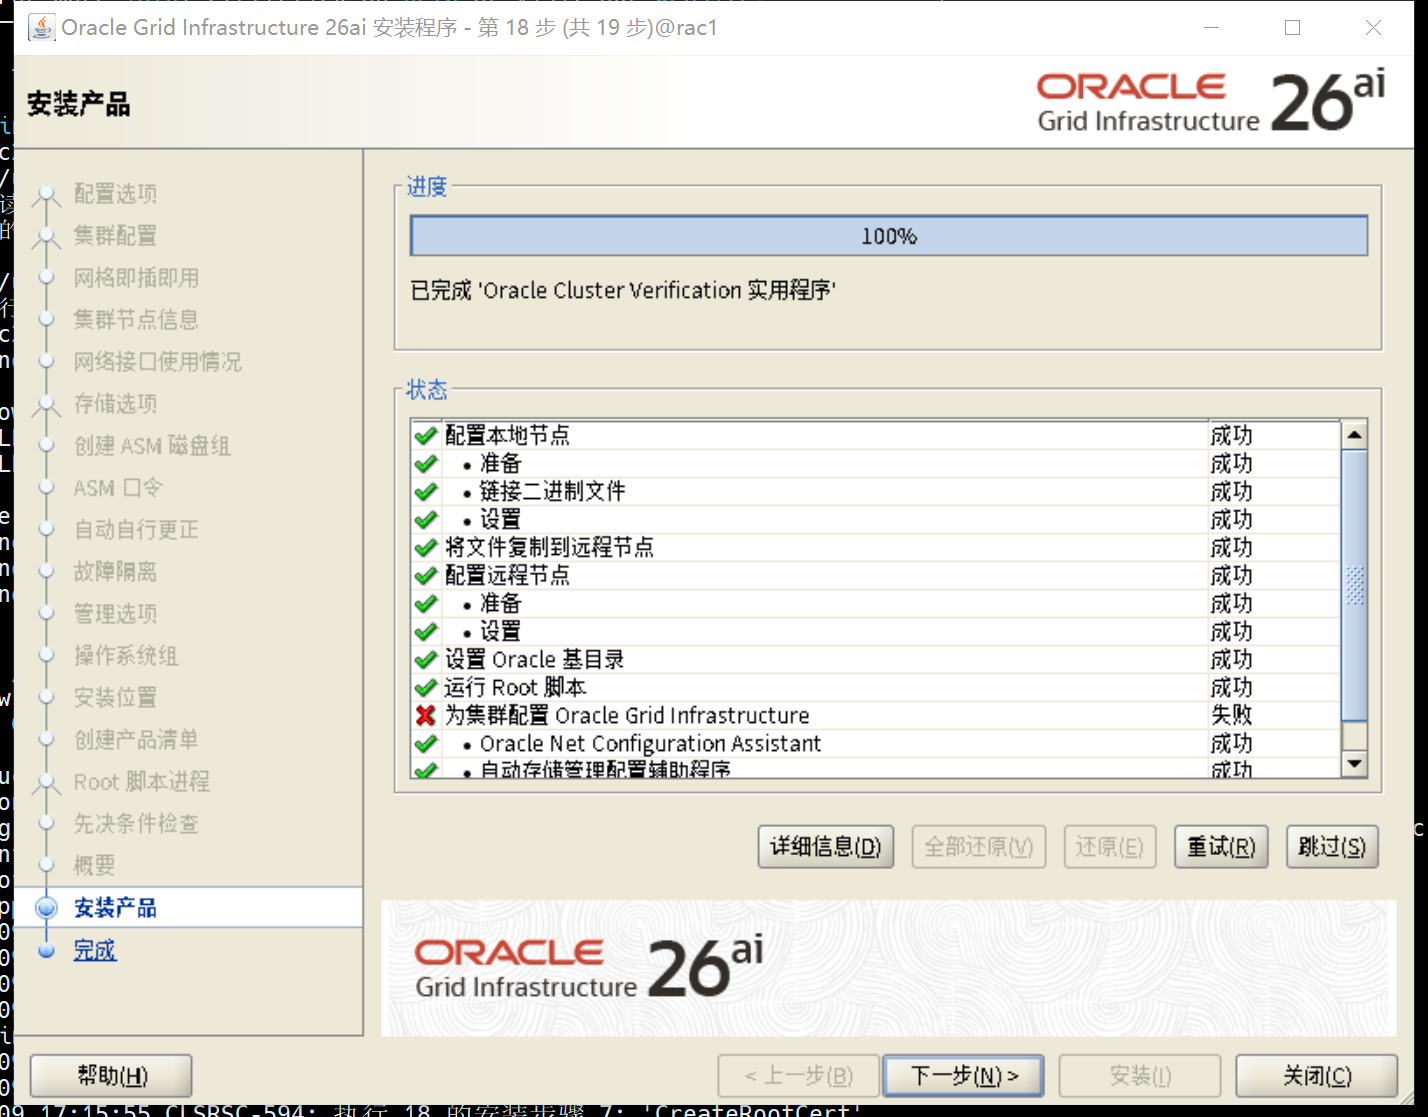
5.6.3 检查
su - grid
crsctl stat res -t
systemctl status oracle-ohasd.service

[grid@rac1:/home/grid]$ crsctl stat res -t
--------------------------------------------------------------------------------
Name           Target  State        Server                   State details
--------------------------------------------------------------------------------
Local Resources
--------------------------------------------------------------------------------
ora.LISTENER.lsnr
               ONLINE  ONLINE       rac1                     STABLE
               ONLINE  ONLINE       rac2                     STABLE
ora.chad
               ONLINE  ONLINE       rac1                     STABLE
               ONLINE  ONLINE       rac2                     STABLE
ora.cvuadmin
               OFFLINE OFFLINE      rac1                     STABLE
               OFFLINE OFFLINE      rac2                     STABLE
ora.helper
               OFFLINE OFFLINE      rac1                     STABLE
               OFFLINE OFFLINE      rac2                     IDLE,STABLE
ora.net1.network
               ONLINE  ONLINE       rac1                     STABLE
               ONLINE  ONLINE       rac2                     STABLE
ora.ons
               ONLINE  ONLINE       rac1                     STABLE
               ONLINE  ONLINE       rac2                     STABLE
--------------------------------------------------------------------------------
Cluster Resources
--------------------------------------------------------------------------------
ora.ASMNET1LSNR_ASM.lsnr(ora.asmgroup)
      1        ONLINE  ONLINE       rac1                     STABLE
      2        ONLINE  ONLINE       rac2                     STABLE
ora.LISTENER_SCAN1.lsnr
      1        ONLINE  ONLINE       rac1                     STABLE
ora.OCRVOTE.dg(ora.asmgroup)
      1        ONLINE  ONLINE       rac1                     STABLE
      2        ONLINE  ONLINE       rac2                     STABLE
ora.asm(ora.asmgroup)
      1        ONLINE  ONLINE       rac1                     Started,STABLE
      2        ONLINE  ONLINE       rac2                     Started,STABLE
ora.asmnet1.asmnetwork(ora.asmgroup)
      1        ONLINE  ONLINE       rac1                     STABLE
      2        ONLINE  ONLINE       rac2                     STABLE
ora.cdp1.cdp
      1        OFFLINE OFFLINE                               STABLE
ora.cvu
      1        ONLINE  ONLINE       rac1                     STABLE
ora.cvuhelper
      1        OFFLINE OFFLINE                               STABLE
ora.rac1.vip
      1        ONLINE  ONLINE       rac1                     STABLE
ora.rac2.vip
      1        ONLINE  ONLINE       rac2                     STABLE
ora.rhpserver
      1        OFFLINE OFFLINE                               STABLE
ora.scan1.vip
      1        ONLINE  ONLINE       rac1                     STABLE
--------------------------------------------------------------------------------
[grid@rac1:/home/grid]$ systemctl status oracle-ohasd.service
● oracle-ohasd.service - Oracle High Availability Services
     Loaded: loaded (/etc/systemd/system/oracle-ohasd.service; enabled; preset: disabled)
    Drop-In: /etc/systemd/system/oracle-ohasd.service.d
             └─00_oracle-ohasd.conf
     Active: active (running) since Mon 2026-02-09 17:12:14 CST; 10min ago
   Main PID: 14770 (init.ohasd)
      Tasks: 491 (limit: 101883)
     Memory: 2.5G (peak: 2.8G)
        CPU: 2min 23.223s
     CGroup: /oracle.slice/oracle-ohasd.service
             ├─14770 /bin/sh /etc/oracle/scls_scr/rac1/root/init.ohasd run ">/dev/null" "2>&1" "</dev/null"
             ├─25714 /u01/app/23.0.0/grid/bin/ohasd.bin reboot "BLOCKING_STACK_LOCALE_OHAS=SIMPLIFIED CHINESE_CHINA.AL32UTF8;CRS_AUX_DATA=CRS_AUXD_FASTCSS=yes"
             ├─25794 /u01/app/23.0.0/grid/bin/orarootagent.bin
             ├─25974 /u01/app/23.0.0/grid/bin/oraagent.bin
             ├─25996 /u01/app/23.0.0/grid/bin/mdnsd.bin
             ├─25999 /u01/app/23.0.0/grid/bin/evmd.bin
             ├─26032 /u01/app/23.0.0/grid/bin/gpnpd.bin
             ├─26079 /u01/app/23.0.0/grid/bin/gipcd.bin
             ├─26104 /u01/app/23.0.0/grid/bin/evmlogger.bin
             ├─26164 /u01/app/23.0.0/grid/bin/cssdmonitor
             ├─26167 /u01/app/23.0.0/grid/bin/osysmond.bin
             ├─26212 /u01/app/23.0.0/grid/python/bin/python /u01/app/23.0.0/grid/pylib/chmdiag.zip start -f "-n rac1"
             ├─26228 /u01/app/23.0.0/grid/bin/cssdagent
             ├─26279 /u01/app/23.0.0/grid/bin/onmd.bin "" -S 1 -F
             ├─26282 /u01/app/23.0.0/grid/bin/ocssd.bin "" -S 1 -F
             ├─26356 /u01/app/23.0.0/grid/bin/crfelsnr -n rac1
             ├─26669 asm_pmon_+ASM1
             ├─26673 asm_clmn_+ASM1
             ├─26677 asm_psp0_+ASM1
             ├─26681 asm_vktm_+ASM1
             ├─26688 asm_gen0_+ASM1
             ├─26693 asm_mman_+ASM1
             ├─26699 asm_lmon_+ASM1
             ├─26703 asm_gen2_+ASM1
             ├─26705 asm_vosd_+ASM1
             ├─26707 asm_lms0_+ASM1
             ├─26714 asm_diag_+ASM1
             ├─26716 asm_ping_+ASM1
             ├─26720 asm_pman_+ASM1
             ├─26722 asm_dia0_+ASM1
             ├─26726 asm_dia1_+ASM1
             ├─26728 asm_lmd0_+ASM1
             ├─26730 asm_lmhb_+ASM1
             ├─26733 asm_lck1_+ASM1
             ├─26736 asm_dbw0_+ASM1
             ├─26738 asm_lgwr_+ASM1
             ├─26740 asm_ckpt_+ASM1
             ├─26743 asm_smon_+ASM1
             ├─26746 asm_lreg_+ASM1
             ├─26752 asm_pxmn_+ASM1
             ├─26757 asm_rbal_+ASM1
             ├─26761 asm_gmon_+ASM1
             ├─26764 asm_mmon_+ASM1
             ├─26767 asm_mmnl_+ASM1
             ├─26774 asm_bg00_+ASM1
             ├─26784 asm_bg01_+ASM1
             ├─26792 asm_bg02_+ASM1
             ├─26797 asm_bg03_+ASM1
             ├─26807 asm_dt00_+ASM1
             ├─26809 asm_dt01_+ASM1
             ├─26816 asm_imr0_+ASM1
             ├─26821 asm_lck0_+ASM1
             ├─26844 asm_gcw0_+ASM1
             ├─26846 asm_gcr0_+ASM1
             ├─26989 /u01/app/23.0.0/grid/bin/crsd.bin reboot
             ├─27006 asm_asmb_+ASM1
             ├─27016 oracle+ASM1_asmb_+asm1 "(DESCRIPTION=(LOCAL=YES)(ADDRESS=(PROTOCOL=beq)))"
             ├─27030 asm_o000_+ASM1
             ├─27032 oracle+ASM1_o000_+asm1 "(DESCRIPTION=(LOCAL=YES)(ADDRESS=(PROTOCOL=beq)))"
             ├─27048 oracle+ASM1_ocr "(DESCRIPTION=(LOCAL=YES)(ADDRESS=(PROTOCOL=beq)))"
             ├─27102 asm_gcr1_+ASM1
             ├─28236 /u01/app/23.0.0/grid/bin/orarootagent.bin
             ├─28263 /u01/app/23.0.0/grid/bin/oraagent.bin
             ├─28865 /u01/app/23.0.0/grid/bin/tnslsnr LISTENER_SCAN1 -no_crs_notify -inherit
             ├─29146 /u01/app/23.0.0/grid/opmn/bin/ons -d
             ├─29147 /u01/app/23.0.0/grid/opmn/bin/ons -d
             ├─30271 /u01/app/23.0.0/grid/bin/tnslsnr LISTENER -no_crs_notify -inherit
             ├─30517 asm_r000_+ASM1
             ├─30806 /u01/app/23.0.0/grid/bin/tnslsnr ASMNET1LSNR_ASM -no_crs_notify -inherit
             ├─30861 oracle+ASM1 "(DESCRIPTION=(LOCAL=YES)(ADDRESS=(PROTOCOL=beq)))"
             ├─35326 oracle+ASM1 "(DESCRIPTION=(LOCAL=YES)(ADDRESS=(PROTOCOL=beq)))"
             ├─43330 /u01/app/23.0.0/grid/jdk/bin/java -server -Xms30M -Xmx1024M -Djava.awt.headless=true -Ddisable.checkForUpdate=true -DTRACING.ENABLED=false -XX:ParallelGCThreads=1 -cp /opt/oracle.ahf/common/jlib/cha.jar:/opt/oracle.ahf/>
             └─43805 asm_ppa7_+ASM1

[grid@rac1:/home/grid]$
六、创建磁盘组
图形化操作,创建DATA磁盘组
asmca
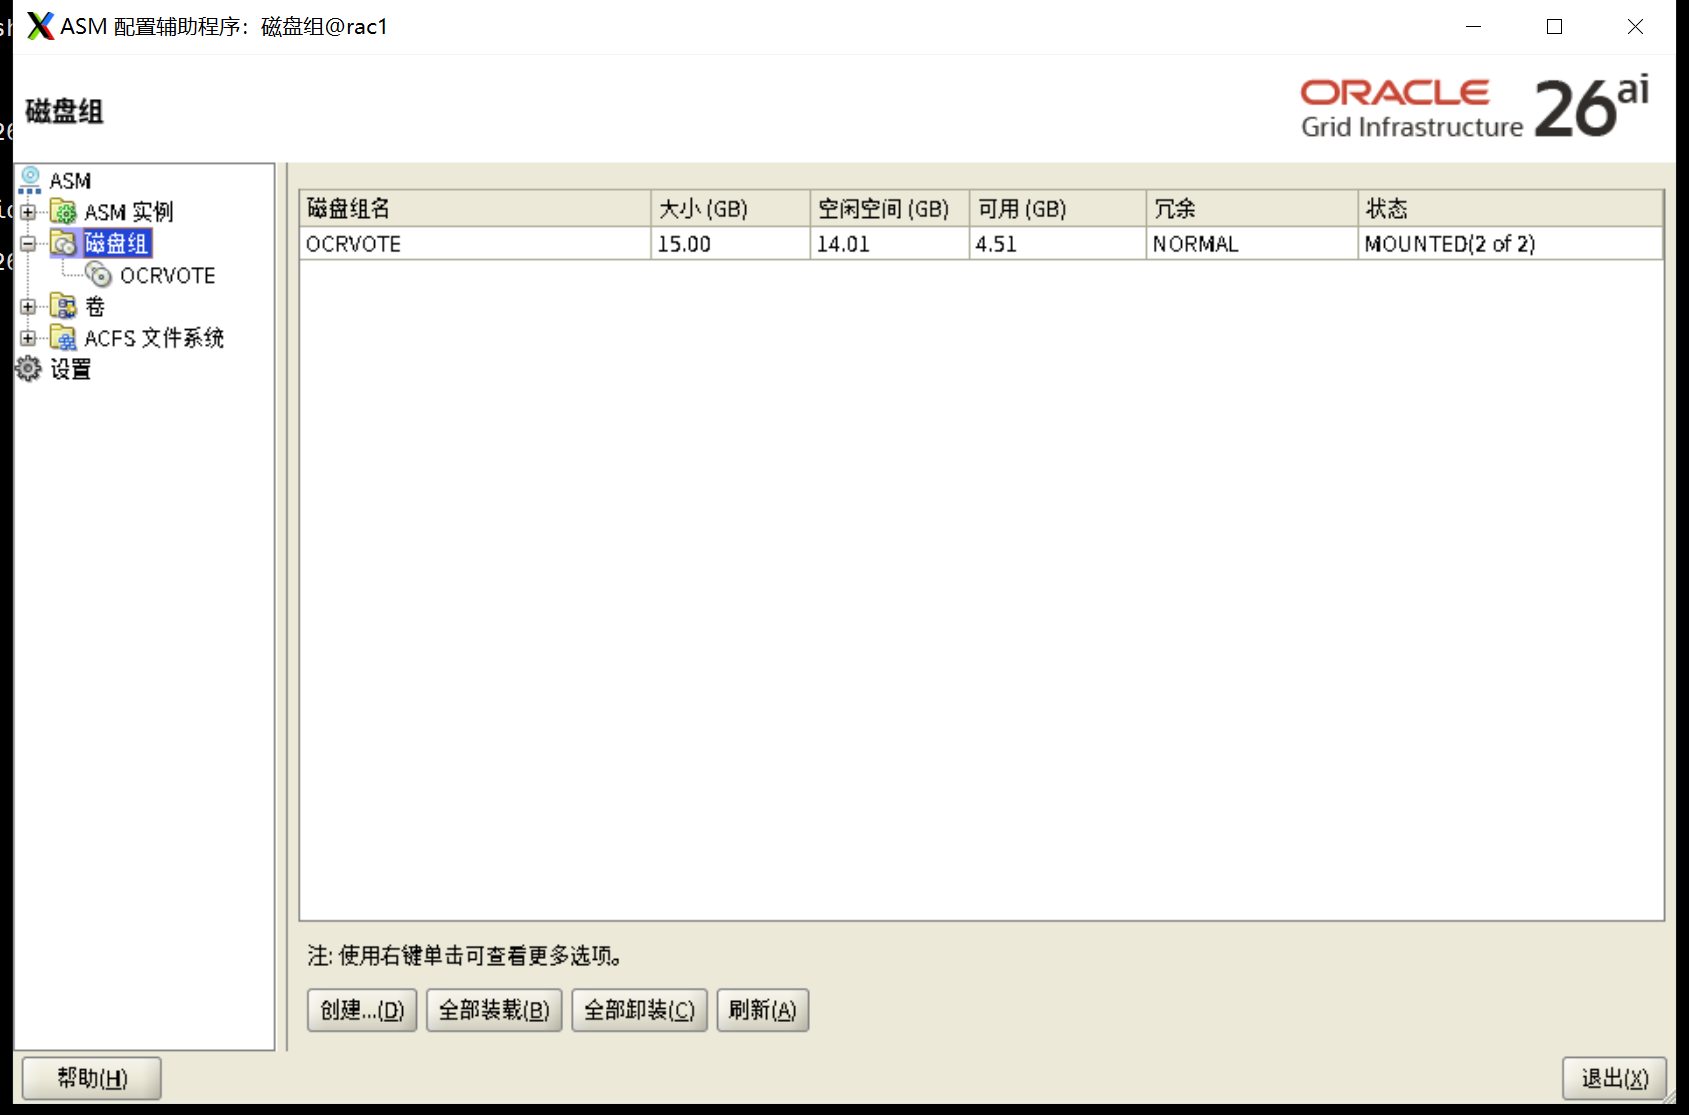
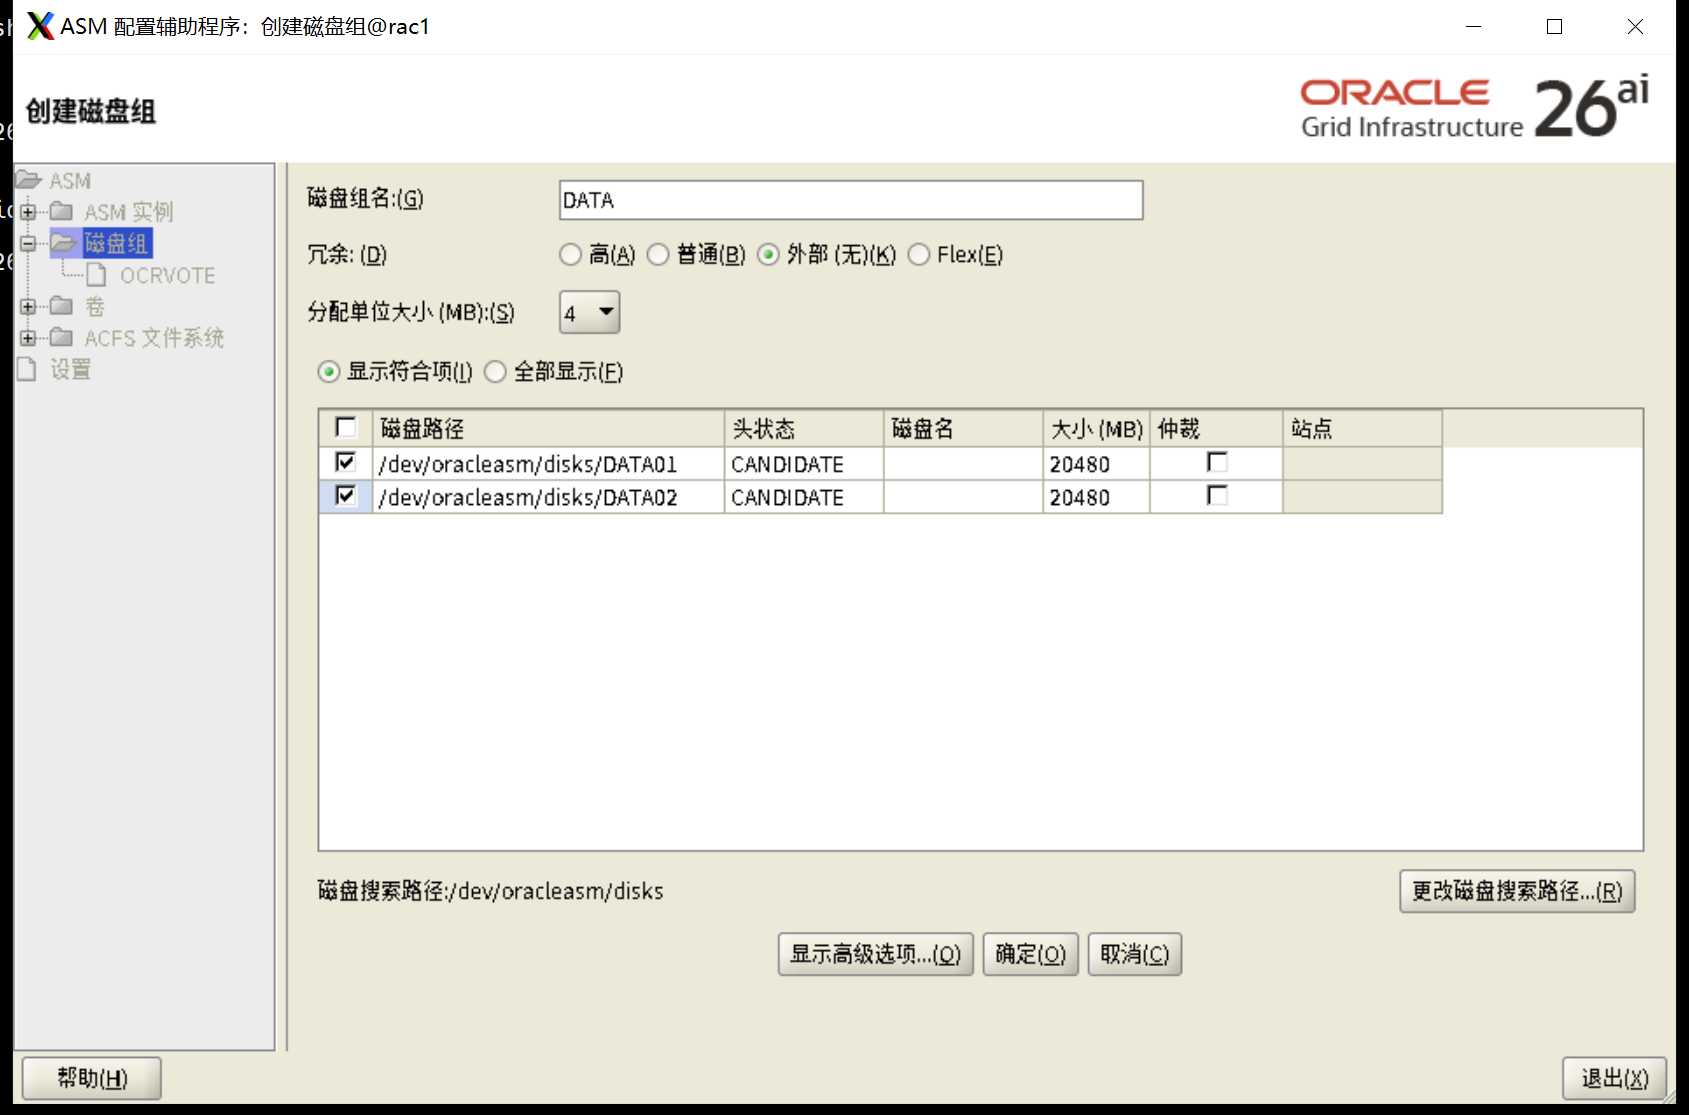
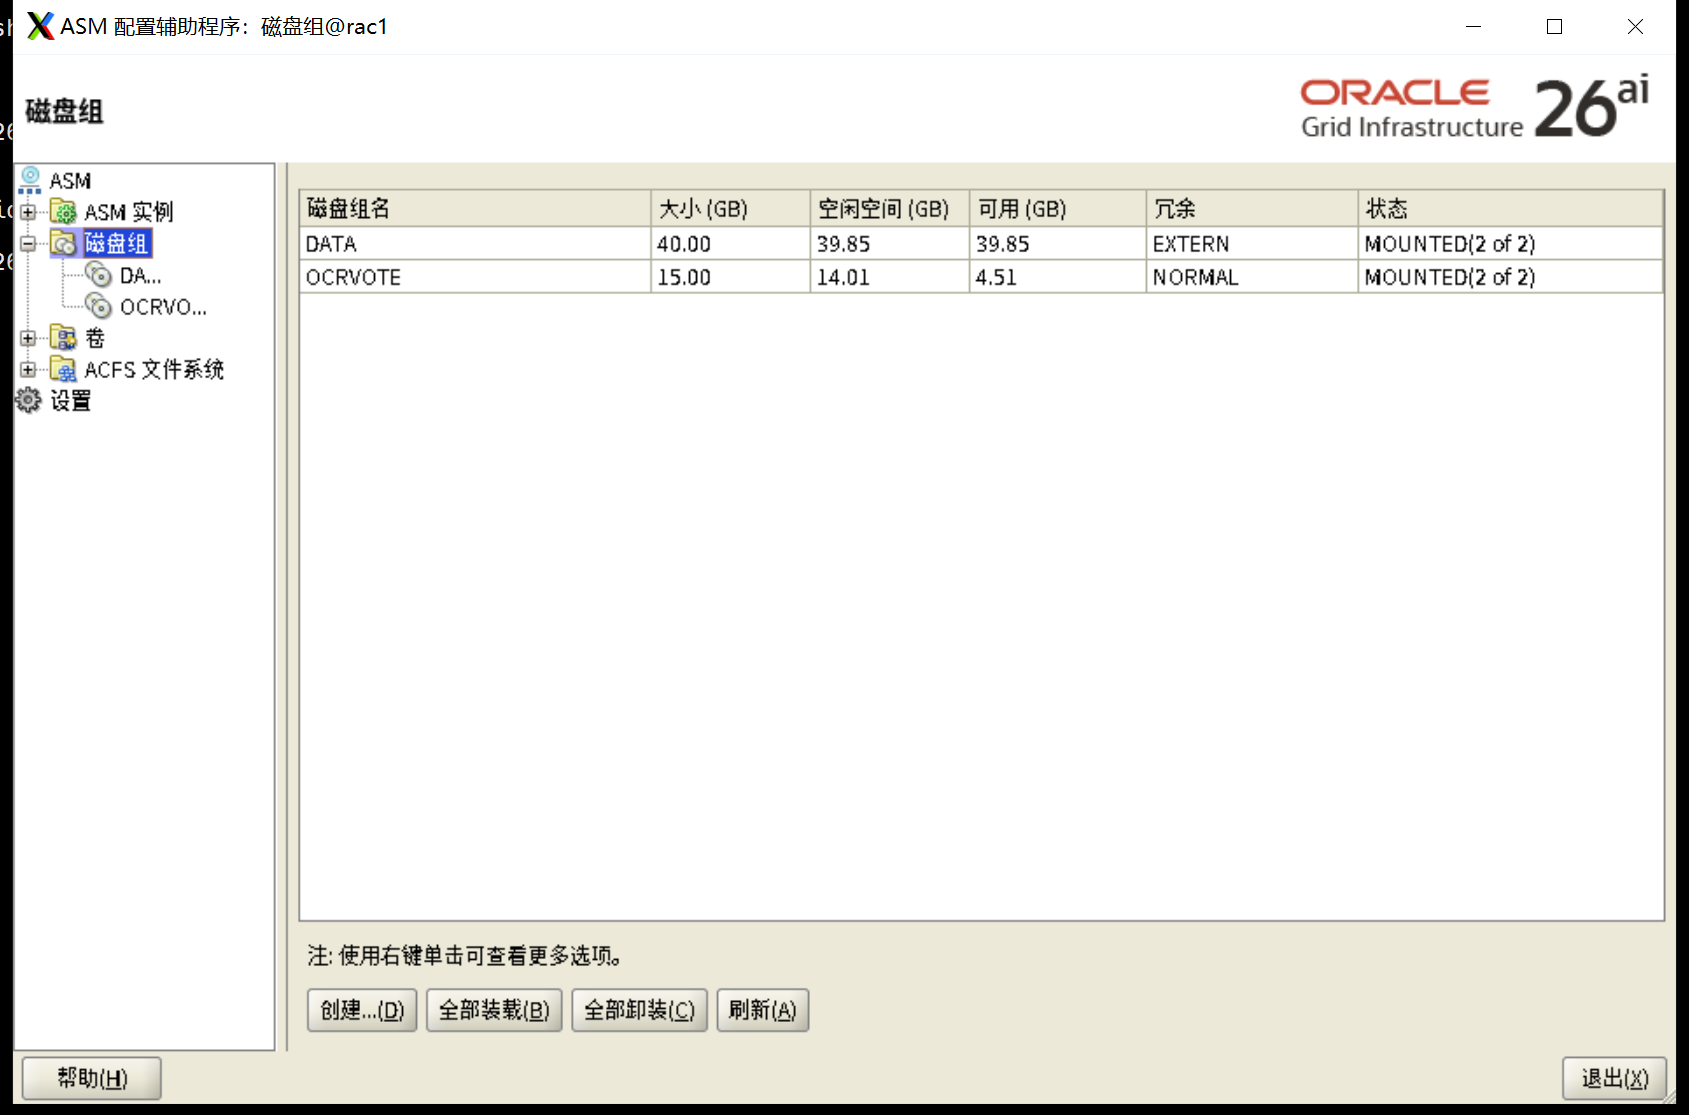
七、安装Oracle软件
7.1 修改软件包权限
mv LINUX.X64_2326100_db_home.zip /soft
cd /soft
chown oracle:oinstall LINUX.X64_2326100_db_home.zip

[root@rac1 ~]# mv LINUX.X64_2326100_db_home.zip /soft
[root@rac1 ~]# cd /soft
[root@rac1 soft]# chown oracle:oinstall LINUX.X64_2326100_db_home.zip
[root@rac1 soft]#
7.2 解压缩到oracle_home
su - oracle
unzip -q /soft/LINUX.X64_2326100_db_home.zip -d $ORACLE_HOME

[root@rac1 soft]# su - oracle
Last login: Thu Oct 23 11:59:22 CST 2025 on pts/0
[oracle@rac1:/home/oracle]$ unzip -q /soft/LINUX.X64_193000_db_home.zip -d $ORACLE_HOME
[oracle@rac1:/home/oracle]$
7.3 升级opatch版本(可选)
这里不需要升级
[oracle@rac1:/u01/app/oracle/product/23.0.0/dbhome_1/OPatchbak]$ ./opatch version
OPatch Version: 12.2.0.1.17

OPatch succeeded.
[oracle@rac1:/u01/app/oracle/product/23.0.0/dbhome_1]$ mv OPatch/ OPatchbak
[oracle@rac1:/u01/app/oracle/product/23.0.0/dbhome_1]$ unzip /u01/sw/p6880880_190000_Linux-x86-64.zip -d $ORACLE_HOME

[oracle@rac1:/u01/app/oracle/product/23.0.0/dbhome_1/OPatchbak]$ ./opatch version
OPatch Version: 12.2.0.1.17

OPatch succeeded.
7.4 安装Oracle软件
# 解决密钥长度太弱,被 OL9 的 OpenSSH/系统加密策略(尤其 FIPS / FUTURE)直接拒绝(最常见:老的 1024-bit 或更小的 RSA/DSA)
# oracle用户
mv -f /home/oracle/.ssh/id_rsa /home/oracle/.ssh/id_rsa.bak.$(date +%F_%H%M%S) 2>/dev/null
mv -f /home/oracle/.ssh/id_rsa.pub /home/oracle/.ssh/id_rsa.pub.bak.$(date +%F_%H%M%S) 2>/dev/null
ssh-keygen -t rsa -b 3072 -o -a 100 -f /home/oracle/.ssh/id_rsa

[root@rac1 soft]# su - oracle
[oracle@rac1:/home/oracle]$ unzip -q /soft/LINUX.X64_2326100_db_home.zip -d $ORACLE_HOME
[oracle@rac1:/home/oracle]$ mv -f /home/oracle/.ssh/id_rsa /home/oracle/.ssh/id_rsa.bak.$(date +%F_%H%M%S) 2>/dev/null
mv -f /home/oracle/.ssh/id_rsa.pub /home/oracle/.ssh/id_rsa.pub.bak.$(date +%F_%H%M%S) 2>/dev/null
[oracle@rac1:/home/oracle]$
[oracle@rac1:/home/oracle]$ ssh-keygen -t rsa -b 3072 -o -a 100 -f /home/oracle/.ssh/id_rsa
Generating public/private rsa key pair.
Created directory '/home/oracle/.ssh'.
Enter passphrase (empty for no passphrase):
Enter same passphrase again:
Your identification has been saved in /home/oracle/.ssh/id_rsa
Your public key has been saved in /home/oracle/.ssh/id_rsa.pub
The key fingerprint is:
SHA256:ERB1OJItsmLqVJ75YcEhBTJBrtUlb1KKL/EK86ysYjo oracle@rac1
The key's randomart image is:
+---[RSA 3072]----+
|.=..+.=*o..      |
|. o+.B+ +o       |
| .+ *o+o..       |
|..o=.=   .       |
|+o+.= . S        |
|.* * o           |
|o + o .          |
|E+   .           |
|Oo               |
+----[SHA256]-----+
[oracle@rac1:/home/oracle]$


[root@rac2 ~]# su - oracle
[oracle@rac2:/home/oracle]$ mv -f /home/oracle/.ssh/id_rsa /home/oracle/.ssh/id_rsa.bak.$(date +%F_%H%M%S) 2>/dev/null
[oracle@rac2:/home/oracle]$ mv -f /home/oracle/.ssh/id_rsa.pub /home/oracle/.ssh/id_rsa.pub.bak.$(date +%F_%H%M%S) 2>/dev/null
[oracle@rac2:/home/oracle]$ ssh-keygen -t rsa -b 3072 -o -a 100 -f /home/oracle/.ssh/id_rsa
Generating public/private rsa key pair.
Created directory '/home/oracle/.ssh'.
Enter passphrase (empty for no passphrase):
Enter same passphrase again:
Your identification has been saved in /home/oracle/.ssh/id_rsa
Your public key has been saved in /home/oracle/.ssh/id_rsa.pub
The key fingerprint is:
SHA256:zMcWTvW8OkT3fiPpirl4EnwZtN3eExJu9Pqn82Xqx/I oracle@rac2
The key's randomart image is:
+---[RSA 3072]----+
|            .    |
|         . . =   |
|        . = = *  |
|       o * + * = |
|      . S B + = o|
|       o = . +.+ |
|        o   oo.o*|
|       ...o ..++B|
|       .o+...o+BE|
+----[SHA256]-----+
[oracle@rac2:/home/oracle]$


#oracle用户
$ORACLE_HOME/oui/prov/resources/scripts/sshUserSetup.sh -user oracle -hosts "rac1 rac2" -advanced -noPromptPassphrase
/u01/app/oracle/product/23.0.0/dbhome_1/oui/prov/resources/scripts/sshUserSetup.sh  -user oracle -hosts "rac1 rac2" -advanced -noPromptPassphrase
#测试
ssh rac1 date;ssh rac2 date;ssh rac1-priv date;ssh rac2-priv date

[oracle@rac1:/home/oracle]$ /u01/app/oracle/product/23.0.0/dbhome_1/oui/prov/resources/scripts/sshUserSetup.sh  -user oracle -hosts "rac1 rac2" -advanced -noPromptPassphrase
The output of this script is also logged into /tmp/sshUserSetup_2026-02-09-17-32-34.log
Hosts are rac1 rac2
user is oracle
Platform:- Linux
Checking if the remote hosts are reachable
PING rac1 (192.168.18.5) 56(84) 比特的数据。
64 比特,来自 rac1 (192.168.18.5): icmp_seq=1 ttl=64 时间=0.019 毫秒
64 比特,来自 rac1 (192.168.18.5): icmp_seq=2 ttl=64 时间=0.020 毫秒
64 比特,来自 rac1 (192.168.18.5): icmp_seq=3 ttl=64 时间=0.019 毫秒
64 比特,来自 rac1 (192.168.18.5): icmp_seq=4 ttl=64 时间=0.027 毫秒
64 比特,来自 rac1 (192.168.18.5): icmp_seq=5 ttl=64 时间=0.024 毫秒

--- rac1 ping 统计 ---
已发送 5 个包, 已接收 5 个包, 0% packet loss, time 4102ms
rtt min/avg/max/mdev = 0.019/0.021/0.027/0.003 ms
PING rac2 (192.168.18.6) 56(84) 比特的数据。
64 比特,来自 rac2 (192.168.18.6): icmp_seq=1 ttl=64 时间=0.235 毫秒
64 比特,来自 rac2 (192.168.18.6): icmp_seq=2 ttl=64 时间=0.176 毫秒
64 比特,来自 rac2 (192.168.18.6): icmp_seq=3 ttl=64 时间=0.359 毫秒
64 比特,来自 rac2 (192.168.18.6): icmp_seq=4 ttl=64 时间=0.236 毫秒
64 比特,来自 rac2 (192.168.18.6): icmp_seq=5 ttl=64 时间=0.201 毫秒

--- rac2 ping 统计 ---
已发送 5 个包, 已接收 5 个包, 0% packet loss, time 4093ms
rtt min/avg/max/mdev = 0.176/0.241/0.359/0.062 ms
Remote host reachability check succeeded.
The following hosts are reachable: rac1 rac2.
The following hosts are not reachable: .
All hosts are reachable. Proceeding further...
firsthost rac1
numhosts 2
The script will setup SSH connectivity from the host rac1 to all
the remote hosts. After the script is executed, the user can use SSH to run
commands on the remote hosts or copy files between this host rac1
and the remote hosts without being prompted for passwords or confirmations.

NOTE 1:
As part of the setup procedure, this script will use ssh and scp to copy
files between the local host and the remote hosts. Since the script does not
store passwords, you may be prompted for the passwords during the execution of
the script whenever ssh or scp is invoked.

NOTE 2:
AS PER SSH REQUIREMENTS, THIS SCRIPT WILL SECURE THE USER HOME DIRECTORY
AND THE .ssh DIRECTORY BY REVOKING GROUP AND WORLD WRITE PRIVILEGES TO THESE
directories.

Do you want to continue and let the script make the above mentioned changes (yes/no)?
yes

The user chose yes
User chose to skip passphrase related questions.
Creating .ssh directory on local host, if not present already
Creating authorized_keys file on local host
Changing permissions on authorized_keys to 644 on local host
Creating known_hosts file on local host
Changing permissions on known_hosts to 644 on local host
Creating config file on local host
If a config file exists already at /home/oracle/.ssh/config, it would be backed up to /home/oracle/.ssh/config.backup.
Creating .ssh directory and setting permissions on remote host rac1
THE SCRIPT WOULD ALSO BE REVOKING WRITE PERMISSIONS FOR group AND others ON THE HOME DIRECTORY FOR oracle. THIS IS AN SSH REQUIREMENT.
The script would create ~oracle/.ssh/config file on remote host rac1. If a config file exists already at ~oracle/.ssh/config, it would be backed up to ~oracle/.ssh/config.backup.
The user may be prompted for a password here since the script would be running SSH on host rac1.
Warning: Permanently added 'rac1' (ED25519) to the list of known hosts.
oracle@rac1's password:
Done with creating .ssh directory and setting permissions on remote host rac1.
Creating .ssh directory and setting permissions on remote host rac2
THE SCRIPT WOULD ALSO BE REVOKING WRITE PERMISSIONS FOR group AND others ON THE HOME DIRECTORY FOR oracle. THIS IS AN SSH REQUIREMENT.
The script would create ~oracle/.ssh/config file on remote host rac2. If a config file exists already at ~oracle/.ssh/config, it would be backed up to ~oracle/.ssh/config.backup.
The user may be prompted for a password here since the script would be running SSH on host rac2.
Warning: Permanently added 'rac2' (ED25519) to the list of known hosts.
oracle@rac2's password:
Done with creating .ssh directory and setting permissions on remote host rac2.
Copying local host public key to the remote host rac1
The user may be prompted for a password or passphrase here since the script would be using SCP for host rac1.
oracle@rac1's password:
Done copying local host public key to the remote host rac1
Copying local host public key to the remote host rac2
The user may be prompted for a password or passphrase here since the script would be using SCP for host rac2.
oracle@rac2's password:
Done copying local host public key to the remote host rac2
Creating keys on remote host rac1 if they do not exist already. This is required to setup SSH on host rac1.

Creating keys on remote host rac2 if they do not exist already. This is required to setup SSH on host rac2.

Updating authorized_keys file on remote host rac1
Updating known_hosts file on remote host rac1
Updating authorized_keys file on remote host rac2
Updating known_hosts file on remote host rac2
cat: /home/oracle/.ssh/known_hosts.tmp: 没有那个文件或目录
cat: /home/oracle/.ssh/authorized_keys.tmp: 没有那个文件或目录
SSH setup is complete.

------------------------------------------------------------------------
Verifying SSH setup
===================
The script will now run the date command on the remote nodes using ssh
to verify if ssh is setup correctly. IF THE SETUP IS CORRECTLY SETUP,
THERE SHOULD BE NO OUTPUT OTHER THAN THE DATE AND SSH SHOULD NOT ASK FOR
PASSWORDS. If you see any output other than date or are prompted for the
password, ssh is not setup correctly and you will need to resolve the
issue and set up ssh again.
The possible causes for failure could be:
1. The server settings in /etc/ssh/sshd_config file do not allow ssh
for user oracle.
2. The server may have disabled public key based authentication.
3. The client public key on the server may be outdated.
4. ~oracle or ~oracle/.ssh on the remote host may not be owned by oracle.
5. User may not have passed -shared option for shared remote users or
may be passing the -shared option for non-shared remote users.
6. If there is output in addition to the date, but no password is asked,
it may be a security alert shown as part of company policy. Append the
additional text to the <OMS HOME>/sysman/prov/resources/ignoreMessages.txt file.
------------------------------------------------------------------------
--rac1:--
Running /usr/bin/ssh -x -l oracle rac1 date to verify SSH connectivity has been setup from local host to rac1.
IF YOU SEE ANY OTHER OUTPUT BESIDES THE OUTPUT OF THE DATE COMMAND OR IF YOU ARE PROMPTED FOR A PASSWORD HERE, IT MEANS SSH SETUP HAS NOT BEEN SUCCESSFUL. Please note that being prompted for a passphrase may be OK but being prompted for a password is ERROR.
2026年 02月 09日 星期一 17:32:58 CST
------------------------------------------------------------------------
--rac2:--
Running /usr/bin/ssh -x -l oracle rac2 date to verify SSH connectivity has been setup from local host to rac2.
IF YOU SEE ANY OTHER OUTPUT BESIDES THE OUTPUT OF THE DATE COMMAND OR IF YOU ARE PROMPTED FOR A PASSWORD HERE, IT MEANS SSH SETUP HAS NOT BEEN SUCCESSFUL. Please note that being prompted for a passphrase may be OK but being prompted for a password is ERROR.
2026年 02月 09日 星期一 17:32:58 CST
------------------------------------------------------------------------
------------------------------------------------------------------------
Verifying SSH connectivity has been setup from rac1 to rac1
IF YOU SEE ANY OTHER OUTPUT BESIDES THE OUTPUT OF THE DATE COMMAND OR IF YOU ARE PROMPTED FOR A PASSWORD HERE, IT MEANS SSH SETUP HAS NOT BEEN SUCCESSFUL.
2026年 02月 09日 星期一 17:32:59 CST
------------------------------------------------------------------------
------------------------------------------------------------------------
Verifying SSH connectivity has been setup from rac1 to rac2
IF YOU SEE ANY OTHER OUTPUT BESIDES THE OUTPUT OF THE DATE COMMAND OR IF YOU ARE PROMPTED FOR A PASSWORD HERE, IT MEANS SSH SETUP HAS NOT BEEN SUCCESSFUL.
2026年 02月 09日 星期一 17:32:59 CST
------------------------------------------------------------------------
-Verification from complete-
SSH verification complete.
[oracle@rac1:/home/oracle]$ ssh rac1 date;ssh rac2 date;ssh rac1-priv date;ssh rac2-priv date
2026年 02月 09日 星期一 17:33:36 CST
2026年 02月 09日 星期一 17:33:36 CST
The authenticity of host 'rac1-priv (18.18.18.5)' can't be established.
ED25519 key fingerprint is SHA256:VK0Kdy20xxkoQcLyTehBp3rFhniGOtJF8exmt5+dK1c.
This host key is known by the following other names/addresses:
    ~/.ssh/known_hosts:1: rac1
    ~/.ssh/known_hosts:2: rac2
    ~/.ssh/known_hosts:3: rac1
Are you sure you want to continue connecting (yes/no/[fingerprint])? yes
Warning: Permanently added 'rac1-priv' (ED25519) to the list of known hosts.
2026年 02月 09日 星期一 17:33:38 CST
The authenticity of host 'rac2-priv (18.18.18.6)' can't be established.
ED25519 key fingerprint is SHA256:VK0Kdy20xxkoQcLyTehBp3rFhniGOtJF8exmt5+dK1c.
This host key is known by the following other names/addresses:
    ~/.ssh/known_hosts:1: rac1
    ~/.ssh/known_hosts:2: rac2
    ~/.ssh/known_hosts:3: rac1
    ~/.ssh/known_hosts:4: rac1-priv
Are you sure you want to continue connecting (yes/no/[fingerprint])? yes
Warning: Permanently added 'rac2-priv' (ED25519) to the list of known hosts.
2026年 02月 09日 星期一 17:33:38 CST
[oracle@rac1:/home/oracle]$ ssh rac1 date;ssh rac2 date;ssh rac1-priv date;ssh rac2-priv date
2026年 02月 09日 星期一 17:33:40 CST
2026年 02月 09日 星期一 17:33:40 CST
2026年 02月 09日 星期一 17:33:41 CST
2026年 02月 09日 星期一 17:33:40 CST
[oracle@rac1:/home/oracle]$


[oracle@rac2:/home/oracle]$ ssh rac1 date;ssh rac2 date;ssh rac1-priv date;ssh rac2-priv date
2026年 02月 09日 星期一 17:33:57 CST
2026年 02月 09日 星期一 17:33:57 CST
The authenticity of host 'rac1-priv (18.18.18.5)' can't be established.
ED25519 key fingerprint is SHA256:VK0Kdy20xxkoQcLyTehBp3rFhniGOtJF8exmt5+dK1c.
This host key is known by the following other names/addresses:
    ~/.ssh/known_hosts:1: rac1
    ~/.ssh/known_hosts:2: rac2
    ~/.ssh/known_hosts:3: rac1
Are you sure you want to continue connecting (yes/no/[fingerprint])? yes
Warning: Permanently added 'rac1-priv' (ED25519) to the list of known hosts.
2026年 02月 09日 星期一 17:33:59 CST
The authenticity of host 'rac2-priv (18.18.18.6)' can't be established.
ED25519 key fingerprint is SHA256:VK0Kdy20xxkoQcLyTehBp3rFhniGOtJF8exmt5+dK1c.
This host key is known by the following other names/addresses:
    ~/.ssh/known_hosts:1: rac1
    ~/.ssh/known_hosts:2: rac2
    ~/.ssh/known_hosts:3: rac1
    ~/.ssh/known_hosts:4: rac1-priv
Are you sure you want to continue connecting (yes/no/[fingerprint])? yes
Warning: Permanently added 'rac2-priv' (ED25519) to the list of known hosts.
2026年 02月 09日 星期一 17:34:00 CST
[oracle@rac2:/home/oracle]$ ssh rac1 date;ssh rac2 date;ssh rac1-priv date;ssh rac2-priv date
2026年 02月 09日 星期一 17:34:03 CST
2026年 02月 09日 星期一 17:34:02 CST
2026年 02月 09日 星期一 17:34:03 CST
2026年 02月 09日 星期一 17:34:03 CST
[oracle@rac2:/home/oracle]$
7.5 安装截图
图形化安装
[oracle@rac1:/home/oracle]$ cd $ORACLE_HOME
[oracle@rac1:/u01/app/oracle/product/23.0.0/dbhome_1]$ ./runInstaller
正在启动 Oracle AI 数据库安装向导...
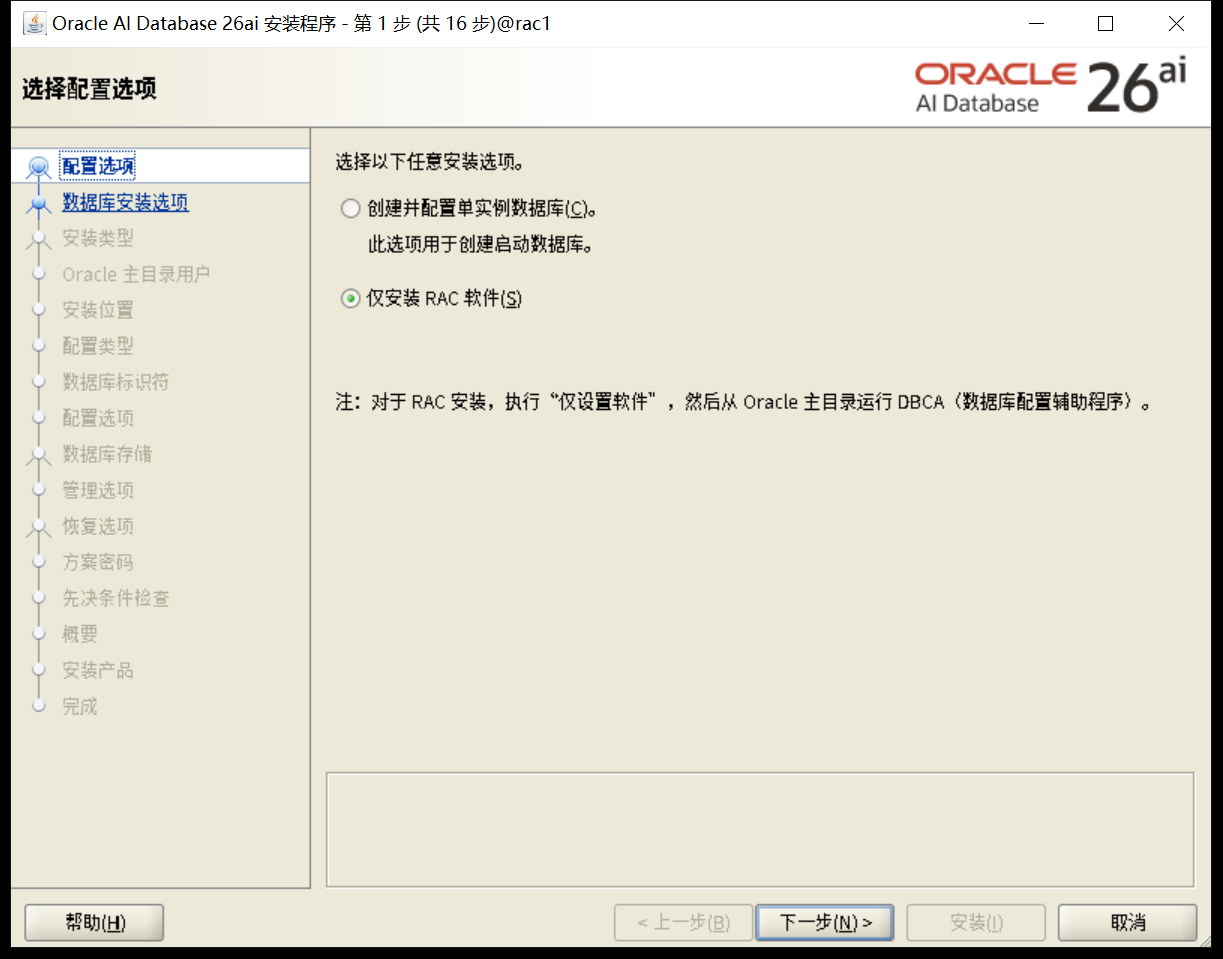

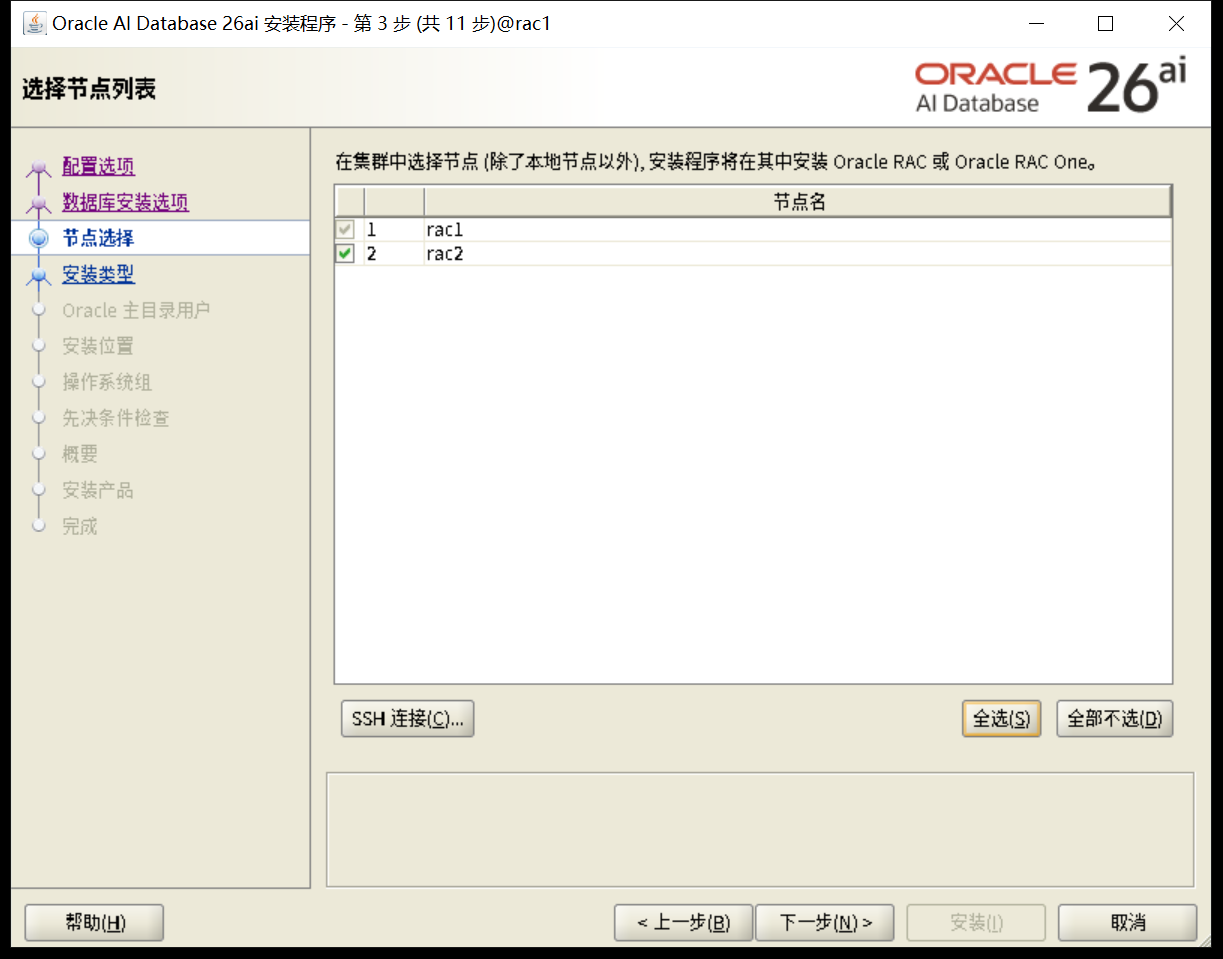
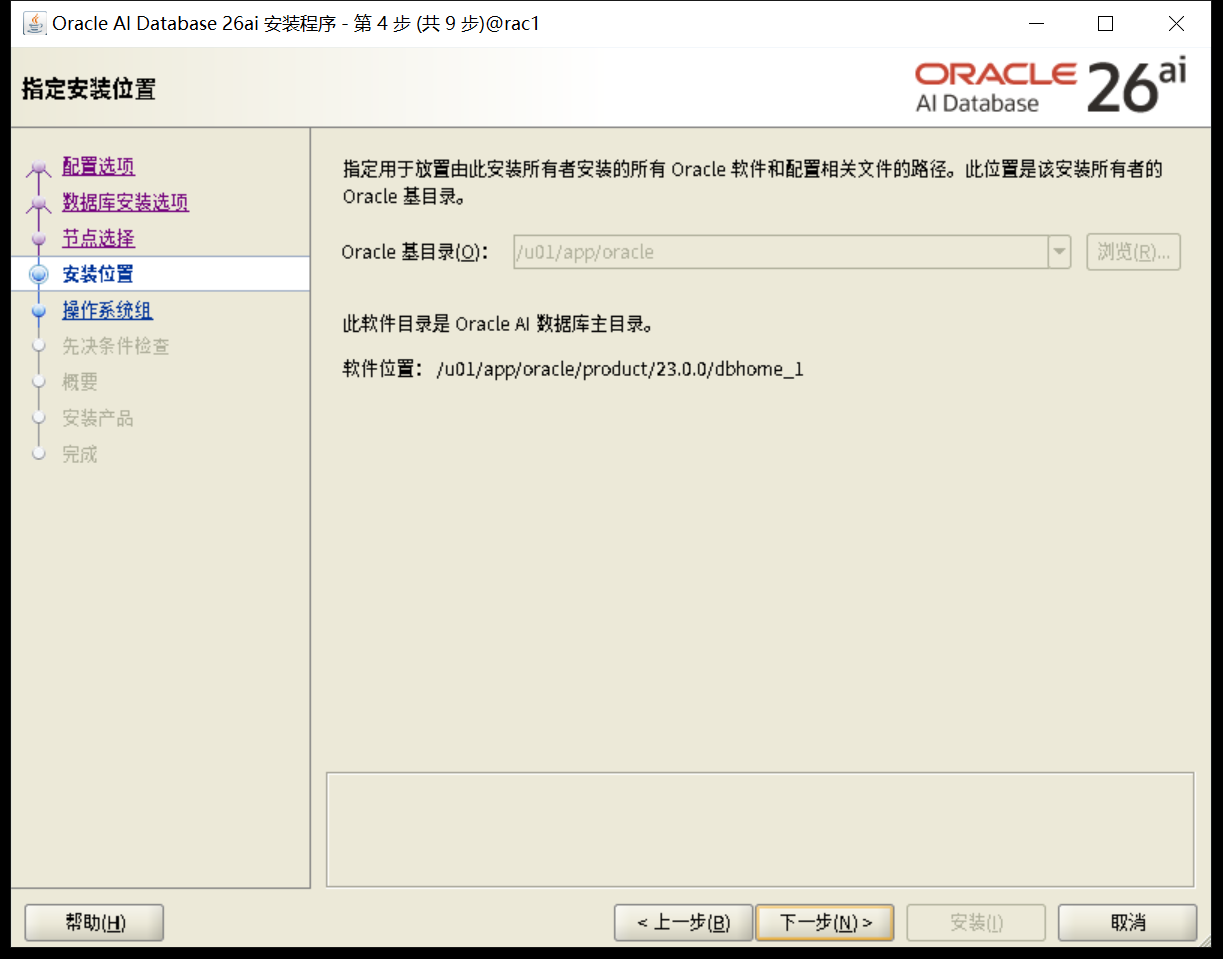
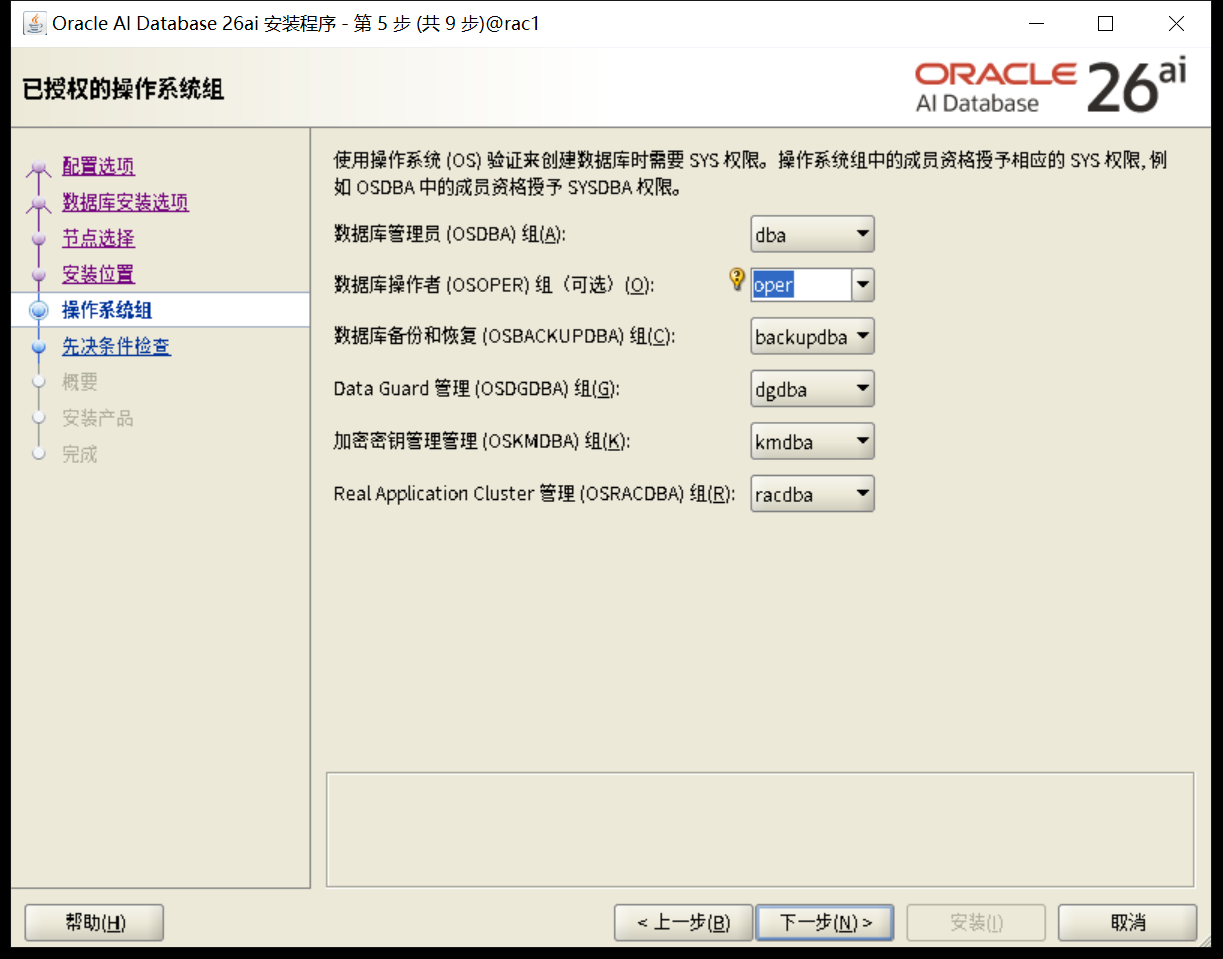
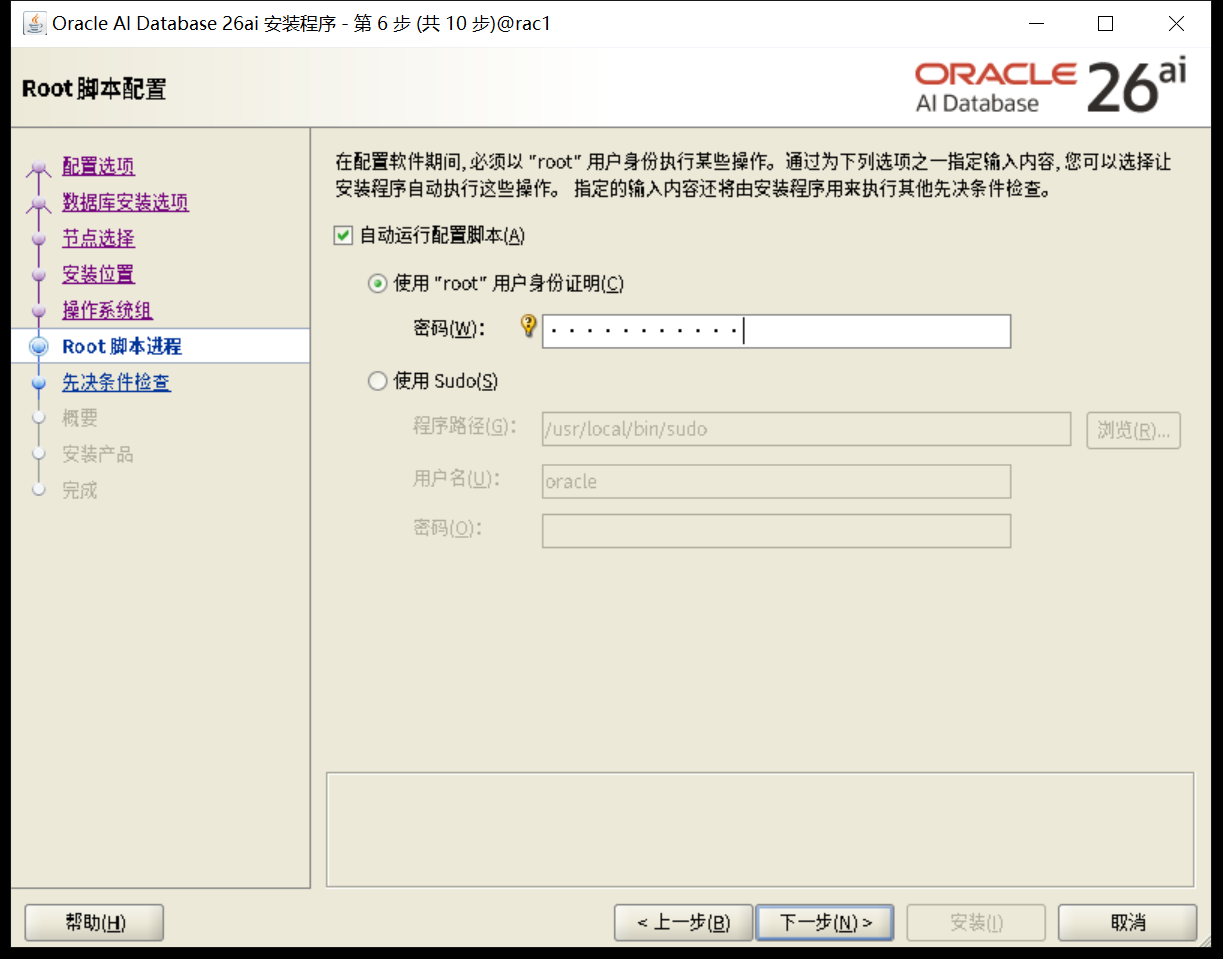
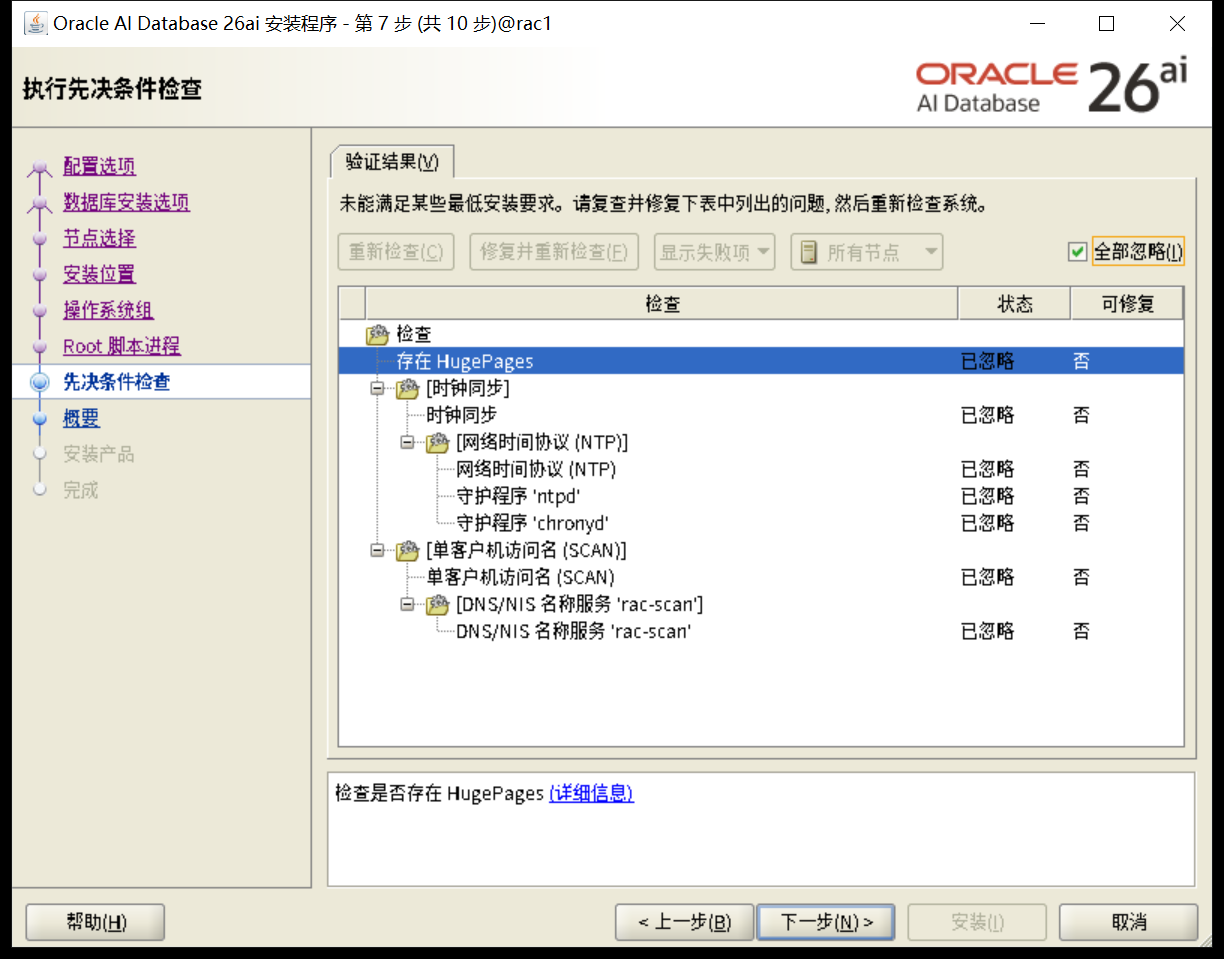
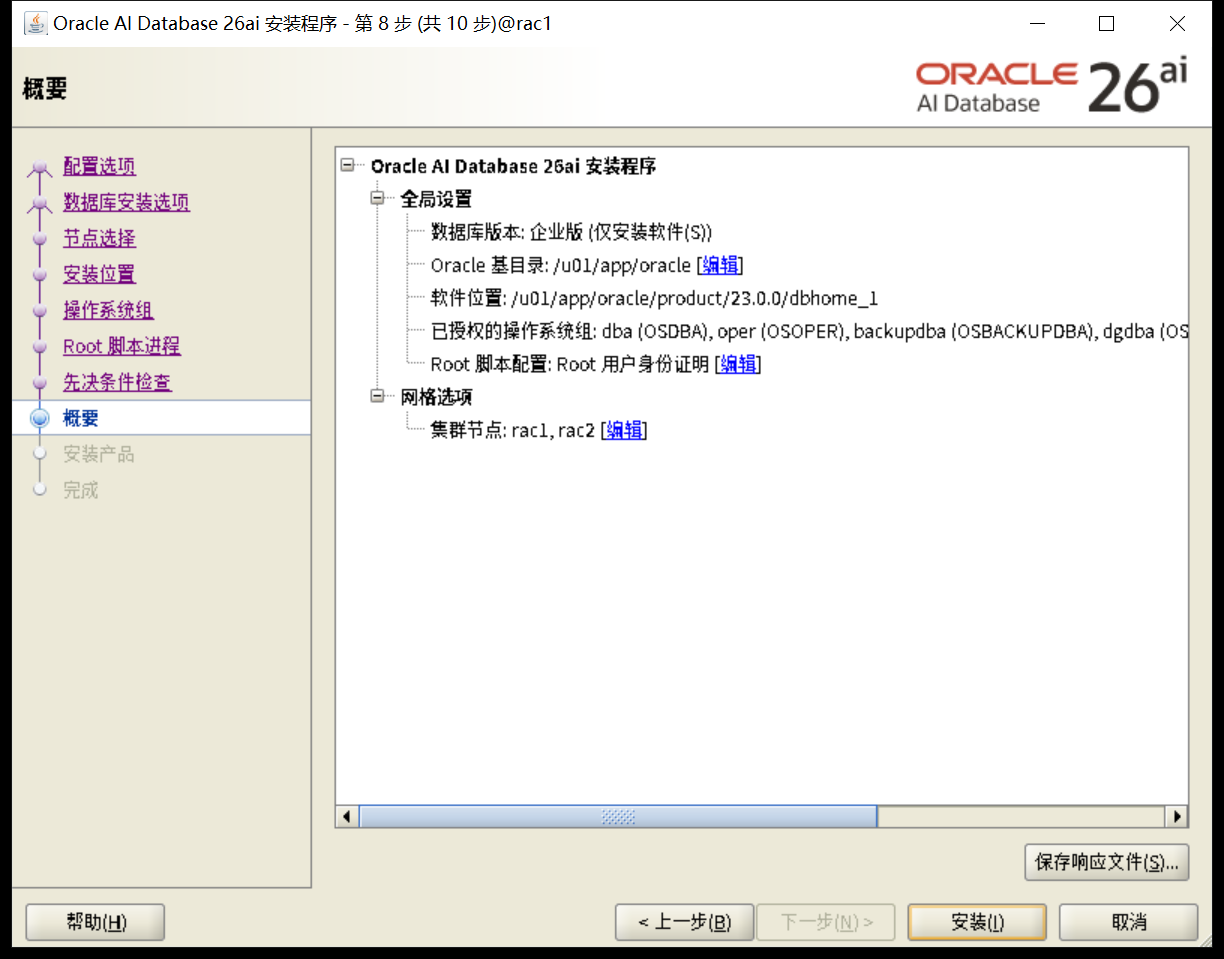
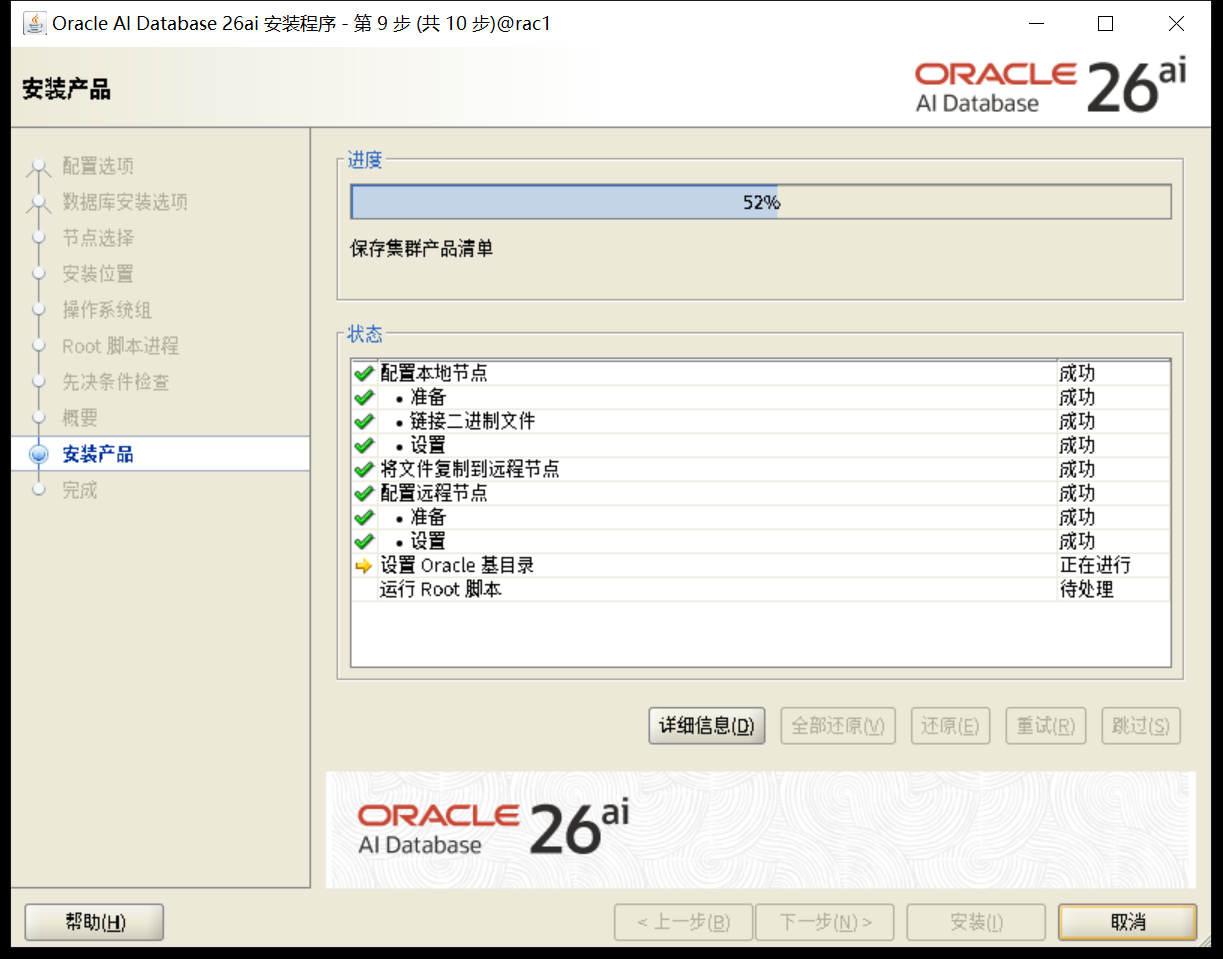

确认版本
[oracle@rac1:/home/oracle]$ sqlplus / as sysdba

SQL*Plus: Release 23.26.1.0.0 - Production on Mon Feb 9 19:57:59 2026
Version 23.26.1.0.0

Copyright (c) 1982, 2025, Oracle.  All rights reserved.

Connected to an idle instance.

SQL>
八、创建数据库
8.1 数据库规划
| 规划内容 | 规划描述 |
|---|---|
| 内存规划 | SGA PGA |
| processes | 1000 |
| 字符集 | AL32UTF8 |
| 归档模式 | 非 |
| redo | 5组 每组200M |
| undo | 2G 自动扩展 最大4G |
| temp | 4G |
| 闪回配置 | 4G大小 |
8.2 dbca建库
使用 dbca创建数据库。
[oracle@rac1:/home/oracle]$ dbca
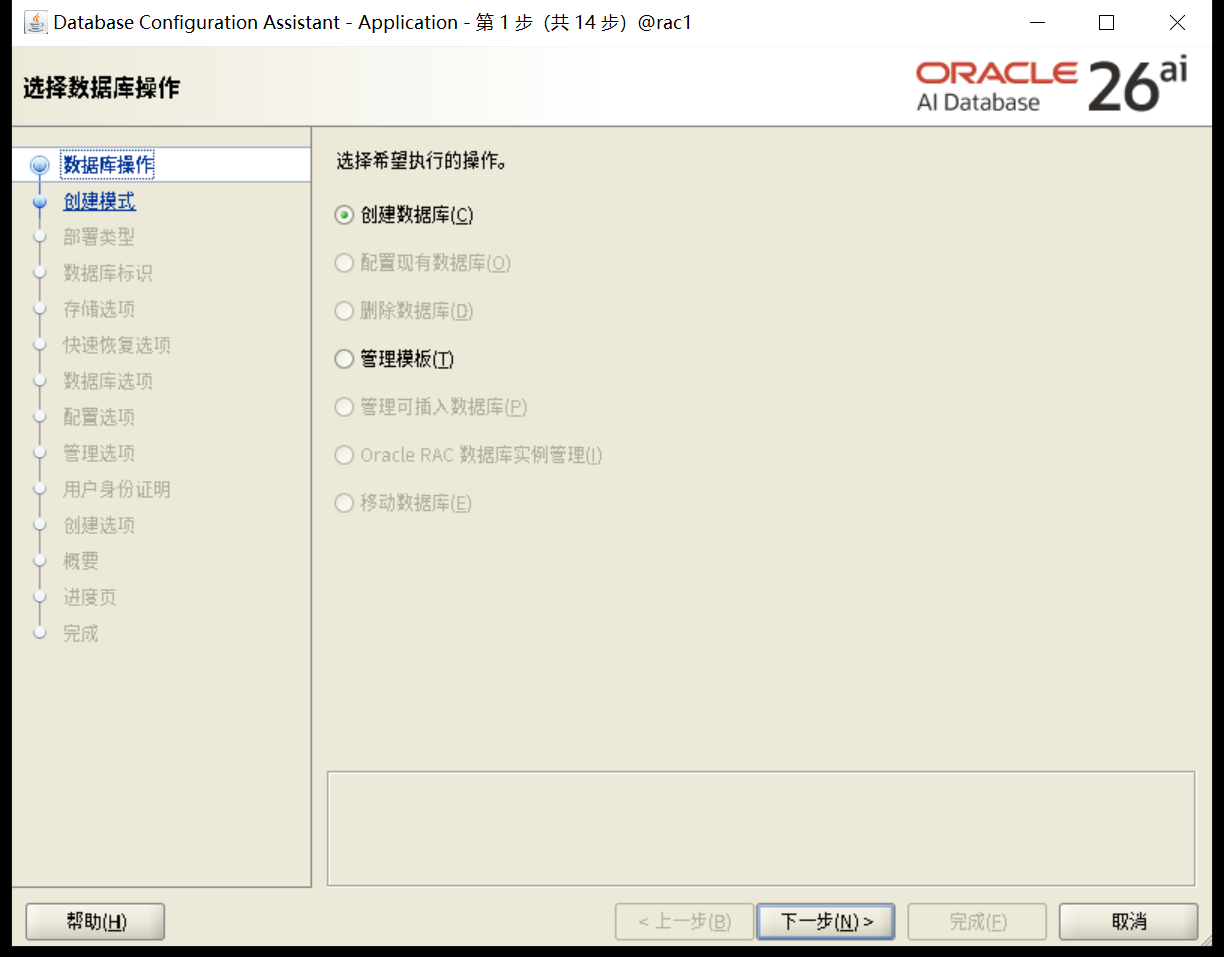
高级安装
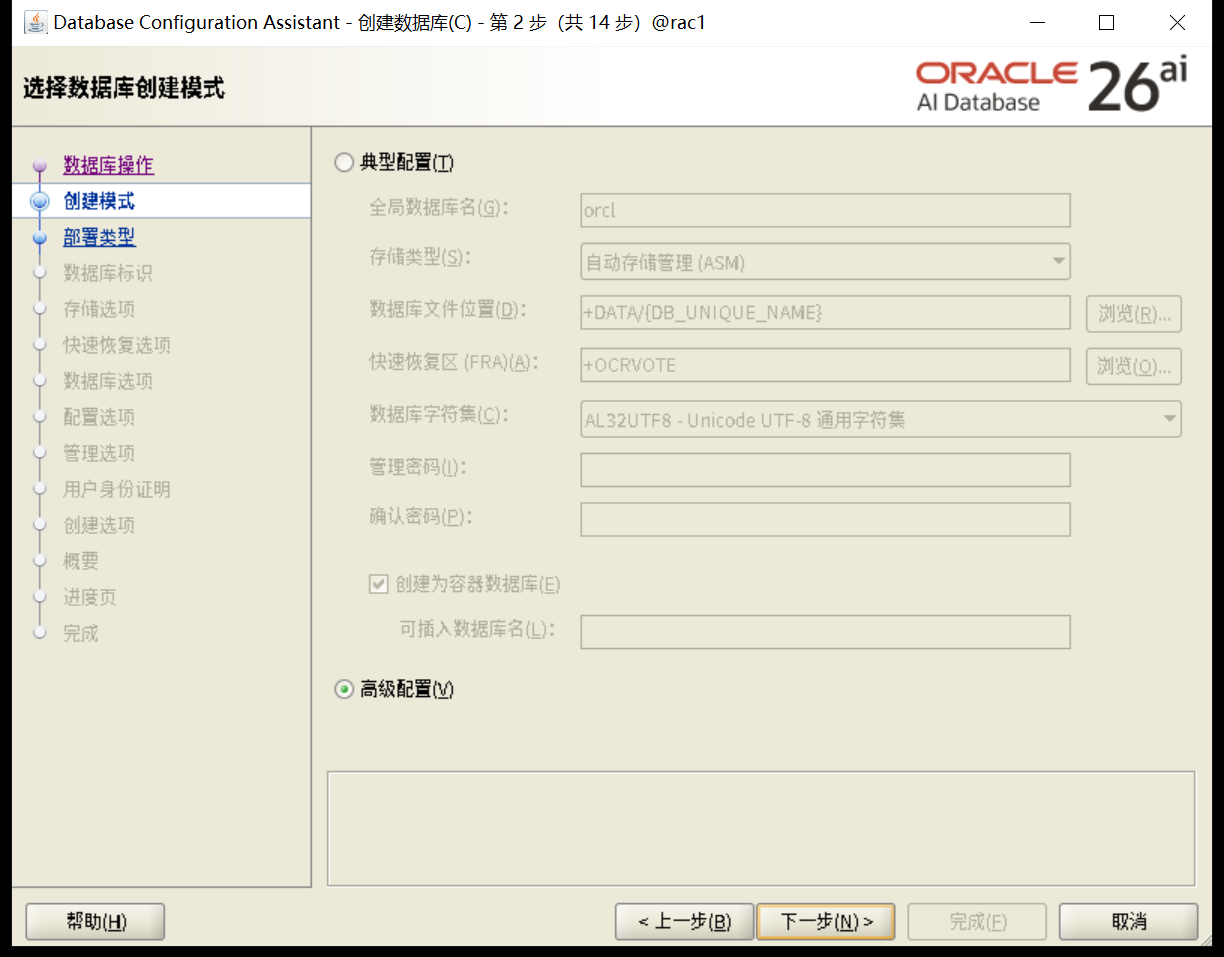
选择一般用途
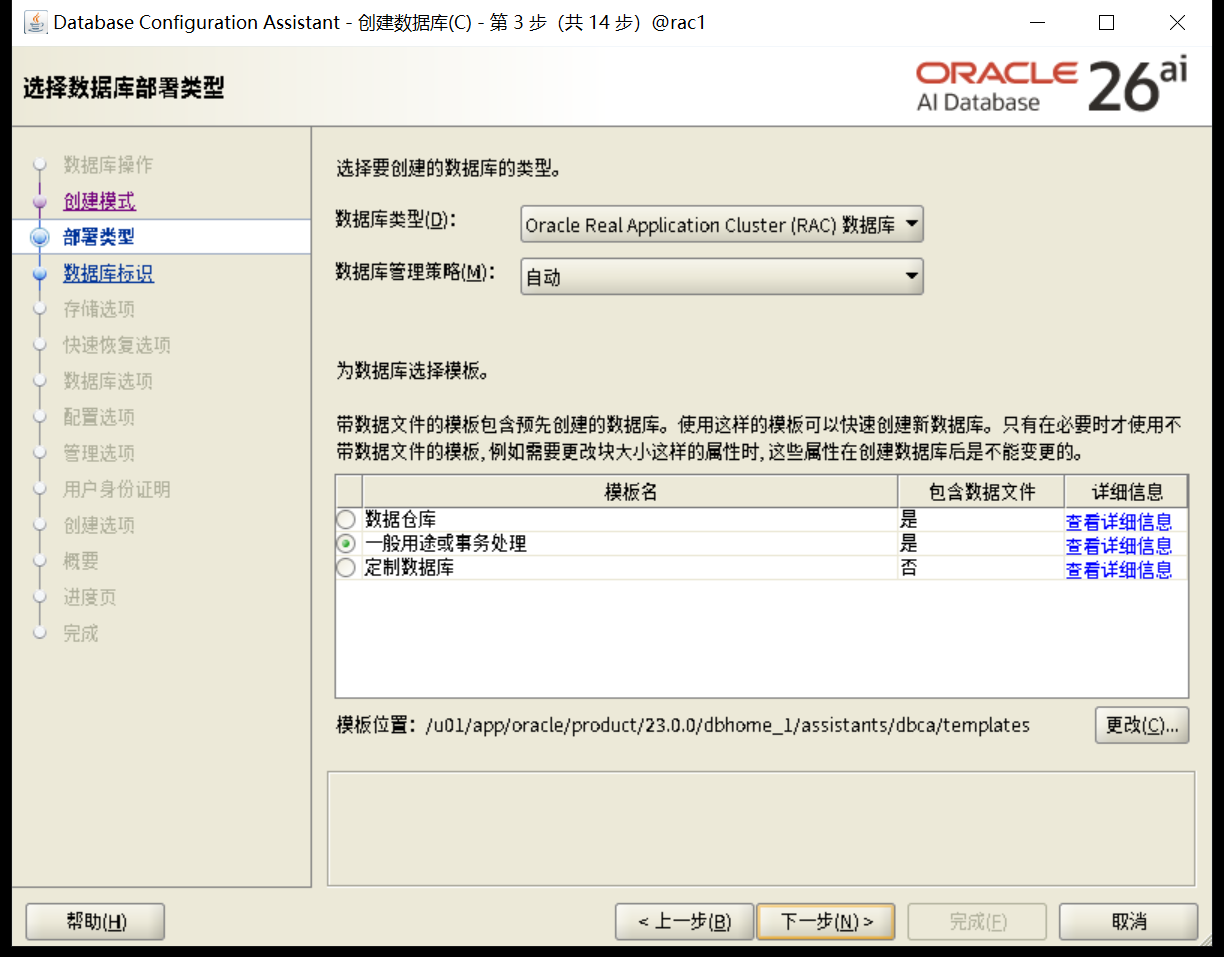
选择节点
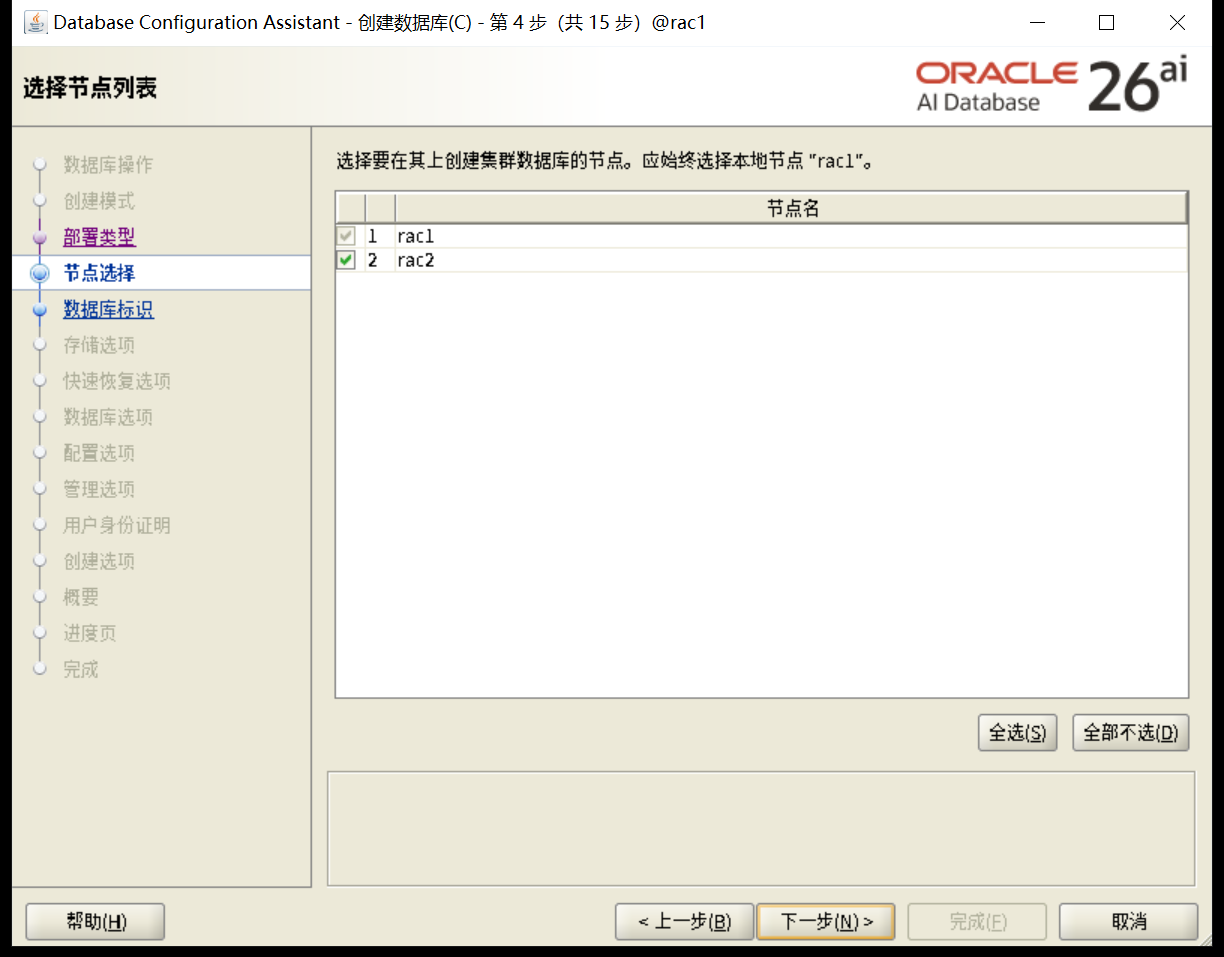
选择创建数据库名,是否包含PDB
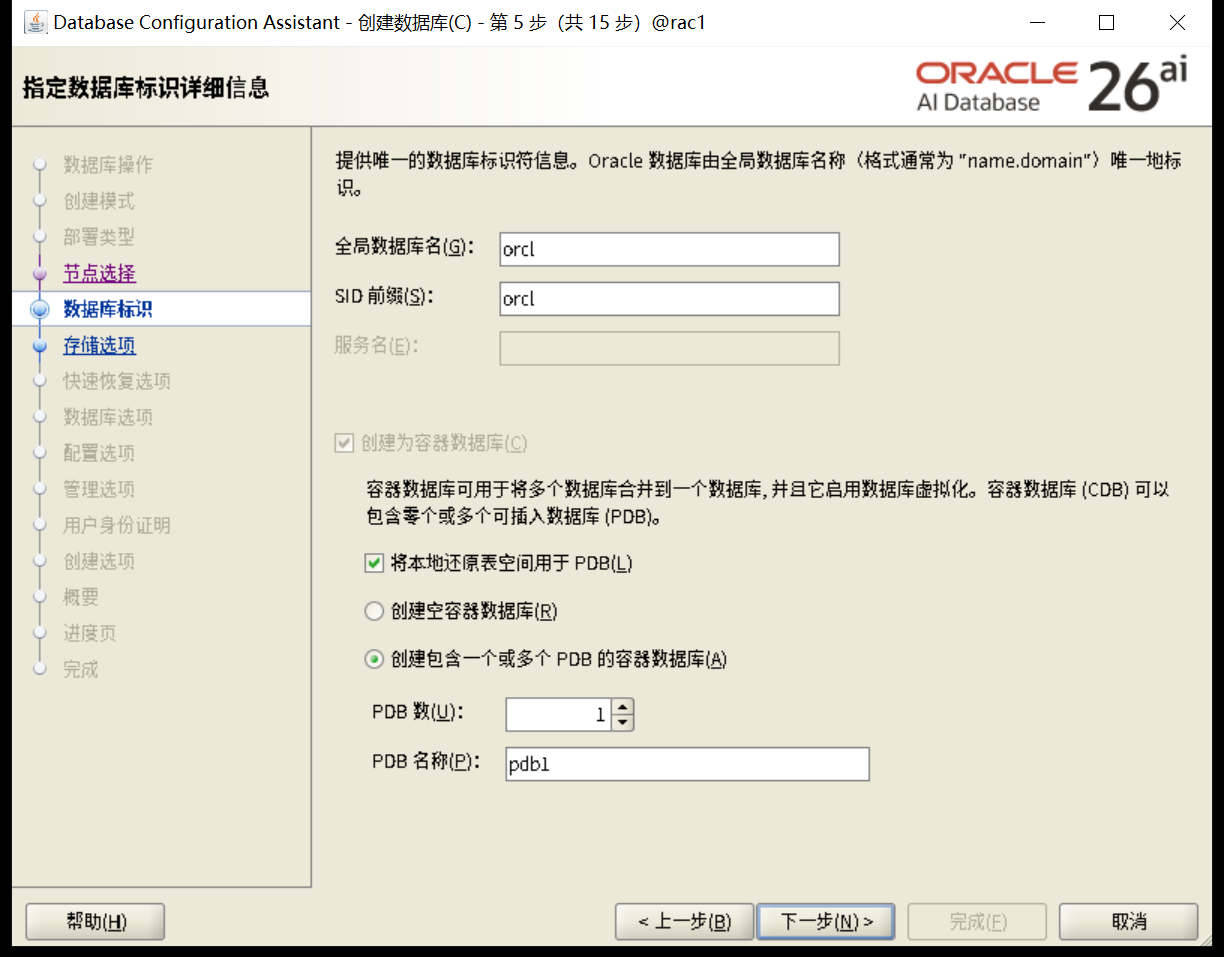
选择数据库安装路径和管理方式
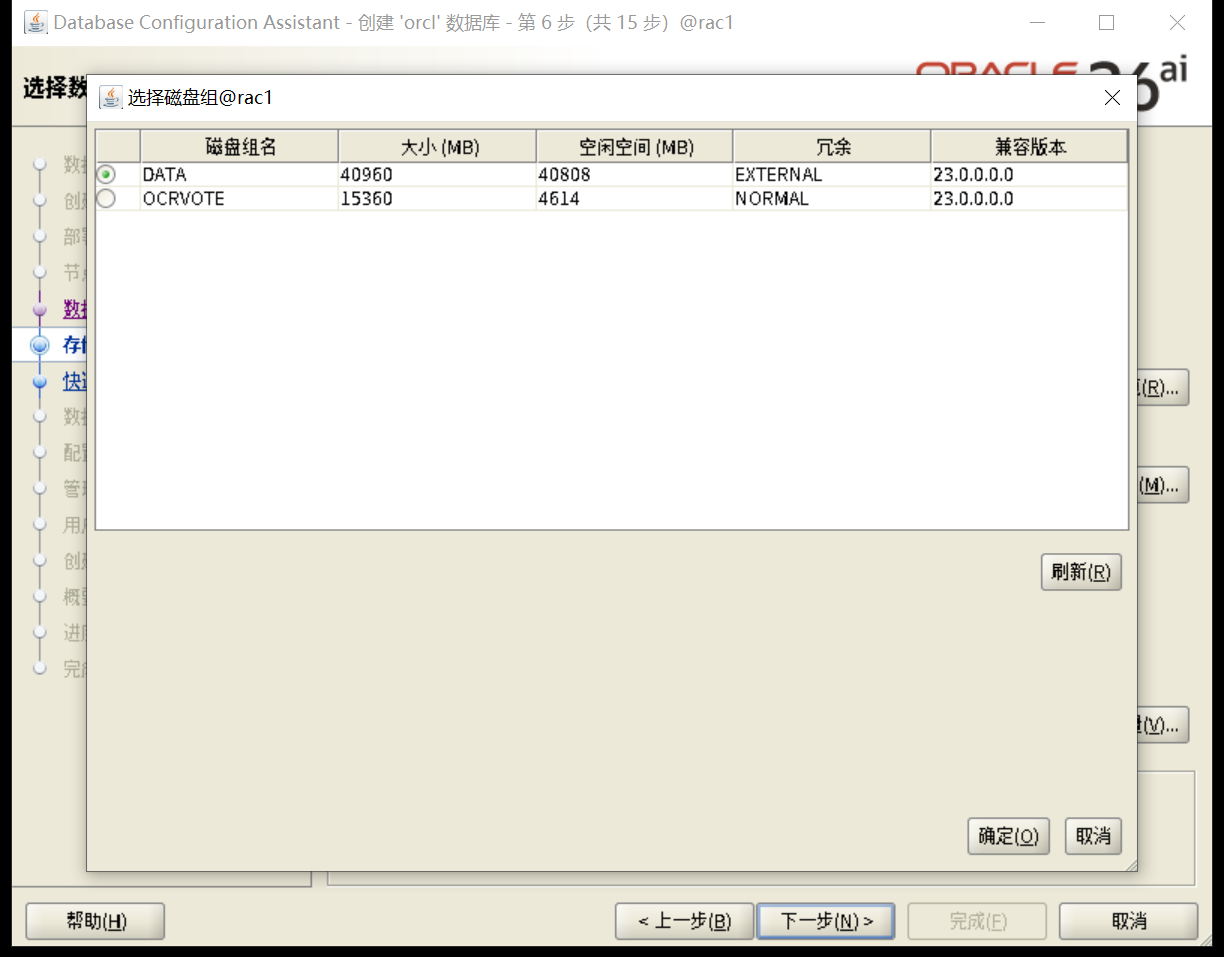
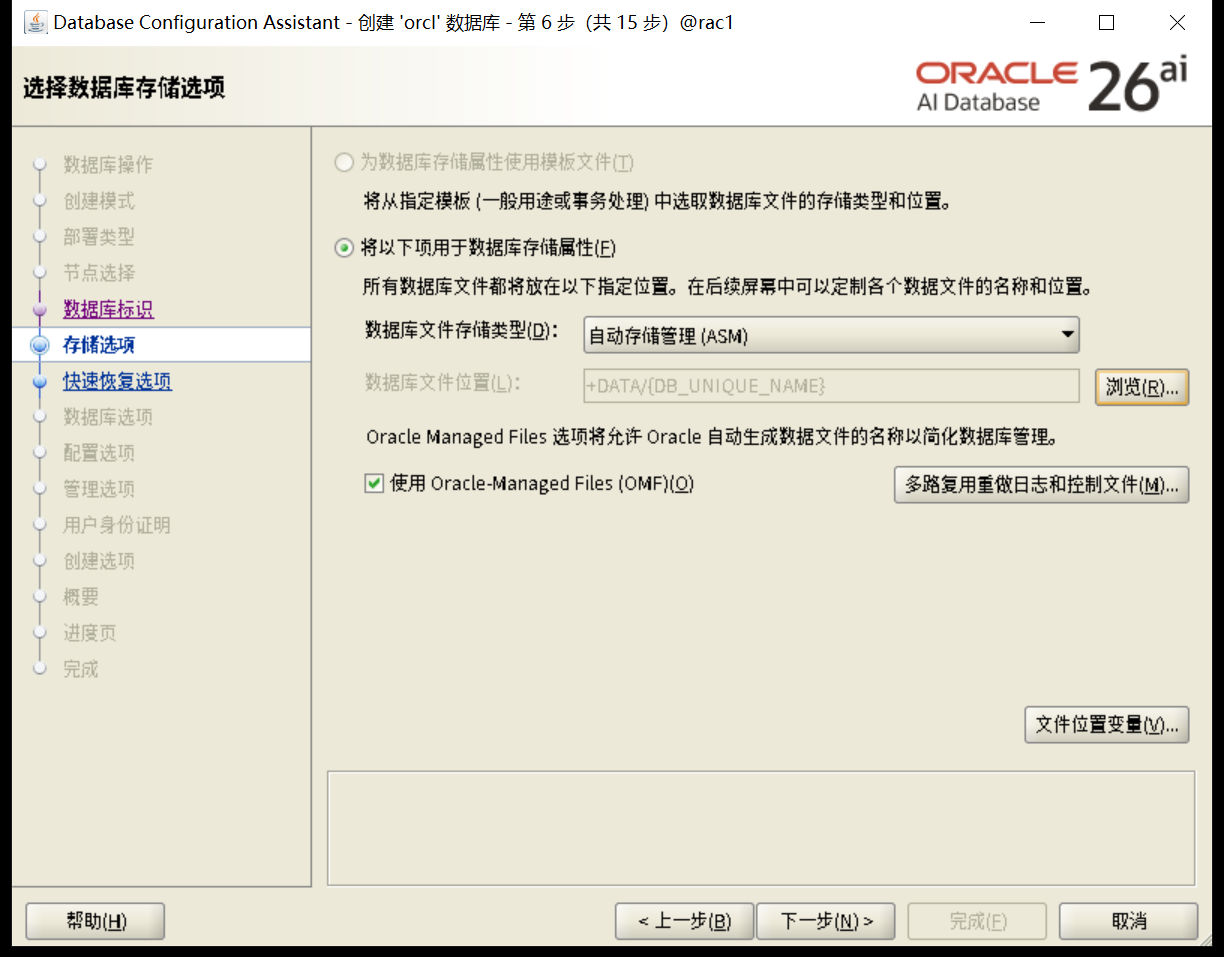
是否启动FRA和归档
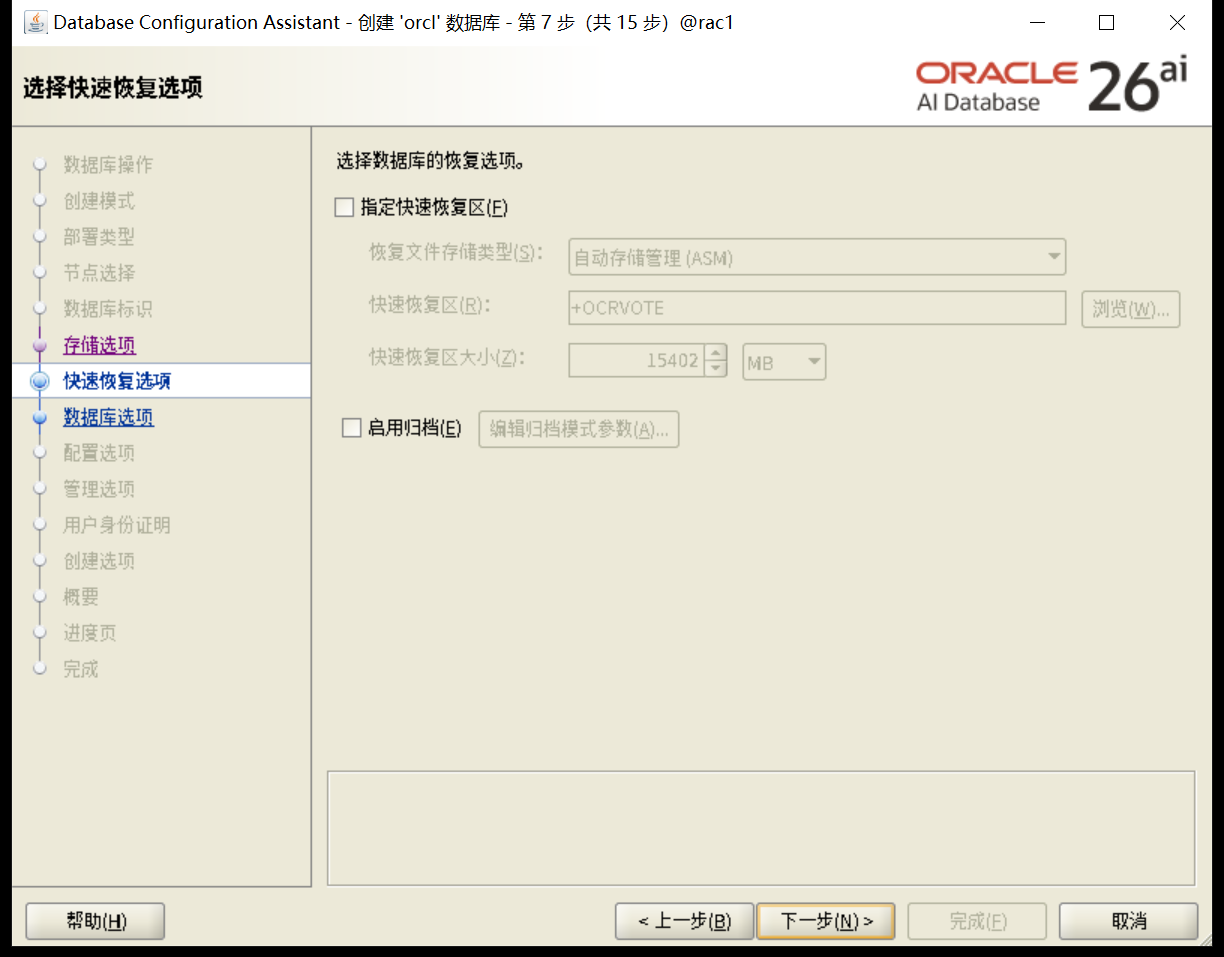
不使用vault
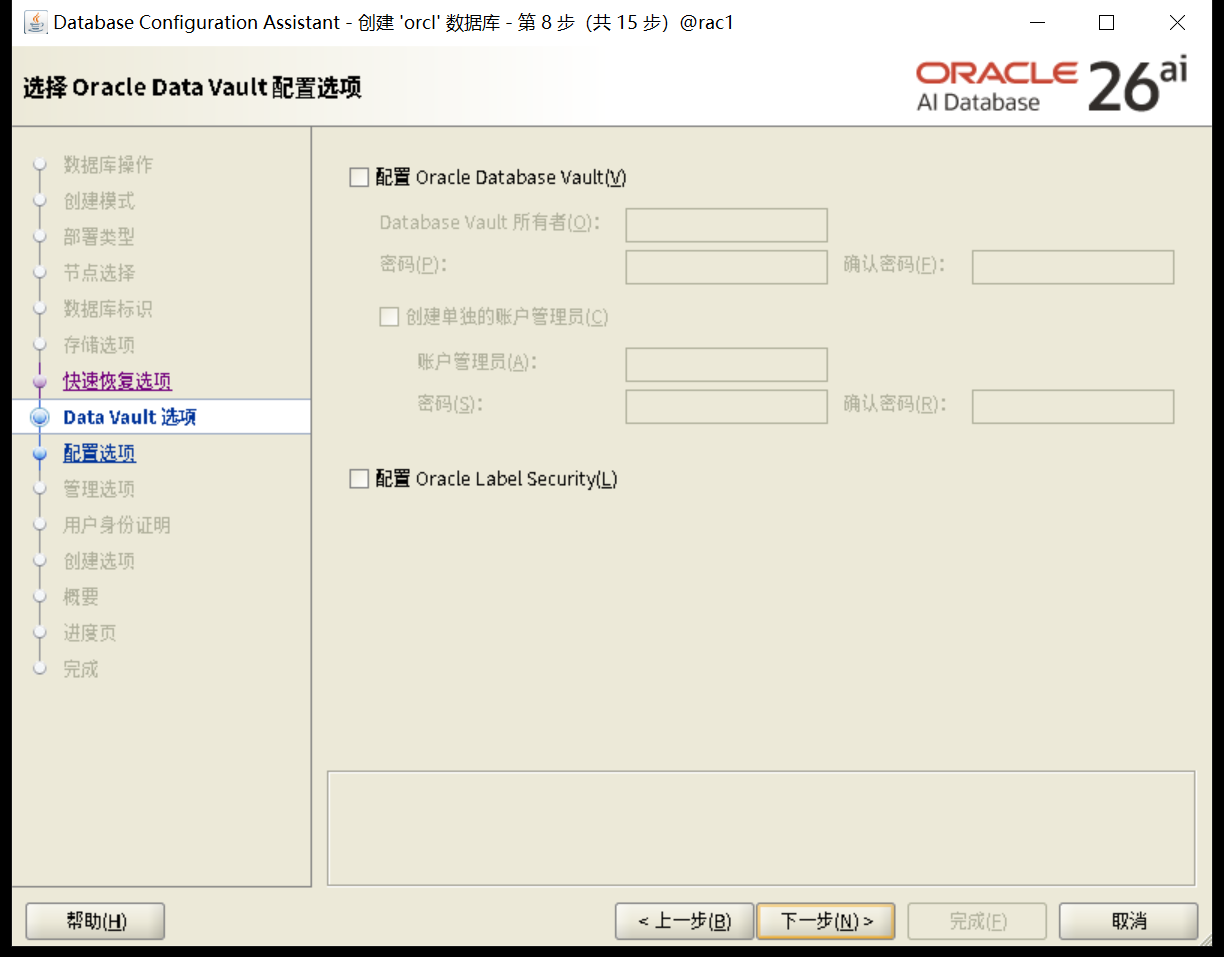
内存配置
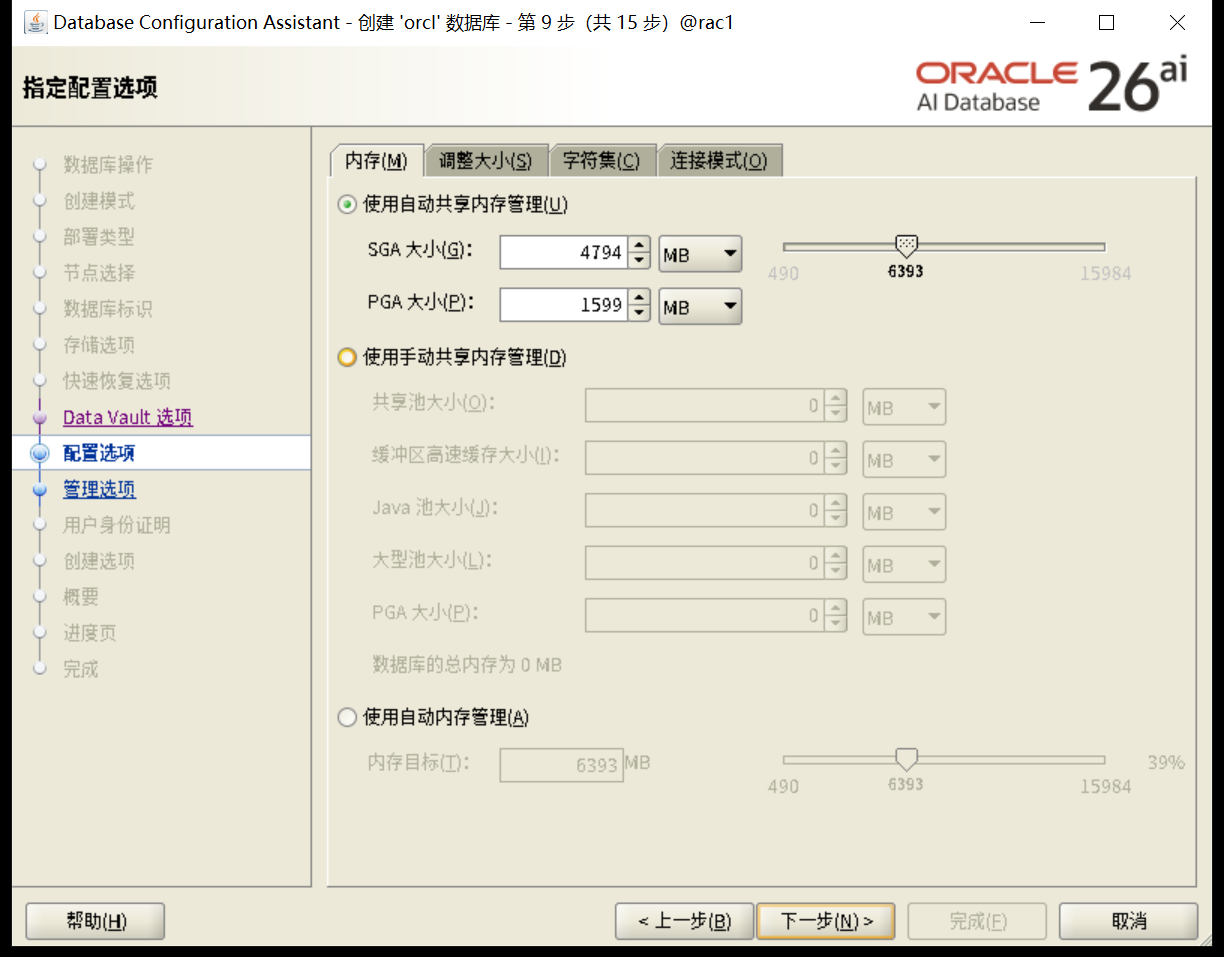
process配置
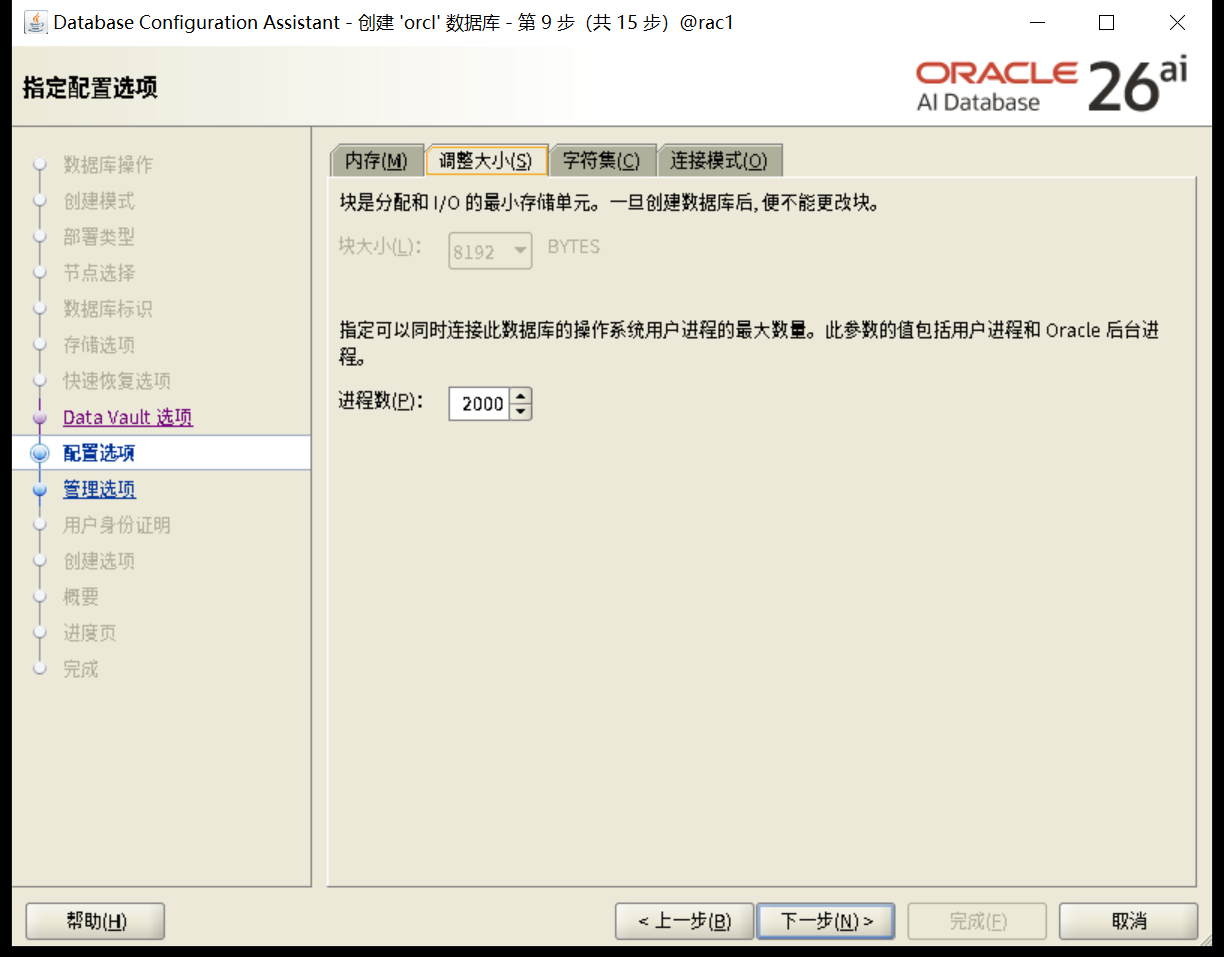
字符集配置
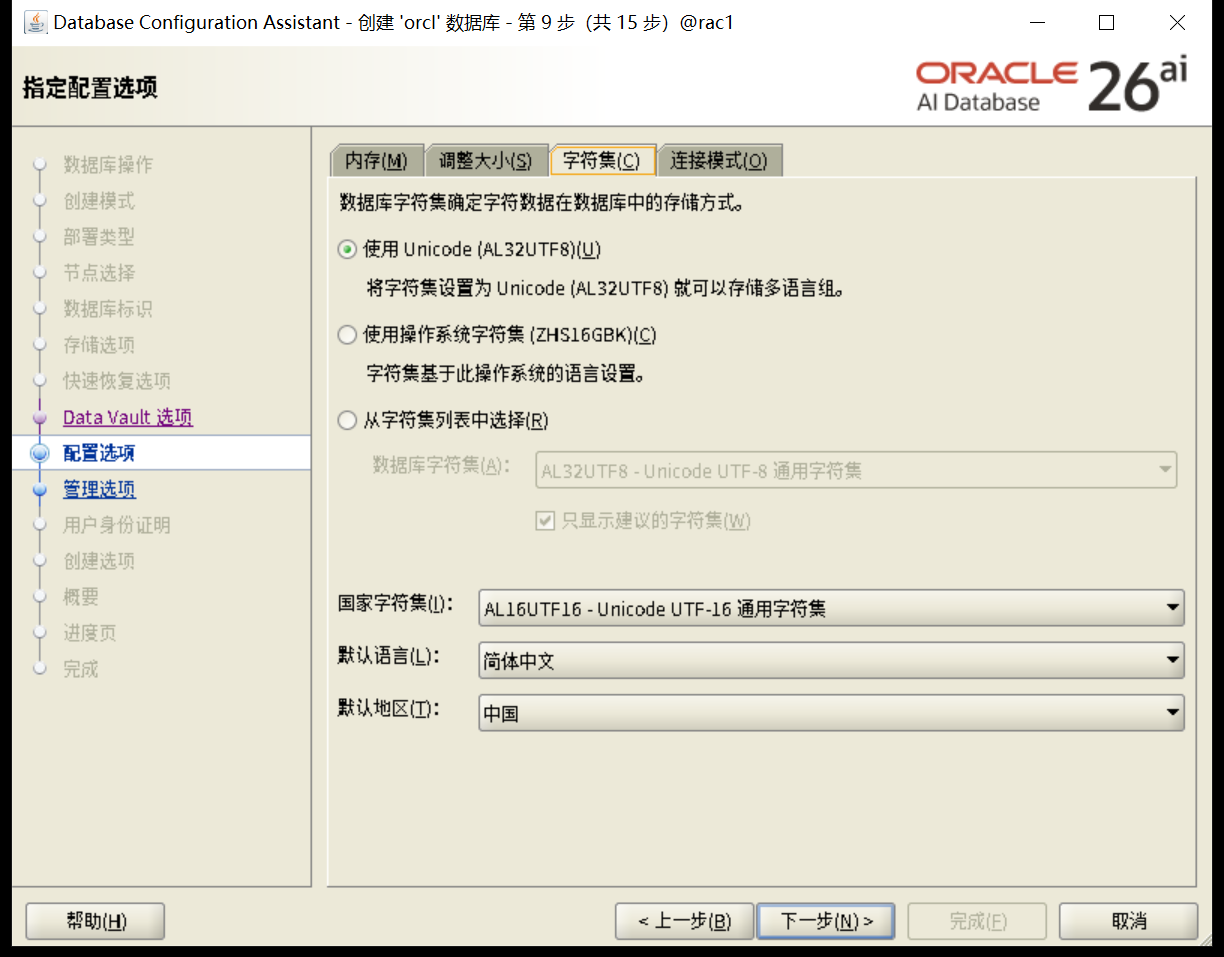
EM配置
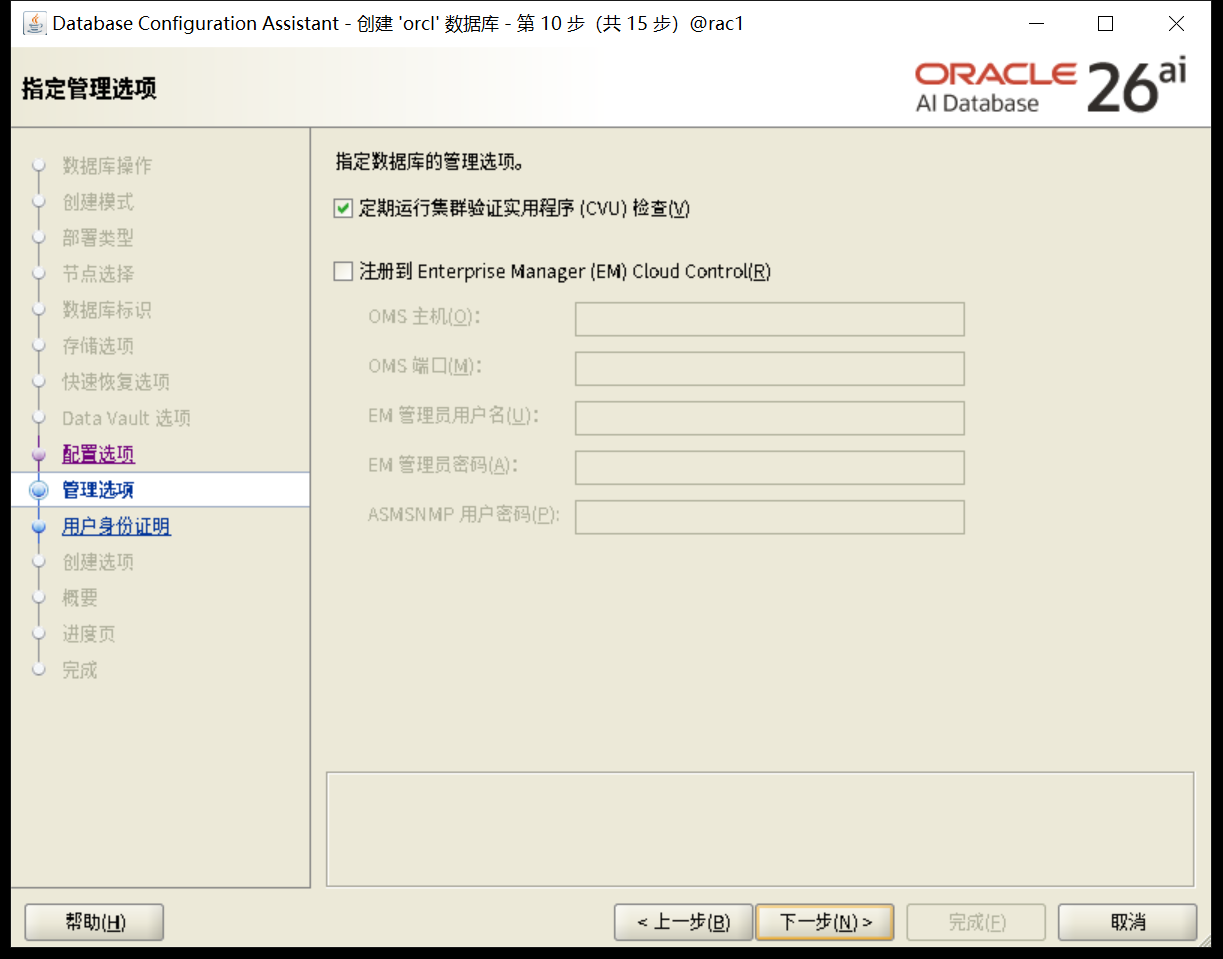
用户密码
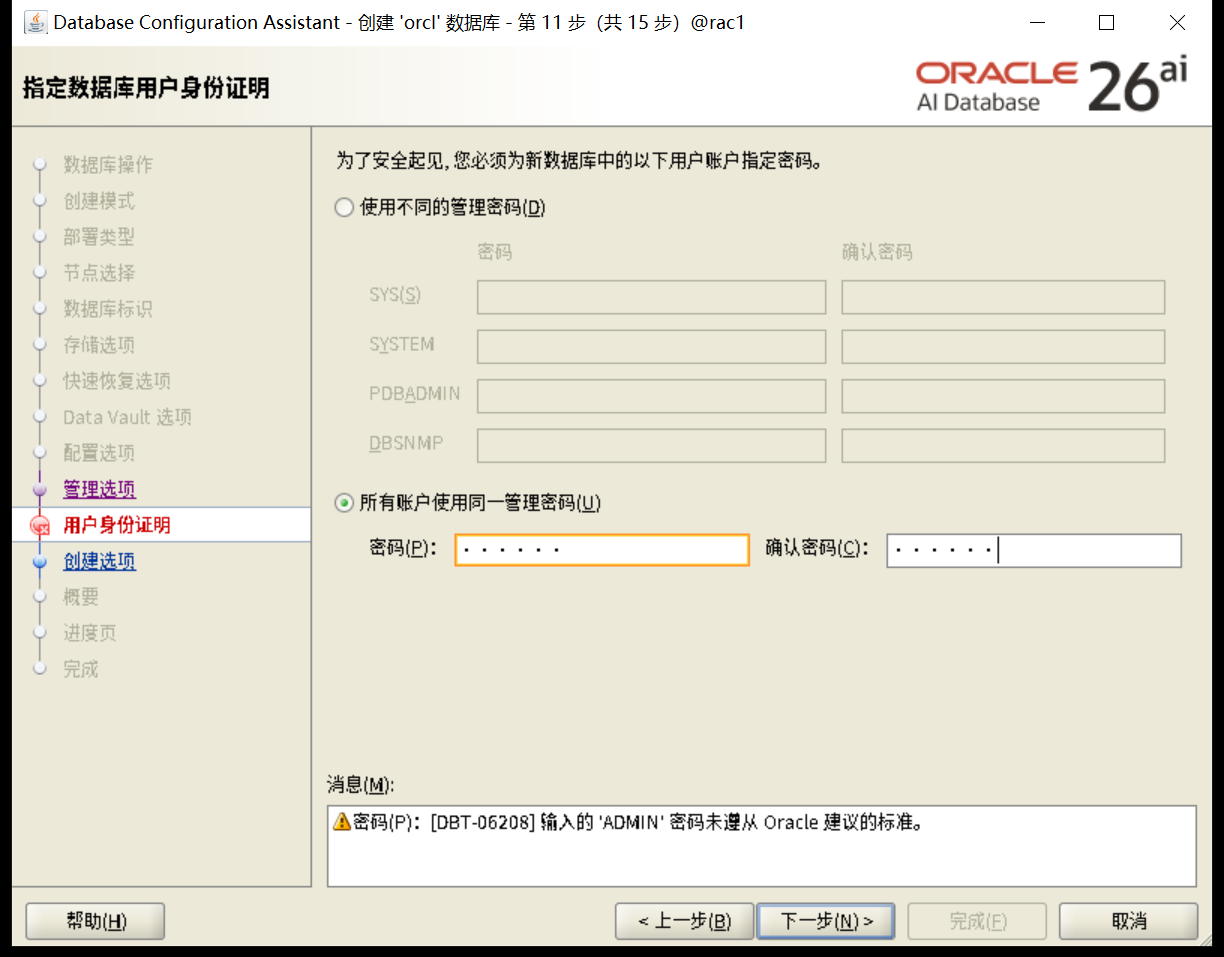
执行下一步
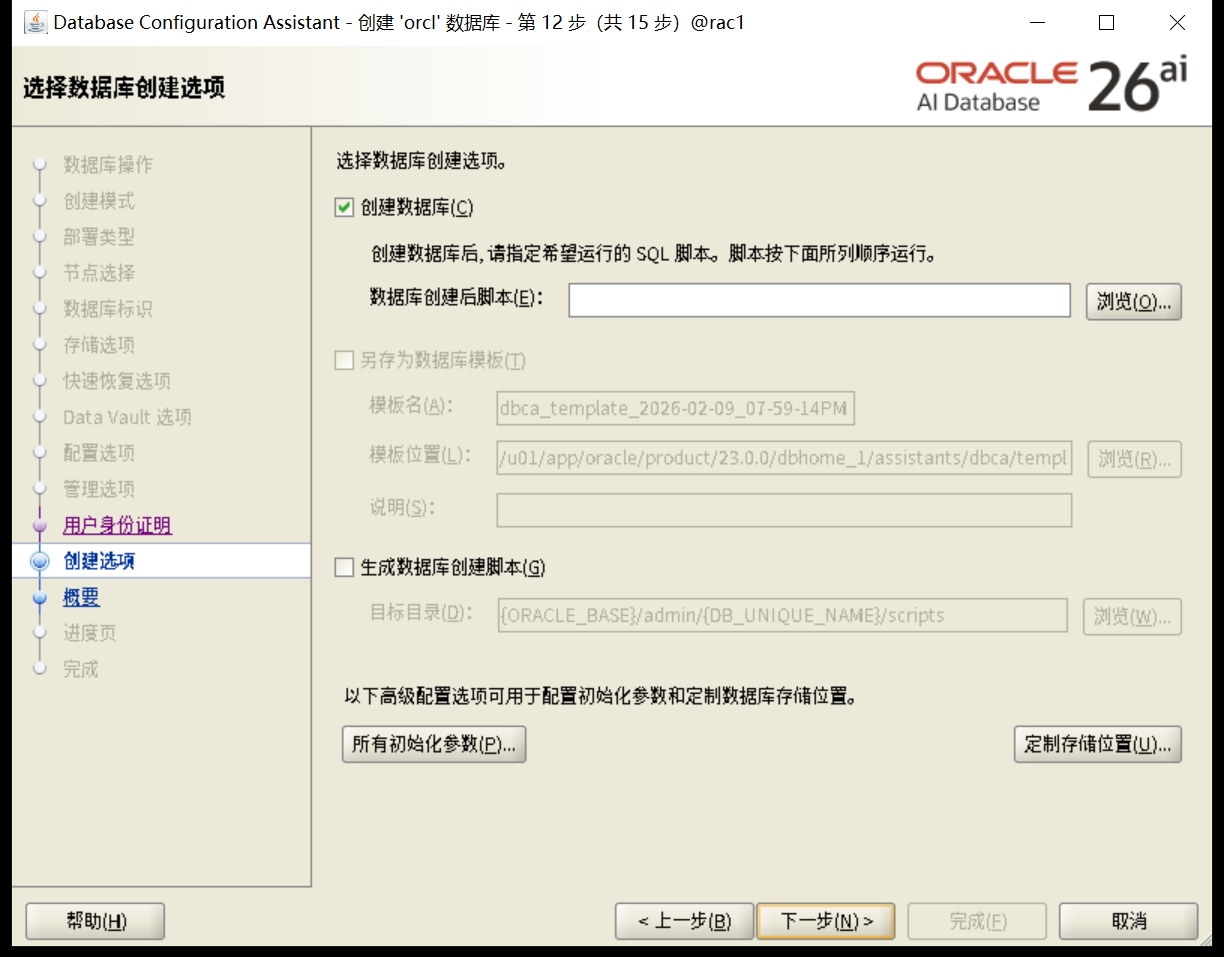
检查
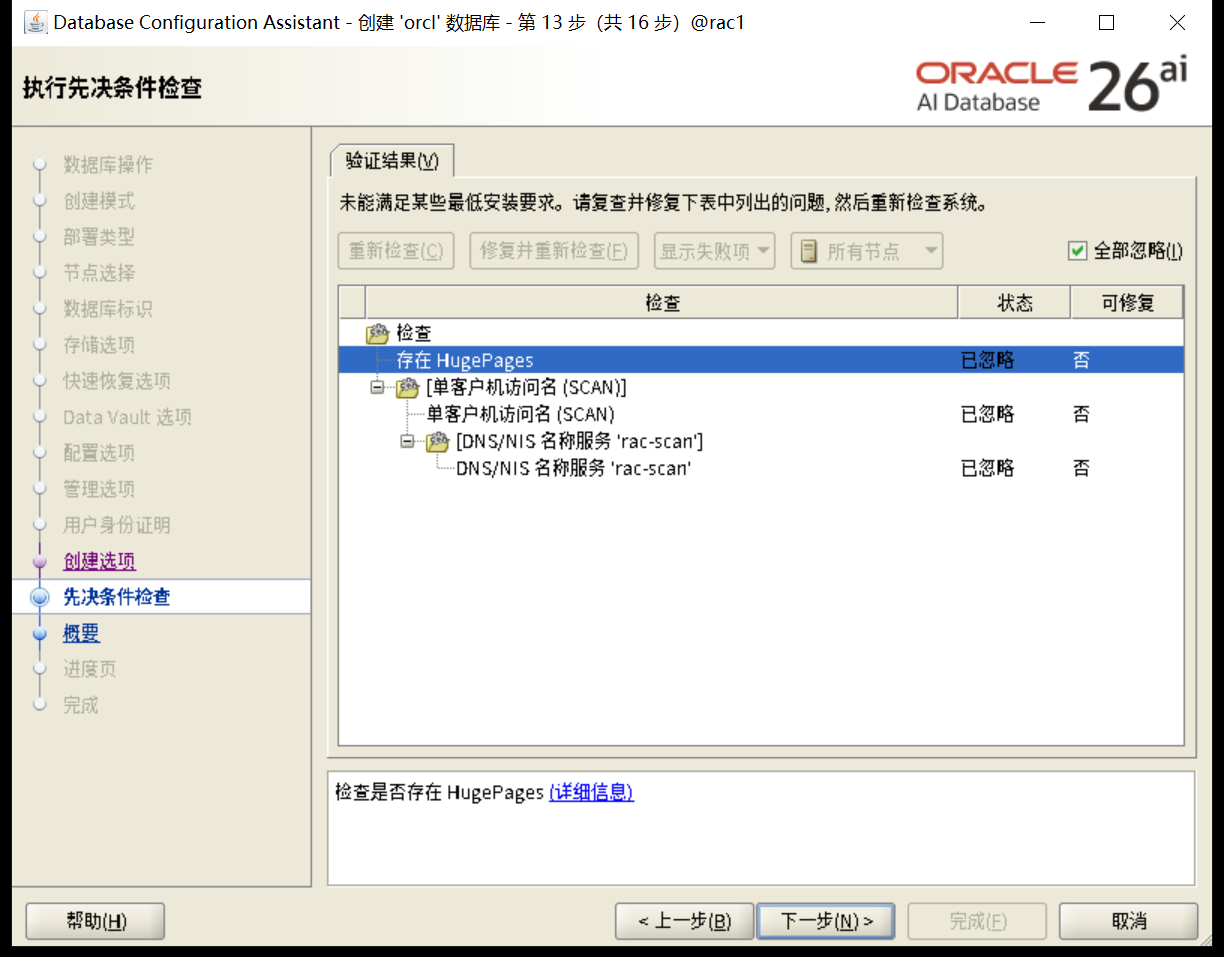
安装汇总
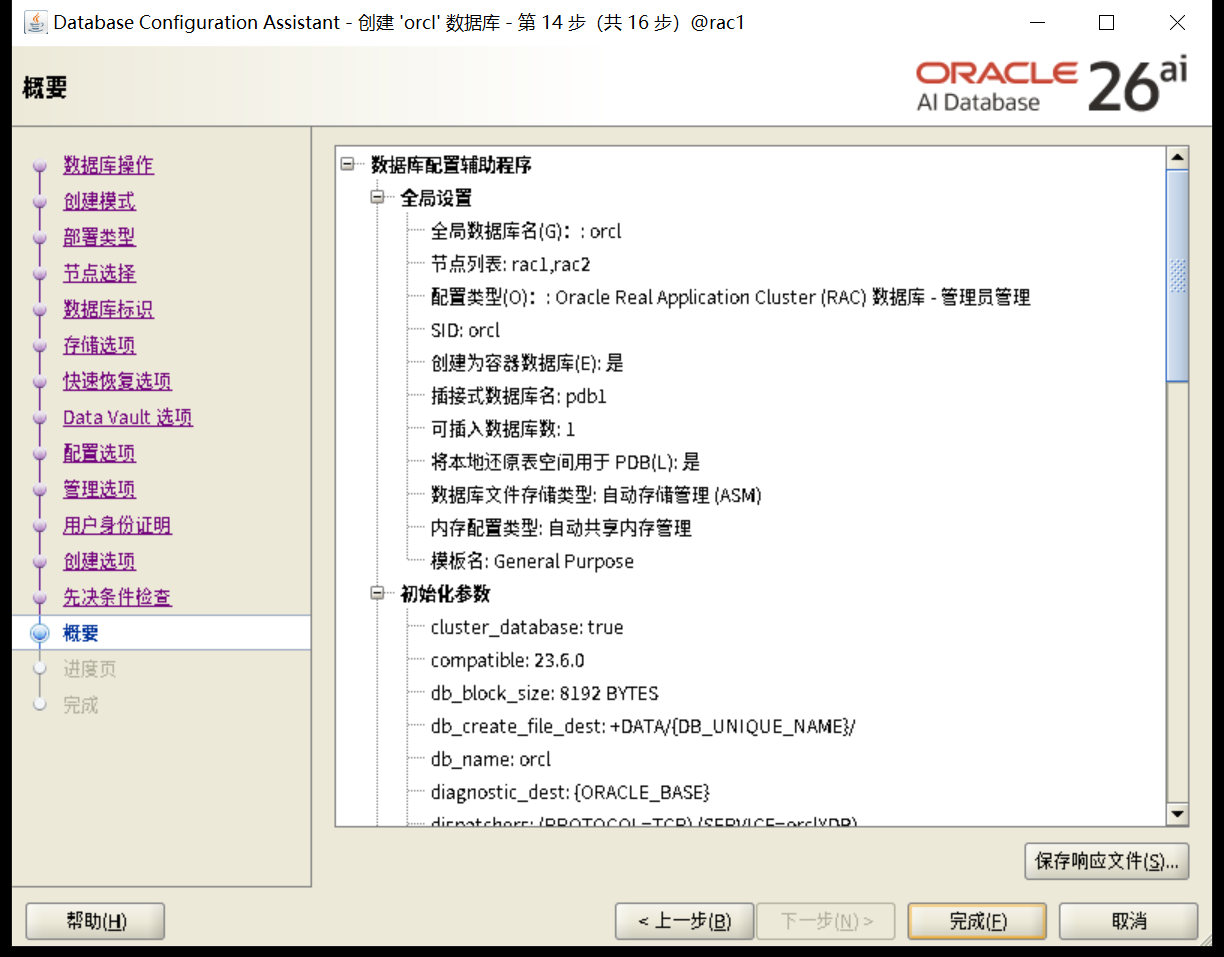
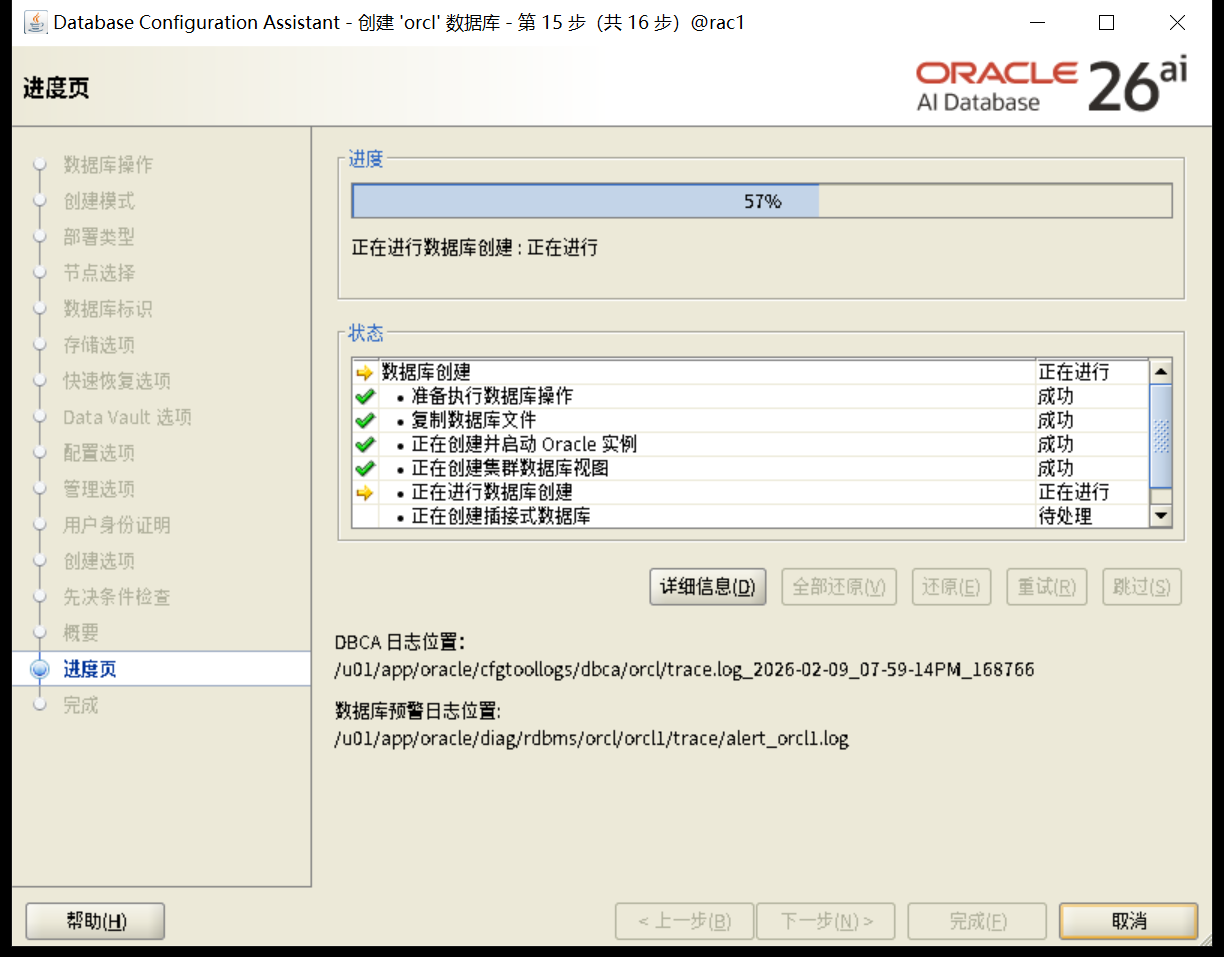
安装完成
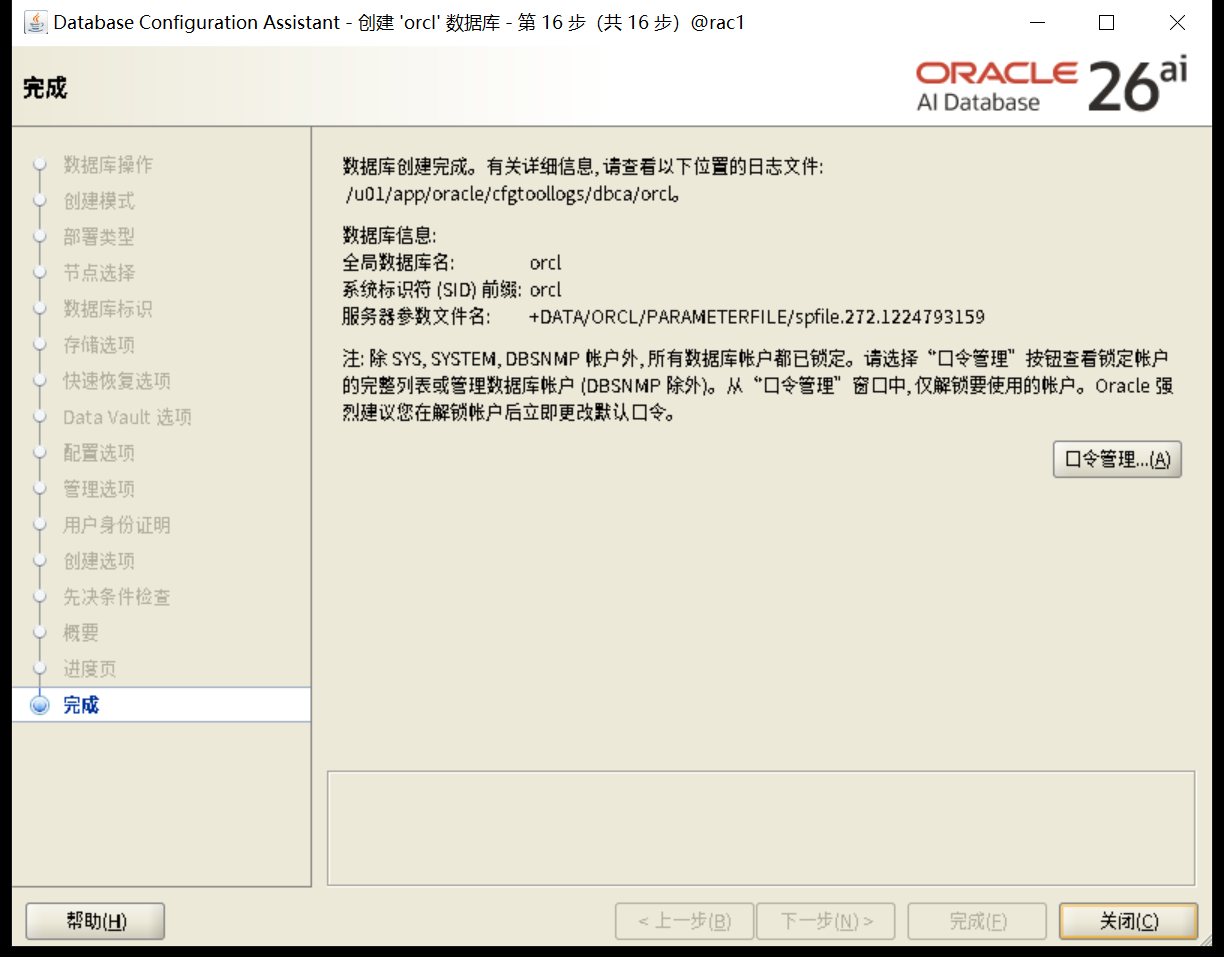
确认版本信息
set lines 200
col status for a10
col action for a10
col action_time for a30
col description for a60
select patch_id,patch_type,action,status,action_time,description from dba_registry_sqlpatch;


[oracle@rac1:/home/oracle]$ sqlplus / as sysdba

SQL*Plus: Release 23.26.1.0.0 - Production on Mon Feb 9 20:23:23 2026
Version 23.26.1.0.0

Copyright (c) 1982, 2025, Oracle.  All rights reserved.


Connected to:
Oracle AI Database 26ai Enterprise Edition Release 23.26.1.0.0 - Production
Version 23.26.1.0.0

SQL> set lines 200
col status for a10
col action for a10
col action_time for a30
col description for a60
select patch_id,patch_type,action,status,action_time,description from dba_registry_sqlpatch;SQL> SQL> SQL> SQL> SQL>

  PATCH_ID PATCH_TYPE ACTION     STATUS     ACTION_TIME                    DESCRIPTION
---------- ---------- ---------- ---------- ------------------------------ ------------------------------------------------------------
  38743669 RU         APPLY      SUCCESS    09-FEB-26 08.18.07.139595 PM   Database Release Update : 23.26.1.0.0 (38743669) Gold Image

SQL>
8.3 连接测试
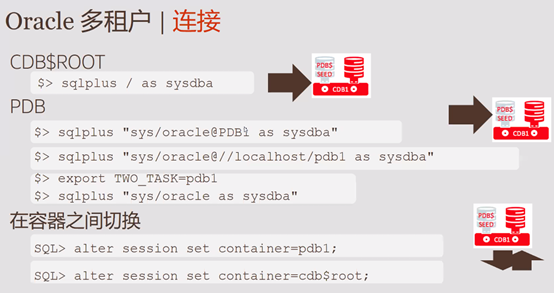
8.3.1 连接CDB
startup
show pdbs
set linesize 300
select
  'DB Name: ' ||Sys_Context('Userenv', 'DB_Name')||
  ' / CDB?: ' ||case
  when Sys_Context('Userenv', 'CDB_Name') is not null then 'YES'
  else 'NO'
  end||
  ' / Auth-ID: ' ||Sys_Context('Userenv', 'Authenticated_Identity')||
  ' / Sessn-User: '||Sys_Context('Userenv', 'Session_User')||
  ' / Container: ' ||Nvl(Sys_Context('Userenv', 'Con_Name'), 'n/a')
  "Who am I?"
  from Dual
/


[oracle@rac1:/home/oracle]$ sqlplus / as sysdba

SQL*Plus: Release 23.26.1.0.0 - Production on Mon Feb 9 20:27:07 2026
Version 23.26.1.0.0

Copyright (c) 1982, 2025, Oracle.  All rights reserved.

Connected to an idle instance.

SQL> startup
ORACLE instance started.

Total System Global Area 5030262392 bytes
Fixed Size                  5019256 bytes
Variable Size            1258291200 bytes
Database Buffers         3758096384 bytes
Redo Buffers                8855552 bytes
Database mounted.
Database opened.
SQL> show pdbs

    CON_ID CON_NAME                       OPEN MODE  RESTRICTED
---------- ------------------------------ ---------- ----------
         2 PDB$SEED                       READ ONLY  NO
         3 PDB1                           READ WRITE NO
SQL> set linesize 300
SQL> select
  'DB Name: ' ||Sys_Context('Userenv', 'DB_Name')||
  ' / CDB?: ' ||case
  when Sys_Context('Userenv', 'CDB_Name') is not null then 'YES'
  else 'NO'
  end||
  ' / Auth-ID: ' ||Sys_Context('Userenv', 'Authenticated_Identity')||
  ' / Sessn-User: '||Sys_Context('Userenv', 'Session_User')||
  ' / Container: ' ||Nvl(Sys_Context('Userenv', 'Con_Name'), 'n/a')
  "Who am I?"
  from Dual
/SQL>   2    3    4    5    6    7    8    9   10   11   12

Who am I?
------------------------------------------------------------------------------------------------------------------------------------------------------------------------------------------------------------------------------------------------------------------------------------------------------------
DB Name: orcl / CDB?: YES / Auth-ID: oracle / Sessn-User: SYS / Container: CDB$ROOT

SQL>
8.3.2 连接pdb
ORACLE_PDB_SID方式
export ORACLE_PDB_SID=pdb1

[oracle@rac1:/home/oracle]$ export ORACLE_PDB_SID=pdb1
[oracle@rac1:/home/oracle]$ sqlplus / as sysdba

SQL*Plus: Release 23.26.1.0.0 - Production on Mon Feb 9 20:30:59 2026
Version 23.26.1.0.0

Copyright (c) 1982, 2025, Oracle.  All rights reserved.


Connected to:
Oracle AI Database 26ai Enterprise Edition Release 23.26.1.0.0 - Production
Version 23.26.1.0.0

SQL> show pdbs

    CON_ID CON_NAME                       OPEN MODE  RESTRICTED
---------- ------------------------------ ---------- ----------
         3 PDB1                           READ WRITE NO
SQL>
SET CONTAINER方式
ALTER SESSION SET CONTAINER = PDB1;

[oracle@rac1:/home/oracle]$ sqlplus / as sysdba

SQL*Plus: Release 23.26.1.0.0 - Production on Mon Feb 9 20:39:06 2026
Version 23.26.1.0.0

Copyright (c) 1982, 2025, Oracle.  All rights reserved.


Connected to:
Oracle AI Database 26ai Enterprise Edition Release 23.26.1.0.0 - Production
Version 23.26.1.0.0

SQL> show pdbs

    CON_ID CON_NAME                       OPEN MODE  RESTRICTED
---------- ------------------------------ ---------- ----------
         2 PDB$SEED                       READ ONLY  NO
         3 PDB1                           READ WRITE NO
SQL> ALTER SESSION SET CONTAINER = PDB1;

Session altered.

SQL> show pdbs

    CON_ID CON_NAME                       OPEN MODE  RESTRICTED
---------- ------------------------------ ---------- ----------
         3 PDB1                           READ WRITE NO
SQL> exit
Disconnected from Oracle AI Database 26ai Enterprise Edition Release 23.26.1.0.0 - Production
Version 23.26.1.0.0
[oracle@rac1:/home/oracle]$ sqlplus "sys/oracle@//192.168.18.9/pdb1 as sysdba"

SQL*Plus: Release 23.26.1.0.0 - Production on Mon Feb 9 20:44:04 2026
Version 23.26.1.0.0

Copyright (c) 1982, 2025, Oracle.  All rights reserved.


Connected to:
Oracle AI Database 26ai Enterprise Edition Release 23.26.1.0.0 - Production
Version 23.26.1.0.0

SQL> show pdbs

    CON_ID CON_NAME                       OPEN MODE  RESTRICTED
---------- ------------------------------ ---------- ----------
         3 PDB1                           READ WRITE NO
SQL>
service方式+tnsnames.ora
[oracle@rac1:/home/oracle]$ lsnrctl status

LSNRCTL for Linux: Version 23.26.1.0.0 - Production on 09-FEB-2026 20:40:30

Copyright (c) 1991, 2026, Oracle.  All rights reserved.

Connecting to (ADDRESS=(PROTOCOL=tcp)(HOST=)(PORT=1521))
STATUS of the LISTENER
------------------------
Alias                     LISTENER
Version                   TNSLSNR for Linux: Version 23.26.1.0.0 - Production
Start Date                09-FEB-2026 17:15:20
Uptime                    0 days 3 hr. 25 min. 10 sec
Trace Level               off
Security                  ON: Local OS Authentication
SNMP                      OFF
Listener Parameter File   /u01/app/23.0.0/grid/network/admin/listener.ora
Listener Log File         /u01/app/grid/diag/tnslsnr/rac1/listener/alert/log.xml
Listening Endpoints Summary...
  (DESCRIPTION=(ADDRESS=(PROTOCOL=ipc)(KEY=LISTENER)))
  (DESCRIPTION=(ADDRESS=(PROTOCOL=tcp)(HOST=192.168.18.5)(PORT=1521)))
  (DESCRIPTION=(ADDRESS=(PROTOCOL=tcp)(HOST=192.168.18.7)(PORT=1521)))
Services Summary...
Service "+ASM" has 1 instance(s).
  Instance "+ASM1", status READY, has 1 handler(s) for this service...
Service "+ASM_DATA" has 1 instance(s).
  Instance "+ASM1", status READY, has 1 handler(s) for this service...
Service "+ASM_OCRVOTE" has 1 instance(s).
  Instance "+ASM1", status READY, has 1 handler(s) for this service...
Service "48945b67d121c623e063399b5e6478e6" has 1 instance(s).
  Instance "orcl1", status READY, has 1 handler(s) for this service...
Service "4a642eb750c86927e0630612a8c0345a" has 1 instance(s).
  Instance "orcl1", status READY, has 1 handler(s) for this service...
Service "orcl" has 1 instance(s).
  Instance "orcl1", status READY, has 1 handler(s) for this service...
Service "orclXDB" has 1 instance(s).
  Instance "orcl1", status READY, has 1 handler(s) for this service...
Service "orcl_pdb1" has 1 instance(s).
  Instance "orcl1", status READY, has 1 handler(s) for this service...
Service "pdb1" has 1 instance(s).
  Instance "orcl1", status READY, has 1 handler(s) for this service...
The command completed successfully
[oracle@rac1:/home/oracle]$ cd $ORACLE_HOME/network/admin
[oracle@rac1:/u01/app/oracle/product/23.0.0/dbhome_1/network/admin]$ vi tnsnames.ora
[oracle@rac1:/u01/app/oracle/product/23.0.0/dbhome_1/network/admin]$ cat tnsnames.ora
# tnsnames.ora Network Configuration File: /u01/app/oracle/product/23.0.0/dbhome_1/network/admin/tnsnames.ora
# Generated by Oracle configuration tools.


ORCL =
  (DESCRIPTION =
    (ADDRESS = (PROTOCOL = TCP)(HOST = rac-scan)(PORT = 1521))
    (CONNECT_DATA =
      (SERVER = DEDICATED)
      (SERVICE_NAME = orcl)
    )
  )

PDB1 =
  (DESCRIPTION =
    (ADDRESS = (PROTOCOL = TCP)(HOST = rac-scan)(PORT = 1521))
    (CONNECT_DATA =
      (SERVER = DEDICATED)
      (SERVICE_NAME = pdb1)
    )
  )


[oracle@rac1:/u01/app/oracle/product/23.0.0/dbhome_1/network/admin]$ sqlplus sys/oracle@PDB1 as sysdba

SQL*Plus: Release 23.26.1.0.0 - Production on Mon Feb 9 20:41:26 2026
Version 23.26.1.0.0

Copyright (c) 1982, 2025, Oracle.  All rights reserved.


Connected to:
Oracle AI Database 26ai Enterprise Edition Release 23.26.1.0.0 - Production
Version 23.26.1.0.0

SQL> show con_name

CON_NAME
------------------------------
PDB1
SQL> show pdbs

    CON_ID CON_NAME                       OPEN MODE  RESTRICTED
---------- ------------------------------ ---------- ----------
         3 PDB1                           READ WRITE NO
SQL>
tow_task
export TWO_TASK=PDB
tow_task连接方式
普通用户。
sys加上密码
sys不加密码方式
[oracle@rac1:/home/oracle]$ export TWO_TASK=pdb1
[oracle@rac1:/home/oracle]$ sqlplus "sys/oracle as sysdba"

SQL*Plus: Release 23.26.1.0.0 - Production on Mon Feb 9 20:33:42 2026
Version 23.26.1.0.0

Copyright (c) 1982, 2025, Oracle.  All rights reserved.


Connected to:
Oracle AI Database 26ai Enterprise Edition Release 23.26.1.0.0 - Production
Version 23.26.1.0.0

SQL> show pdbs

    CON_ID CON_NAME                       OPEN MODE  RESTRICTED
---------- ------------------------------ ---------- ----------
         3 PDB1                           READ WRITE NO
SQL> exit
Disconnected from Oracle AI Database 26ai Enterprise Edition Release 23.26.1.0.0 - Production
Version 23.26.1.0.0
[oracle@rac1:/home/oracle]$ sqlplus / as sysdba

SQL*Plus: Release 23.26.1.0.0 - Production on Mon Feb 9 20:34:43 2026
Version 23.26.1.0.0

Copyright (c) 1982, 2025, Oracle.  All rights reserved.

ERROR:
ORA-01017: 身份证明无效或未授权;登录被拒绝 Help:
https://docs.oracle.com/error-help/db/ora-01017/


Enter user-name:
ERROR:
ORA-01017: invalid credential or not authorized; logon denied
Help: https://docs.oracle.com/error-help/db/ora-01017/


Enter user-name:
ERROR:
ORA-01017: invalid credential or not authorized; logon denied
Help: https://docs.oracle.com/error-help/db/ora-01017/


SP2-0157: unable to CONNECT to ORACLE after 3 attempts, exiting SQL*Plus
Help: https://docs.oracle.com/error-help/db/sp2-0157/
[oracle@rac1:/home/oracle]$ sqlplus system/oracle

SQL*Plus: Release 23.26.1.0.0 - Production on Mon Feb 9 20:35:05 2026
Version 23.26.1.0.0

Copyright (c) 1982, 2025, Oracle.  All rights reserved.

Last Successful login time: Mon Feb 09 2026 20:18:35 +08:00

Connected to:
Oracle AI Database 26ai Enterprise Edition Release 23.26.1.0.0 - Production
Version 23.26.1.0.0

SQL> show con_name

CON_NAME
------------------------------
PDB1
SQL> exit
Disconnected from Oracle AI Database 26ai Enterprise Edition Release 23.26.1.0.0 - Production
Version 23.26.1.0.0
[oracle@rac1:/home/oracle]$

PS:使用no-sys和sys密码的方式是可以登录的,但是 sqlplus / as sysdba是不允许的
8.3.3 datafile
set lines 200
col CON_ID for 99999999
col CON_NAME for a20
col TABLESPACE_NAME for a20
col FILE_NAME for a80
WITH CONTAINERS AS (
SELECT PDB_ID CON_ID, PDB_NAME CON_NAME FROM DBA_PDBS
UNION
SELECT 1 CON_ID, 'CDB$ROOT' CON_NAME FROM DUAL)
SELECT CON_ID,CON_NAME,TABLESPACE_NAME,FILE_NAME
 FROM CDB_DATA_FILES INNER JOIN CONTAINERS USING (CON_ID)
UNION
SELECT CON_ID,CON_NAME,TABLESPACE_NAME,FILE_NAME
 FROM CDB_TEMP_FILES INNER JOIN CONTAINERS USING (CON_ID)
ORDER BY 1, 3;

[oracle@rac1:/home/oracle]$ sqlplus / as sysdba

SQL*Plus: Release 23.26.1.0.0 - Production on Mon Feb 9 20:45:56 2026
Version 23.26.1.0.0

Copyright (c) 1982, 2025, Oracle.  All rights reserved.


Connected to:
Oracle AI Database 26ai Enterprise Edition Release 23.26.1.0.0 - Production
Version 23.26.1.0.0

SQL> set lines 200
col CON_ID for 99999999
col CON_NAME for a20
col TABLESPACE_NAME for a20
SQL> SQL> SQL> SQL> col FILE_NAME for a80
WITH CONTAINERS AS (
SELECT PDB_ID CON_ID, PDB_NAME CON_NAME FROM DBA_PDBS
UNION
SQL>   2    3    4  SELECT 1 CON_ID, 'CDB$ROOT' CON_NAME FROM DUAL)
SELECT CON_ID,CON_NAME,TABLESPACE_NAME,FILE_NAME
  5    6   FROM CDB_DATA_FILES INNER JOIN CONTAINERS USING (CON_ID)
UNION
SELECT CON_ID,CON_NAME,TABLESPACE_NAME,FILE_NAME
 FROM CDB_TEMP_FILES INNER JOIN CONTAINERS USING (CON_ID)
  7    8    9   10  ORDER BY 1, 3;

   CON_ID CON_NAME             TABLESPACE_NAME      FILE_NAME
--------- -------------------- -------------------- --------------------------------------------------------------------------------
        1 CDB$ROOT             SYSAUX               +DATA/ORCL/DATAFILE/sysaux.260.1224793043
        1 CDB$ROOT             SYSTEM               +DATA/ORCL/DATAFILE/system.258.1224793011
        1 CDB$ROOT             TEMP                 +DATA/ORCL/TEMPFILE/temp.267.1224793071
        1 CDB$ROOT             UNDOTBS1             +DATA/ORCL/DATAFILE/undotbs1.257.1224793011
        1 CDB$ROOT             UNDOTBS2             +DATA/ORCL/DATAFILE/undotbs2.269.1224793131
        1 CDB$ROOT             USERS                +DATA/ORCL/DATAFILE/users.262.1224793057
        3 PDB1                 SYSAUX               +DATA/ORCL/4A642EB750C86927E0630612A8C0345A/DATAFILE/sysaux.275.1224793307
        3 PDB1                 SYSTEM               +DATA/ORCL/4A642EB750C86927E0630612A8C0345A/DATAFILE/system.274.1224793307
        3 PDB1                 TEMP                 +DATA/ORCL/4A642EB750C86927E0630612A8C0345A/TEMPFILE/temp.276.1224793327
        3 PDB1                 UNDOTBS1             +DATA/ORCL/4A642EB750C86927E0630612A8C0345A/DATAFILE/undotbs1.273.1224793307
        3 PDB1                 UNDO_5               +DATA/ORCL/4A642EB750C86927E0630612A8C0345A/DATAFILE/undo_5.277.1224793323

   CON_ID CON_NAME             TABLESPACE_NAME      FILE_NAME
--------- -------------------- -------------------- --------------------------------------------------------------------------------
        3 PDB1                 USERS                +DATA/ORCL/4A642EB750C86927E0630612A8C0345A/DATAFILE/users.278.1224793335

12 rows selected.

SQL>
九、RAC日常管理命令
9.1 集群资源状态
crsctl stat res -t

[grid@rac1:/home/grid]$ crsctl stat res -t
--------------------------------------------------------------------------------
Name           Target  State        Server                   State details
--------------------------------------------------------------------------------
Local Resources
--------------------------------------------------------------------------------
ora.LISTENER.lsnr
               ONLINE  ONLINE       rac1                     STABLE
               ONLINE  ONLINE       rac2                     STABLE
ora.chad
               ONLINE  ONLINE       rac1                     STABLE
               ONLINE  ONLINE       rac2                     STABLE
ora.cvuadmin
               OFFLINE OFFLINE      rac1                     STABLE
               OFFLINE OFFLINE      rac2                     STABLE
ora.helper
               OFFLINE OFFLINE      rac1                     STABLE
               OFFLINE OFFLINE      rac2                     IDLE,STABLE
ora.net1.network
               ONLINE  ONLINE       rac1                     STABLE
               ONLINE  ONLINE       rac2                     STABLE
ora.ons
               ONLINE  ONLINE       rac1                     STABLE
               ONLINE  ONLINE       rac2                     STABLE
--------------------------------------------------------------------------------
Cluster Resources
--------------------------------------------------------------------------------
ora.ASMNET1LSNR_ASM.lsnr(ora.asmgroup)
      1        ONLINE  ONLINE       rac1                     STABLE
      2        ONLINE  ONLINE       rac2                     STABLE
ora.DATA.dg(ora.asmgroup)
      1        ONLINE  ONLINE       rac1                     STABLE
      2        ONLINE  ONLINE       rac2                     STABLE
ora.LISTENER_SCAN1.lsnr
      1        ONLINE  ONLINE       rac1                     STABLE
ora.OCRVOTE.dg(ora.asmgroup)
      1        ONLINE  ONLINE       rac1                     STABLE
      2        ONLINE  ONLINE       rac2                     STABLE
ora.asm(ora.asmgroup)
      1        ONLINE  ONLINE       rac1                     Started,STABLE
      2        ONLINE  ONLINE       rac2                     Started,STABLE
ora.asmnet1.asmnetwork(ora.asmgroup)
      1        ONLINE  ONLINE       rac1                     STABLE
      2        ONLINE  ONLINE       rac2                     STABLE
ora.cdp1.cdp
      1        OFFLINE OFFLINE                               STABLE
ora.cvu
      1        ONLINE  ONLINE       rac1                     STABLE
ora.cvuhelper
      1        OFFLINE OFFLINE                               STABLE
ora.orcl.db
      1        ONLINE  ONLINE       rac1                     Open,HOME=/u01/app/o
                                                             racle/product/23.0.0
                                                             /dbhome_1,STABLE
      2        ONLINE  ONLINE       rac2                     Open,HOME=/u01/app/o
                                                             racle/product/23.0.0
                                                             /dbhome_1,STABLE
ora.orcl.orcl_pdb1.svc
      1        ONLINE  ONLINE       rac1                     STABLE
      2        ONLINE  ONLINE       rac2                     STABLE
ora.orcl.pdb1.pdb
      1        ONLINE  ONLINE       rac1                     READ WRITE,STABLE
      2        ONLINE  ONLINE       rac2                     READ WRITE,STABLE
ora.rac1.vip
      1        ONLINE  ONLINE       rac1                     STABLE
ora.rac2.vip
      1        ONLINE  ONLINE       rac2                     STABLE
ora.rhpserver
      1        OFFLINE OFFLINE                               STABLE
ora.scan1.vip
      1        ONLINE  ONLINE       rac1                     STABLE
--------------------------------------------------------------------------------
[grid@rac1:/home/grid]$
9.2 集群服务状态
crsctl check cluster -all
crsctl check crs

[grid@rac1:/home/grid]$ crsctl check cluster -all
**************************************************************
rac1:
CRS-4537: Cluster Ready Services is online
CRS-4529: Cluster Synchronization Services is online
CRS-4533: Event Manager is online
**************************************************************
rac2:
CRS-4537: Cluster Ready Services is online
CRS-4529: Cluster Synchronization Services is online
CRS-4533: Event Manager is online
**************************************************************
[grid@rac1:/home/grid]$ crsctl check crs
CRS-4638: Oracle High Availability Services is online
CRS-4537: Cluster Ready Services is online
CRS-4529: Cluster Synchronization Services is online
CRS-4533: Event Manager is online
[grid@rac1:/home/grid]$
9.3 数据库状态
srvctl status database -d orcl

[grid@rac1:/home/grid]$ srvctl status database -d orcl
实例 orcl1 正在节点 rac1 上运行
实例 orcl2 正在节点 rac2 上运行
[grid@rac1:/home/grid]$
9.4 监听状态
lsnrctl status

[grid@rac1:/home/grid]$ lsnrctl status

LSNRCTL for Linux: Version 23.26.1.0.0 - Production on 09-FEB-2026 20:49:16

Copyright (c) 1991, 2026, Oracle.  All rights reserved.

Connecting to (DESCRIPTION=(ADDRESS=(PROTOCOL=IPC)(KEY=LISTENER)))
STATUS of the LISTENER
------------------------
Alias                     LISTENER
Version                   TNSLSNR for Linux: Version 23.26.1.0.0 - Production
Start Date                09-FEB-2026 17:15:20
Uptime                    0 days 3 hr. 33 min. 55 sec
Trace Level               off
Security                  ON: Local OS Authentication
SNMP                      OFF
Listener Parameter File   /u01/app/23.0.0/grid/network/admin/listener.ora
Listener Log File         /u01/app/grid/diag/tnslsnr/rac1/listener/alert/log.xml
Listening Endpoints Summary...
  (DESCRIPTION=(ADDRESS=(PROTOCOL=ipc)(KEY=LISTENER)))
  (DESCRIPTION=(ADDRESS=(PROTOCOL=tcp)(HOST=192.168.18.5)(PORT=1521)))
  (DESCRIPTION=(ADDRESS=(PROTOCOL=tcp)(HOST=192.168.18.7)(PORT=1521)))
Services Summary...
Service "+ASM" has 1 instance(s).
  Instance "+ASM1", status READY, has 1 handler(s) for this service...
Service "+ASM_DATA" has 1 instance(s).
  Instance "+ASM1", status READY, has 1 handler(s) for this service...
Service "+ASM_OCRVOTE" has 1 instance(s).
  Instance "+ASM1", status READY, has 1 handler(s) for this service...
Service "48945b67d121c623e063399b5e6478e6" has 1 instance(s).
  Instance "orcl1", status READY, has 1 handler(s) for this service...
Service "4a642eb750c86927e0630612a8c0345a" has 1 instance(s).
  Instance "orcl1", status READY, has 1 handler(s) for this service...
Service "orcl" has 1 instance(s).
  Instance "orcl1", status READY, has 1 handler(s) for this service...
Service "orclXDB" has 1 instance(s).
  Instance "orcl1", status READY, has 1 handler(s) for this service...
Service "orcl_pdb1" has 1 instance(s).
  Instance "orcl1", status READY, has 1 handler(s) for this service...
Service "pdb1" has 1 instance(s).
  Instance "orcl1", status READY, has 1 handler(s) for this service...
The command completed successfully
[grid@rac1:/home/grid]$
9.5 scan状态
srvctl status scan
srvctl status scan_listener
lsnrctl status LISTENER_SCAN1

[grid@rac1:/home/grid]$ srvctl status scan
SCAN VIP scan1 已启用
SCAN VIP scan1 正在节点 rac1 上运行
[grid@rac1:/home/grid]$ srvctl status scan_listener
SCAN 监听程序 LISTENER_SCAN1 已启用
SCAN 监听程序 LISTENER_SCAN1 正在节点 rac1 上运行
[grid@rac1:/home/grid]$ lsnrctl status LISTENER_SCAN1

LSNRCTL for Linux: Version 23.26.1.0.0 - Production on 09-FEB-2026 20:49:52

Copyright (c) 1991, 2026, Oracle.  All rights reserved.

Connecting to (DESCRIPTION=(ADDRESS=(PROTOCOL=IPC)(KEY=LISTENER_SCAN1)))
STATUS of the LISTENER
------------------------
Alias                     LISTENER_SCAN1
Version                   TNSLSNR for Linux: Version 23.26.1.0.0 - Production
Start Date                09-FEB-2026 17:15:13
Uptime                    0 days 3 hr. 34 min. 38 sec
Trace Level               off
Security                  ON: Local OS Authentication
SNMP                      OFF
Listener Parameter File   /u01/app/23.0.0/grid/network/admin/listener.ora
Listener Log File         /u01/app/grid/diag/tnslsnr/rac1/listener_scan1/alert/log.xml
Listening Endpoints Summary...
  (DESCRIPTION=(ADDRESS=(PROTOCOL=ipc)(KEY=LISTENER_SCAN1)))
  (DESCRIPTION=(ADDRESS=(PROTOCOL=tcp)(HOST=192.168.18.9)(PORT=1521)))
Services Summary...
Service "48945b67d121c623e063399b5e6478e6" has 2 instance(s).
  Instance "orcl1", status READY, has 1 handler(s) for this service...
  Instance "orcl2", status READY, has 1 handler(s) for this service...
Service "4a642eb750c86927e0630612a8c0345a" has 2 instance(s).
  Instance "orcl1", status READY, has 1 handler(s) for this service...
  Instance "orcl2", status READY, has 1 handler(s) for this service...
Service "orcl" has 2 instance(s).
  Instance "orcl1", status READY, has 1 handler(s) for this service...
  Instance "orcl2", status READY, has 1 handler(s) for this service...
Service "orclXDB" has 2 instance(s).
  Instance "orcl1", status READY, has 1 handler(s) for this service...
  Instance "orcl2", status READY, has 1 handler(s) for this service...
Service "orcl_pdb1" has 2 instance(s).
  Instance "orcl1", status READY, has 1 handler(s) for this service...
  Instance "orcl2", status READY, has 1 handler(s) for this service...
Service "pdb1" has 2 instance(s).
  Instance "orcl1", status READY, has 1 handler(s) for this service...
  Instance "orcl2", status READY, has 1 handler(s) for this service...
The command completed successfully
[grid@rac1:/home/grid]$
9.6 nodeapps状态
srvctl status nodeapps

[grid@rac1:/home/grid]$ srvctl status nodeapps
VIP 192.168.18.7 已启用
VIP 192.168.18.7 正在节点上运行: rac1
VIP 192.168.18.8 已启用
VIP 192.168.18.8 正在节点上运行: rac2
网络已启用
网络正在节点上运行: rac1
网络正在节点上运行: rac2
adminhelper 已启用
adminhelper 未在节点上运行: rac1
adminhelper 未在节点上运行: rac2
ONS 已启用
ONS 守护程序正在节点上运行:rac1
ONS 守护程序正在节点上运行:rac2
[grid@rac1:/home/grid]$
9.7 VIP状态
srvctl status vip -node rac1
srvctl status vip -node rac2

[grid@rac1:/home/grid]$ srvctl status vip -node rac1
VIP 192.168.18.7 已启用
VIP 192.168.18.7 正在节点上运行: rac1
[grid@rac1:/home/grid]$ srvctl status vip -node rac2
VIP 192.168.18.8 已启用
VIP 192.168.18.8 正在节点上运行: rac2
[grid@rac1:/home/grid]$
9.8 数据库配置
srvctl config database -d orcl
crsctl status res ora.orcl.db -p |grep -i auto

[grid@rac1:/home/grid]$ srvctl config database -d orcl
数据库唯一名称: orcl
数据库名: orcl
Oracle 主目录: /u01/app/oracle/product/23.0.0/dbhome_1
Oracle 用户: oracle
Spfile: +DATA/ORCL/PARAMETERFILE/spfile.272.1224793159
口令文件: +DATA/ORCL/PASSWORD/pwdorcl.256.1224793001
域:
启动选项: open
停止选项: immediate
数据库角色: PRIMARY
管理策略: AUTOMATIC
服务器池:
磁盘组: DATA
装载点路径:
服务: orcl_pdb1
类型: RAC
启动并行:
停止并行:
OSDBA 组: dba
OSOPER 组: oper
数据库实例: orcl1,orcl2
已配置的节点: rac1,rac2
CSS 关键型: no
CPU 计数: 0
内存目标: 0
最大内存: 0
数据库服务的默认网络编号:
数据库是管理员管理的
[grid@rac1:/home/grid]$

[grid@rac1:/home/grid]$ crsctl status res ora.orcl.db -p |grep -i auto
AUTO_START=restore
MANAGEMENT_POLICY=AUTOMATIC
START_DEPENDENCIES_RTE_INTERNAL=<xml><Cond name="isEDV">False</Cond><Cond name="ASMClientMode">False</Cond><Cond name="ASMmode">remote</Cond><Arg name="dg" type="ResList">ora.DATA.dg</Arg><Arg name="acfs_or_nfs" type="ResList"></Arg><Cond name="OHResExist">False</Cond><Cond name="DATABASE_TYPE">RAC</Cond><Cond name="MANAGEMENT_POLICY">AUTOMATIC</Cond><Arg name="acfs_and_nfs" type="ResList"></Arg></xml>
[grid@rac1:/home/grid]$

AUTO_START=restore是设置数据库是否启动的,restore就是保持上次状态。
9.9 OCR
ocrcheck

[grid@rac1:/home/grid]$ ocrcheck
Status of Oracle Cluster Registry is as follows :
         Version                  :          4
         Total space (kbytes)     :     901284
         Used space (kbytes)      :      84916
         Available space (kbytes) :     816368
         ID                       :  820960958
         Device/File Name         :   +OCRVOTE
                                    Device/File integrity check succeeded

                                    Device/File not configured

                                    Device/File not configured

                                    Device/File not configured

                                    Device/File not configured

         Cluster registry integrity check succeeded

         Logical corruption check bypassed due to non-privileged user

[grid@rac1:/home/grid]$
9.10 VOTEDISK
crsctl query css votedisk

[grid@rac1:/home/grid]$ crsctl query css votedisk
##  STATE    File Universal Id                File Name Disk group
--  -----    -----------------                --------- ---------
 1. ONLINE   7ecae8014ddb4f2fbf737811e66686a1 (/dev/oracleasm/disks/OCRVOTE01) [OCRVOTE]
 2. ONLINE   b1bb79c499b04f7cbf69083bb5a9af99 (/dev/oracleasm/disks/OCRVOTE03) [OCRVOTE]
 3. ONLINE   810f931fe52a4f63bf0d474beeca2518 (/dev/oracleasm/disks/OCRVOTE02) [OCRVOTE]
Located 3 voting disk(s).
[grid@rac1:/home/grid]$
9.11 GI版本
crsctl query crs releaseversion
crsctl query crs activeversion

[grid@rac1:/home/grid]$ crsctl query crs releaseversion
Oracle High Availability Services release version on the local node is [23.0.0.0.0]
[grid@rac1:/home/grid]$ crsctl query crs activeversion
Oracle Clusterware active version on the cluster is [23.0.0.0.0]
[grid@rac1:/home/grid]$
9.12 ASM
asmcmd
lsdg
lsof
lsdsk

[grid@rac1:/home/grid]$ asmcmd
ASMCMD> lsdg
State    Type    Rebal  Sector  Logical_Sector  Block       AU  Total_MB  Free_MB  Req_mir_free_MB  Usable_file_MB  Offline_disks  Voting_files  Name
MOUNTED  EXTERN  N         512             512   4096  4194304     40960    36020                0           36020              0             N  DATA/
MOUNTED  NORMAL  N         512             512   4096  4194304     15360    14348             5120            4614              0             Y  OCRVOTE/
ASMCMD> lsof
DB_Name  Instance_Name  Path
+ASM     +ASM1          +OCRVOTE.255.1224782017
orcl     orcl1          +DATA/ORCL/48945B67D122C623E063399B5E6478E6/DATAFILE/sysaux.261.1224793051
orcl     orcl1          +DATA/ORCL/48945B67D122C623E063399B5E6478E6/DATAFILE/system.259.1224793037
orcl     orcl1          +DATA/ORCL/48945B67D122C623E063399B5E6478E6/DATAFILE/undotbs1.263.1224793059
orcl     orcl1          +DATA/ORCL/48945B67D122C623E063399B5E6478E6/TEMPFILE/temp.268.1224793075
orcl     orcl1          +DATA/ORCL/4A642EB750C86927E0630612A8C0345A/DATAFILE/sysaux.275.1224793307
orcl     orcl1          +DATA/ORCL/4A642EB750C86927E0630612A8C0345A/DATAFILE/system.274.1224793307
orcl     orcl1          +DATA/ORCL/4A642EB750C86927E0630612A8C0345A/DATAFILE/undo_5.277.1224793323
orcl     orcl1          +DATA/ORCL/4A642EB750C86927E0630612A8C0345A/DATAFILE/undotbs1.273.1224793307
orcl     orcl1          +DATA/ORCL/4A642EB750C86927E0630612A8C0345A/DATAFILE/users.278.1224793335
orcl     orcl1          +DATA/ORCL/4A642EB750C86927E0630612A8C0345A/TEMPFILE/temp.276.1224793327
orcl     orcl1          +DATA/ORCL/CONTROLFILE/current.264.1224793069
orcl     orcl1          +DATA/ORCL/DATAFILE/sysaux.260.1224793043
orcl     orcl1          +DATA/ORCL/DATAFILE/system.258.1224793011
orcl     orcl1          +DATA/ORCL/DATAFILE/undotbs1.257.1224793011
orcl     orcl1          +DATA/ORCL/DATAFILE/undotbs2.269.1224793131
orcl     orcl1          +DATA/ORCL/DATAFILE/users.262.1224793057
orcl     orcl1          +DATA/ORCL/ONLINELOG/group_1.265.1224793069
orcl     orcl1          +DATA/ORCL/ONLINELOG/group_2.266.1224793069
orcl     orcl1          +DATA/ORCL/ONLINELOG/group_3.270.1224793159
orcl     orcl1          +DATA/ORCL/ONLINELOG/group_4.271.1224793159
orcl     orcl1          +DATA/ORCL/TEMPFILE/temp.267.1224793071
ASMCMD> lsdsk
Path
/dev/oracleasm/disks/DATA01
/dev/oracleasm/disks/DATA02
/dev/oracleasm/disks/OCRVOTE01
/dev/oracleasm/disks/OCRVOTE02
/dev/oracleasm/disks/OCRVOTE03
ASMCMD>
9.13 启动和关闭RAC
启动和关闭RAC
-关闭\启动单个实例
$ srvctl stop\start instance -d orcl -i rac1

--关闭\启动所有实例
$ srvctl stop\start database -d orcl

--关闭\启动CRS
$ crsctl stop\start crs

--关闭\启动集群服务
$ crsctl stop\start cluster -all
crsctl start\stop crs 是单节管理
crsctl start\stop cluster [-all 所有节点] 可以管理多个节点
crsctl start\stop crs 管理crs 包含进程 OHASD
crsctl start\stop cluster 不包含OHASD进程 要先启动 OHASD进程才可以使用
srvctl stop\start database 启动\停止所有实例及其启用的服务
9.14 节点状态
节点示例状态
set lines 200
col inst_id for 999999
col instance_number for 999999
col instance_name for a20
col parallel for a10
col status for a20
col database_status for a20
col active_state for a20
col host_name for a20
SELECT inst_id,instance_number,instance_name,parallel,status,database_status,active_state,host_name FROM gv$instance order by 1;

[oracle@rac1:/home/oracle]$ sqlplus / as sysdba

SQL*Plus: Release 23.26.1.0.0 - Production on Mon Feb 9 20:57:05 2026
Version 23.26.1.0.0

Copyright (c) 1982, 2025, Oracle.  All rights reserved.


Connected to:
Oracle AI Database 26ai Enterprise Edition Release 23.26.1.0.0 - Production
Version 23.26.1.0.0

SQL> set lines 200
col inst_id for 999999
col instance_number for 999999
col instance_name for a20
col parallel for a10
col status for a20
SQL> SQL> SQL> SQL> SQL> SQL> col database_status for a20
col active_state for a20
col host_name for a20
SELECT inst_id,instance_number,instance_name,parallel,status,database_status,active_state,host_name FROM gv$instance order by 1;SQL> SQL> SQL>

INST_ID INSTANCE_NUMBER INSTANCE_NAME        PARALLEL   STATUS               DATABASE_STATUS      ACTIVE_STATE         HOST_NAME
------- --------------- -------------------- ---------- -------------------- -------------------- -------------------- --------------------
      1               1 orcl1                YES        OPEN                 ACTIVE               NORMAL               rac1
      2               2 orcl2                YES        OPEN                 ACTIVE               NORMAL               rac2

SQL>
9.15 切换scan
srvctl relocate scan_listener -i 1 -n rac2
9.16 切换VIP
srvctl config network
srvctl relocate vip -vip rac2-vip -node rac2
十、总结
本文按规划 → 虚拟机与网络 → 共享存储(ASM)→ OS 预检查与参数调优 → RAC 安装准备的顺序,给出在 VMware 上用 Oracle Linux 9.7 部署 Oracle 26ai RAC 的全流程实战指南。
