





01
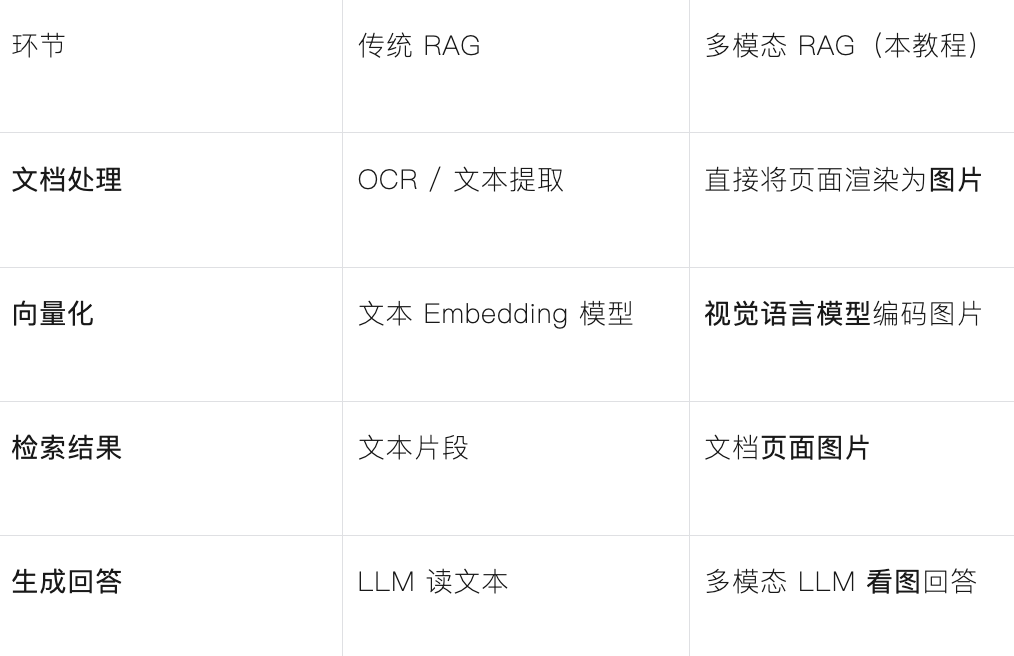
什么是多模态 RAG?
02
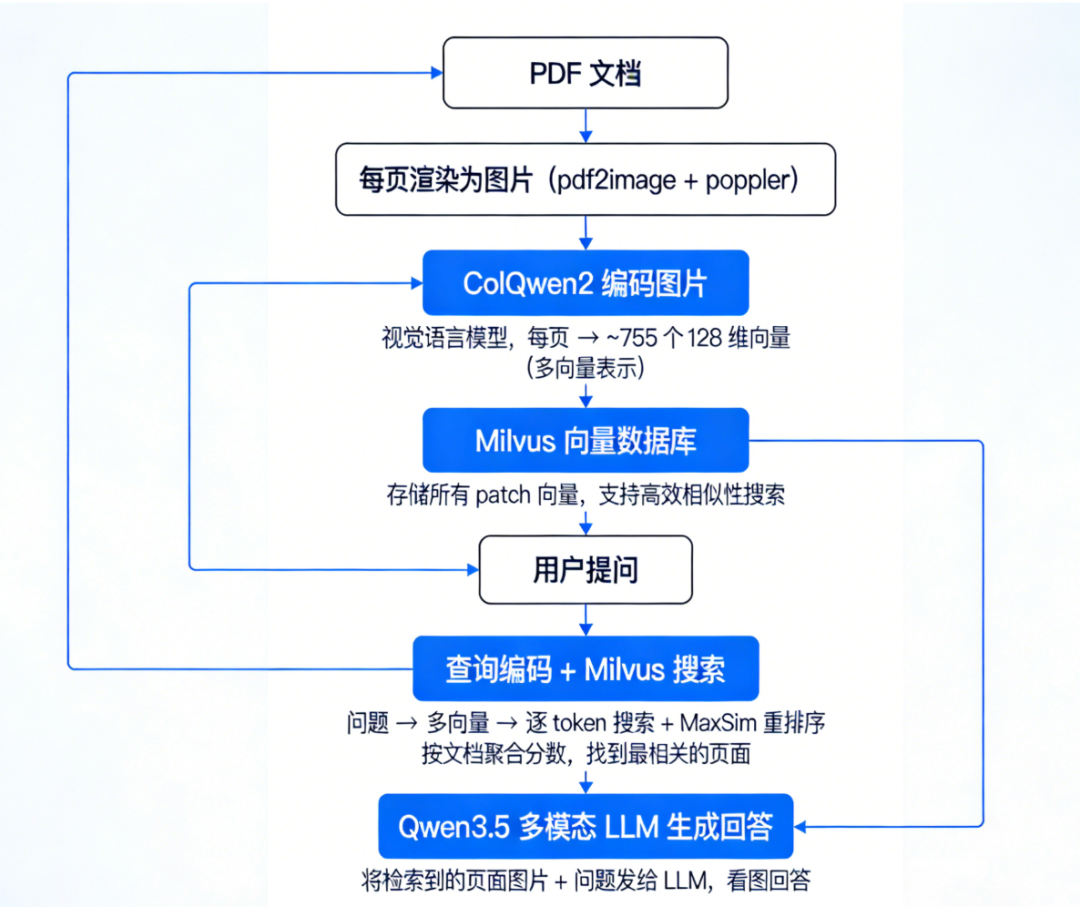
架构概览
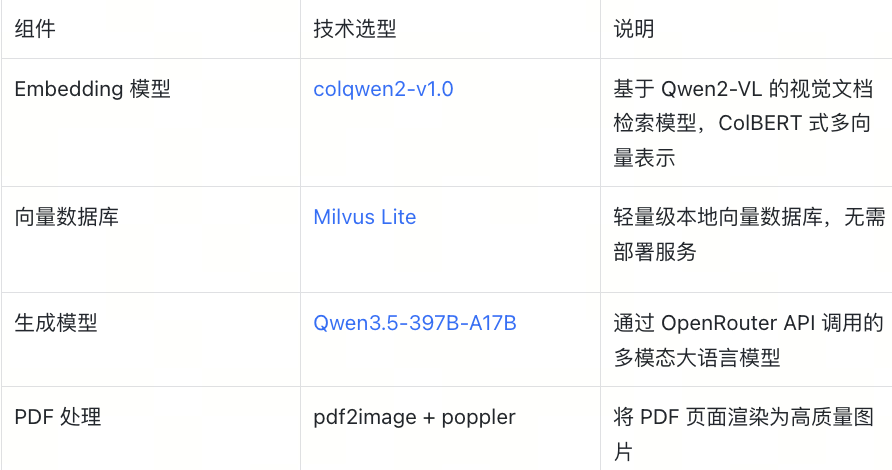
03 技术栈
04 实操
环境准备
pip install colpali-engine pymilvus openai pdf2image torch pillow tqdm
# macOSbrew install poppler# Ubuntu/Debiansudo apt-get install poppler-utils# Windows: 从 https://github.com/oschwartz10612/poppler-windows 下载
mkdir -p ~/models/colqwen2-v1.0-merged# 下载所有模型文件到该目录
分步实现
Step 1: 导入依赖和配置
import os, io, base64import torchimport numpy as npfrom PIL import Imagefrom tqdm import tqdmfrom pdf2image import convert_from_pathfrom openai import OpenAIfrom pymilvus import MilvusClient, DataTypefrom colpali_engine.models import ColQwen2, ColQwen2Processor
# 配置参数EMBED_MODEL = os.path.expanduser("~/models/colqwen2-v1.0-merged")EMBED_DIM = 128 # ColQwen2 输出向量维度MILVUS_URI = "./milvus_demo.db" # Milvus Lite 本地文件COLLECTION = "doc_patches"TOP_K = 3 # 检索返回的页数CANDIDATE_PATCHES = 300 # 每个 query token 的候选 patch 数# OpenRouter LLMOPENROUTER_API_KEY = os.environ.get("OPENROUTER_API_KEY","<your-api-key-here>",)GENERATION_MODEL = "qwen/qwen3.5-397b-a17b"# 设备选择DEVICE = "cuda" if torch.cuda.is_available() else "cpu"DTYPE = torch.bfloat16 if DEVICE == "cuda" else torch.float32print(f"Device: {DEVICE}")
Step 2: 加载 Embedding 模型
print(f"Loading embedding model: {EMBED_MODEL}")emb_model = ColQwen2.from_pretrained(EMBED_MODEL,torch_dtype=DTYPE,attn_implementation="flash_attention_2" if DEVICE == "cuda" else None,device_map=DEVICE,).eval()emb_processor = ColQwen2Processor.from_pretrained(EMBED_MODEL)print(f"Embedding model ready on {DEVICE}")

Step 3: 初始化 Milvus 向量数据库
milvus_client = MilvusClient(uri=MILVUS_URI)if milvus_client.has_collection(COLLECTION):milvus_client.drop_collection(COLLECTION)schema = milvus_client.create_schema(auto_id=True, enable_dynamic_field=True)schema.add_field("id", DataType.INT64, is_primary=True)schema.add_field("doc_id", DataType.INT64)schema.add_field("patch_idx", DataType.INT64)schema.add_field("vector", DataType.FLOAT_VECTOR, dim=EMBED_DIM)index = milvus_client.prepare_index_params()index.add_index(field_name="vector", index_type="FLAT", metric_type="IP")milvus_client.create_collection(COLLECTION, schema=schema, index_params=index)print("Milvus collection created.")
Step 4: PDF 转图片
PDF_PATH = "Milvus vs Zilliz.pdf" #替换成自己的PDF文档images = [p.convert("RGB") for p in convert_from_path(PDF_PATH, dpi=150)]print(f"{len(images)} pages loaded.")# 预览第一页images[0].resize((400, int(400 * images[0].height / images[0].width)))

Step 5: 编码图片并写入 Milvus
# 编码所有页面all_page_embs = []with torch.no_grad():for i in tqdm(range(0, len(images), 2), desc="Encoding pages"):batch = images[i : i + 2]inputs = emb_processor.process_images(batch).to(emb_model.device)embs = emb_model(**inputs)for e in embs:all_page_embs.append(e.cpu().float().numpy())print(f"Encoded {len(all_page_embs)} pages, ~{all_page_embs[0].shape[0]} patches per page, dim={all_page_embs[0].shape[1]}")
# 插入 Milvusfor doc_id, patch_vecs in enumerate(all_page_embs):rows = [{"doc_id": doc_id, "patch_idx": j, "vector": v.tolist()}for j, v in enumerate(patch_vecs)]milvus_client.insert(COLLECTION, rows)total = milvus_client.get_collection_stats(COLLECTION)["row_count"]print(f"Indexed {len(all_page_embs)} pages, {total} patches total.")
Step 6: 检索——查询编码 + MaxSim 重排序
将用户问题编码为多个 token 向量 每个 token 向量在 Milvus 中搜索最相似的 patch 按文档(页码)聚合分数,找到最相关的 TOP_K 页
question = "What is the difference between Milvus and Zilliz Cloud?"# 1. 编码查询with torch.no_grad():query_inputs = emb_processor.process_queries([question]).to(emb_model.device)query_vecs = emb_model(**query_inputs)[0].cpu().float().numpy()print(f"Query encoded: {query_vecs.shape[0]} token vectors")# 2. 逐 token 搜索 Milvusdoc_patch_scores = {}for qv in query_vecs:hits = milvus_client.search(COLLECTION, data=[qv.tolist()], limit=CANDIDATE_PATCHES,output_fields=["doc_id", "patch_idx"],search_params={"metric_type": "IP"},)[0]for h in hits:did = h["entity"]["doc_id"]pid = h["entity"]["patch_idx"]score = h["distance"]doc_patch_scores.setdefault(did, {})[pid] = max(doc_patch_scores.get(did, {}).get(pid, 0), score)# 3. MaxSim 聚合:每个文档的总分 = 所有匹配 patch 的分数之和doc_scores = {d: sum(ps.values()) for d, ps in doc_patch_scores.items()}ranked = sorted(doc_scores.items(), key=lambda x: x[1], reverse=True)[:TOP_K]print(f"Top-{TOP_K} retrieved pages: {[(d, round(s, 2)) for d, s in ranked]}")
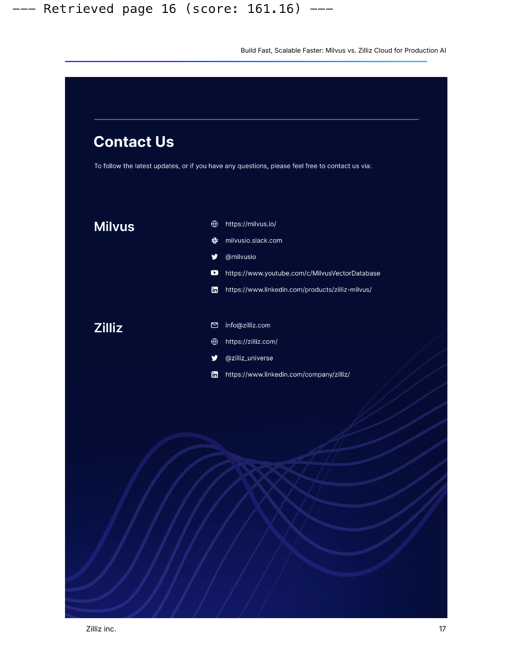
#展示检索到的页面context_images = [images[d] for d, _ in ranked if d < len(images)]for i, img in enumerate(context_images):print(f"--- Retrieved page {ranked[i][0]} (score: {ranked[i][1]:.2f}) ---")display(img.resize((500, int(500 * img.height / img.width))))
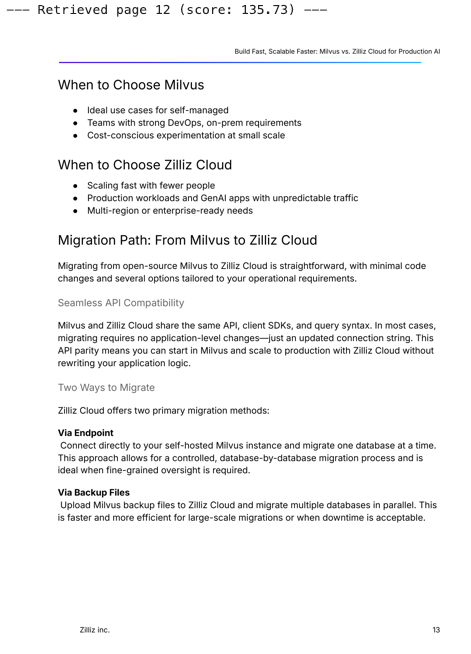
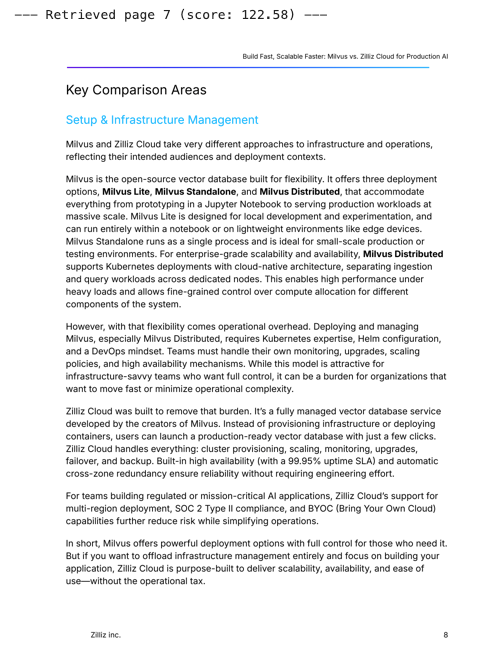
Step 7: 多模态 LLM 生成回答
def image_to_uri(img):"""将图片转为 base64 data URI,用于发送给 LLM"""img = img.copy()w, h = img.sizeif max(w, h) > 1600:r = 1600 / max(w, h)img = img.resize((int(w * r), int(h * r)), Image.LANCZOS)buf = io.BytesIO()img.save(buf, format="PNG")return f"data:image/png;base64,{base64.b64encode(buf.getvalue()).decode()}"# 构建多模态 promptcontext_images = [images[d] for d, _ in ranked if d < len(images)]content = [{"type": "image_url", "image_url": {"url": image_to_uri(img)}}for img in context_images]content.append({"type": "text","text": (f"Above are {len(context_images)} retrieved document pages.\n"f"Read them carefully and answer the following question:\n\n"f"Question: {question}\n\n"f"Be concise and accurate. If the documents don't contain "f"relevant information, say so."),})# 调用 LLMllm = OpenAI(api_key=OPENROUTER_API_KEY, base_url="https://openrouter.ai/api/v1")response = llm.chat.completions.create(model=GENERATION_MODEL,messages=[{"role": "user", "content": content}],max_tokens=1024,temperature=0.7,)answer = response.choices[0].message.content.strip()print(f"Question: {question}\n")print(f"Answer: {answer}")

尾声
作者介绍
王舒虹
Zilliz Social Media Advocate



文章转载自ZILLIZ,如果涉嫌侵权,请发送邮件至:contact@modb.pro进行举报,并提供相关证据,一经查实,墨天轮将立刻删除相关内容。
