




注: 本文为安丫科技焱焱枫的原创,请尊重知识产权,转发请注明出处,不接受任何抄袭、演绎和未经注明出处的转载。
在当今数据驱动的世界中,数据库系统作为信息存储和管理的核心工具,其重要性不言而喻。
无论是企业级应用还是个人开发项目,一个稳定、高效的数据库环境都是成功的关键。由于开源的 centos已经停止维护,Oracle Linux 9(OEL 9)凭借其卓越的稳定性、安全性和性能,成为部署数据库的理想选择之一。
与此同时,VMware Workstation 17 Pro提供了强大的虚拟化能力,使得我们可以在单一物理机上创建多个隔离的测试环境,极大地提高了开发效率与灵活性。
01
软件准备
首先,访问VMware官方网站下载并安装VMware Workstation Pro 17。
接着,从Oracle官方网站获取Oracle Linux 9的ISO镜像文件,这是构建虚拟机所需的基础。
关于vmware的配置,参见
软件安装请读者自行完成。
02
配置虚拟机
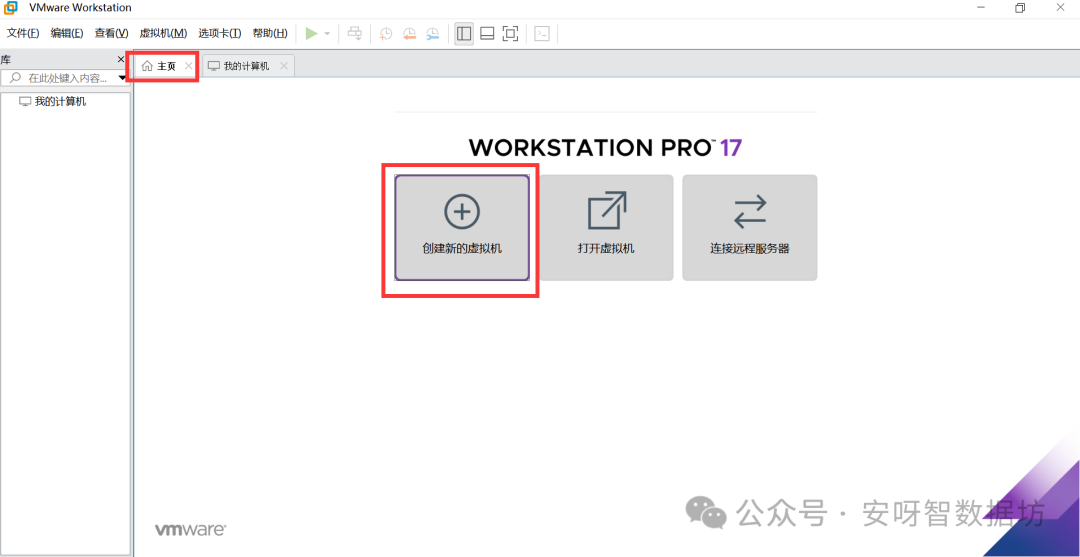
1. 新建虚拟机
主页-->创建虚拟机
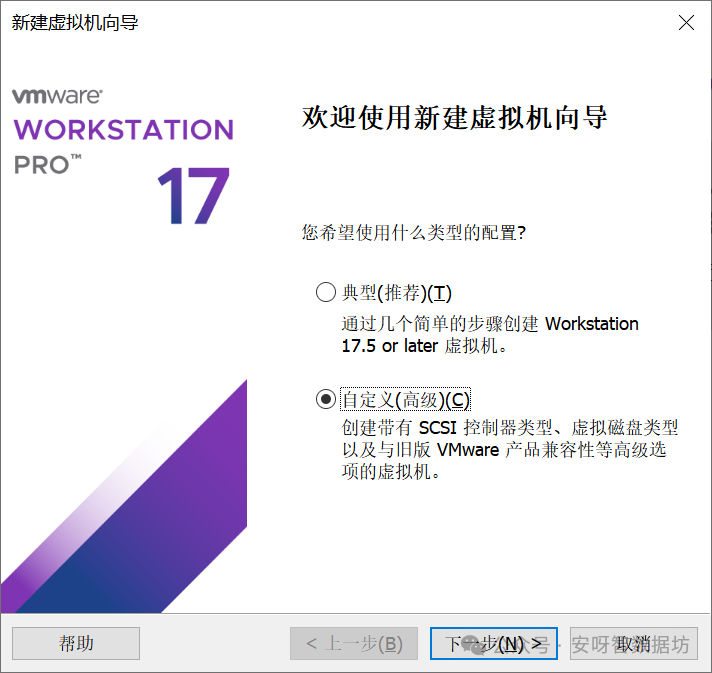
2. 先选自定义,下一步
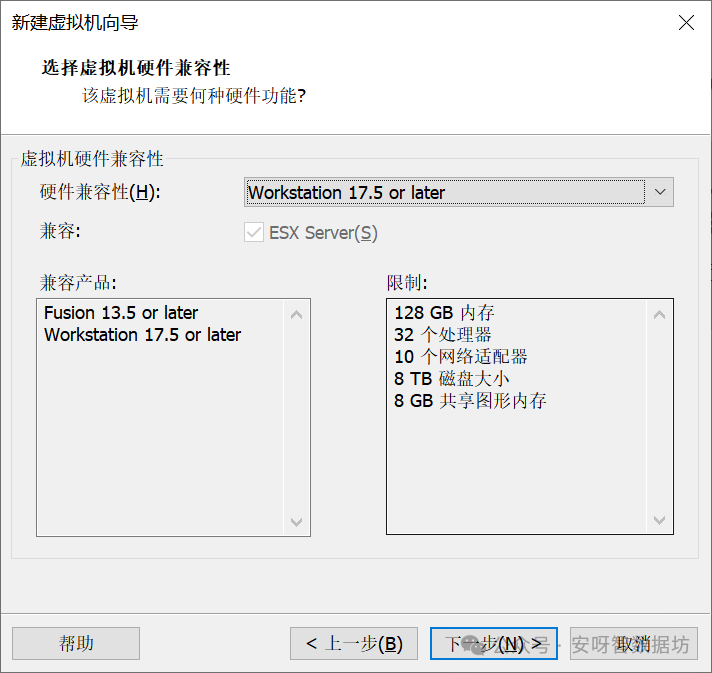
3. 选择17.5,下一步
4. 选择操作系统的映像文件
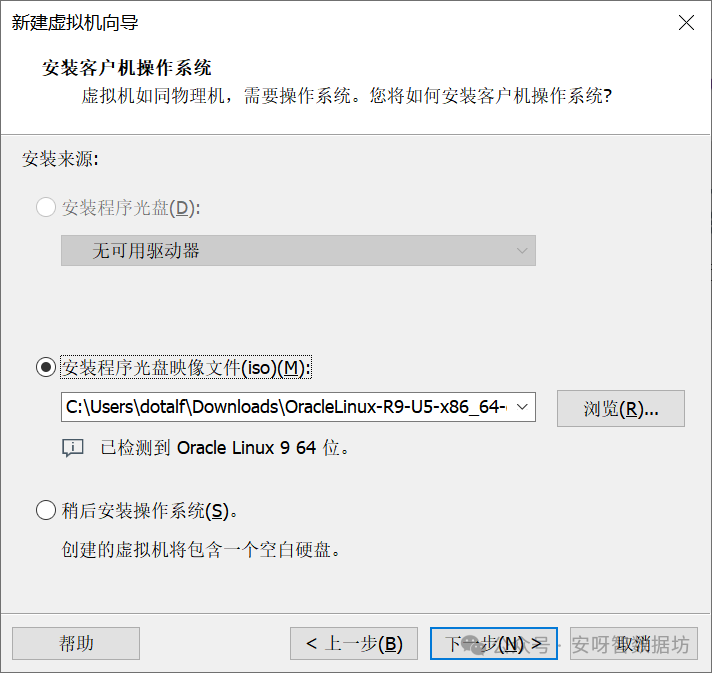
这里自动识别到了Oracle Linux 9 64位
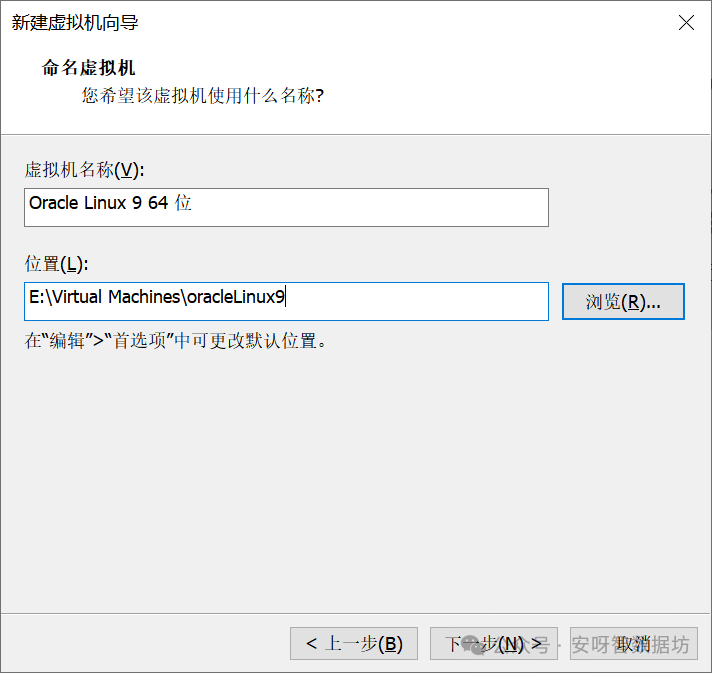
5. 自定义虚拟机名称和位置(不要使用默认的名称和路径)
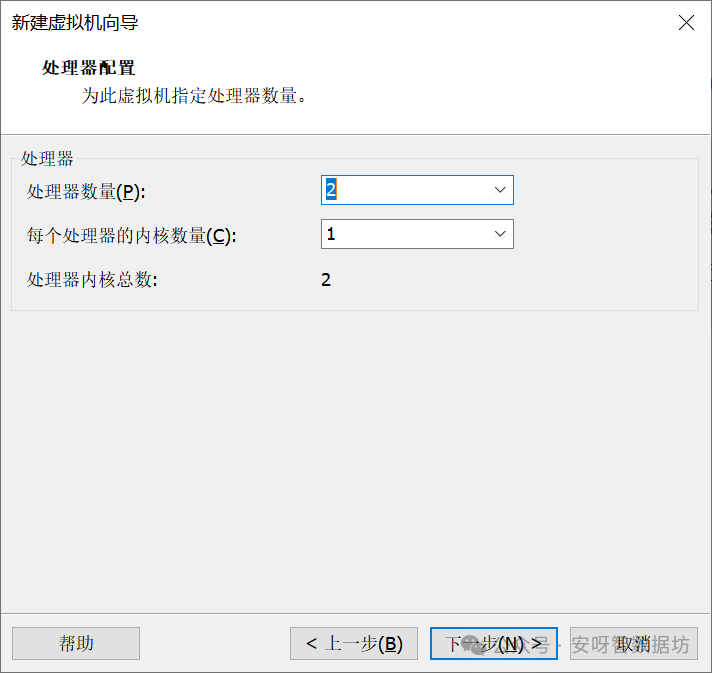
6. 配置处理器,默认2核
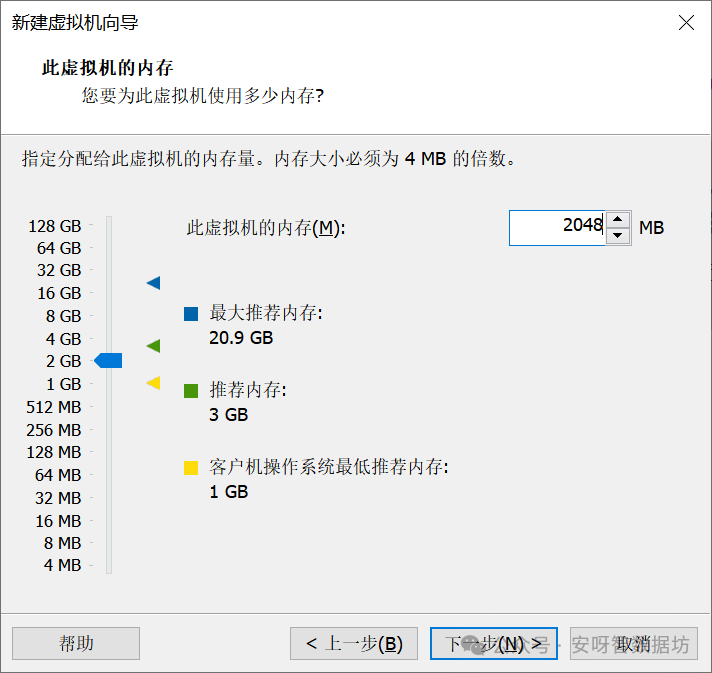
7. 内存配置,默认2G够用
8. 网络类型,默认NAT,下一步
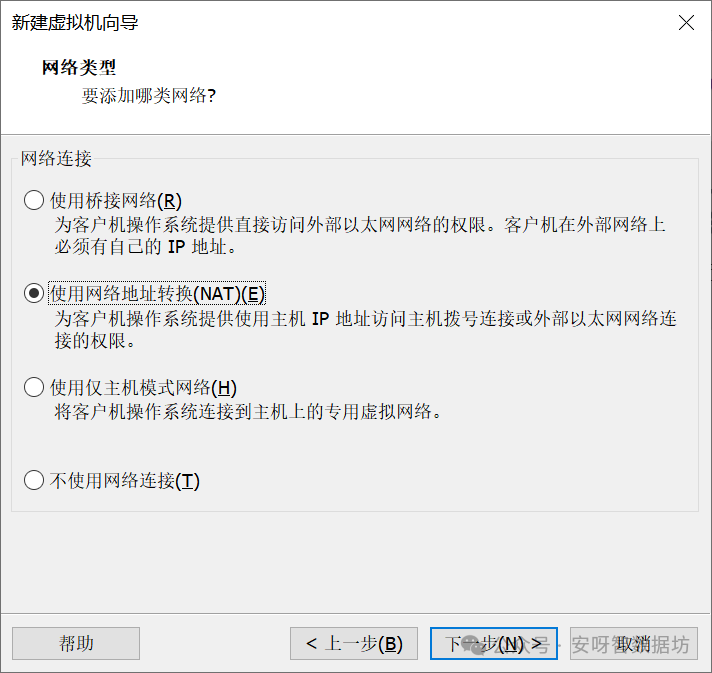
关于网络的配置区别,我会在单独的视频里的讲解。
9. 选择IO控制器类型,默认即可
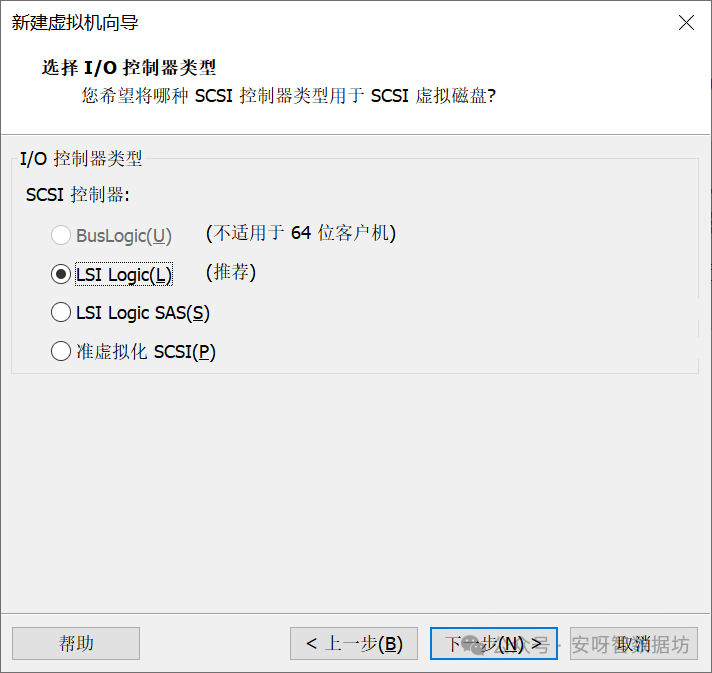
10. 选择磁盘接口,默认即
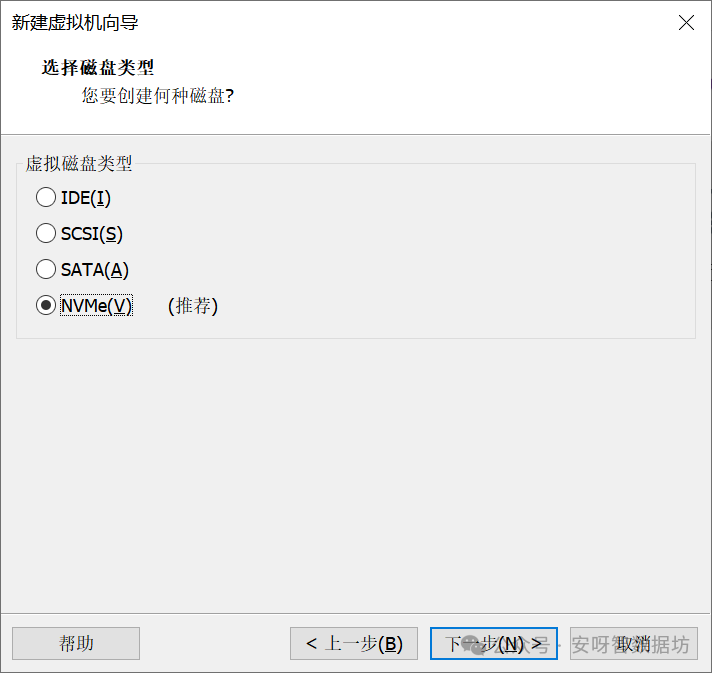
11. 创建虚拟磁盘
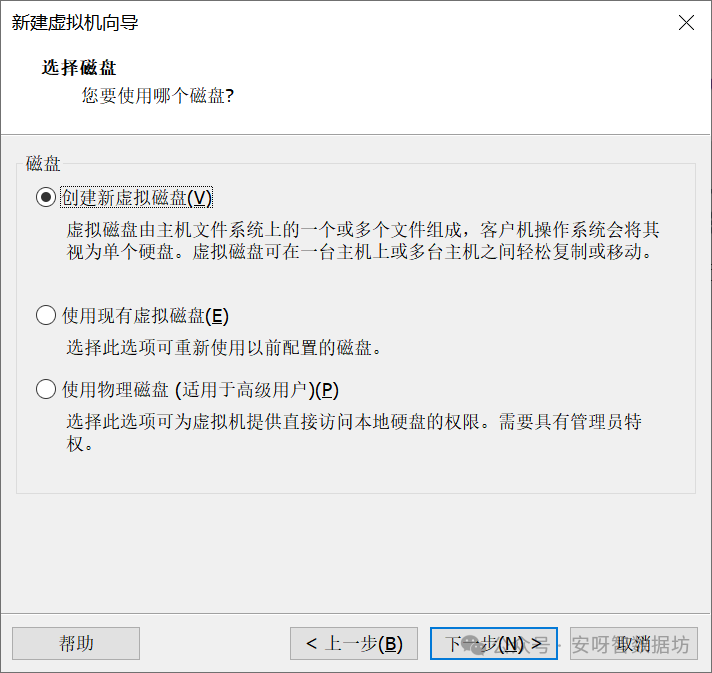
12. 分配磁盘容量
分配50G,安装操作系统,下面的选项表示用多少分配多少。
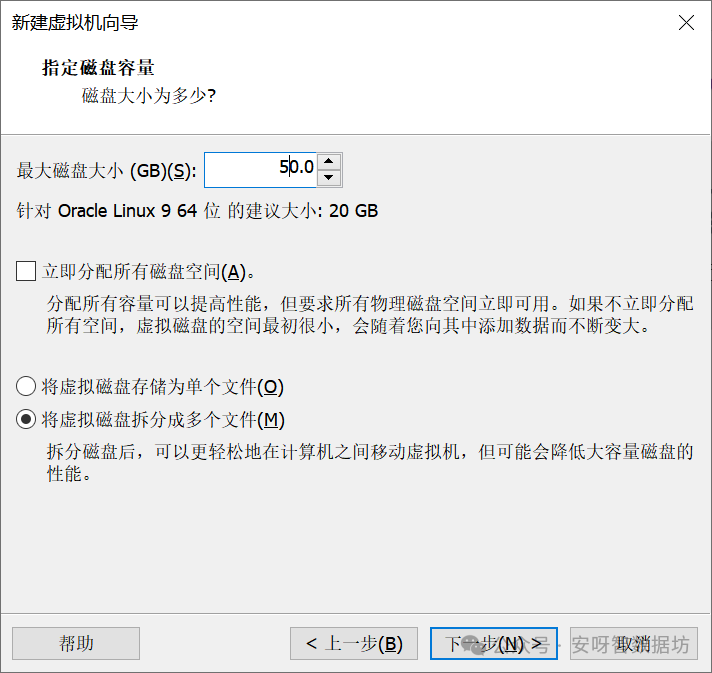
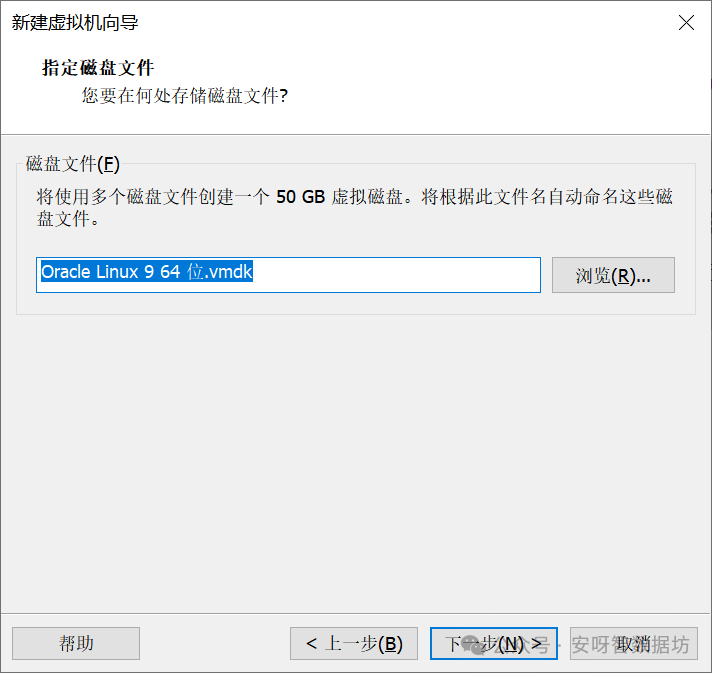
13. 确认指定磁盘文件,点击下一步
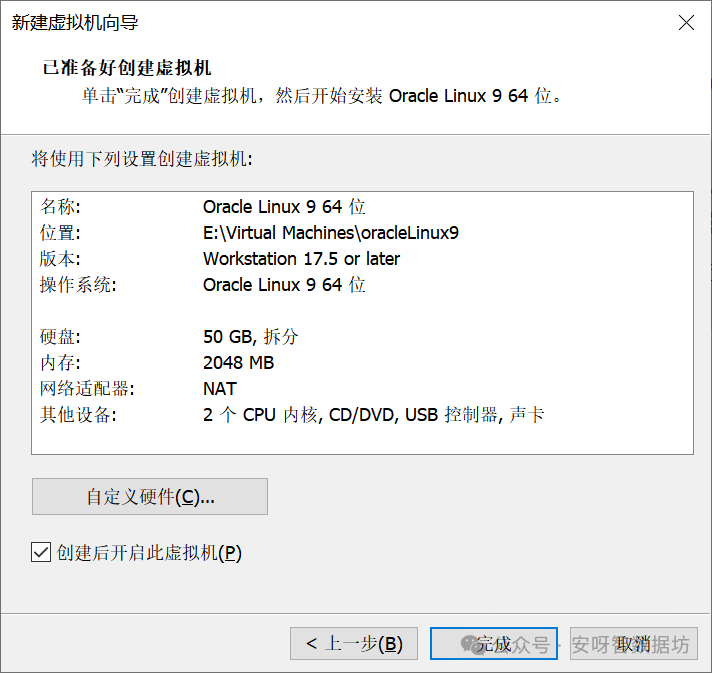
14. 确认虚拟机配置信息,点击完成
02
规划虚拟机配置
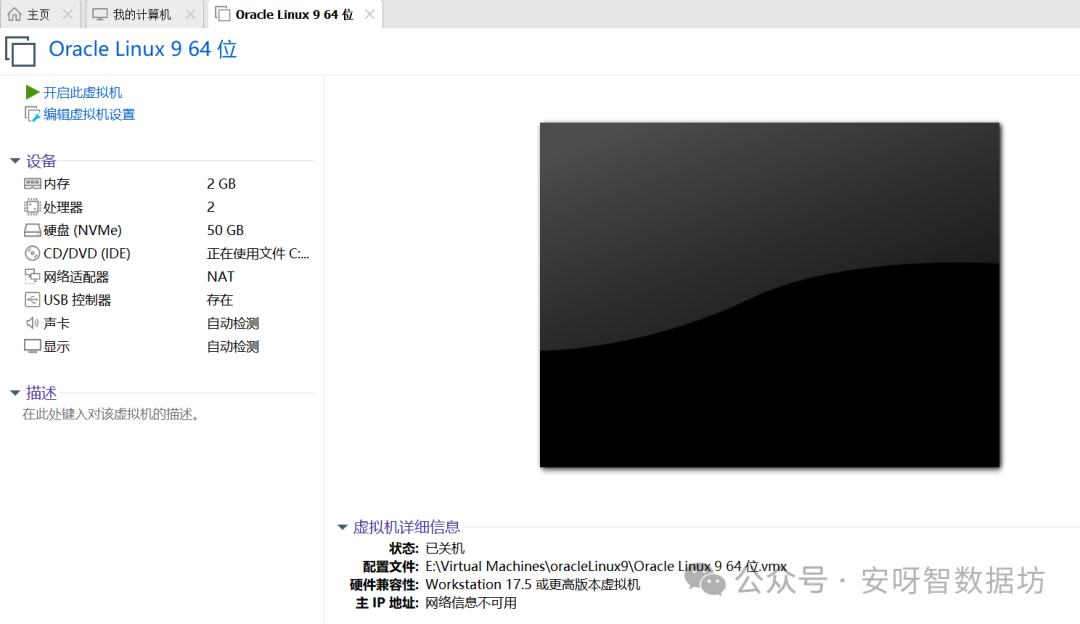
1. 查看虚拟机的配置,点击编辑虚拟机设置
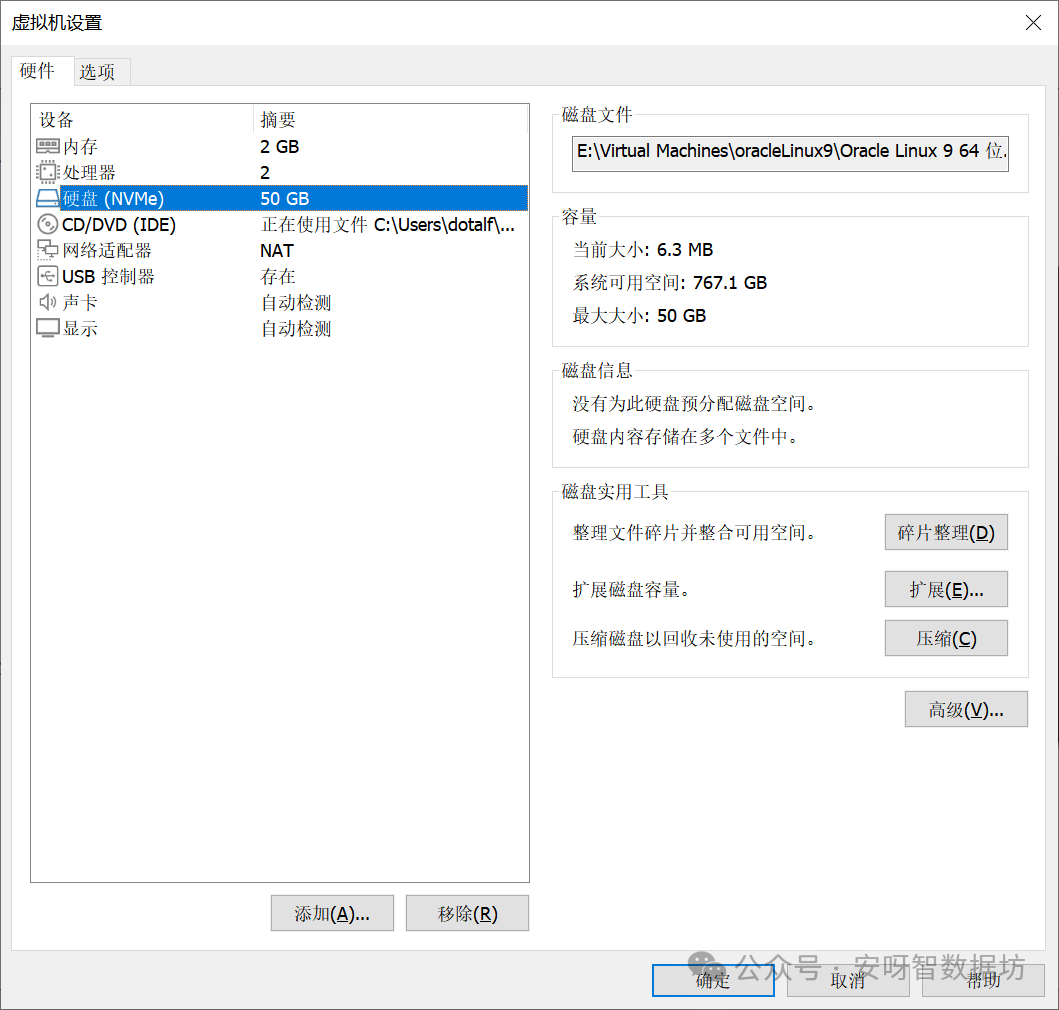
2. 选择添加磁盘
这里添加磁盘,作为数据库数据目录使用
3. 选择添加磁盘,下一步
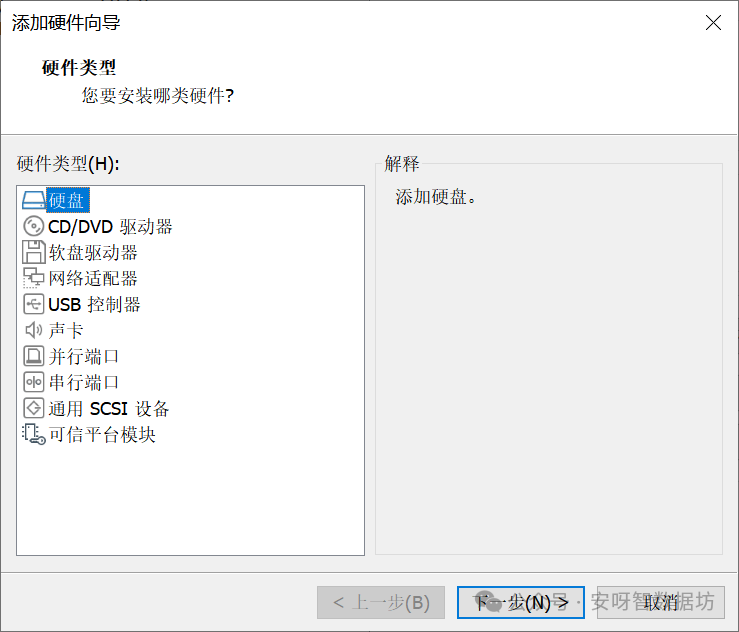
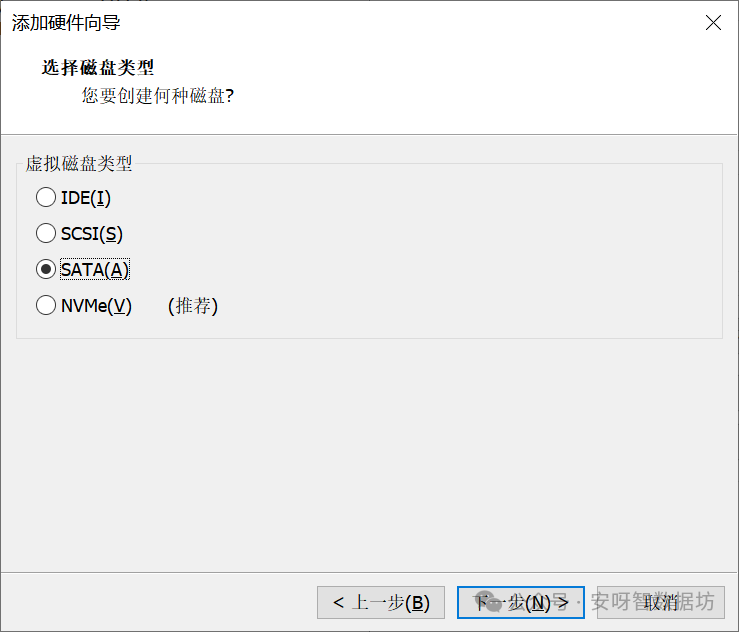
4. 选择磁盘类型,选择SATA,下一步
默认nvme也可以
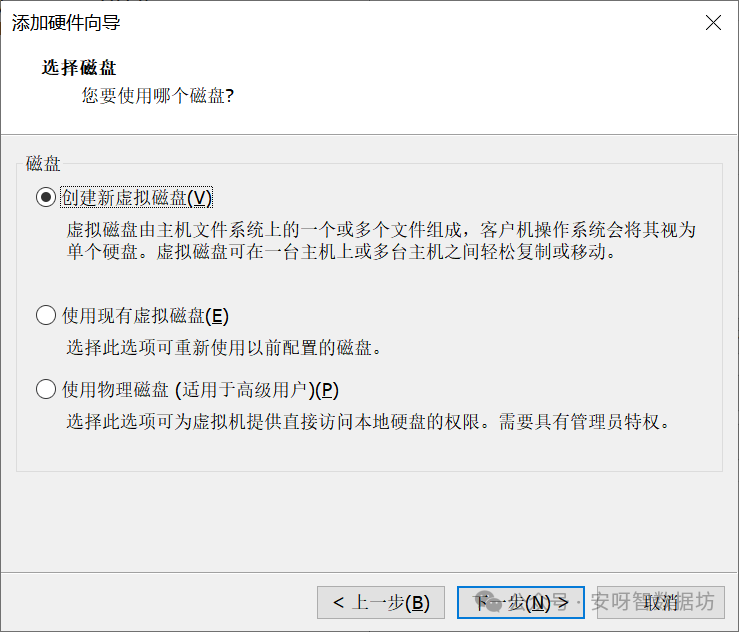
5. 创建新的虚拟机磁盘
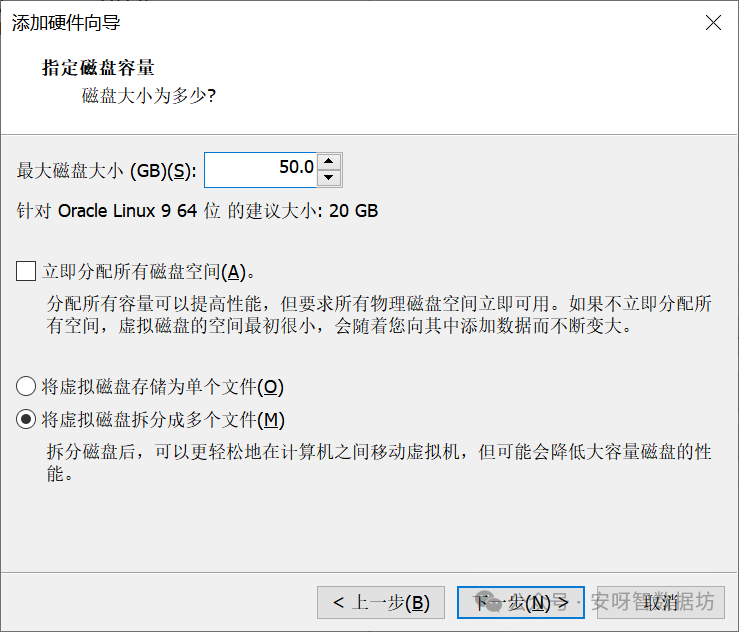
6. 指定50GB
7. 确认磁盘文件
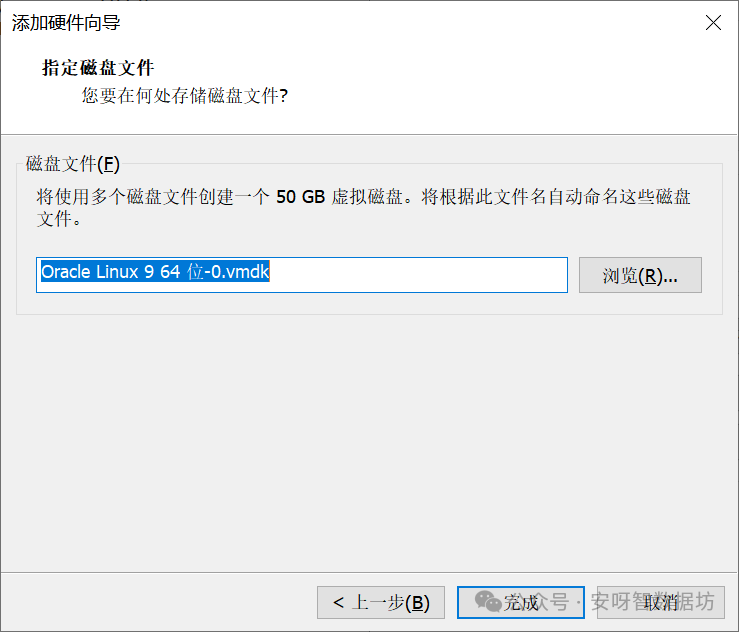
8. 完成添加
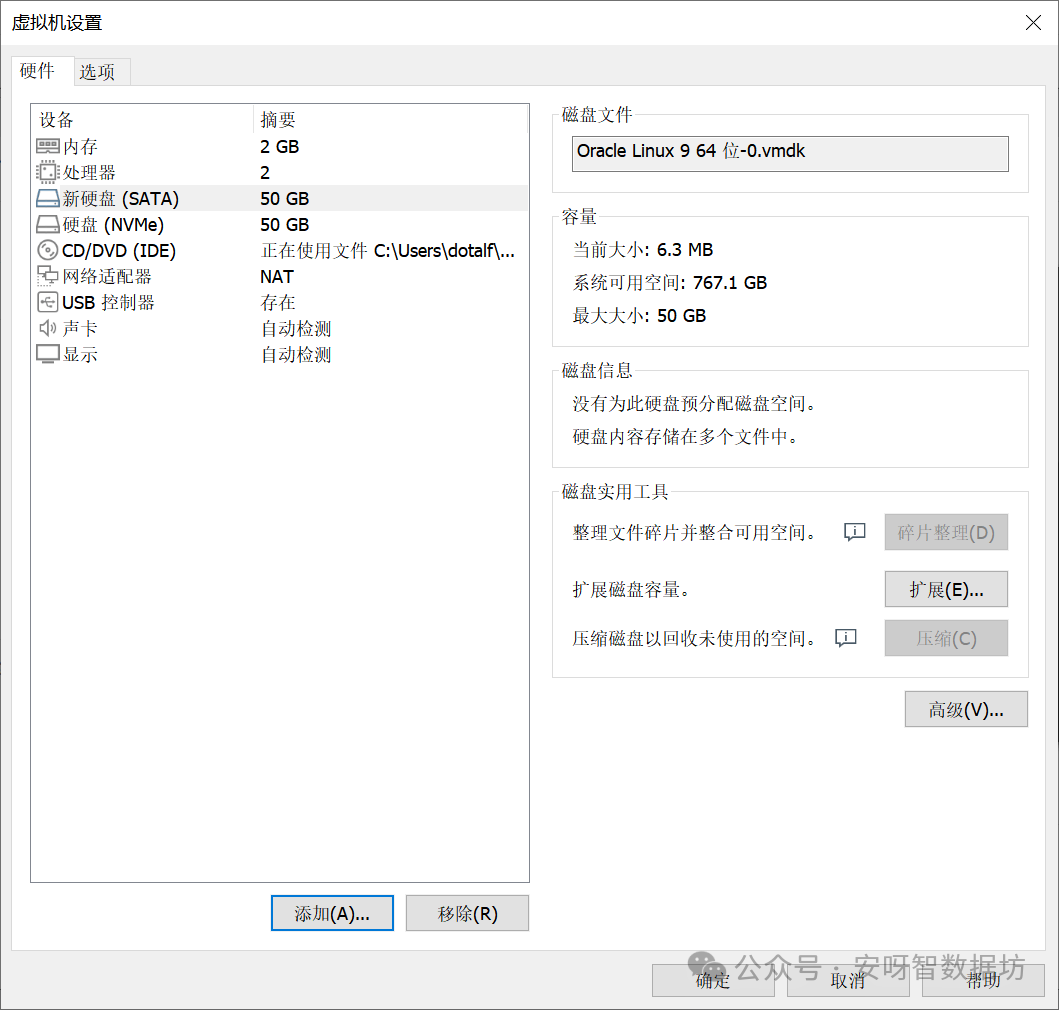
9. 确认虚拟机配置
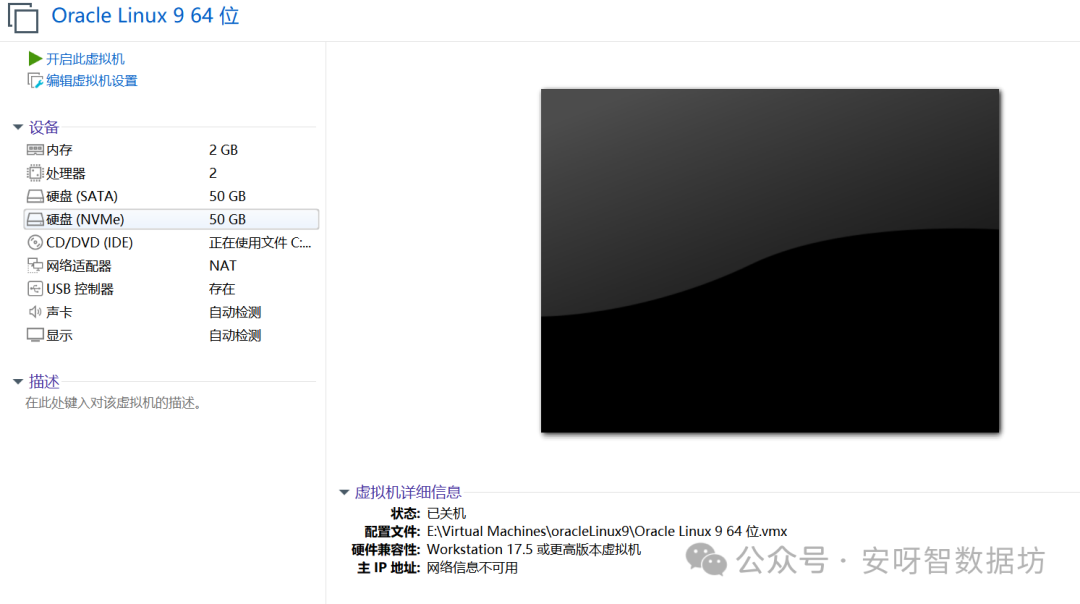
03
安装操作系统
1. 开启虚拟机
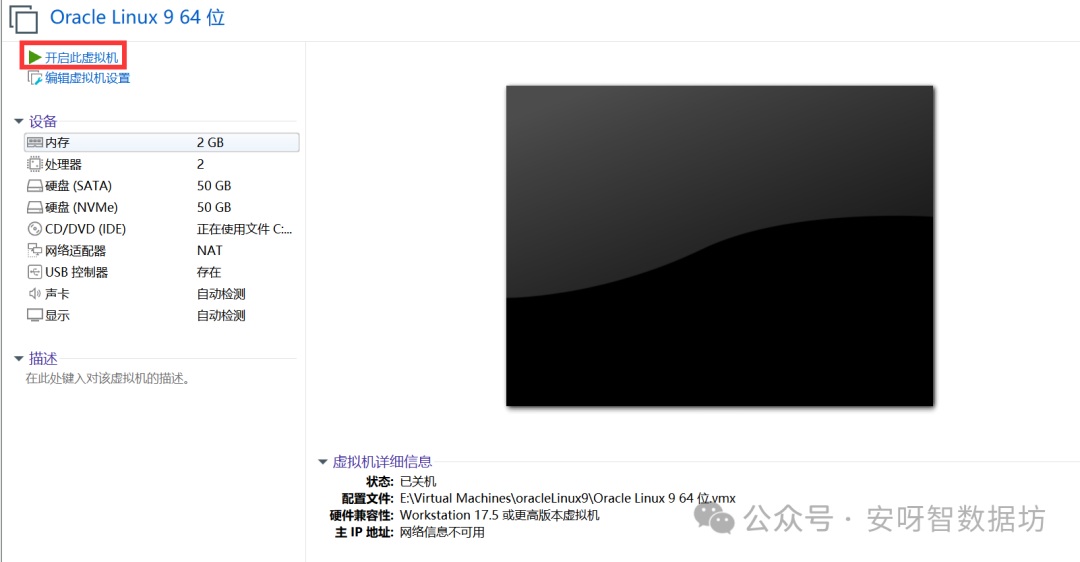
2. 选择安装操作系统
虚拟机界面单击鼠标,进入操作界面,按上键选择安装操作系统
ctl+atl退出界面
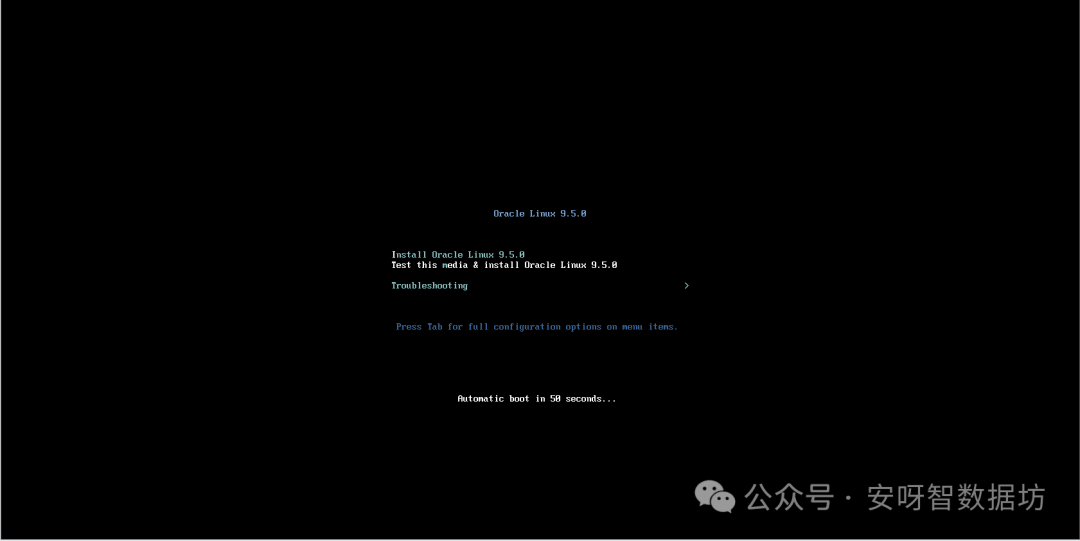
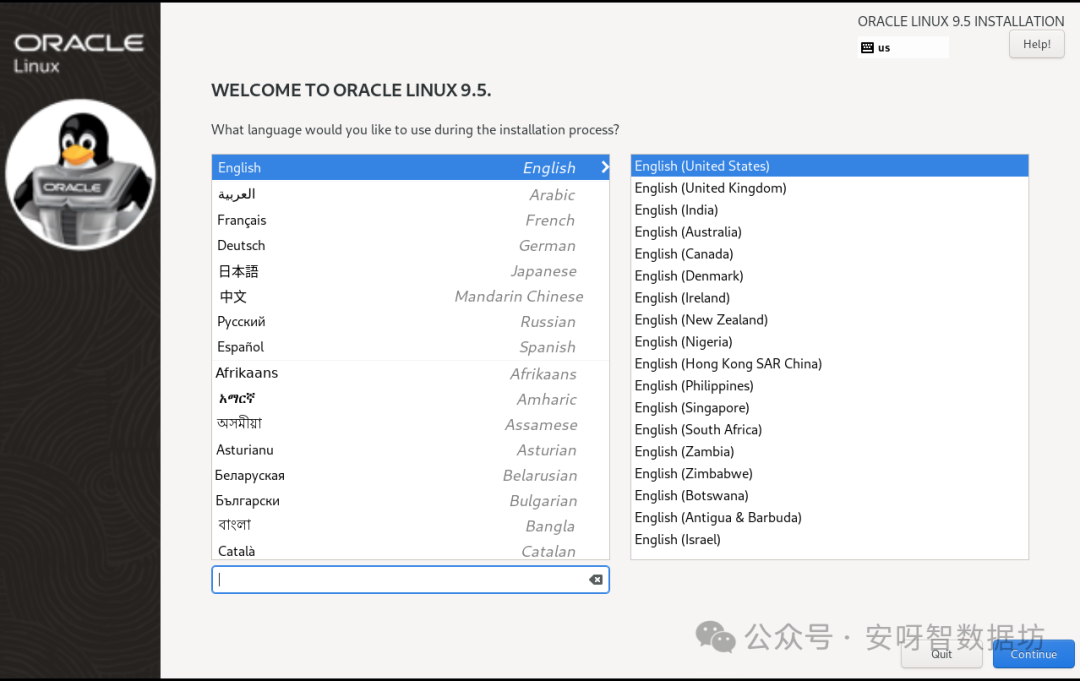
3. 选择语言,默认英语
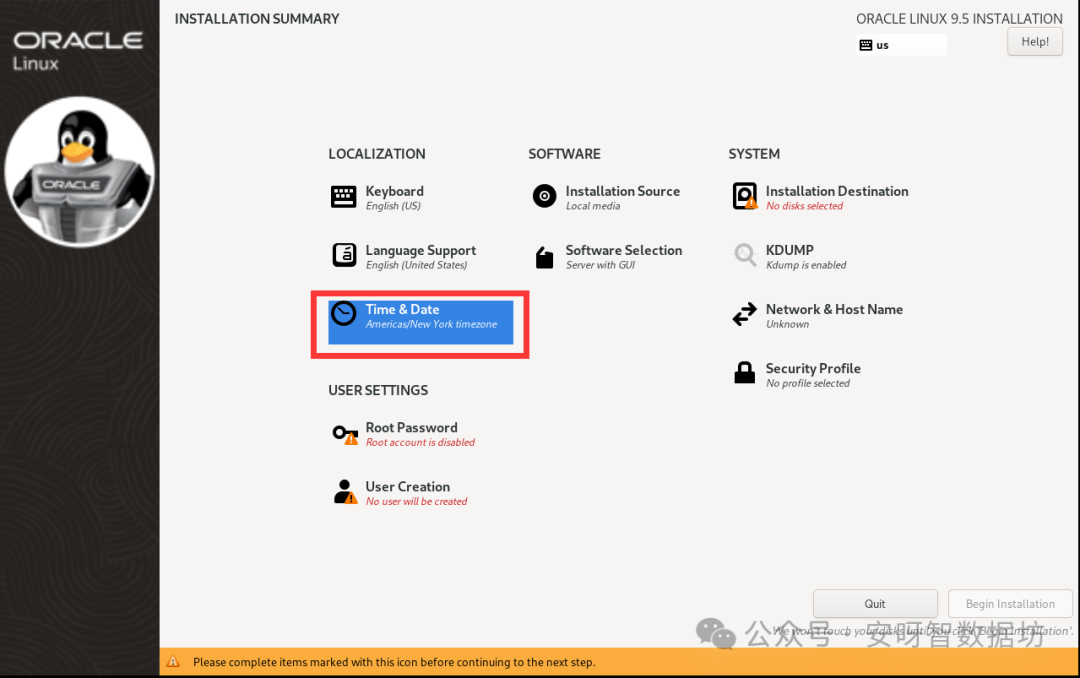
4. 配置时间和日期
当前时间为美国纽约
选择中国上海,完成配置
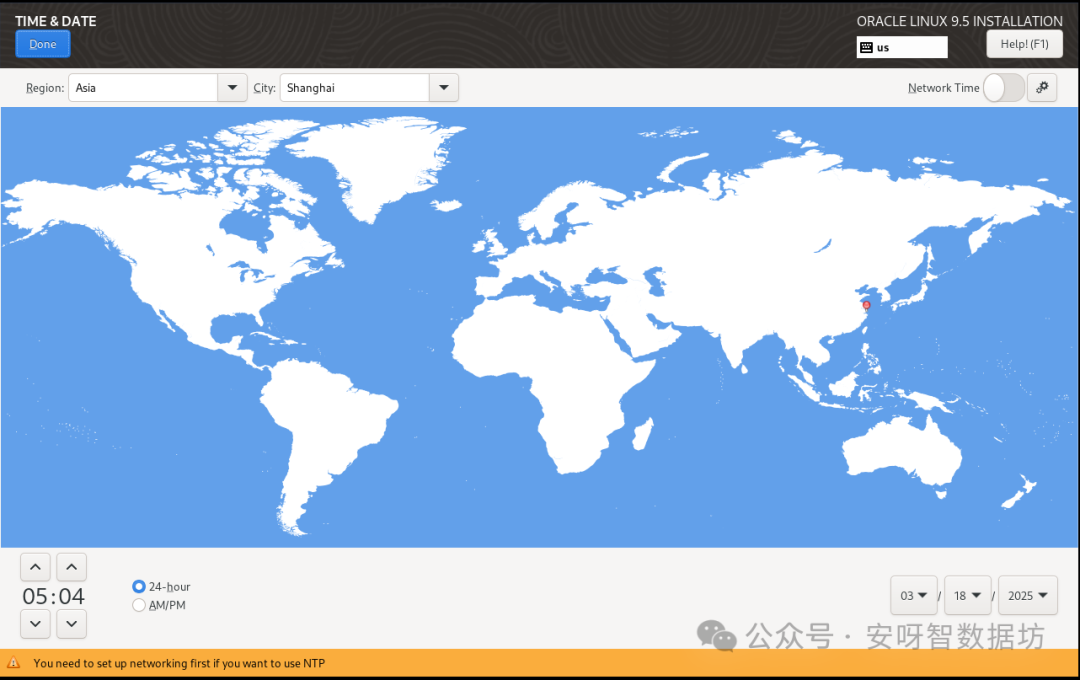
确认时区
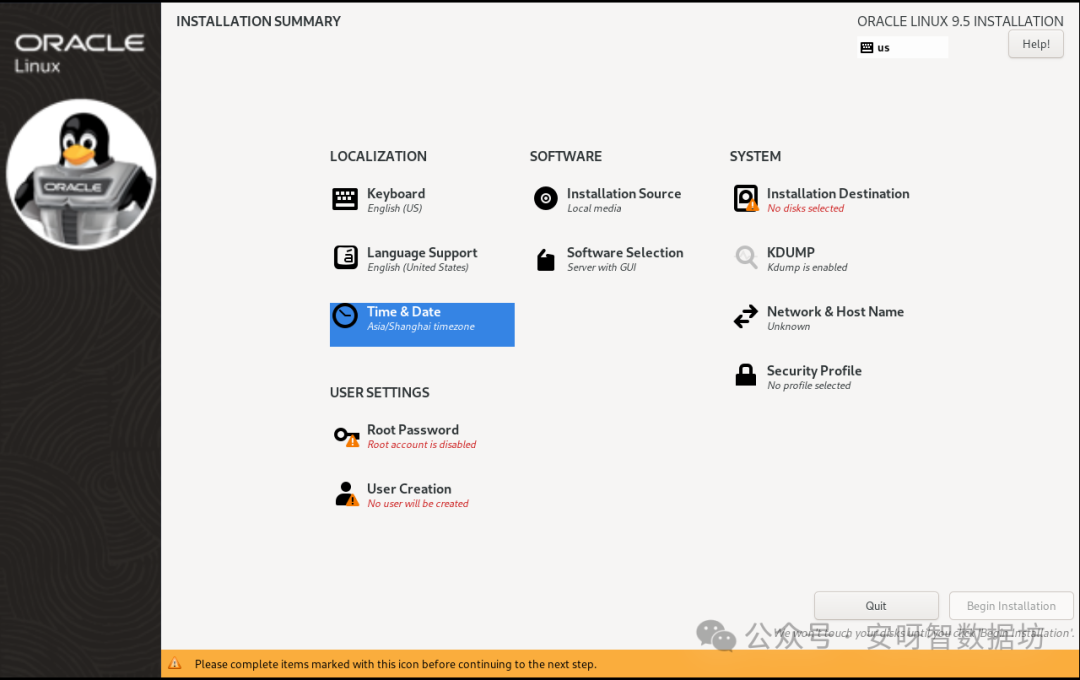
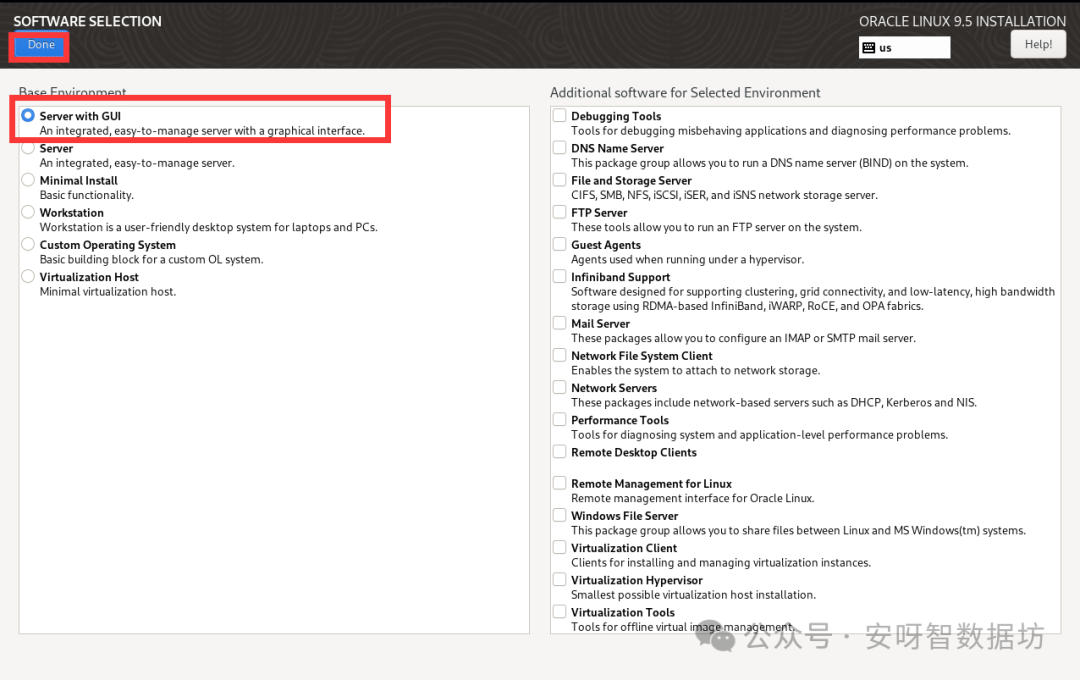
5. 选择带GUI的安装包,默认配置即可
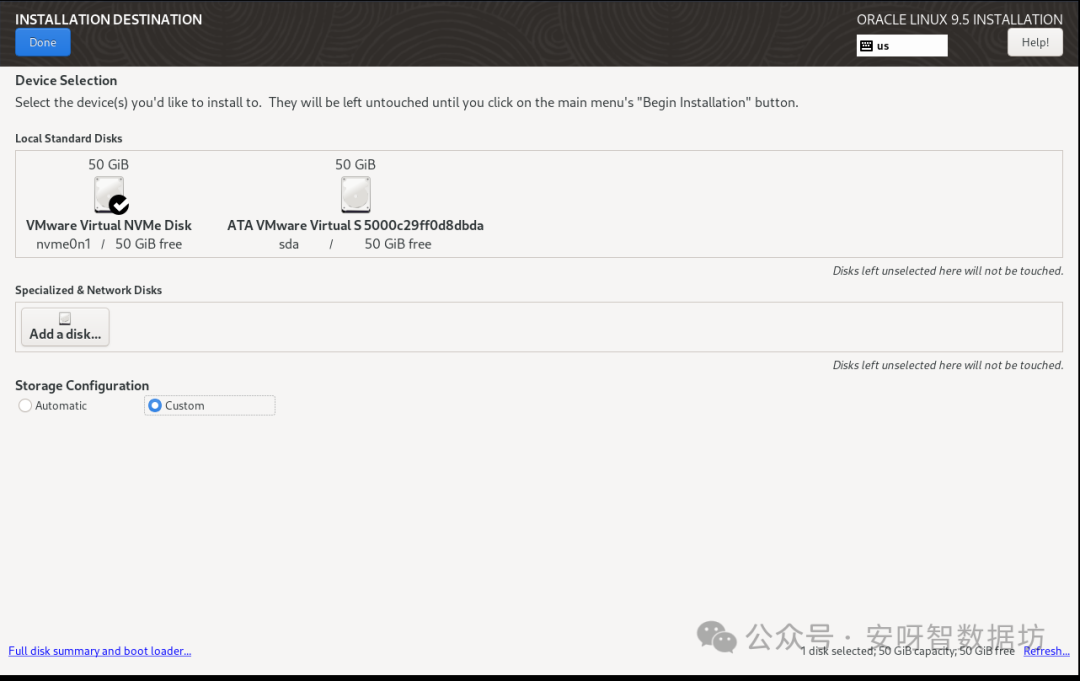
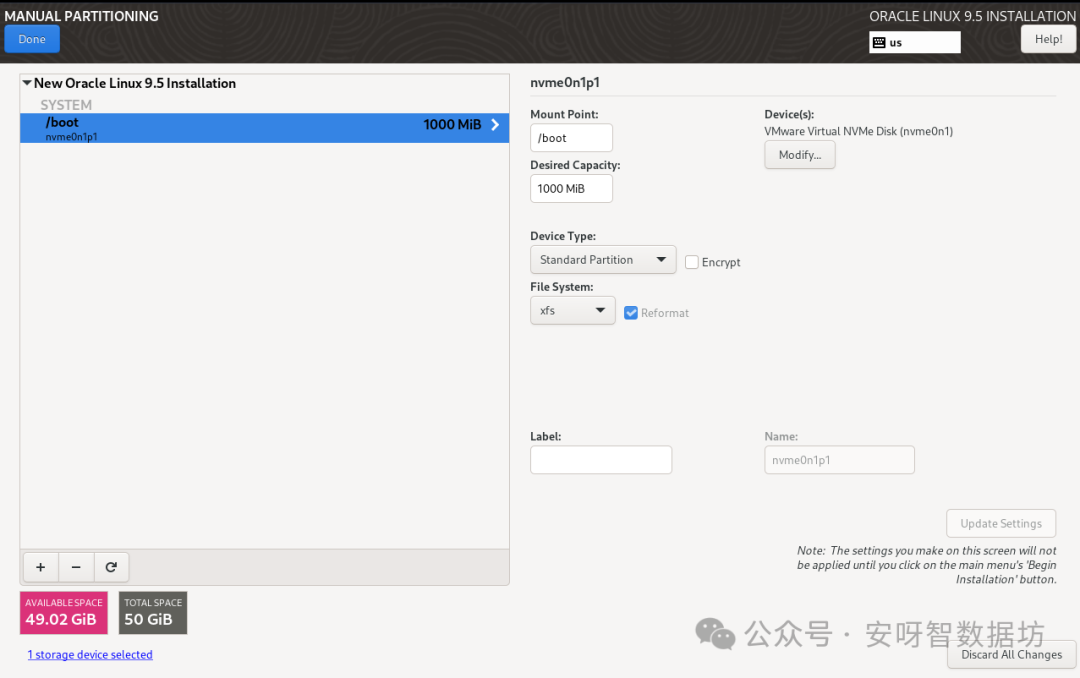
6. 配置磁盘分区
选择第一块50G盘,自定义配置
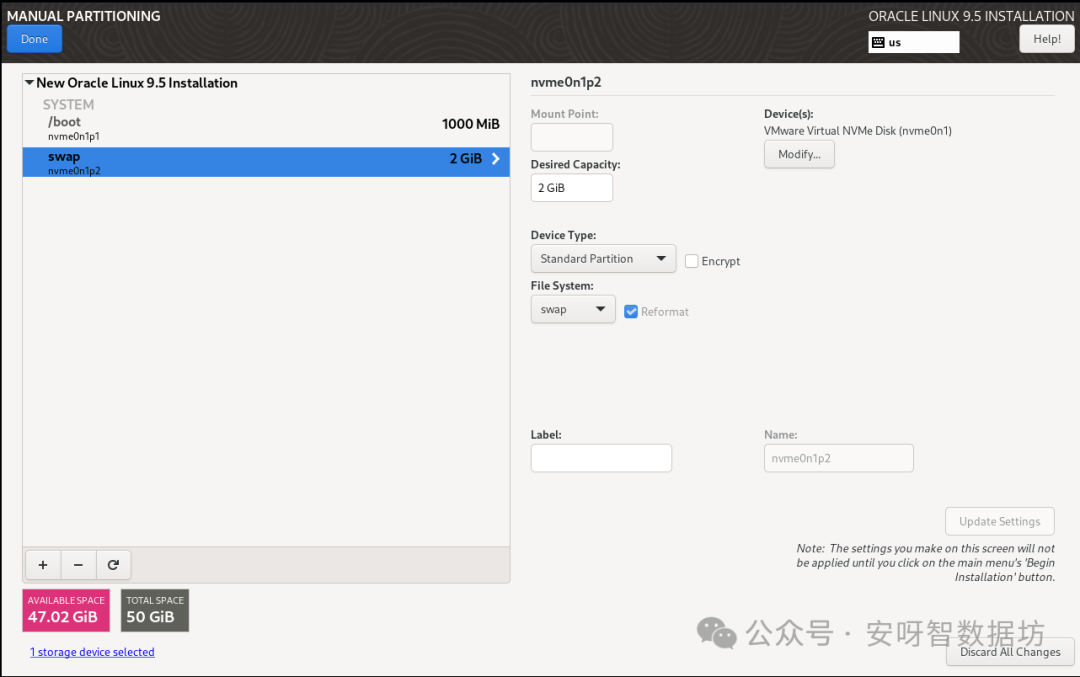
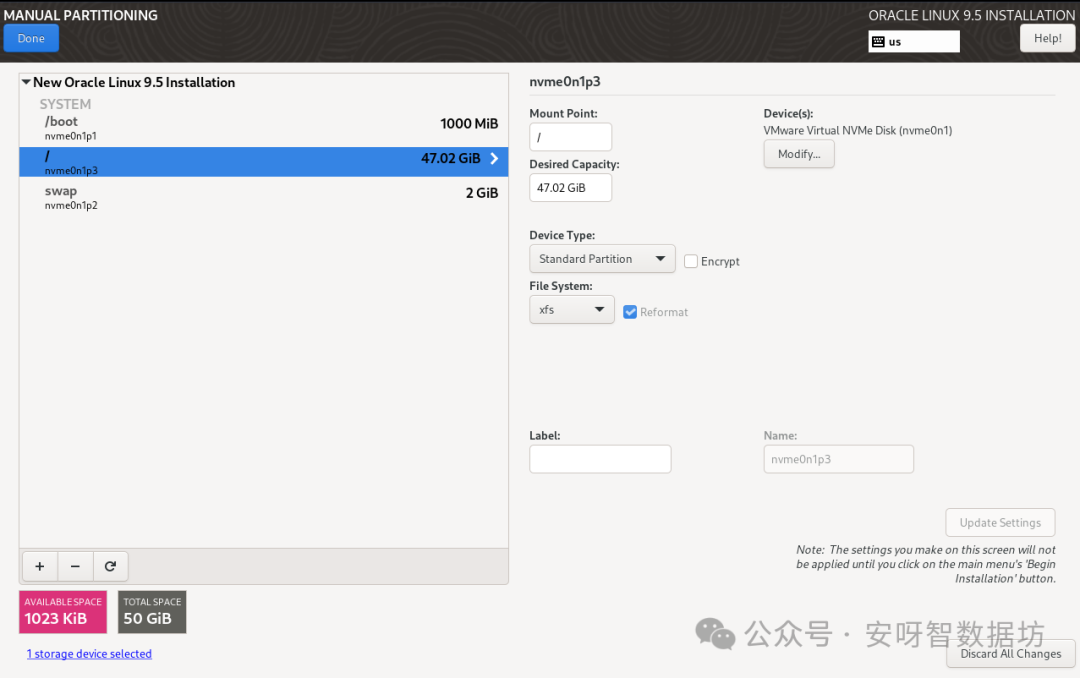
选择标准分区,不使用LVM,点击添加分区
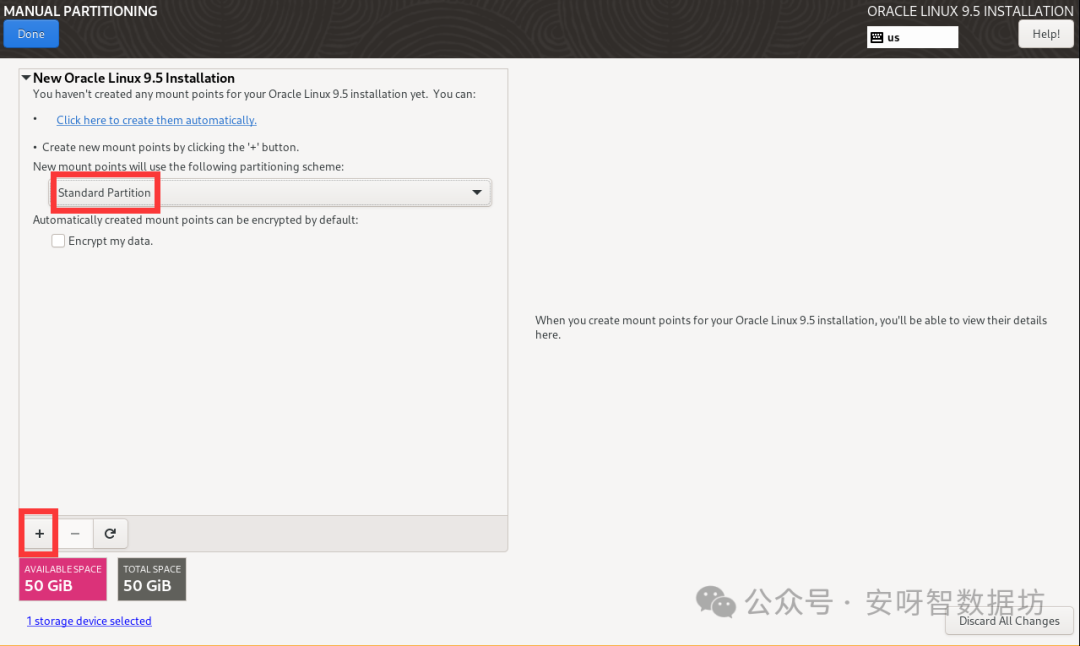
配置/boot分区 1000M
配置SWAP分区 2048M
剩下的磁盘给/分区
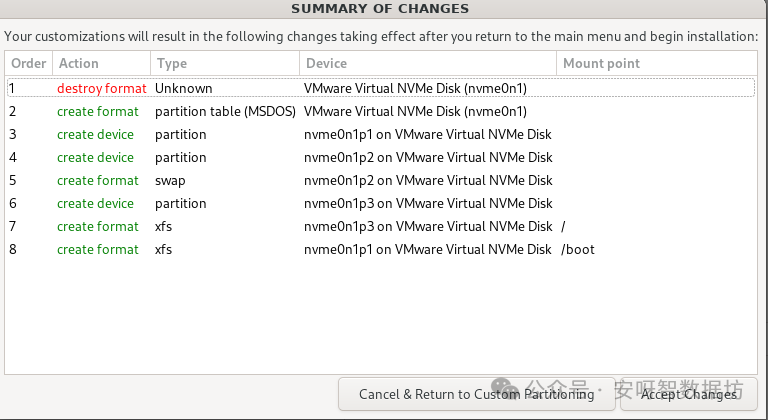
点击确认,接受配置。另外两块盘暂时不要配置,等操作系统安装完成之后再配置
7. 配置root密码
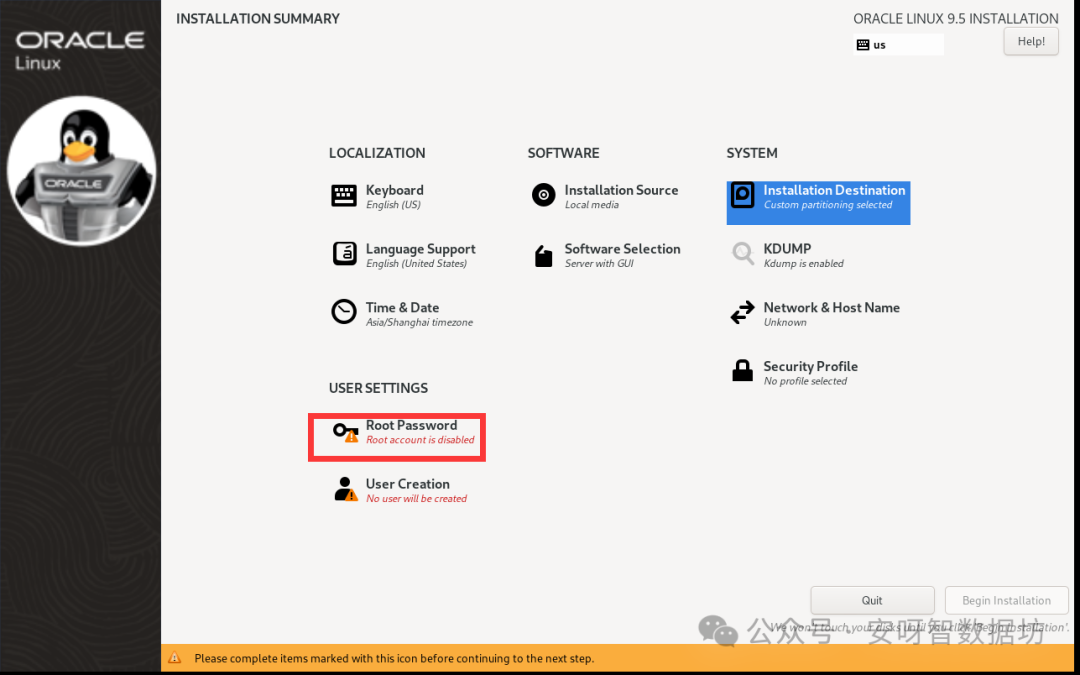
配置root密码
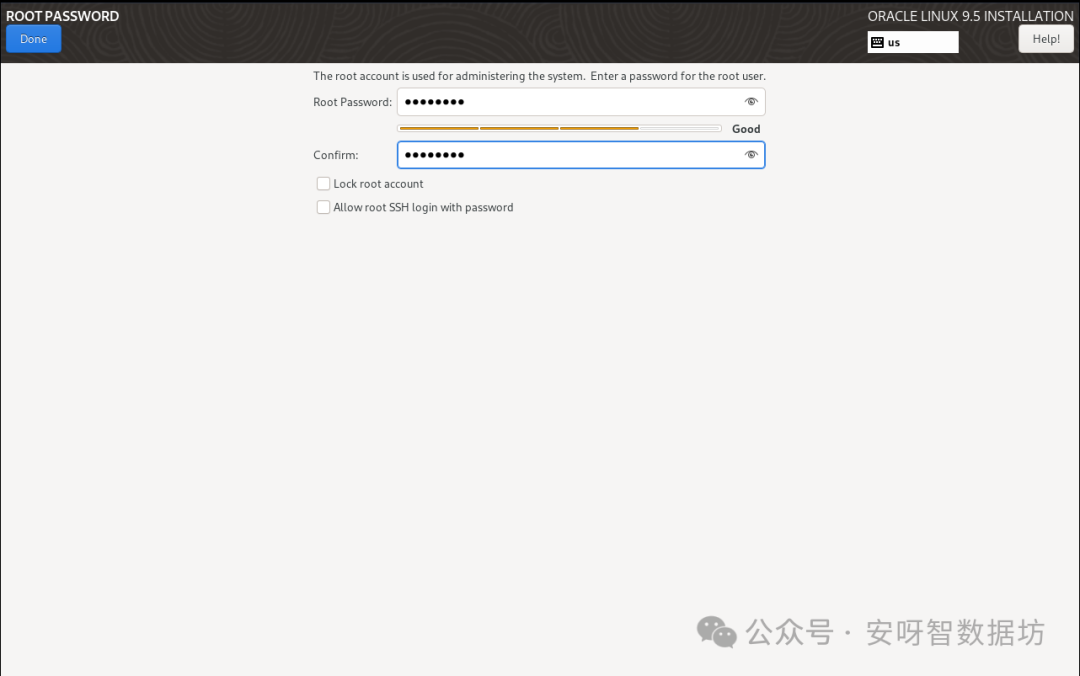
确认安装项
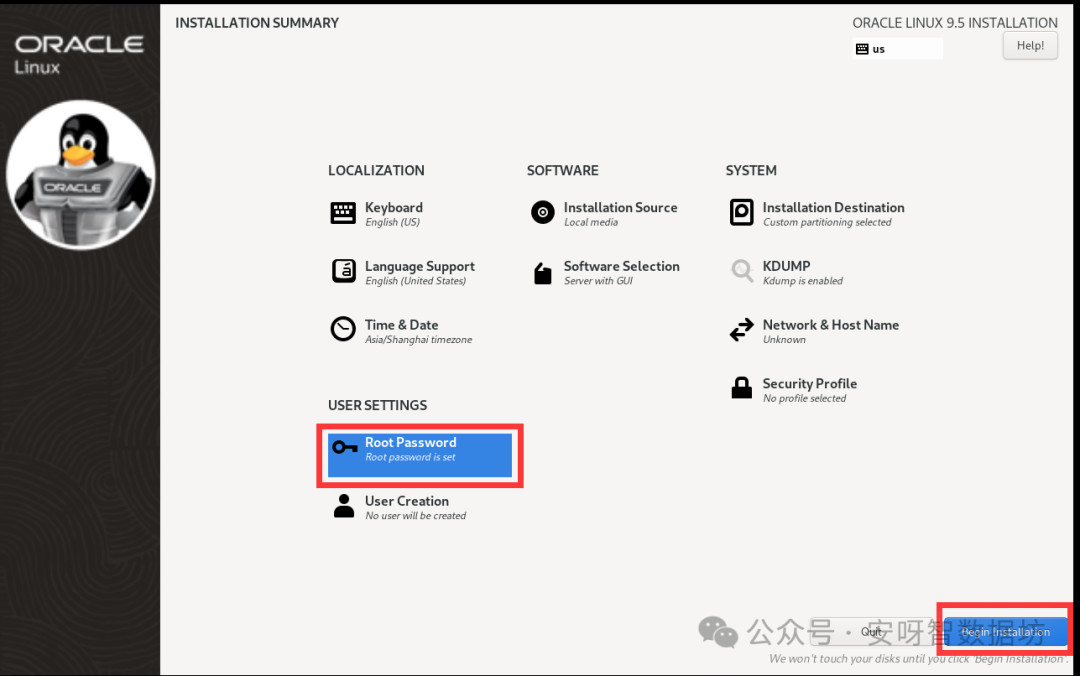
8. 网络配置
这里暂时不配置,跳过
9. 开始安装
确认所有必须配置项均己完成配置,开始安装操作系统
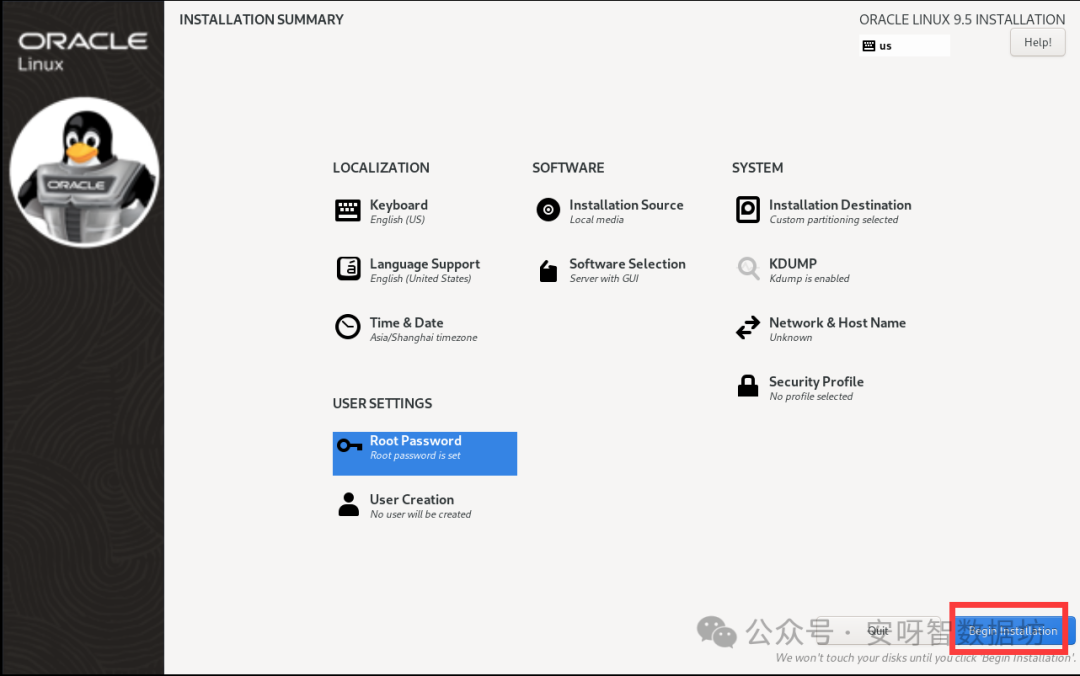
10. 安装中
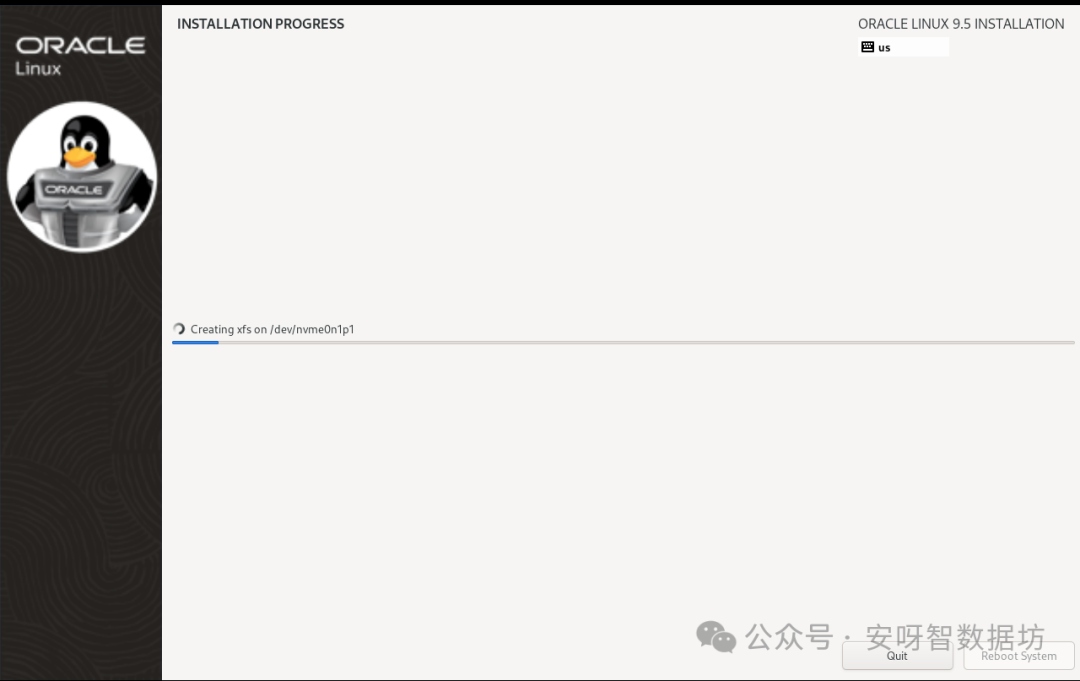
11. 安装完成,点击重启即可
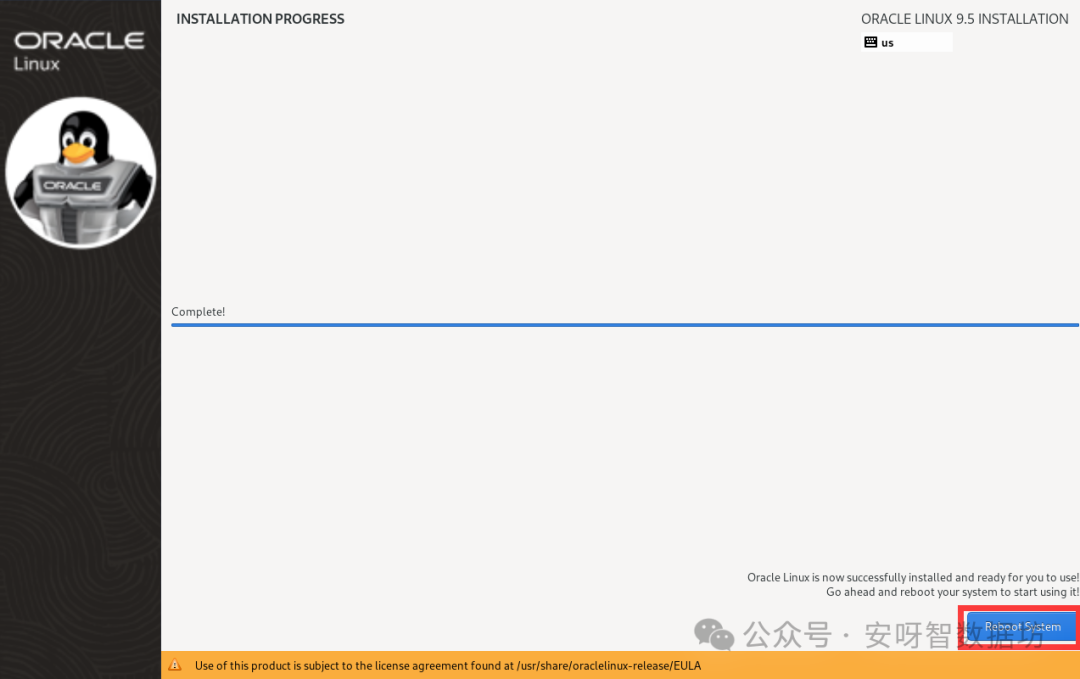
如果重启失败提示操作系统找不到,参考链接《重启Linux操作系统失败,提示Operating System not found》解决。
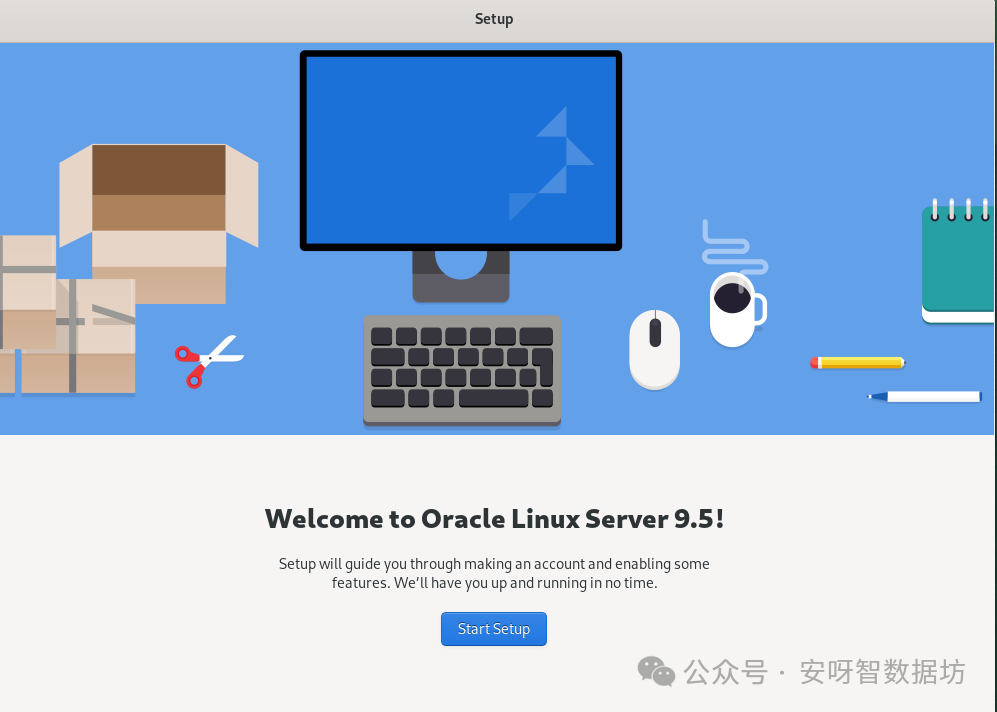
12. 初始化配置
开始配置
下一步
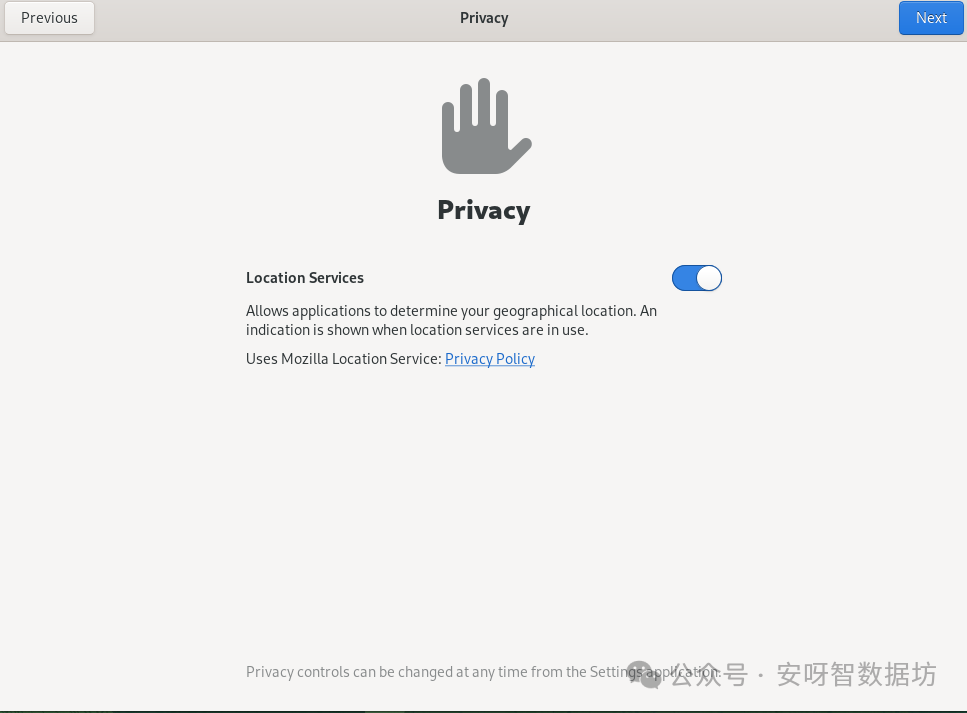
填写个人用户
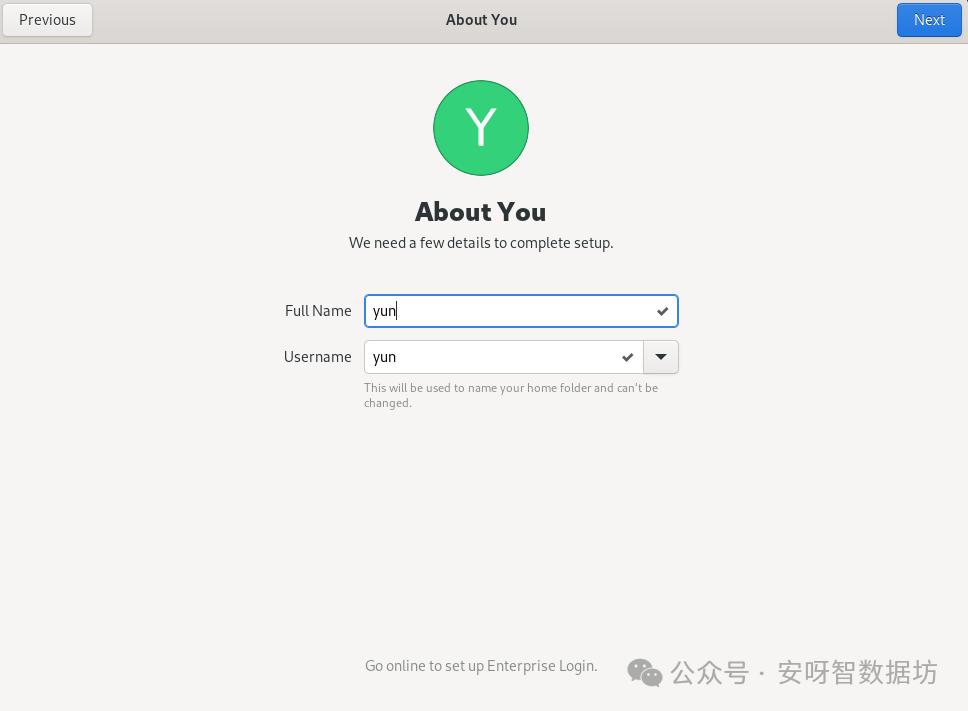
填写个人密码
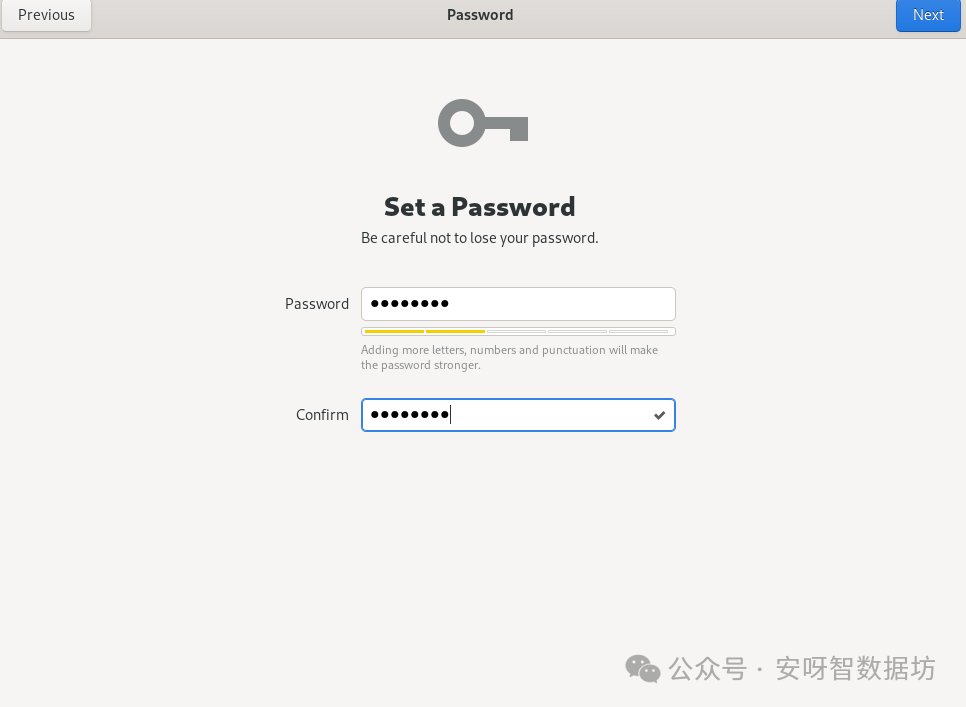
04
初始化配置
1. 网络配置
2. 配置主机名
#hostnamectl set-hostname db1#bash# hostnamedb1
3. 配置主机配置文件
[root@db1]# echo "192.168.74.45 db1" >> etc/hosts[root@db1]# cat /etc/hosts127.0.0.1 localhost localhost.localdomain localhost4 localhost4.localdomain4::1 localhost localhost.localdomain localhost6 localhost6.localdomain6192.168.74.45 db1
4. 存储挂载配置
1)查看未使用的磁盘
[root@db1 ~]# fdisk -lDisk dev/nvme0n1: 50 GiB, 53687091200 bytes, 104857600 sectorsDisk model: VMware Virtual NVMe DiskUnits: sectors of 1 * 512 = 512 bytesSector size (logical/physical): 512 bytes 512 bytesI/O size (minimum/optimal): 512 bytes 512 bytesDisklabel type: dosDisk identifier: 0x003aa2e7Device Boot Start End Sectors Size Id Type/dev/nvme0n1p1 * 2048 2050047 2048000 1000M 83 Linux/dev/nvme0n1p2 2050048 6244351 4194304 2G 82 Linux swap Solaris/dev/nvme0n1p3 6244352 104857599 98613248 47G 83 LinuxDisk dev/sda: 50 GiB, 53687091200 bytes, 104857600 sectorsDisk model: VMware Virtual SUnits: sectors of 1 * 512 = 512 bytesSector size (logical/physical): 512 bytes 512 bytesI/O size (minimum/optimal): 512 bytes 512 bytes
2)分区存储
规划如下:
/dev/sda1挂载到/u01目录,用于安装数据库软件和存储数据库文件
针对磁盘分区
[root@db1 ~]# fdisk dev/sdaWelcome to fdisk (util-linux 2.37.4).Changes will remain in memory only, until you decide to write them.Be careful before using the write command.Device does not contain a recognized partition table.Created a new DOS disklabel with disk identifier 0x0831b5cc.Command (m for help): nPartition typep primary (0 primary, 0 extended, 4 free)e extended (container for logical partitions)Select (default p):Using default response p.Partition number (1-4, default 1):First sector (2048-104857599, default 2048):Last sector, +/-sectors or +/-size{K,M,G,T,P} (2048-104857599, default 104857599):Created a new partition 1 of type 'Linux' and of size 50 GiB.Command (m for help): pDisk dev/sda: 50 GiB, 53687091200 bytes, 104857600 sectorsDisk model: VMware Virtual SUnits: sectors of 1 * 512 = 512 bytesSector size (logical/physical): 512 bytes 512 bytesI/O size (minimum/optimal): 512 bytes 512 bytesDisklabel type: dosDisk identifier: 0x0831b5ccDevice Boot Start End Sectors Size Id Type/dev/sda1 2048 104857599 104855552 50G 83 LinuxCommand (m for help): wThe partition table has been altered.Calling ioctl() to re-read partition table.Syncing disks.
3)格式化分区
mkfs.xfs /dev/sda1
4)挂载分区
创建挂载目录
mkdir /u01
挂载分区到指定目录
mount /dev/sda1 /u01
检查挂载点
df -Th
5)配置自动挂载
编辑配置文件 /etc/fstab
/dev/sda1 /u01 xfs defaults 0 0
也可以查出分区的UUID,通过UUDI挂载
[root@db1 ~]# blkid /dev/sda1/dev/sda1: UUID="9b60e945-2e8b-46e2-9f10-096b7df0df4f" TYPE="xfs" PARTUUID="0831b5cc-01"UUID=9b60e945-2e8b-46e2-9f10-096b7df0df4f /u01 xfs defaults 0 0
5. 配置YUM源
Oracle linux 9自带yum仓库,不需要做额外配置。
1)查看yum文件
[root@db1 yum.repos.d]# ll -d /etc/yum.repos.d/oracle-linux-ol9.repo-rw-r--r--. 1 root root 3014 Nov 15 00:42 /etc/yum.repos.d/oracle-linux-ol9.repo
2) 测试yum
dnf -y install lrzsz
写在最后
经过一系列详细的步骤,我们现在已经在VMware Workstation 17中成功安装并初步配置了oracle linux 9操作系统。
这不仅为接下来的数据库安装工作铺平了道路,也为未来的数据库应用开发提供了稳定的实验环境。
关键词回复(可见相应文章):
oracle、mysql、pg、postgresql、sql、性能优化、故障处理、数据迁移、备份恢复、版本升级、补丁管理、深度巡检、解决方案、架构设计......

有任何问题或疑问,欢迎加V进群探讨哦~
