



Spring Cloud Config为分布式系统中的外部化配置提供服务器端和客户端支持。在分布式系统中,由于服务数量很多,为了方便服务配置文件统一管理,实时更新,所以需要分布式配置中心组件。在Spring Cloud中,有分布式配置中心组件spring cloud config ,它支持配置服务放在配置服务的内存中(即本地),也支持放在远程Git仓库中同时也可以存放在Mysql数据库。在spring cloud config 组件中,分两个角色,一是config server,二是config client
本文将介绍三种实现方式 Git 本地 JDBC
一 简介
概念理解
来源官方文档 https://cloud.spring.io/spring-cloud-config/spring-cloud-config.html#redisbackend
Spring Cloud Config为分布式系统中的外部化配置提供服务器和客户端支持。使用Config Server,您可以在所有环境中管理应用程序的外部属性。客户端和服务器上的概念映射与Spring Environment和PropertySource抽象,因此它们非常适合Spring应用程序,但可以与任何语言运行的任何应用程序一起使用。当应用程序通过部署管道从开发到测试并进入生产时,您可以管理这些环境之间的配置,并确保应用程序具有迁移时需要运行的所有内容。服务器存储后端的默认实现使用git,因此它可以轻松支持配置环境的标签版本,以及可用于管理内容的各种工具。添加替代实现并使用Spring配置插入它们很容易。
2.功能介绍
Spring Cloud Config Server功能:
用于外部配置的HTTP,基于资源的API(名称 - 值对或等效的YAML内容)
加密和解密属性值(对称或非对称)
使用可轻松嵌入Spring Boot应用程序 @EnableConfigServer Config Client功能(适用于Spring应用程序):
绑定到Config Server并Environment使用远程属性源初始化Spring
加密和解密属性值(对称或非对称)
二. 构建config server 服务端
引入依赖
     <dependency>
       <groupId>org.springframework.cloud</groupId>
       <artifactId>spring-cloud-config-server</artifactId>
    </dependency>
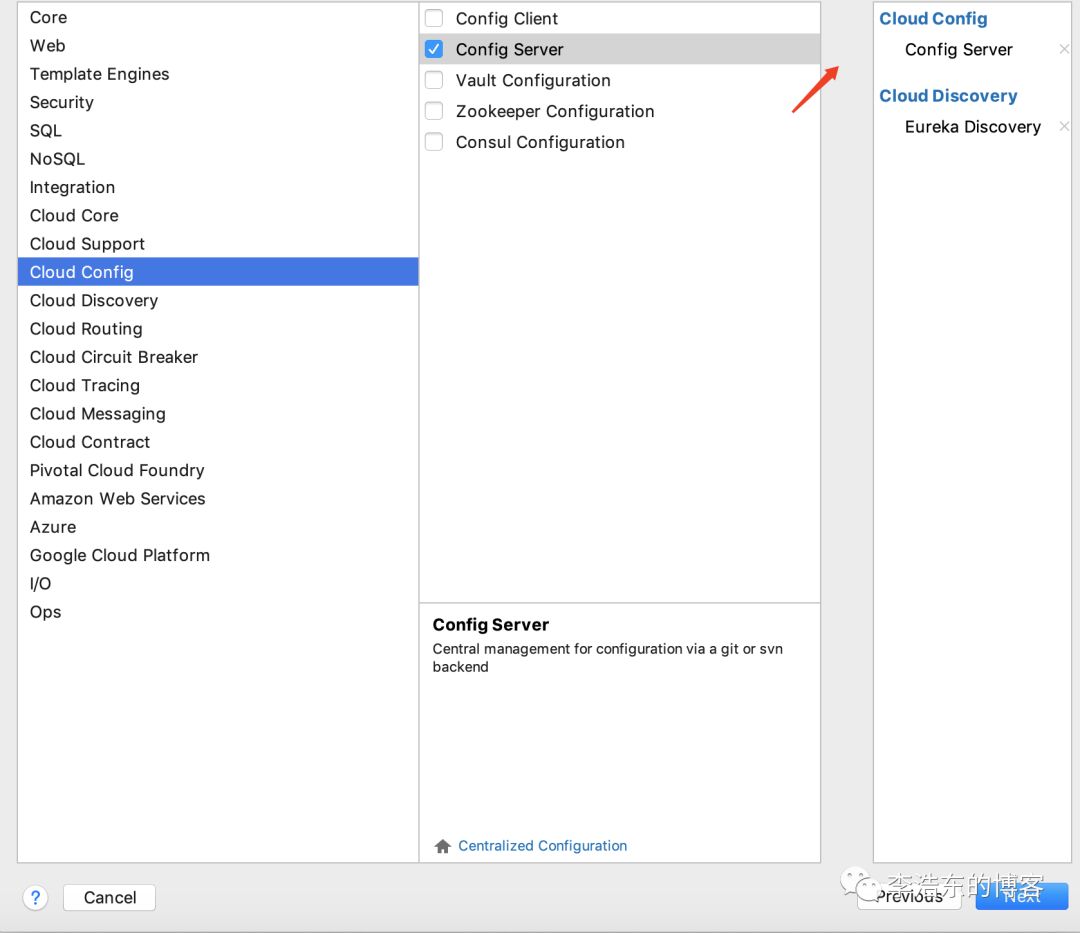
改造后的pom.xml文件
<?xml version="1.0" encoding="UTF-8"?>
<project xmlns="http://maven.apache.org/POM/4.0.0" xmlns:xsi="http://www.w3.org/2001/XMLSchema-instance"
    xsi:schemaLocation="http://maven.apache.org/POM/4.0.0 http://maven.apache.org/xsd/maven-4.0.0.xsd">
    <modelVersion>4.0.0</modelVersion>
    <parent>
        <groupId>com.li</groupId>
        <artifactId>SpringCloudLearn</artifactId>
        <version>1.0-SNAPSHOT</version>
        <relativePath>../</relativePath>
    </parent>
    <artifactId>config-server</artifactId>
    <version>0.0.1-SNAPSHOT</version>
    <name>config-server</name>
    <description>分布式配置中心服务端</description>

    <dependencies>
        <dependency>
            <groupId>org.springframework.cloud</groupId>
            <artifactId>spring-cloud-config-server</artifactId>
        </dependency>
        <dependency>
            <groupId>org.springframework.cloud</groupId>
            <artifactId>spring-cloud-starter-netflix-eureka-client</artifactId>
        </dependency>

    </dependencies>

    <dependencyManagement>
        <dependencies>
            <dependency>
                <groupId>org.springframework.cloud</groupId>
                <artifactId>spring-cloud-dependencies</artifactId>
                <version>${spring-cloud.version}</version>
                <type>pom</type>
                <scope>import</scope>
            </dependency>
        </dependencies>
    </dependencyManagement>

    <build>
        <plugins>
            <plugin>
                <groupId>org.springframework.boot</groupId>
                <artifactId>spring-boot-maven-plugin</artifactId>
            </plugin>
        </plugins>
    </build>

</project>
在程序入口类加上@EnableEurekaClient向服务中心注册和@EnableConfigServer注解开启配置服务器的功能
package com.li.configserver;

import org.springframework.boot.SpringApplication;
import org.springframework.boot.autoconfigure.SpringBootApplication;
import org.springframework.cloud.config.server.EnableConfigServer;
import org.springframework.cloud.netflix.eureka.EnableEurekaClient;

@EnableConfigServer
@EnableEurekaClient
@SpringBootApplication
public class ConfigServerApplication {

    public static void main(String[] args) {
        SpringApplication.run(ConfigServerApplication.class, args);
    }

}
application.properties配置
server.port=8769
#服务注册中心实例的主机名
eureka.instance.hostname=localhost
#服务注册中心端口号
eureka.port=8761
#在此指定服务注册中心地址
eureka.client.service-url.defaultZone=http://${eureka.instance.hostname}:${eureka.port}/eureka/

# git方式
# github地址
spring.cloud.config.server.git.uri=https://github.com/LiHaodong888/SpringCloudLearn
# 仓库路径 spring cloud会先在searchPaths中寻找配置文件
spring.cloud.config.server.git.searchPaths=config-repo
# 仓库的分支
spring.cloud.config.label=master
#git仓库账号
spring.cloud.config.server.git.username=xxxx
#git仓库密码
spring.cloud.config.server.git.password=xxxx
如果Git仓库为公开仓库,可以不填写用户名和密码,如果是私有仓库需要填写,我这边是公开仓库
config-repo文件夹下有config-dev.properties配置文件内容属性为
my.name=lhd
HTTP服务具有以下形式的资源:
/{application}/{profile}[/{label}]
/{application}-{profile}.yml
/{label}/{application}-{profile}.yml
/{application}-{profile}.properties
/{label}/{application}-{profile}.properties
启动程序 打开浏览器访问 http://localhost:8769/config/dev/master

config是我的配置文件前缀 dev表示开发环境 master表示分支 到这里配置文件服务端就搭建好了 下面搭建客户端
三. 构建config client 客户端
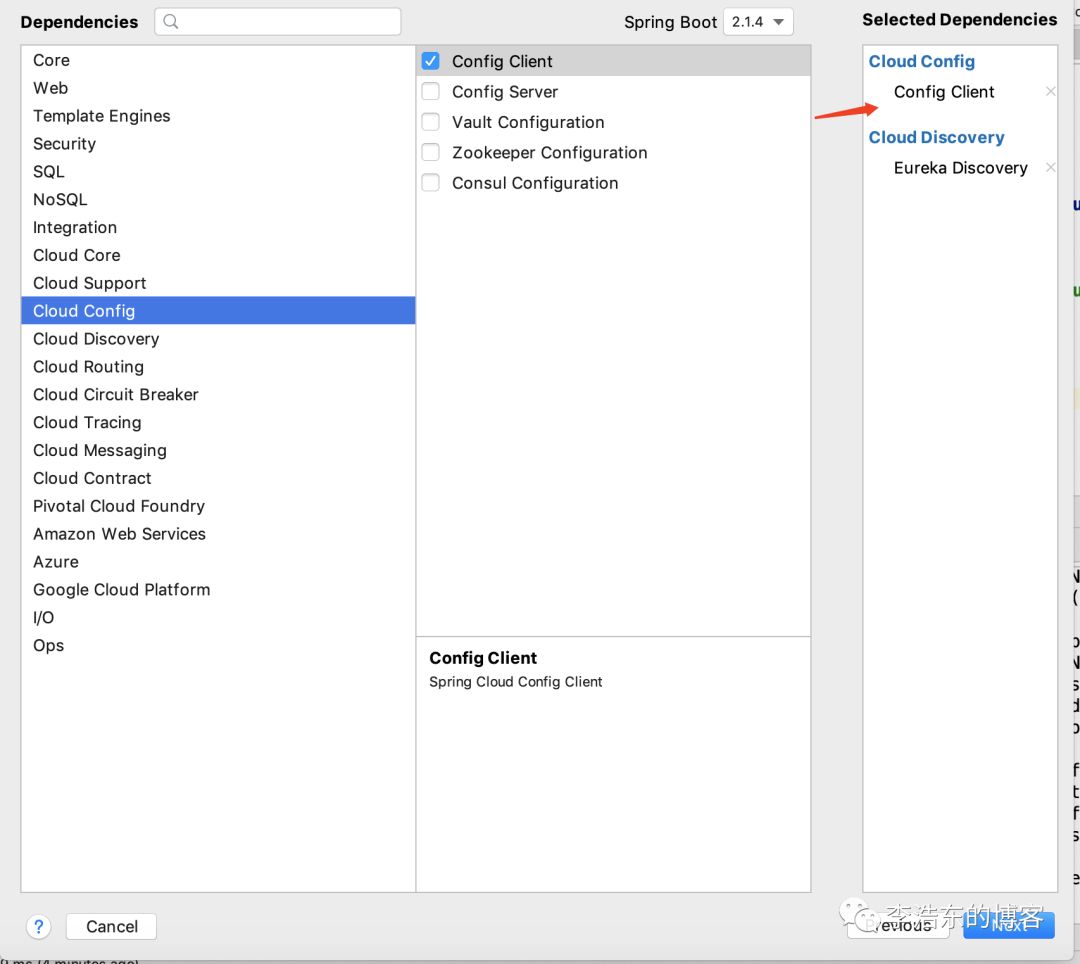
改造后的pom.xml文件
<?xml version="1.0" encoding="UTF-8"?>
<project xmlns="http://maven.apache.org/POM/4.0.0" xmlns:xsi="http://www.w3.org/2001/XMLSchema-instance"
    xsi:schemaLocation="http://maven.apache.org/POM/4.0.0 http://maven.apache.org/xsd/maven-4.0.0.xsd">
    <modelVersion>4.0.0</modelVersion>
    <parent>
        <groupId>com.li</groupId>
        <artifactId>SpringCloudLearn</artifactId>
        <version>1.0-SNAPSHOT</version>
        <relativePath>../</relativePath>
    </parent>
    <artifactId>config-server</artifactId>
    <version>0.0.1-SNAPSHOT</version>
    <name>config-server</name>
    <description>分布式配置中心服务端</description>

    <dependencies>
        <dependency>
            <groupId>org.springframework.cloud</groupId>
            <artifactId>spring-cloud-config-server</artifactId>
        </dependency>
        <dependency>
            <groupId>org.springframework.cloud</groupId>
            <artifactId>spring-cloud-starter-netflix-eureka-client</artifactId>
        </dependency>

    </dependencies>

    <dependencyManagement>
        <dependencies>
            <dependency>
                <groupId>org.springframework.cloud</groupId>
                <artifactId>spring-cloud-dependencies</artifactId>
                <version>${spring-cloud.version}</version>
                <type>pom</type>
                <scope>import</scope>
            </dependency>
        </dependencies>
    </dependencyManagement>

    <build>
        <plugins>
            <plugin>
                <groupId>org.springframework.boot</groupId>
                <artifactId>spring-boot-maven-plugin</artifactId>
            </plugin>
        </plugins>
    </build>

</project>
bootstrap.properties配置文件
spring.application.name=config-client
server.port=8770

#服务注册中心实例的主机名
eureka.instance.hostname=localhost
#服务注册中心端口号
eureka.port=8761
#在此指定服务注册中心地址
eureka.client.service-url.defaultZone=http://${eureka.instance.hostname}:${eureka.port}/eureka/

# 配置文件前缀 config-dev.properties
spring.cloud.config.name=config
# 指明远程仓库的分支
spring.cloud.config.label=master
# dev开发环境配置文件 test测试环境 pro正式环境
spring.cloud.config.profile=dev
# 配置服务中心的网址
spring.cloud.config.uri=http://localhost:8769/
spring.cloud.config.discovery.enabled=true
# 配置中心服务端服务名
spring.cloud.config.discovery.serviceId=config-server
重点说下
当你的配置中心的 server.port 不是 8888 的时候,服务就起不来了,从日志中可以发现,服务启动的时候,Fetching config from server at: http://localhost:8888,说明其他服务还是去 8888 这个默认端口取配置中心的文件,而不去你在 application.properties 文件中配置的配置中心读取配置文件 当你的服务配置文件使用 application.properties 文件时,服务启动还没到加载 application.properties 文件那一步,所以并不会去你配置的注册中心里的配置中心读取所需要的配置信息,因为application.properties 的优先级不高,而此时又需要一些配置信息(例如数据库的信息),系统才能继续往下执行启动,这个时候就需要使用 bootstrap.properties 引导配置文件,使用这个配置文件时,服务在启动的时候就会先加载 bootstrap.properties 配置文件,这样就会去你配置的注册中心里的配置中心读取配置文件信息,然后加载信息进行启动。 优先级bootstrap>application
在程序的入口类,写一个接口,返回从配置中心读取的my.name变量的值,代码如下:
package com.li.configclient;

import org.springframework.beans.factory.annotation.Value;
import org.springframework.boot.SpringApplication;
import org.springframework.boot.autoconfigure.SpringBootApplication;
import org.springframework.cloud.netflix.eureka.EnableEurekaClient;
import org.springframework.web.bind.annotation.RequestMapping;
import org.springframework.web.bind.annotation.RestController;

@RestController
@EnableEurekaClient
@SpringBootApplication
public class ConfigClientApplication {

    public static void main(String[] args) {
        SpringApplication.run(ConfigClientApplication.class, args);
    }

    @Value("${my.name}")
    String name;

    @RequestMapping("/hello")
    public String hello(){
        return name;
    }
}
启动程序 打开浏览器访问 http://localhost:8770/hello
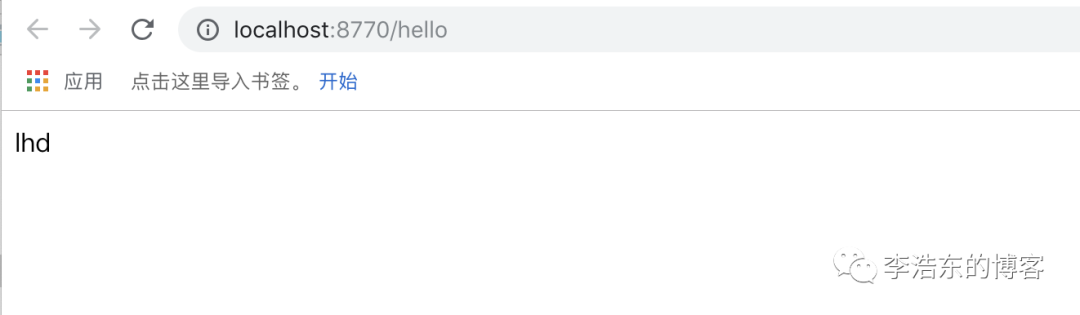
说明配置中心成功
四. 本地配置
修改application.properties配置文件
server.port=8769
spring.application.name=config-server
#服务注册中心实例的主机名
eureka.instance.hostname=localhost
#服务注册中心端口号
eureka.port=8761
#在此指定服务注册中心地址
eureka.client.service-url.defaultZone=http://${eureka.instance.hostname}:${eureka.port}/eureka/


# 本地配置
#设置为本地启动的方式,而不是通过git
spring.profiles.active= native
#配置文件所在目录,classpath(类路径)和(系统文件路径)两种方式配置
spring.cloud.config.server.native.search-locations=classpath:/config

# 版本号
spring.cloud.config.server.native.version=1.0.0
在resources下新建config文件夹并新建config-dev.properties文件
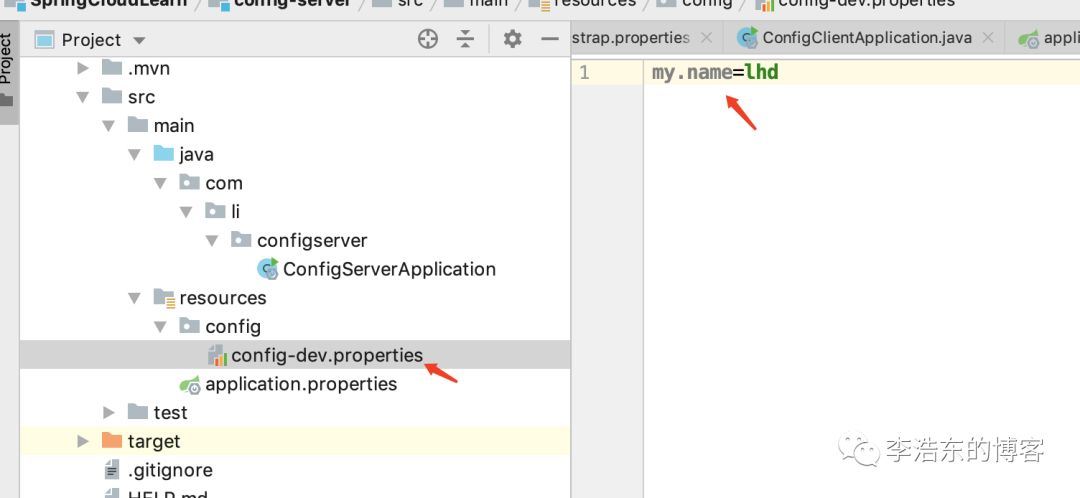
启动程序 打开浏览器输入 http://localhost:8769/config/dev/ 测试
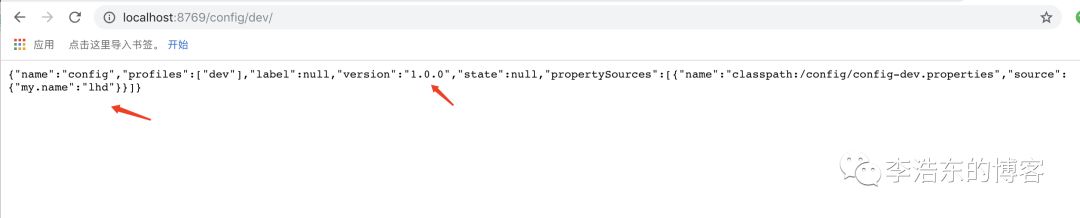
说明配置成功
重启config-client服务 看是是否可以获取

控制台打印结果 说明是可以的 访问 http://localhost:8770/hello
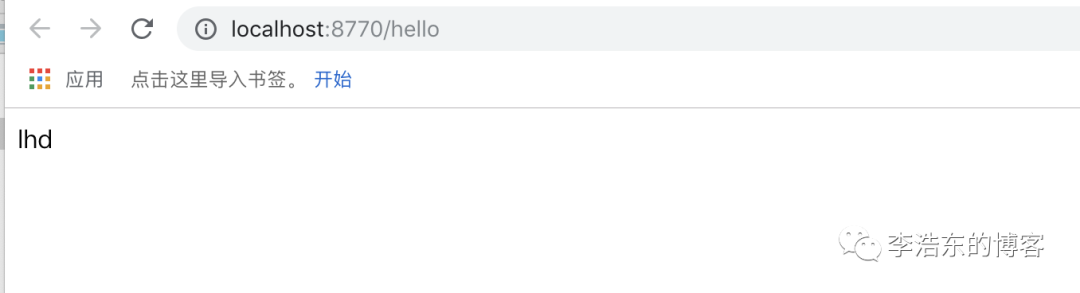
本地配置成功
四. JDBC配置
Spring Cloud Config Server支持JDBC(关系数据库)作为配置属性的后端。您可以通过添加spring-jdbc到类路径并使用jdbc配置文件或添加类型的bean 来启用此功能JdbcEnvironmentRepository。如果在类路径中包含正确的依赖项(有关详细信息,请参阅用户指南),Spring Boot会配置数据源。
数据库需要有一个叫做表PROPERTIES一个名为列APPLICATION,PROFILE以及LABEL(与通常的Environment意思),再加上KEY和VALUE在键和值对Properties风格。所有字段都是Java中的String类型,因此您可以根据VARCHAR需要设置它们。属性值的行为方式与它们来自命名的Spring Boot属性文件{application}-{profile}.properties(包括所有加密和解密)的行为方式相同,后者将作为后处理步骤(即不直接在存储库实现中)应用。
引入数据库依赖
<!--mysql数据库驱动-->
        <dependency>
            <groupId>mysql</groupId>
            <artifactId>mysql-connector-java</artifactId>
        </dependency>
    <dependency>
            <groupId>org.springframework.boot</groupId>
            <artifactId>spring-boot-starter-jdbc</artifactId>
        </dependency>
修改application.properties配置文件
server.port=8769
spring.application.name=config-server
#服务注册中心实例的主机名
eureka.instance.hostname=localhost
#服务注册中心端口号
eureka.port=8761
#在此指定服务注册中心地址
eureka.client.service-url.defaultZone=http://${eureka.instance.hostname}:${eureka.port}/eureka/

# JDBC配置
#数据库相关信息
spring.datasource.url=jdbc:mysql://127.0.0.1:3306/config-jdbc?useUnicode=true&characterEncoding=utf8&characterSetResults=utf8
spring.datasource.username=root
spring.datasource.password=root
spring.datasource.driver-class-name=com.mysql.jdbc.Driver
#指明为jdbc
spring.profiles.active=jdbc
#读取的配置的分支,需要在数据库中数据对应
spring.cloud.config.label=master
spring.cloud.config.server.jdbc.order=0
#查询数据库的sql语句,该语句的字段必须与数据库的表字段一致
spring.cloud.config.server.jdbc.sql=SELECT key1, value1 from config_properties where APPLICATION=? and PROFILE=? and LABEL=?
初始化数据库
CREATE TABLE `config_properties` (
  `id` bigint(20) NOT NULL AUTO_INCREMENT,
  `key1` varchar(50) COLLATE utf8_bin NOT NULL,
  `value1` varchar(500) COLLATE utf8_bin DEFAULT NULL,
  `application` varchar(50) COLLATE utf8_bin NOT NULL,
  `profile` varchar(50) COLLATE utf8_bin NOT NULL,
  `label` varchar(50) COLLATE utf8_bin DEFAULT NULL,
  PRIMARY KEY (`id`)
) ENGINE=InnoDB AUTO_INCREMENT=3 DEFAULT CHARSET=utf8 COLLATE=utf8_bin
其中key1字段为配置的key,value1字段为配置的值,application字段对应于应用名,profile对应于环境,label对应于读取的分支,一般为master。
插入数据config-client 的1条数据,my.name配置,具体数据库脚本如下:
insert into `config_properties` (`id`, `key1`, `value1`, `application`, `profile`, `label`) values('1','my.name','lhd','config','dev','master');
启动程序测试 打开浏览器访问 http://localhost:8769/config/dev/master

说明配置成功
重启config-client服务测试
控制台打印

浏览器访问 http://localhost:8770/hello
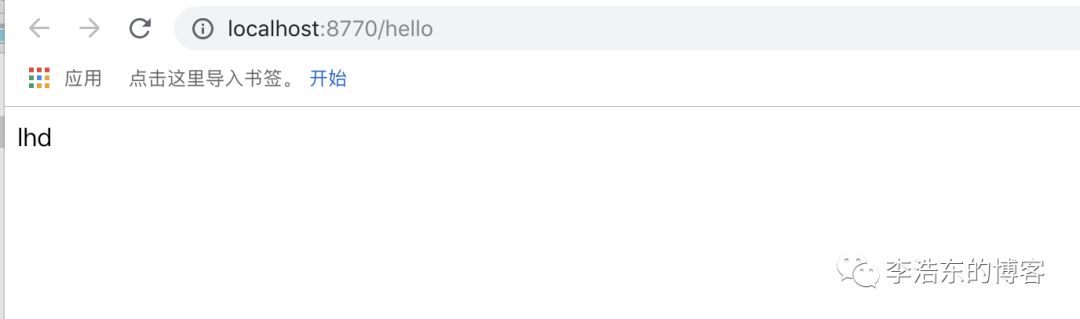
说明数据库配置中心成功
三种方式实现配置中心你学会了吗?
redis的 后面在研究 下面介绍如何不重启服务即可实现实时更新配置
源码下载: https://github.com/LiHaodong888/SpringCloudLearn
参考资料:
https://blog.csdn.net/forezp/article/details/87866560
往期文章回顾
SpringCloud详细教程 | 第四篇:断路器客户端Hystrix(Greenwich版本)
SpringCloud详细教程 | 第三篇: 声明性REST客户端Feign(Greenwich版本)
