


相信使用过Spring的众多开发者都知道Spring提供了非常好用的JavaMailSender接口实现邮件发送。在Spring Boot的Starter模块中也为此提供了自动化配置。下面通过实例看看如何在Spring Boot中使用JavaMailSender发送邮件。
1.引入依赖
在Spring Boot的工程中的pom.xml中引入spring-boot-starter-mail依赖:
<dependency>
    <groupId>org.springframework.boot</groupId>
    <artifactId>spring-boot-starter-mail</artifactId>
</dependency>
如其他自动化配置模块一样,在完成了依赖引入之后,只需要在application.properties中配置相应的属性内容。
下面我们以QQ邮箱为例,在application.properties中加入如下配置(注意替换自己的用户名和密码):
#QQ邮箱
spring.mail.host=smtp.qq.com
#发送者邮箱需要和实际发送者一致,否则报错501
spring.mail.username=757479746@qq.com
#发送者邮箱的授权码,不是密码,自己去qq邮箱设置
spring.mail.password=
# 设置是否需要认证,如果为true,那么用户名和密码就必须的,
# 如果设置false,可以不设置用户名和密码,当然也得看你的对接的平台是否支持无密码进行访问的
spring.mail.properties.mail.smtp.auth=true
spring.mail.properties.mail.smtp.starttls.enable=true
spring.mail.properties.mail.smtp.starttls.required=true
2.通过单元测试来实现一封简单邮件的发送:
package com.li.springbootmail.test;

import org.junit.Test;
import org.junit.runner.RunWith;
import org.springframework.beans.factory.annotation.Autowired;
import org.springframework.beans.factory.annotation.Value;
import org.springframework.boot.test.context.SpringBootTest;
import org.springframework.mail.SimpleMailMessage;
import org.springframework.mail.javamail.JavaMailSender;
import org.springframework.test.context.junit4.SpringRunner;

/**
 * @ClassName MailTest
 * @Author lihaodong
 * @Date 2019/2/24 18:53
 * @Mail lihaodongmail@163.com
 * @Description
 * @Version 1.0
 **/

@RunWith(SpringRunner.class)
@SpringBootTest
public class MailTest {

    /**
     * 获取JavaMailSender bean
     */
    @Autowired
    private JavaMailSender javaMailSender;

    /**
     * 获取配置文件的username
     */
    @Value("${spring.mail.username}")
    private String username;

    /**
     * 实现发送简单的邮件
     */
    @Test
    public void sendSimpleMail1() {
        SimpleMailMessage message = new SimpleMailMessage();
        //设定邮件参数
        //发送者
        message.setFrom(username);
        //接收者
        message.setTo("lihaodongmail@163.com");
        //主题
        message.setSubject("测试主题");
        //邮件内容
        message.setText("测试内容");
        // 发送邮件
        javaMailSender.send(message);
    }
}
到这里,一个简单的邮件发送就完成了,运行一下该单元测试,看看效果如何
启动测试程序,查看邮箱
PS:
由于Spring Boot的starter模块提供了自动化配置,所以在引入了spring-boot-starter-mail依赖之后,会根据配置文件中的内容去创建JavaMailSender实例,因此我们可以直接在需要使用的地方直接@Autowired来引入邮件发送对象。
3.发送附件邮箱
在上面单元测试中加入如下测试用例(通过MimeMessageHelper来发送一封带有附件的邮件):
    /**
     * 发送附件邮箱
     * @throws Exception
     */
    @Test
    public void sendAttachmentsMail() throws Exception {

        MimeMessage mimeMessage = javaMailSender.createMimeMessage();
        MimeMessageHelper helper = new MimeMessageHelper(mimeMessage, true);
        helper.setFrom(username);
        helper.setTo("lihaodongmail@163.com");
        helper.setSubject("测试主题:有附件");
        helper.setText("测试内容:有附件的邮件");
        FileSystemResource file = new FileSystemResource(new File("weixin_qrcode.jpg"));
        helper.addAttachment("附件-1.jpg", file);
        helper.addAttachment("附件-2.jpg", file);
        javaMailSender.send(mimeMessage);

    }
启动测试程序,查看邮箱
4.嵌入静态资源
    /**
     * 发送静态邮箱
     * @throws Exception
     */
    @Test
    public void sendStaticMail() throws Exception {
        MimeMessage mimeMessage = javaMailSender.createMimeMessage();

        MimeMessageHelper helper = new MimeMessageHelper(mimeMessage, true);
        helper.setFrom(username);
        helper.setTo("lihaodongmail@163.com");
        helper.setSubject("测试主题:嵌入静态资源");
        helper.setText("<html><body><img src=\"cid:weixin_qrcode\" ></body></html>", true);
        FileSystemResource file = new FileSystemResource(new File("weixin_qrcode.jpg"));
        // addInline函数中资源名称jpg需要与正文中cid:weixin_qrcode对应起来
        helper.addInline("weixin_qrcode", file);
        javaMailSender.send(mimeMessage);

    }
启动测试程序,查看结果
5.发送模板邮件
以Freemarker为例
引入依赖
        <dependency>
            <groupId>org.springframework.boot</groupId>
            <artifactId>spring-boot-starter-freemarker</artifactId>
        </dependency>
在resources/templates/下,创建一个模板页面mail.ftl:
<html>
<body>
<h3>你好, <span style="color: red;">${userName}</span>, 这是一封模板邮件!</h3>
</body>
</html>
我们之前在Spring Boot中开发Web应用时,提到过在Spring Boot的自动化配置下,模板默认位于resources/templates/目录下
最后,我们在单元测试中加入发送模板邮件的测试用例,具体如下:
/**
     * 发送模板信息
     * @throws Exception
     */
    @Test
    public void sendTemplateMail() throws Exception {

        MimeMessage mimeMessage = javaMailSender.createMimeMessage();
        MimeMessageHelper helper = new MimeMessageHelper(mimeMessage, true);
        helper.setFrom(username);
        helper.setTo("lihaodongmail@163.com");
        helper.setSubject("测试主题:模板邮件");
        /**
         * 模板内需要的参数,保持一致
         */
        Map<String, Object> params = new HashMap<>();
        params.put("userName", "lihaodong");
        /**
         * 配置FreeMarker模板路径
         */
        Configuration configuration = new Configuration(Configuration.VERSION_2_3_28);
        configuration.setClassForTemplateLoading(this.getClass(), "/templates");
        String html = FreeMarkerTemplateUtils.processTemplateIntoString(configuration.getTemplate("mail.ftl"), params);
        helper.setText(html, true);

        javaMailSender.send(mimeMessage);
    }
启动测试程序,查看邮箱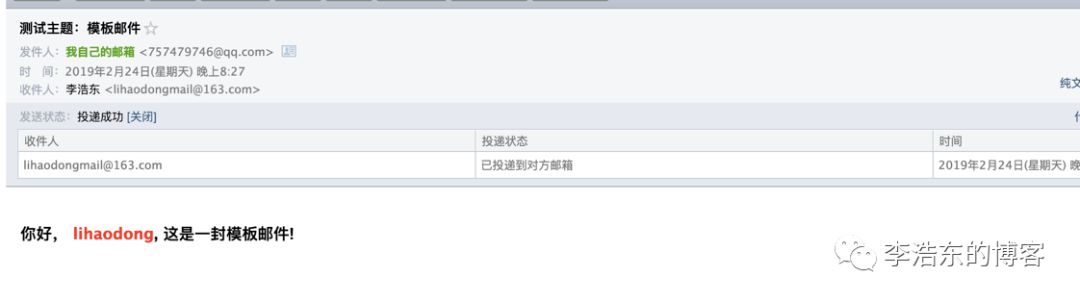
OK,这就是发送邮箱的所有类型
源码下载:https://github.com/LiHaodong888/SpringBootLearn
