


用Heartbeat搭建web服务器双机热备
1.环境
CentOS6.6 两台
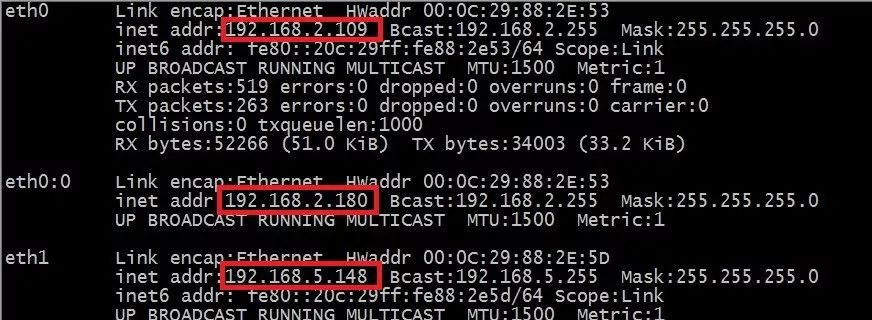
node1 eth0实际地址192.168.2.109
node1 eth1心跳地址192.168.5.148
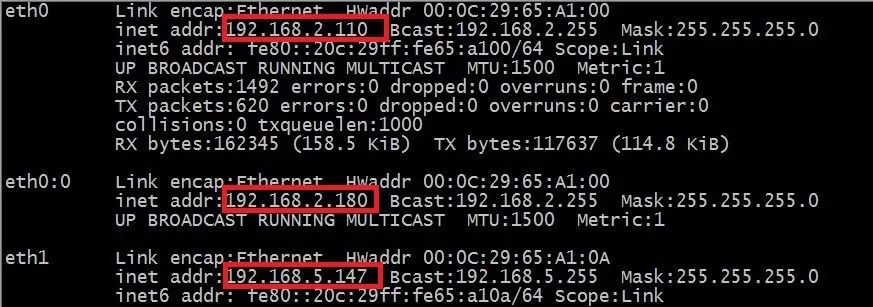
node2 eth0实际地址192.168.2.110
node2 eth1心跳地址192.168.5.147
虚拟地址:192.168.2.180
两台虚拟机都把防火墙关闭
selinux设置为disabled
第一台虚拟机的主机名是node1
第二台虚拟机的主机名是node2
编辑vim /etc/hosts添加(两台同样的操作)
192.168.2.109 node1
192.168.2.110 node2
安装 hearbeat
yum -y install epel-release
yum -y install hearbeat
yum -y install httpd
2.node1主机配置
cd /usr/share/doc/heartbeat-3.0.4
cp authkeys ha.cf haresources /etc/ha.d/
cd /etc/ha.d
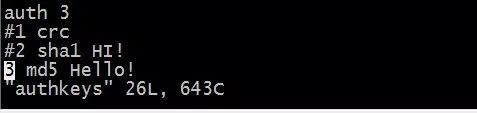
vim authkeys 选择md5的加密方式
auth 3
md5
vim haresources
node1 192.168.2.180/24/eth0:0 httpd
主服务器的主机名 虚拟地址 启动的服务

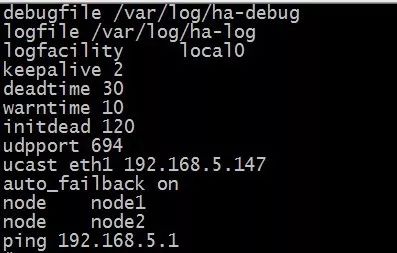
vim ha.cf
debugfile /var/log/ha-debug
debug的路径
logfile /var/log/ha-log
日志的路径
logfacility local0
keepalive 2
心跳间隔
deadtime 30
warntime 10
警告时间
initdead 120
首次开机初始化服务时间
udpport 694
连接端口
ucast eth1 192.168.5.147
从服务器的心跳地址
auto_failback on
主服务器恢复,服务自动切换到主服务器
node node1
主服务器的主机名
node node2
从服务器的主机名
ping 192.168.5.1
复制三个文件到node2
scp authkeys ha.cf haresources node2:/etc/ha.d/
3.node2配置
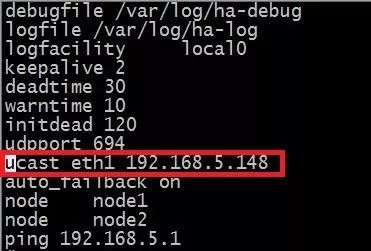
vim /etc/ha.d/ha.cf
ucast eth1 192.168.5.148
主服务器的心跳地址
4.启动hearbeat服务,先主后从
service hearbeat start
5.测试apache服务器主从双击热备
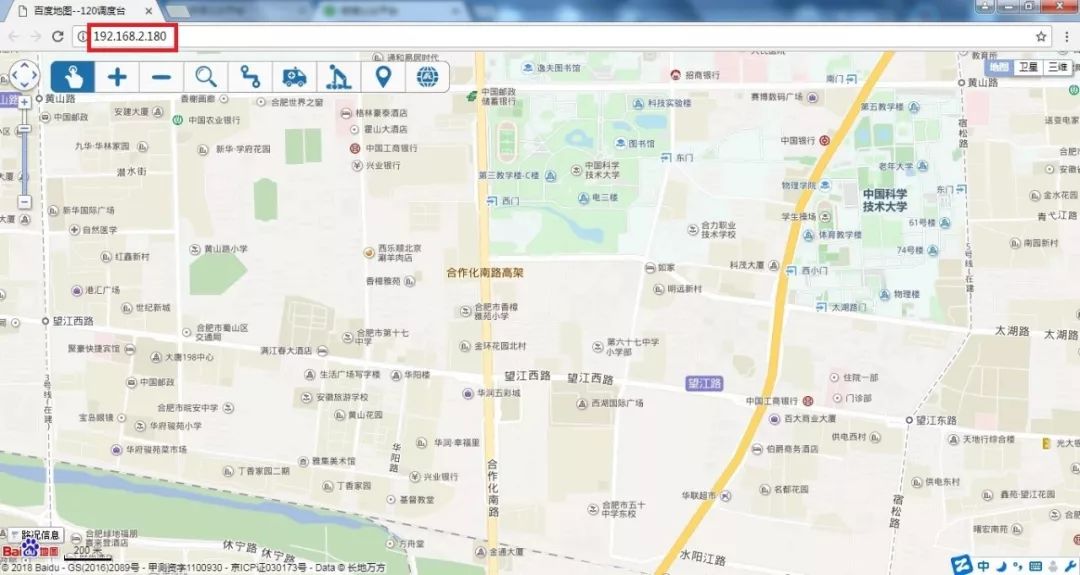
在windows浏览器,访问虚拟地址
虚拟地址是192.168.2.180
查看node1的IP地址
模拟node1服务器宕机,查看node2IP
当node1恢复后heartbeat服务自动切换至node1
