《spring-boot-actuator源码解析(上)【基于SB 2.X版本的实战】》
《spring-boot-actuator源码解析(中)【micrometer极大值BUG及源码层面优化Actuator内存溢出】》
《spring-boot-actuator 2.X源码解析(下)【Info藏地密码独家实战解密】》
在上篇文章《Prometheus从零开始搭建日志监控报警系统之邮件告警》中,我们已经在本地搭建了SpringBoot 2.X的微服务并集成了Prometheus监控,且支持了邮件告警。那么这篇文章,我们用最快的十分钟时间,来支持一下钉钉告警。
强调,本文只是在用轮子,但是使用Go系列的产品,一定要学会自己使用Go语言,应对不同的情况写一些定制的插件或者脚本!
第一步、安装MacOS Docker
如果已经安装的同学可以跳过这步。
我们可以使用Homebrew 来安装 Docker,Homebrew 的 Cask 已经支持 Docker for Mac,因此可以很方便的使用 Homebrew Cask 来进行安装
brew cask install docker
当然也可以手动下载安装,如果需要手动下载,请点击以下链接下载 Stable 或 Edge 版本的 Docker for Mac。
https://download.docker.com/mac/stable/Docker.dmg

https://download.docker.com/mac/edge/Docker.dmg
安装完成以后,启动终端后,通过命令可以检查安装后的 Docker 版本。
docker --version
Docker version 19.03.2, build 6a30dfc
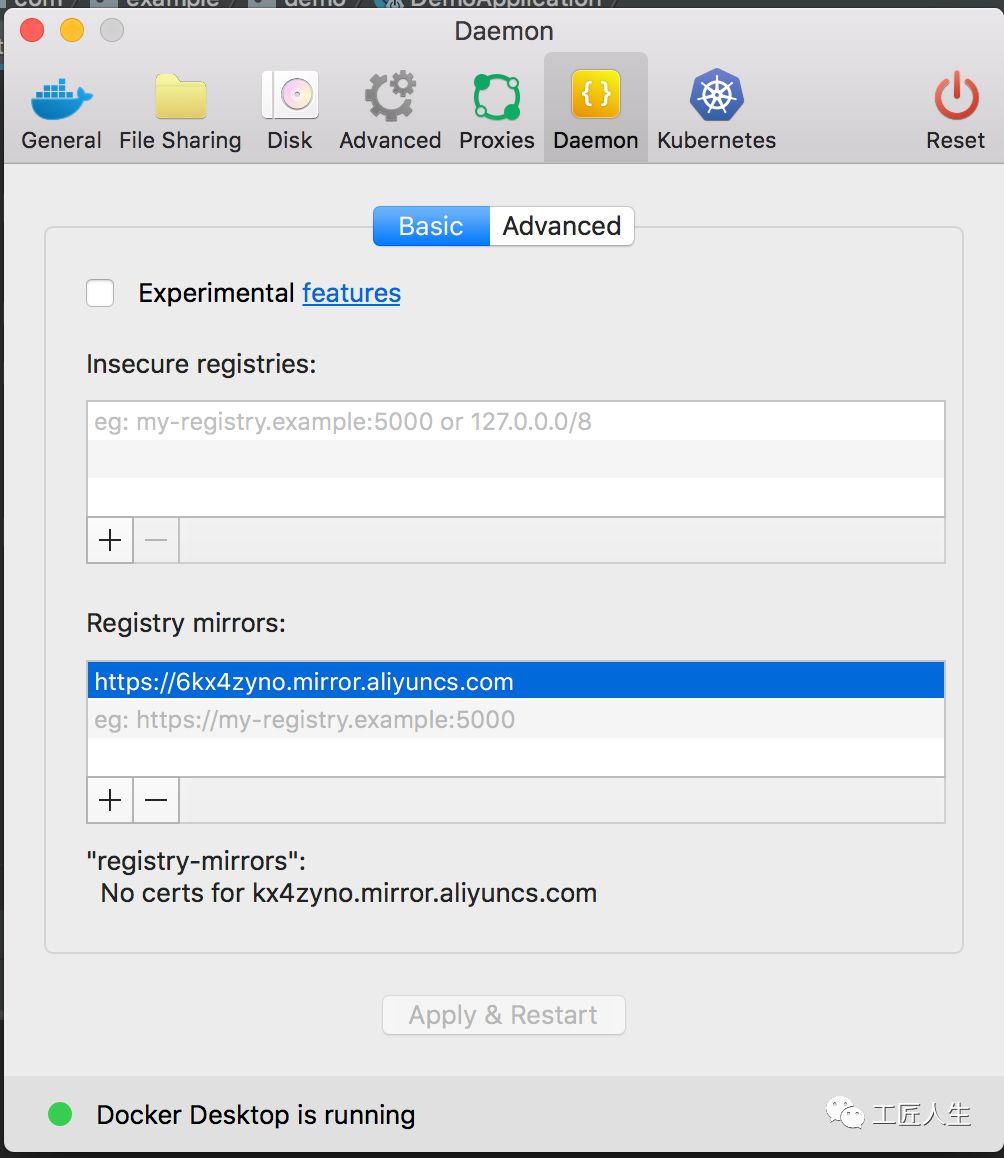
镜像加速,鉴于国内网络问题,后续拉取 Docker 镜像十分缓慢,我们可以需要配置加速器来解决。我使用的地址是:
https://6kx4zyno.mirror.aliyuncs.com
在任务栏点击 Docker for mac 应用图标 -> Perferences… -> Daemon -> Registry mirrors。在列表中填写加速器地址即可。修改完成之后,点击 Apply & Restart 按钮,Docker 就会重启并应用配置的镜像地址了。
之后我们可以通过docker info来查看是否配置成功
第二步、安装Docker镜像prometheus-webhook-dingtalk
Docker Hub(这是docker官方提供的存放所有docker镜像软件的地方,类似maven的中央仓库)中的镜像 https://hub.docker.com

在这里看到了一系列插件以后,我们在Mac的Console执行 docker search XXX镜像
~ docker search prometheus-webhook-dingtalk
NAME                                        DESCRIPTION         STARS               OFFICIAL            AUTOMATED
timonwong/prometheus-webhook-dingtalk                           4
rainbond/prometheus-webhook-dingtalk                            0
slpcat/prometheus-webhook-dingtalk                              0
zhaojiedi1992/prometheus-webhook-dingtalk                       0
marvinpan/prometheus-webhook-dingtalk                           0
sanger/prometheus-webhook-dingtalk                              0
tuananhpham/prometheus-webhook-dingtalk                         0
xpmotors/prometheus-webhook-dingtalk                            0
baixiaochao/prometheus-webhook-dingtalk     普罗米修斯钉钉告警组件         0
doublemine/prometheus-webhook-dingtalk                          0
xuejipeng/prometheus-webhook-dingtalk                           0
myftcode/prometheus-webhook-dingtalk                            0
antonyxin/prometheus-webhook-dingtalk                           0
我们选择第一个插件,执行docker pull命令即可
docker pull timonwong/prometheus-webhook-dingtalk
Using default tag: latest
latest: Pulling from timonwong/prometheus-webhook-dingtalk
[DEPRECATION NOTICE] registry v2 schema1 support will be removed in an upcoming release. Please contact admins of the docker.io registry NOW to avoid future disruption.
aab39f0bc16d: Pull complete
a3ed95caeb02: Pull complete
2cd9e239cea6: Pull complete
2e9091ef5cc7: Pull complete
7e999a8b25ab: Pull complete
Digest: sha256:705b8a2764b33540774d1f08111597d49680bf15152f5e0101011d29d2c262d2
Status: Downloaded newer image for timonwong/prometheus-webhook-dingtalk:latest
列出镜像使用 docker images命令即可列出已下载的镜像
 ~  docker images
REPOSITORY                              TAG                 IMAGE ID            CREATED             SIZE
timonwong/prometheus-webhook-dingtalk   latest              5e05f165bf60        21 months ago       10MB
使用如下命令启动钉钉镜像
docker run -d --restart always -p 8060:8060 timonwong/prometheus-webhook-dingtalk:v0.3.0 --ding.profile="webhook1=https://oapi.dingtalk.com/robot/send?access_token=XXX"
上述access_token填写你的钉钉机器人的hook
删除镜像 使用 docker rmi java 命令即可删除指定镜像
docker rmi d23bdf5b1b1b
钉钉的webhook设置方式,就是在你的微信群点击群机器人,案后机器人管理->自定义(通过webhook接入自定义服务)->添加->复制webhook

选择最后一个自定义傻瓜式流程走下去,记录下https://oapi.dingtalk.com/robot/send?access_token=XXX的地址即可
第三步、修改alertmanager.yml以支持钉钉
在上篇支持邮件的文章中,alertmanager.yml的配置如下所示:
global:
  resolve_timeout: 5m

  smtp_smarthost: 'smtp.126.com:25'  # 邮箱smtp服务器代理
  smtp_from: '******@126.com' # 发送邮箱名称
  smtp_auth_username: '******@126.com' # 邮箱名称
  smtp_auth_password: '******' # 邮箱密码或授权码

route:
  group_by: ['alertname']
  group_wait: 10s
  group_interval: 10s
  repeat_interval: 1h
  receiver: 'mail-receiver'
receivers:
- name: 'mail-receiver'
  email_configs:
  - to: '******@126.com'
inhibit_rules:
  - source_match:
      severity: 'critical'
    target_match:
      severity: 'warning'
    equal: ['alertname', 'dev', 'instance']
在钉钉接入方面,我们调整如下:
global:
  resolve_timeout: 5m

  smtp_smarthost: 'smtp.126.com:25'  # 邮箱smtp服务器代理
  smtp_from: '******@126.com' # 发送邮箱名称
  smtp_auth_username: '******@126.com' # 邮箱名称
  smtp_auth_password: '******' # 邮箱密码或授权码

route:
  group_by: ['alertname']
  group_wait: 10s
  group_interval: 10s
  repeat_interval: 1h
  receiver: 'webhook'
receivers:
- name: 'mail-receiver'
  email_configs:
  - to: '******@126.com'
- name: 'webhook'
  webhook_configs:
  - url: http://localhost:8060/dingtalk/webhook1/send
    send_resolved: true
inhibit_rules:
  - source_match:
      severity: 'critical'
    target_match:
      severity: 'warning'
    equal: ['alertname', 'dev', 'instance']
测试邮件告警功能
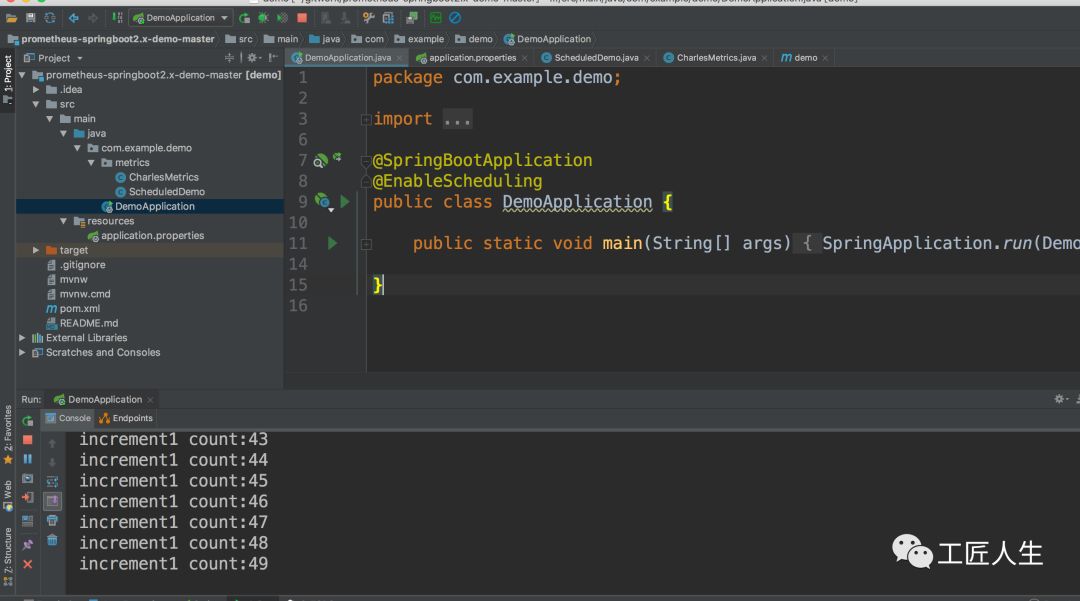
第一步、启动微服务
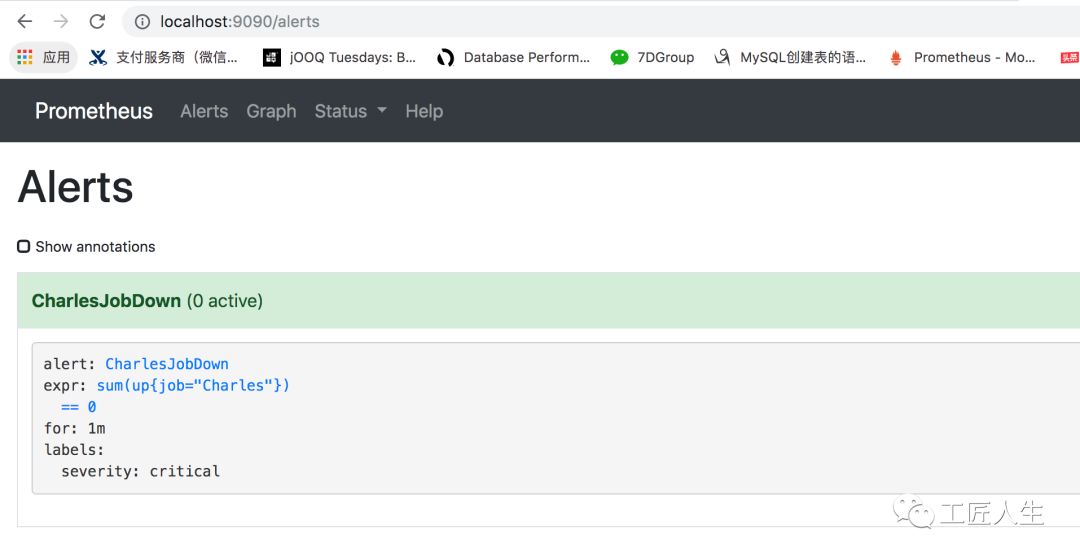
第二步、验证Prometheus
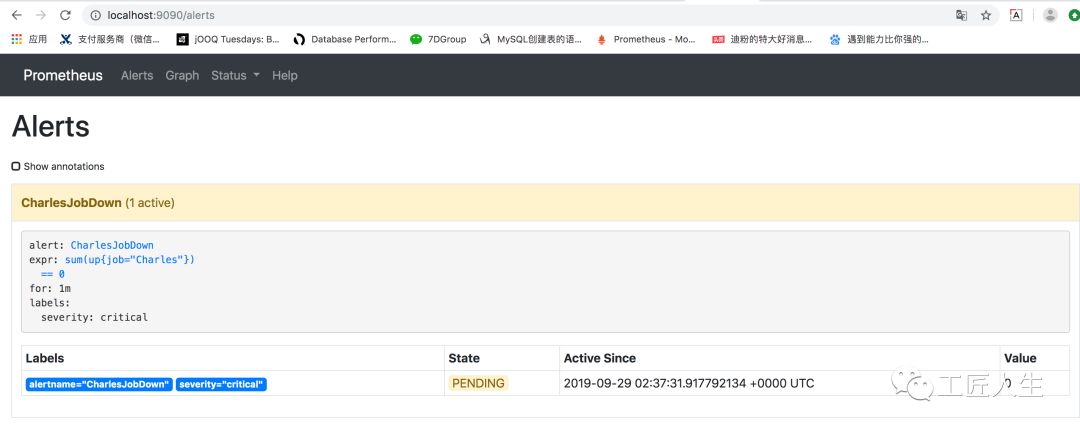
访问如下Prometheus页面可以看到告警信息已经录入
http://localhost:9090/alerts
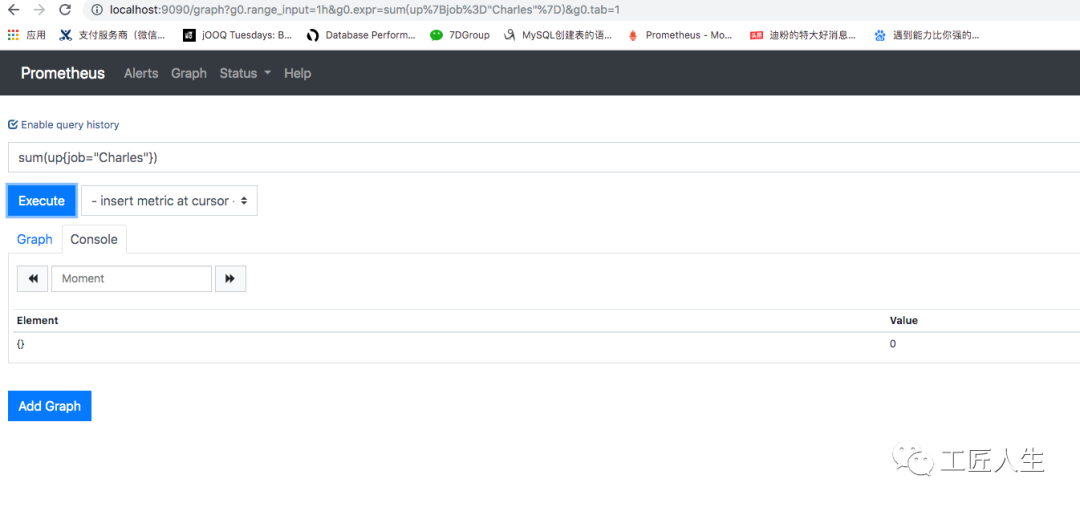
由于微服务是启动状态,在localhost:9090页面查询 sum(up{job="Charles"})结果是1

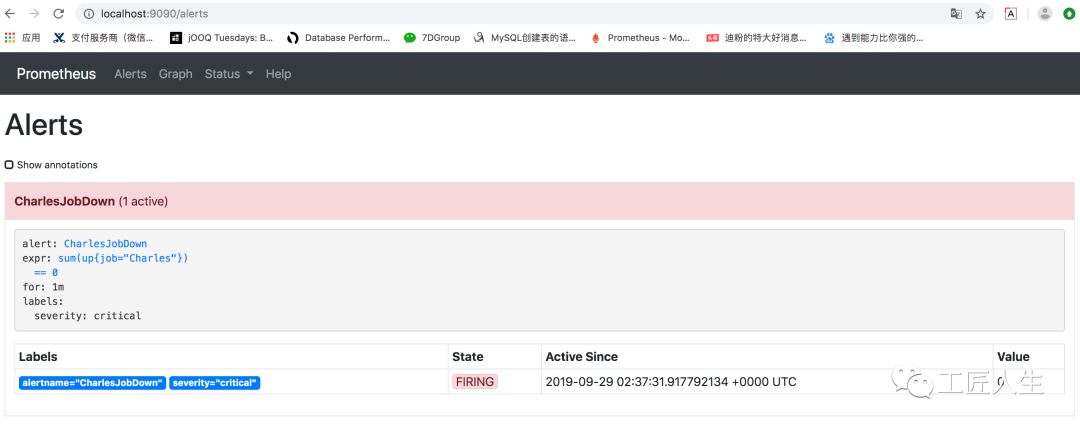
第三步、关闭微服务
关闭微服务以后,sum(up{job="Charles"})的值立马变为0
此时 http://localhost:9090/alerts 值变为 PENDING状态
过一段时间刷新变成 FIRING状态
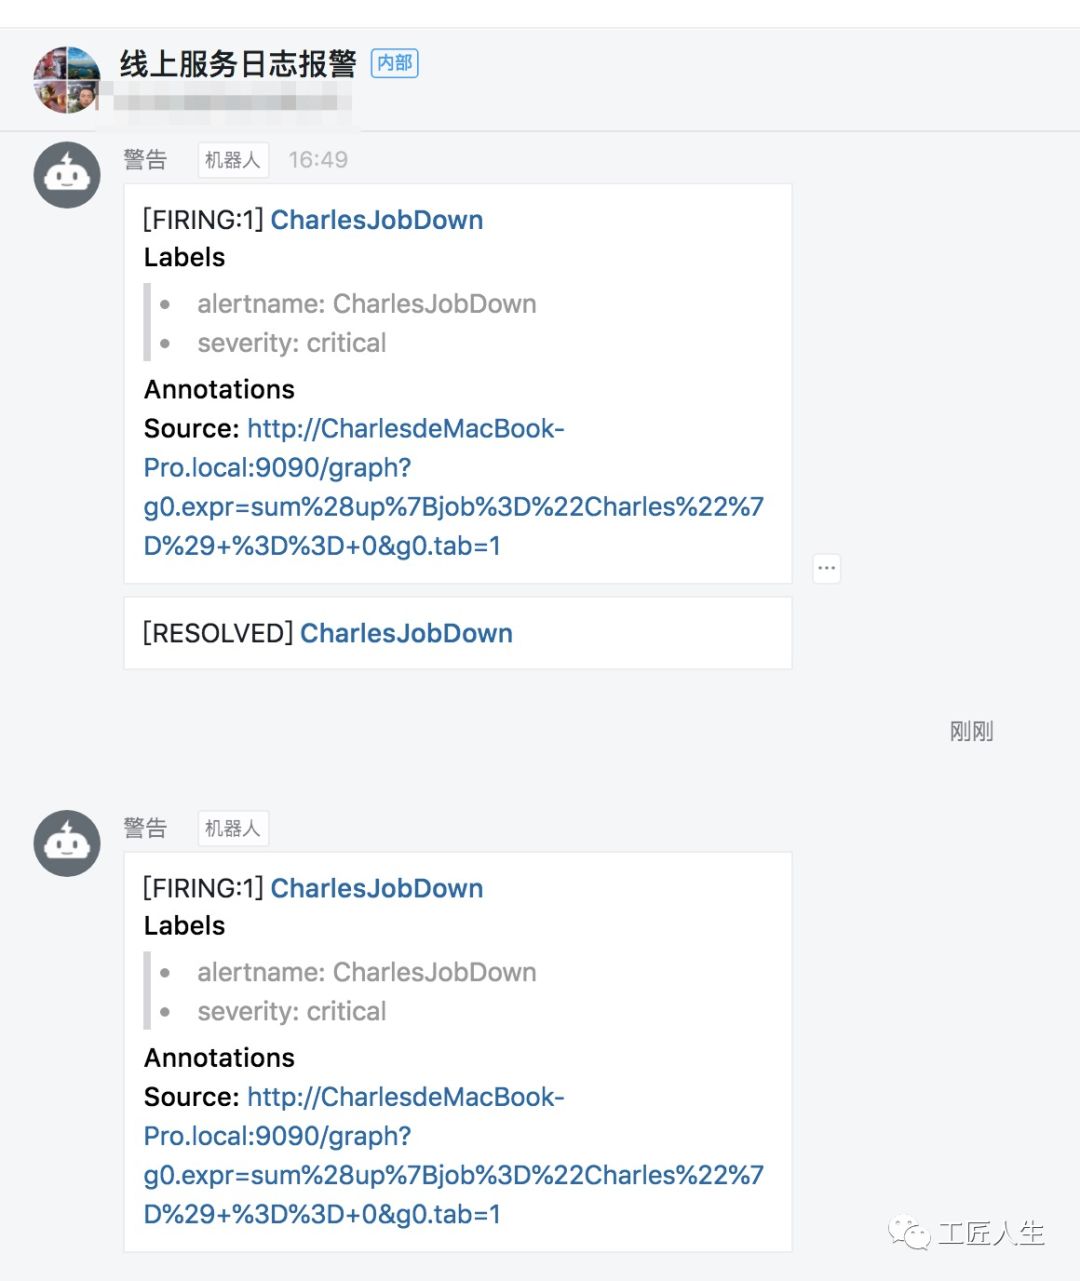
此时,我的钉钉群也收到了钉钉告警
后续文章计划
介绍完邮件和钉钉的告警,后面我们会继续围绕如下几个方面继续介绍Prometheus
从分组(group)、抑制(inhibition)、静默(silences)谈Prometheus智能化报警流程避免邮件轰炸
Prometheus一条告警是怎么触发的
欢迎购买扫码购买我的新书:
欢迎加入我的知识星球,一起探讨架构,交流源码。加入方式,长按下方二维码噢: